Add GraphQL to Remix app with Storyblok
Storyblok is the first headless CMS that works for developers & marketers alike.
Remix is an increasingly popular server-side rendering framework built on solid web principles for React. To take advantage of the speed and efficiency of this framework when building an application to the fullest, GraphQL becomes a great option for interacting with external APIs such as a Headless CMS. With the Storyblok GraphQL API, we can leverage the speed and efficiency of both Remix and GraphQL to build an efficient and dynamic application powered by Storyblok.
Storyblok GraphQL API
Here, we’ll briefly cover the Storyblok GraphQL API and highlight a few benefits over traditional REST.
Storyblok provides a GraphQL API alongside the REST API which is optimized for fast content delivery. This is a read-only endpoint which means that changes to your content from your application will still have to be made via the Storyblok management API. Also, since it’s a GraphQL endpoint, it offers a number of advantages like automated documentation and strongly typed responses. The GraphQL API can be accessed via the following endpoints:
https://gapi.storyblok.com/v1/apiandhttps://gapi-<region-code>.storyblok.com/v1/apie.g.https://gapi-us.storyblok.com/v1/apifor a specific region.
The region code in the Storyblok endpoint is needed when we’re making a CDN request for that specific region.
In order to gain access to your data via the API, you’ll need to send an API token in the Token header of your request. You can always learn now about the GraphQL API from the official docs.
In the next section, we’ll look at what we’re going to be building using GraphQL API and Remix.
What we’re building
We’ll be building a simple site with the following pages:
- The home page
- An articles page
- Individual article pages
Each page will have its content pulled from the Storyblok Headless CMS. The site will be connected to the Storyblok Visual editor and components in the pages will be rendered using the Storyblok SDK which allows them to be editable in the Visual editor.
Prerequisites
To follow along with this article, we’ll need:
- A text editor (VSCode for example)
- Basic knowledge of Remix
- Basic knowledge of GraphQL
- A recent Node.js version installed
- A Storyblok account, you can create an account if you haven't already.
Set up the Remix project
In this section, we’ll quickly set up a fresh Remix project with TailwindCSS for styling. To make the process much easier, there’s a starter template setup with Apollo Client, Remix, and TailwindCSS available on GitHub. Here is a fork of https://github.com/jgarrow/remix-apollo (opens in a new window) which is a demonstration of using Apollo Client with Remix. It uses Apollo's recommended setup for SSR. This allows us to take advantage of Apollo Client's hooks and caching while still having requests done on the server.
You can read more on how to set up Remix with Apollo Client on the official Apollo blog.
For now, we can simply navigate to a folder of choice and create a new Remix project based on the template by running this command in the terminal:
npx create-remix@latest --template miracleonyenma/remix-apolloThen follow the prompts:
? Where would you like to create your app? remix-graphql
? What type of app do you want to create? Just the basics
? Where do you want to deploy? Choose Remix App Server if you're unsure; it's easy to change deployment targets. Remix App Server
? TypeScript or JavaScript? TypeScript
? Do you want me to run `npm install`? Yes
Or we can clone the project from GitHub and install
git clone https://github.com/miracleonyenma/remix-apollo

# install project
cd remix-apollo
npm install
This installs the Remix project, TailwindCSS, and a few other packages including @apollo/client and graphql for Apollo Client and @storyblok/react for integrating with Storyblok.
Once the project has been created and installed, we can proceed. If we run:
npm run devWe should have something like this:

Also, for this tutorial, we will set up our dev server with an HTTPS proxy.
The Storyblok visual editor requires us to use a secure connection with the application.
We'll be using port 3010, so the URL to access our website will end up being https://localhost:3010/.
If you don’t know how to set up an HTTPS proxy on macOS, you can read this guide. If you’re on a Widows device, you can also find the guide for windows here.
Next, let's set up GraphL and Apollo client in our application.
Set up Storyblok space
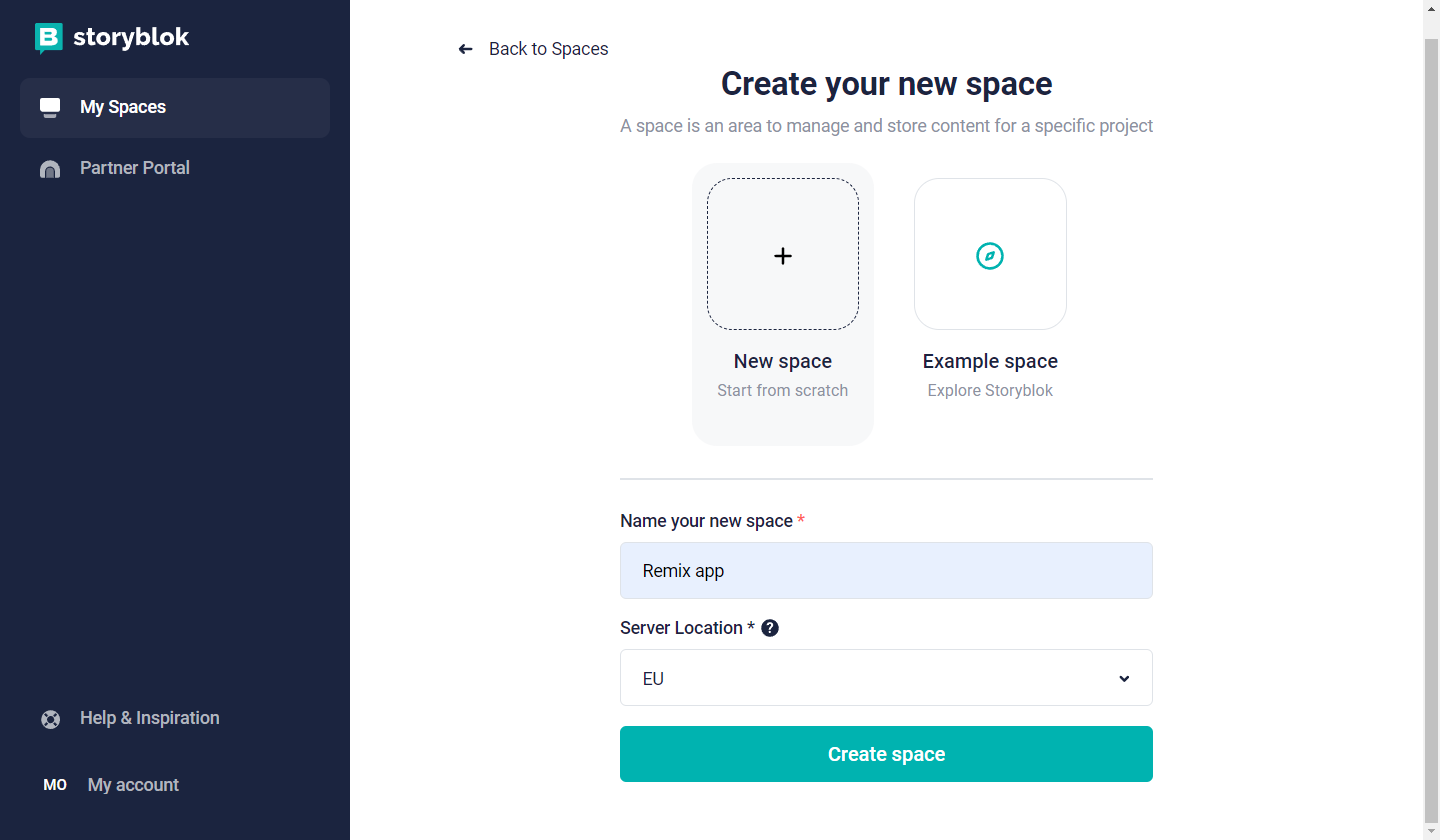
To get started, navigate to our Storyblok dashboard, click on Spaces and create a new Space by entering the name of the space and server location.
Once the space has been created, let’s get an API token we’ll use to make requests from our application.
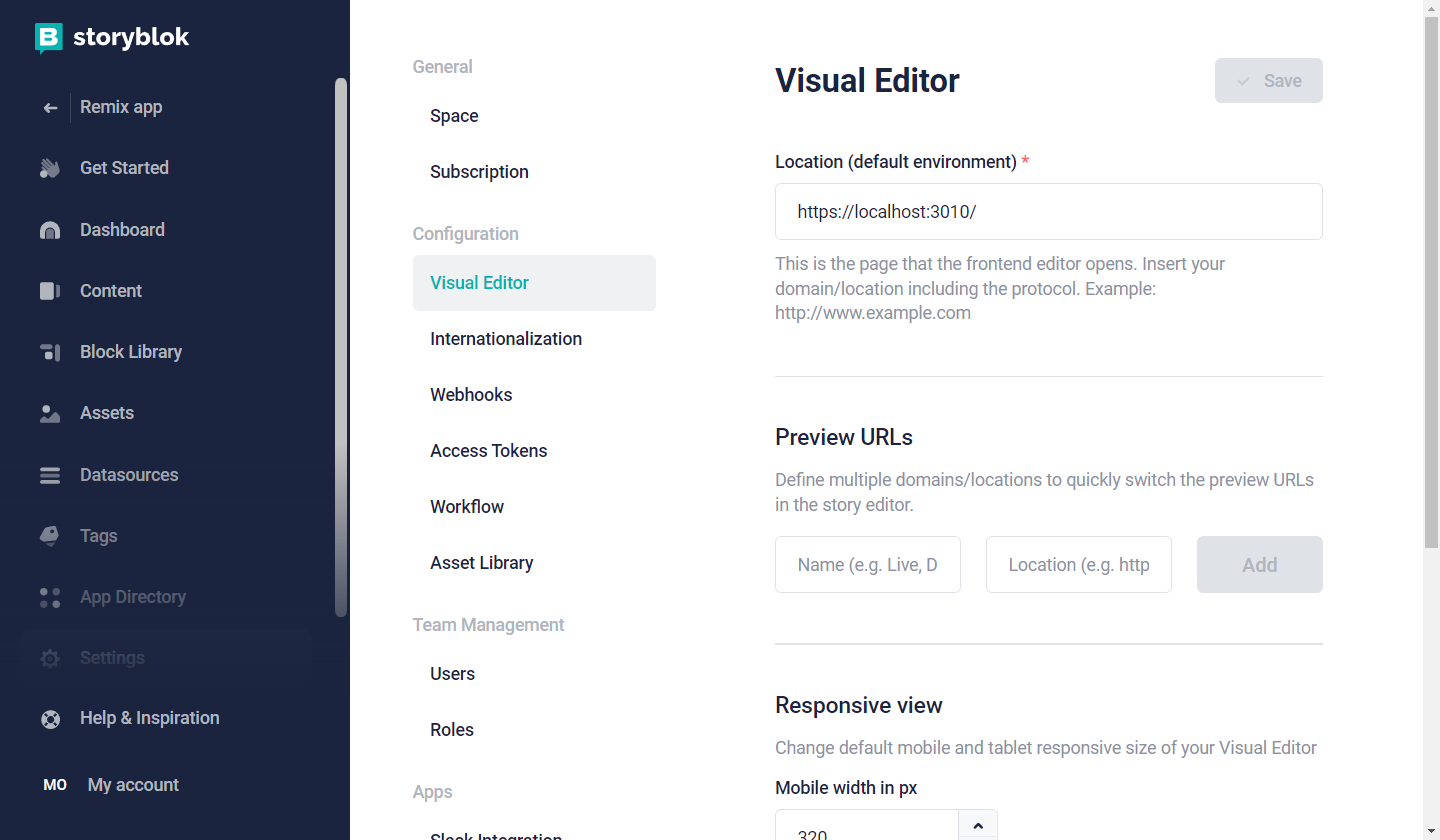
Since we’ve set up HTTPS proxy using the guide earlier, we can enter the URL for our app to use the visual editor
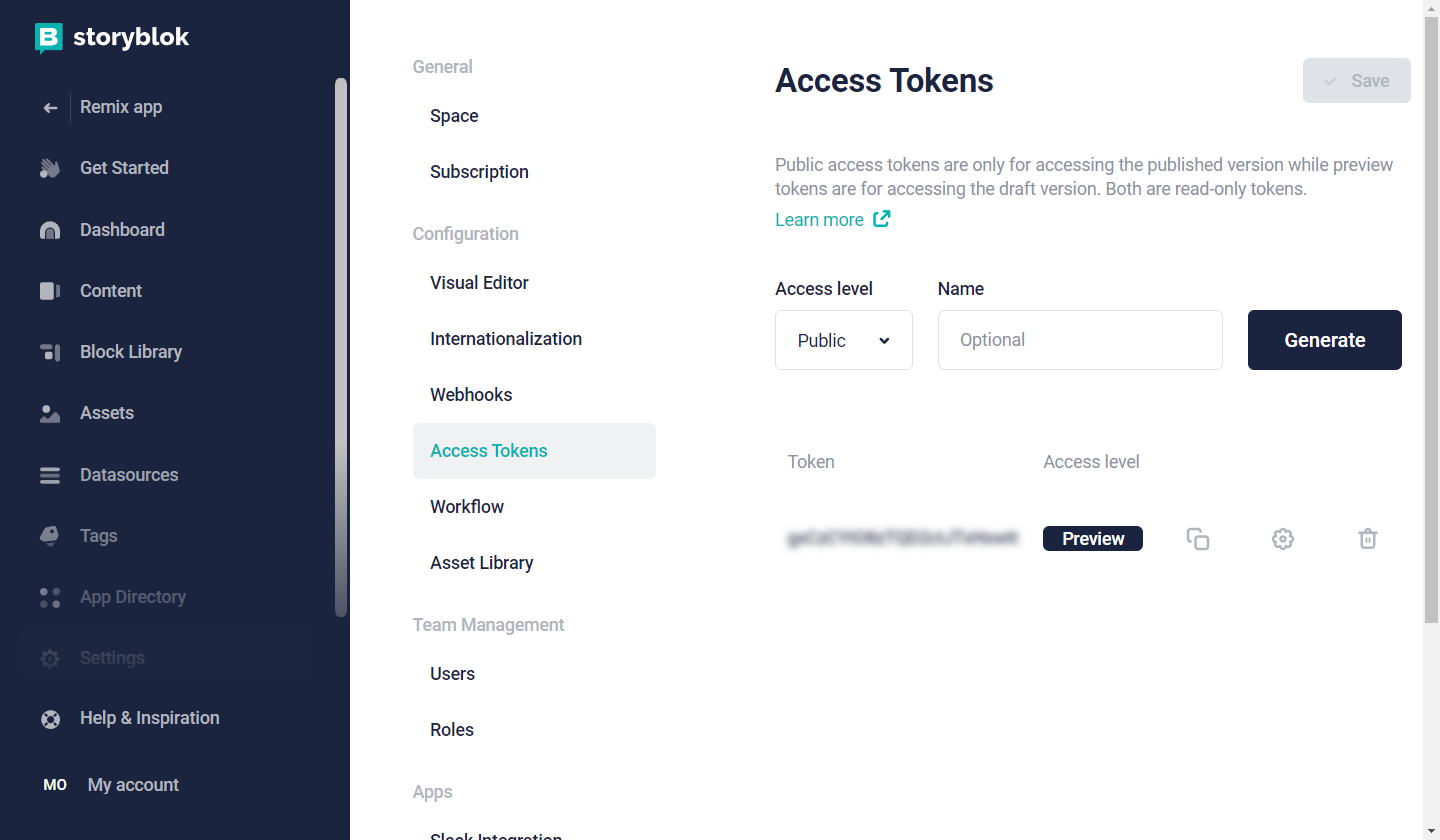
Once that’s done, navigate to Settings > Access Tokens and copy the token. We’ll use it to access our GraphQL API.
Back to the application project, create a new file - ./.env
STORYBLOK_API_TOKEN=<API TOKEN>With this token, we can set up authentication in our Apollo Client configuration to connect to our Storyblok GraphQL API.
To do that, open the ./app/entry.server.tsx file and replace it with the following:
import type { EntryContext } from "@remix-run/node";
import { RemixServer } from "@remix-run/react";
import { renderToString } from "react-dom/server";
import {
  ApolloProvider,
  ApolloClient,
  InMemoryCache,
  HttpLink,
  ApolloLink,
  concat,
} from "@apollo/client";
import { getDataFromTree } from "@apollo/client/react/ssr";
export default function handleRequest(
  request: Request,
  responseStatusCode: number,
  responseHeaders: Headers,
  remixContext: EntryContext
) {
  const httpLink = new HttpLink({ uri: "https://gapi.storyblok.com/v1/api" });
  const authMiddleware = new ApolloLink((operation, forward) => {
    operation.setContext(({ headers = {} }) => ({
      headers: {
        ...headers,
        token: process.env.STORYBLOK_API_TOKEN,
        version: "draft",
      },
    }));
    return forward(operation);
  });
  const client = new ApolloClient({
    ssrMode: true,
    cache: new InMemoryCache(),
    link: concat(authMiddleware, httpLink),
  });
  const App = (
    <ApolloProvider client={client}>
      <RemixServer context={remixContext} url={request.url} />
    </ApolloProvider>
  );
  return getDataFromTree(App).then(() => {
    const initialState = client.extract();
    const markup = renderToString(
      <>
        {App}
        <script
          dangerouslySetInnerHTML={{
            __html: `window.__APOLLO_STATE__=${JSON.stringify(
              initialState
            ).replace(/</g, "\\u003c")}`, // The replace call escapes the < character to prevent cross-site scripting attacks that are possible via the presence of </script> in a string literal
          }}
        />
      </>
    );
    responseHeaders.set("Content-Type", "text/html");
    return new Response("<!DOCTYPE html>" + markup, {
      status: responseStatusCode,
      headers: responseHeaders,
    });
  });
}
Here we set up HttpLink with the URL to our Storyblok GraphQL endpoint as our uri.
Next, to be able to fetch data, we need to set up authentication which is what we did by configuring ApolloLink to add the token and version to the operation headers.
Finally, in ApolloClient, we set link: concat(authMiddleware, httpLink) in order to use the authentication and GraphQL API.
Update Client Side Apollo
Next, we’ll update the URI on the client side in entry.client.tsx:
import { ApolloClient, ApolloProvider, InMemoryCache } from "@apollo/client";
import { RemixBrowser } from "@remix-run/react";
import { hydrate } from "react-dom";
function Client() {
  const client = new ApolloClient({
    // `restore` rehydrates the cache so it will match the cache on the server
    cache: new InMemoryCache().restore(window.__APOLLO_STATE__),
    uri: "https://gapi.storyblok.com/v1/api",
  });
  return (
    <ApolloProvider client={client}>
      <RemixBrowser />
    </ApolloProvider>
  );
}
hydrate(<Client />, document);
Fetch data from Storyblok
Finally, to fetch data from Storyblok, we define a query and pass it to the useQuery() function. You can see how to make a GraphQL query from the Storyblok API here from this guide
Storyblok’s GraphQL schema is generated from our content types. For each content type, Storyblok generates two fields:
- One for receiving a single item: [Humanized Name]Item e.g. PageItem
- And one for receiving multiple items: [Humanized Name]Items e.g. PageItems
If you have created a content type with the name Product, you will have the fields ProductItem and ProductItems in GraphQL.
Below, we will query the home content item and output the page name
In ./app/routes/index.tsx:
import { gql, useQuery } from "@apollo/client";
const PAGEITEMS_QUERY = gql`
{
PageItem(id: "home") {
name
}
}
`;
export default function Index() {
const { data } = useQuery(PAGEITEMS_QUERY);
return (
<div style={{ fontFamily: "system-ui, sans-serif", lineHeight: "1.4" }}>
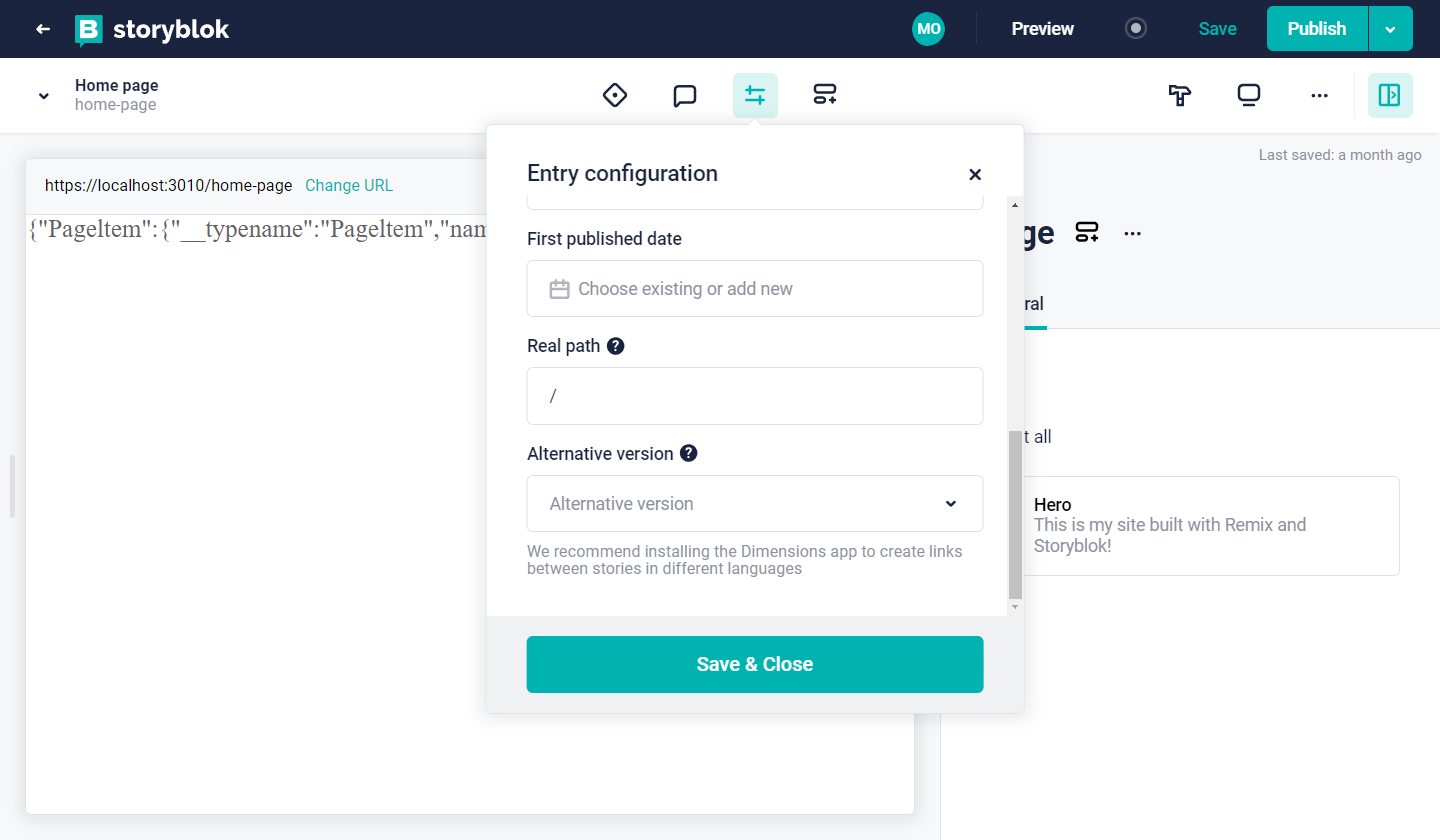
{JSON.stringify(data)}
</div>
);
}Now we should see something like this
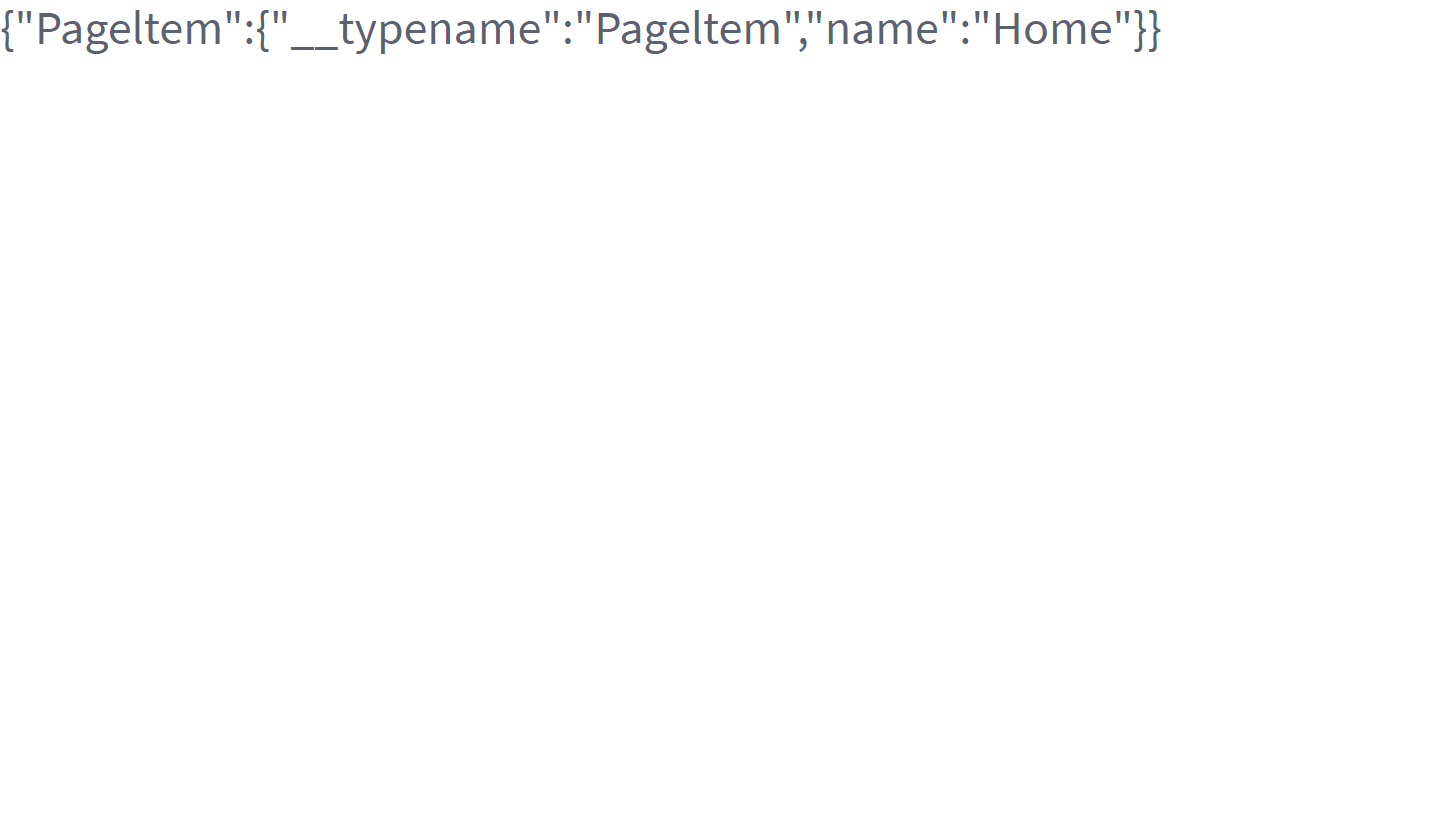
Great!
Also, to get a documented schema definition of your content type we can use the GraphQL playground.
We just have to exchange the token (YOUR_TOKEN) with our Preview token and open the link: http://gapi-browser.storyblok.com/?token=YOUR_TOKEN
Set up Storyblok Content structure
Now, we’ll walk through how to set up a basic content structure for our site in Storyblok.
Create a new story
Let’s create a new story for our site, Storyblok has set up a demo story already, but we’ll ignore that for now and create a new story.
Click on the Create new button and the Story option from the dropdown.
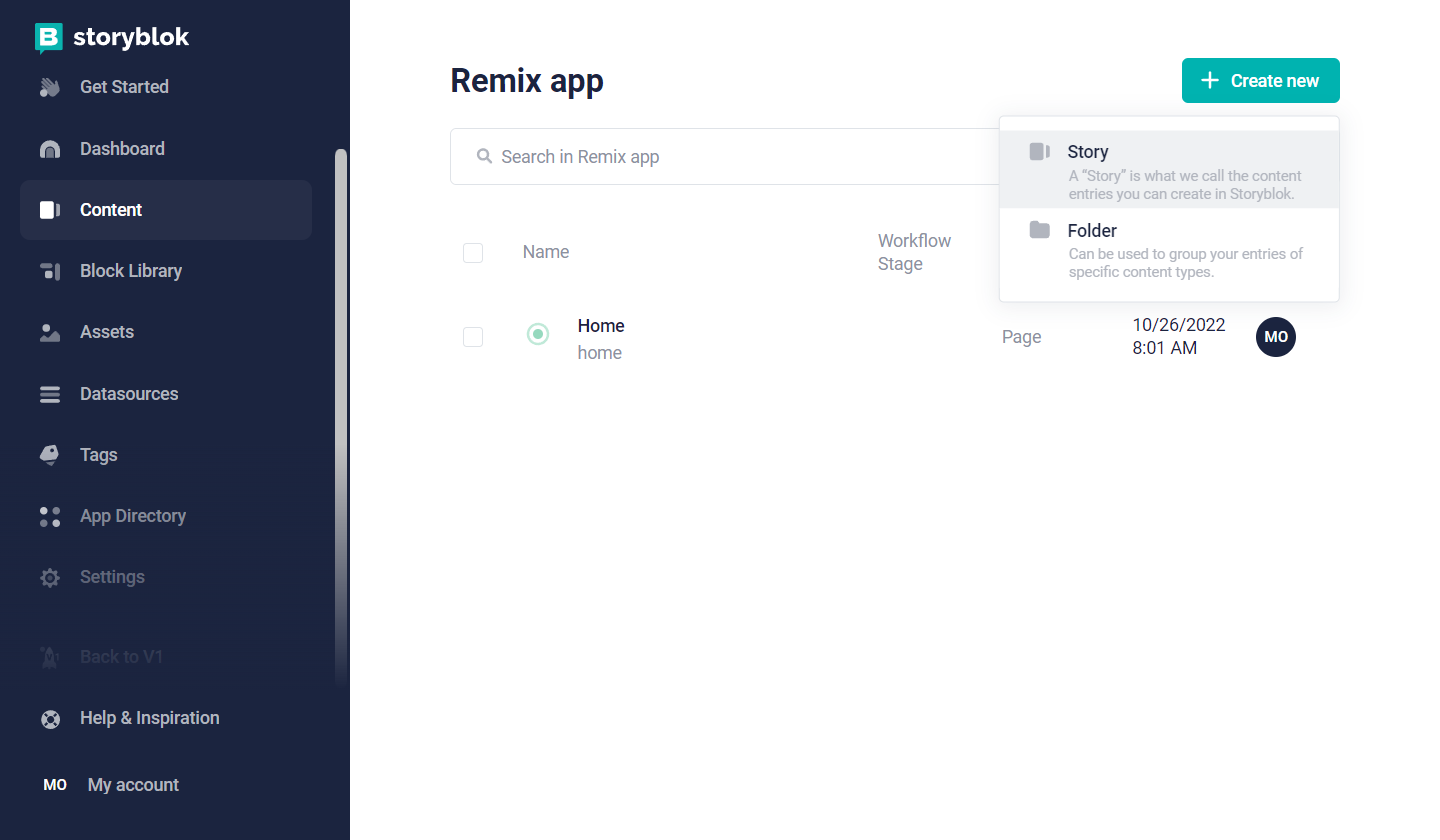
Now, we’ll give our new story a name. Let’s name it the Home page, the slug is automatically generated.
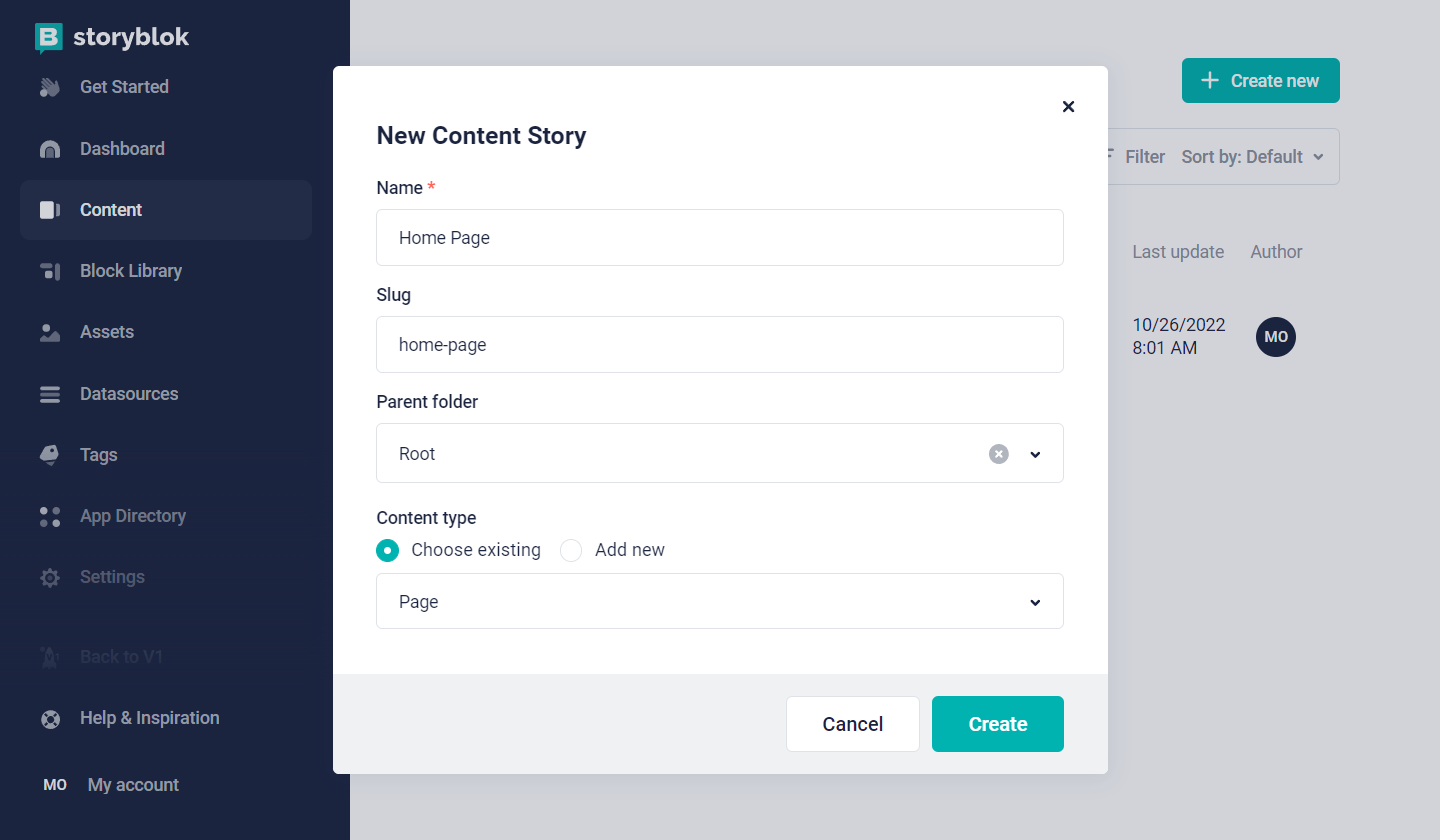
Next: we have to modify the Entry configuration and set the Real path to / which corresponds to the index route in our Remix application.
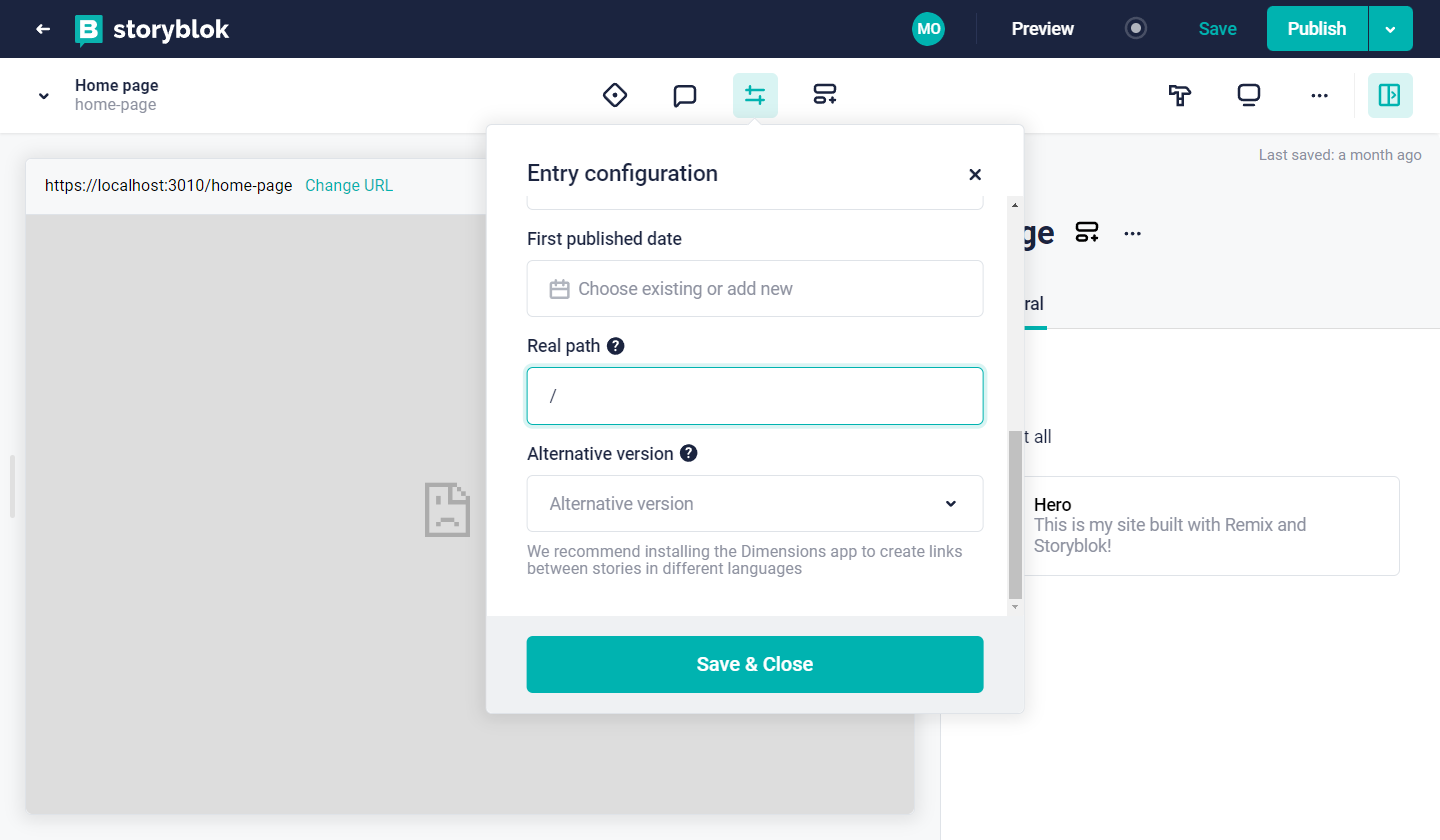
Once we’ve done that, you should see the page showing in the Visual editor.
Create Hero block
Now, we’ll create a new nestable block that will live in our home page story. This will contain the data for a <Hero /> component we’ll create later in our application.
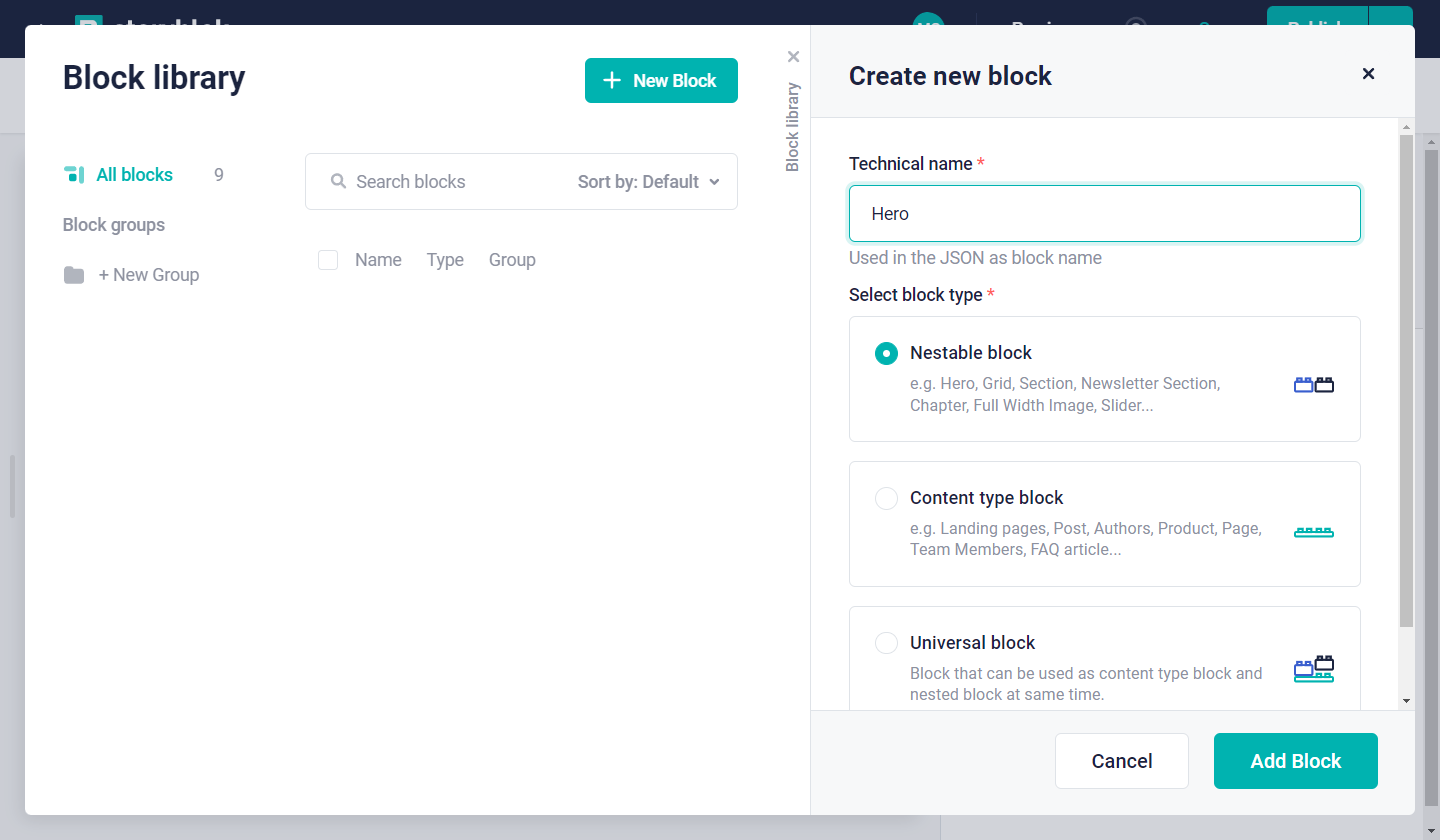
To create a new block, click the Block Library button at the top of the page opens up this modal.
Next, click on the New Block button. On the side, we can enter the name of our component and its type which should correspond to:
- “Hero” - Technical name
Nestable block- Block type
Now, click on the Add block button to create the block so we can start editing.
Now, for our Hero block, let’s create a few fields. To create a new field, enter the field name and select the field type by clicking on the field type icon.
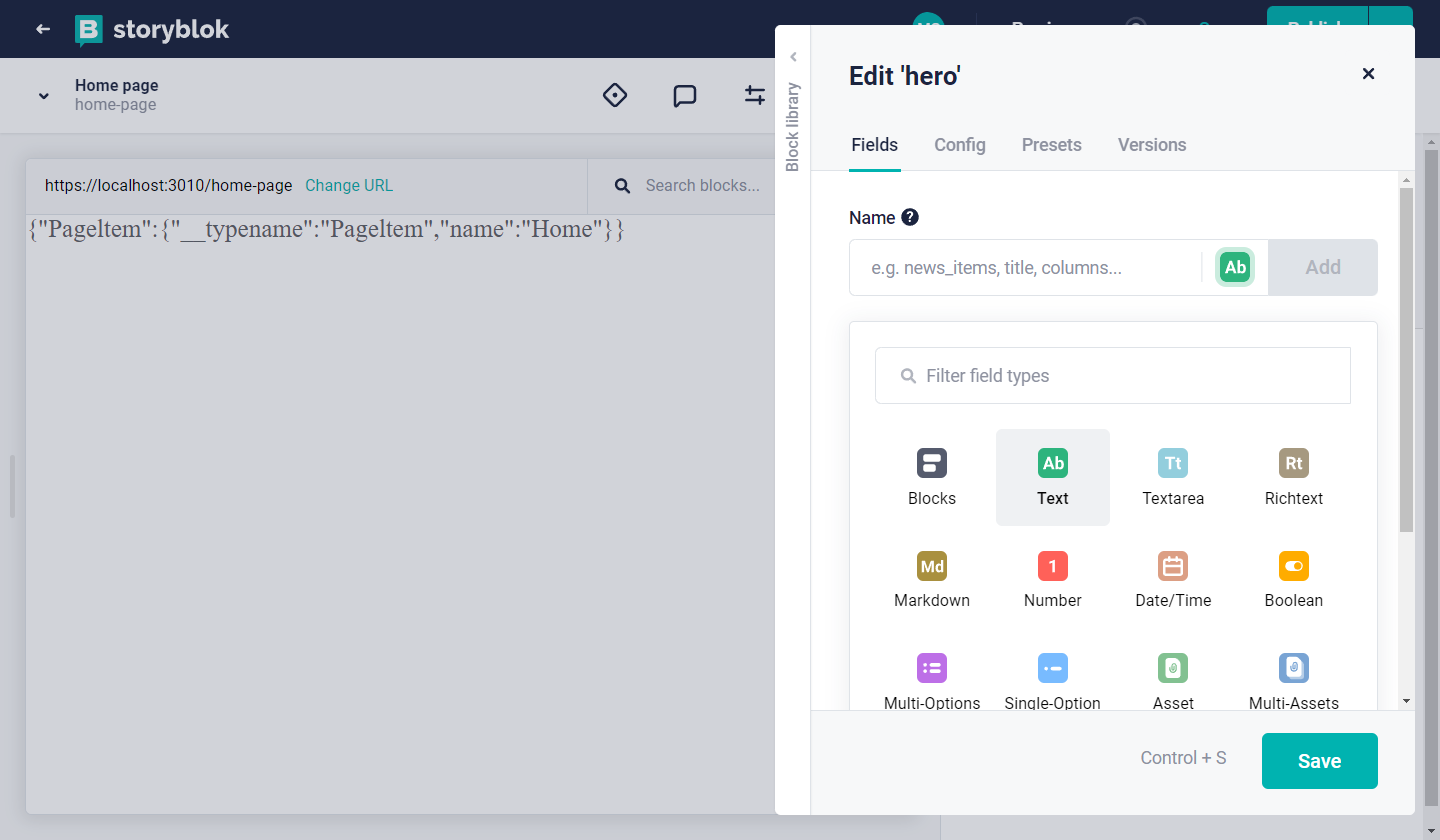
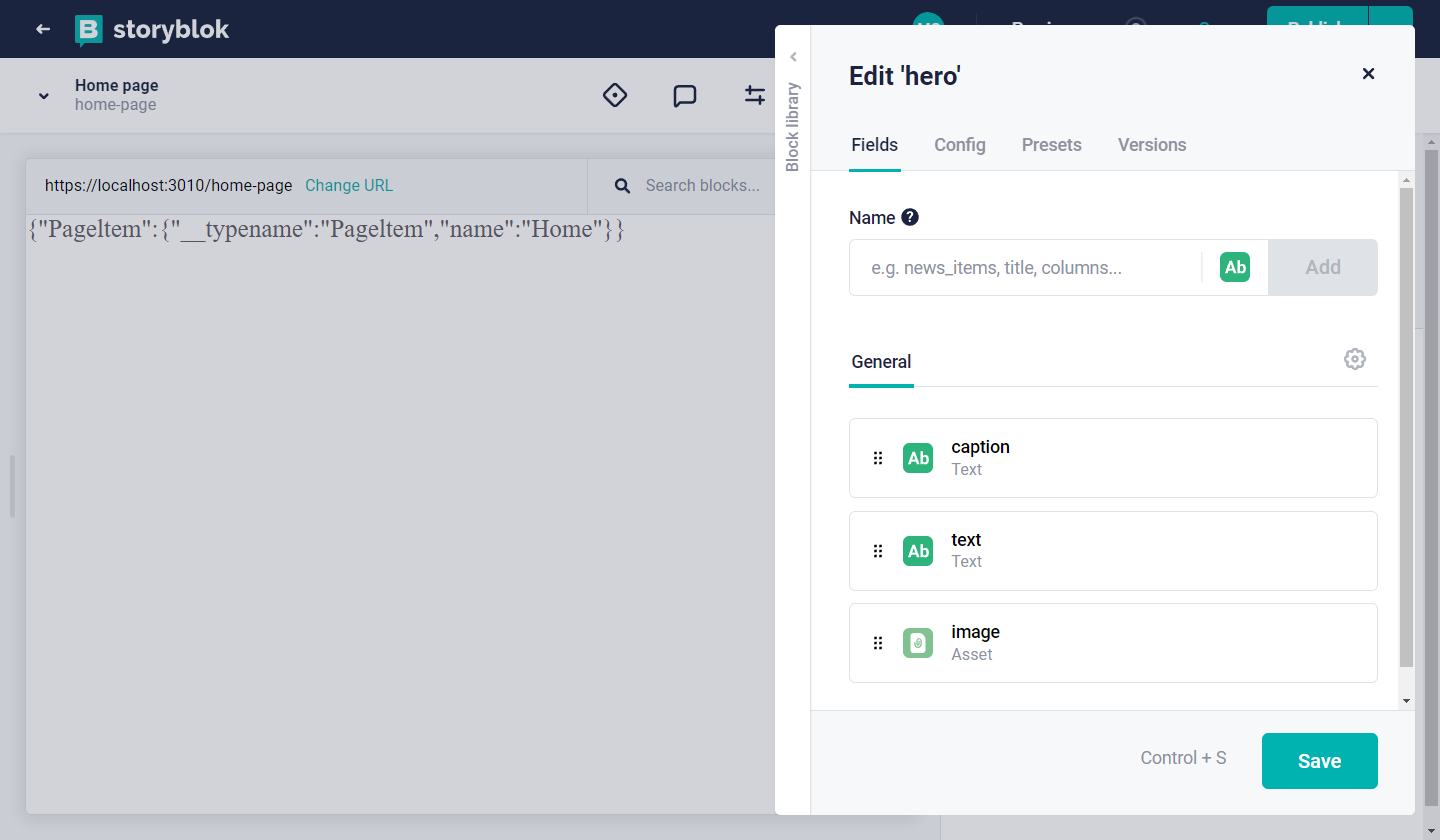
Here’s the schema for our Hero block:
- “caption” - Text
- “text” - Text
- “image” - Asset
It should look something like this:
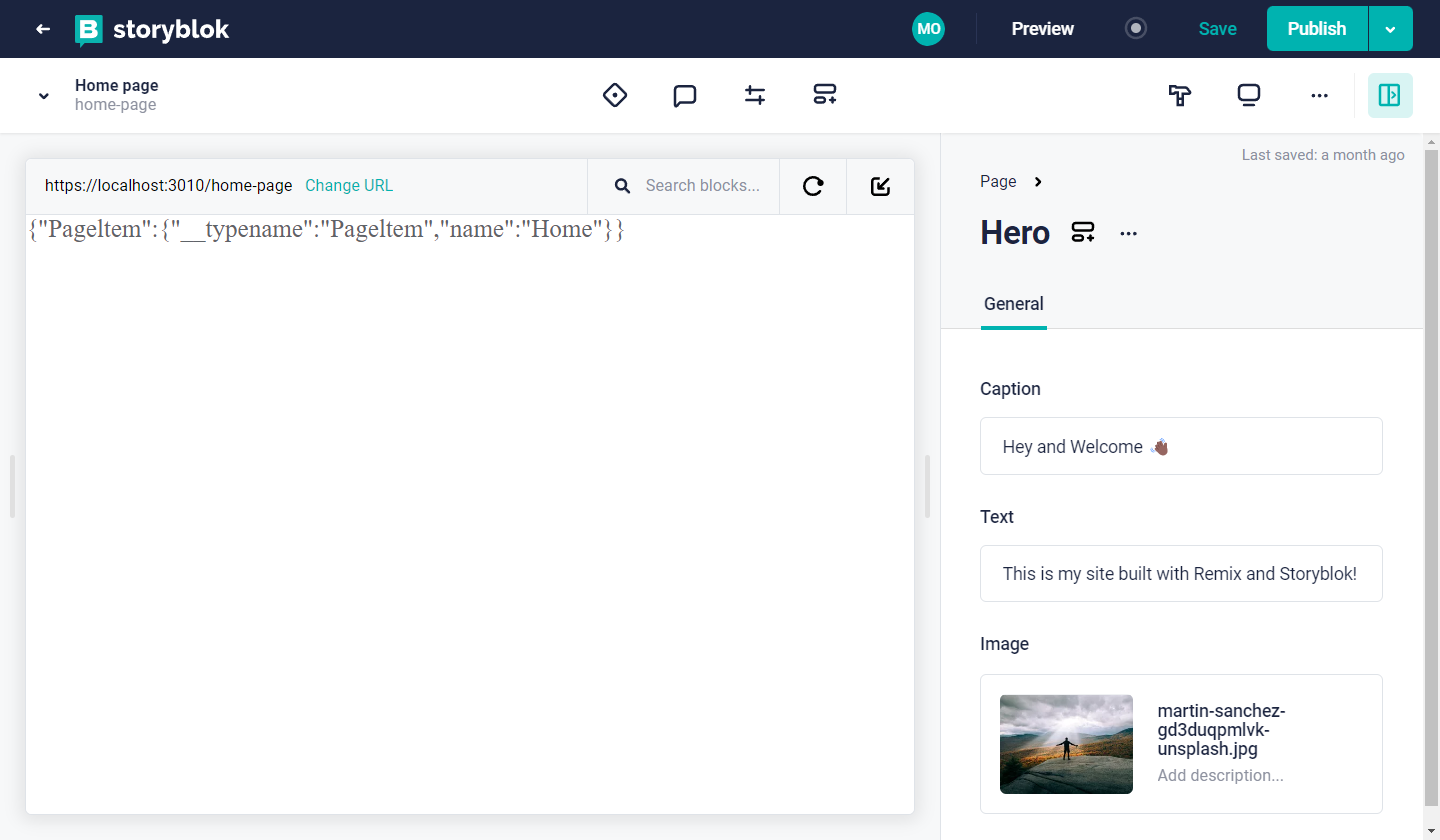
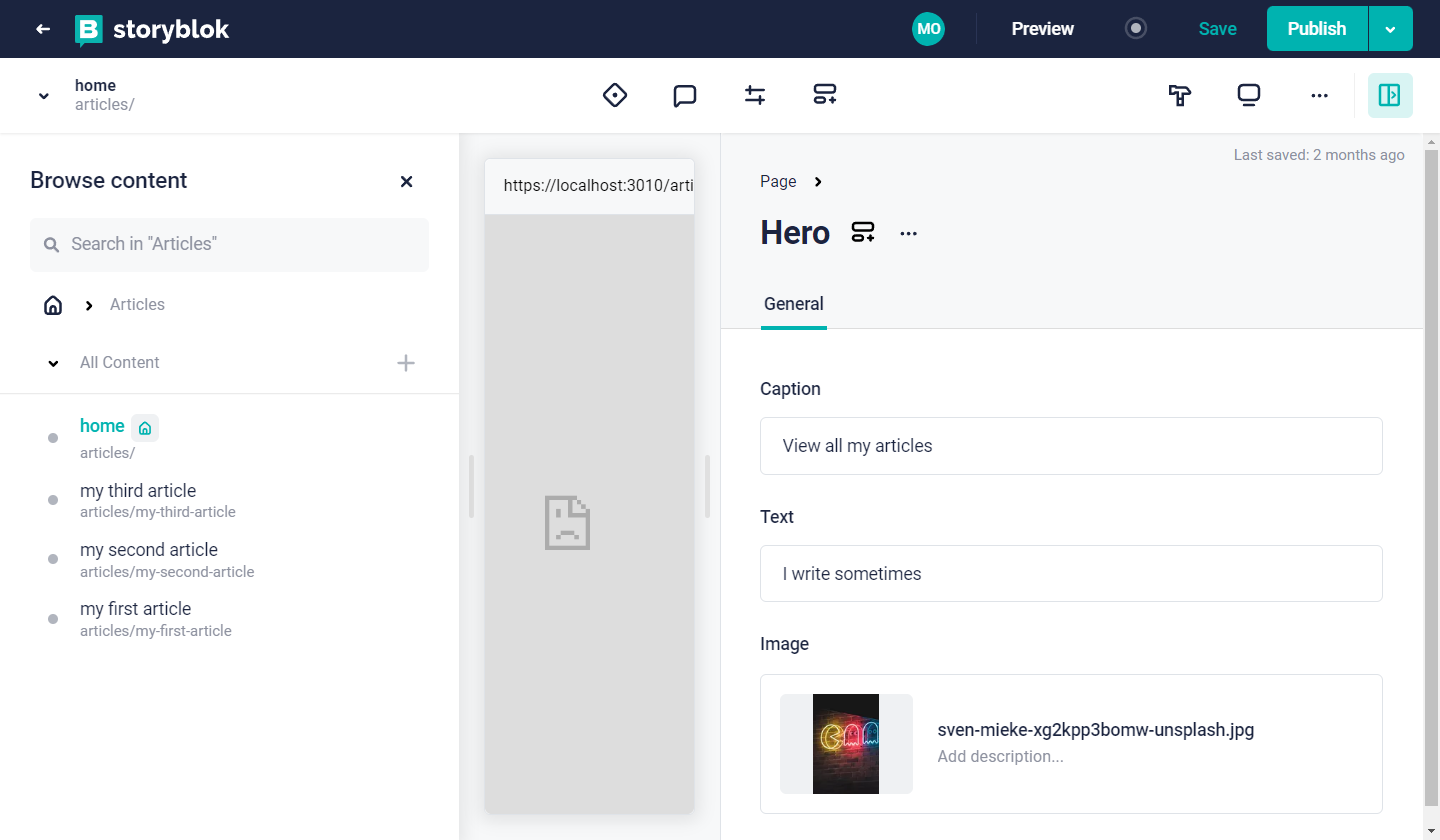
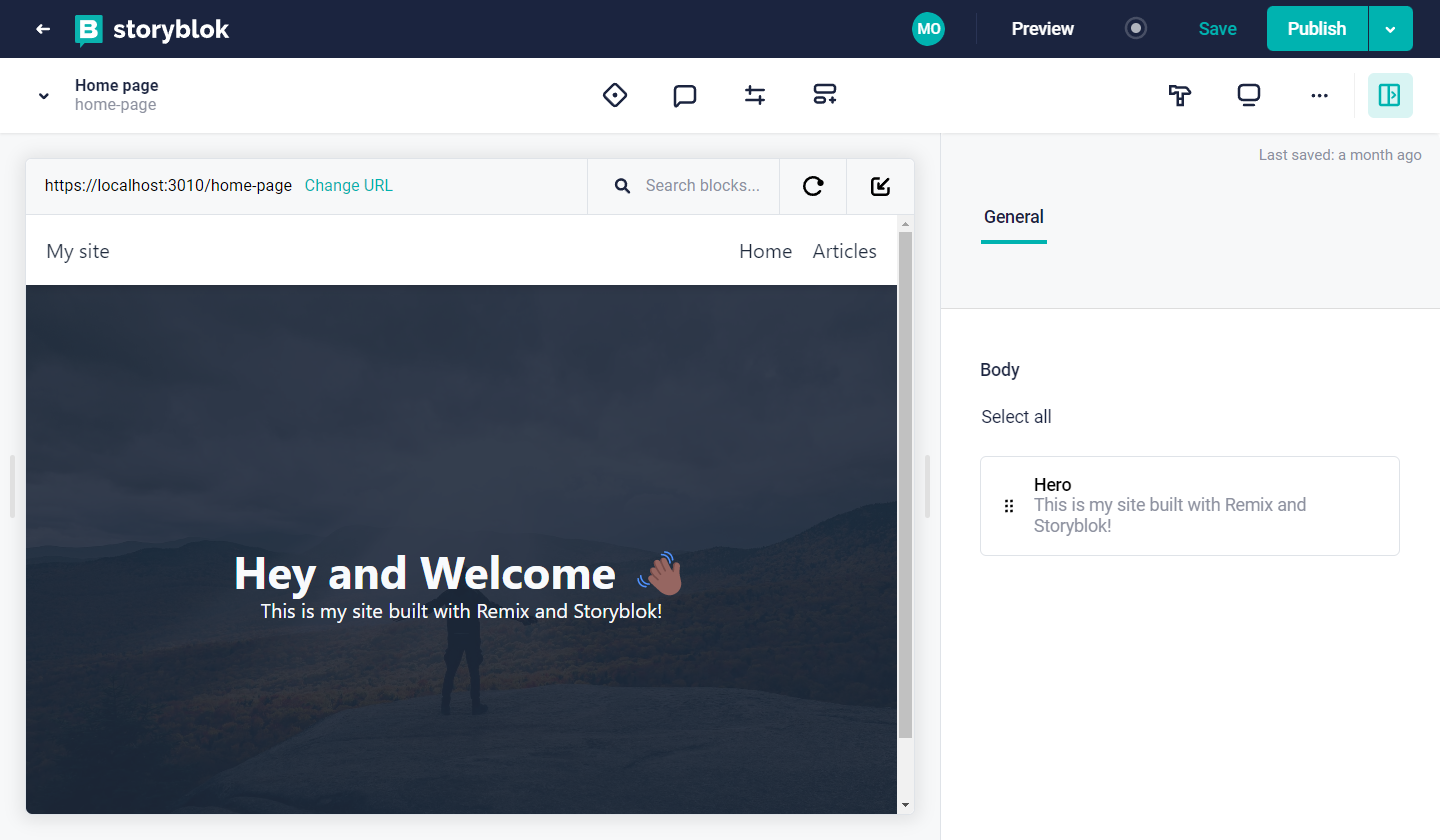
Now that we’ve set up our Hero block, we can save it and add our content. Here’s mine below:
Awesome. Next, we’ll create a new folder for our articles.
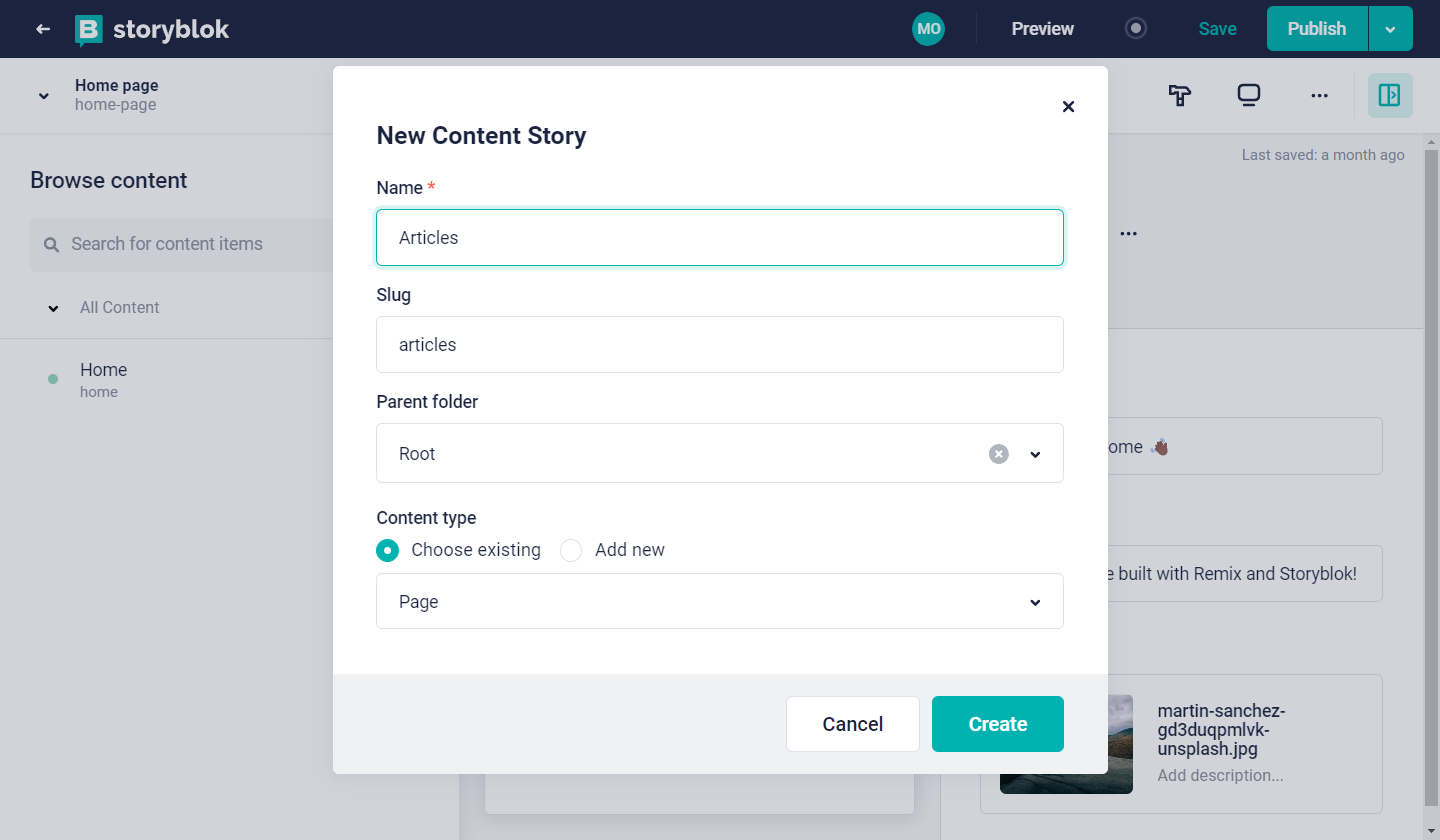
Create Articles folder
This folder will contain all our article stories.
To create a new folder open the Browse content side bar and click on the + button to select the Folder option from the dropdown.
Next, we have to enter the following:
- Name - “Articles”
- Slug (Automatically generated) - “articles”
- Project folder - Root
- Content-Type: Here, we’ll select Choose existing and select Pages
Once that's done, we can create the folder by clicking on Create.
Create articles home page
In our newly created folder, we can create a new story.
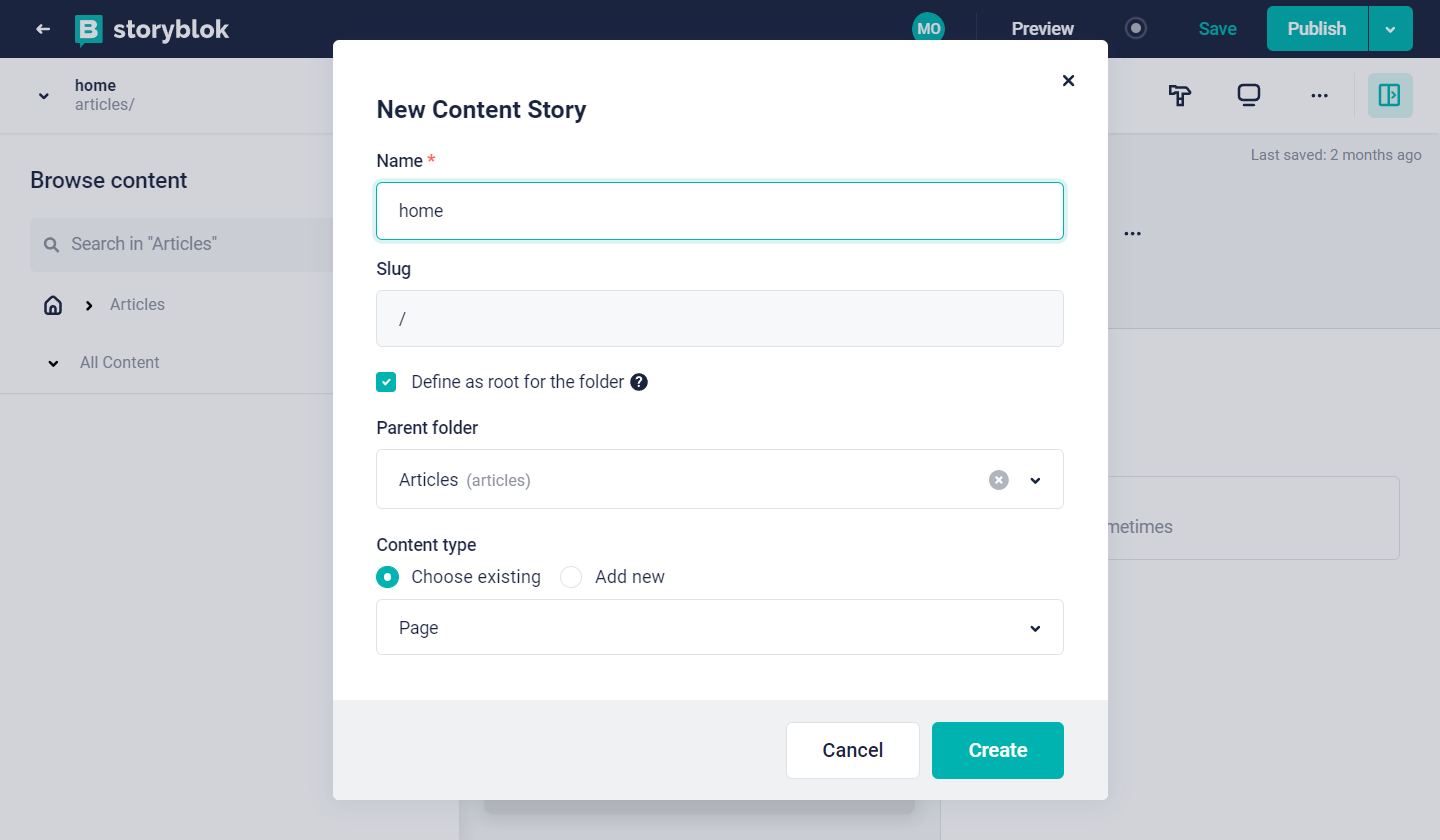
Now, we can proceed to create a new story for our articles home page with the following configuration:
- Name - “home”
- Slug - “home (auto-generated)
- Parent folder - Articles
- Define as root for the folder - ✅
- Content-Type - Page
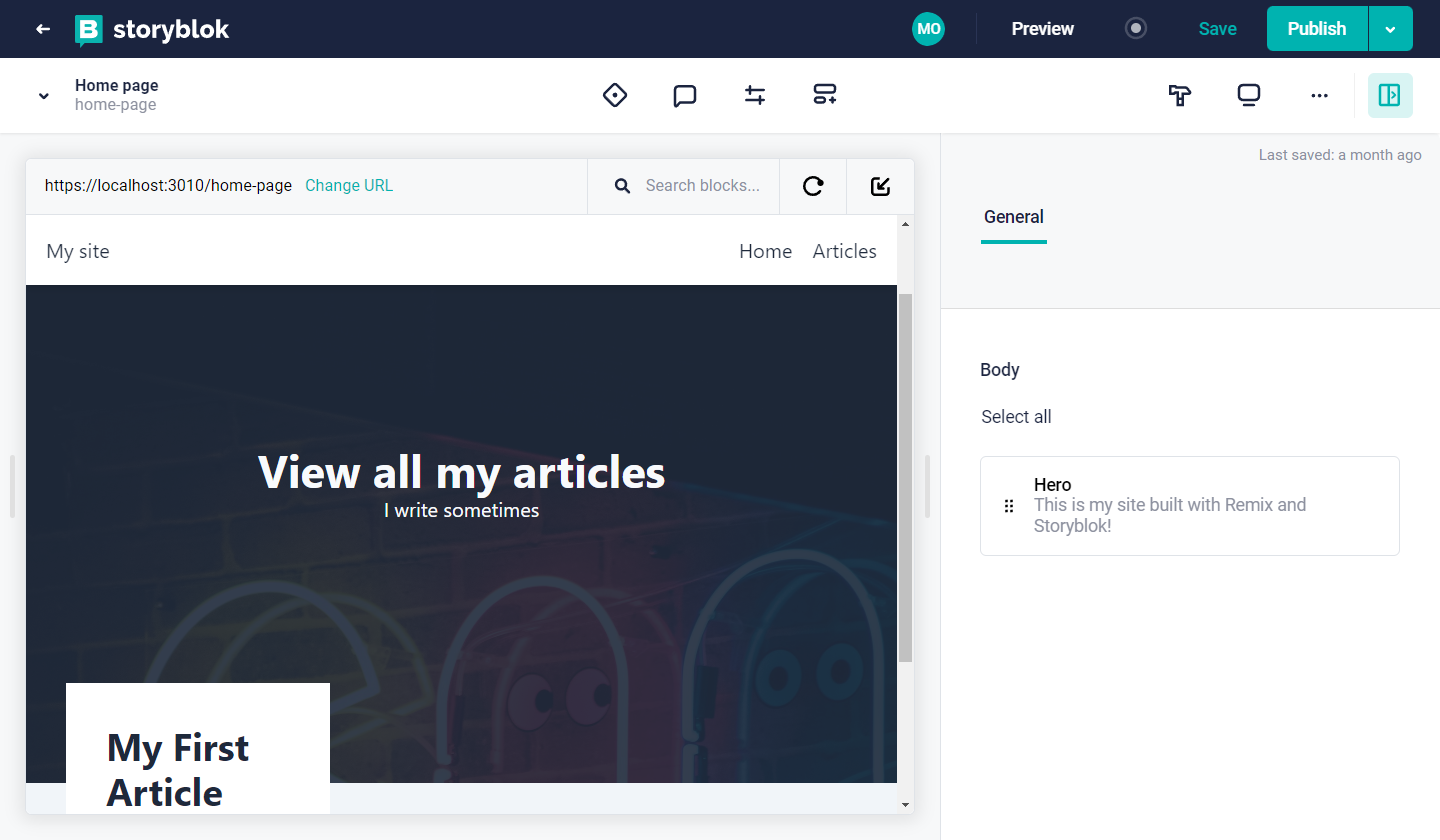
Once that’s done, click on Create. Next, add a Hero block to the page, enter some content, and save it.
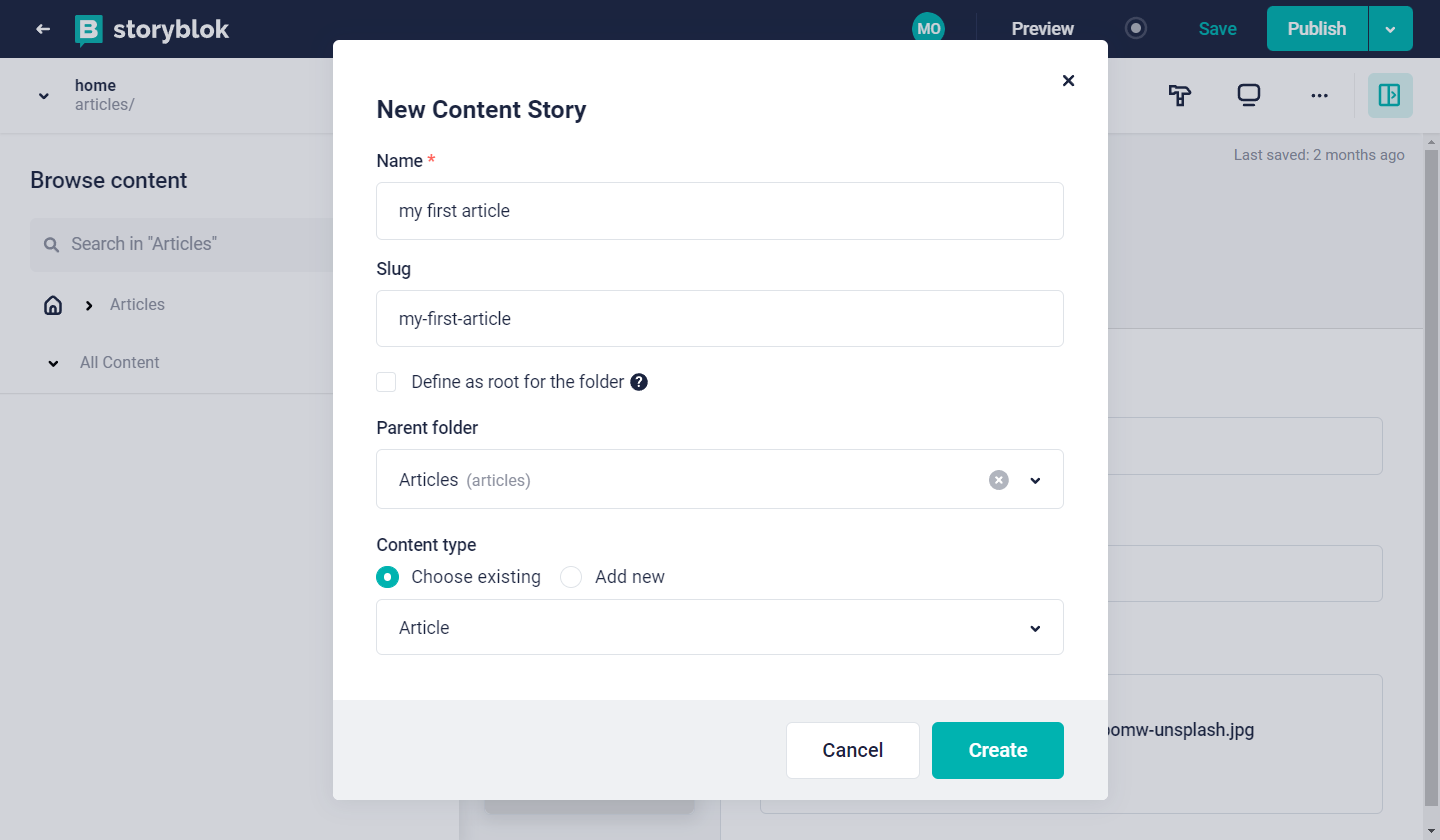
Now, we can proceed to create another story for our example article with the following configuration:
- Name - “my first article”
- Slug - “my-first-article” (auto-generated)
- Parent folder - Articles
- Content-Type - Page
Click on Create to create the new story
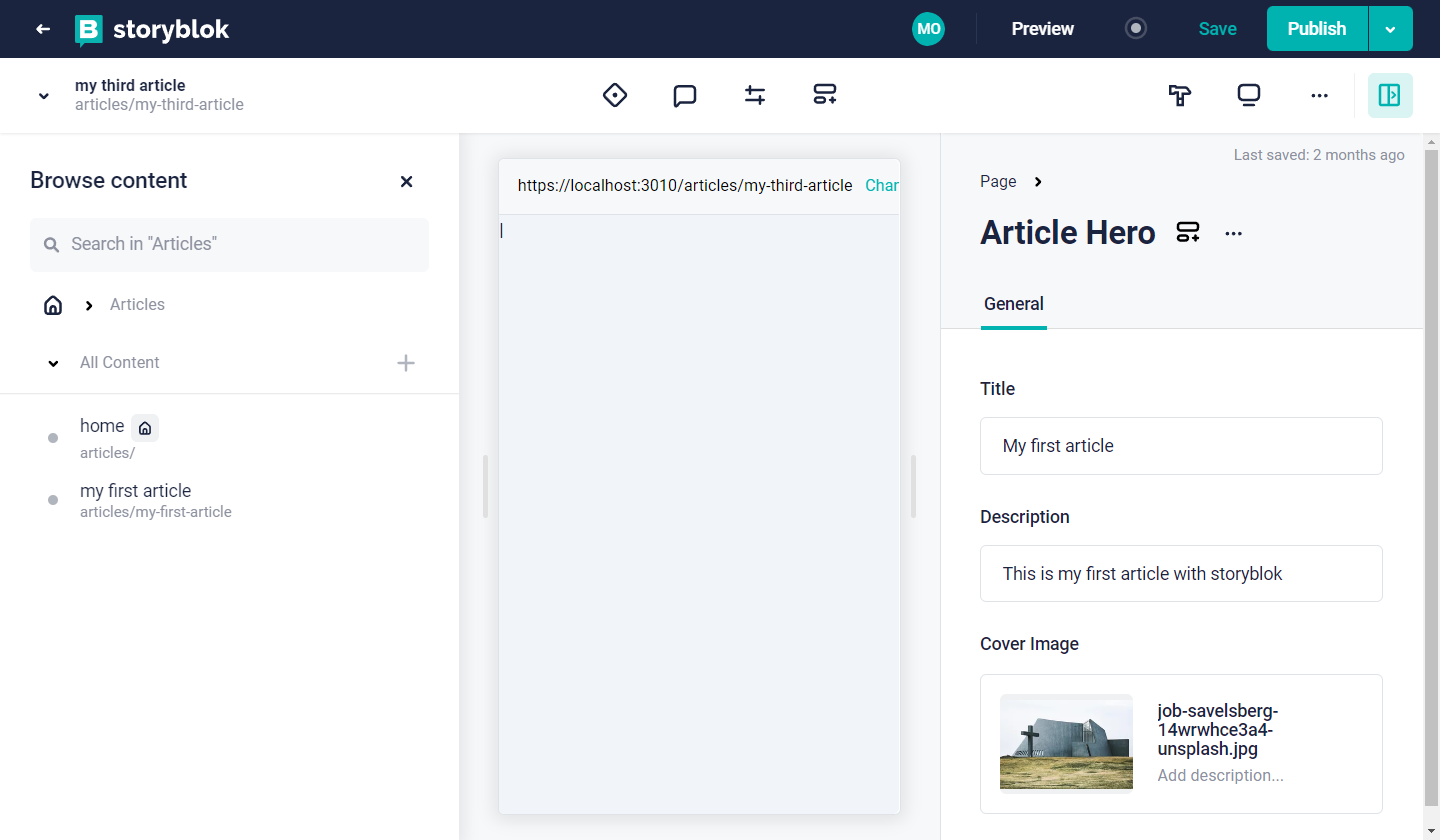
Create Article Hero block
Before we proceed, let’s go to our block library and create a new block for our article story. Click on the + New Block button and give the new block the technical name of “Article Hero,” and select “Nestable Block” as its Block type.
This block is going to have the following schema:
- “title” - Text
This will be the article title - “description” - Text
This will have the article's subtitle - “cover_image” - Asset
This will be the cover image for the article
Click on the Save button to save the changes. Now, in our story, we can add the Article Hero block and enter our content; here’s mine:
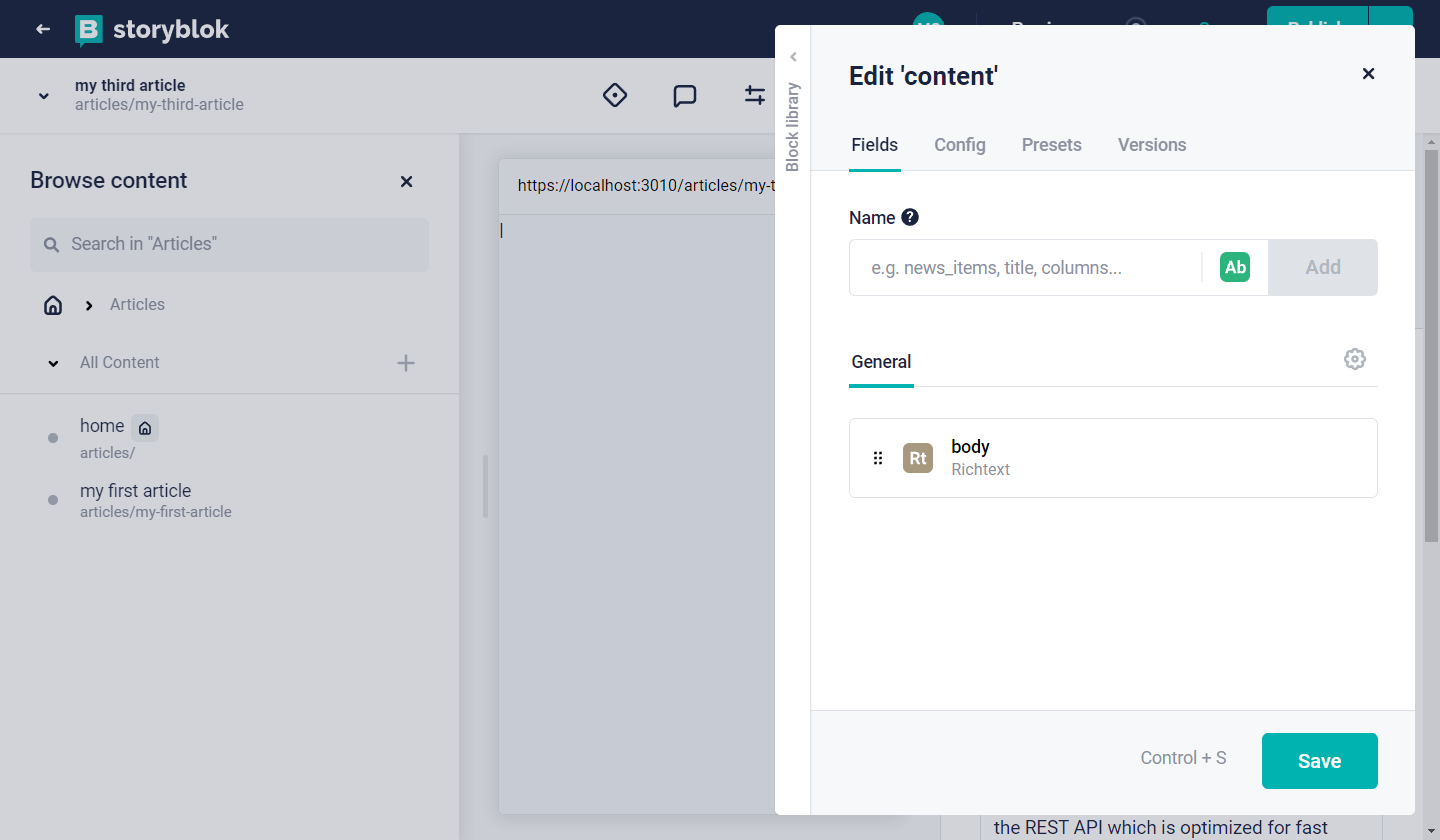
Create Content block
Now. we’ll create a new Content block that will hold the markdown content for our article. Create a new block from the block library with the following configuration:
- Technical name - “content”
- Block type - Nestable block
Click on Add block to create the block and name it “Content”. Now, we can edit our newly created block and add the schema:
- “body” - Richtext
This will be the body of the article
Once we've saved the changes for our content block, we can proceed to add our content to the page.
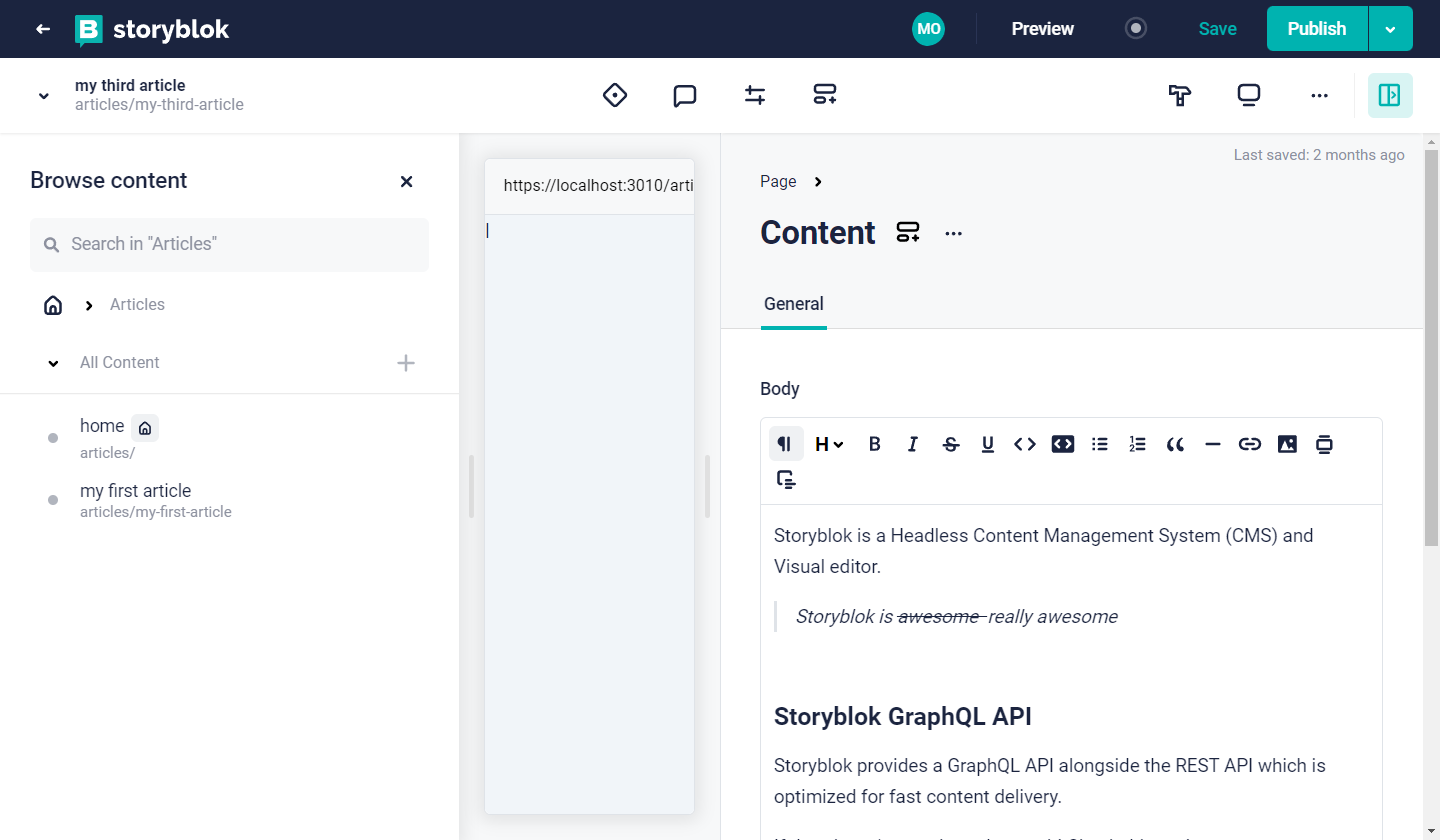
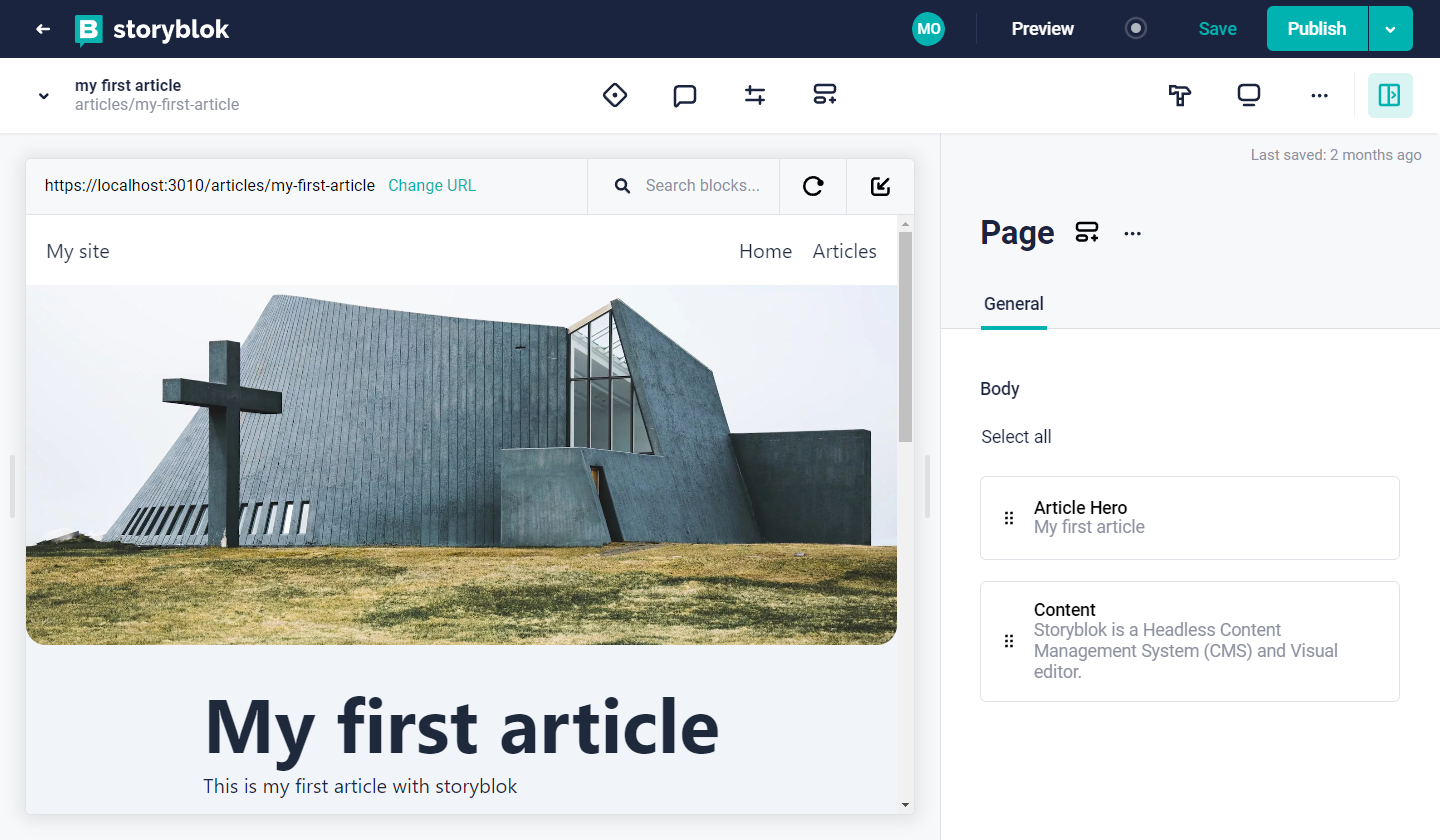
Here’s what we should have so far on the Article page:
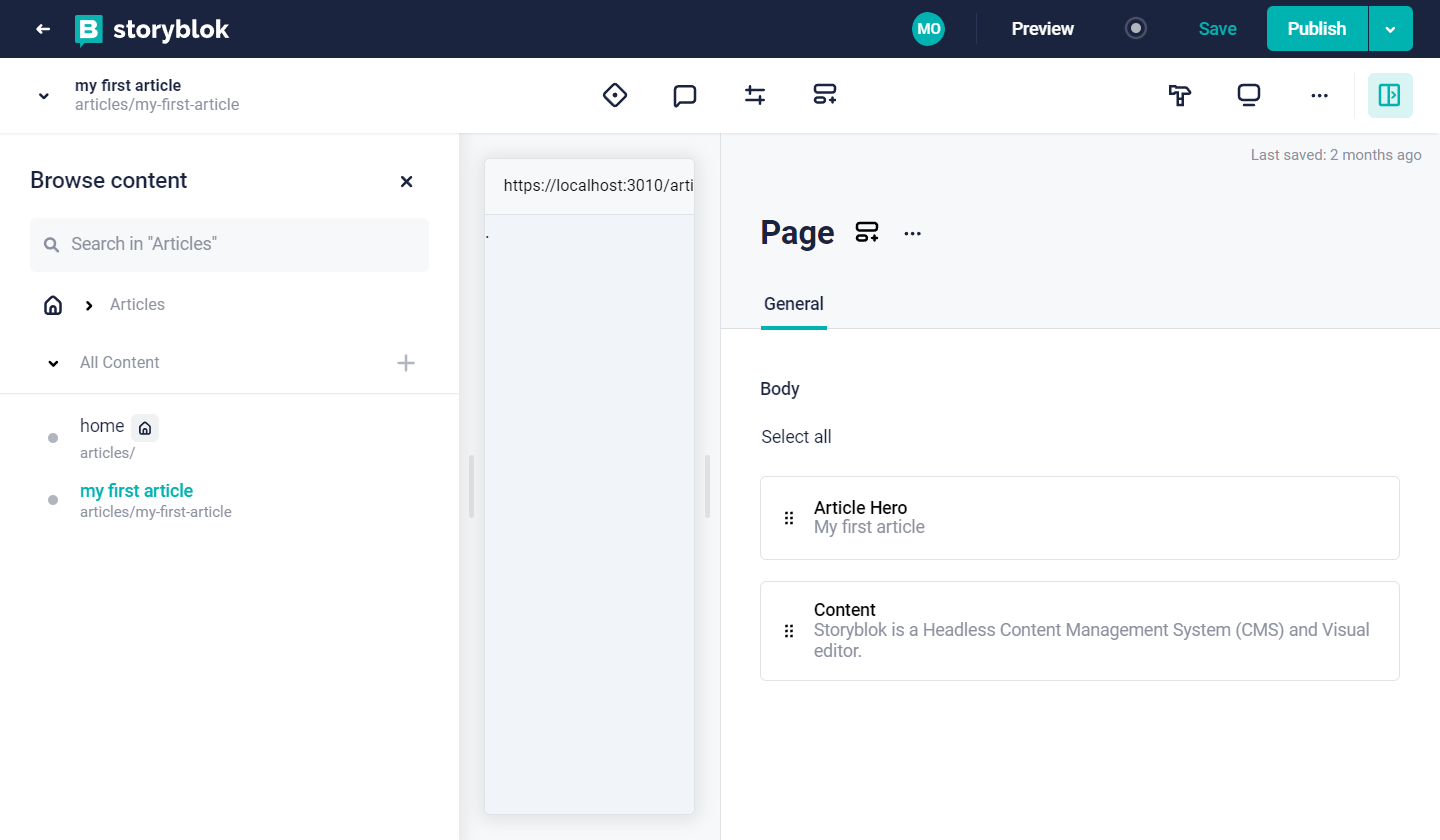
Great! Now we can create our components in Remix, render them using the Storyblok React SDK and make changes from the Visual editor.
Rendering Components with the Storyblok React SDK
The Storyblok SDK allows us to create layouts by rendering components based on the data we get from our Storyblok space. We will create React components that will link to the component structures available in our Storyblok space.
First, let's create a regular site header component for navigation.
Create SIteHeader component
First, we’ll create a simple site header component with a nav to navigate through our app. Create a new file ./app/components/SiteHeader.tsx:
// ./app/components/SiteHeader.tsx
const SiteHeader = () => {
  return (
    <header className="site-header">
      <div className="wrapper">
        <div className="logo">
          <h1>My site</h1>
        </div>
        <nav className="site-nav">
          <ul className="links">
            <li className="link">
              <a href="/">
                Home
              </a>
            </li>
            <li className="link">
              <a href="/articles">
                Articles
              </a>
            </li>
          </ul>
        </nav>
      </div>
    </header>
  )
}
export default SiteHeader
Next, we’ll build dynamic Storyblok components for the blocks in our Home page story in Storyblok.
Create Page component
This component is responsible for rendering HTML content for a Page content type, the Page content type has a property called body, which includes a list of blocks.
Create a new file ./app/components/Page.tsx:
// ./app/components/Page.tsx
import { storyblokEditable, StoryblokComponent } from "@storyblok/react";
const Page = ({ blok }: { blok: any }) => (
  <main {...storyblokEditable(blok)} key={blok._uid}>
    {blok.body.map((nestedBlok: any) => (
      <StoryblokComponent blok={nestedBlok} key={nestedBlok._uid} />
    ))}
  </main>
);
export default Page;
Here, we’re using a few elements included in the @storyblok/react package:
storyblokEditable- This function marks a React component as "editable". So, when the component appears inside the Visual Editor, we'll be able to click on it and edit its properties.StoryblokComponent- This is a React generic component that allows us to render any React component linked to a Storyblok item. This component corresponds to the component type included in the storybook configuration list which we’ll soon create.
Let’s create the components for our blocks in Story blok including:
- A Hero component for the Hero block in our Home page story.
- An Article Hero component for the Article Hero block in our article story and
- A Content component for the Content block in our article story
Create Hero component
Create a new file ./app/components/Hero.tsx:
// ./app/components/Hero.jsx
import { storyblokEditable } from "@storyblok/react";
const Hero = ({ blok }: { blok: any }) => {
  return (
    <section {...storyblokEditable(blok)} key={blok?._uid} className="hero">
      <div className="wrapper flex w-full">
        <header
          className="hero-header w-full min-h-screen bg-cover"
          style={{ backgroundImage: `url(${blok?.image.filename})` }}
        >
          <div className="wrapper flex flex-col items-center justify-center w-full h-full text-slate-50 bg-slate-800/90">
            <h1 className="text-4xl font-bold">{blok?.caption}</h1>
            <p> {blok?.text} </p>
          </div>
        </header>
      </div>
    </section>
  );
};
export default Hero;
Create Article Hero component
Create a new file, ./app/components/ArticleHero.tsx and enter the following:
// ./app/components/ArticleHero.jsx
import { storyblokEditable } from "@storyblok/react";
const ArticleHero = ({ blok }: { blok: any }) => {
  return (
    <section
      {...storyblokEditable(blok)}
      key={blok?._uid}
      className="article-hero"
    >
      <div className="wrapper">
        <header className="article-hero-header">
          <div className="cover img-cont h-72">
            <img
              src={blok?.cover_image?.filename}
              alt=""
              className="rounded-b-2xl"
            />
          </div>
          <div className="details">
            <h1 className="text-6xl font-bold">{blok?.title}</h1>
            <p> {blok?.description} </p>
          </div>
        </header>
      </div>
    </section>
  );
};
export default ArticleHero;
Create Content component
Create a new file, ./app/components/Content.tsx:
// ./app/components/Content.jsx
import { storyblokEditable, renderRichText } from "@storyblok/react";
const Content = ({ blok }: { blok: any }) => {
  return (
    <article {...storyblokEditable(blok)} key={blok?._uid} className="content prose p-4 m-auto">
      <div
        className="body"
        dangerouslySetInnerHTML={{
          __html: renderRichText(blok?.body),
        }}
      ></div>
    </article>
  );
};
export default Content;
Here, you can see that in order to render the rich text content of the body field of our content blok, we use the renderRichText function available from the Storyblok SDK. We pass block?.body which contains the rich text data to renderRichText(), which generates HTML.
In order to render the HTML, we pass it to dangerouslySetInnerHTML on the .body element.
Set up Tailwind Typography
In order for our rendered rich text to display properly, we’ll use the Tailwind Typography plugin. To install run:
npm install -D @tailwindcss/typographyThen add the plugin to our tailwind.config.js file:
module.exports = {
  plugins: [
    require('@tailwindcss/typography'),
    // ...
  ],
}
Awesome. Now with the .prose class we added earlier, our rich text content will be displayed properly.
Configure list of components
As stated earlier, we need to configure the components identified by StoryblokComponent, and link them to their representation in the Storyblok space. To do that, let's go back to app/root.jsx and add a new components parameter to storyblokInit call:
// ./app/root.tsx

// ...

import { storyblokInit } from "@storyblok/react";
import Grid from "./components/Grid";
import Page from "./components/Page";
import Teaser from "./components/Teaser";
import Feature from "./components/Feature";

// our components list
const components = {
  hero: Hero,
  "Article Hero": ArticleHero,
  content: Content,
};

storyblokInit({
  accessToken: "access token here",
  components,
});

// ...
Next, in our ./app/routes/index.tsx route, we have to update our query to fetch the Storyblok space and pass the data to the StoryblokComponent component.
In ./app/routes/index.ts enter the following:
import { gql, useQuery } from "@apollo/client";
import { useStoryblokState, StoryblokComponent } from "@storyblok/react";
const PAGEITEMS_QUERY = gql`
  {
    PageItem(id: "home-page") {
      id
      slug
      content {
        _uid
        component
        body
      }
    }
  }
`;
export default function Index() {
  const { data } = useQuery(PAGEITEMS_QUERY);

  let story: any = useStoryblokState(data?.PageItem);
  if (!story?.content) {
    return <div>Loading...</div>;
  }
  return <StoryblokComponent blok={story.content} />;
}
Now, if we go to our Storyblok dashboard we should see our home page and be able to edit it. We can also save the edits by clicking on the Save button.
Next, we can create a /articles route in our application which will display a list of our articles.
Create ArticlesList component
Let’s create a normal component that displays a list or articles, create a new file ./app/components/ArticlesList.tsx
// ./app/components/ArticlesList.tsx

const ArticlesList = ({ items }: { items: [any] }) => {
  return (
    <section className="article-list-section">
      <div className="wrapper">
        <ul className="article-list">
          {items.map((item) => (
            <li key={item.id} className="bg-white p-8 capitalize">
              <a href={`/articles/${item.slug}`}>
                <div className="wrapper">
                  <h3 className="text-3xl font-bold">{item?.name}</h3>
                </div>
              </a>
            </li>
          ))}
        </ul>
      </div>
    </section>
  );
};
export default ArticlesList;
To get a list of articles, however, we’re going to make a query that does just that in our articles/ route
Create Articles route
We’ll create a new file ./app/routes/articles/index.tsx:
// ./app/routes/articles/index.tsx
import { gql, useQuery } from "@apollo/client";
import { useStoryblokState, StoryblokComponent } from "@storyblok/react";
import ArticlesList from "~/components/ArticlesList";
const PAGEITEMS_QUERY = gql`
  {
    PageItem(id: "articles") {
      id
      slug
      content {
        _uid
        component
        body
      }
    }
  }
`;
// query to get article pages
const ARTICLES_QUERY = gql`
  {
    PageItems(starts_with: "articles", excluding_ids: "210214930") {
      items {
        full_slug
        name
        slug
        id
      }
    }
  }
`;
export default function Index() {
  const pageItems = useQuery(PAGEITEMS_QUERY);
  const articleItems = useQuery(ARTICLES_QUERY);

  let story: any = useStoryblokState(pageItems.data?.PageItem);
  if (!story?.content) {
    return <div>Loading...</div>;
  }
  return (
    <>
      <StoryblokComponent blok={story.content} />
      <ArticlesList items={articleItems.data.PageItems.items} />
    </>
  );
}
With that said, we should get something like this:
Create a dynamic route for articles
To create a dynamic route that displays the content of an article from the slug, we have to do a few things in our dynamic route:
- Create a loader that gets the slug from the params
- Pass the slug as a variable to the query to fetch the page item
Let’s create a new file - ./app/``*routes/articles/$slug.tsx* and enter the following:
// ./app/routes/articles/$slug.tsx
import { gql, useQuery } from "@apollo/client";
import { json } from "@remix-run/node";
import { useLoaderData } from "@remix-run/react";
import { useStoryblokState, StoryblokComponent } from "@storyblok/react";
const PAGEITEM_QUERY = gql`
  query ($slug: ID!) {
    PageItem(id: $slug) {
      id
      slug
      content {
        _uid
        component
        body
      }
    }
  }
`;
export const loader = async ({ params }: { params: any }) => {
  const slug = params.slug ?? "home";

  return json({ slug });
};
export default function Page() {
  let { slug } = useLoaderData();
  const { data } = useQuery(PAGEITEM_QUERY, {
    variables: {
      slug: `articles/${slug}`,
    },
  });

  let story: any = useStoryblokState(data?.PageItem);
  if (!story?.content) {
    return <div>Loading...</div>;
  }
  return (
    <main>
      <div className="wrapper">
        <StoryblokComponent blok={story.content} />
      </div>
    </main>
  );
}
Now, our first article page should show us our article content:
Awesome! So far, we’ve covered almost all the basic and most important parts of creating a Remix application with Storyblok GraphQL. In the following sections, we’ll look at a few other features of Storyblok.
Optimizing images with the Image service
In this section, we’ll briefly see how we can use the Storyblok image service to deliver optimized images.
The Storyblok image service is a very useful service as it provides you with high-quality images in different formats and sizes for all devices and platforms.
It covers so many use cases and the best way to learn all about it and start using it in any application is through the official guide.
For now, we’re simply going to use it to optimize our images. For that, we can simply append /m/to the end of our URL in our ArticlesHero component.
For the ArticlesHero component, in *./app/components/ArticleHero.tsx*:
// ./app/components/ArticleHero.jsx
// ...
const ArticleHero = ({ blok }: { blok: any }) => {
  return (
    <section
      {...storyblokEditable(blok)}
      key={blok?._uid}
      className="article-hero"
    >
      <div className="wrapper">
        <header className="article-hero-header">
          <div className="cover img-cont h-72">
            <img
              src={blok?.cover_image?.filename+'/m/'}
              alt=""
              className="rounded-b-2xl"
            />
          </div>
          // ...
        </header>
      </div>
    </section>
  );
};
export default ArticleHero;
Currently, our article images will be served in an optimized WebP format in supported browsers.
Conclusion
So far we’ve covered how to build a simple GraphQL-enabled Remix application with Apollo Client. We also covered how to connect our application to the Storyblok GraphQL API to get data. We used the Storyblok React SDK to render our components and make them editable in the Visual editor.
We also explored other features of Storyblok, particularly the image service which allowed us to optimize our images.
It doesn't end there though, by exploring more of Storyblok’s features and services we can further improve our application.
Further reading & Resources
Here are a few useful reads and links to the example code:
Currently, our article images will be served in an optimized WebP format in supported browsers.
| Resources | Link |
|---|---|
| GraphQL Content Delivery API | https://www.storyblok.com/docs/api/graphql/getting-started/ |
| Add a headless CMS to Remix in 5 minutes | https://www.storyblok.com/tp/headless-cms-remix |
| How to use Storyblok's GraphQL endpoint with React and Apollo | https://www.storyblok.com/tp/storyblok-graphql-react-apollo |
| How to use Apollo Client with Remix | https://www.apollographql.com/blog/apollo-client/how-to-use-apollo-client-with-remix/ |
- Code on GitHub - https://github.com/miracleonyenma/remix-graphql-storyblok/
- Live example hosted on Vercel - https://remix-graphql-storyblok.vercel.app/
