How to fetch Spotify data with a Field Type Plugin
Storyblok is the first headless CMS that works for developers & marketers alike.
The default field types in the Storyblok Block Library are great – they allow you to add and modify Storyblok-related data that is output in the API. However, sometimes you want to fetch data outside of Storyblok. The Field Type Plugin is an excellent feature that allows you to fetch and output external data.
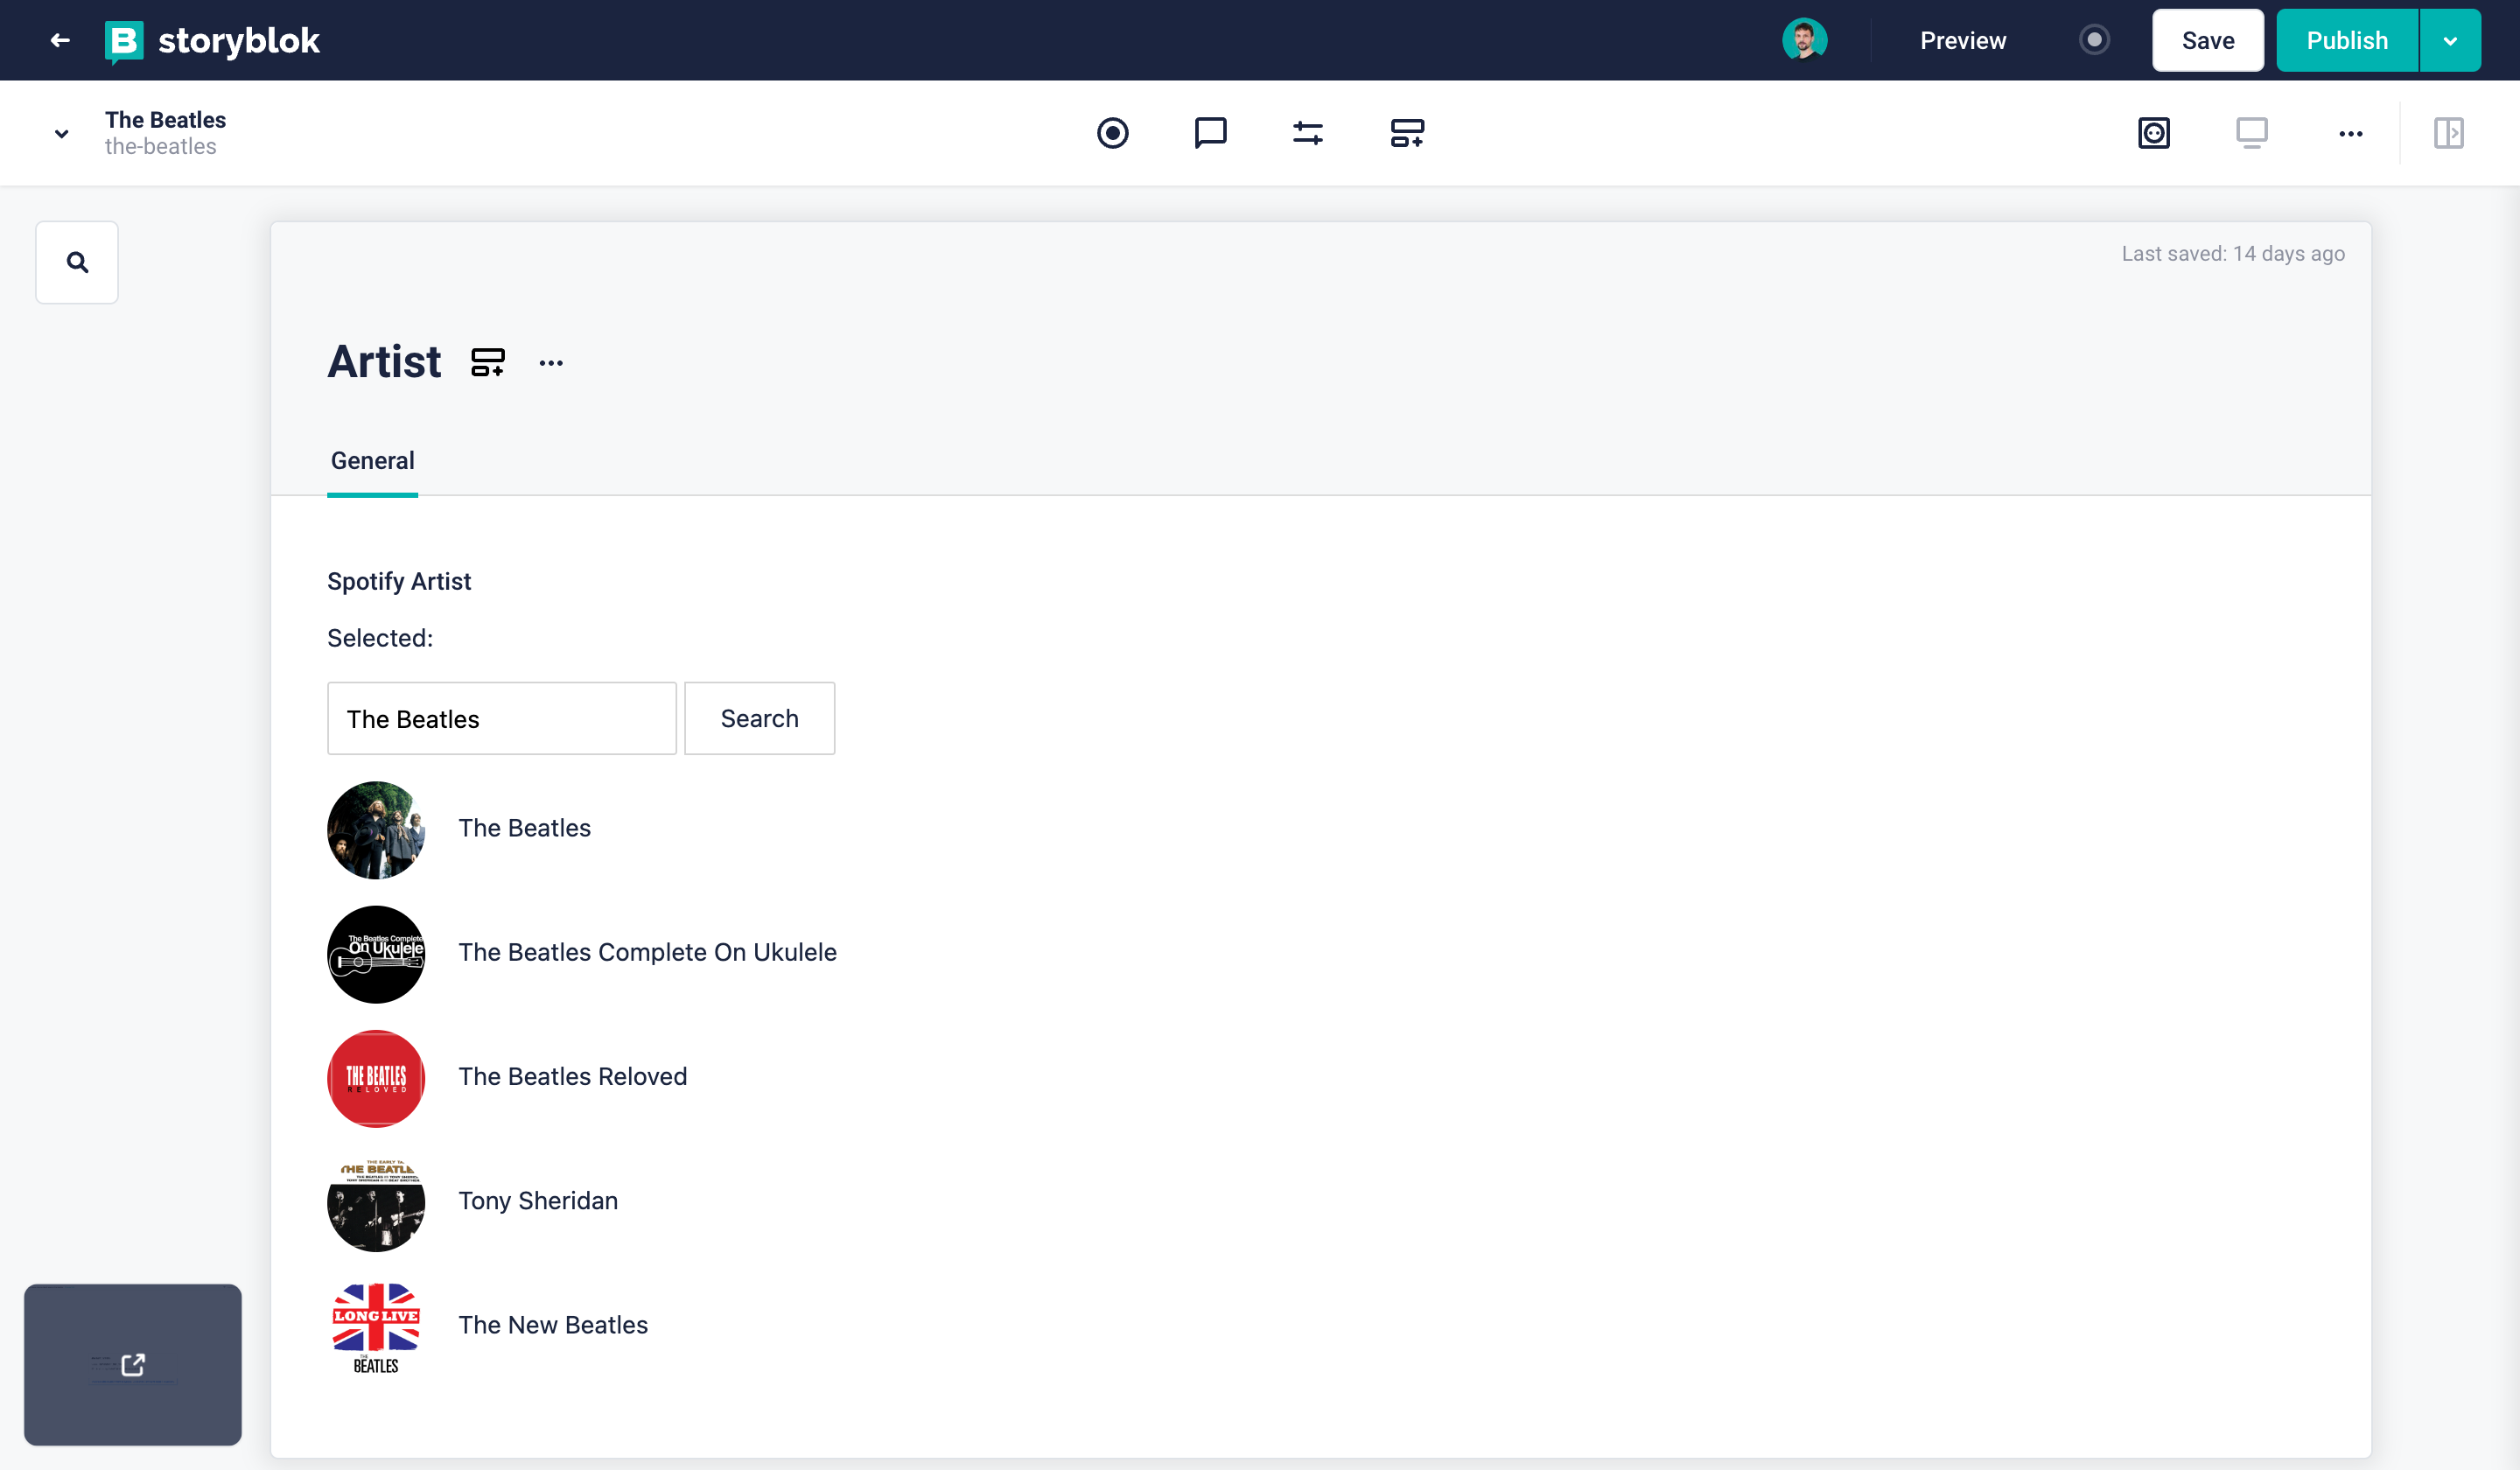
With a simple Single File Component built in Vue, we can fetch artist data from Spotify and render it in the front end.

A simple dropdown to query and display artists by the Spotify API
Before starting this tutorial, it is recommended to read about the basics of the Field Type Plugin. If you wish to code the plugin locally, please follow these instructions.
Since the Field Type Plugin is written in Vue, basic knowledge of Vue application programming is required.
A good tutorial on how to get the Spotify token can be found here.
How to use the Spotify API
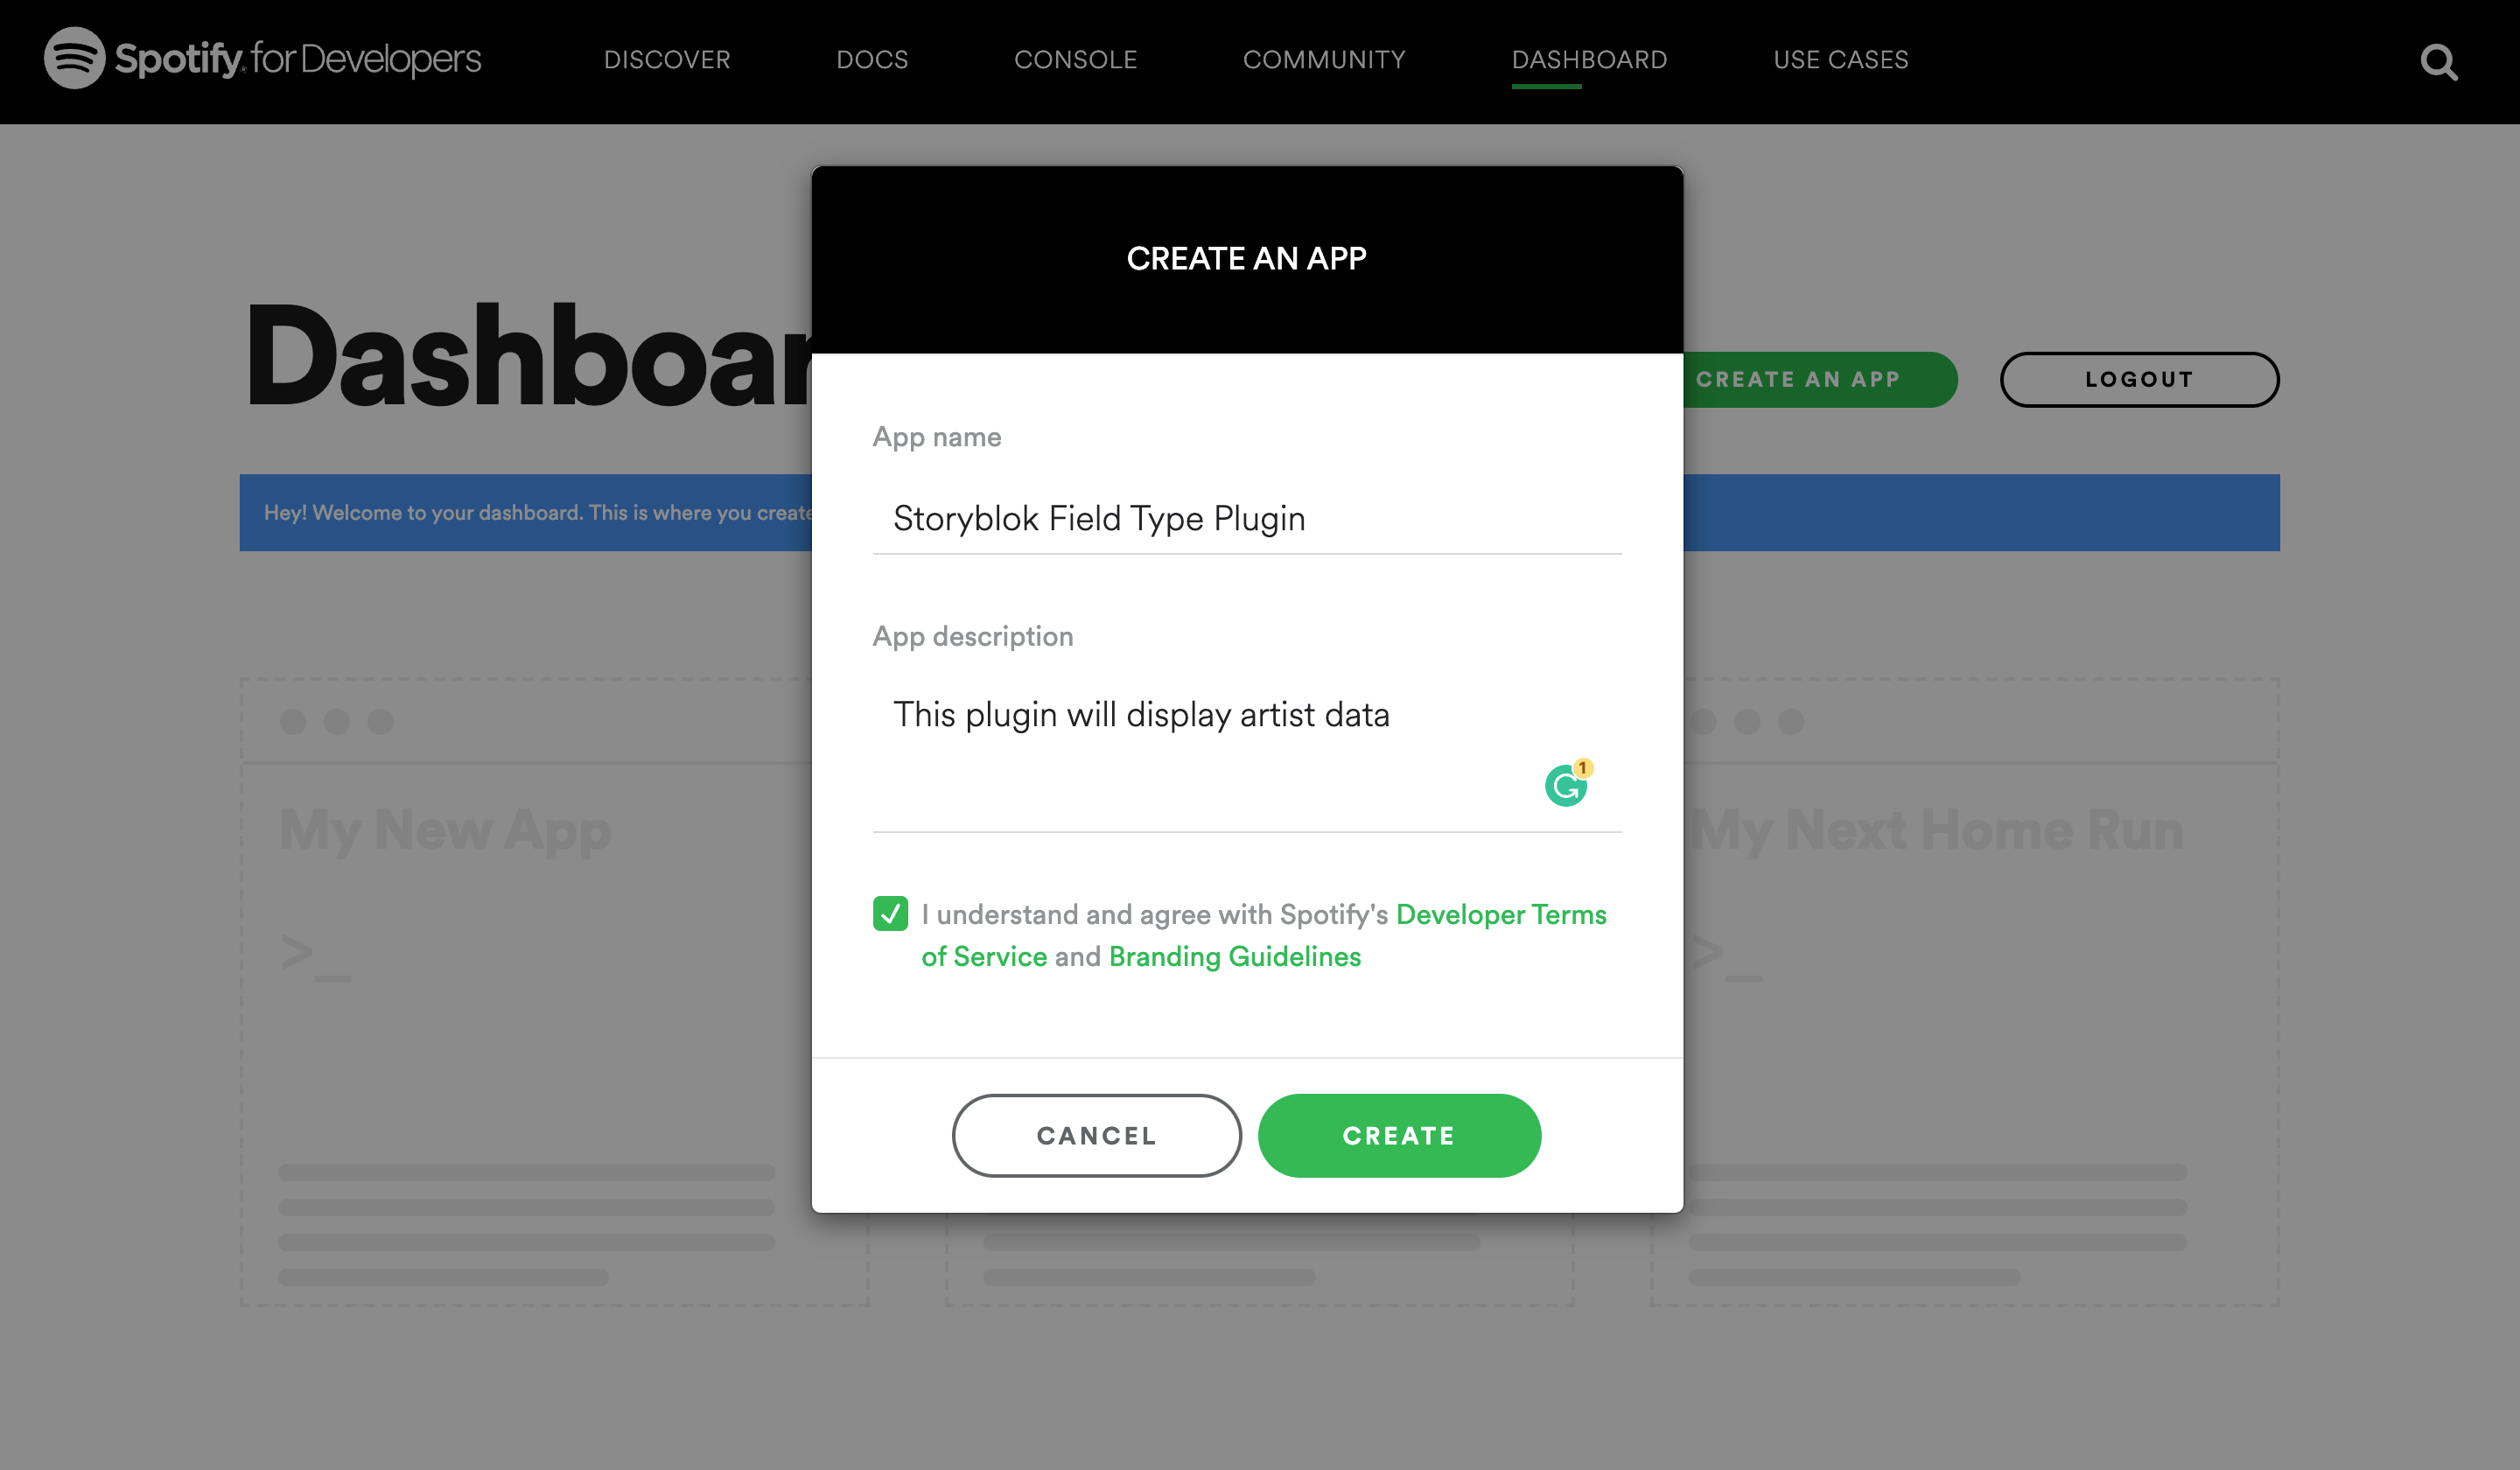
To be able to use the Spotify API, you have to install an app. Installing an app on the Spotify developers page is easy and free. Head over to the Spotify dashboard, login with your Spotify account, and click on Create an app.
After adding a name and description, press Create {1}.
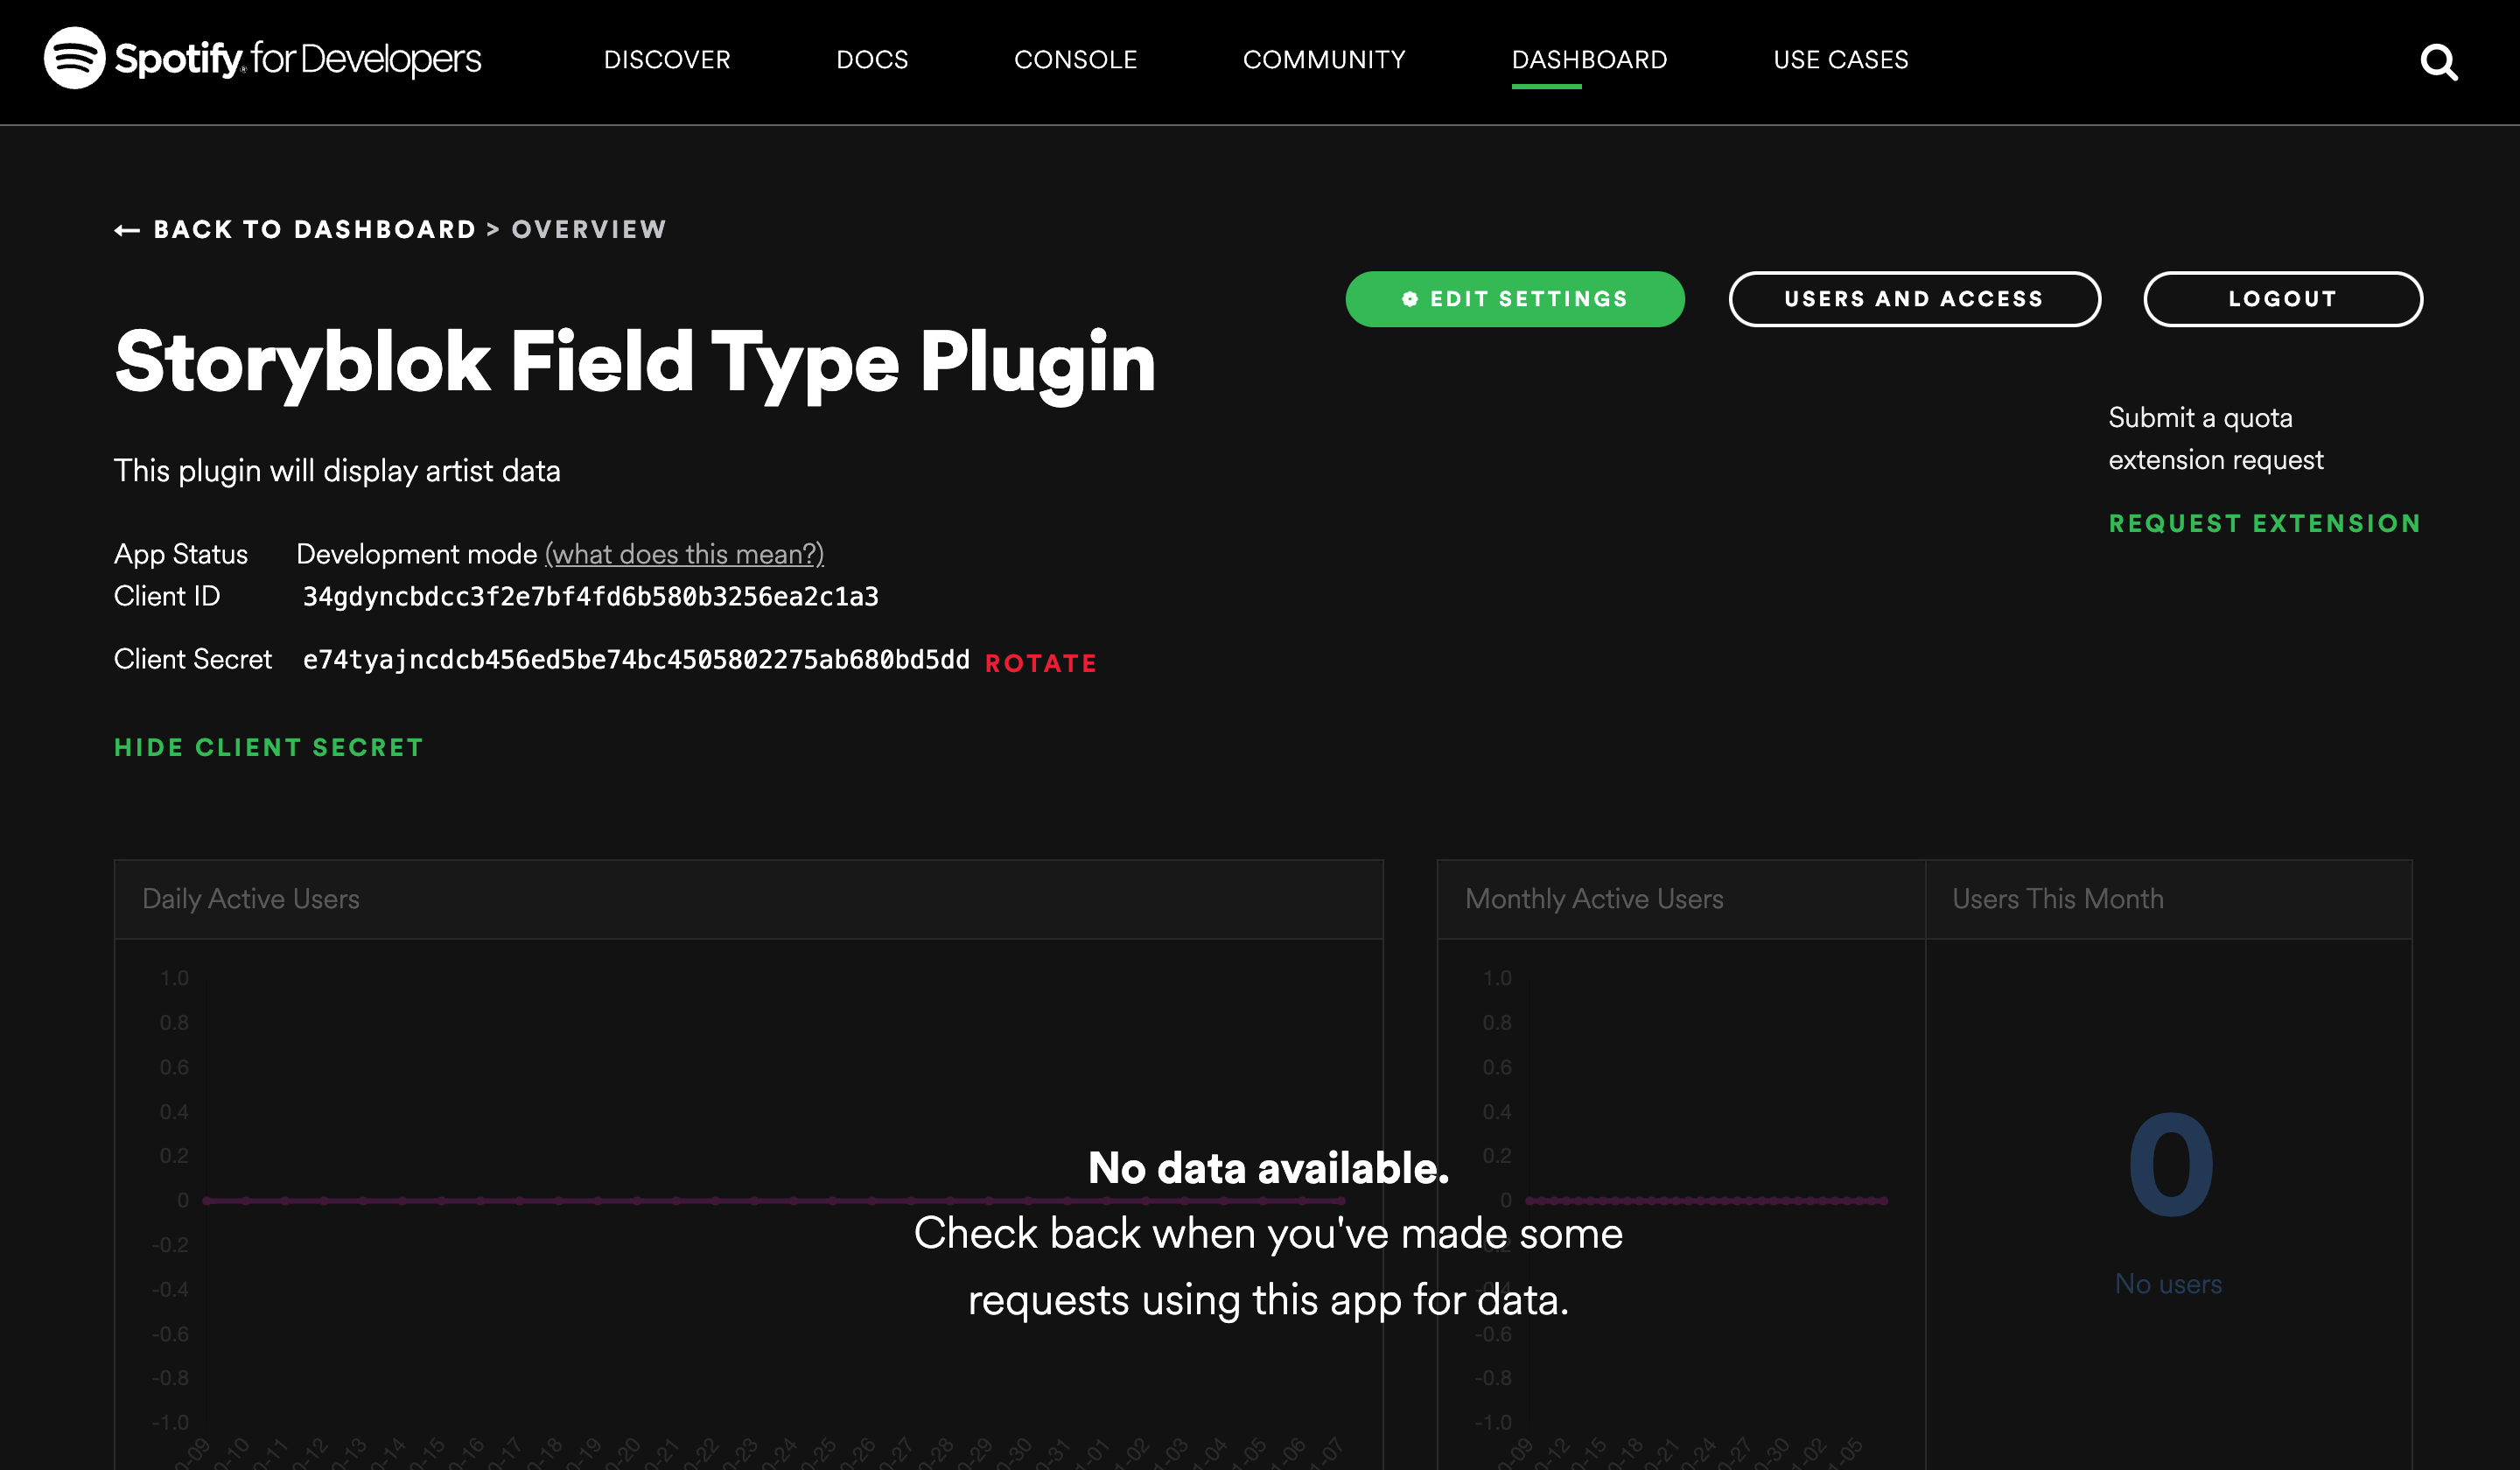
After submitting, proceed by copying the Client ID {1} and Client Secret {2}, we will need them later.
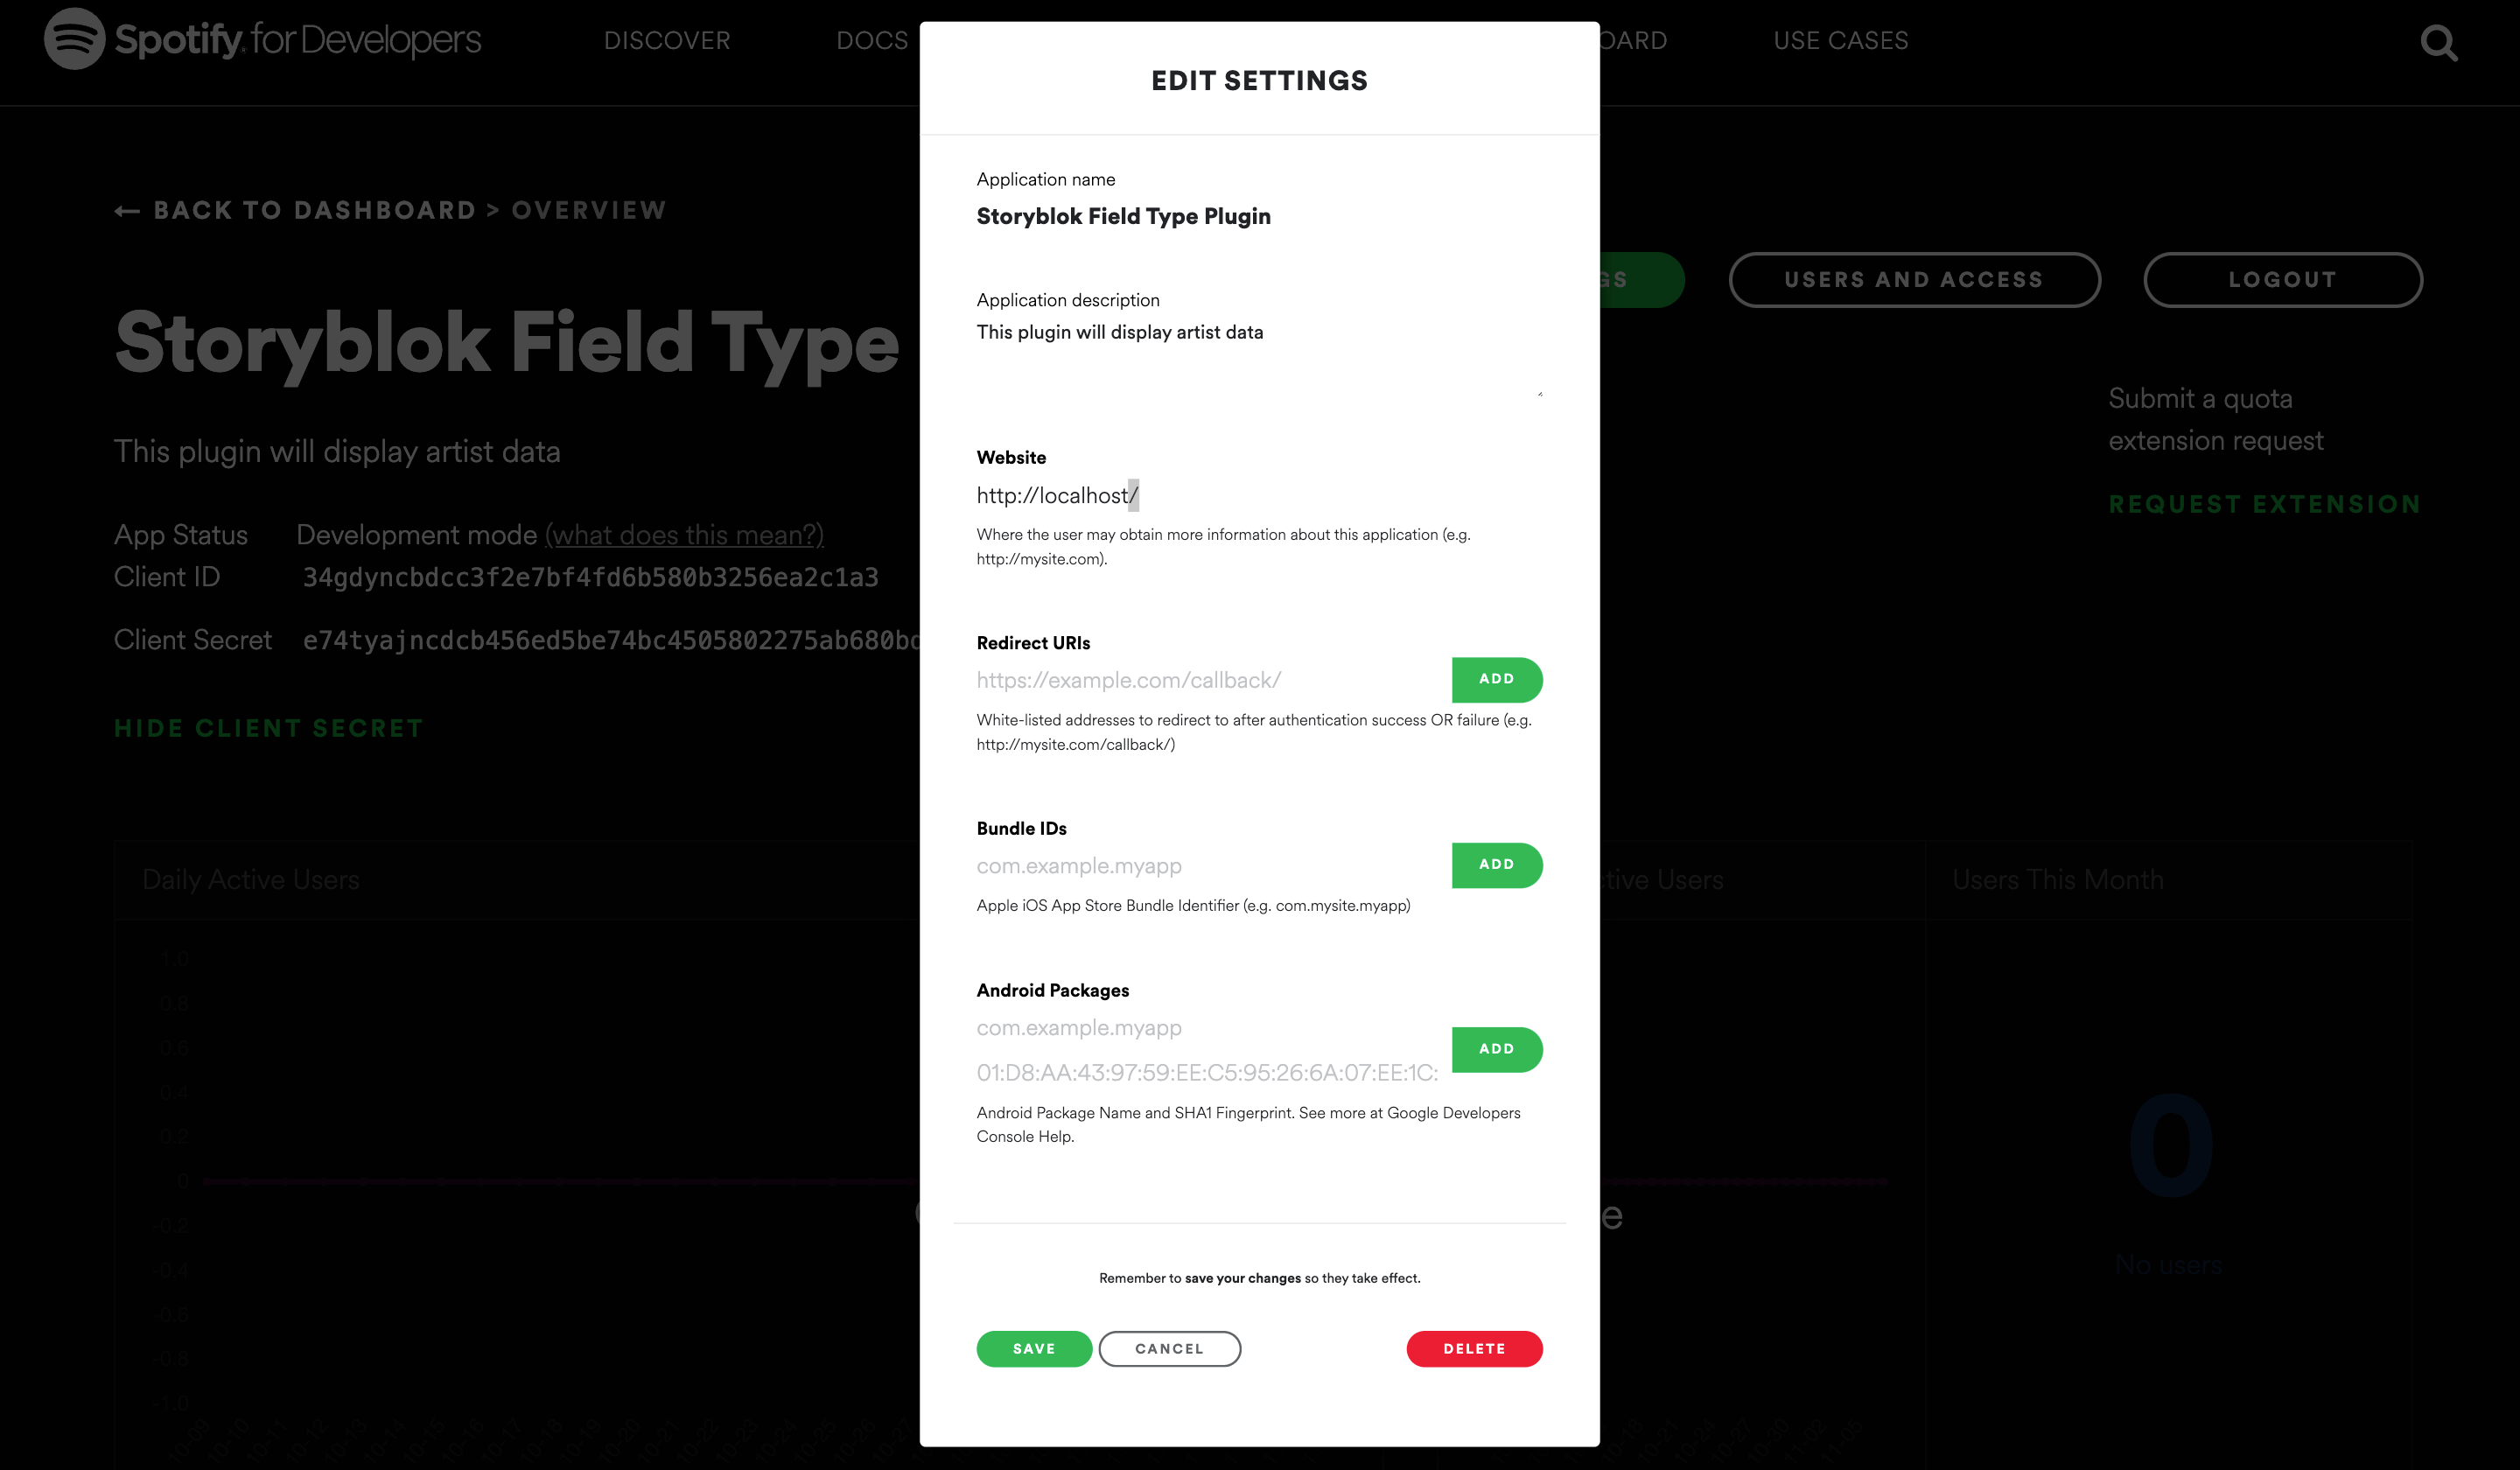
The next step is to whitelist the localhost domain. Click on Edit Settings. Add http://localhost to Redirect URIs and click Add and then Save at the bottom of the modal.
The next step is to obtain a refresh token which is needed to allow creating an access token that will allow us to fetch data from the Spotify API.
Replace the CLIENT_ID with your Spotify app client and open this link:
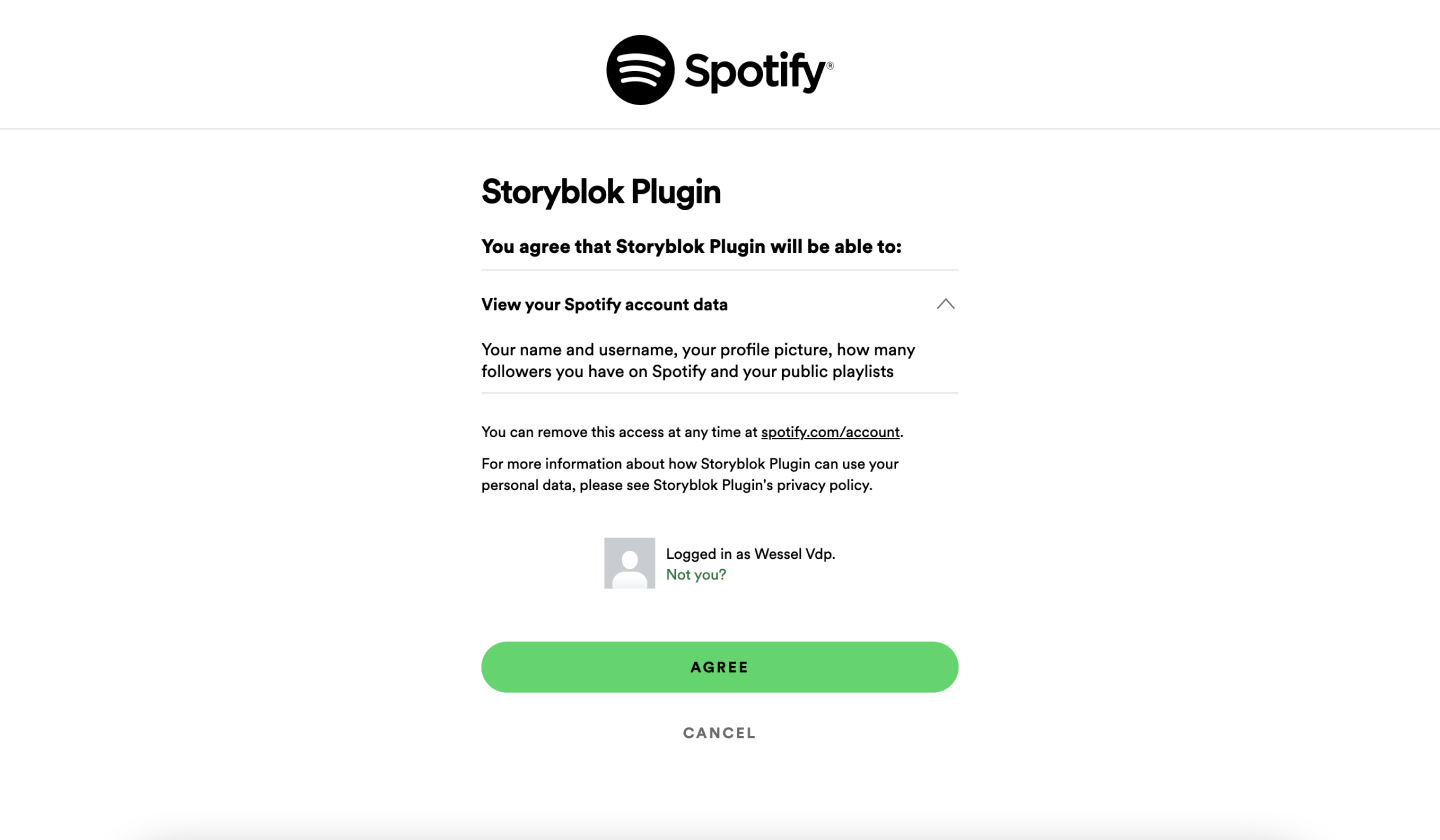
https://accounts.spotify.com/authorize?response_type=code&client_id=$CLIENT_ID&redirect_uri=http://localhostThe following screen should be open. Click on Agree {1}.
The browser should redirect to an empty screen, which is expected to happen. What is important is to copy the URL parameter code, which is needed to fetch the refresh token.
Run the following command in your terminal but please make sure to replace the CLIENT_ID, CLIENT_SECRET, and CODE:
curl -d client_id=$CLIENT_ID -d client_secret=$CLIENT_SECRET -d
grant_type=authorization_code -d code=$CODE -d redirect_uri=http://localhost
https://accounts.spotify.com/api/token
After calling the above command, the result should look like this:
{
  "access_token": "XXX",
  "token_type": "Bearer",
  "expires_in": 3600,
  "refresh_token": "XXX"
}
Copy the refresh_token and then you are ready to build your Storyblok Field Plugin.
Creating the Field Type Plugin
In order to find artists, we need to give the content editors the ability to type an artist's name into a text input. When submitted, it should display a list of matching artists from Spotify. Let's start by adding the basics of the plugin.
const Fieldtype = {
  mixins: [window.Storyblok.plugin],
  template: `<div>
  </div>`,
  methods: {
    initWith() {
      return {
        plugin: 'spotify-search',
      }
    },
  },
  watch: {
    'model': {
      handler: function (value) {
        this.$emit('changed-model', value);
      },
      deep: true
    }
  }
}
The function initWith() sets a state value called model, which is output by the plugin. The watch observes the model that updates the output every time the model data is updated. These functions are related to the Storyblok Vue plugin.
To allow our content editor to search for artists, let's add a simple form including an input field and button.
const Fieldtype = {
  template: `<div>
    <form class="uk-form uk-margin-bottom" @submit.prevent="">
      <div class="uk-margin">
        <input class="uk-input uk-form-width-medium" v-model="" placeholder="Search artist" />
        <button class="uk-button uk-button-default" type="submit">Search</button>
      </div>
    </form>
  </div>`,
}
As you can see, CSS classes prefixed with uk- are used. The Storyblok Plugin UI uses a style utility library called UIkit.
Let's continue by adding relevant data and looping the found artists.
const Fieldtype = {
  template: `<div>
    <form class="uk-form uk-margin-bottom" @submit.prevent="">
      <div class="uk-margin">
        <input class="uk-input uk-form-width-medium" v-model="query" placeholder="Search artist" />
        <button class="uk-button uk-button-default" type="submit">Search</button>
      </div>
    </form>
    <div v-for="artist in artists" :key="artist.id" style="cursor:pointer;" class="uk-margin-bottom flex">
      <img :src="artist.images[0].url" style="height:56px;width:56px;"  class="uk-border-circle uk-margin-right" />
      <span>{{artist.name}}</span>
    </div>
  </div>`,
  data() {
    return {
      artists: [],
      query: '',
    }
  },
}
The artists are looped through and displayed with an image and a name. In its current state, data is not displayed because the array is empty.
Let's change that by getting data.
const CLIENT_ID = '' // add your Spotify client id
const CLIENT_SECRET = '' // add your Spotify client secret
const REFRESH_TOKEN = '' // add your Spotify refresh token

const Fieldtype = {
  methods: {
    fetchToken() {
      return fetch('https://accounts.spotify.com/api/token', {
        body: `grant_type=refresh_token&refresh_token=${REFRESH_TOKEN}&client_secret=${CLIENT_SECRET}&client_id=${CLIENT_ID}`,
        headers: {
          'Content-Type': 'application/x-www-form-urlencoded',
        },
        method: 'POST',
      }).then((response) => response.json())
    },
  },
}
We will need an access token provided by the Spotify token API to be able to fetch artist data.
Add the client ID, client secret, and refresh token to the constants on the top of your file. The fetchToken() function provides a new access token that allows retrieving data from Spotify.
const Fieldtype = {
  mixins: [window.Storyblok.plugin],
  template: `<div>
    <form class="uk-form uk-margin-bottom" @submit.prevent="search">
      <div class="uk-margin">
        <input class="uk-input uk-form-width-medium" v-model="query" placeholder="Search artist" />
        <button class="uk-button uk-button-default" type="submit">Search</button>
      </div>
    </form>
    <div v-for="artist in artists" :key="artist.id" style="cursor:pointer;" class="uk-margin-bottom flex">
      <img :src="artist.images[0].url" style="height:56px;width:56px;"  class="uk-border-circle uk-margin-right" />
      <span>{{artist.name}}</span>
    </div>
  </div>`,
  methods: {
    search() {
      if (this.query === '') {
        this.artists = []
        return
      }
      this.fetchToken()
        .then((data) => {
          return fetch(`https://api.spotify.com/v1/search?q=${this.query}&type=artist&limit=5`, {
            headers: {
              Authorization: `Bearer ${data.access_token}`,
            },
          })
        })
        .then((response) => response.json())
        .then((data) => {
          this.artists = data.artists.items
        })
    },
  },
}
After calling the fetchToken() function, we call the Spotify search endpoint by adding the access token as the authentication bearer. The retrieved artists are set to the artist data array, which was previously looped in the template.
If an empty query happens to be submitted, the artist data object is set to empty. Finally, the search function has been added to the template to allow us to call the search function every time the form is submitted.
const Fieldtype = {
  mixins: [window.Storyblok.plugin],
  template: `<div>
    <div class="uk-margin">
     Selected: {{ model.spotify_name }}
    </div>
    <form class="uk-form uk-margin-bottom" @submit.prevent="search">
      <div class="uk-margin">
        <input class="uk-input uk-form-width-medium" v-model="query" placeholder="Search artist" />
        <button class="uk-button uk-button-default" type="submit">Search</button>
      </div>
    </form>
    <div v-for="artist in artists" :key="artist.id" @click="setItem(artist.name, artist.id)" style="cursor:pointer;" class="uk-margin-bottom flex">
      <img :src="artist.images[0].url" style="height:56px;width:56px;"  class="uk-border-circle uk-margin-right" />
      <span>{{artist.name}}</span>
    </div>
  </div>`,
  methods: {
    initWith() {
      return {
        plugin: 'spotify-search',
        spotify_id: '',
        spotify_name: '',
      }
    },
    setItem(name, id) {
      this.model.spotify_name = name
      this.model.spotify_id = id
    },
  },
}
Fetching and displaying on its own is not helpful for the ultimate use of the plugin. The model has to be extended to add the data to the plugin output, which eventually gets sent to the frontend of the application.
spotify_id and spotify_name have been added to the initWith() function. The setItem() function, which gets called on the click of an artist, sets the newly added model entries.
Let’s apply this to a real-life example!
Our plugin is not complete without adding the output to the frontend. Firstly, let's add the plugin to our block.
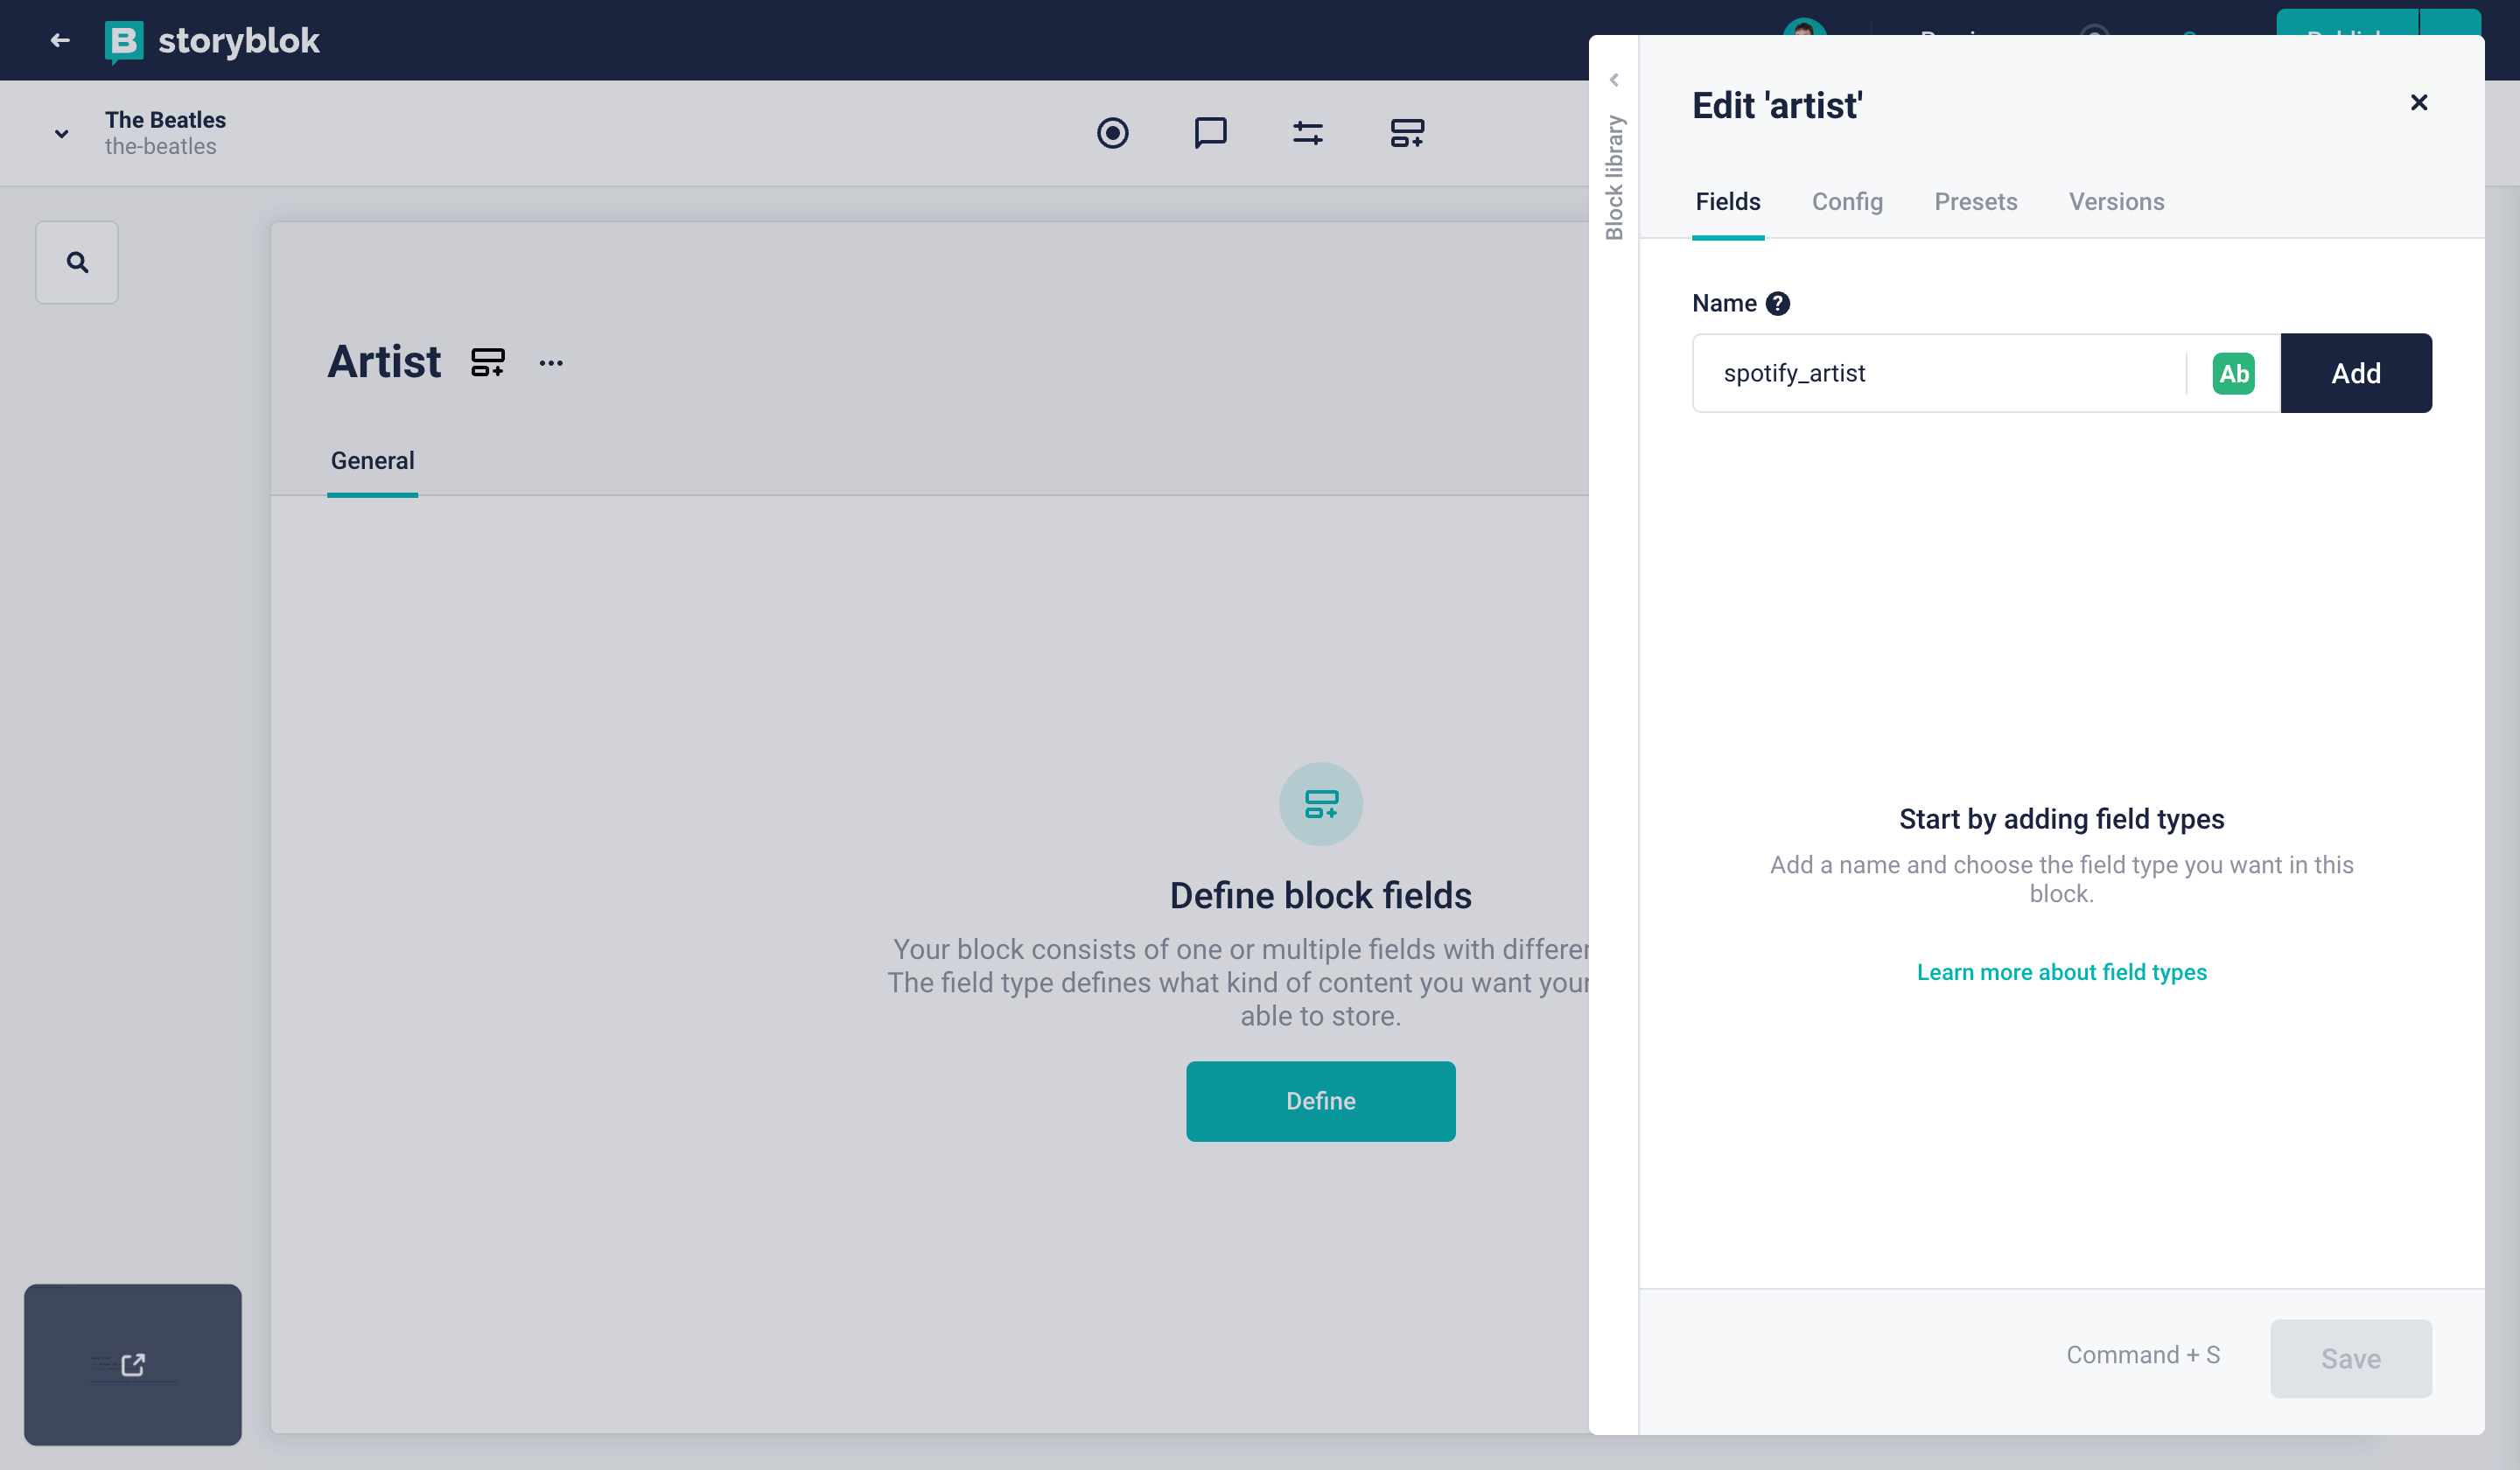
Add a field with the technical name spotify_artist {1}:
Select Plugin as the field type {1}:

Select spotify-search as the custom type {1}:
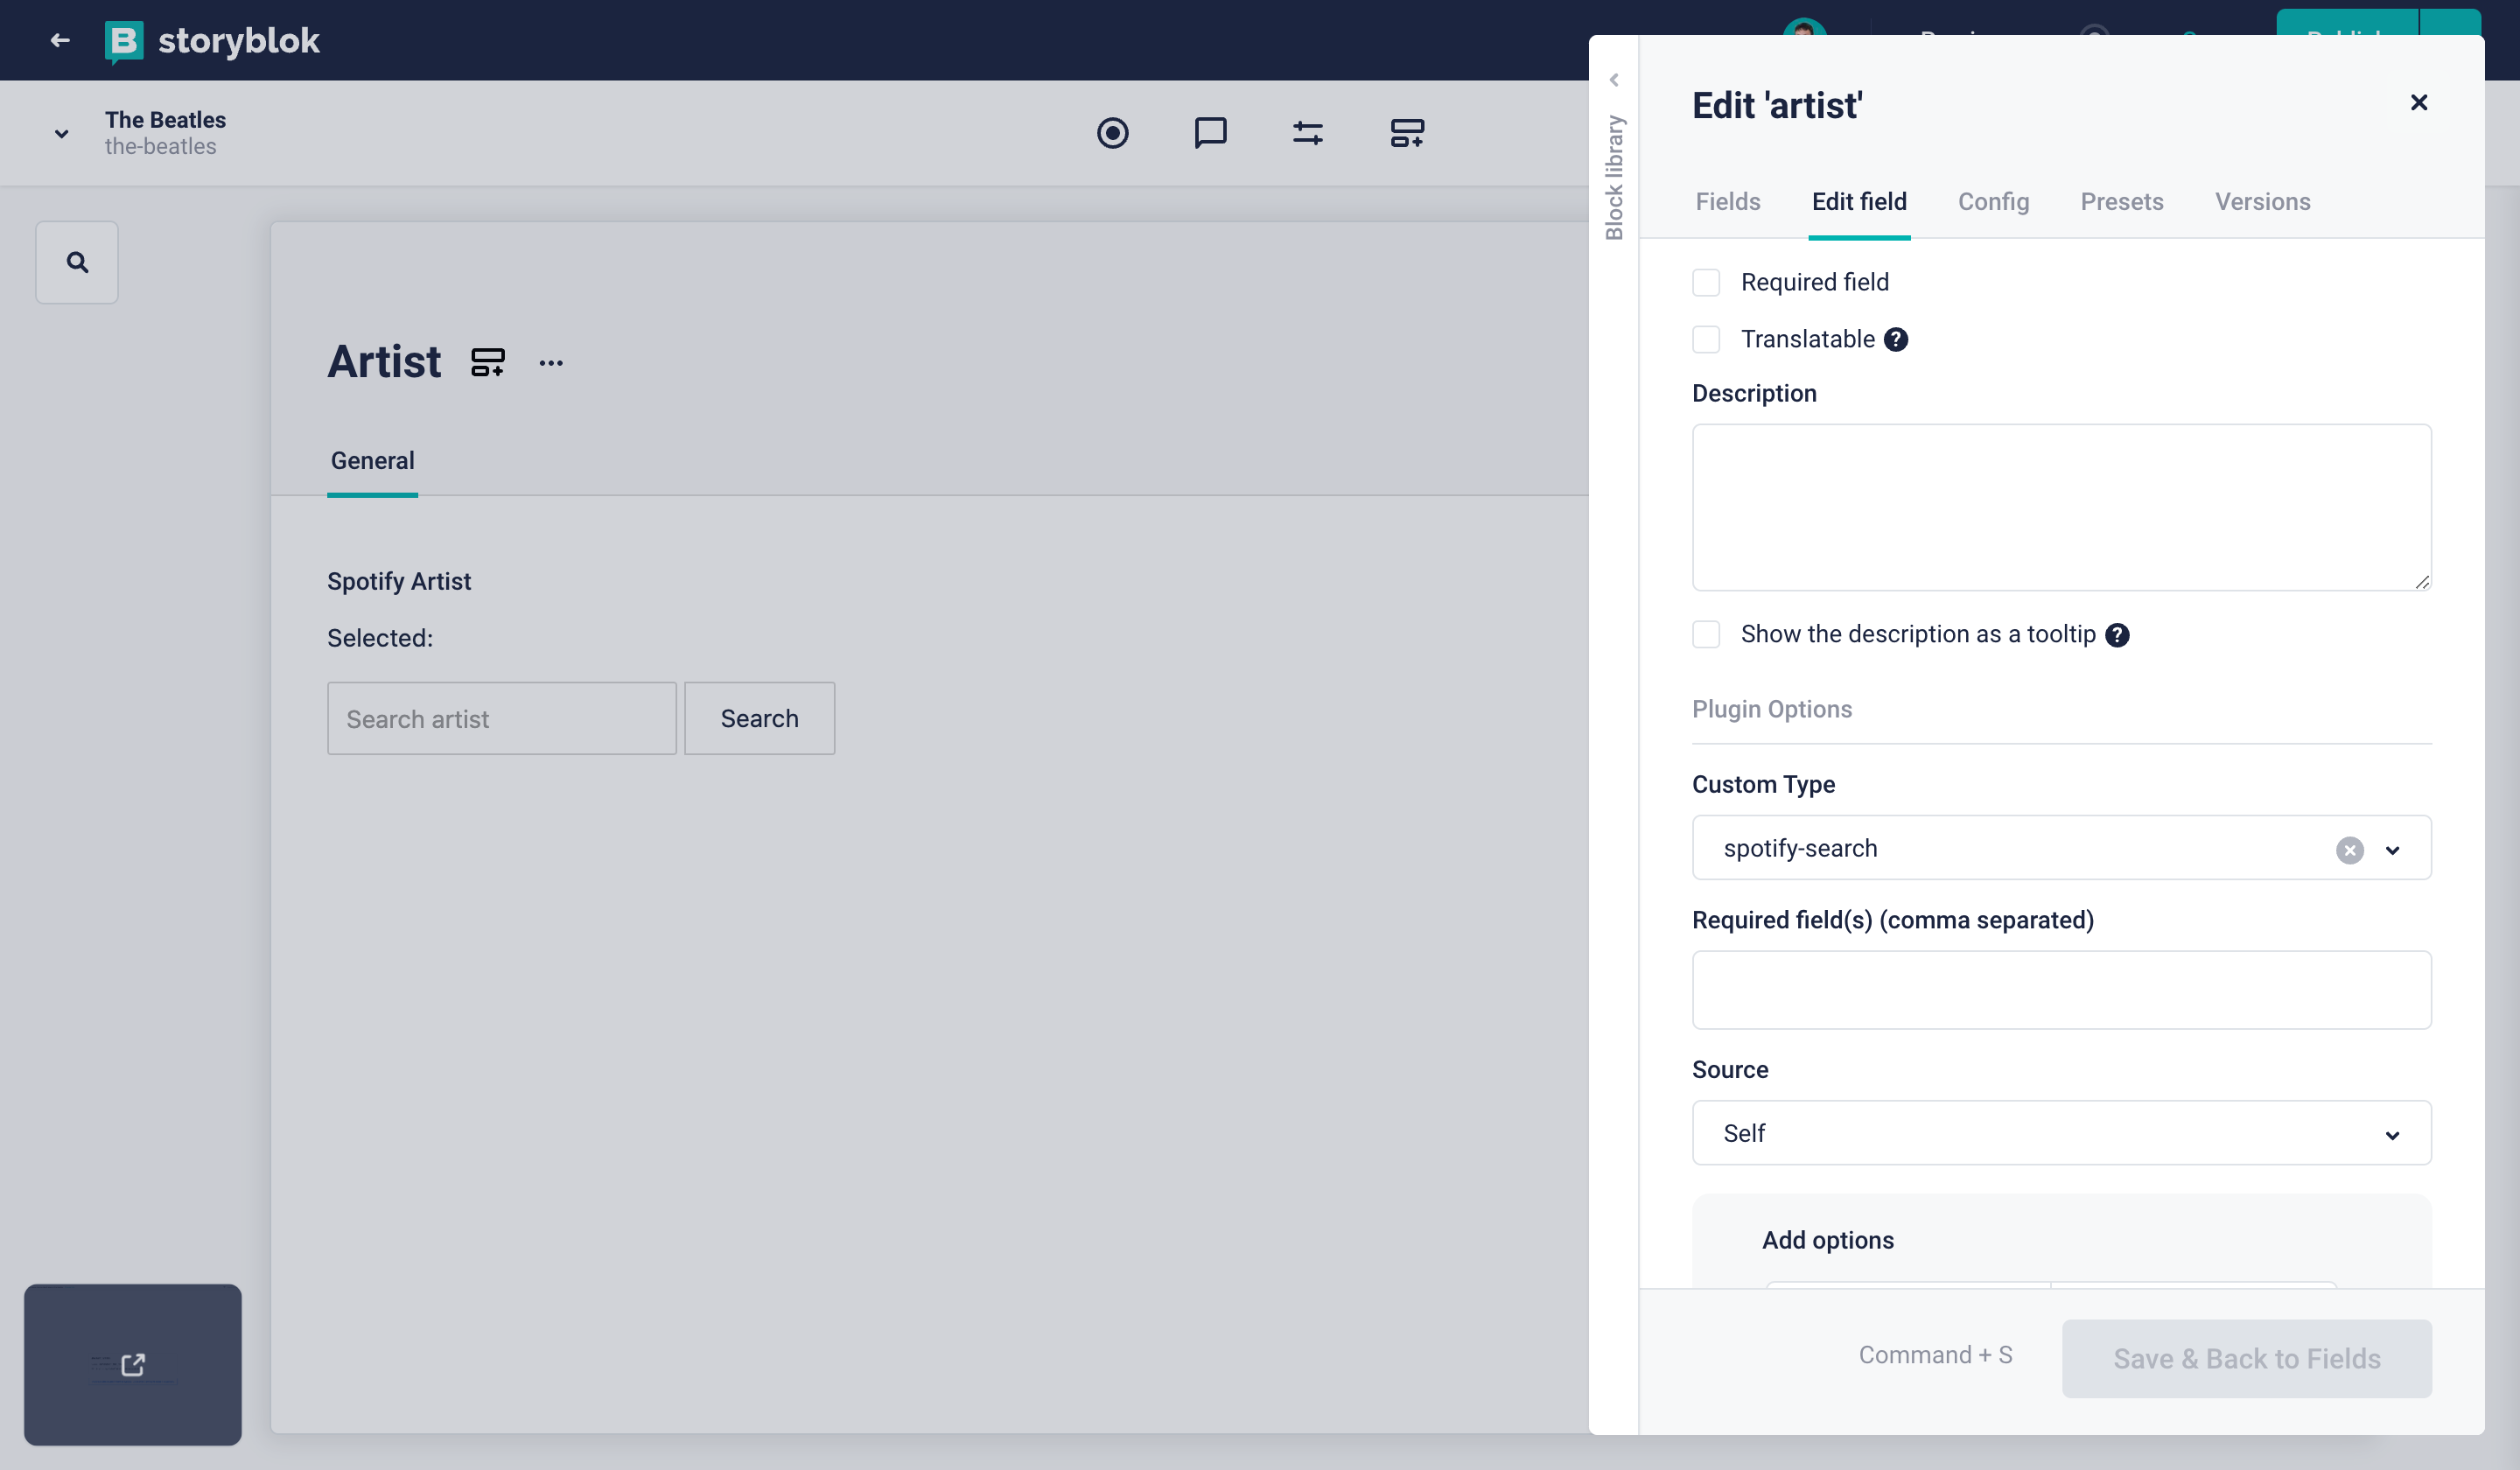
The plugin should now be visible and ready:
To see the final output of the plugin, add an artist, click on Save on the top right corner, click at the arrow right of Publish, and click on Draft JSON, which should open a new tab with a JSON object including the following information:
{
  "story": {
    "content": {
      "component": "Artist",
      "spotify_artist": {
        "_uid": "0c7dee84-4e88-4bd3-ac82-a7ad66e64787",
        "plugin": "spotify-search",
        "spotify_id": "1dfeR4HaWDbWqFHLkxsg1d",
        "spotify_name": "Queen"
      }
    }
  }
}
Of course, spotify_name and spotify_id could be different depending on what artist you added.
This data could now be used to display and render a component on the frontend. For example, how about a Spotify artist widget?
<template>
  <iframe
    :src="`https://open.spotify.com/embed/artist/${content.spotify_artist.spotify_id}`"
    width="100%"
    frameborder="0"
    allowtransparency="true"
    allow="encrypted-media"
  >
  </iframe>
</template>
Conclusion
The Storyblok Field Type Plugin is an excellent choice for handling external data. We created a plugin using Spotify which is a great example. Any other type of data could be fetched and displayed similarly.
| Resource | Link |
|---|---|
| Storyblok Extensions Docs Overview | https://www.storyblok.com/docs/plugins/introduction |
| Storyblok Field-type Docs | https://www.storyblok.com/docs/plugins/field-type |
| Storyblok APIs | https://www.storyblok.com/docs/api |
| Vue.js Docs | https://vuejs.org/guide/introduction.html |
