How to schedule stories for releases
You can schedule a story for release using the Storyblok Releases App (opens in a new window).
Step 1: Install the releases app
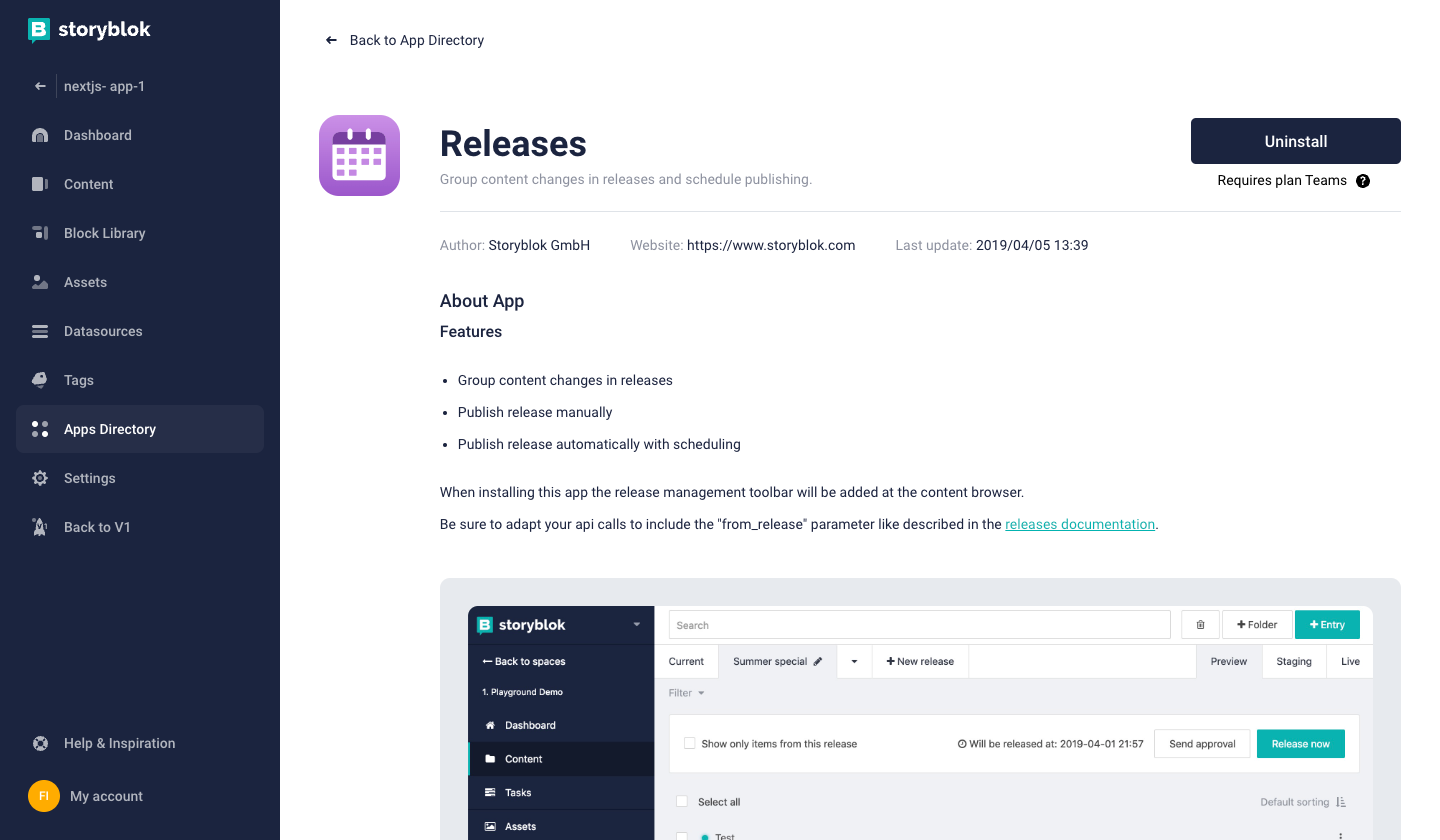
In your Storyblok space, navigate to the Apps directory {1} (This will show as Apps if you’re using Storyblok v1), search for the “Releases” app {2} and install it.
Storyblok releases app
The Storyblok Releases app is only available for Business plans.
Step 2: Create a Release
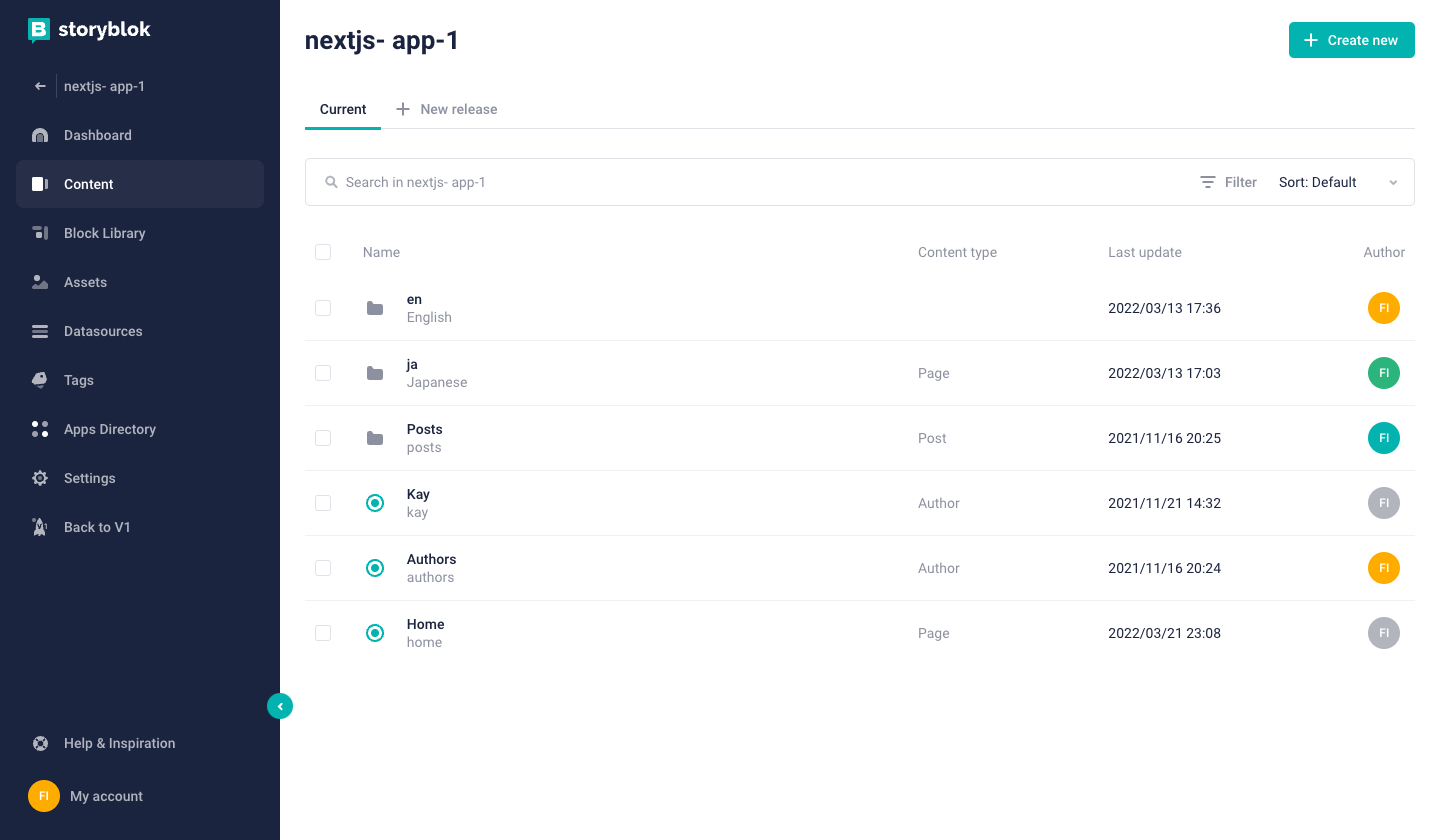
Go to the content tab {1} of your space. After installing the Releases app, you’ll see a new button “New Release” {2} just above your contents.
Creating new releases with Storyblok release app
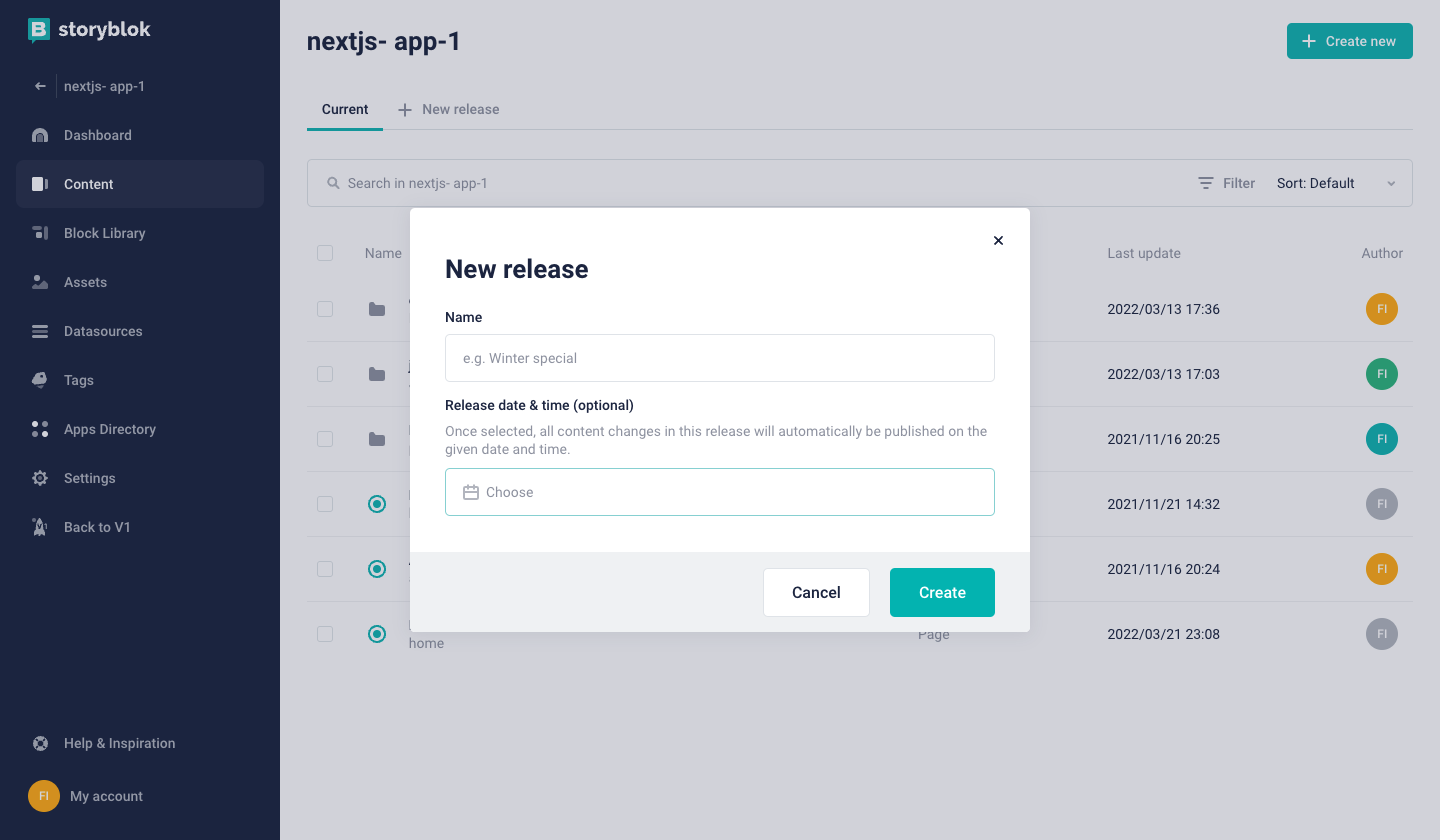
Click on “New release” to schedule a release by entering a name for the release and a date you’d like to schedule the release.
creating releases with the releases app
For Releases to work correctly, you need to set the timezone in your account correctly as the date/time is being saved in UTC on our system. The time shown in the UI is calculated based on the timezone set in the user's account and the saved time in UTC.
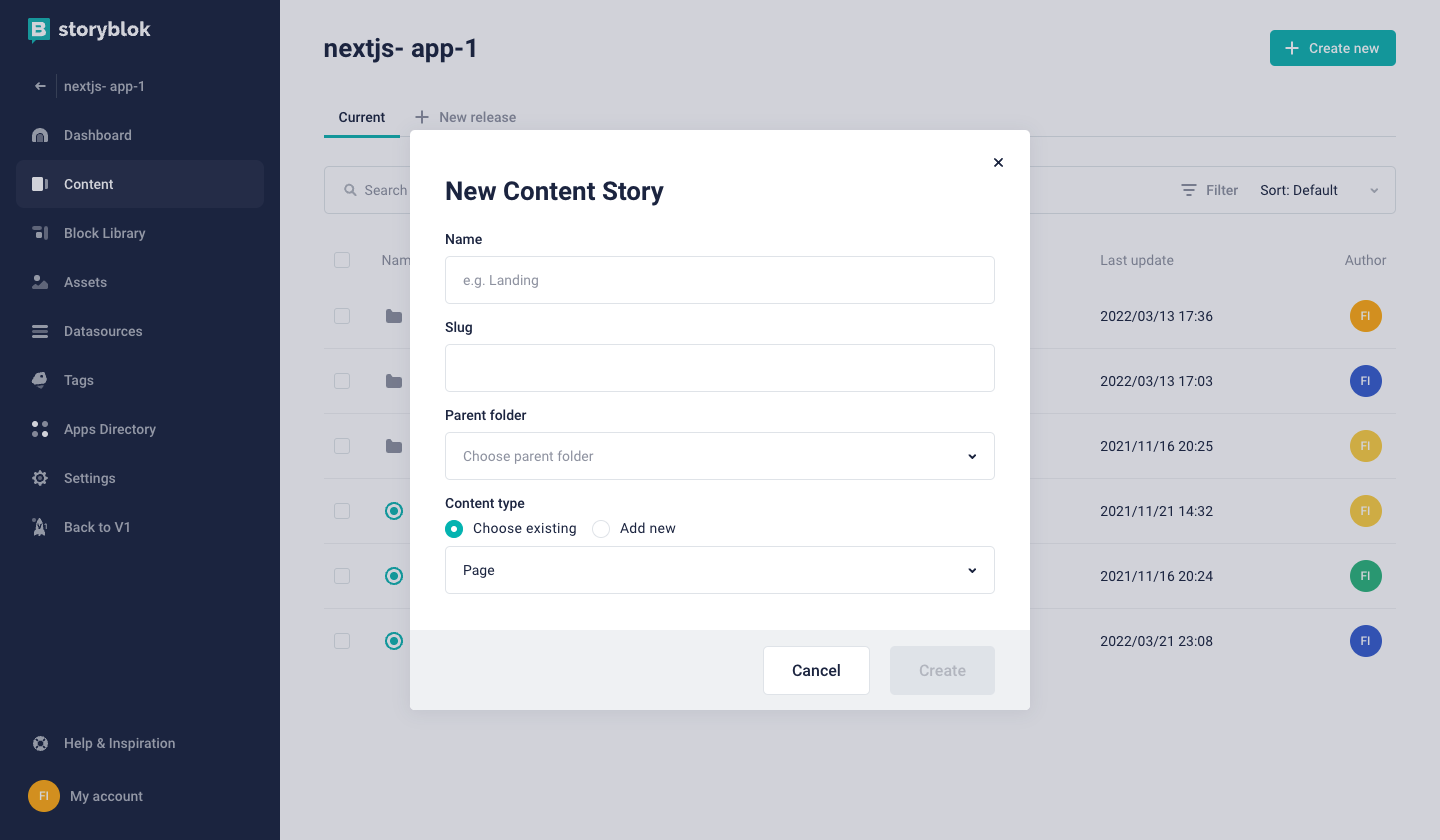
Now under the release you just created, let’s create a new story. Click on “Create new” {1} at the top right.
Creating a Storyblok content story with releases app
After Creating the story, you will be routed to the story editor so you can add details if you want.
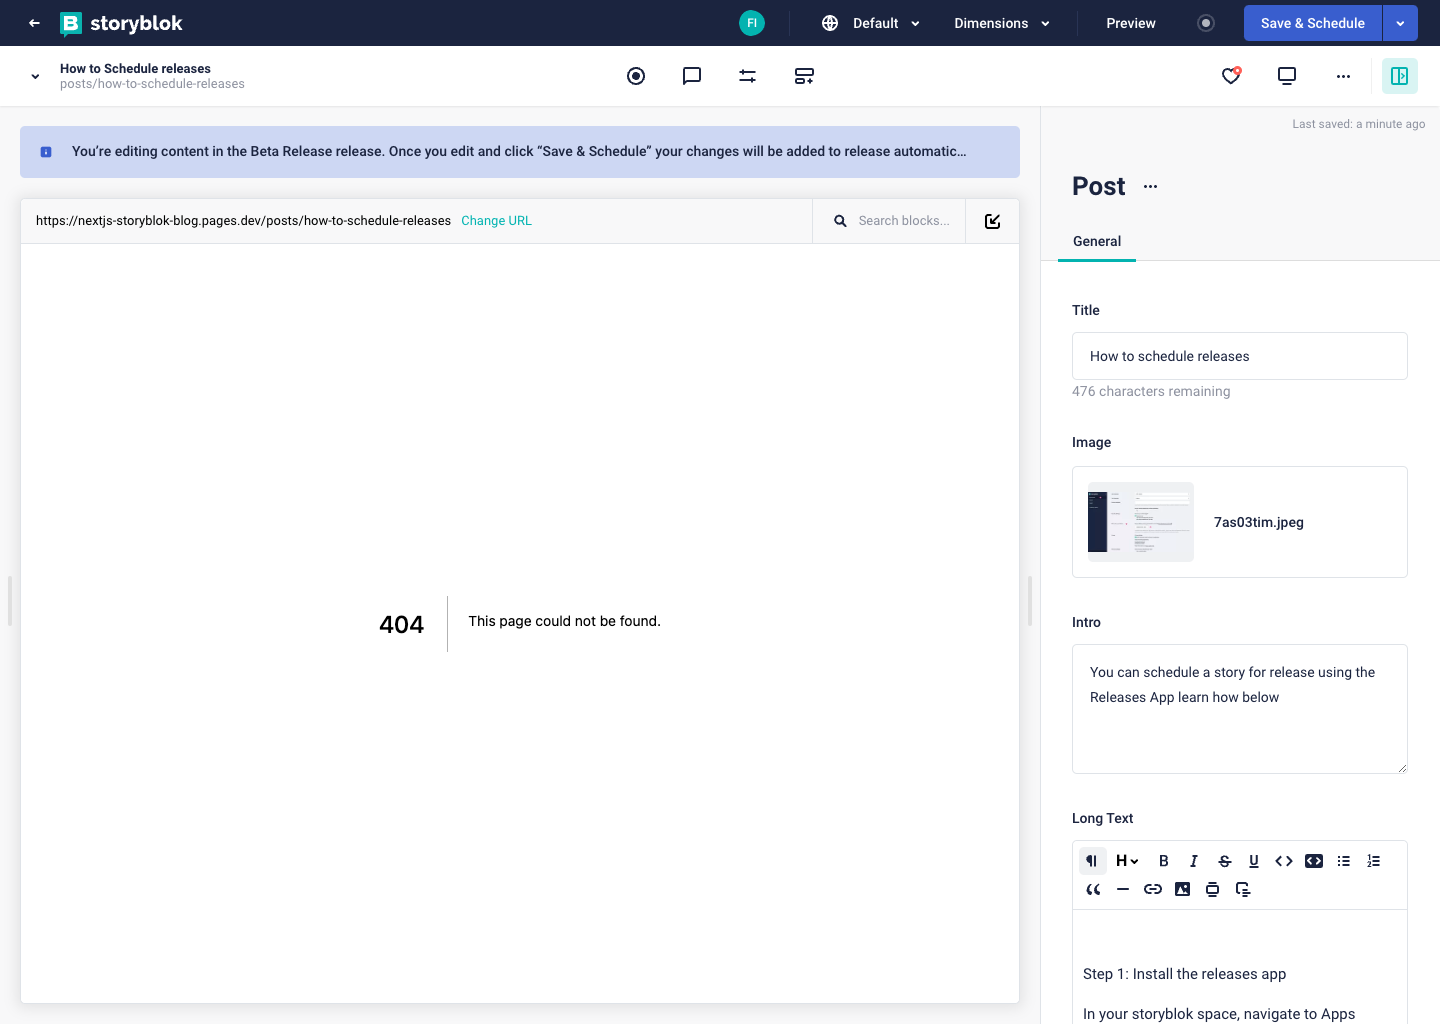
Saving and scheduling a story with releases app
After entering the details, click on the “Save & Schedule” button {1} at the top right.