Image Editor
Storyblok's Asset Manager includes a built-in image editor for JPEG and PNG files.
To access the image editor, navigate to the Assets tab, open the relevant image, and select Open Image Editor.
To undo one change, click Undo. To undo all changes, click Revert.
When you're done editing, either replace the original image or save the modified version as a new file. To replace the original image, click Save. To save the edited version as a new file, click the arrow beside Save and select Save as new.
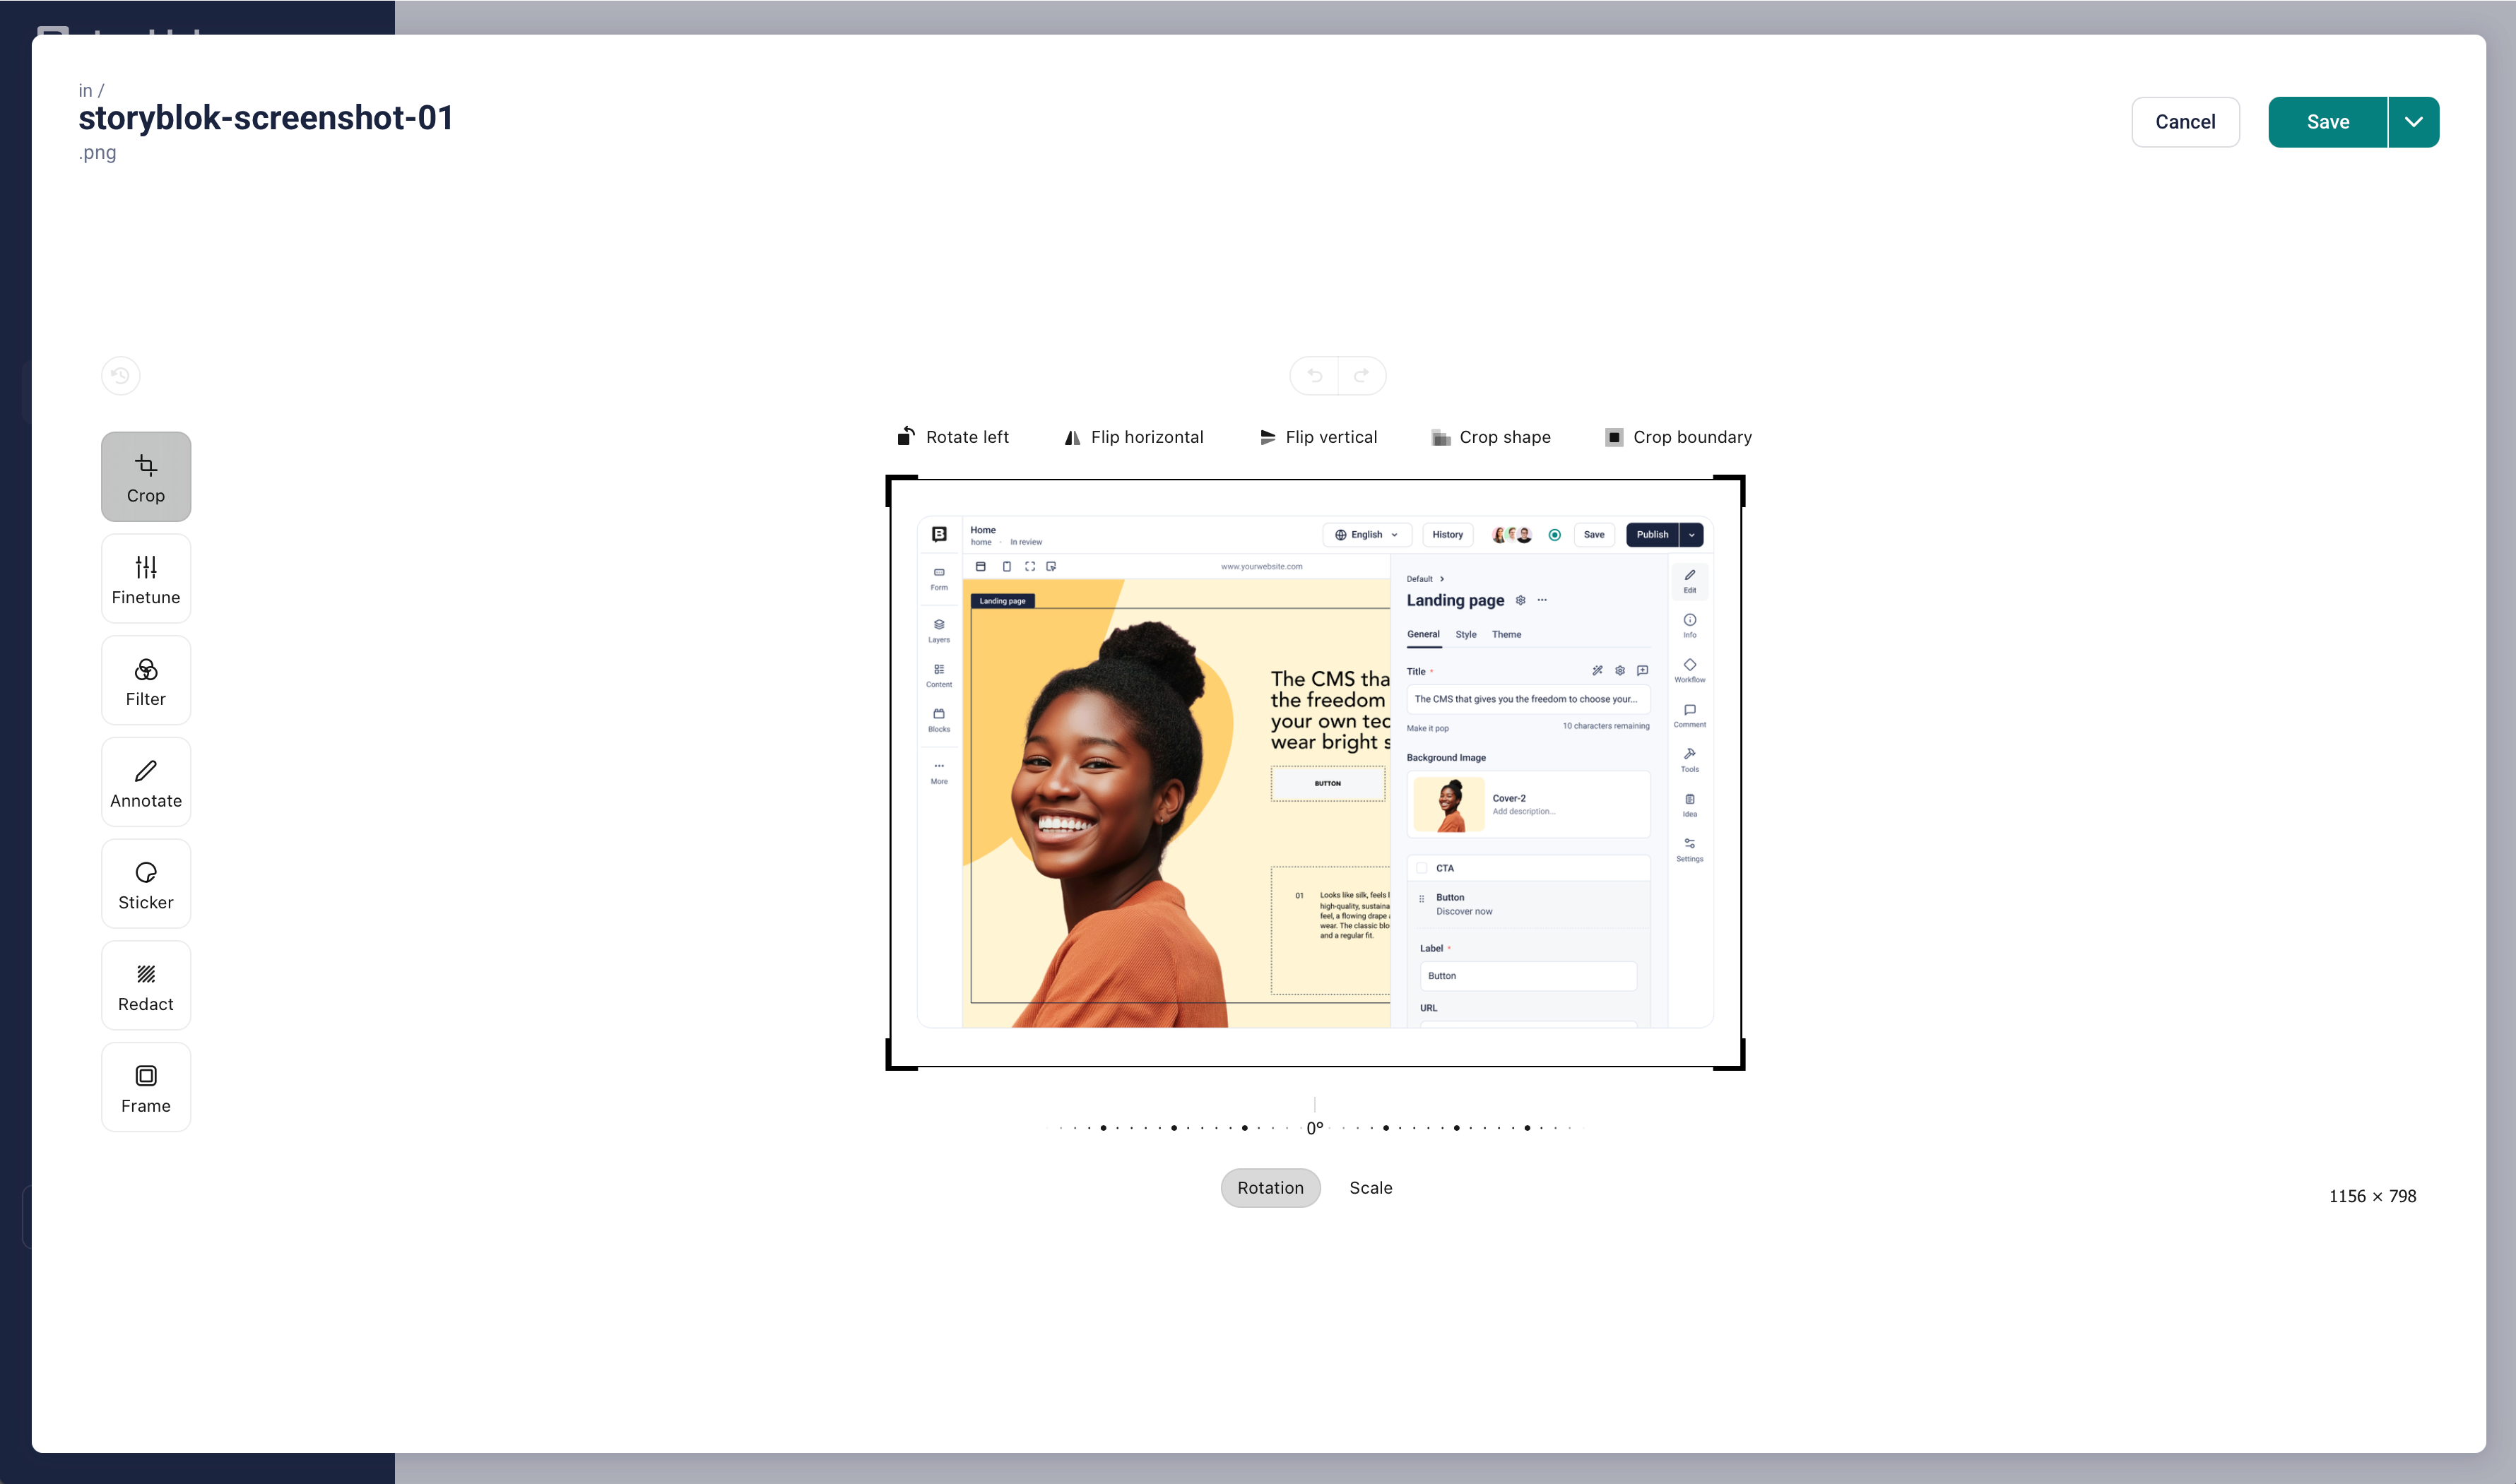
Editing a screenshot in the built-in image editor
The editor provides seven editing tools:
- Crop: Crop and rotate an image
- Fine-tune: Enhance colors
- Filter: Apply filters
- Annotate: Add annotations
- Sticker: Add emojis and stickers
- Redact: Blur portions of an image
- Frame: Add a decorative border
The crop tool provides four actions to reposition the image:
- Trim the image to show only a specific portion. Drag the frame for a freeform crop or select a predefined aspect ratio.
- Flip the image horizontally or vertically.
- Rotate the image. Use the Rotate left button to turn it 90 degrees left (counter-clockwise), or slide the bottom Rotation from -45 to 45 degrees.
- Zoom in or out with the bottom Scale slider.
The Crop boundary button locks the cropping area along the edges of the image.
The Recenter button shifts the selected area to the center of the window.
Fine-tune
Section titled “Fine-tune”The fine-tune tool provides seven actions to recolor the image:
- Increase or decrease brightness
- Increase or decrease contrast
- Increase or decrease color saturation
- Apply a yellow or blue tint
- Amplify shadows and highlights
- Sharpen lines
- Apply a vignette
Filter
Section titled “Filter”The filter tool applies a set of predefined filters to change the look and feel of an image.
Annotate
Section titled “Annotate”The annotate tool adds shapes, text, and drawings to an image. Annotations have various customizations, such as color, width, and size.
After applying an annotation, click on it to edit it or use the Erase to remove it.
Sticker
Section titled “Sticker”The sticker tool applies emojis, digits, or uploaded images to an image as an overlay.
Redact
Section titled “Redact”The redact tool pixelates a section of the image to conceal sensitive information.
The frame tool adds a decorative border to the image.
Each frame style supports different customizations—depending on its properties, including color, size, and offset.
Was this page helpful?
This site uses reCAPTCHA and Google's Privacy Policy (opens in a new window) . Terms of Service (opens in a new window) apply.
Get in touch with the Storyblok community