How to serve gated content with Storyblok private assets
Storyblok is the first headless CMS that works for developers & marketers alike.
By default your assets in Storyblok are public. This means that anyone could see them, provided that they have their URL. Sometimes you may have different needs, such as restricting access to your assets to registered users or make certain assets available or unavailable at specific times.
In this brief tutorial, we will see how you can leverage Storyblok private assets management to handle a common use case scenario: serve gated content after a form submission.
If you are in a hurry, have a look at the source code.
Requirements
A bit of familiarity with Storyblok, its concepts, and its interface and using Storyblok private assets. If you are not familiar with Storyblok, you may want to check out the Storyblok Learning Hub or the Getting Started guide. For the sake of this guide, it would be advisable to have some experience with Vue and the Vercel platform. This is not mandatory, though.
Introduction
In this tutorial, we are going to create a component which will contain a relation to a private asset. For the sake of simplicity, we are going to use that block in the frontend as a form element that will show a link pointing to a serverless function endpoint when the form is submitted. The serverless function will get the temporary URL of the private asset and redirect the user to the private asset itself.
Keep in mind that by default private asset temporary URLs last for a week, but you can also set a custom expiration date!
We are going to use Vue 3 and Vercel functions, but all the concepts in this tutorial are valid for every framework and configuration.
Setup in Storyblok
Create an asset token
The first thing first you will need is an Asset access token. This kind of token will give you all the permission needed to perform operations with your assets, including private ones.
Go to the Settings section inside your Storyblok space, then look for the Access Tokens {1} tab. Here you can create new access tokens. Select the Asset option as the Access Level {2} and provide a name of your choice {3}, then press Generate to create your new token {4}.
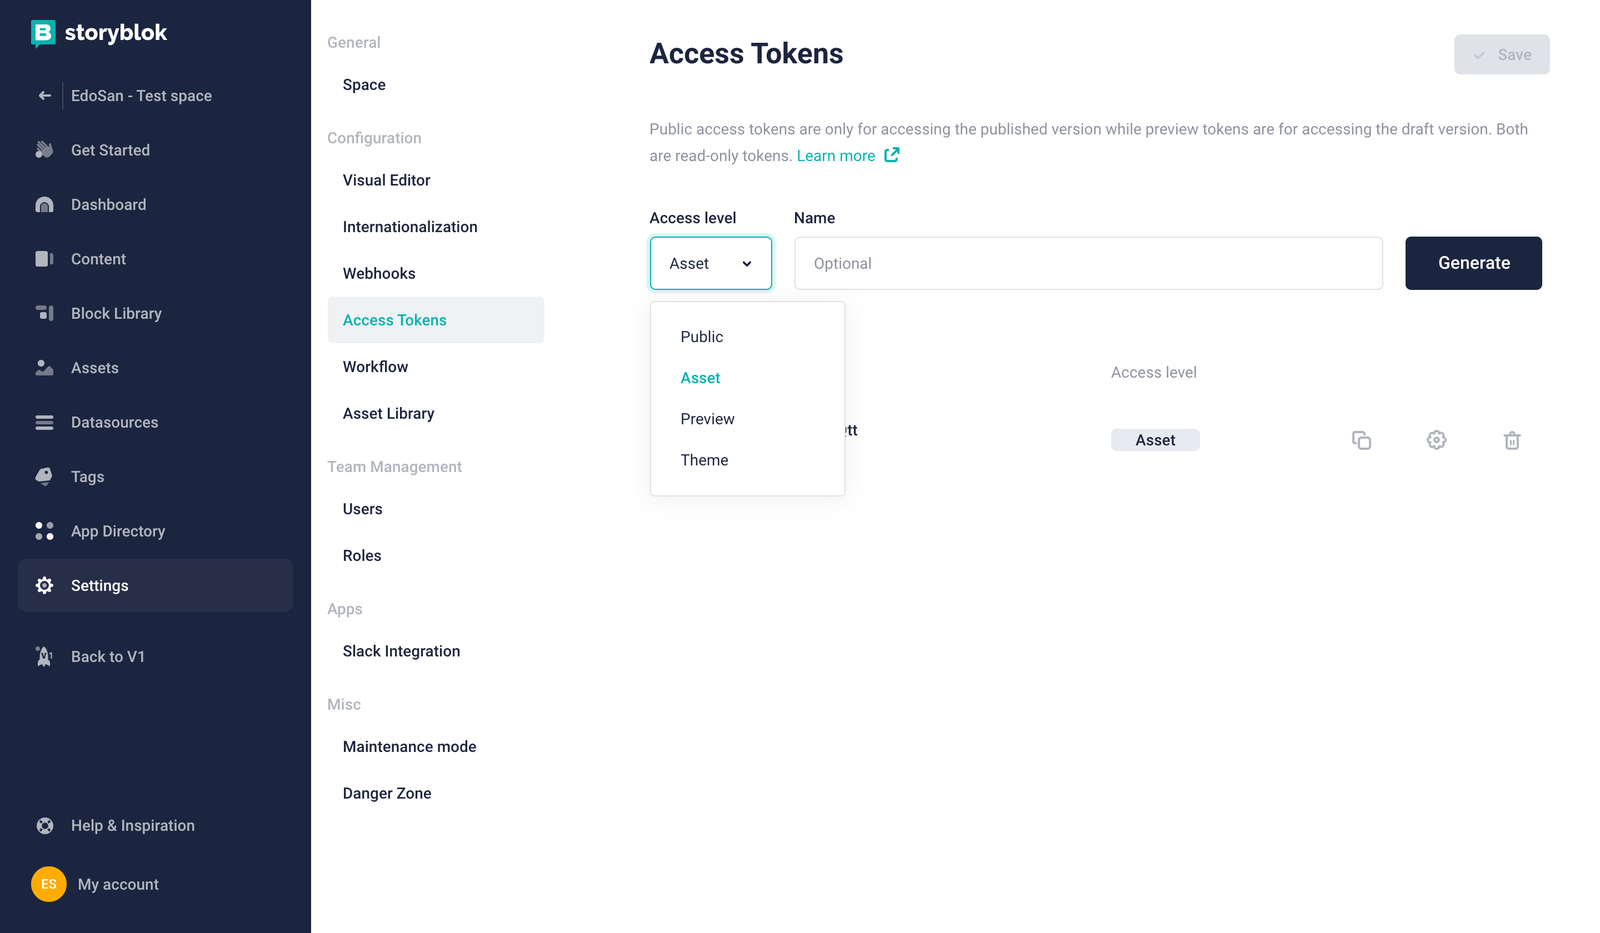
Create an access token with Asset access level
Bear in mind that you will also need a Public or Preview token to retrieve your content in the frontend!
Upload a private asset
To upload a private asset just go to the Assets and upload a new file, then switch on the Private mode by toggling the tiny lock icon.
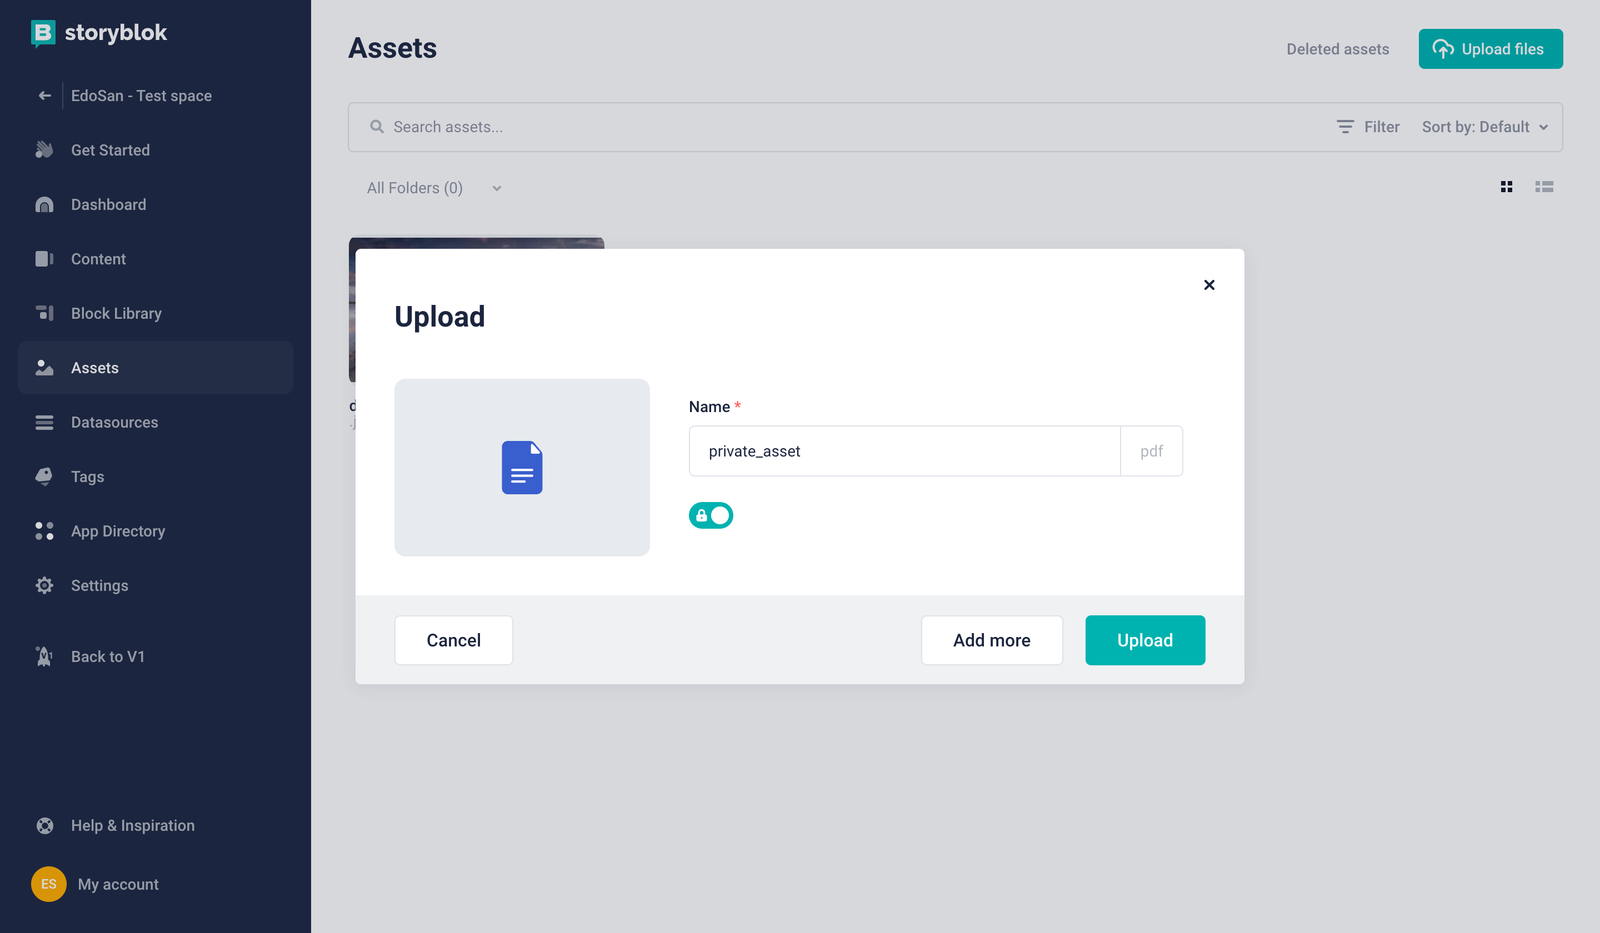
Upload a private asset
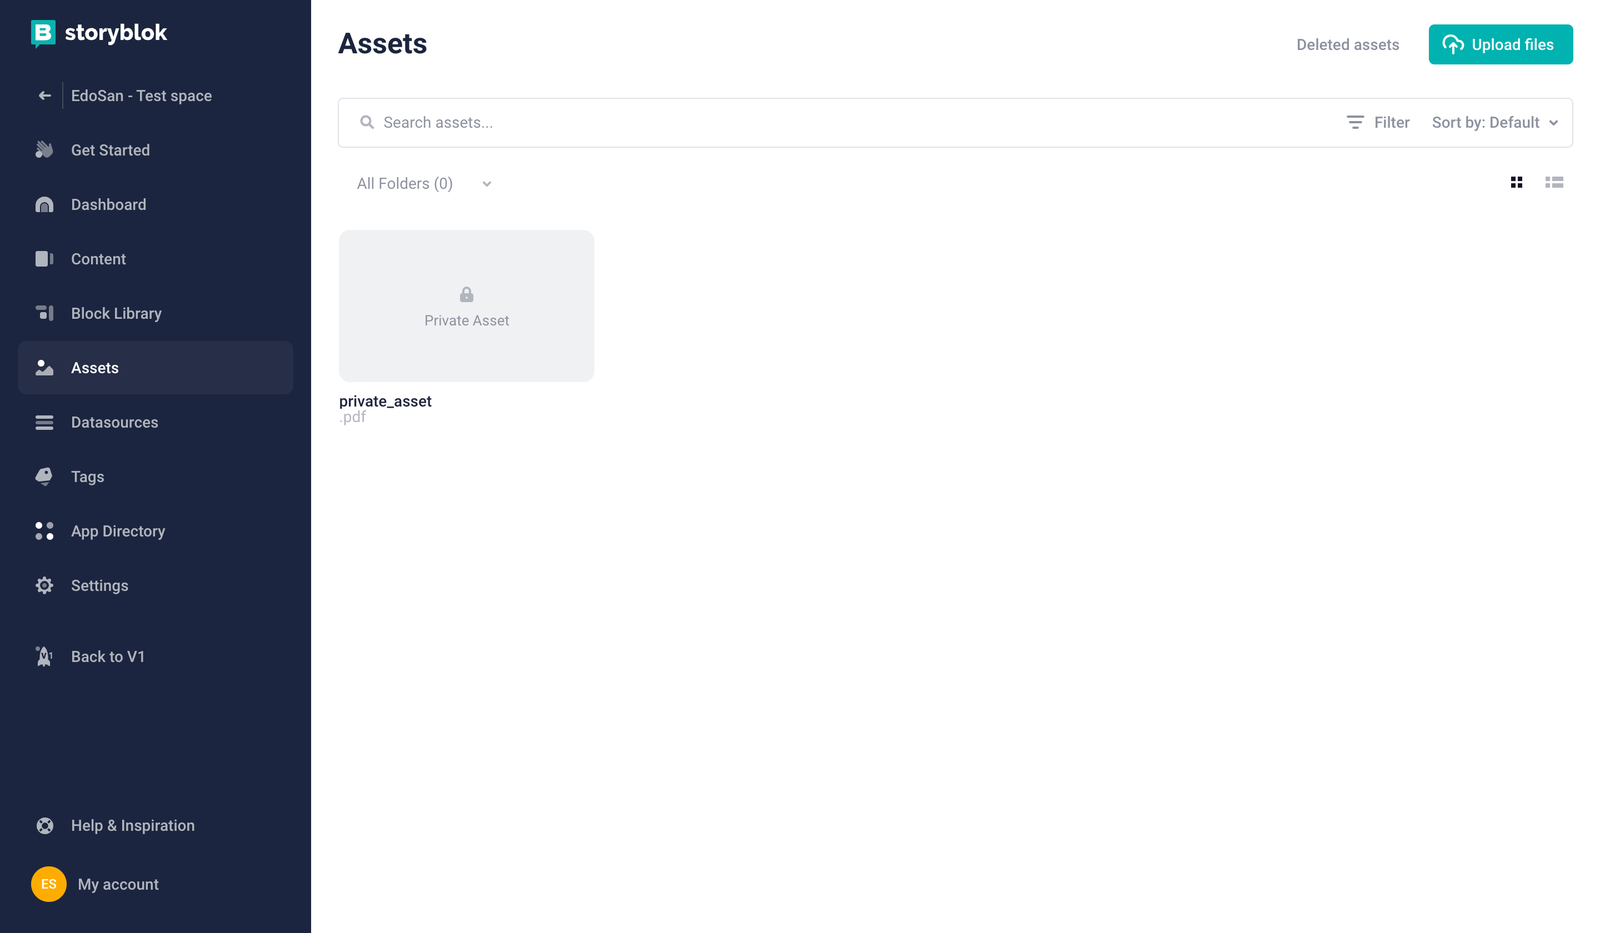
Private assets previews will not be shown, since they are - you know - private!
Reference the private asset in a component
To reference a private asset in a component you can go to the Block Library, select the component you want to have the asset linked to (or create a new component) and add a new field of the type Asset. This field will let you select an asset to be referenced by the component itself each time it is implemented in a page.
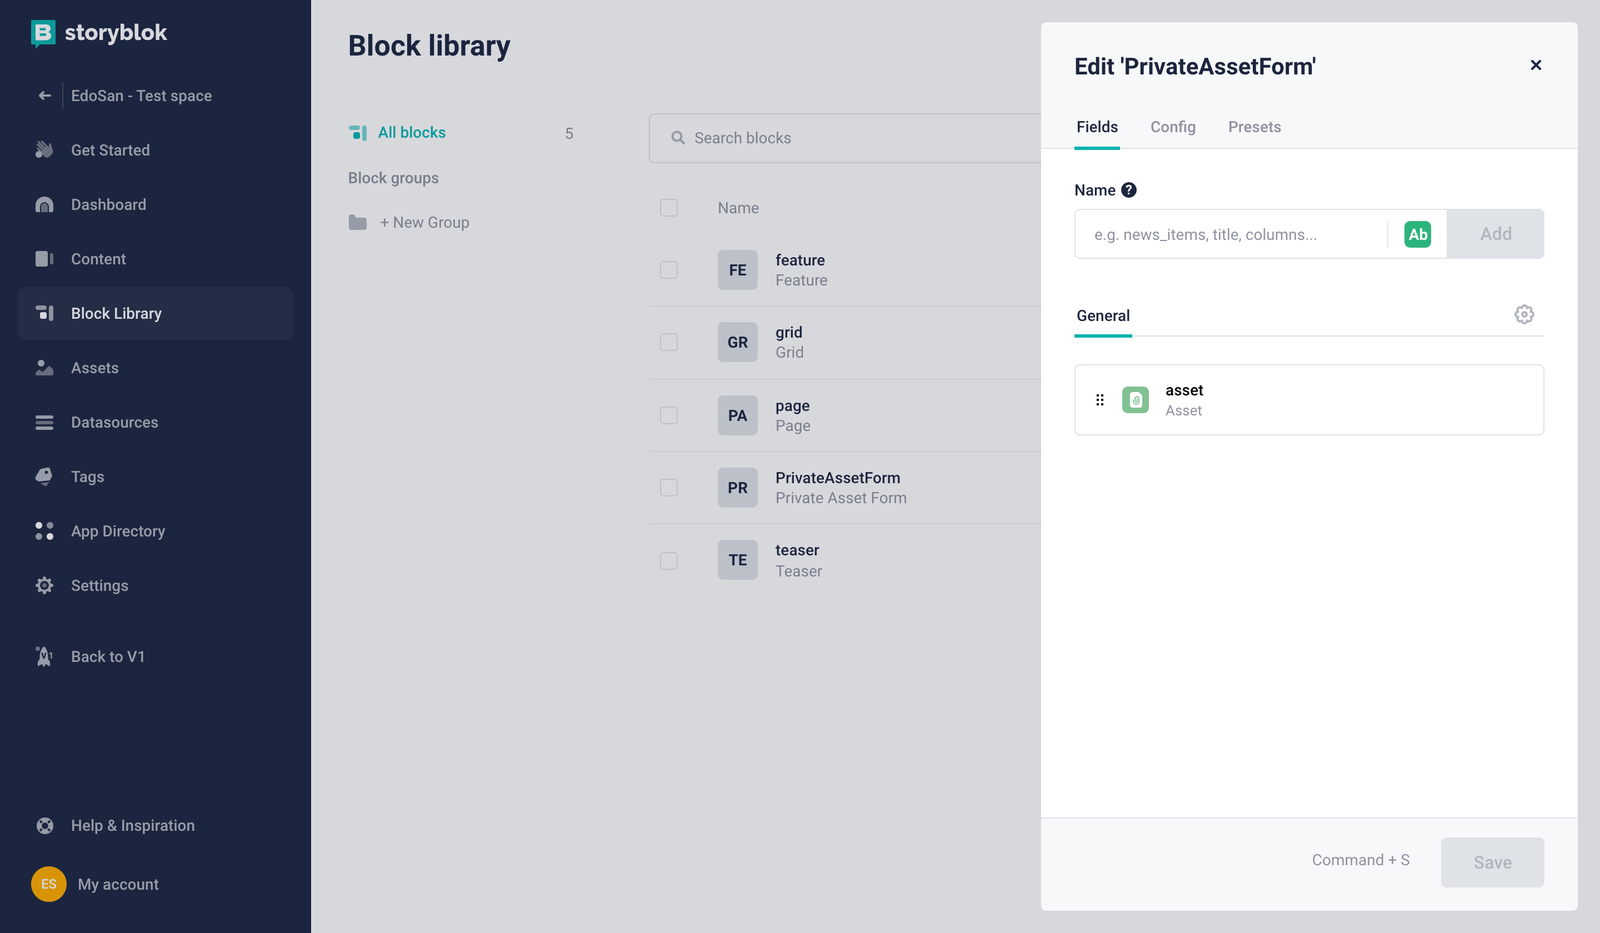
New field of type “Asset”
Now you can go to a page where your component is included and link an asset for that specific instance. For the sake of this guide, I created a custom component called PrivateAssetForm with an Asset field named asset.
Serverless function
Since we need a way to retrieve our private URL we are going to setup a function that will perform this task for us. Here you may find a straightforward example of such a function. We are going to use the assetURL query param as the input source and the user will be redirected to the private asset. For the sake of this tutorial we are using Vercel functions.
import { AxiosError } from "axios";
import StoryblokClient from "storyblok-js-client";

export default async (request, response) => {
  try {
    const storyblokClient = new StoryblokClient({
      accessToken: process.env.VITE_STORYBLOK_ASSET_TOKEN,
    });
    const getSignedURL = async (filename) => {
      const response = await storyblokClient.get("cdn/assets/me", {
        filename: filename,
      });
      return response.data.asset.signed_url;
    };
    const signedURL = await getSignedURL(request.query.assetURL);
    return response.redirect(signedURL);
  } catch (e) {
    if (e instanceof AxiosError) {
      const axiosError = e;
      const statusCode = axiosError.code || 404;
      return response.status(statusCode).end();
    }
  }
};
The frontend
To tie things up we need to retrieve the PrivateAssetForm component info from the frontend in order to create our form and the actual link to the endpoint. We are going to use Vue and the Storyblok Vue SDK to do this.
First of all we’re going to create a PrivateAssetLink component that will be responsible for rendering the link we’re going to display after the form submission. It will need the assetFilename that will be provided by the parent component (PrivateAssetForm).
<template>
    <a :href="privateAssetURL" target="_blank" rel="noopener noreferrer" class="private-asset-link">
        Download private asset
    </a>
</template>
<script setup>
import { computed } from "vue";
const props = defineProps({ assetFilename: String });
const privateAssetURL = computed(
    () =>
        `${import.meta.env.VITE_SERVERLESS_BASE_PATH}${import.meta.env.VITE_SERVERLESS_DOWNLOAD_PRIVATE_ASSET_ENDPOINT
        }?assetURL=${props.assetFilename}`
);
</script>
Next, we’re going to create the actual PrivateAssetForm component, which will be tied to our PrivateAssetForm component. It will render the form and handle the logic to display our PrivateAssetLink component.
<template>
    <div v-editable="blok" class="private-asset-form-container">
        <div class="private-asset-form">
            <form @submit.prevent="fakeSubmitForm">
                <input type="email" :value="email" required />
                <button role="submit">Submit</button>
            </form>
        </div>
        <PrivateAssetLink v-if="isFormSubmissionSuccessful" :assetFilename="blok.asset.filename" />
    </div>
</template>
<script setup>
import { ref } from "vue";
import PrivateAssetLink from "./PrivateAssetLink.vue";
const props = defineProps({ blok: Object });
const email = ref("");
const isFormSubmissionSuccessful = ref(false);
const fakeSubmitForm = () => {
    isFormSubmissionSuccessful.value = true;
};
</script>
Then we need to create a PrivateAssetPage page that will get the content of the page containing the PrivateAssetForm component. It is going to render a Page component and all the components that we included inside the page itself.
<script setup>
import { useStoryblok } from "@storyblok/vue";
const story = await useStoryblok("private-asset-page", { version: "draft" });
</script>
<template>
    <StoryblokComponent v-if="story" :blok="story.content" />
</template>
And that’s it! Now we can spin up the function and our users will be provided with gated content guarded by a form submission.
Quick recap
- Create an Asset token, you will need it to get private asset temporary URLs
- Add an asset and set it as
private - Reference the asset in a custom component, so that you can access its properties
- Create a function to receive private asset temporary URLs
- Build a form and a link to get the gated content with the custom component data
| Resource | Link |
|---|---|
| Demo Repository | https://github.com/storyblok/tool-examples/tree/main/private-assets-demo |
| Vue.js Docs | https://vuejs.org/guide/introduction.html |
| Storyblok Extensions Docs Overview | https://www.storyblok.com/docs/plugins/introduction |
| Storyblok Field-type Docs | https://www.storyblok.com/docs/plugins/field-type |
| Storyblok APIs | https://www.storyblok.com/docs/api |
