Create Dynamic Menus in Storyblok and Laravel
Storyblok is the first headless CMS that works for developers & marketers alike.
In this part of the tutorial series, we will make the menu in our header component dynamic, so that you can manage it directly from Storyblok.
If you’re in a hurry, have a look at our source code demo in GitHub!
Requirements
This tutorial is the third part of the Ultimate Tutorial Series for Laravel. We recommend that you follow the previous tutorials before starting this one.
Setup in Storyblok
First, we will have to create a new content type component wherein our menu entries can be stored. In order to do that, go to the Block Library {1} and create a New block {2}.
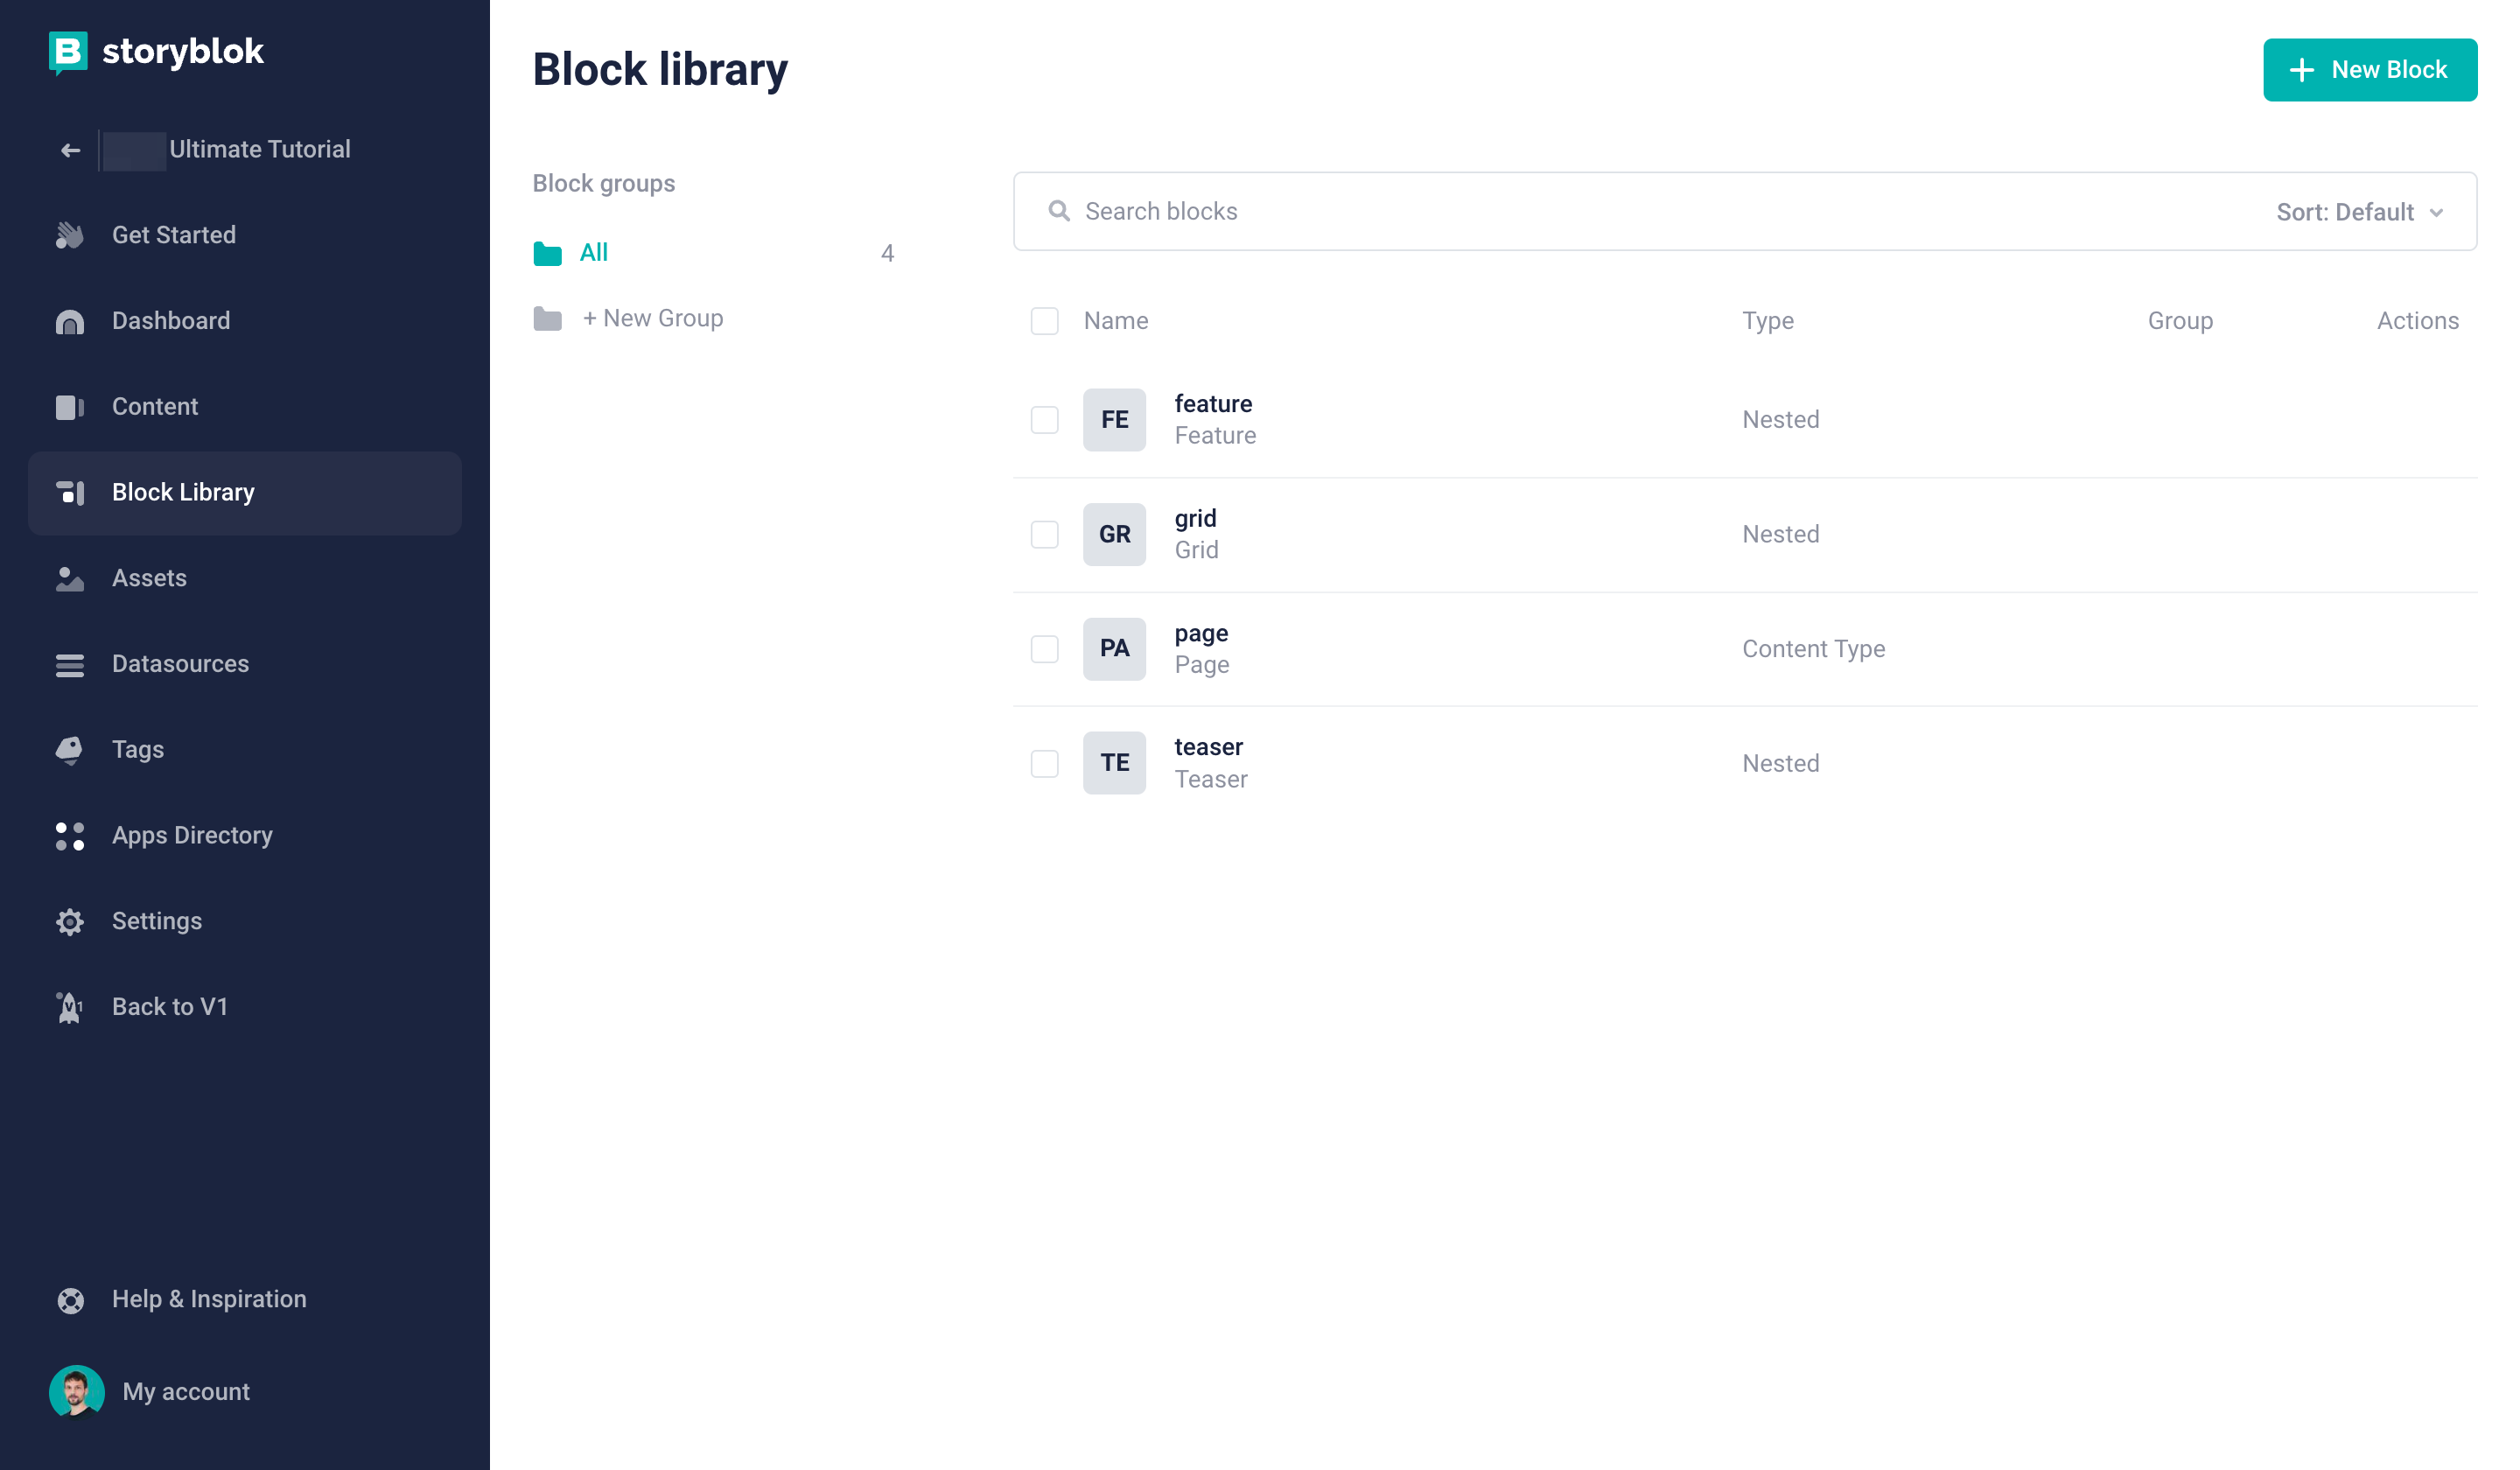
Creating a new block in the Block Library
Enter the name config {1} and choose Content type block {2}.
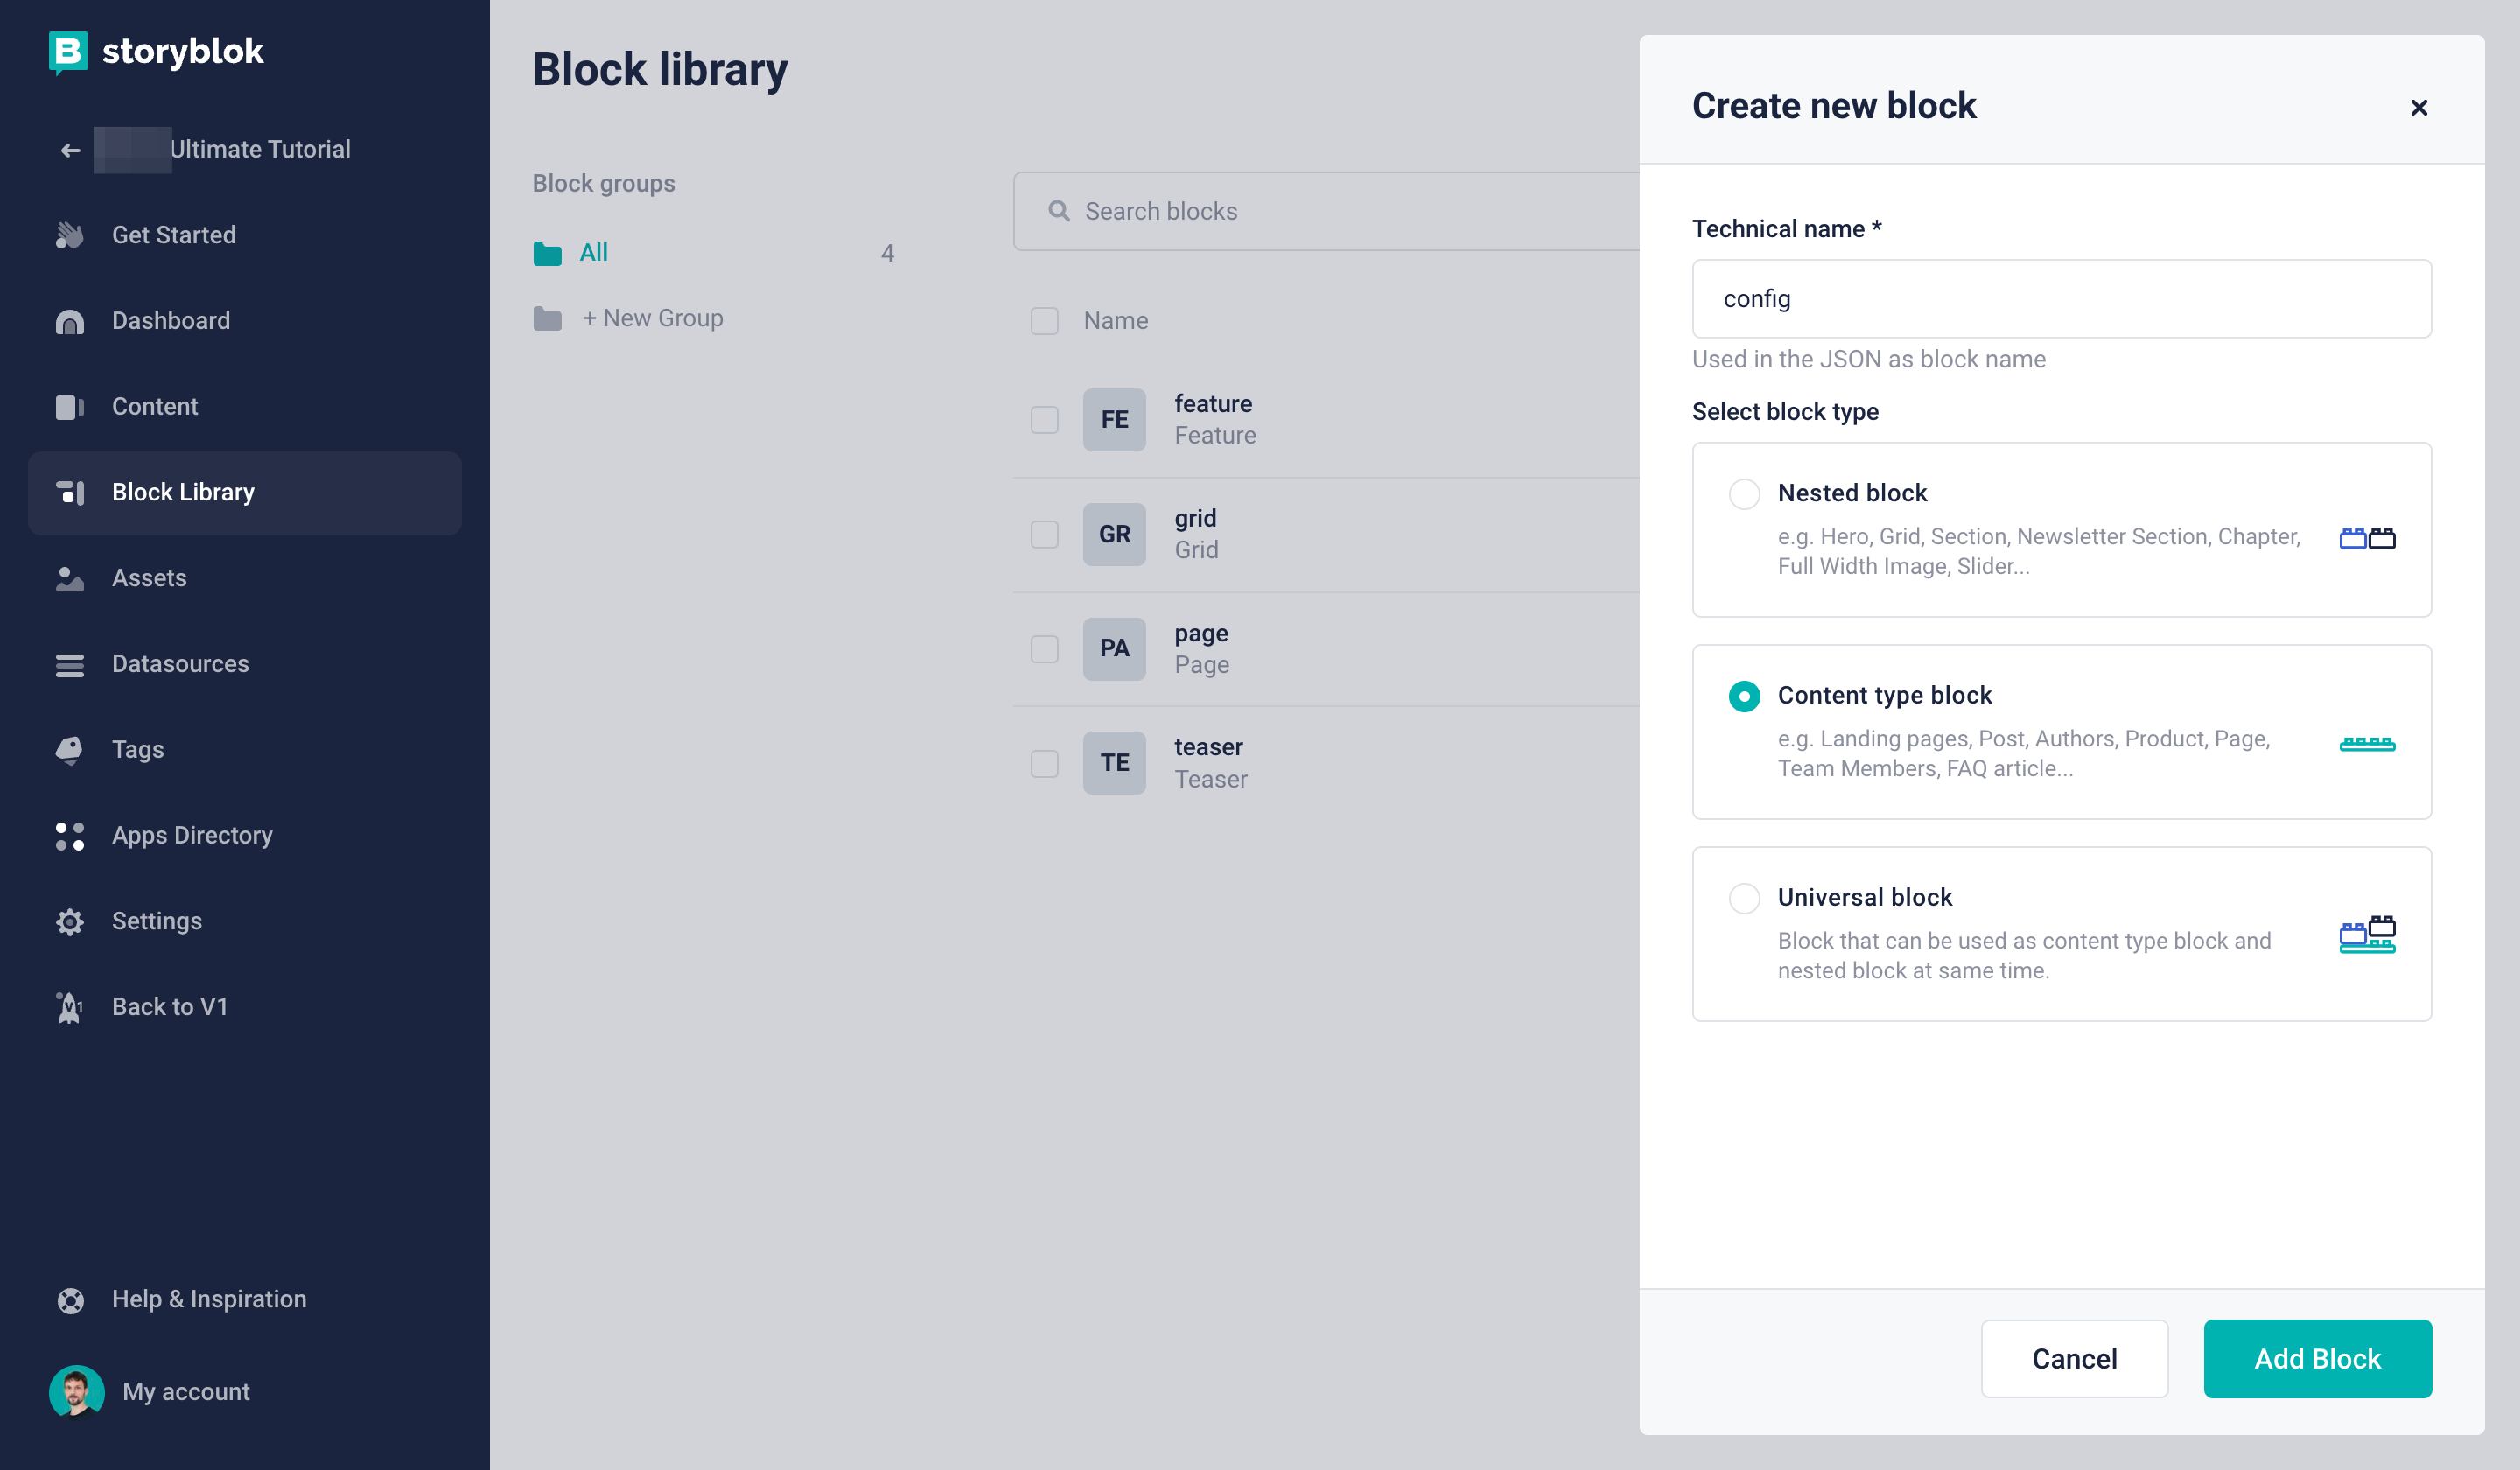
Creating a content type block
Now you can create a new field with the name header_menu {1} and choose the field type Blocks {2}.
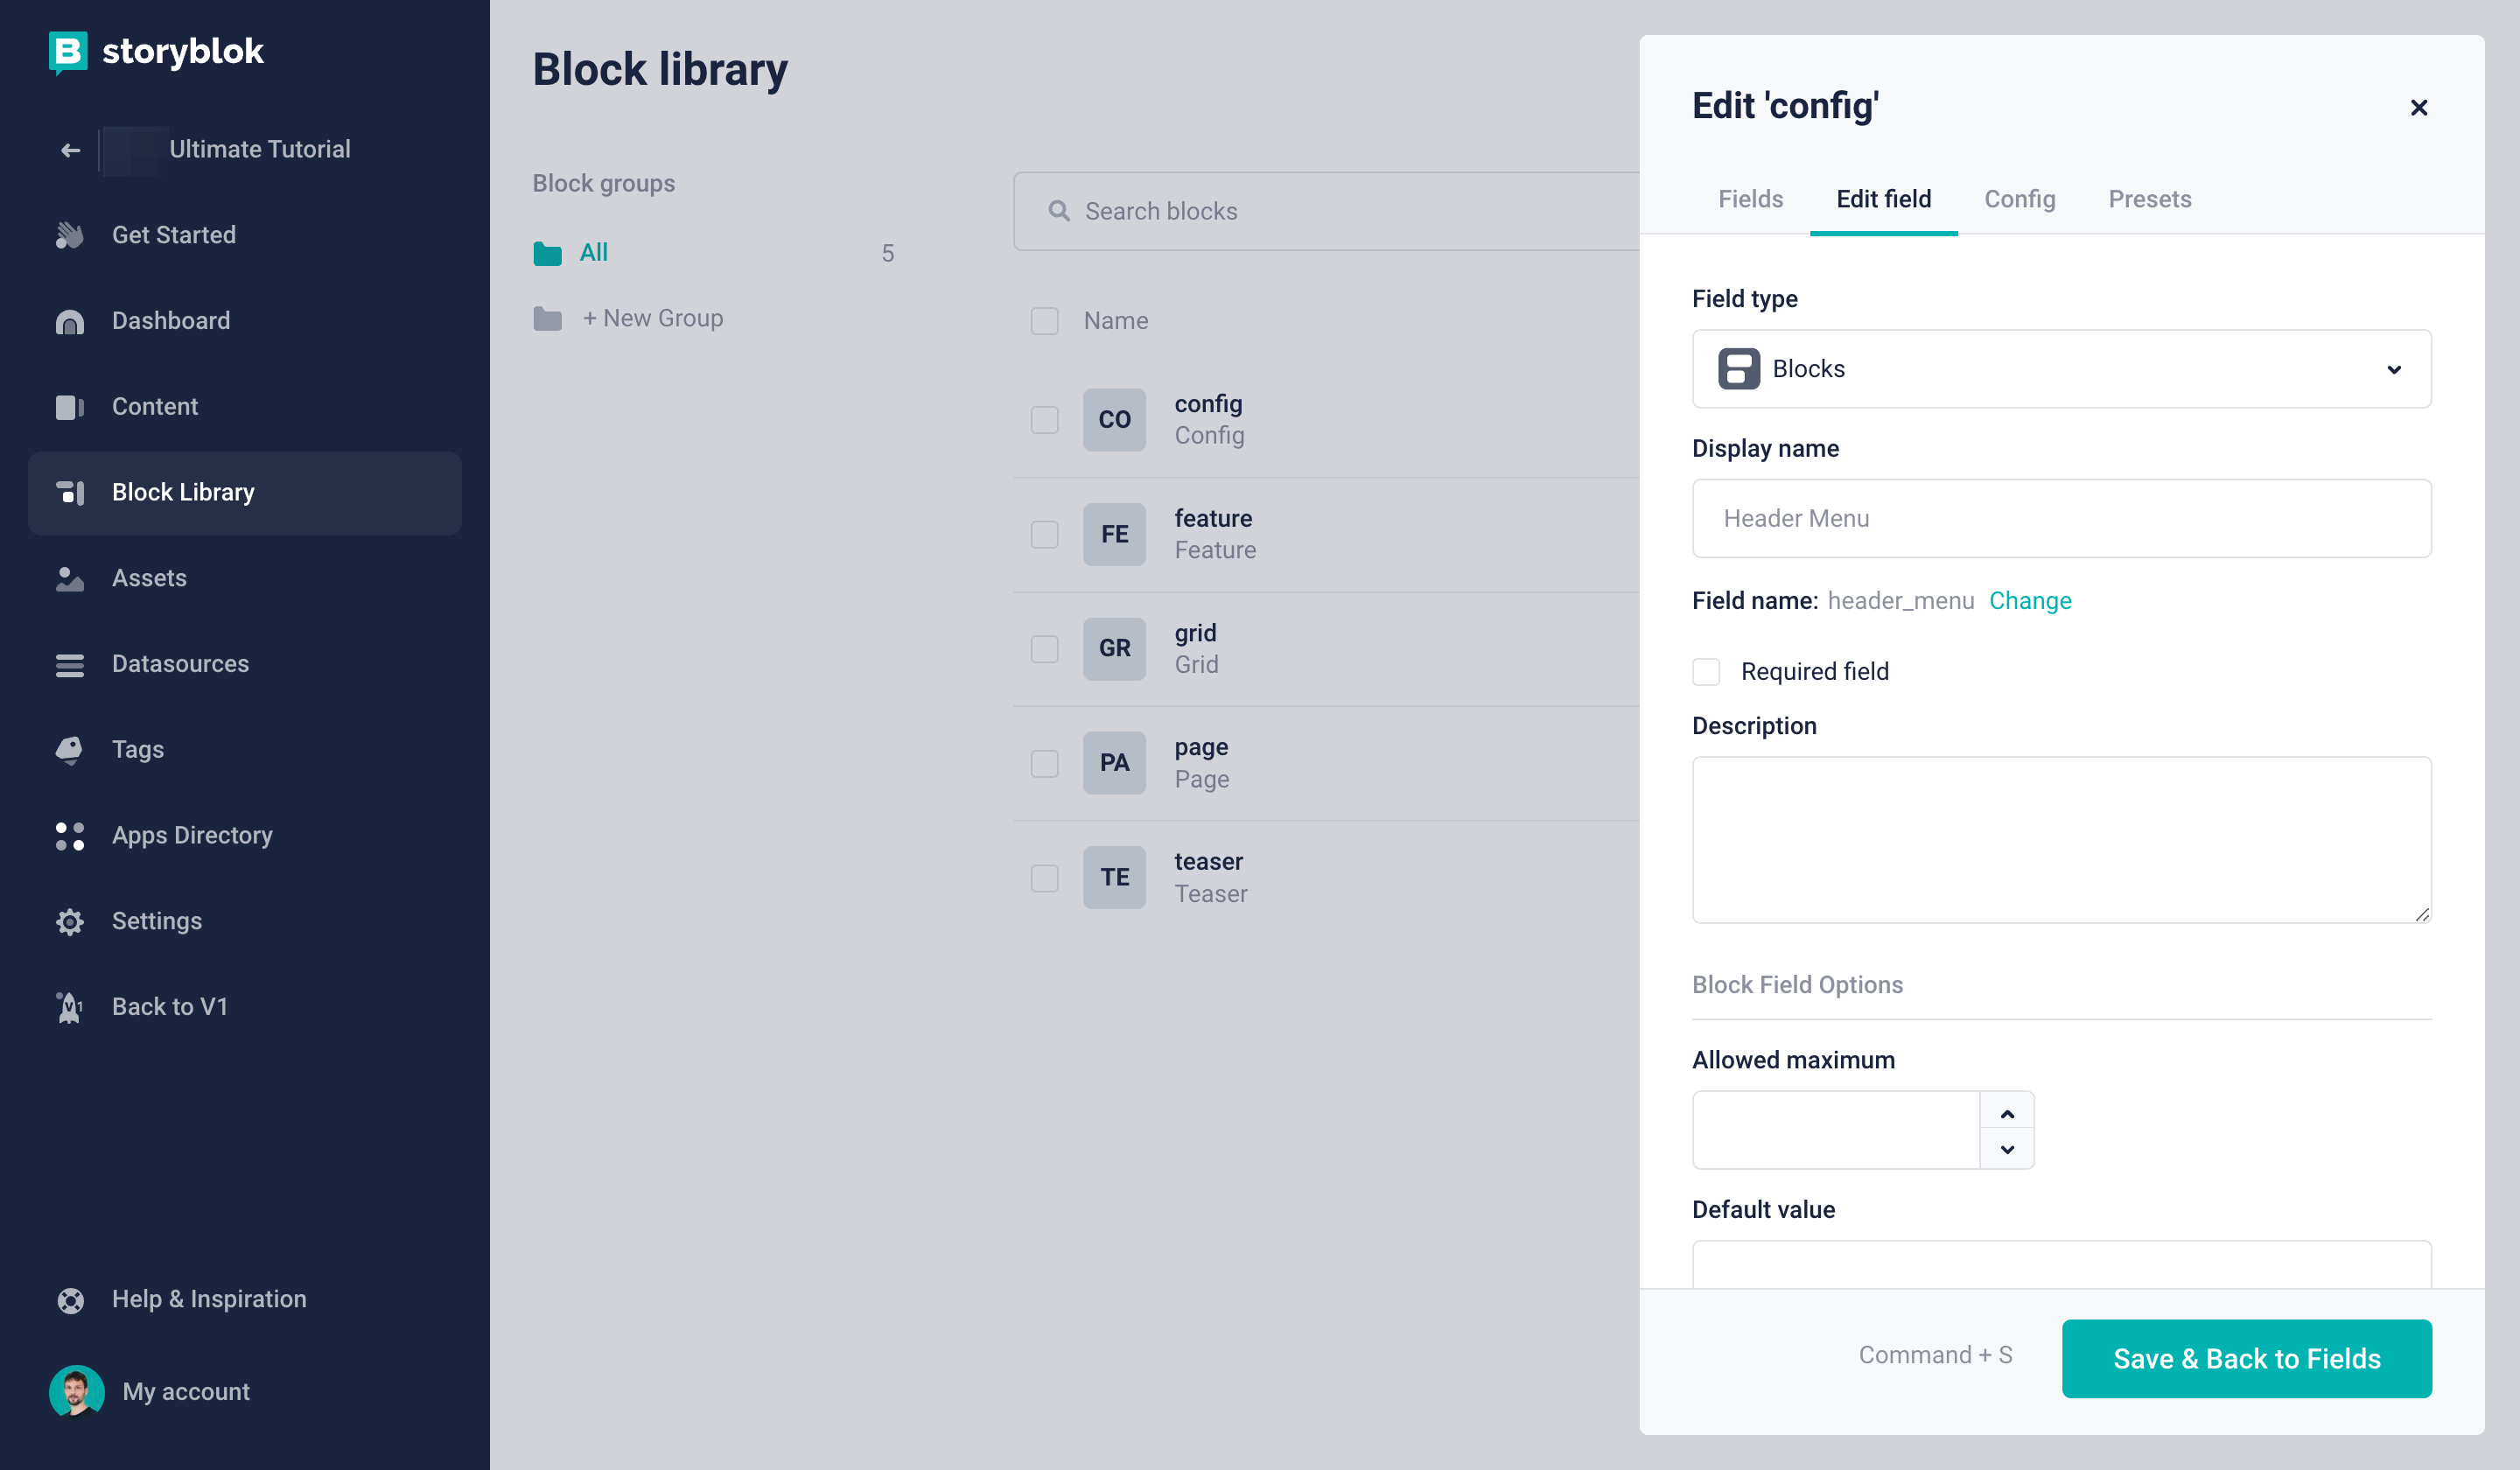
Creating a field for the header menu
In this field, we would like to provide the possibility to add menu links as nested blocks. To accomplish that, let’s create another new block. This time it should be a Nested block {1} with the name menu_link {2}.
Creating a nested block
Now we can add a new field called link {1} in this newly created block and choose Link as the field type {2}.
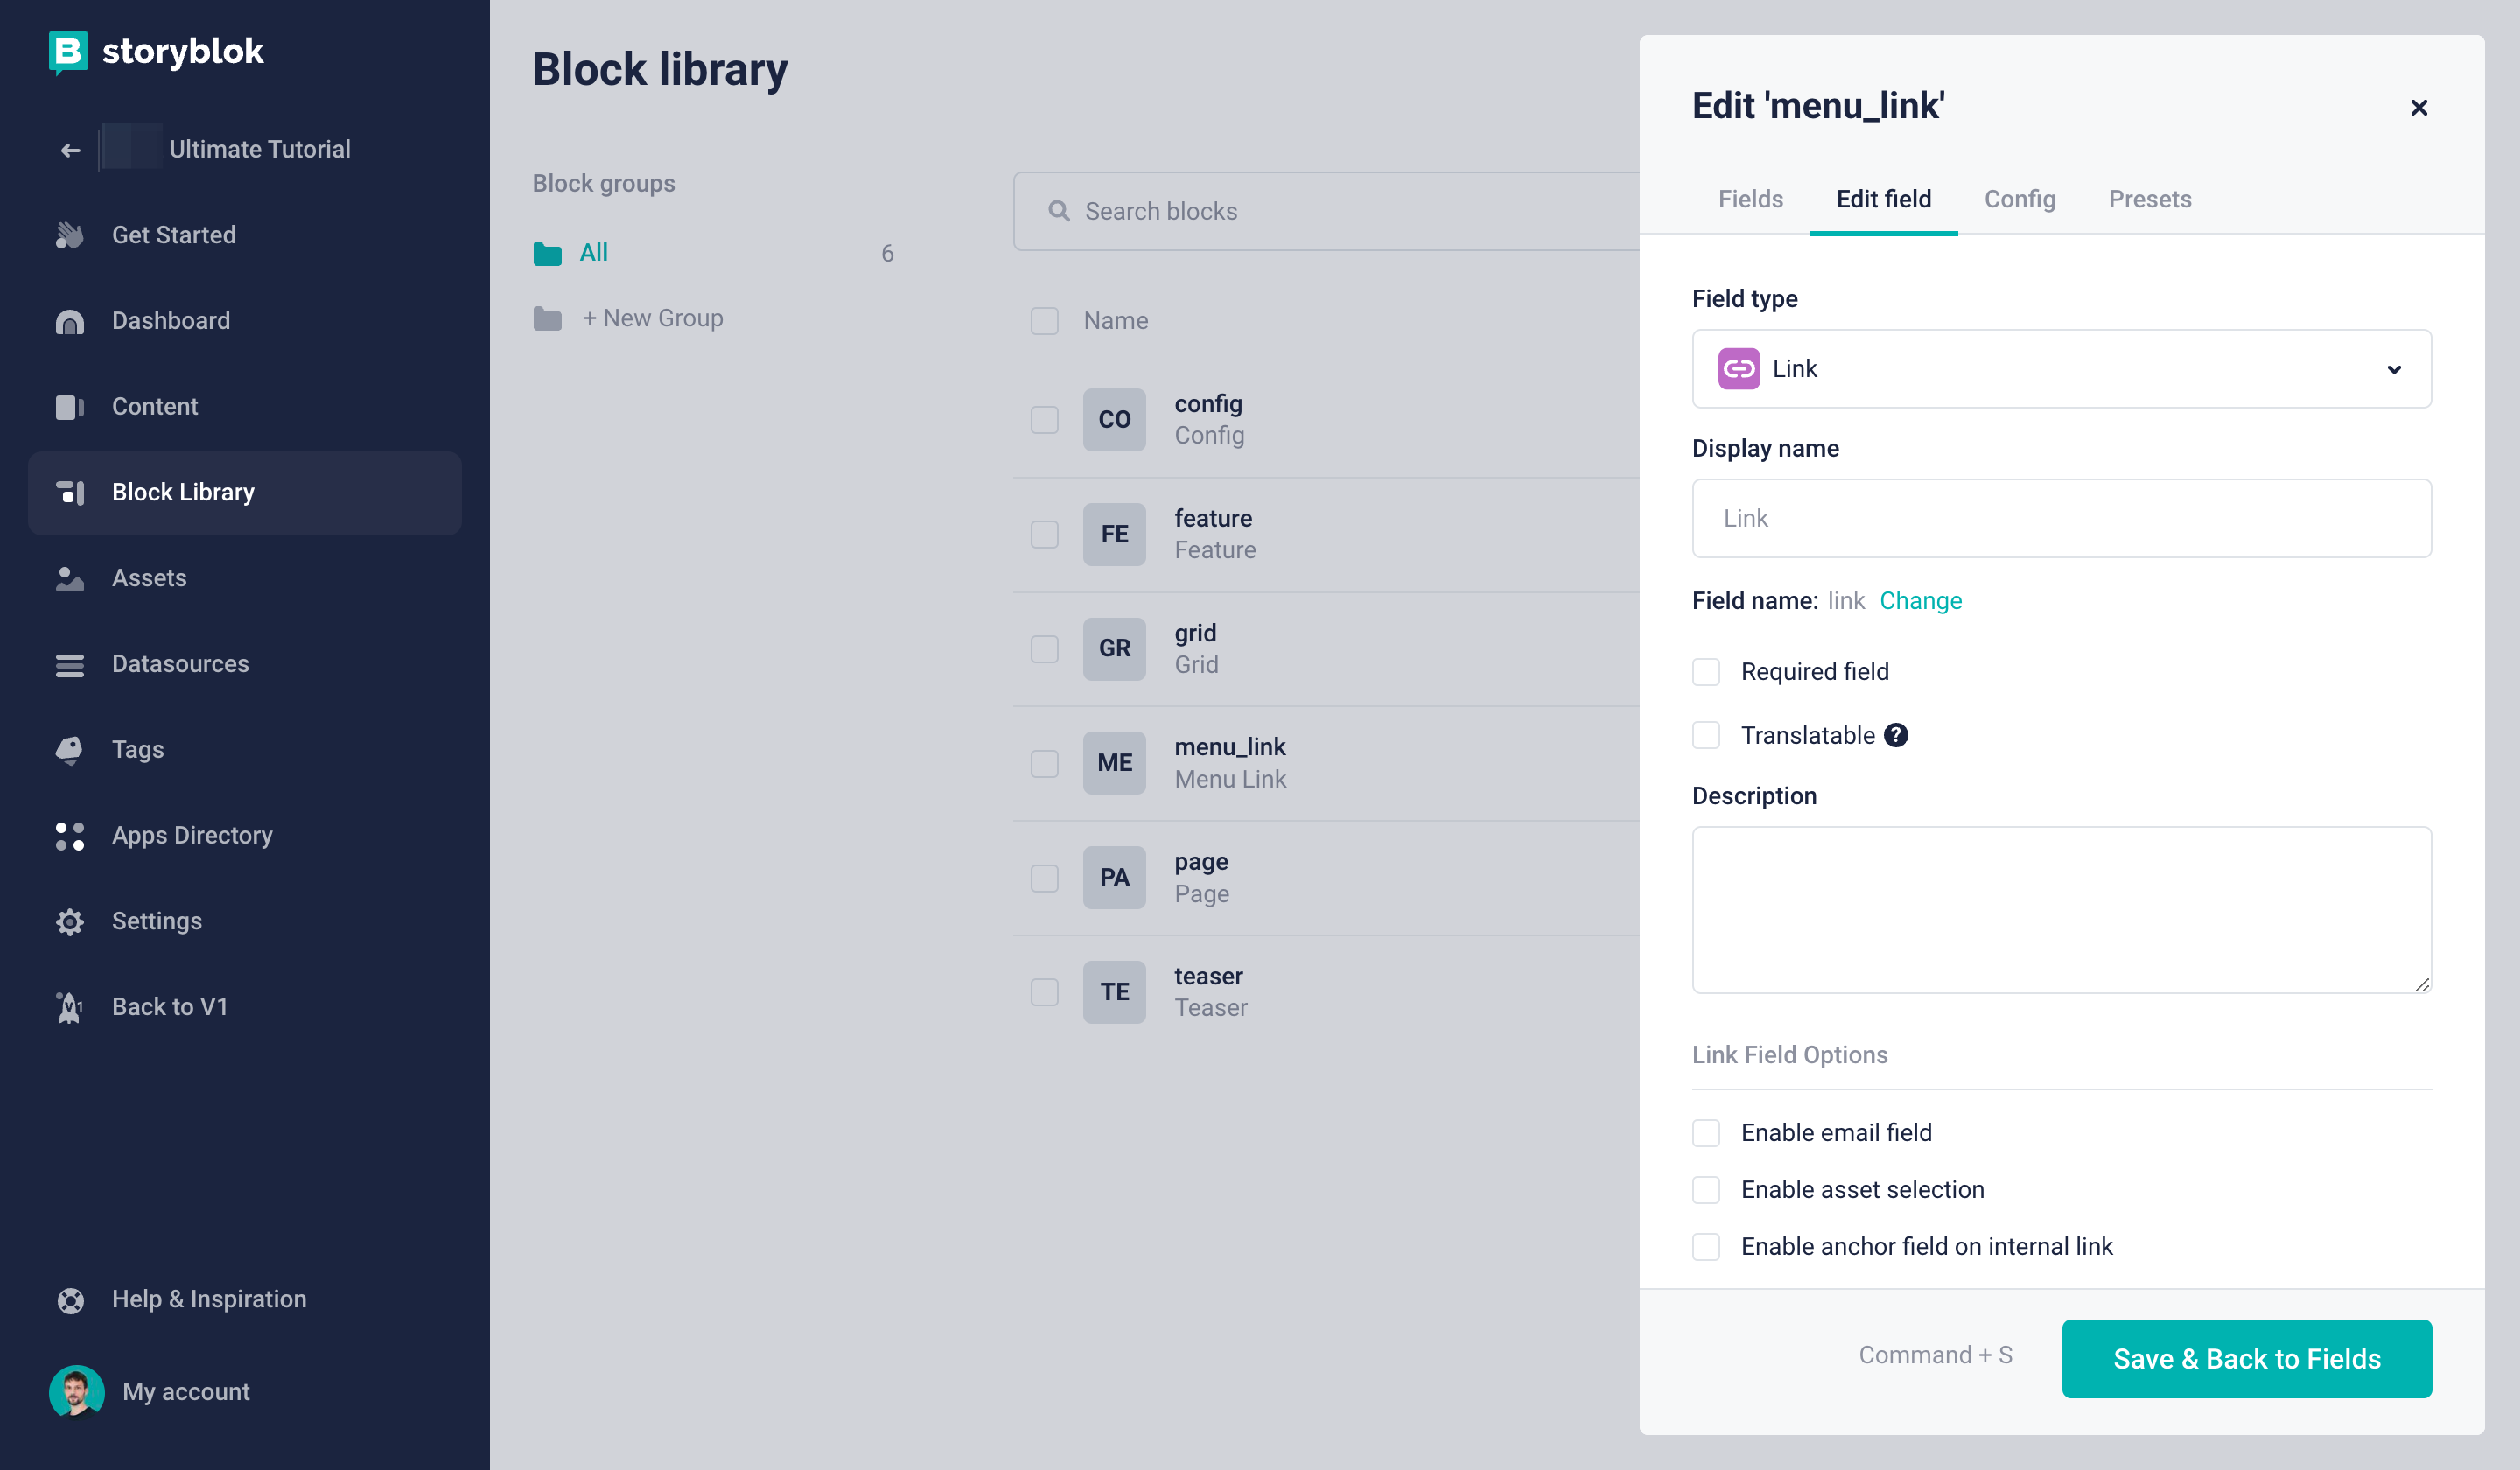
Creating a link field
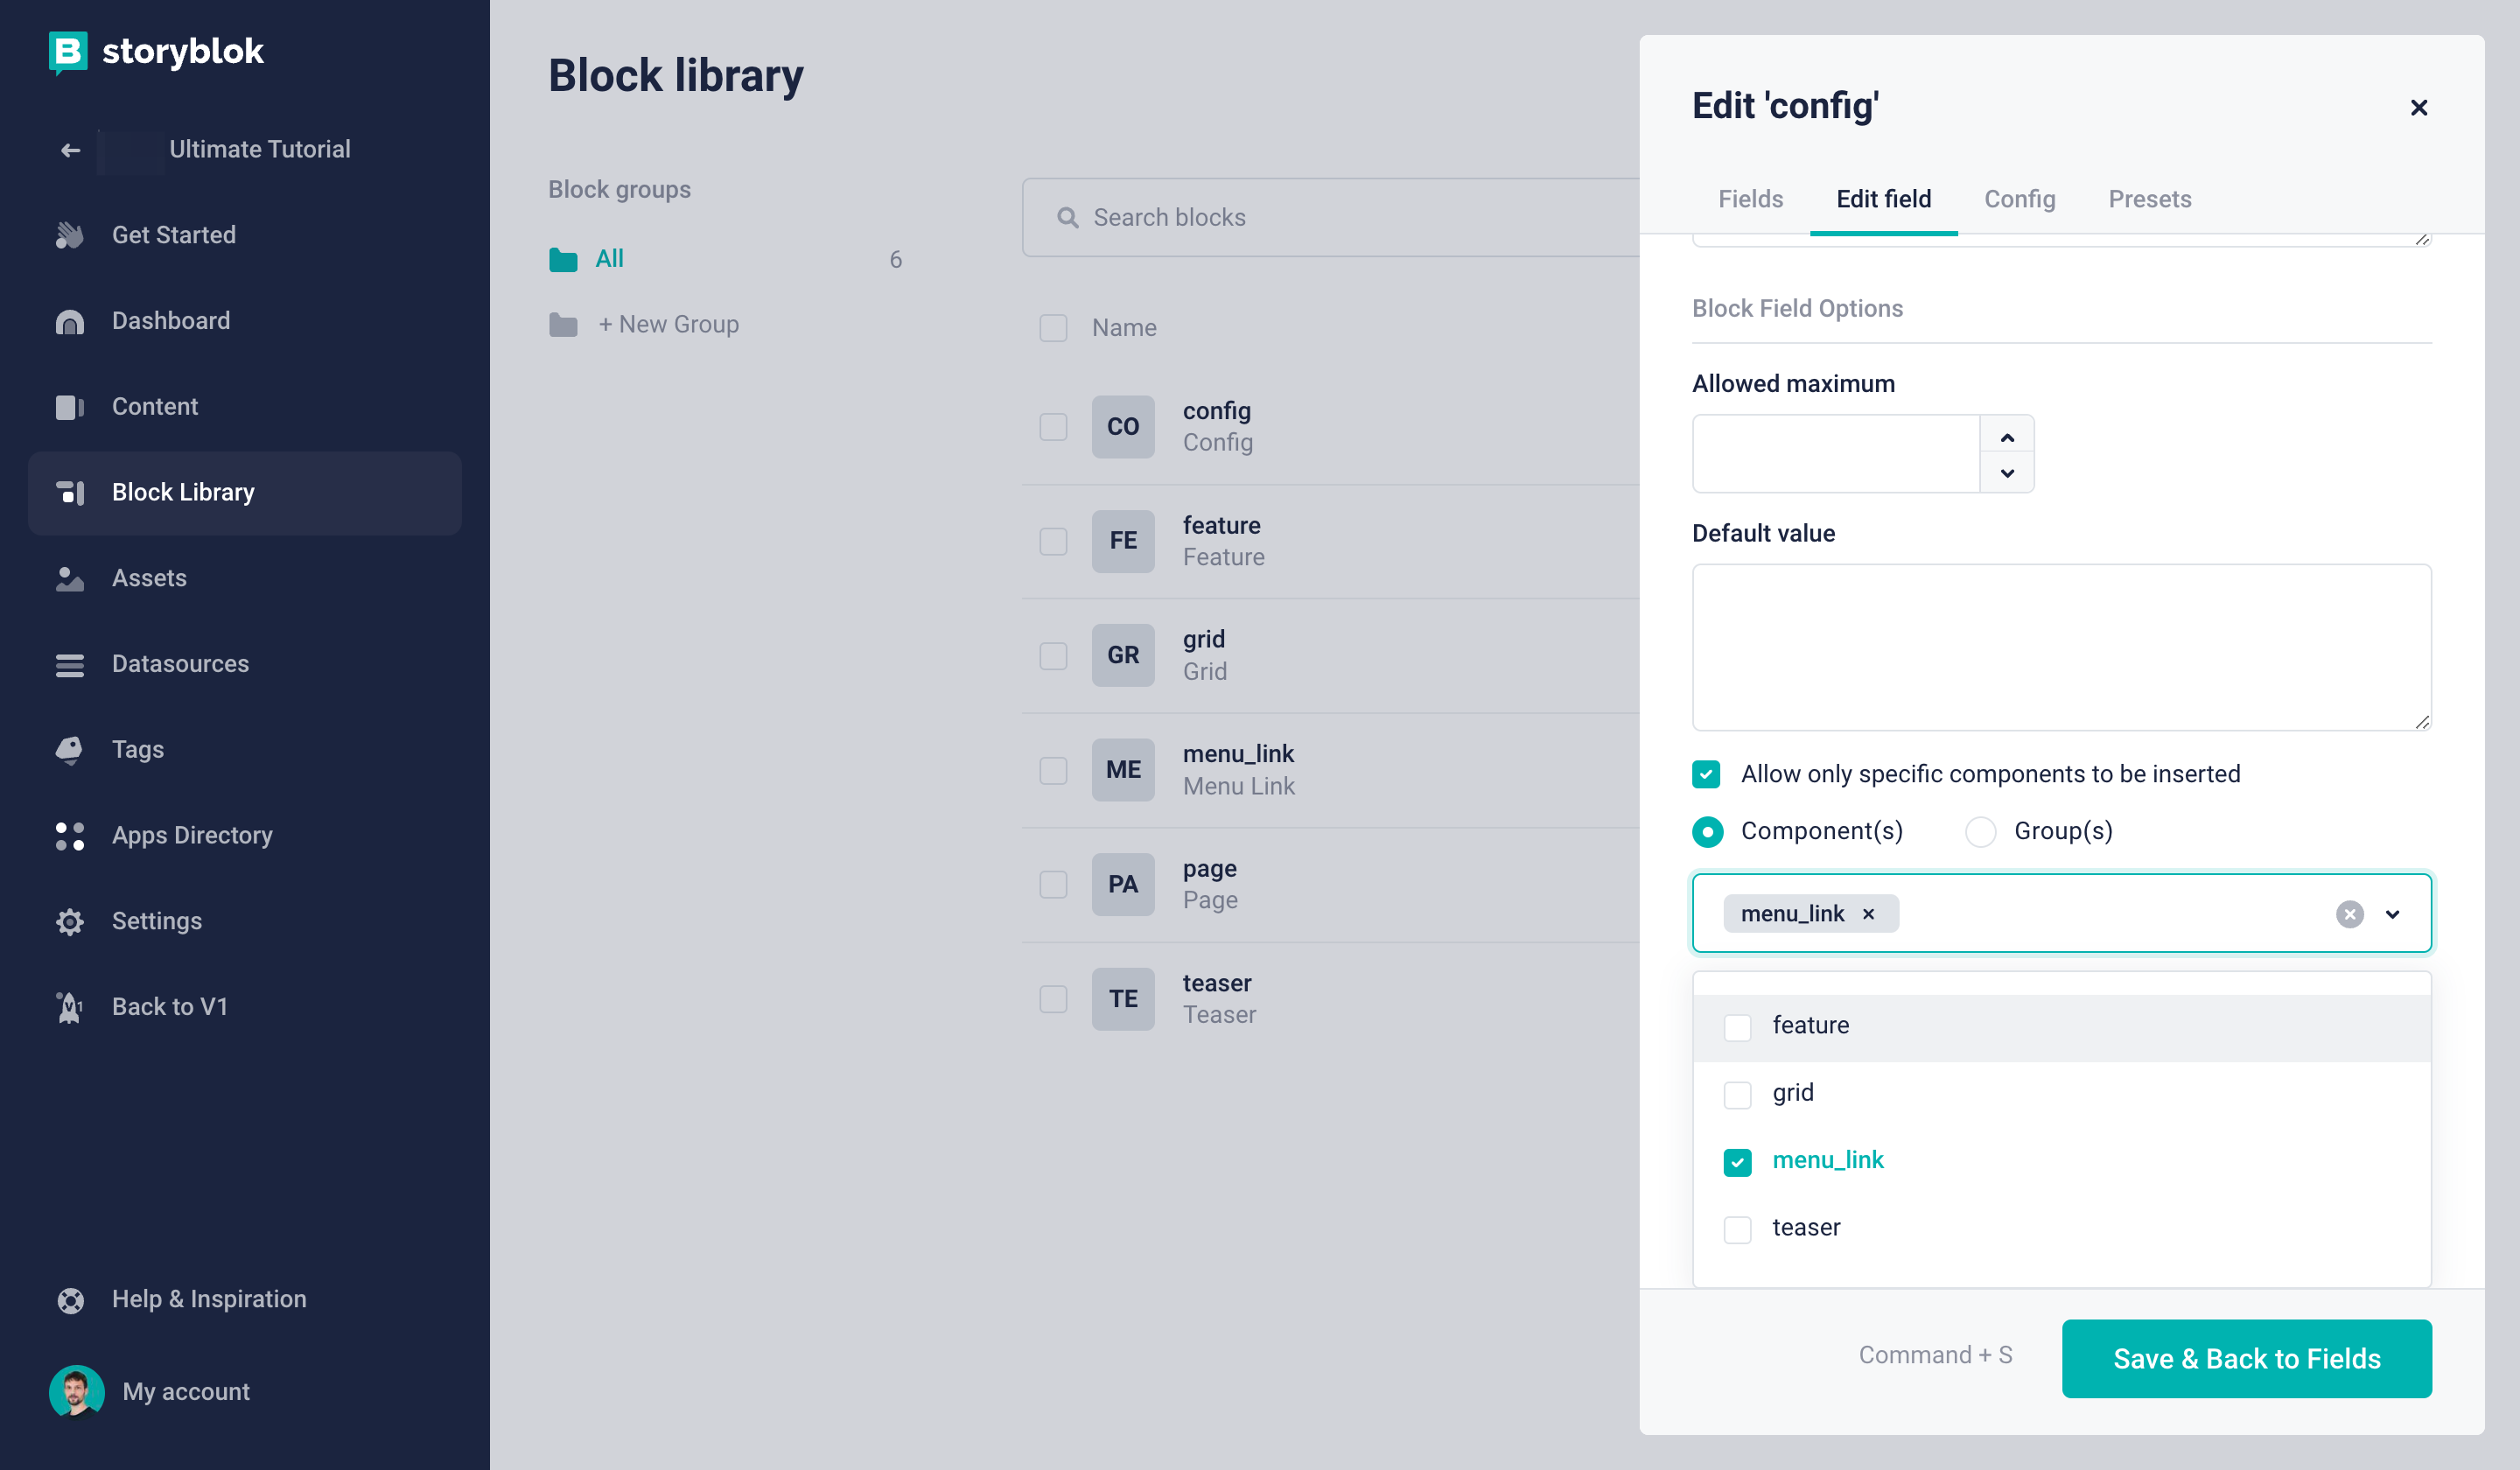
Alright, our component schemas are almost done! Just one more step: to avoid that just any block could be nested in our header_menu, we want to make sure that only specific components can be inserted {1}. Now you can choose the menu_link block in the whitelist {2}.
Allowing only specific components to be inserted
With that out of the way we can now go to the Content of our Storyblok space. In here, we want to create a new story with the name Config {2}, using our recently created content type Config {3}.
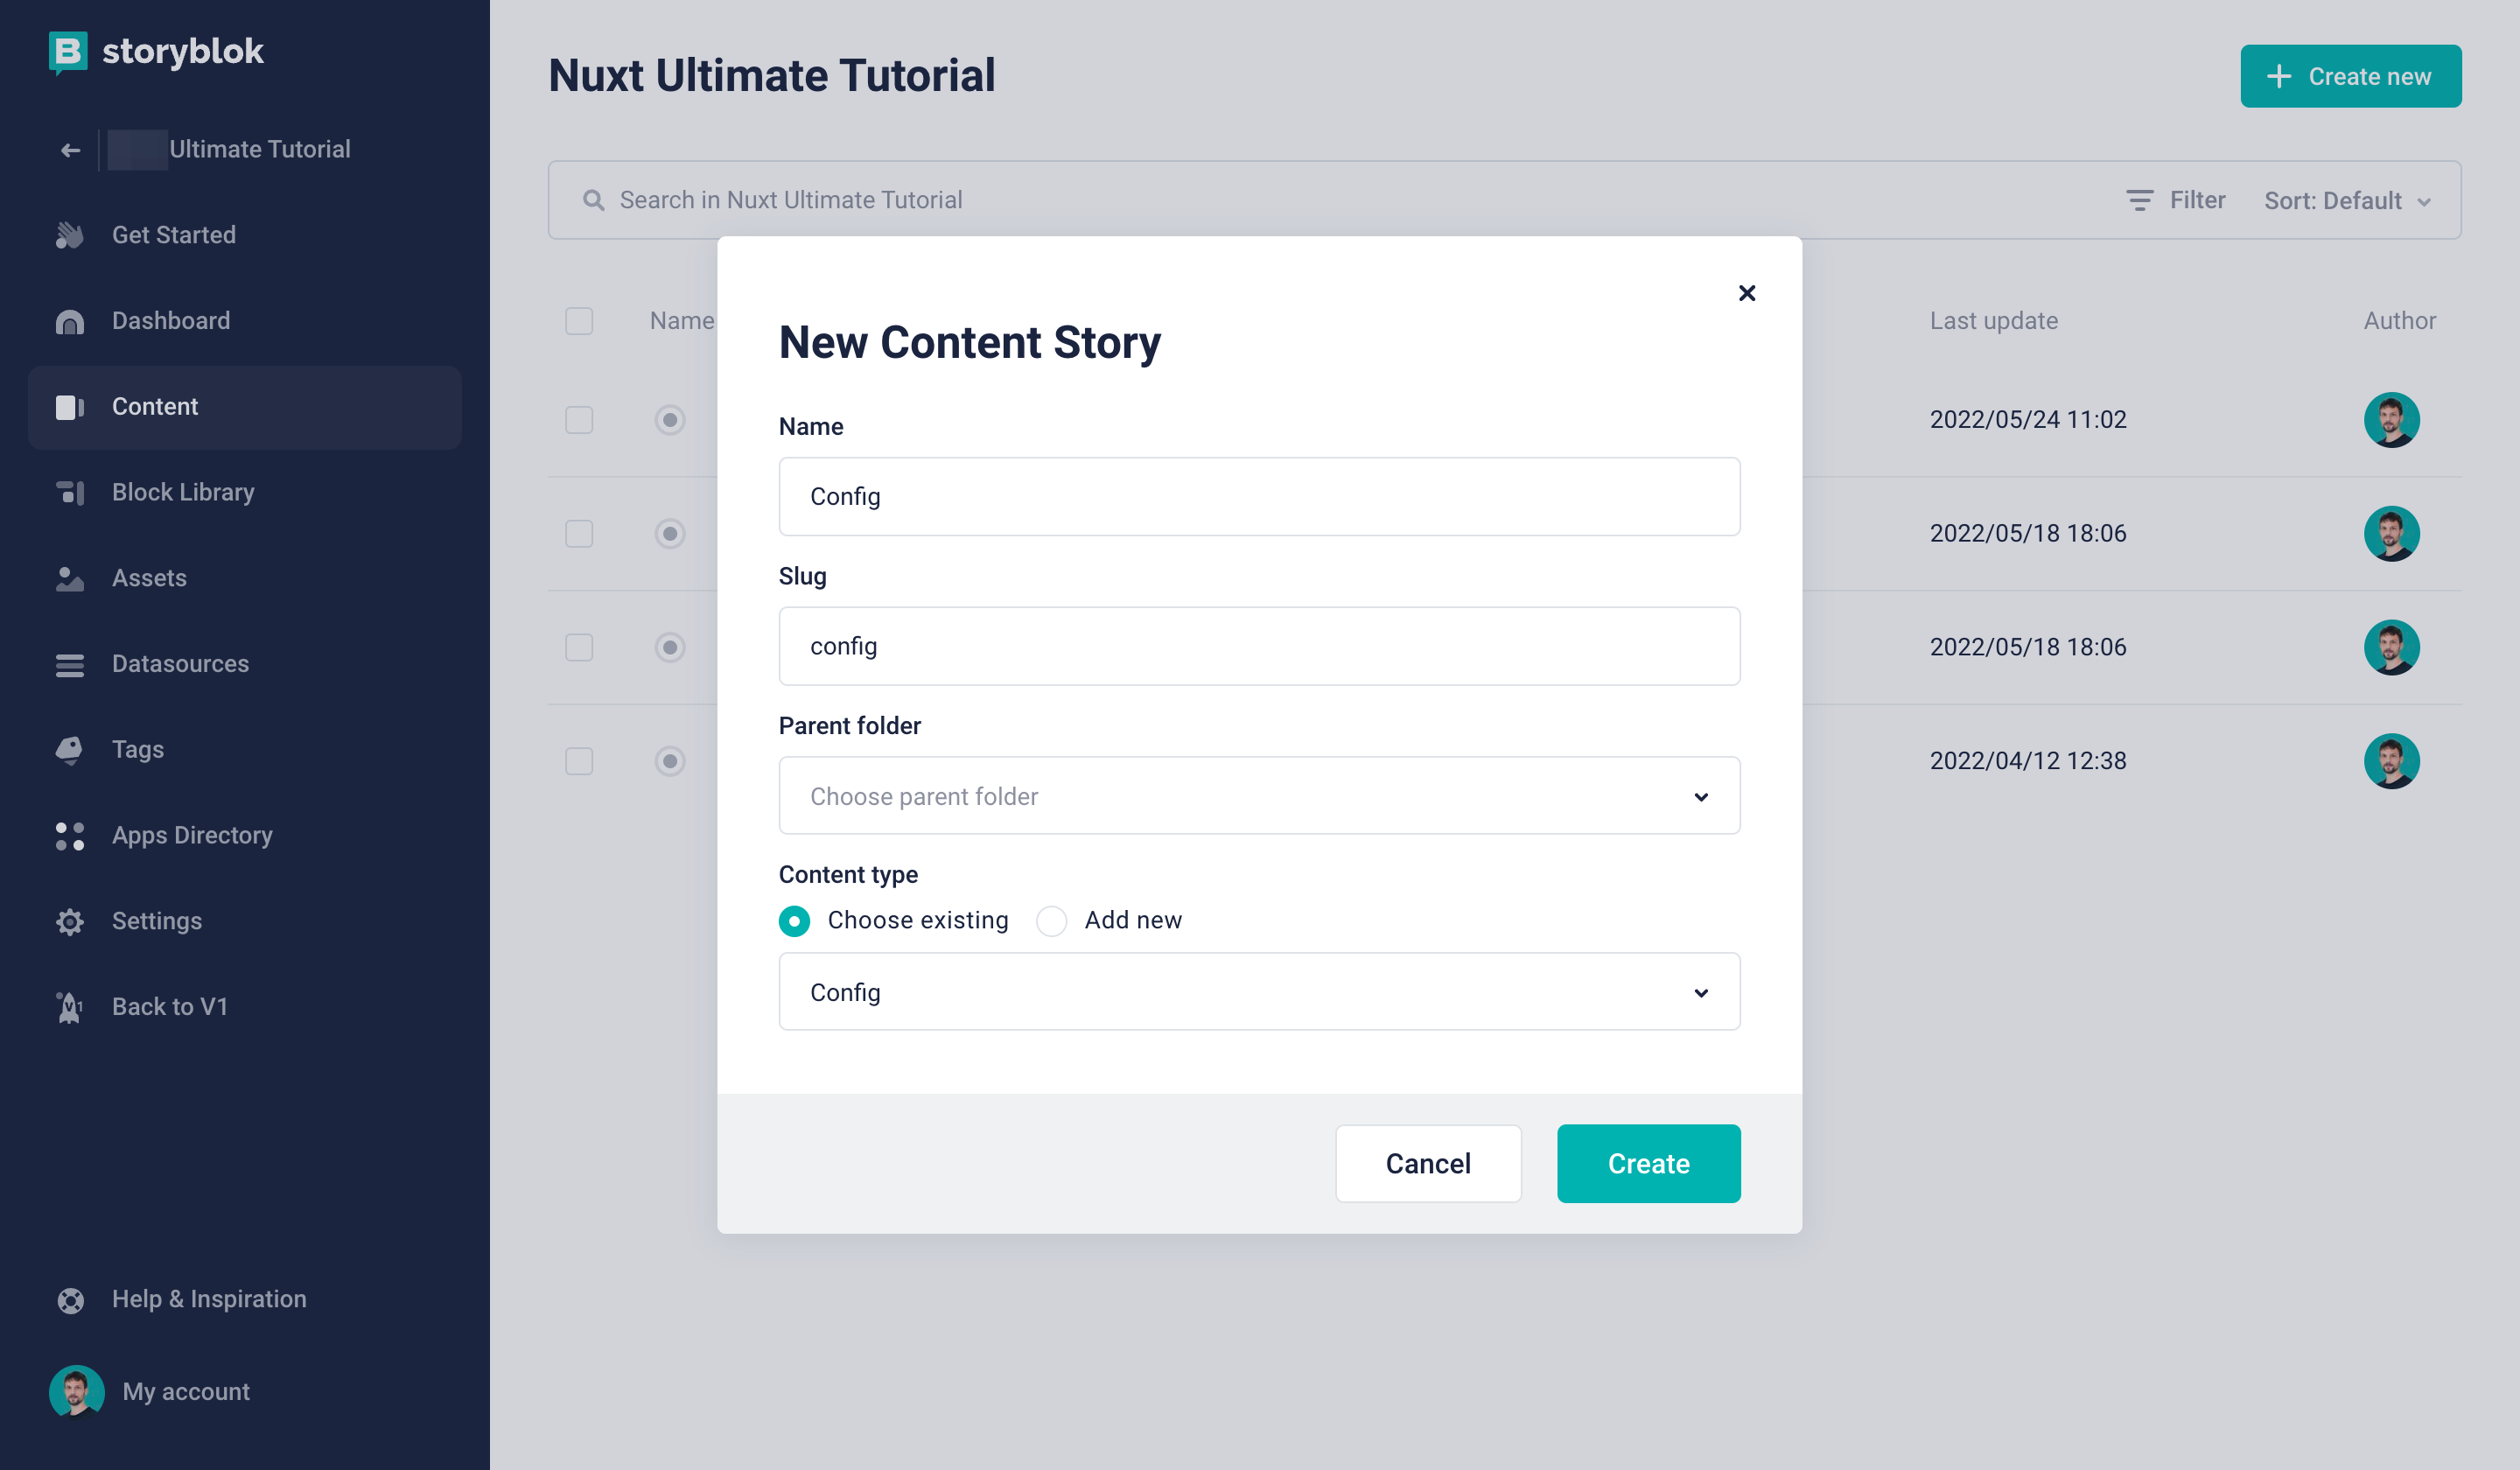
Creating a new Config story
If you open this newly created Config story, you can now nest as many menu_link blocks in the header_menu field as you would like. For now, let’s add our Blog and About page.
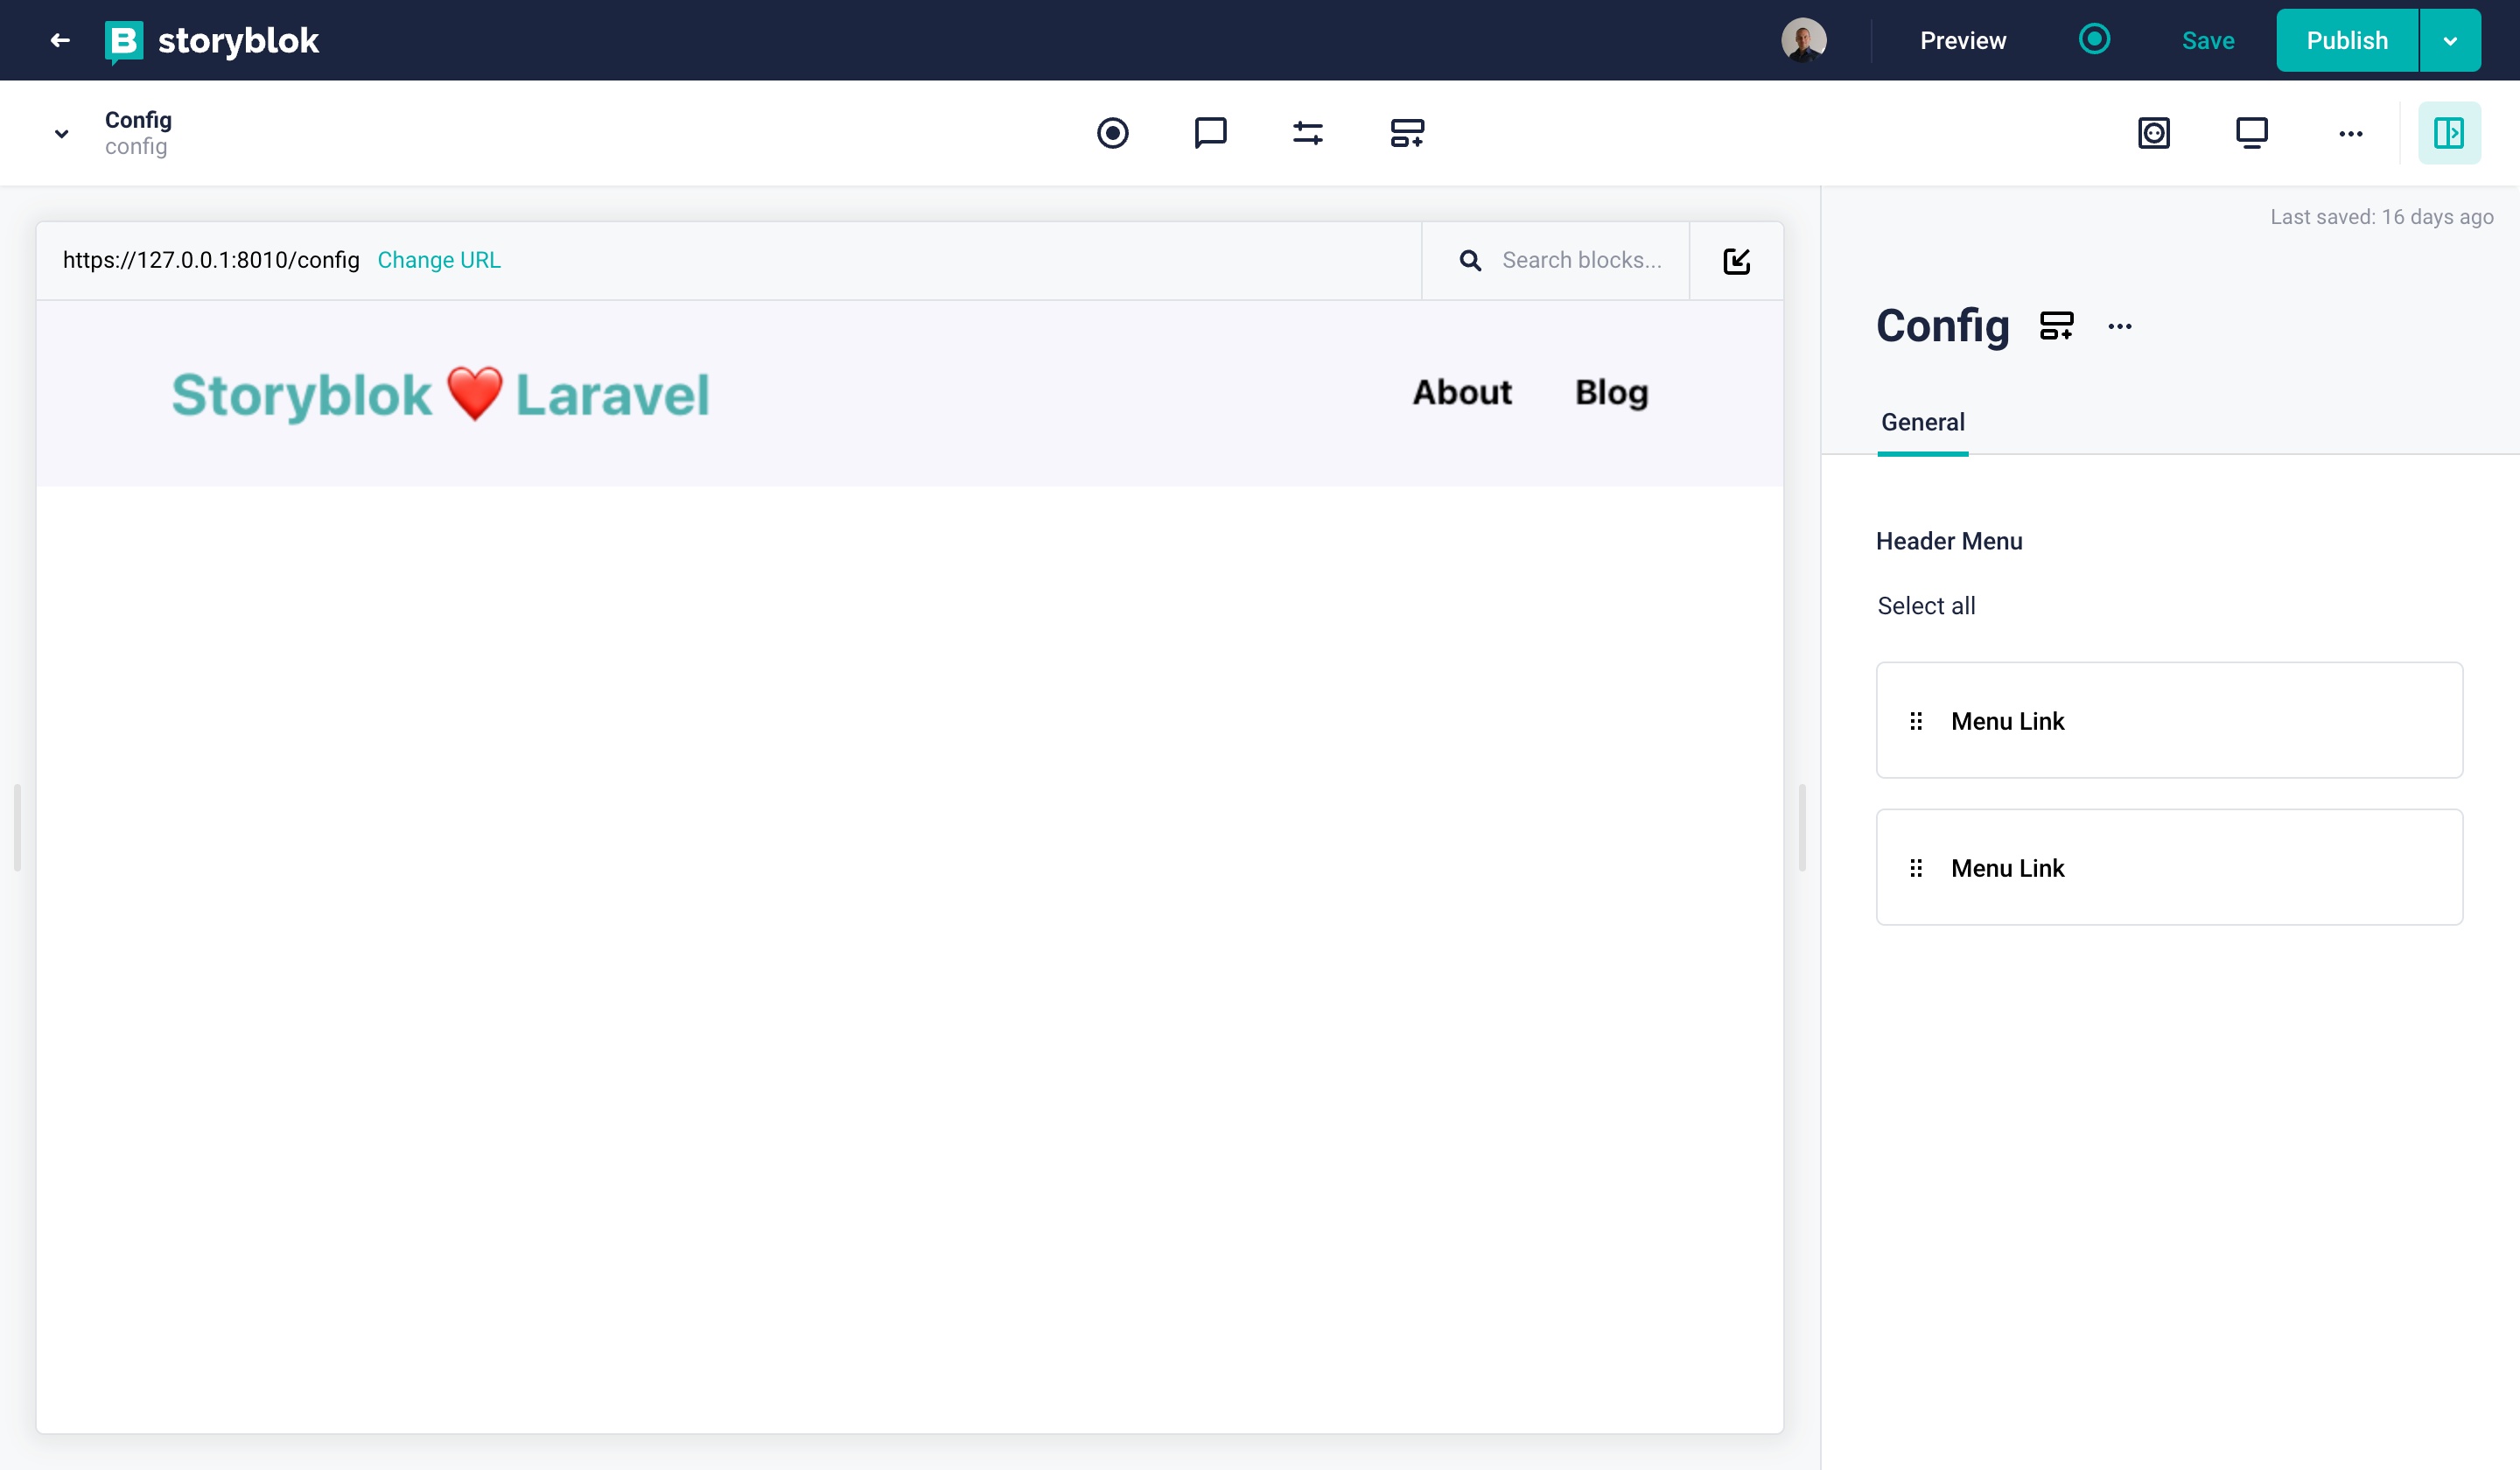
Dynamic menu rendered correctly in Laravel
Rendering the Menu in Laravel
Having taken care of our setup in Storyblok, we can now turn to the code and implement our dynamic menu in the blade template. To accomplish that, we have to refactor a bit of the code we already implemented for the static header, and add the dynamic Header component. In detail we will:
- add a new component class
- add the logic for retrieving the new config Story (via the Storyblok PHP SDK) in a new component class
- refactor the component blade template and make it dynamic
The Header component class
We are going to create a component class for implementing the logic for retrieving the config Story from Storyblok. Create a new file app/View/Components/Header.php. We will implement the two methods: __construct() and render():
<?php

namespace App\View\Components;

use Illuminate\Support\Arr;
use Illuminate\View\Component;

class Header extends Component
{
    public $headerMenu;

    /**
     * Create a new component instance.
     *
     * @return void
     */
    public function __construct()
    {
        $storyblok = new \Storyblok\Client(config('storyblok.api_key'));
        $storyblok->editMode();
        $storyblok->resolveLinks('url');
        // retrieving "config" Story
        $response = $storyblok->getStoryBySlug('config');
        $data = $response->getBody();
        $this->headerMenu = Arr::get($data, 'story.content.header_menu', []);
    }

    /**
     * Get the view / contents that represent the component.
     *
     * @return \Illuminate\View\View|\Closure|string
     */
    public function render()
    {
        return view('components.common.header');
    }
}
In the constructor method we are going to create an instance of Storyblok Client, using the API key from the configuration, setting the editMode (for retrieving the draft version), and setting the resolve links for the URL. For resolving the links we are using: $storyblok->resolveLinks('url');.
If your space was created in the United States, don't forget to set the apiRegion parameter in Storyblok\Client initialization. If you need more examples, you can see the PHP SDK readme documentation for "Initialization for US spaces"
In the constructor we are retrieving the information from a specific Story ('config'): $response = $storyblok->getStoryBySlug('config');.
In the render() method we are going to load the blade in resources/views/components/common/header.blade.php via the view() helper: return view('components.common.header');
The Header blade template
In the file resources/views/components/common/header.blade.php already created in the Part 2 of the Laravel Ultimate Tutorial series, we can load dynamically the menu items thanks to the work made in the component class that filled the $headerMenu variable. The $headerMenu variable is an array, where we can find the menu items, and for each menu item, we can access the full_slug property for composing the destination URL and the name for the label of the link.
<header class="w-full h-24 bg-[#f7f6fd]">
<div class="container h-full mx-auto flex items-center justify-between">
<a href="{{url('/')}}" <h1 class="text-[#50b0ae] text-3xl font-bold">Storyblok ❤ Laravel</h1>
</a>
<nav>
<ul class="flex space-x-8 text-lg font-bold">
@foreach ($headerMenu as $menuItem)
<li>
<x-common.menu_item link="{{url(
Arr::get($menuItem, 'link.story.full_slug', '/')
)}}" label="{{Arr::get($menuItem, 'link.story.name', '')}}" />
</li>
@endforeach
</ul>
</nav>
</div>
</header>Now, we can refactor the way we are calling the Header component from the blade templates. Let's remove the header in the layout file:
<body class="antialiased">
  <x-common.header></x-common.header>
  {{ $slot }}
  <script type="text/javascript" src="//app.storyblok.com/f/storyblok-v2-latest.js"></script>
  <script type="text/javascript">
Afterwards, we can include the new header here:
<x-header></x-header>
{!! Arr::get($blok, '_editable', '') !!}
<div class="font-[Roboto] px-4">
    @foreach ($blok['body'] as $blok)
        <x-dynamic-component :component="$blok['component']" :blok="$blok" class="mt-4" />
    @endforeach
</div>
And finally create the resources/views/components/config.blade.php file, for allowing the correct rendering when the editor user will select the config Story in the visual editor:
<x-header></x-header>When opening the visual editor, you can now see the expected result:
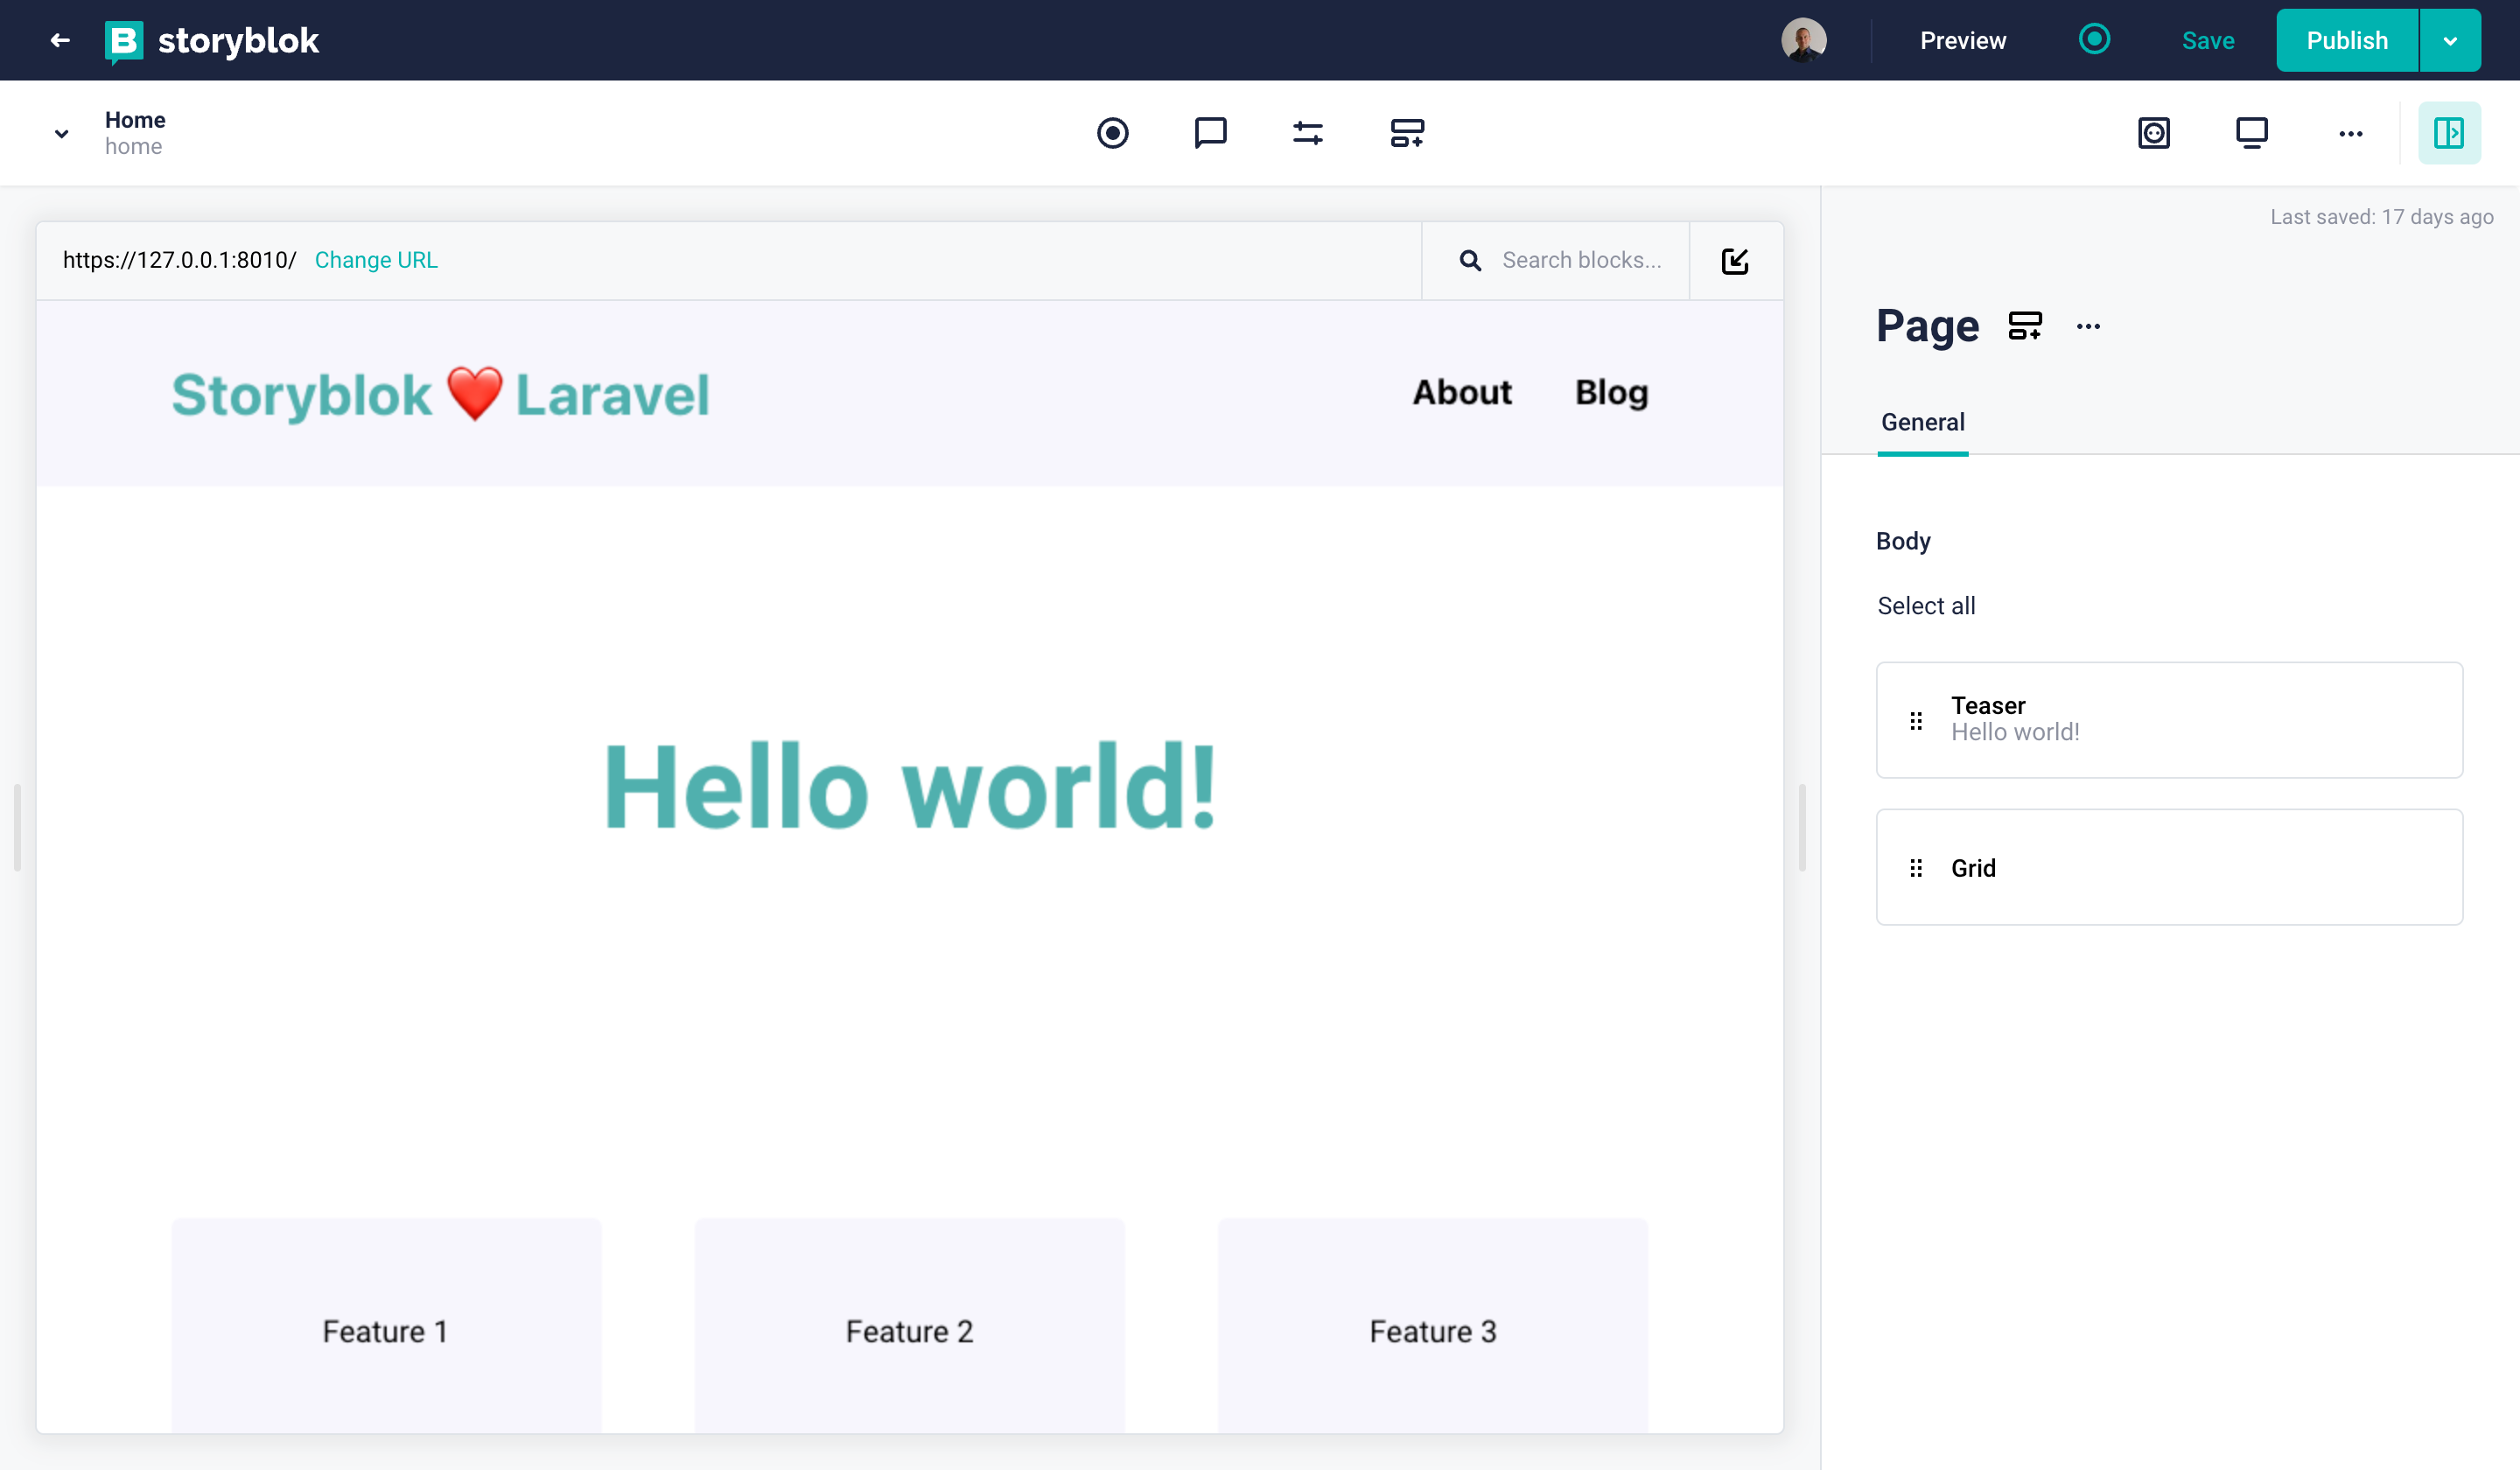
Your Laravel application renders the dynamic menu
Please remember to start your Laravel application locally via php artisan server. Since HTTPS is a requirement for the Visual Editor, you also have to use the following command (as explained in Part 1):
local-ssl-proxy --hostname 127.0.0.1 --source 8010 --target 8000 --cert localhost.pem --key localhost-key.pemIf you missed something, you can start reading and learn Add a headless CMS to Laravel in 5 minutes.
| Resource | Link |
|---|---|
| Storyblok Laravel Ultimate Tutorial | https://www.storyblok.com/tp/storyblok-laravel-ultimate-tutorial |
| Storyblok PHP SDK client | https://github.com/storyblok/php-client |
| Storyblok APIs | https://www.storyblok.com/docs/api |
| Laravel | https://laravel.com/ |
| PHP 8 | https://www.php.net/ |
