Add a headless CMS to Laravel in 5 minutes
Storyblok is the first headless CMS that works for developers & marketers alike.
In this quick walkthrough, we will have a look at how we can use data from the Storyblok API with a Laravel project to create a website. At the end of this article, you will have a Laravel project which renders components filled with data from Storyblok.
This tutorial uses Laravel 10, which is currently a stable release. You can access the source code on our GitHub open source repository
Environment Setup
Requirements
To follow this tutorial make sure to meet these requirements:
- Basic understanding of PHP, Laravel, and Blade components
- PHP 8.1 or PHP 8.2 (opens in a new window)
- Composer (opens in a new window) tool installed
- Homebrew (opens in a new window) tool (if you are using macOS)
- Node and NPM (opens in a new window)
- An account in the Storyblok App
Create a Laravel project
You have more than one way to initialize and set up your Laravel application. You can use Laravel Sail, the Laravel tool to manage Laravel services through Docker, or you can use the Laravel Installer package, or simply via the Composer create-project command:
composer create-project laravel/laravel example-app
cd example-app
The composer create-project command covers also the PHP package installations and the key generation needed by Laravel ( php artisan key:generate). So, once you enter the new directory, you can launch php artisan serve to launch the internal webserver.
Now you’ll see this screen when you open http://127.0.0.1:8000 in your browser:
Welcome screen of your Laravel project
Configuration of the space
Create a new space in the Storyblok app by choosing the Create new space {1} option. Pick a name for it {2}.
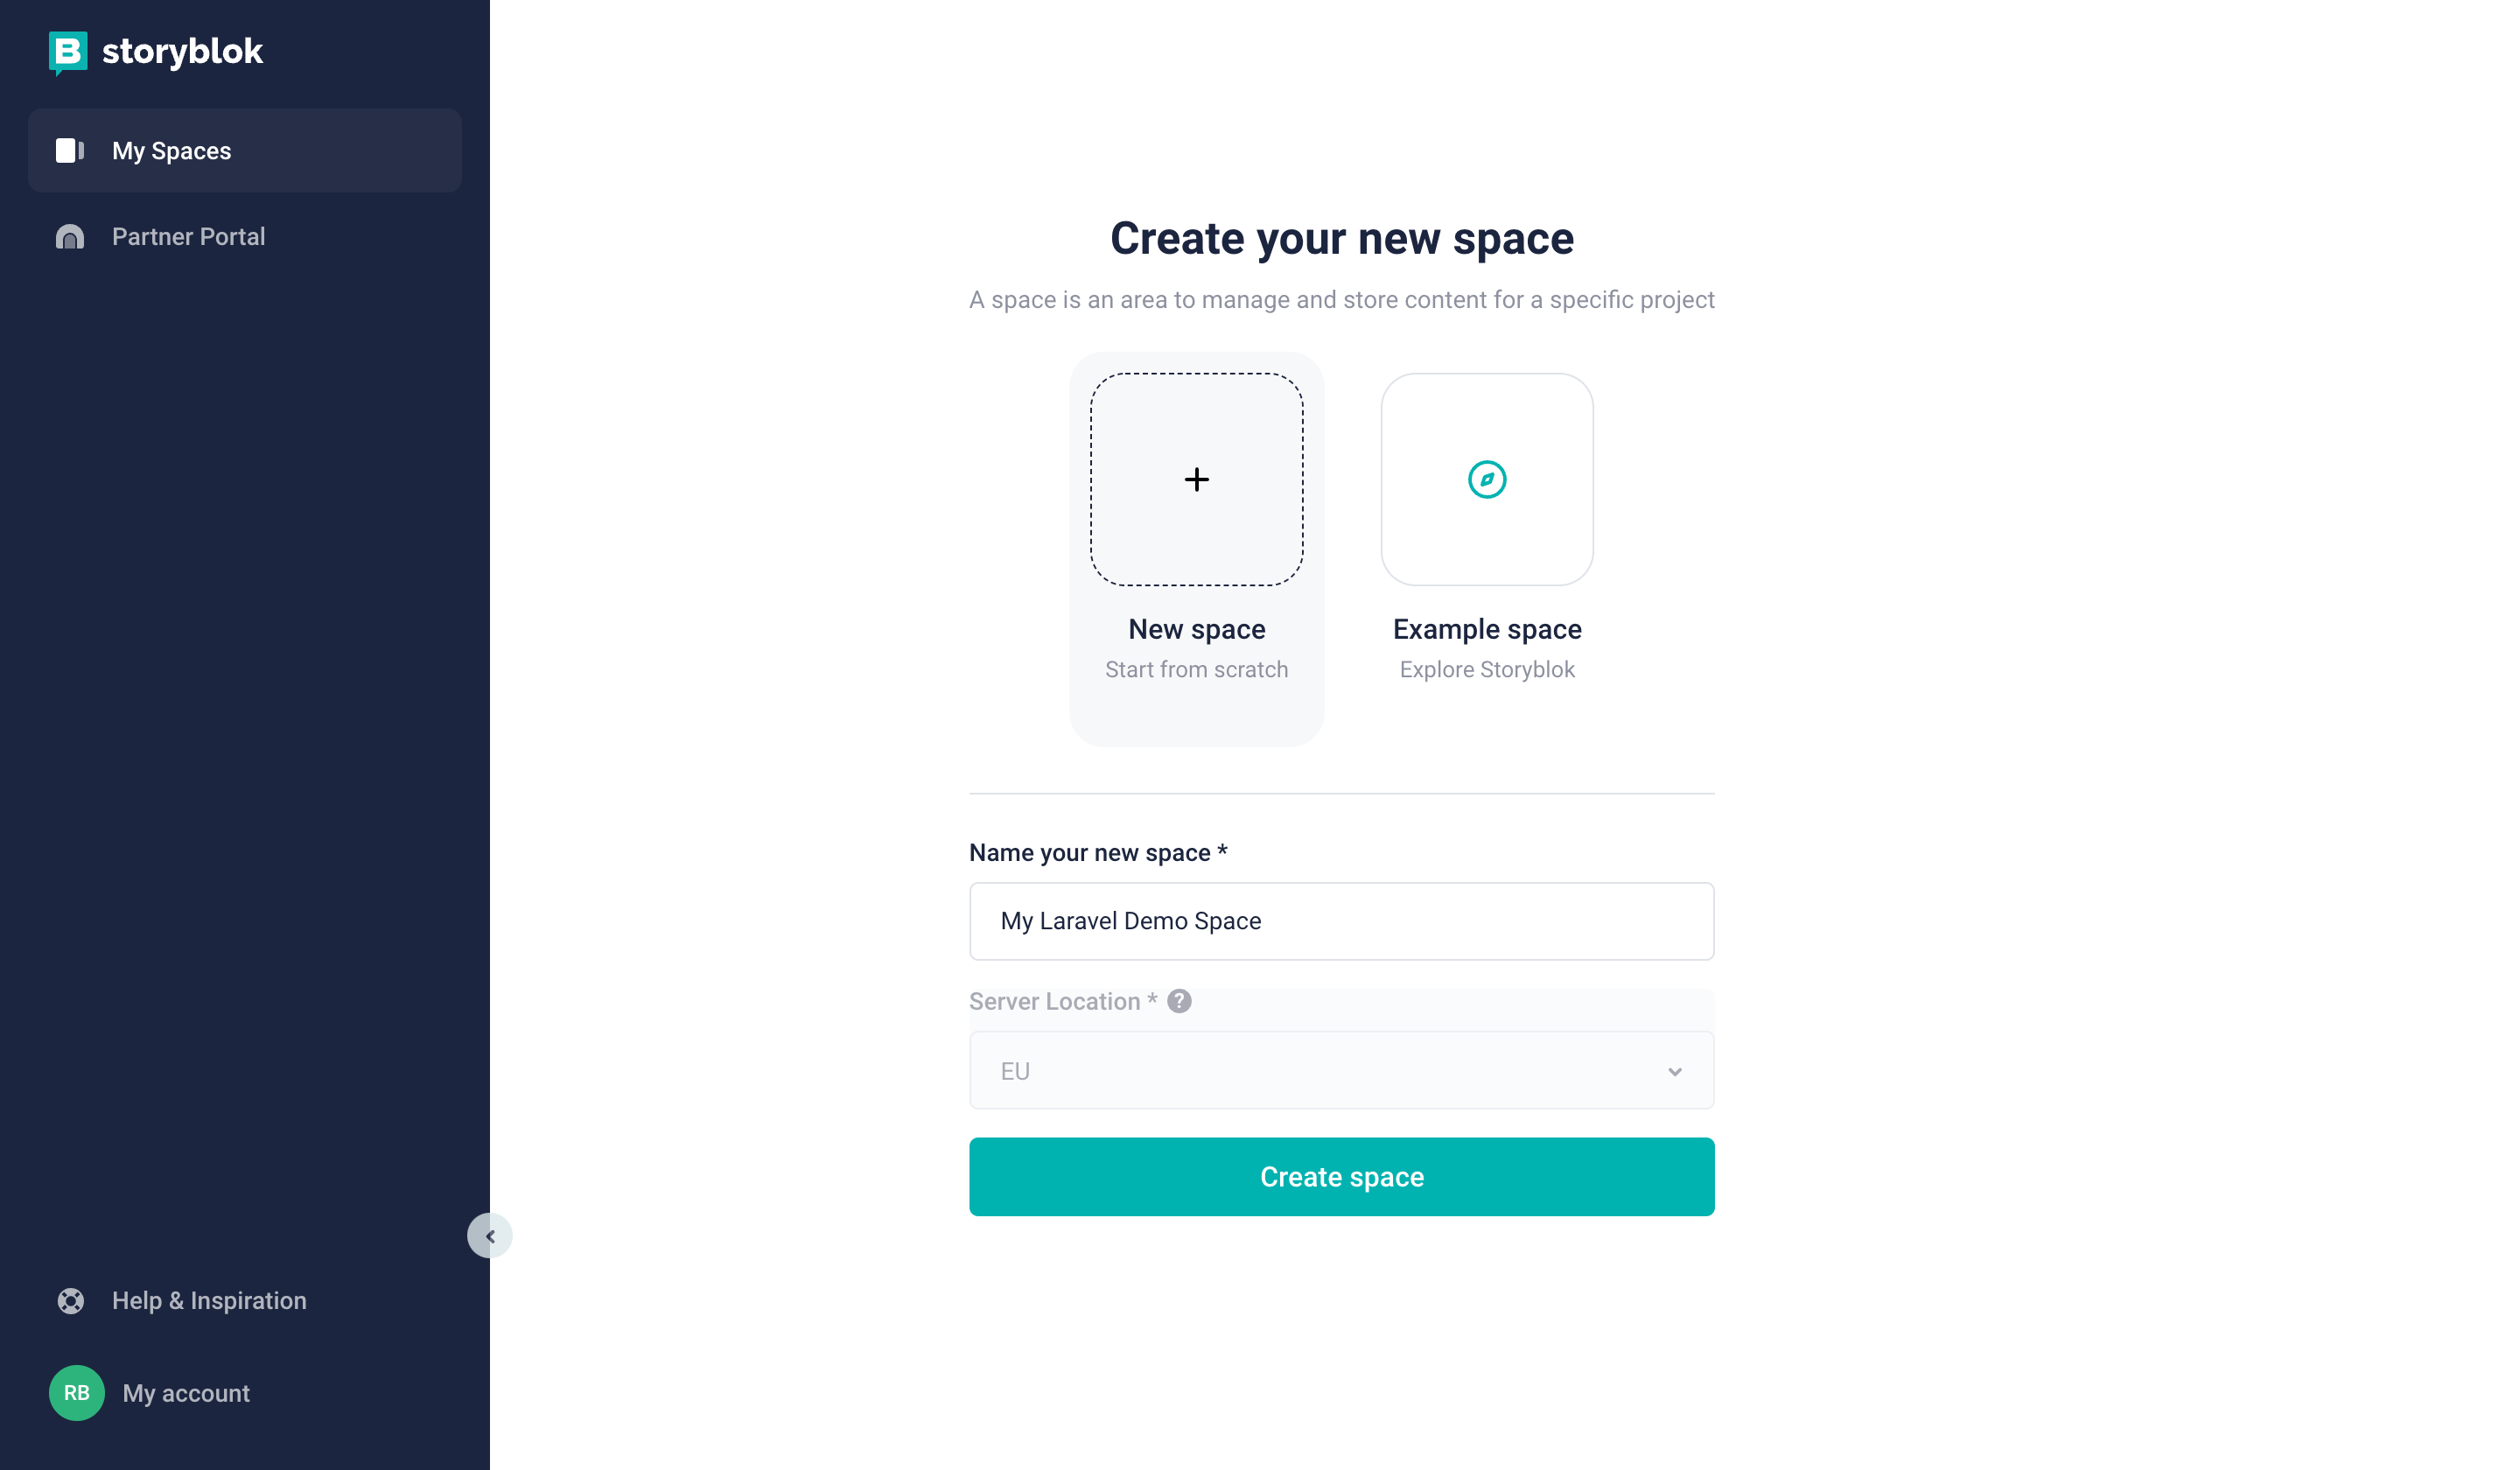
Creating a new space in Storyblok
Shortly afterwards, a Storyblok space with sample content has been created for you. Let’s open the Home story by first clicking on Content {1} and then on Home {2}:
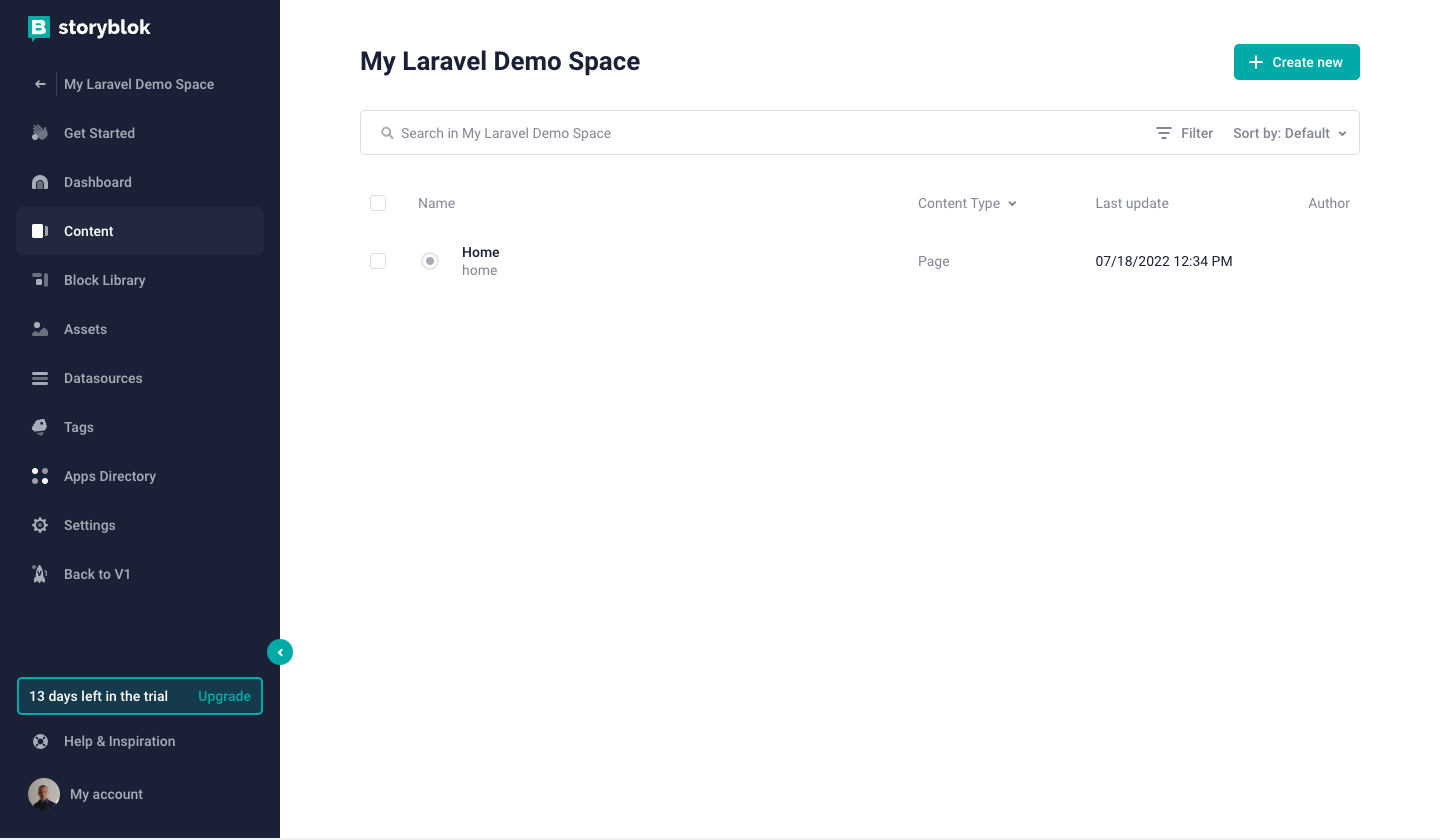
Opening the Home story
The Visual Editor
Now you’ll see the default screen and the Visual Editor:
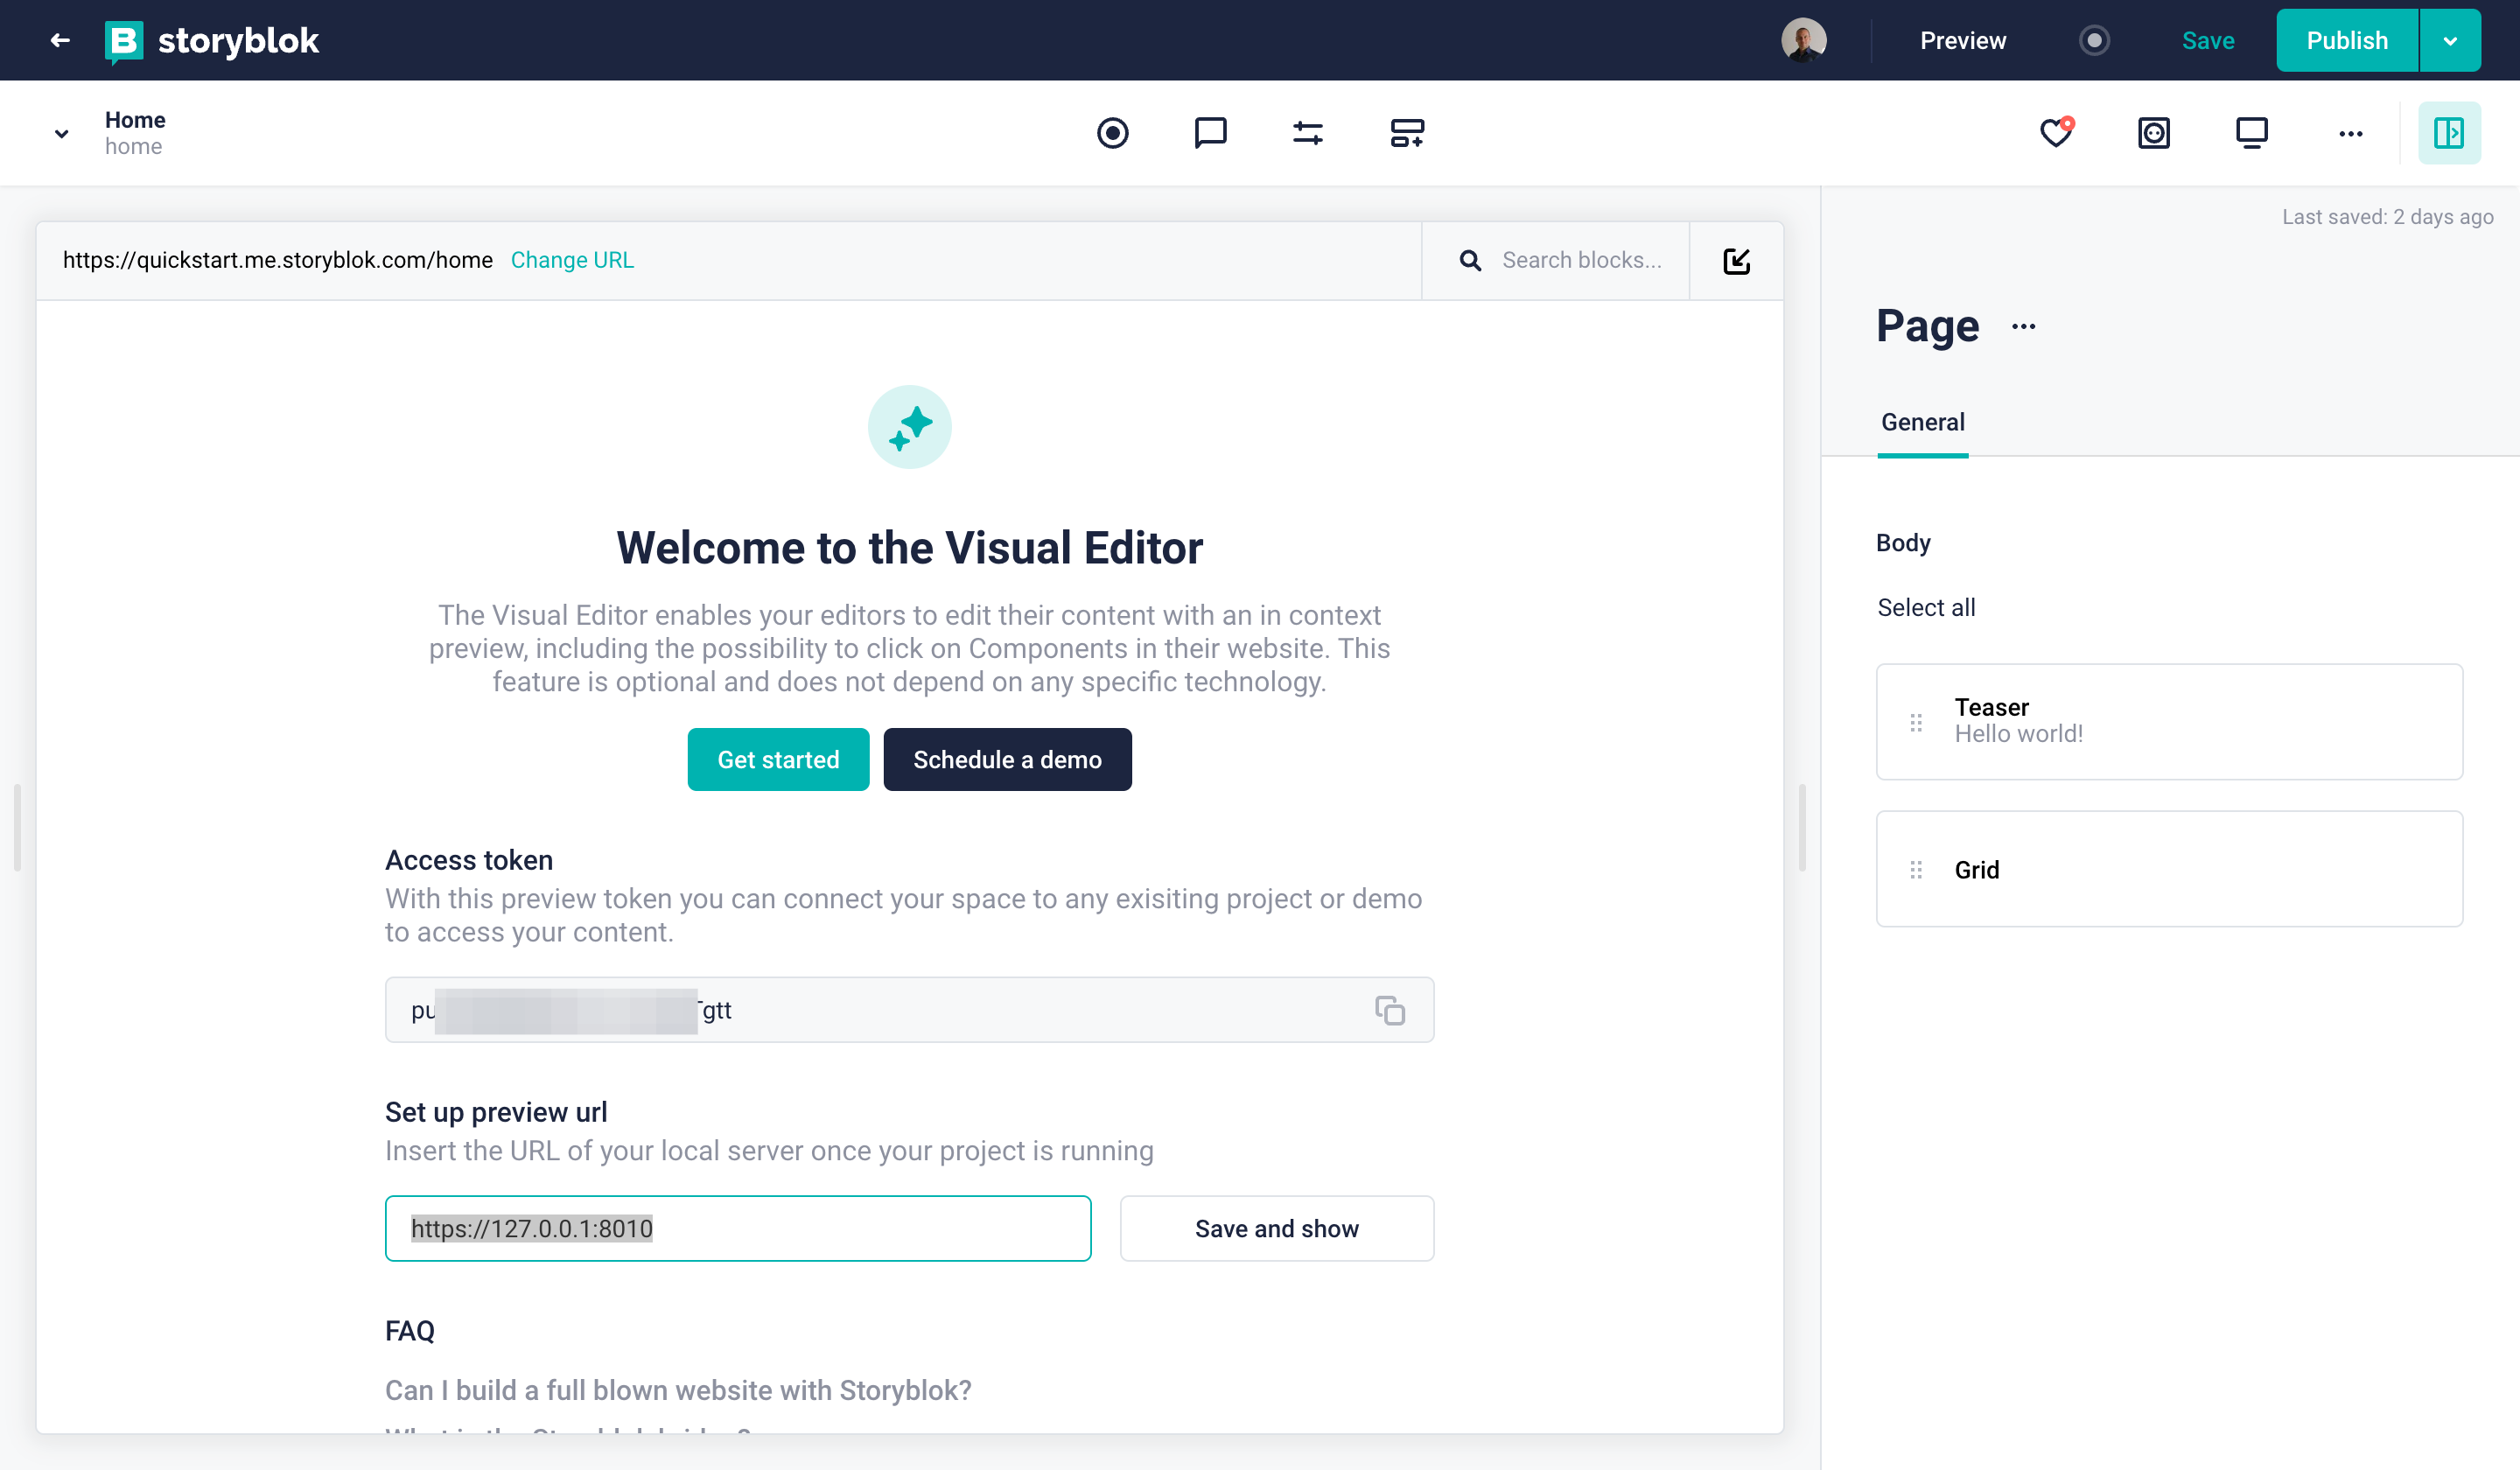
Visual Editor with the default home page
Directly on the default home page, you can retrieve the access token {1} (useful later when we will set the environment variables in Laravel), and you can set the preview URL {2}, where the Laravel Web Application is exposed locally (by default with php artisan serve the address is http://127.0.0.1:8000). If you change the preview URL, click on Save and Show button {3}. Probably you will see an error page, just because we still have to configure HTTPS.
Because the Visual Editor is exposed via HTTPS protocol, also your Laravel Application has to be available via HTTPS. The internal Web server (artisan serve) doesn't support the HTTPS, but we have more than one way to add HTTPS: via Valet (with Valet secure), via Laravel Sail (the Docker way), or using an HTTPS Proxy.
We are going to use the third method, adding an HTTPS Proxy. For that fill the Preview URL with: https://127.0.0.1:8010
At the end:
- the internal web server will expose the Web Application via HTTP on port 8000
- the HTTPS proxy will create a tunnel between the HTTP port 8000 and the exposed HTTPS port 8010.
- The browser will access via HTTPS to port 8010.
You can change the preview URL, and retrieve the access token later in the Settings section.
To change later the preview URL (or add a new one) go to Settings > Visual Editor {1} and set the Location field {2}:

Changing the default environment URL
Storyblok v2 requires that your website is served via HTTPS. You can follow the instructions in our FAQ entries: Setting up Dev Server with HTTPS Proxy On macOS or Setting up Dev Server with HTTPS Proxy On Windows.
Using HTTPS with Laravel local web server
If you followed the steps listed in Setting up Dev Server with HTTPS Proxy, you have to make some fine tuning to the options for command local-ssl-proxy setting the hostname, the target port as 8000 ( the default one for php artisan serve):
mkcert localhost
local-ssl-proxy --hostname 127.0.0.1 --source 8010 --target 8000 --cert localhost.pem --key localhost-key.pem
Now, if you go back to the Home story, you won’t see your Laravel app in there just yet. Just one more quick step to take: Open the Entry configuration {1} and set the Real path to / {2}. After having saved, you should now be seeing your Laravel app in the Visual Editor:
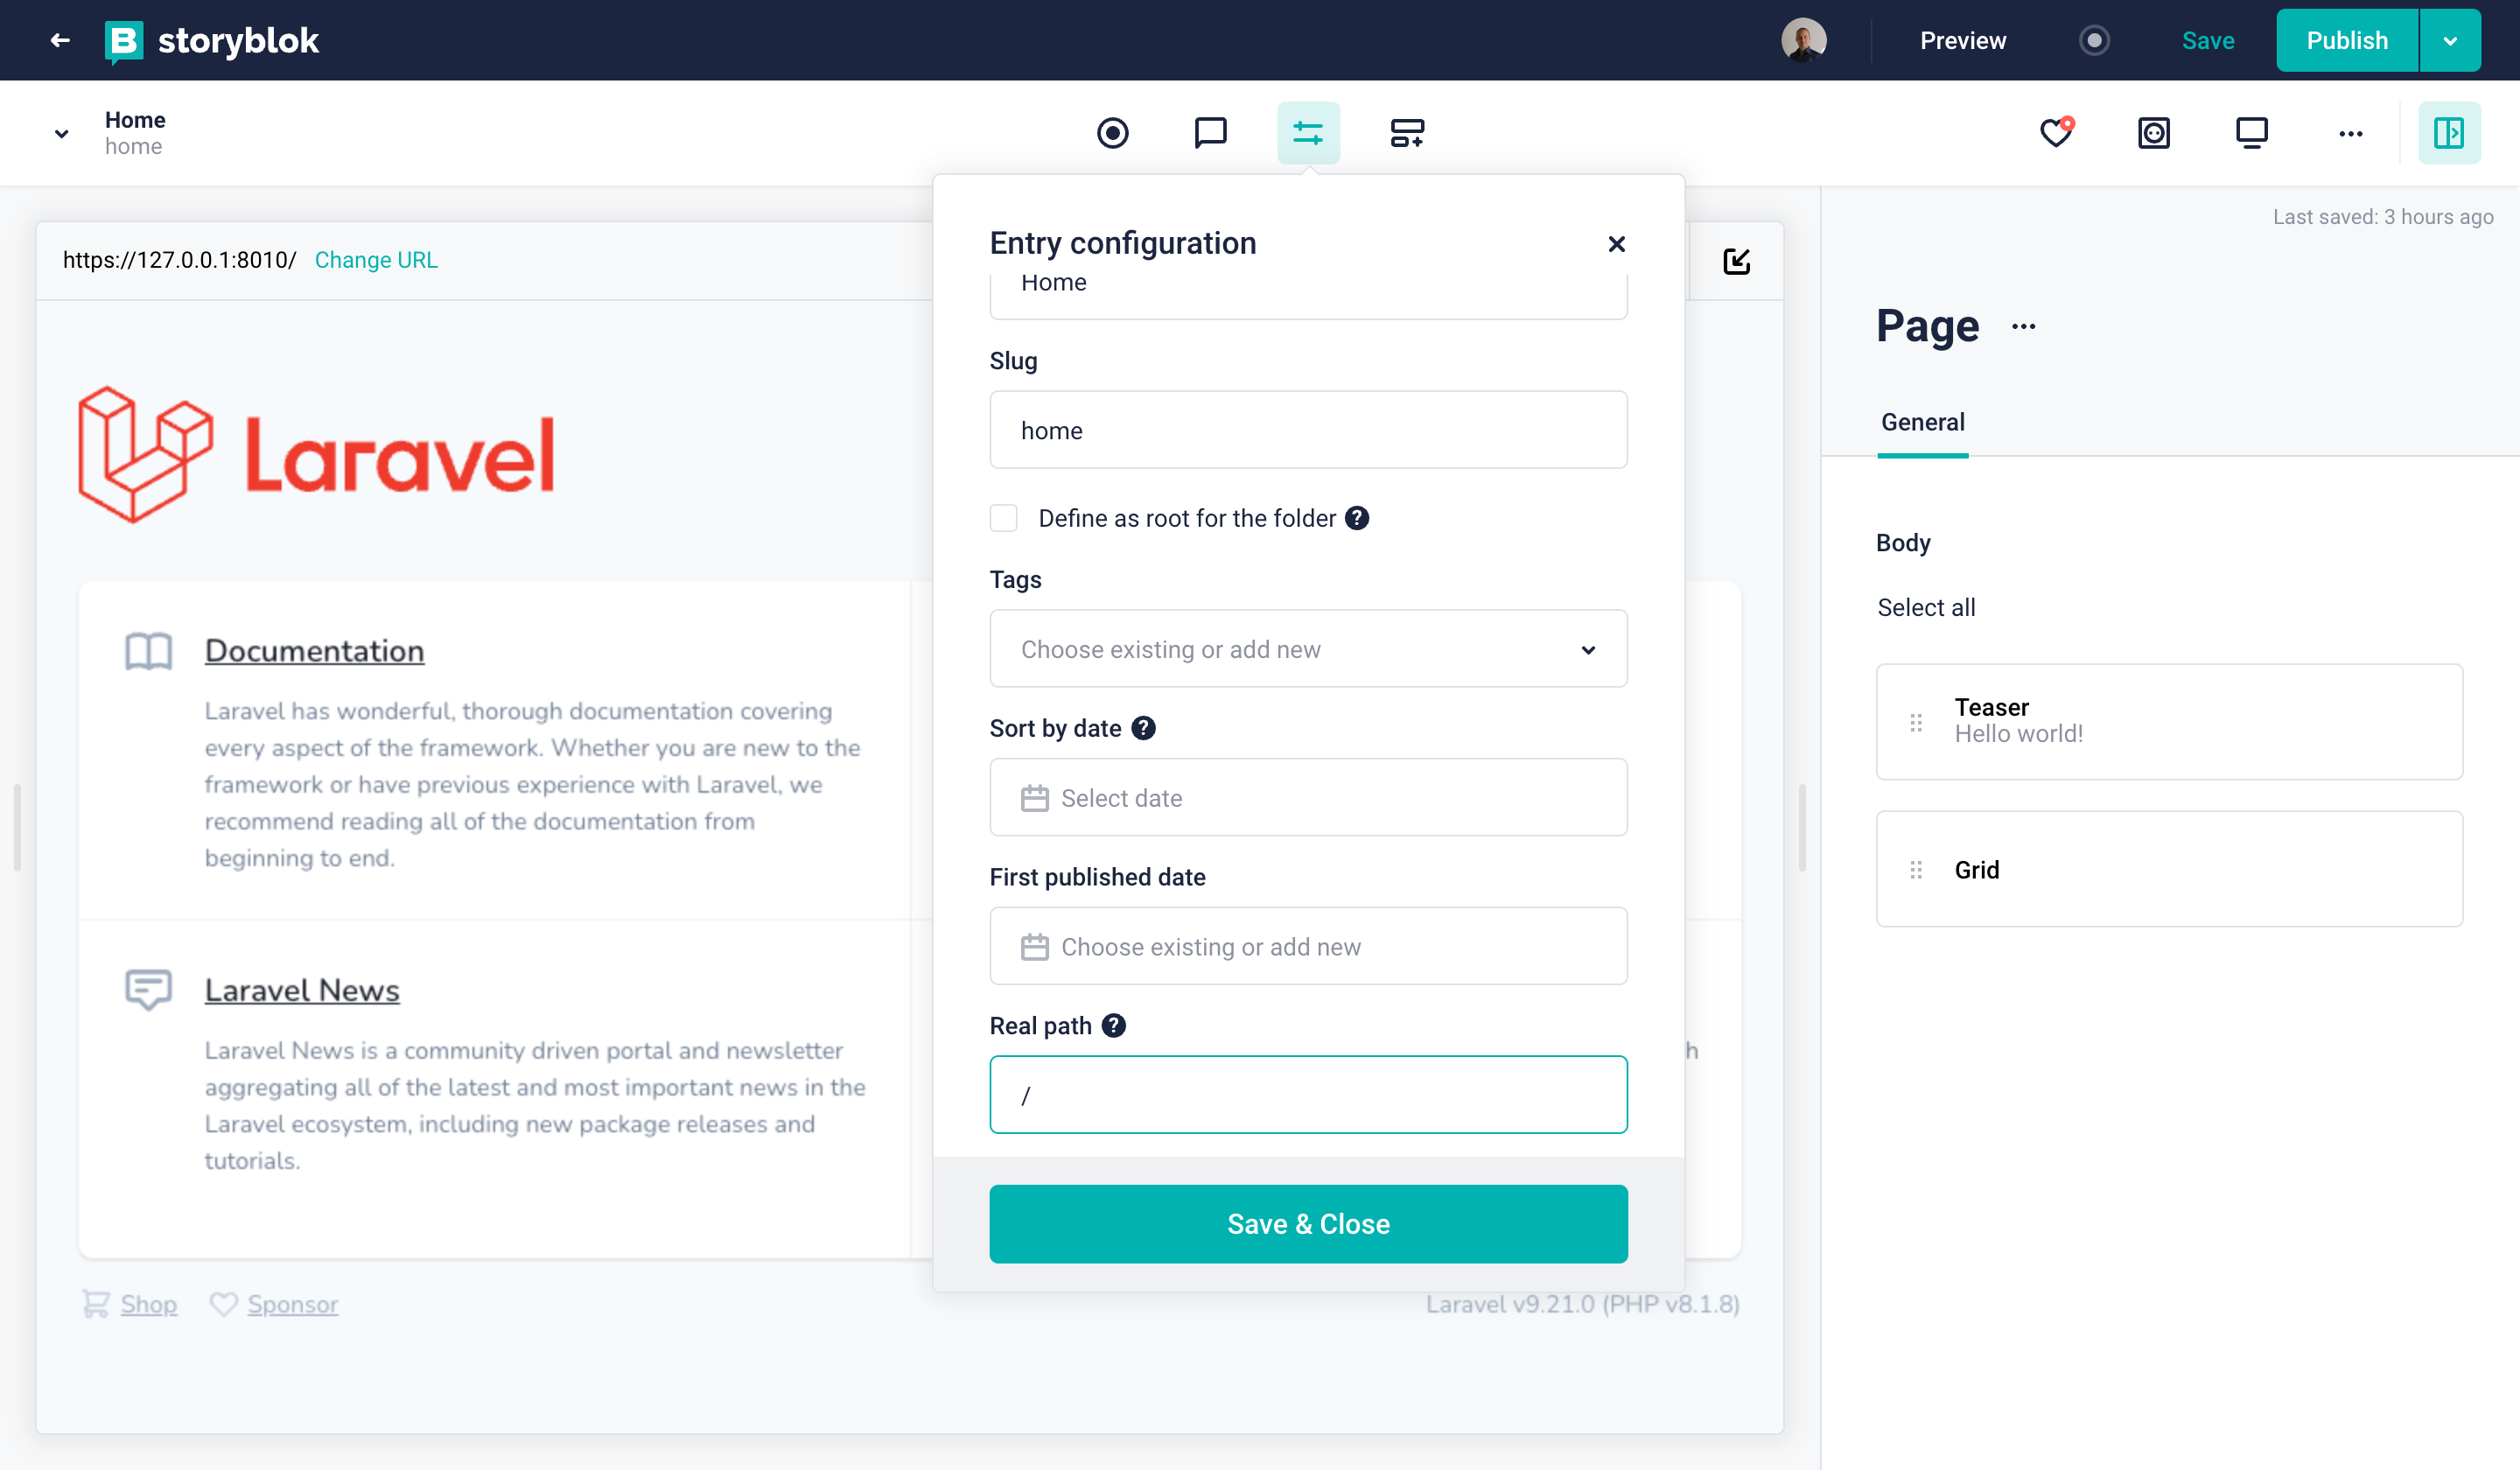
Overriding the real path of the Home story
Connecting Laravel to Storyblok
First of all, let’s install our official SDK for PHP:
composer require storyblok/php-clientThis SDK allows you to interact with the Storyblok API. Let’s start configuring it.
If you didn't copy the API token from the initial default home page, you can grab it by going to Settings > Access Tokens {1} and copying the Preview Token {2}.
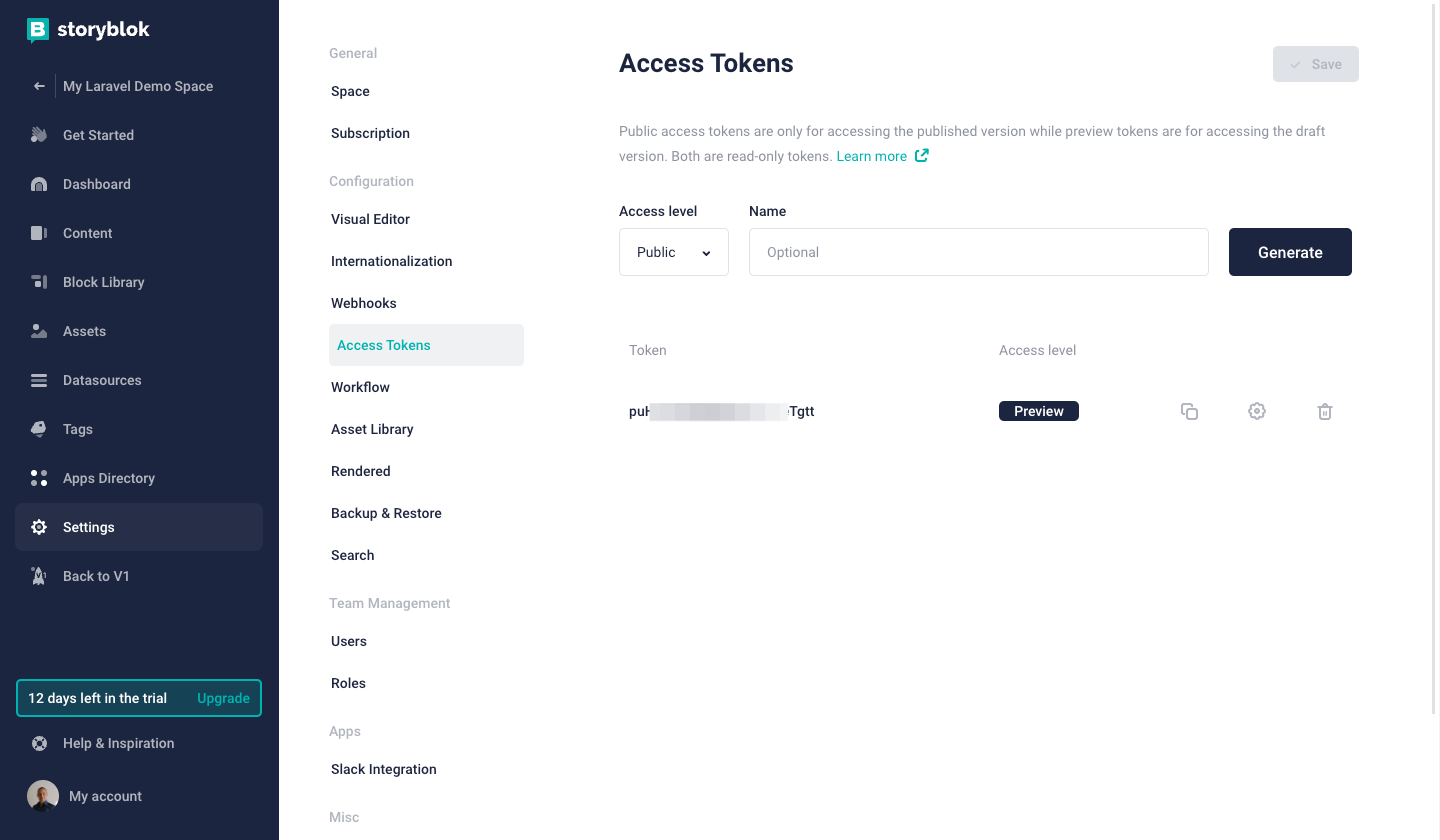
Where to get the preview access token of your Storyblok space
Now we can use this token by adding the STORYBLOK_API_KEY and STORYBLOK_DRAFT to the .env file:
STORYBLOK_API_KEY=<your-api-token>
STORYBLOK_DRAFT=false
Once you define the parameter in .env file you have to allow Laravel to load them correctly. Create a storyblok.php file in the config directory. And load them via env() function. Your parameter will be available to Laravel code with config('storyblok.api_key') and config('storyblok.draft'):
<?php

return [
    'api_key' => env('STORYBLOK_API_KEY'),
    'draft' => env('STORYBLOK_DRAFT', false),
];
Rendering Dynamic Components in the Laravel App
The core idea of using Storyblok for this particular use case is the following:
- Content managers (even if it’s only yourself) can create pages (or stories) composed of different components (or bloks)
- Developers receive the page in the JSON format by using the Storyblok API and can render components accordingly (this is what we want to accomplish in our Laravel app)
When you create a new space from scratch, Storyblok automatically creates four default components for you:
- page (content type)
- grid (nestable component)
- feature (nestable component)
- teaser (nestable component)
You can find find all of these in the Components section of your space.
Understand the difference between the nestable components and content type in our Structures of Content tutorial.
Creating the Laravel Blade Components
Let’s create the counterparts of the four components discussed above in our Laravel app. To do that, generate the following files in a resources/views/components folder at the root of your project:
{!! Arr::get($blok, '_editable', '') !!}
<div class="font-[Roboto] px-4">
    @foreach ($blok['body'] as $blok)
        <x-dynamic-component :component="$blok['component']" :blok="$blok" class="mt-4" />
    @endforeach
</div>{!! Arr::get($blok, '_editable', '') !!}
<div class="container mx-auto grid grid-cols-3 gap-12 place-items-center py-16">
@foreach ($blok['columns'] as $blok)
<x-dynamic-component :component="$blok['component']" :blok="$blok" />
@endforeach
</div>{!! Arr::get($blok, '_editable', '') !!}
<div class="w-full p-12 bg-[#f7f6fd] rounded-[5px] text-center">
{{ $blok["name"] }}
</div>{!! Arr::get($blok, '_editable', '') !!}
<div class="py-32 text-6xl text-[#50b0ae] font-bold text-center">
{{ $blok["headline"] }}
</div>You may be wondering why we added those components to a components subfolder. By doing that, they’re found and loaded automatically by the Laravel x-dynamic-component component. No need to register your components – it doesn’t get any easier!
Optional: Use TailwindCSS to style your components
You may have noticed that we’ve been using Tailwind classes in our components. In order to make these work, let’s quickly add Tailwind to our Laravel project by running:
npm install -D tailwindcss postcss autoprefixer
npx tailwindcss init -p
Finally, we’ll have to edit the following two files:
/** @type {import('tailwindcss').Config} */
module.exports = {
  content: [
    "./resources/**/*.blade.php",
    "./resources/**/*.js",
    "./resources/**/*.vue",
  ],
  theme: {
    extend: {},
  },
  plugins: [],
}@tailwind base;
@tailwind components;
@tailwind utilities;Now you can build your CSS executing npm run build.
And that’s it! Let’s move on.
Once installed and configured the npm packages, you can build the assets via npm run build command. The command will generate all the assets and the manifest file.
Load content using the API
Now that our components are ready, we can fetch the Home story data. You can view the JSON structure of any story by clicking the Draft JSON {1} button:
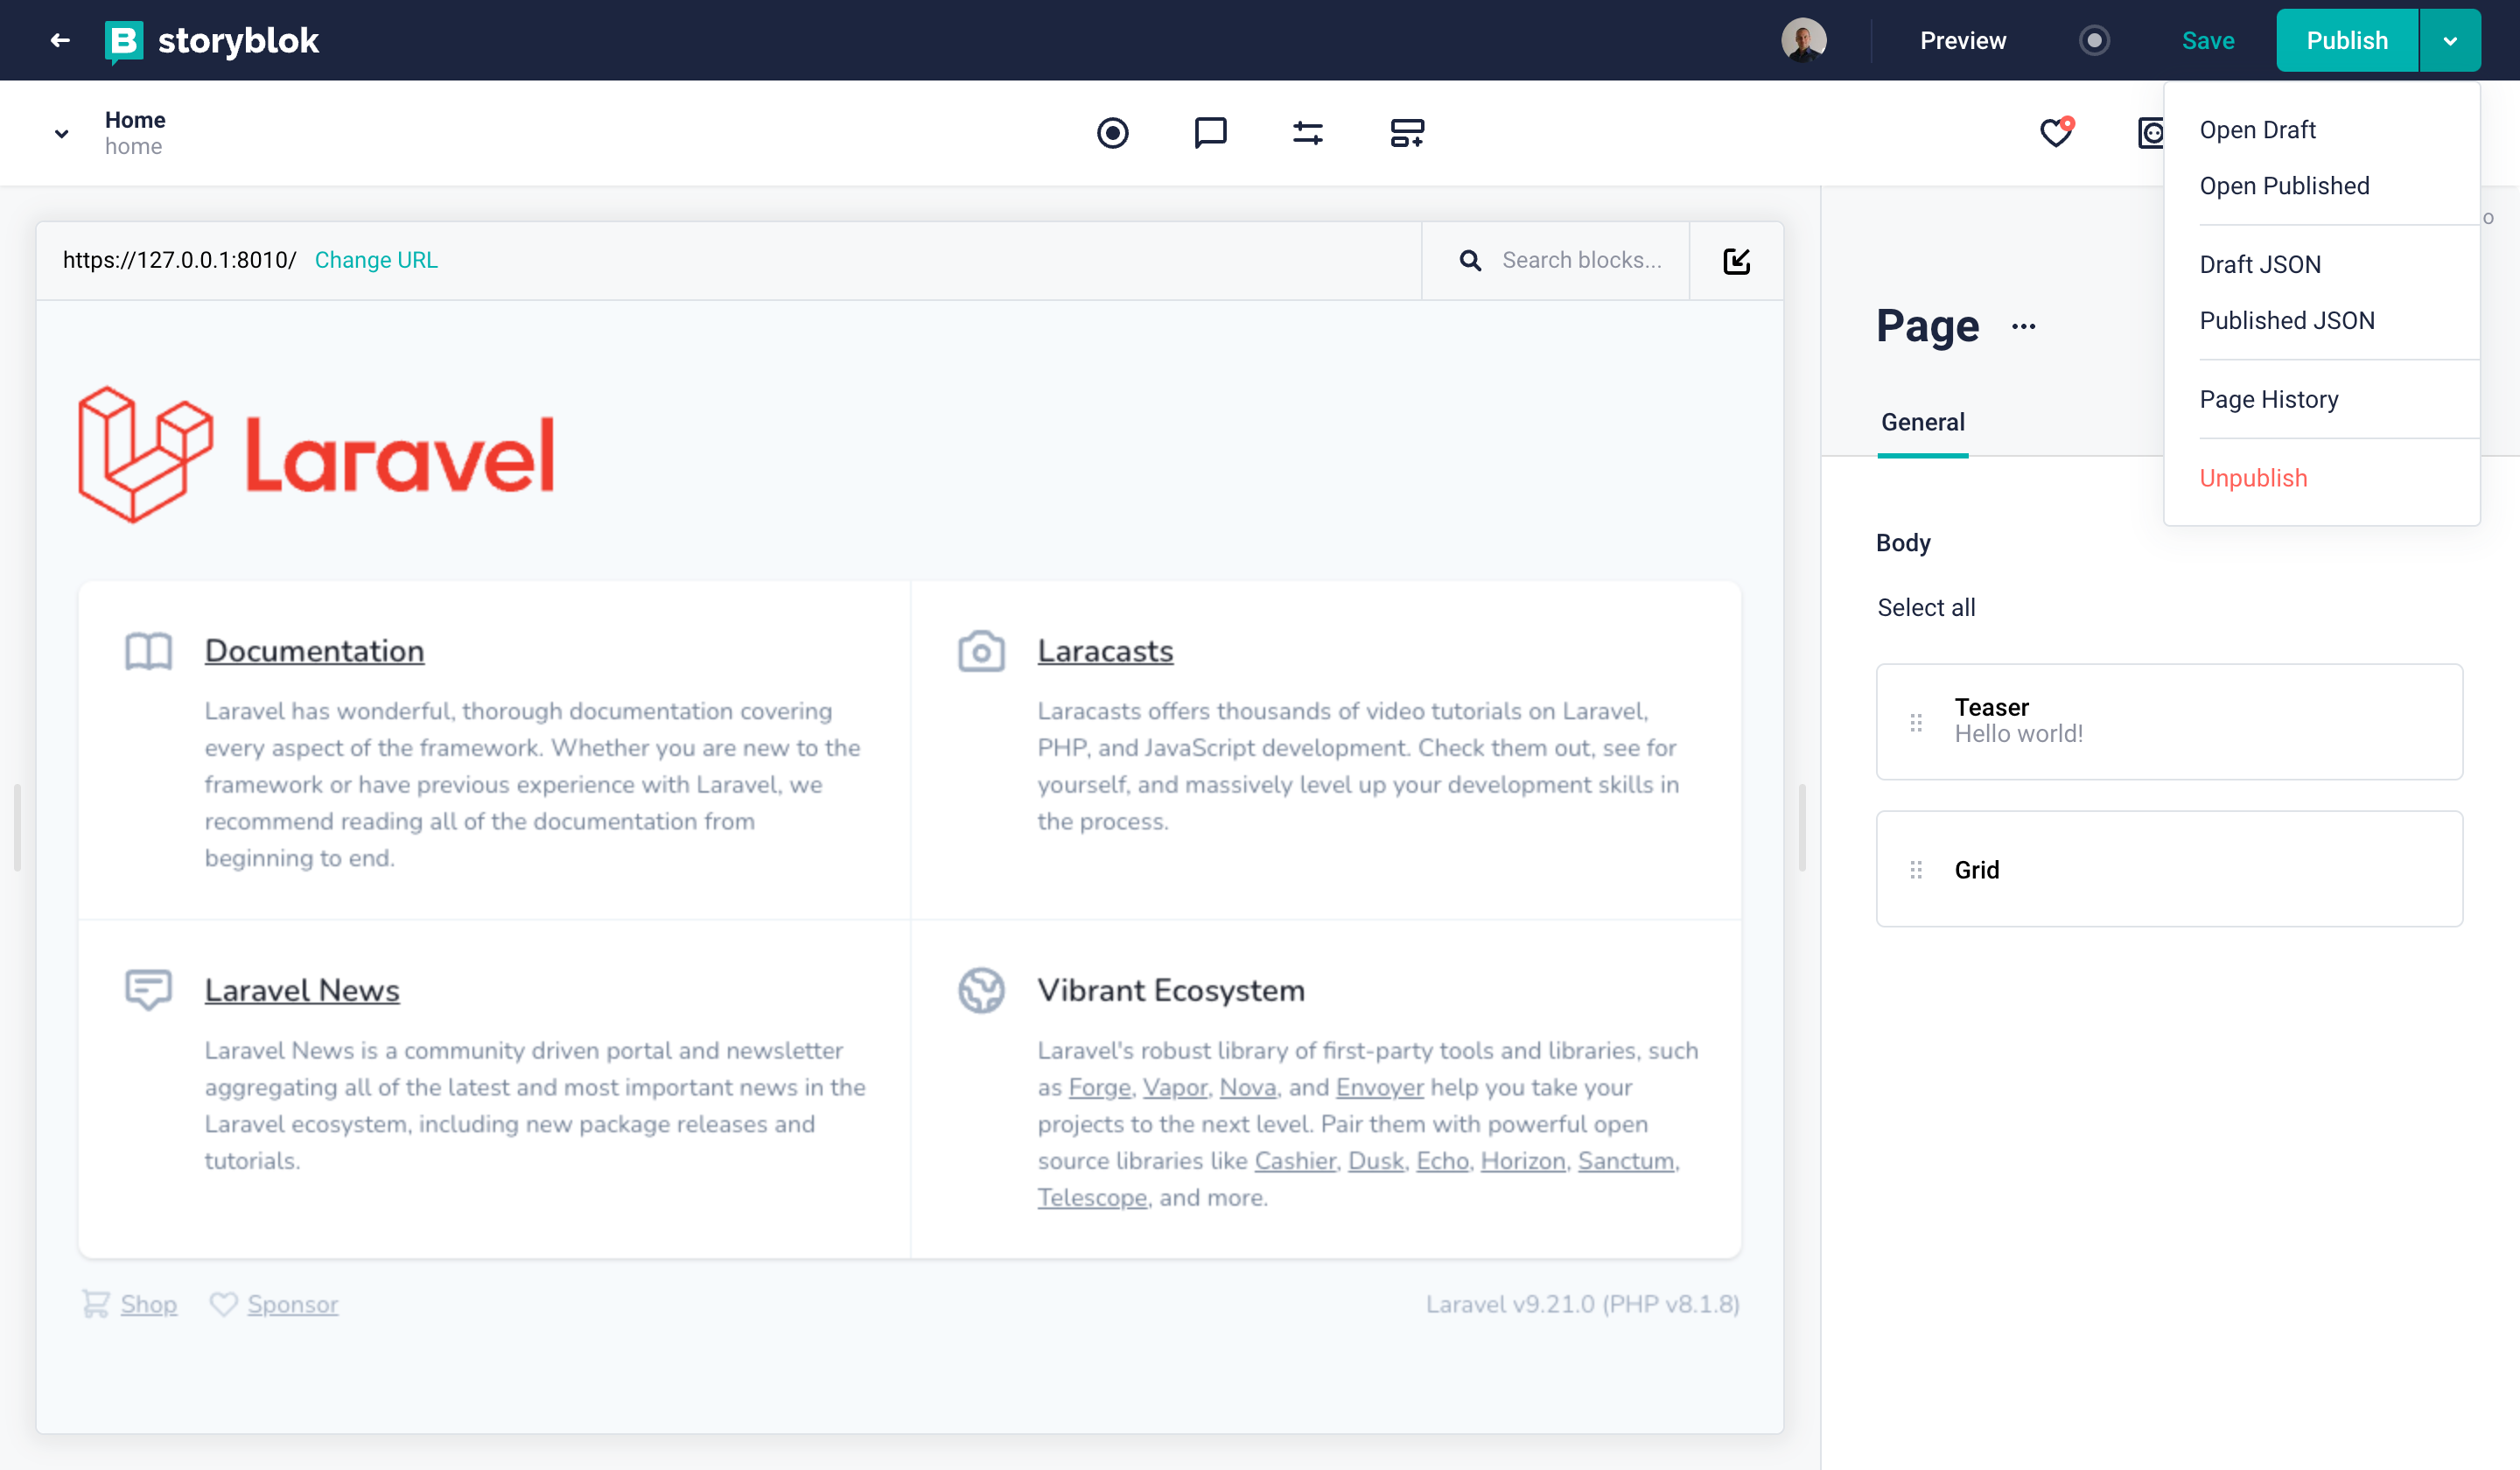
Getting the Draft JSON from the Visual Editor
All we have to do is to create the file resources/views/index.blade.php with the following code:
<!DOCTYPE html>
<html lang="{{ str_replace('_', '-', app()->getLocale()) }}">

<head>
    <meta charset="utf-8">
    <meta name="viewport" content="width=device-width, initial-scale=1">
    <title>{{ $story->name }}</title>
    @vite('resources/css/app.css')
</head>

<body class="antialiased">
    <x-dynamic-component :component="$story->content['component']" :blok="$story->content" class="mt-4" />
</body>

</html>
At this point, we have a couple of things to do: the first one is to force Vitejs configuration and the Laravel assets helpers to provide via HTTPS all the assets included in the HTML page (because in our local environment we are using an HTTPS proxy that communicates with the builtin web server via HTTP), and the second one is to set the route in routes/web.php file for loading the right view index.blade.php created just now.
HTTPS configuration fine tuning
To adjust the Vitejs configuration add these lines
    server: {
        https: true,
        host: 'localhost',
    },
in the vite.config.js fil. So the whole file will look like:
import { defineConfig } from 'vite';
import laravel from 'laravel-vite-plugin';

export default defineConfig({
    plugins: [
        laravel({
            input: [
                'resources/css/app.css',
                'resources/js/app.js',
            ],
            refresh: true,
        }),
    ],
    server: {
        https: true,
        host: 'localhost',
    },
});
The last thing for fixing the behavior of our HTTPS proxy (not needed in a scenario where the Webserver is able to provide directly the HTTPS traffic), is to add this line:
\URL::forceScheme('https');in the app/Providers/AppServiceProvider.php file, in the register() method.
Declaring the catch-all route
In the routes/web.php file we have to declare a catch-all route and be sure that the index.blade.php is loaded with the data that comes from Storyblok API:
Route::get('/{slug?}', function ($slug = 'home') {
    $storyblok = new \Storyblok\Client(config('storyblok.api_key'));
    $storyblok->editMode(); // always enable draft mode
    $data = $storyblok->getStoryBySlug($slug)->getBody();

    return view('index', ['story' => (object) $data['story']]);
});
If you are using a space created in US region, you should set the region (apiRegion parameter) in the Storyblok Client initialization, using the PHP named arguments:
    $storyblok = new \Storyblok\Client(
        apiKey: config('storyblok.api_key'),
        apiRegion: 'us'
    );
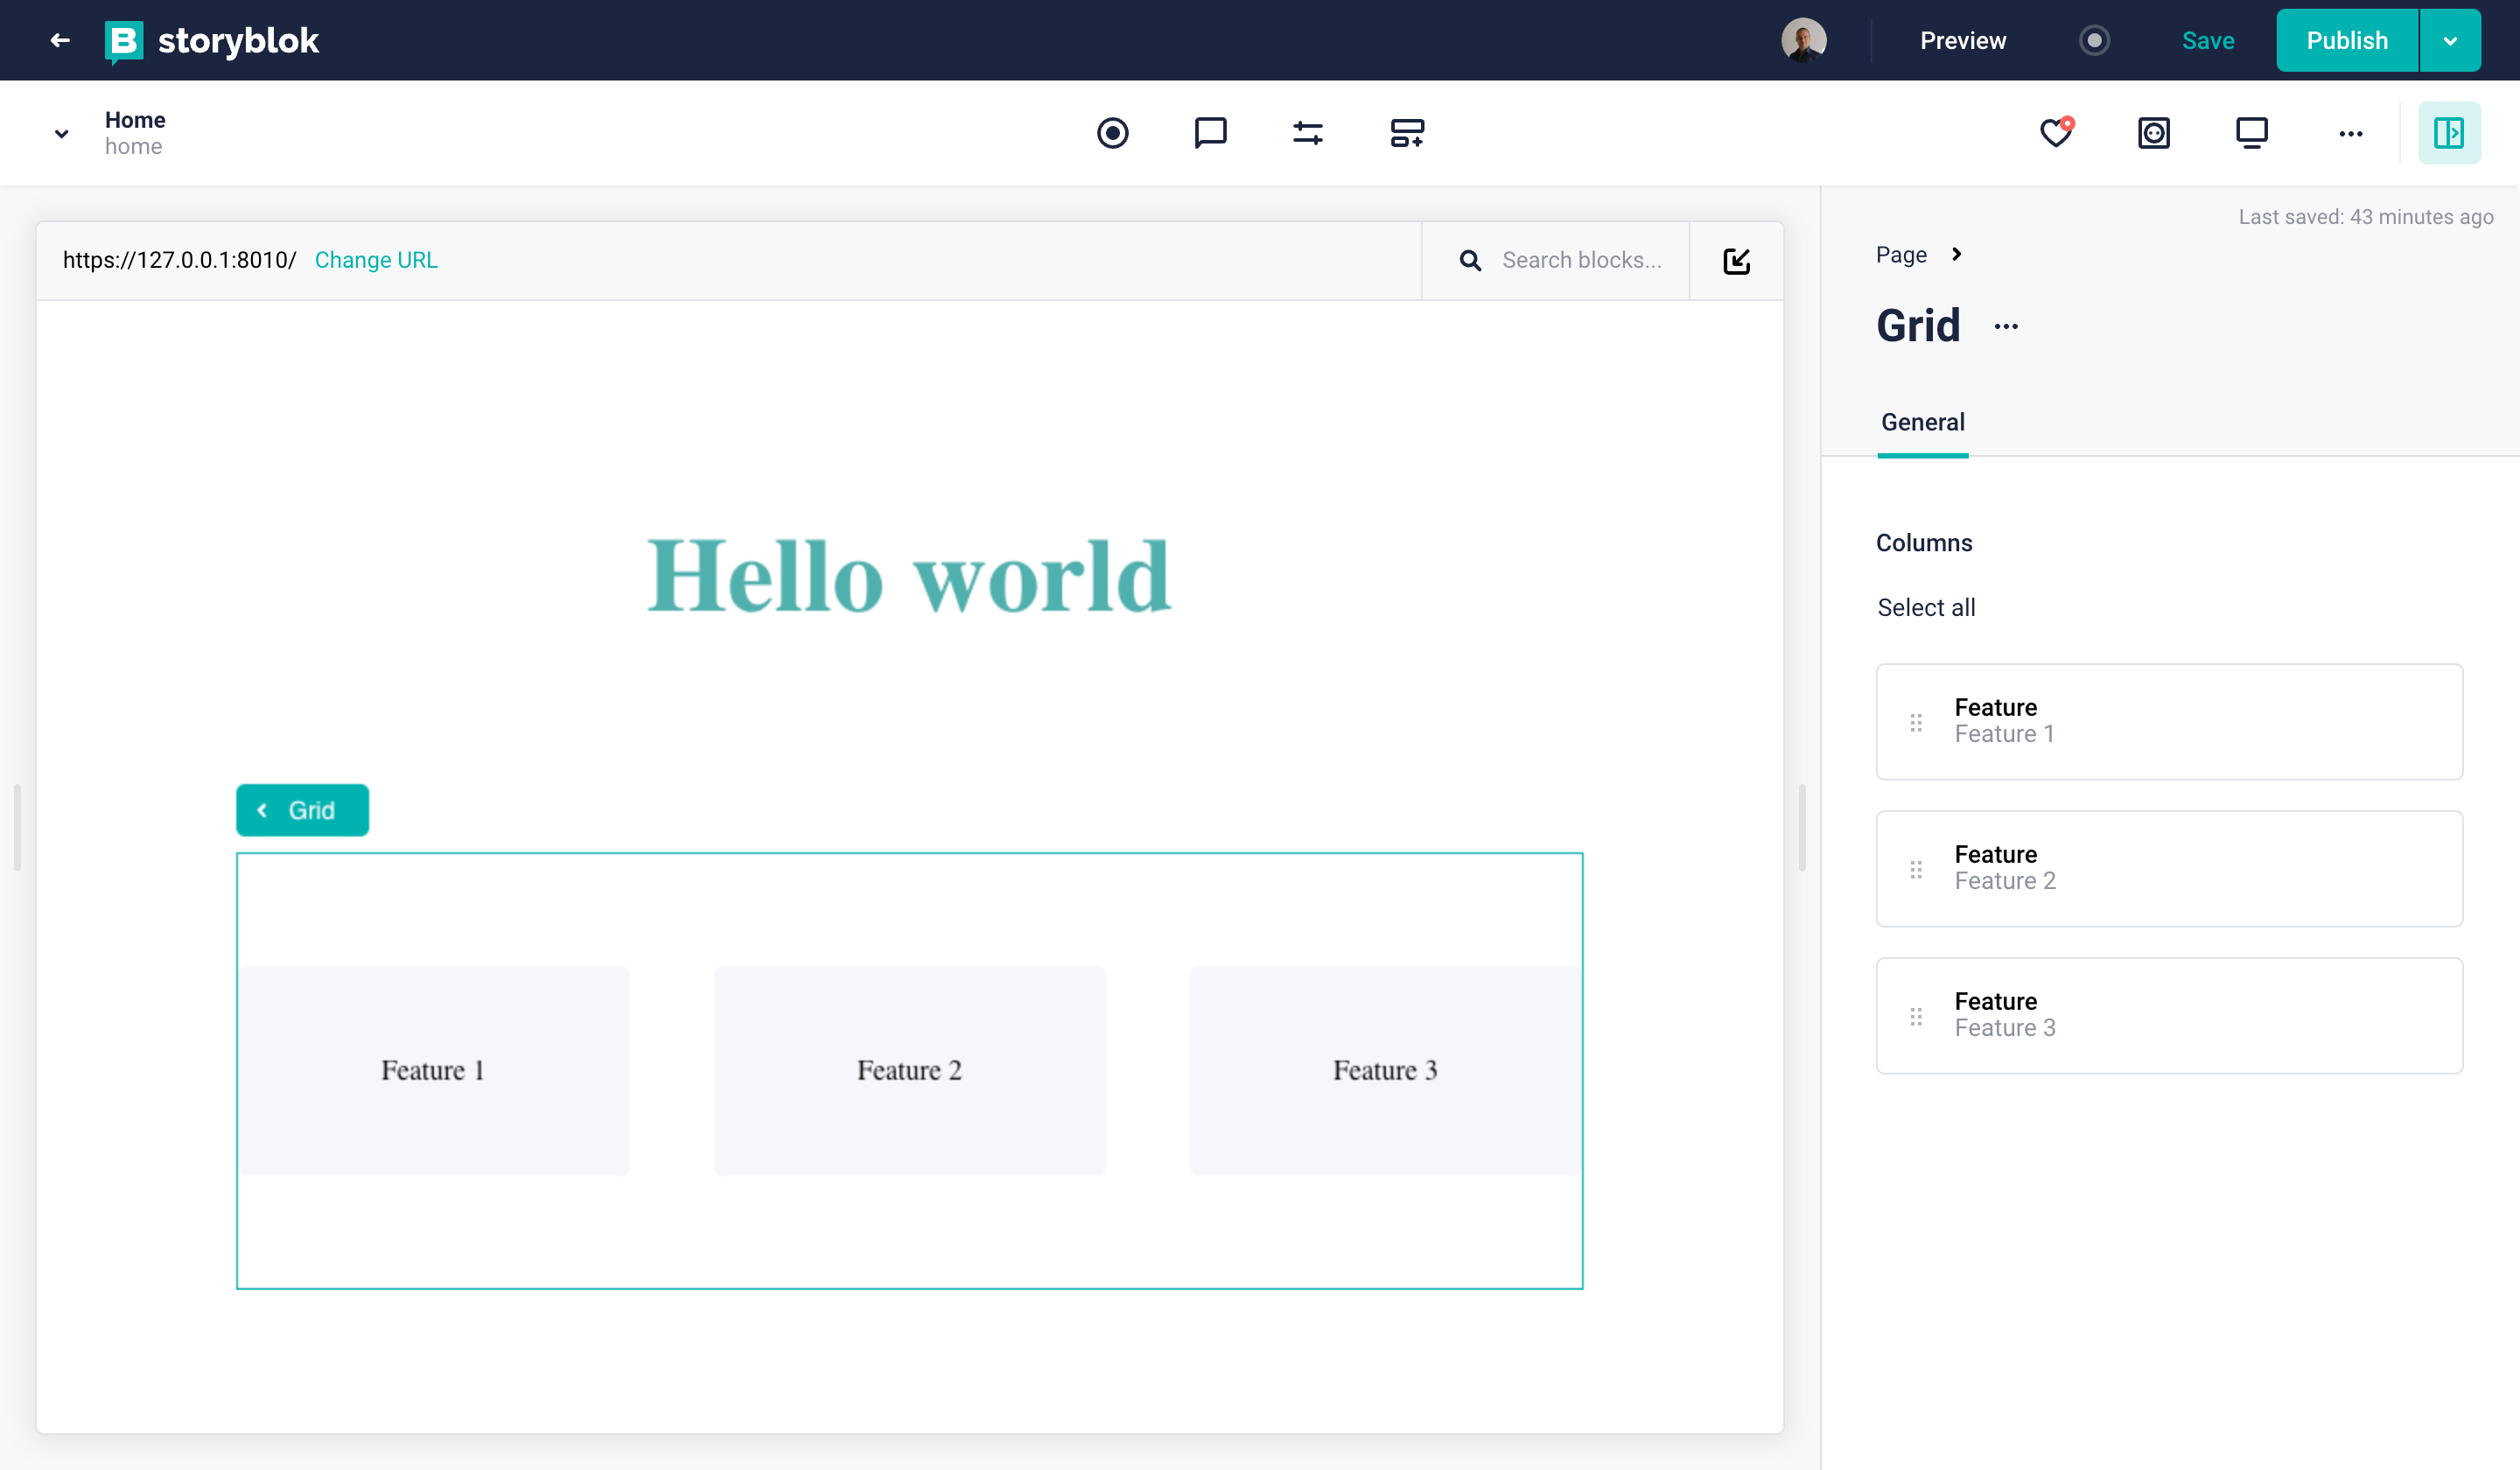
Laravel app integrated into the Storyblok Visual Editor
Visual editing with Storyblok Bridge
The power of Storyblok relies on its fantastic visual editing experience. Play with changing the teaser headline or re-arranging the features and see the magic happen!
In order to make editable the frontend generated from Blade templates you have to include the Storyblok Javascript Bridge in the index.blade.php file before closing body tag:
    <script type="text/javascript" src="//app.storyblok.com/f/storyblok-v2-latest.js"></script>
    <script type="text/javascript">
        const storyblokInstance = new StoryblokBridge()
        storyblokInstance.on('change', () => {
            window.location.reload(true);
        })
    </script>
The first part loads storyblok-v2-latest.js javascript file.
The second part creates a StoryblokBridge instance and reloads the page when a change event occurs. The change event occurs when the content editor click on Save button.
Visual editing experience enabled
Wrapping Up
Congratulations! You now have a Laravel app with dynamic components, dynamic pages and a complete integration with Storyblok, providing a unique visual editing experience.
| Resource | Link |
|---|---|
| Storyblok PHP SDK Client | https://github.com/storyblok/php-client |
| Storyblok APIs | https://www.storyblok.com/docs/api/content-delivery/v2 |
| Laravel | https://laravel.com/ |
