Workflows
A workflow is a set of rules that controls how stories move from draft to publication.
Storyblok offers a Default workflow with three stages: Drafting, Reviewing, and Ready to Publish. This workflow applies to all content types and folders.
- When a new story is created, its workflow stage is None.
- When a writer starts working on a story, they can move it to the Drafting stage.
- When they're done, they can move the story to the Reviewing stage.
- When an editor approves the story, they can move it to the Ready to Publish. In the Default workflow, only stories at this stage can be published.
Manage workflows
Section titled “Manage workflows”Some pricing plans allow admins to edit the Default workflow and stages and create custom workflows. To manage workflows, open Settings → Workflows.
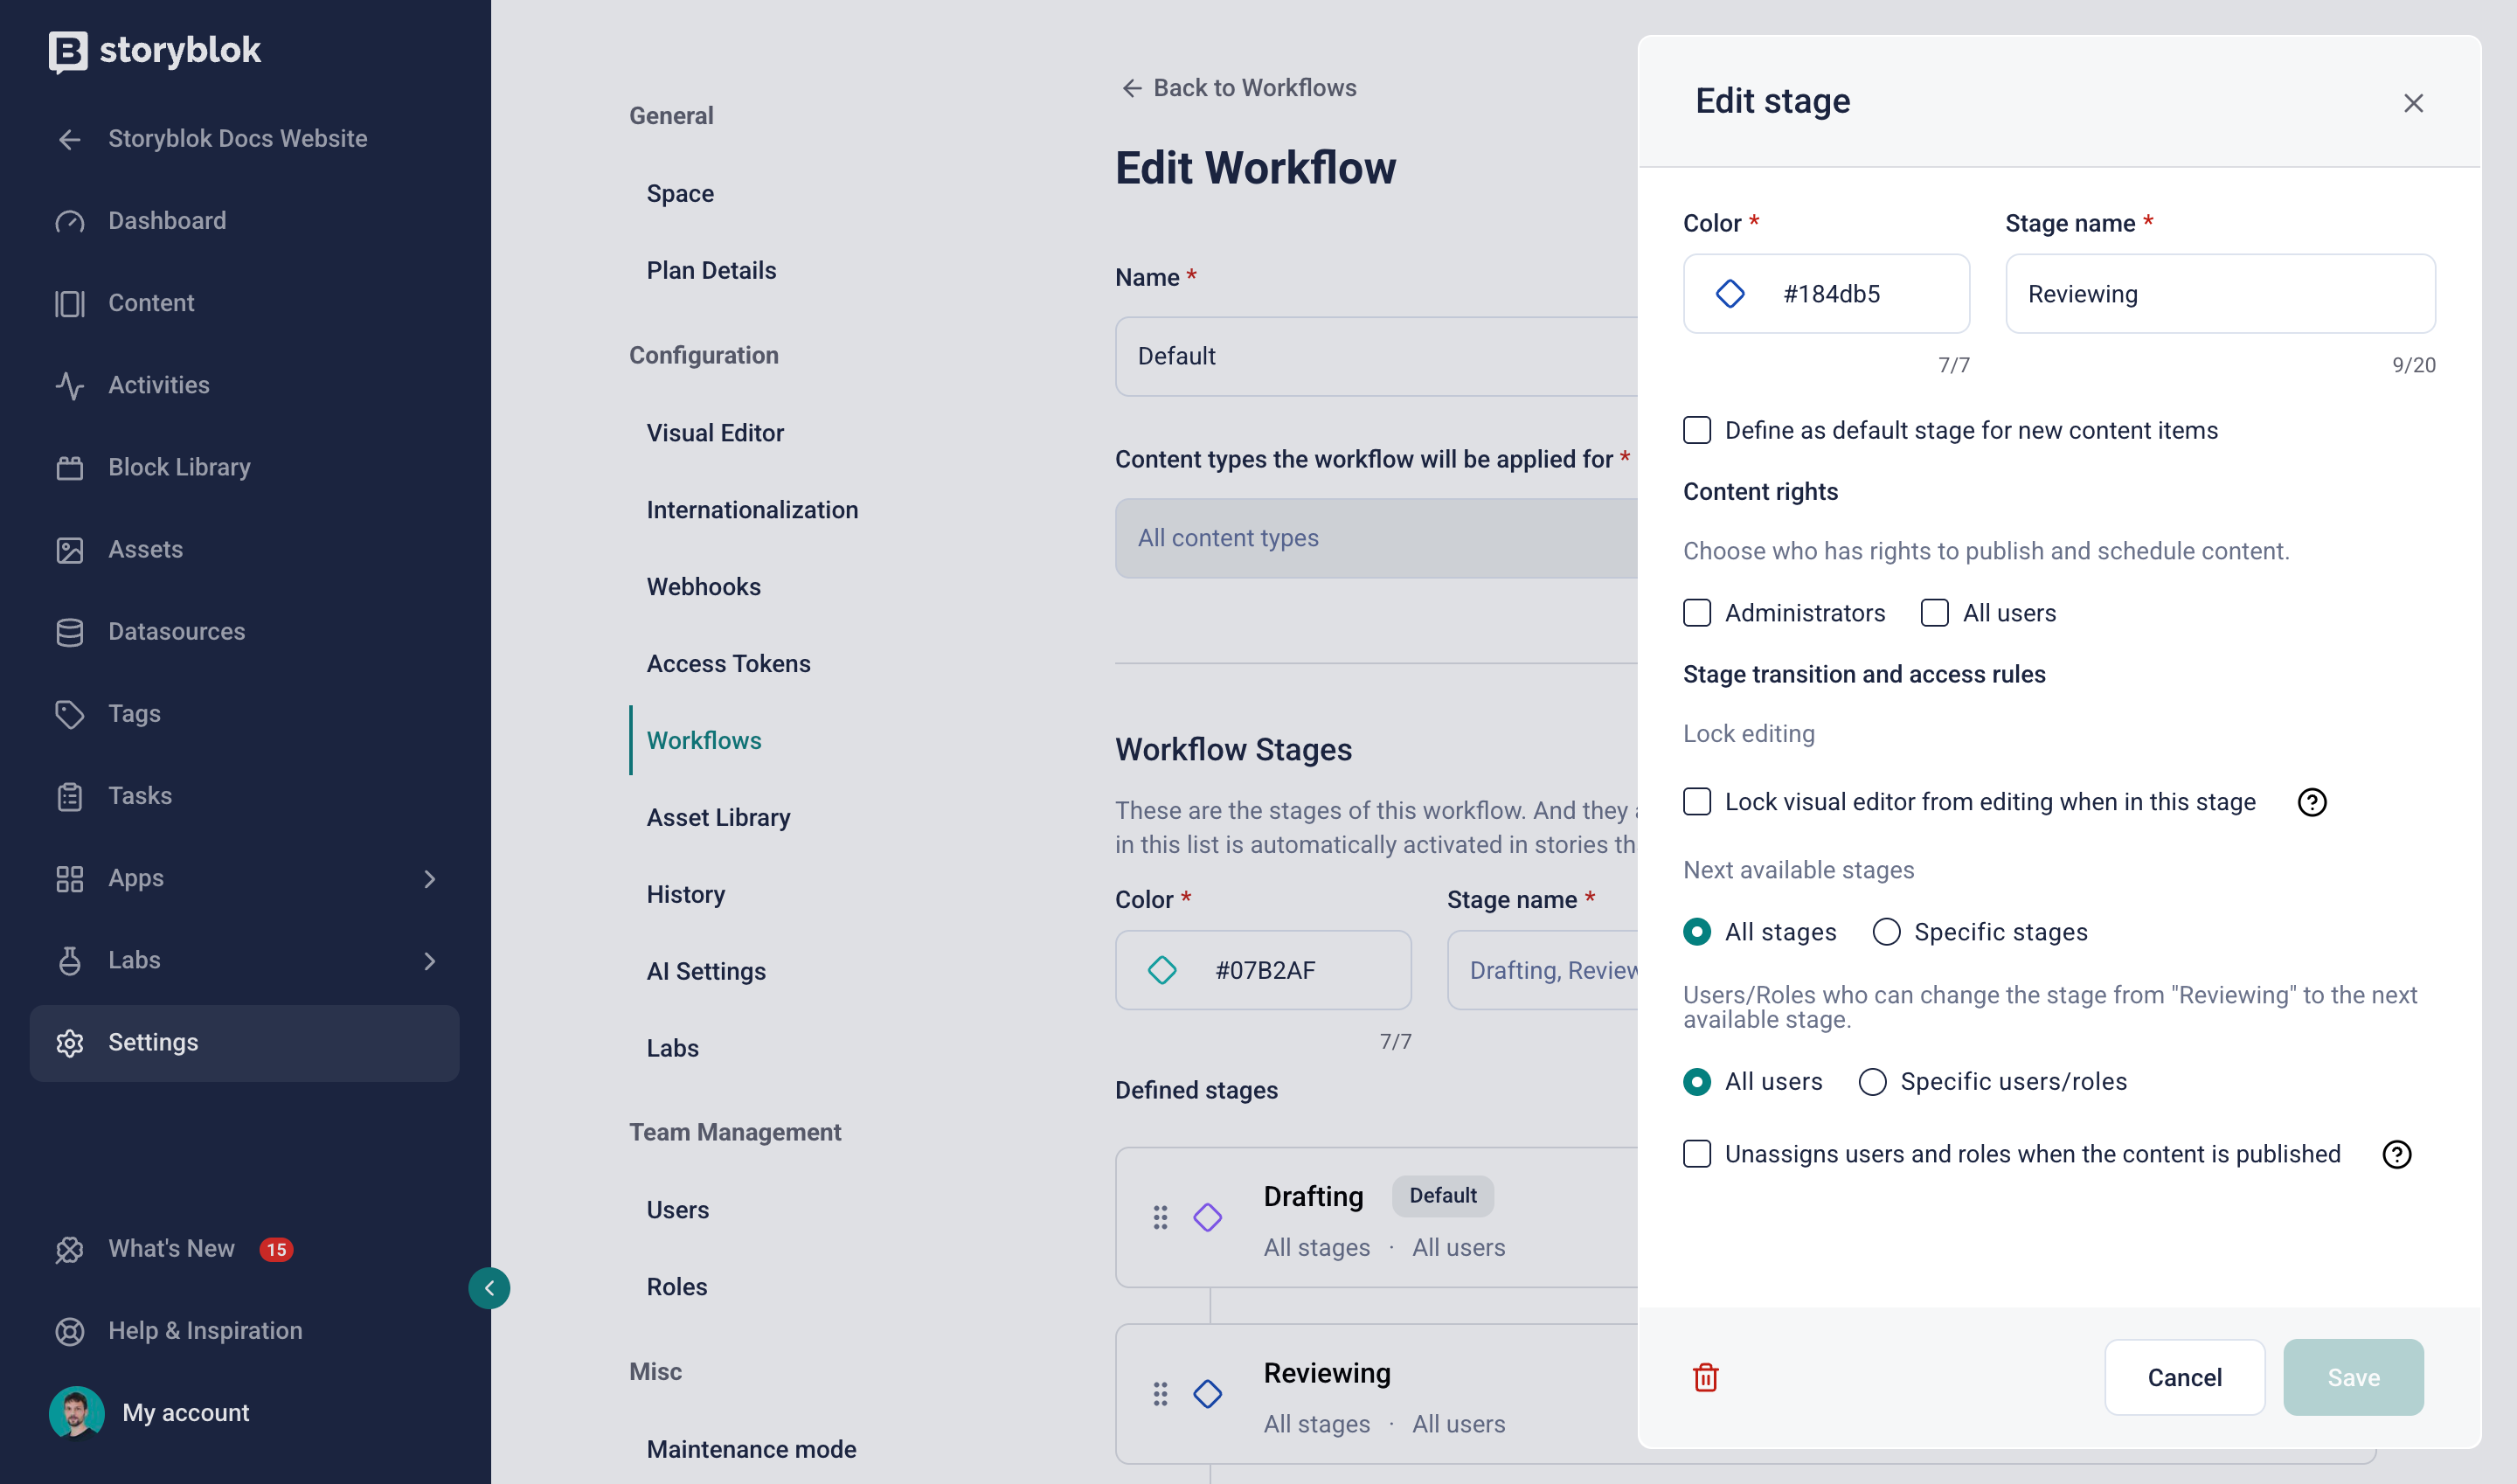
Once you select a workflow, you can edit or remove predefined stages, add new ones, and drag them to reorder. Each stage requires a name and a color, and supports advanced configuration.
Select a stage to set different behaviors and permissions: define relevant content types, the default stage for new stories, who can edit and publish stories in this stage, automatic progress to the next stage, the order of stages in a workflow, and more.
Configure a workflow
Use workflows
Section titled “Use workflows”You can use workflows to manage stories and folders' status from the Visual Editor or the Content section.
Workflows in the Visual Editor
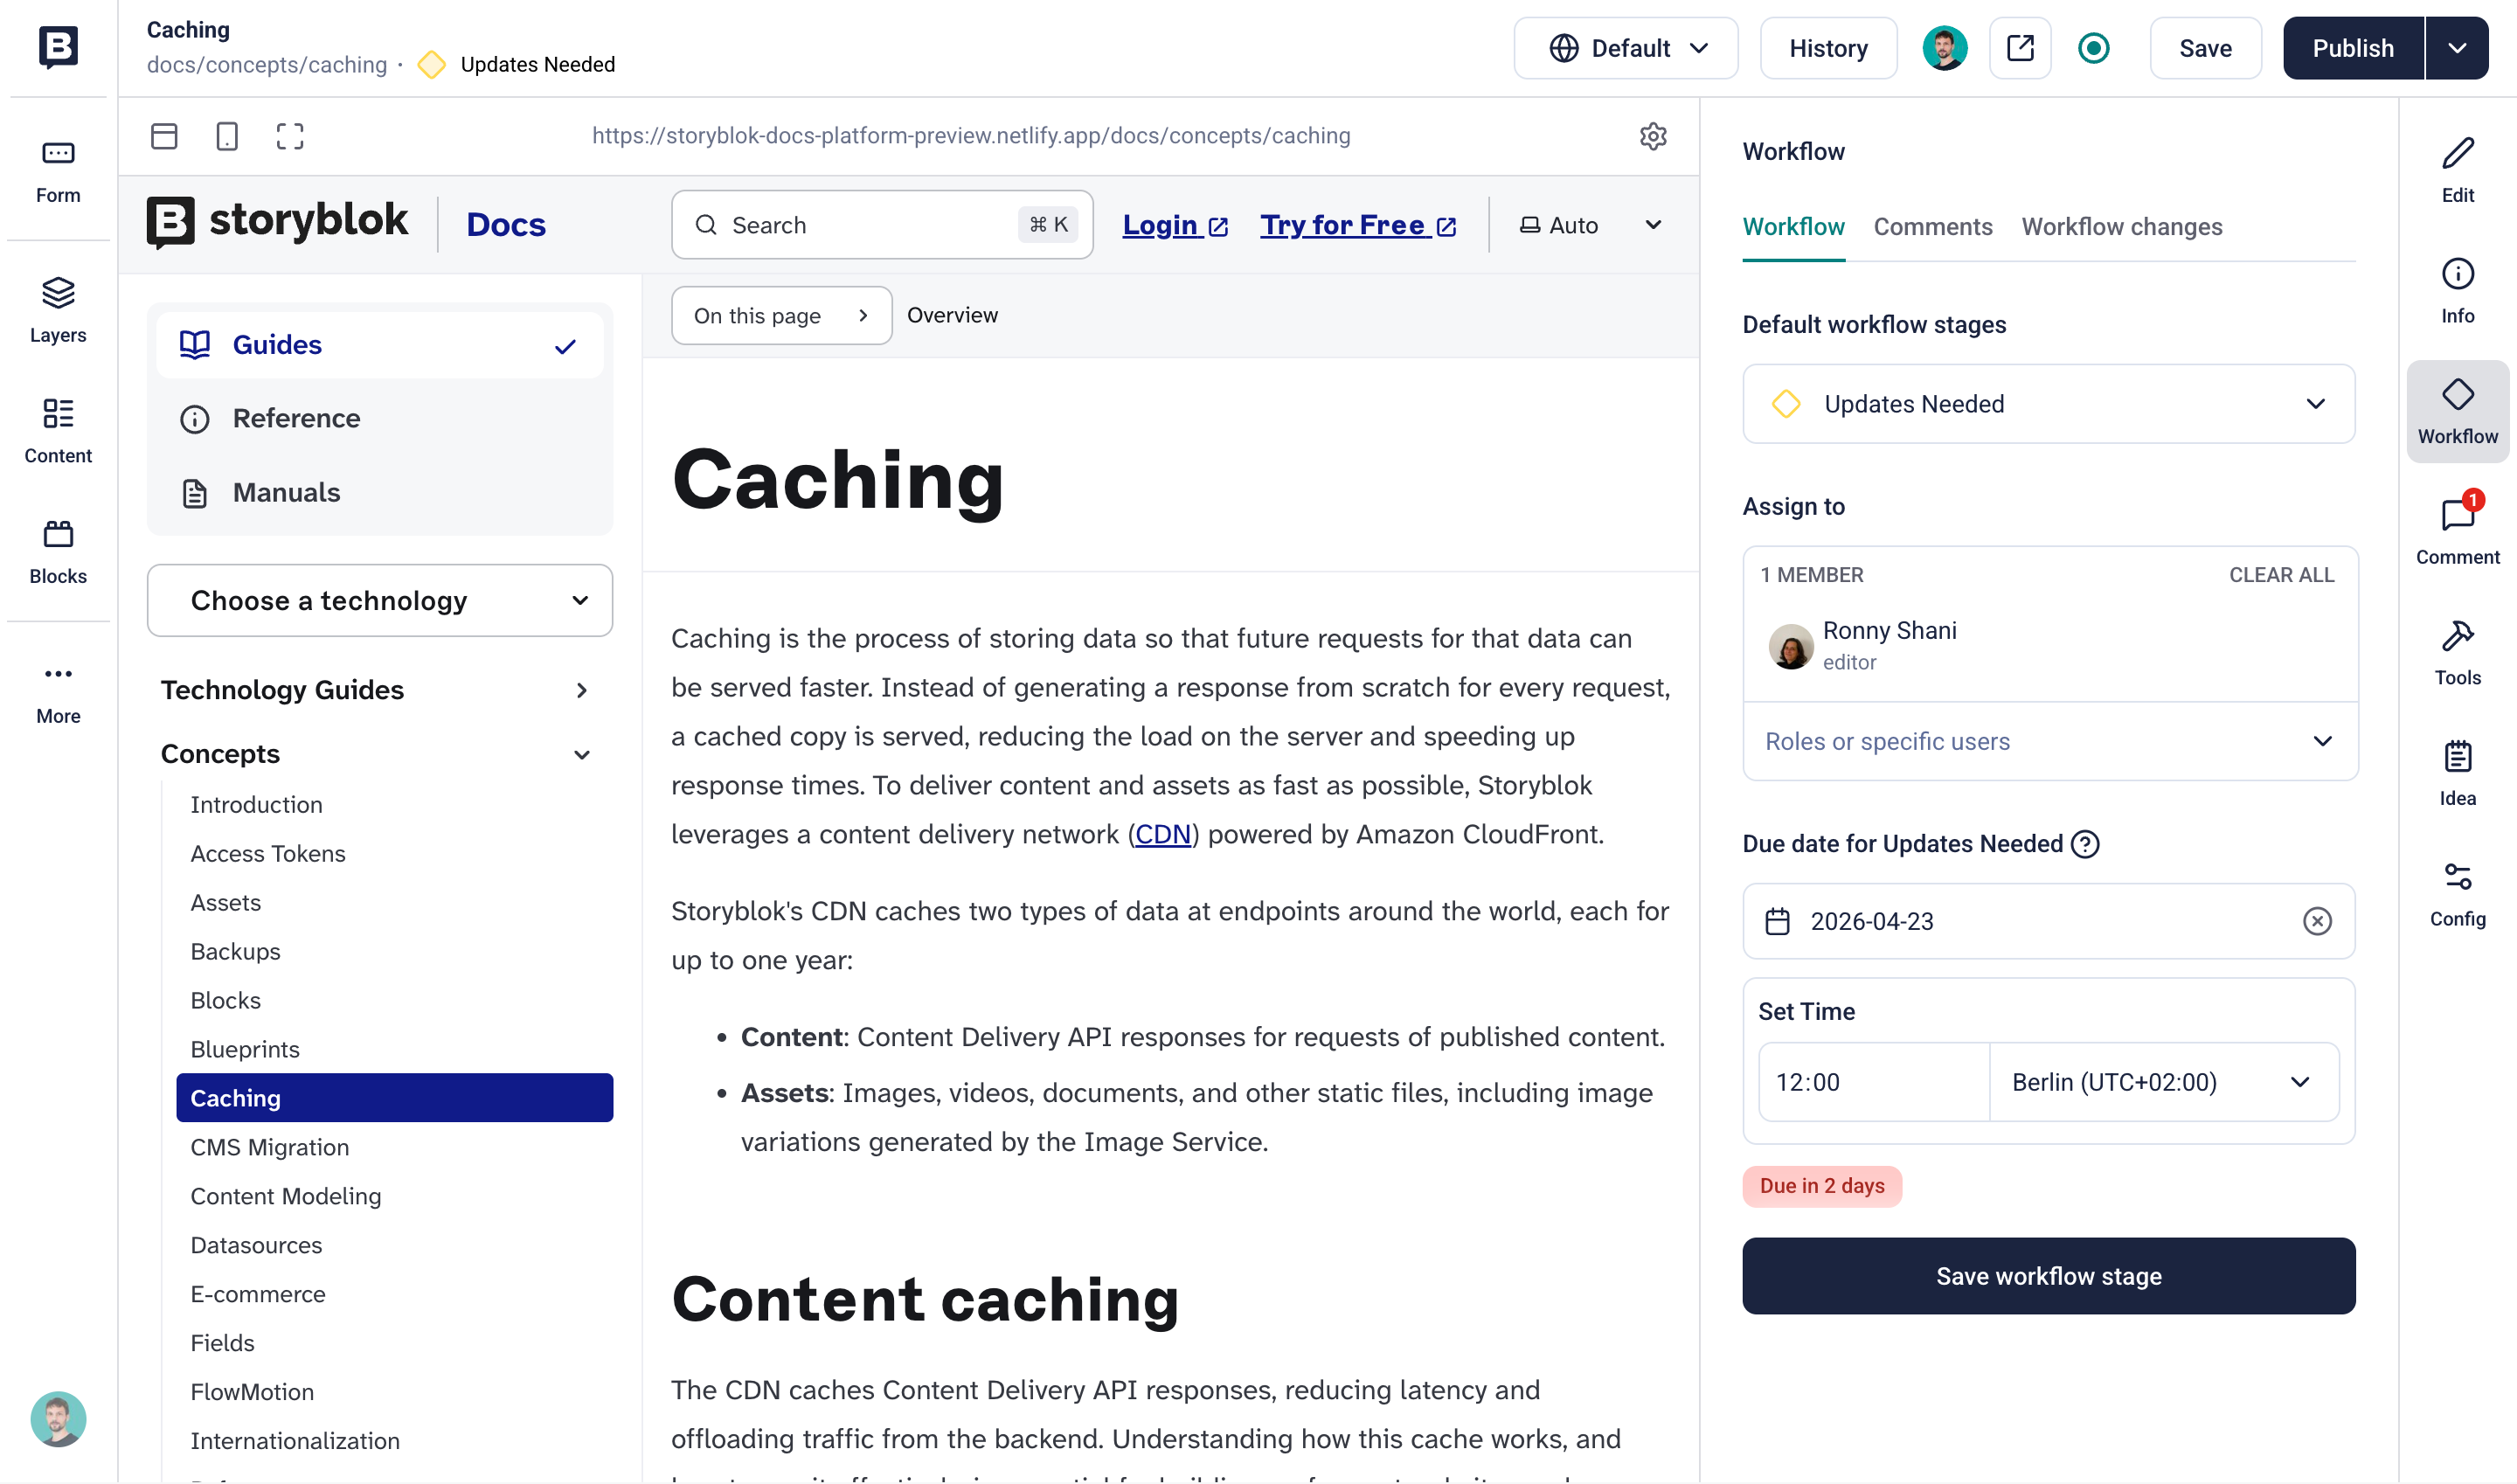
Section titled “Workflows in the Visual Editor”In a story, open the Workflow section in the right toolbar, and select a stage.
Assign a person or role, set a due date for moving to the next stage, and decide whether to notify the assignee by email. Optionally, add a comment to the email message.
- The Comments tab lists the comments that people left when changing workflow stages. You can add, edit, or delete each comment.
- The Workflow changes tab displays a chronological list of workflow stage changes that indicates when and who moved the story to a different stage.
Apply workflow stages to a story
Workflows in the Content section
Section titled “Workflows in the Content section”In the Content section, select a story or folder and choose Settings. Under Workflow Settings, select a stage. Assign a person or role, set a due date for moving to the next stage, and decide whether to notify the assignee by email. Optionally, add a comment to the email message.
Custom workflows
Section titled “Custom workflows”Custom workflows provide editorial teams with granular control and complete freedom to adjust the stages to their matching work processes, content types, and team structure.
For example, create different workflows for press releases, localized product landing pages, or a multi-author company blog.
To create a new workflow, open Settings → Workflows, and select + Add Workflow. Follow the instructions above to add stages and set the behaviors and permissions.
Language-based workflows
Section titled “Language-based workflows”Spaces that include stories in multiple languages can take advantage of Language-based workflows to manage the individual publication status of translated stories.
For example, a story in English can be in the Reviewing stage, while the German version is still in Drafting, and the French version is in Ready to Publish.
To use language-based workflows, open Settings → Workflows and select the relevant workflow. In Edit workflow, choose Enable Language-based workflows.
Then, open the relevant story, switch to the desired language from the Languages menu, and move the translated story to the appropriate workflow stage.
Assigning language-based workflows
Section titled “Assigning language-based workflows”Language-based workflows don’t support per-language assignees. Assigning different people to different workflow stages on a translated story results in the last person assigned to those translations.
For example, you move the English version of Story A to the Reviewing stage and assign person A. Later, you move the German version of Story A to the Drafting stage and assign person B. The result: person B is now assigned to both workflow stages in both languages.
Was this page helpful?
This site uses reCAPTCHA and Google's Privacy Policy (opens in a new window).Terms of Service (opens in a new window) apply.
Get in touch with the Storyblok community