Building Headless eCommerce Integrating Storyblok & Swell in Nuxt 3
Storyblok is the first headless CMS that works for developers & marketers alike.
eCommerce is still a growing business and is a perfect opportunity for local marketers or
companies to sell their products fast and reliably worldwide. In this tutorial, we will set up a Nuxt 3 Project from Scratch and integrate swell with Storyblok. Afterward, we make a product selection in Storyblok to use Swell’s eCommerce data.
We are going to address the following topics:
- Nuxt 3
- Swell
- Storyblok
- Swell-js SDK
- Nuxt Plugin Creation
- Storyblok Field Type Plugin
We open sourced this field type plugin for you. Here is the repository.
What is Swell?
Swell (opens in a new window) is a powerful eCommerce platform to quickly get your store created and online. Combining different payment gateways and cool features like product storage, product variants, multi-currency, subscriptions and much much more together. Easy and headless.
If you are using Nuxt to build your storefront you can make use of my module nuxt-swell
Creating a Swell store
To create a Swell store, either sign up by clicking here, or if you already have an account just create a new store by clicking on your existing one. Once created you should have a Quick start guide visible in the dashboard.
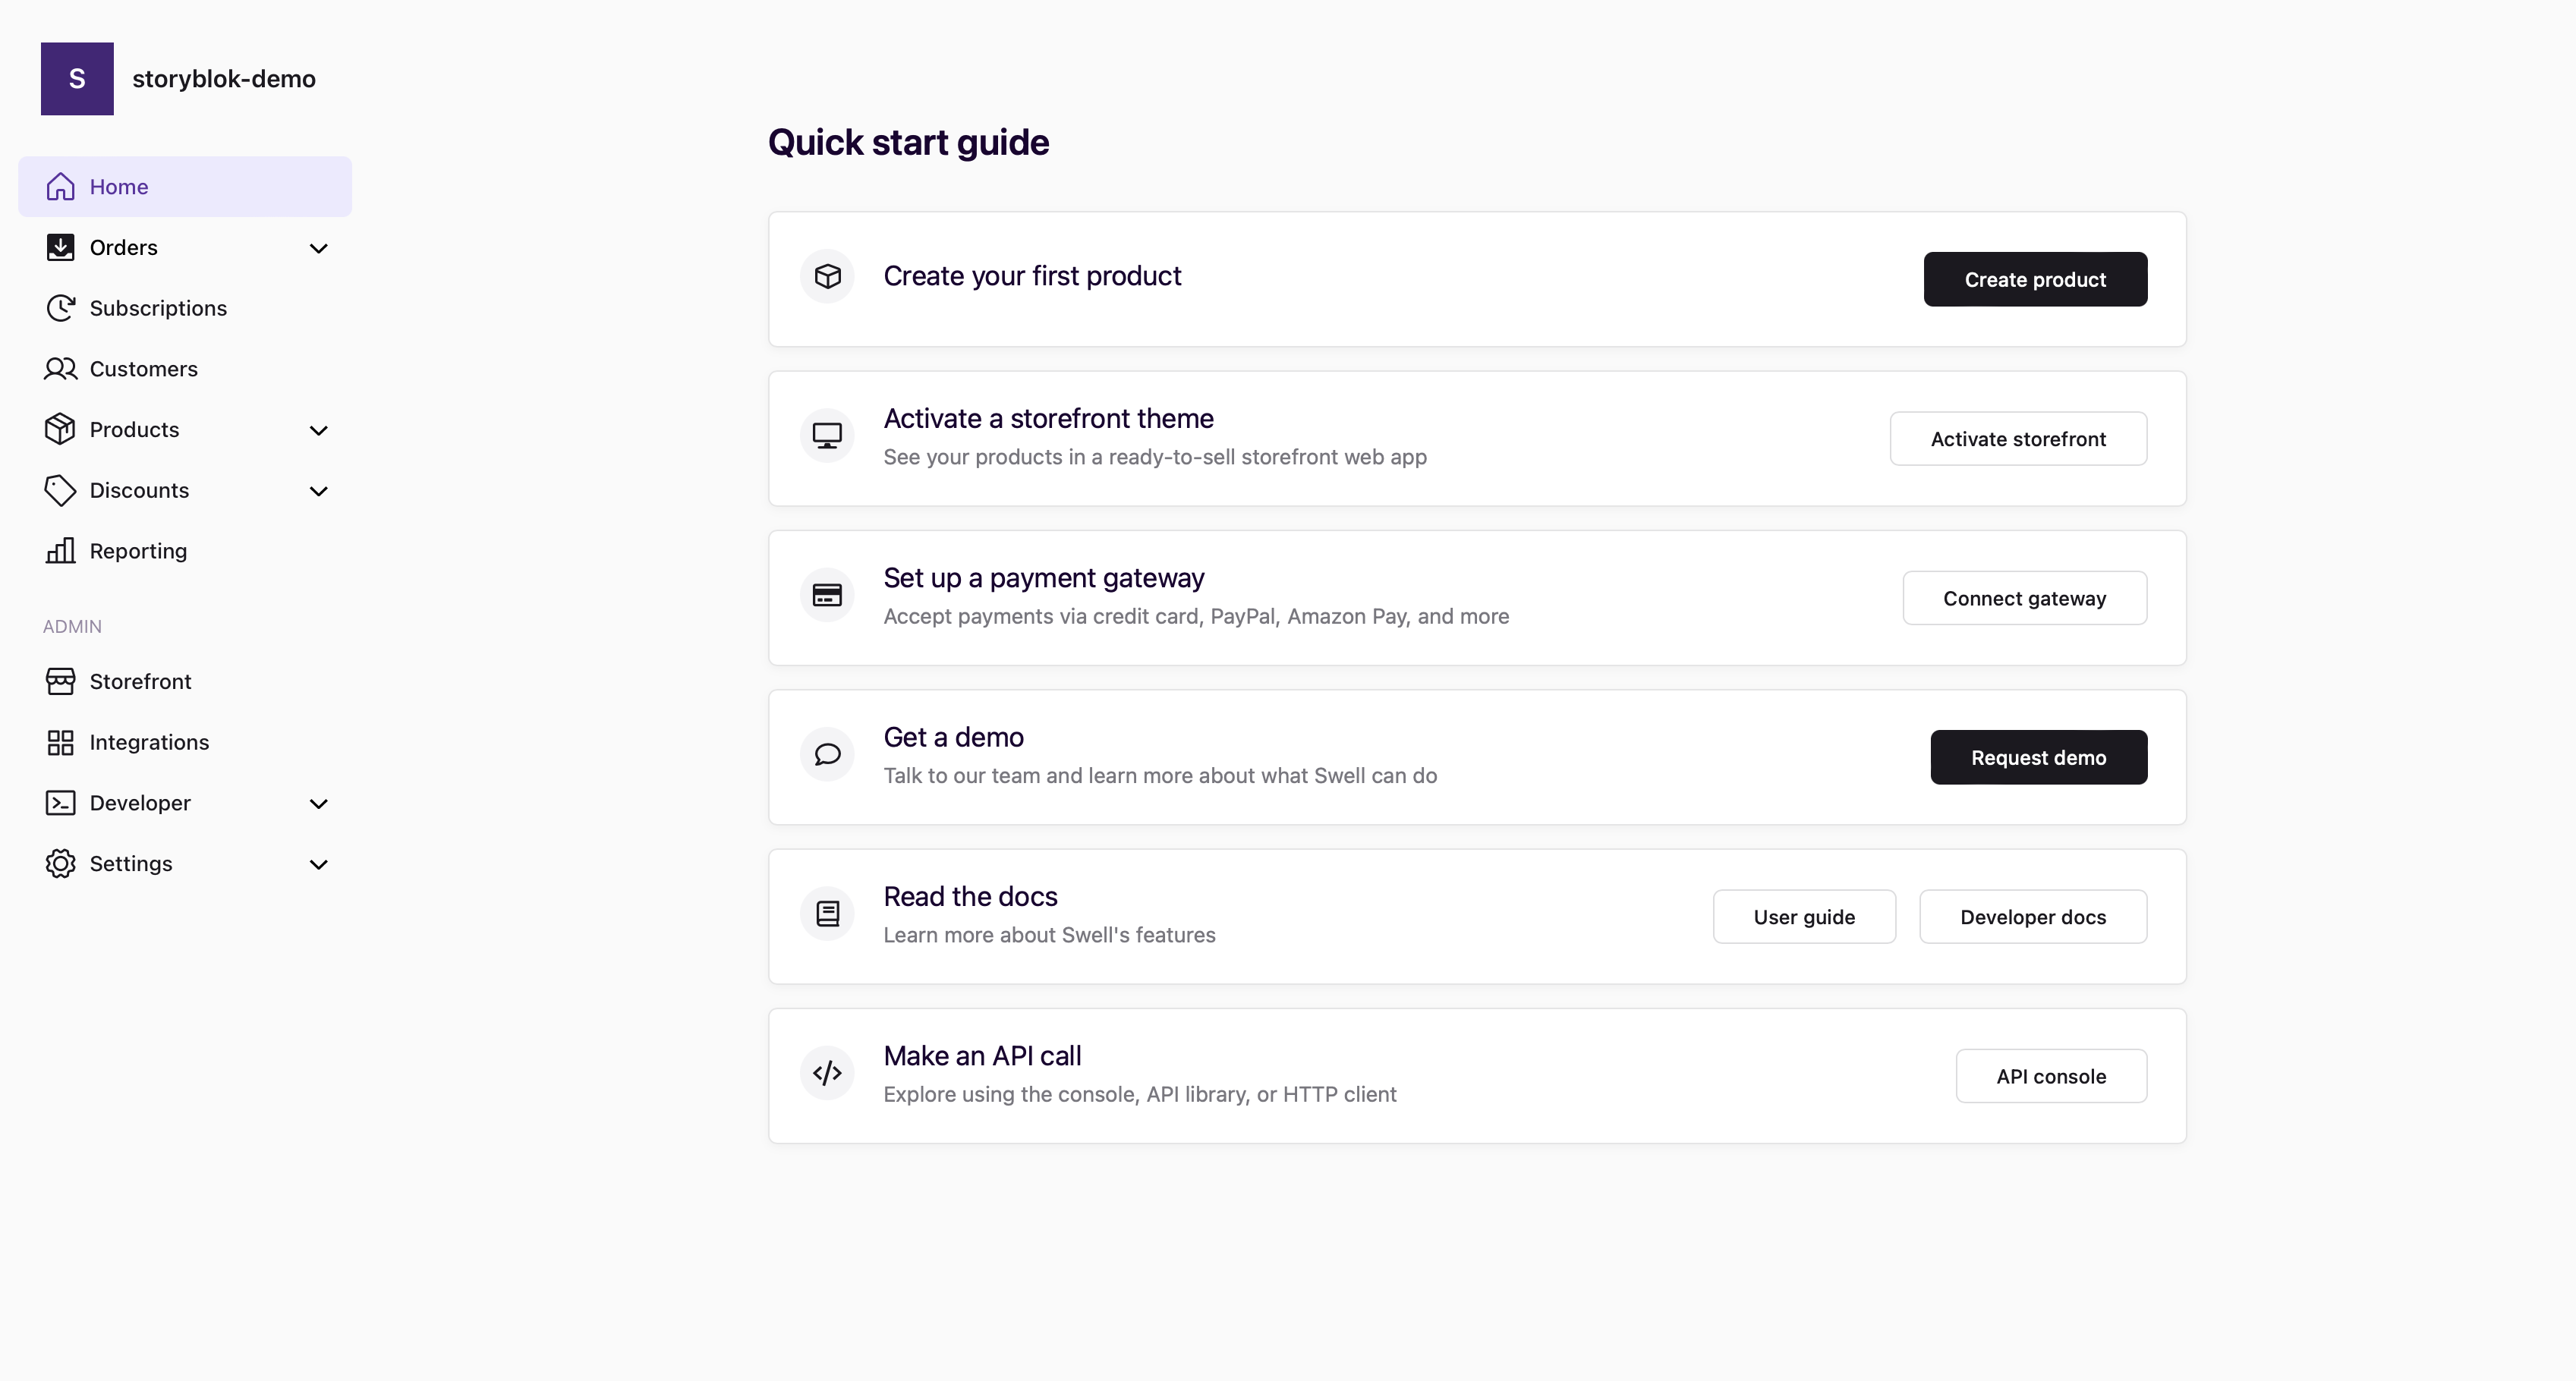
Swell Dashboard
First things first, if we do not want to enable multi-currency head over to Settings > General and change the currency to Euro for example. To later be able to fetch general store settings, you can fill out your business details in the same menu.
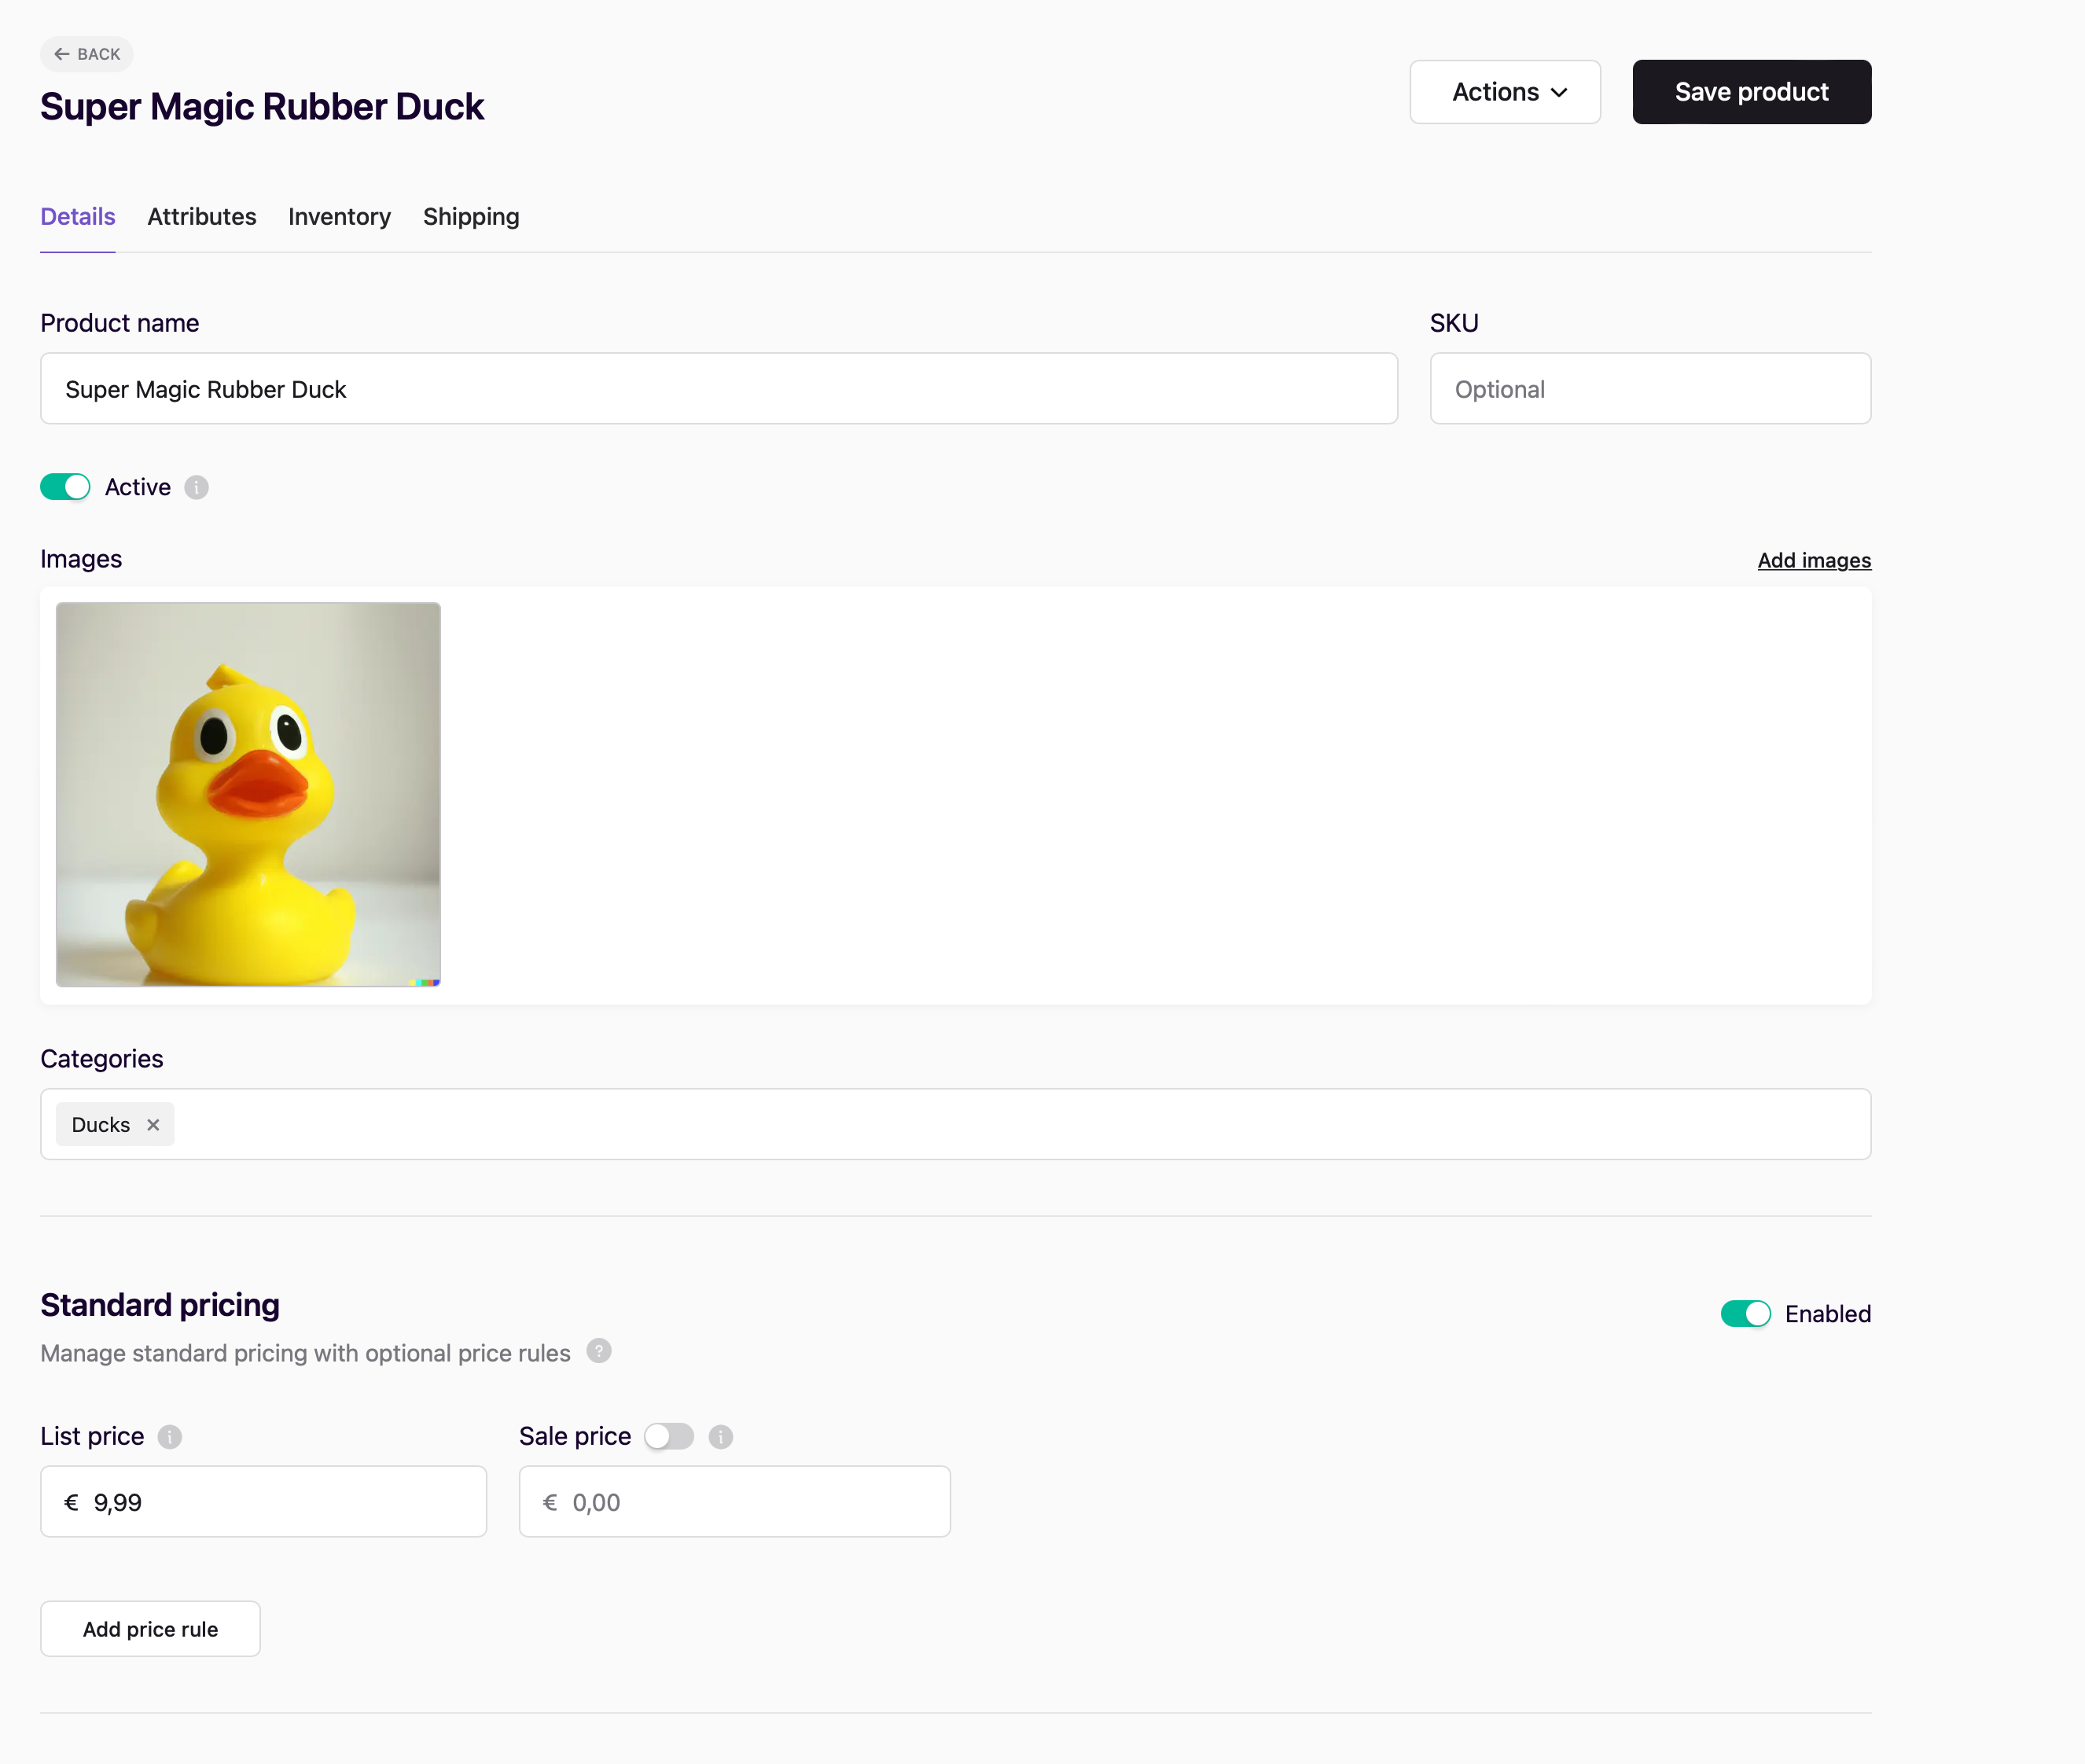
Adding a product in Swell
That’s all we currently need except a good-selling product. We at Regiolix Solutions like ducks (all developers like rubber ducks) so we are creating our first product and it’s called Super Magic Rubber Duck. Don’t forget to add a standard price, category, and image.
The product is ready to go or ready for sale. If you want to, you can even add content like
description, tags, or a page title for SEO purposes.
Storyblok Field Type Plugin & Swell Integration
To organize our content for the world, we of course need a Storyblok space. And for demo purposes, we are going to create a component called product-list.
But before we create this component and are able to select products from Swell, we need a field type plugin.
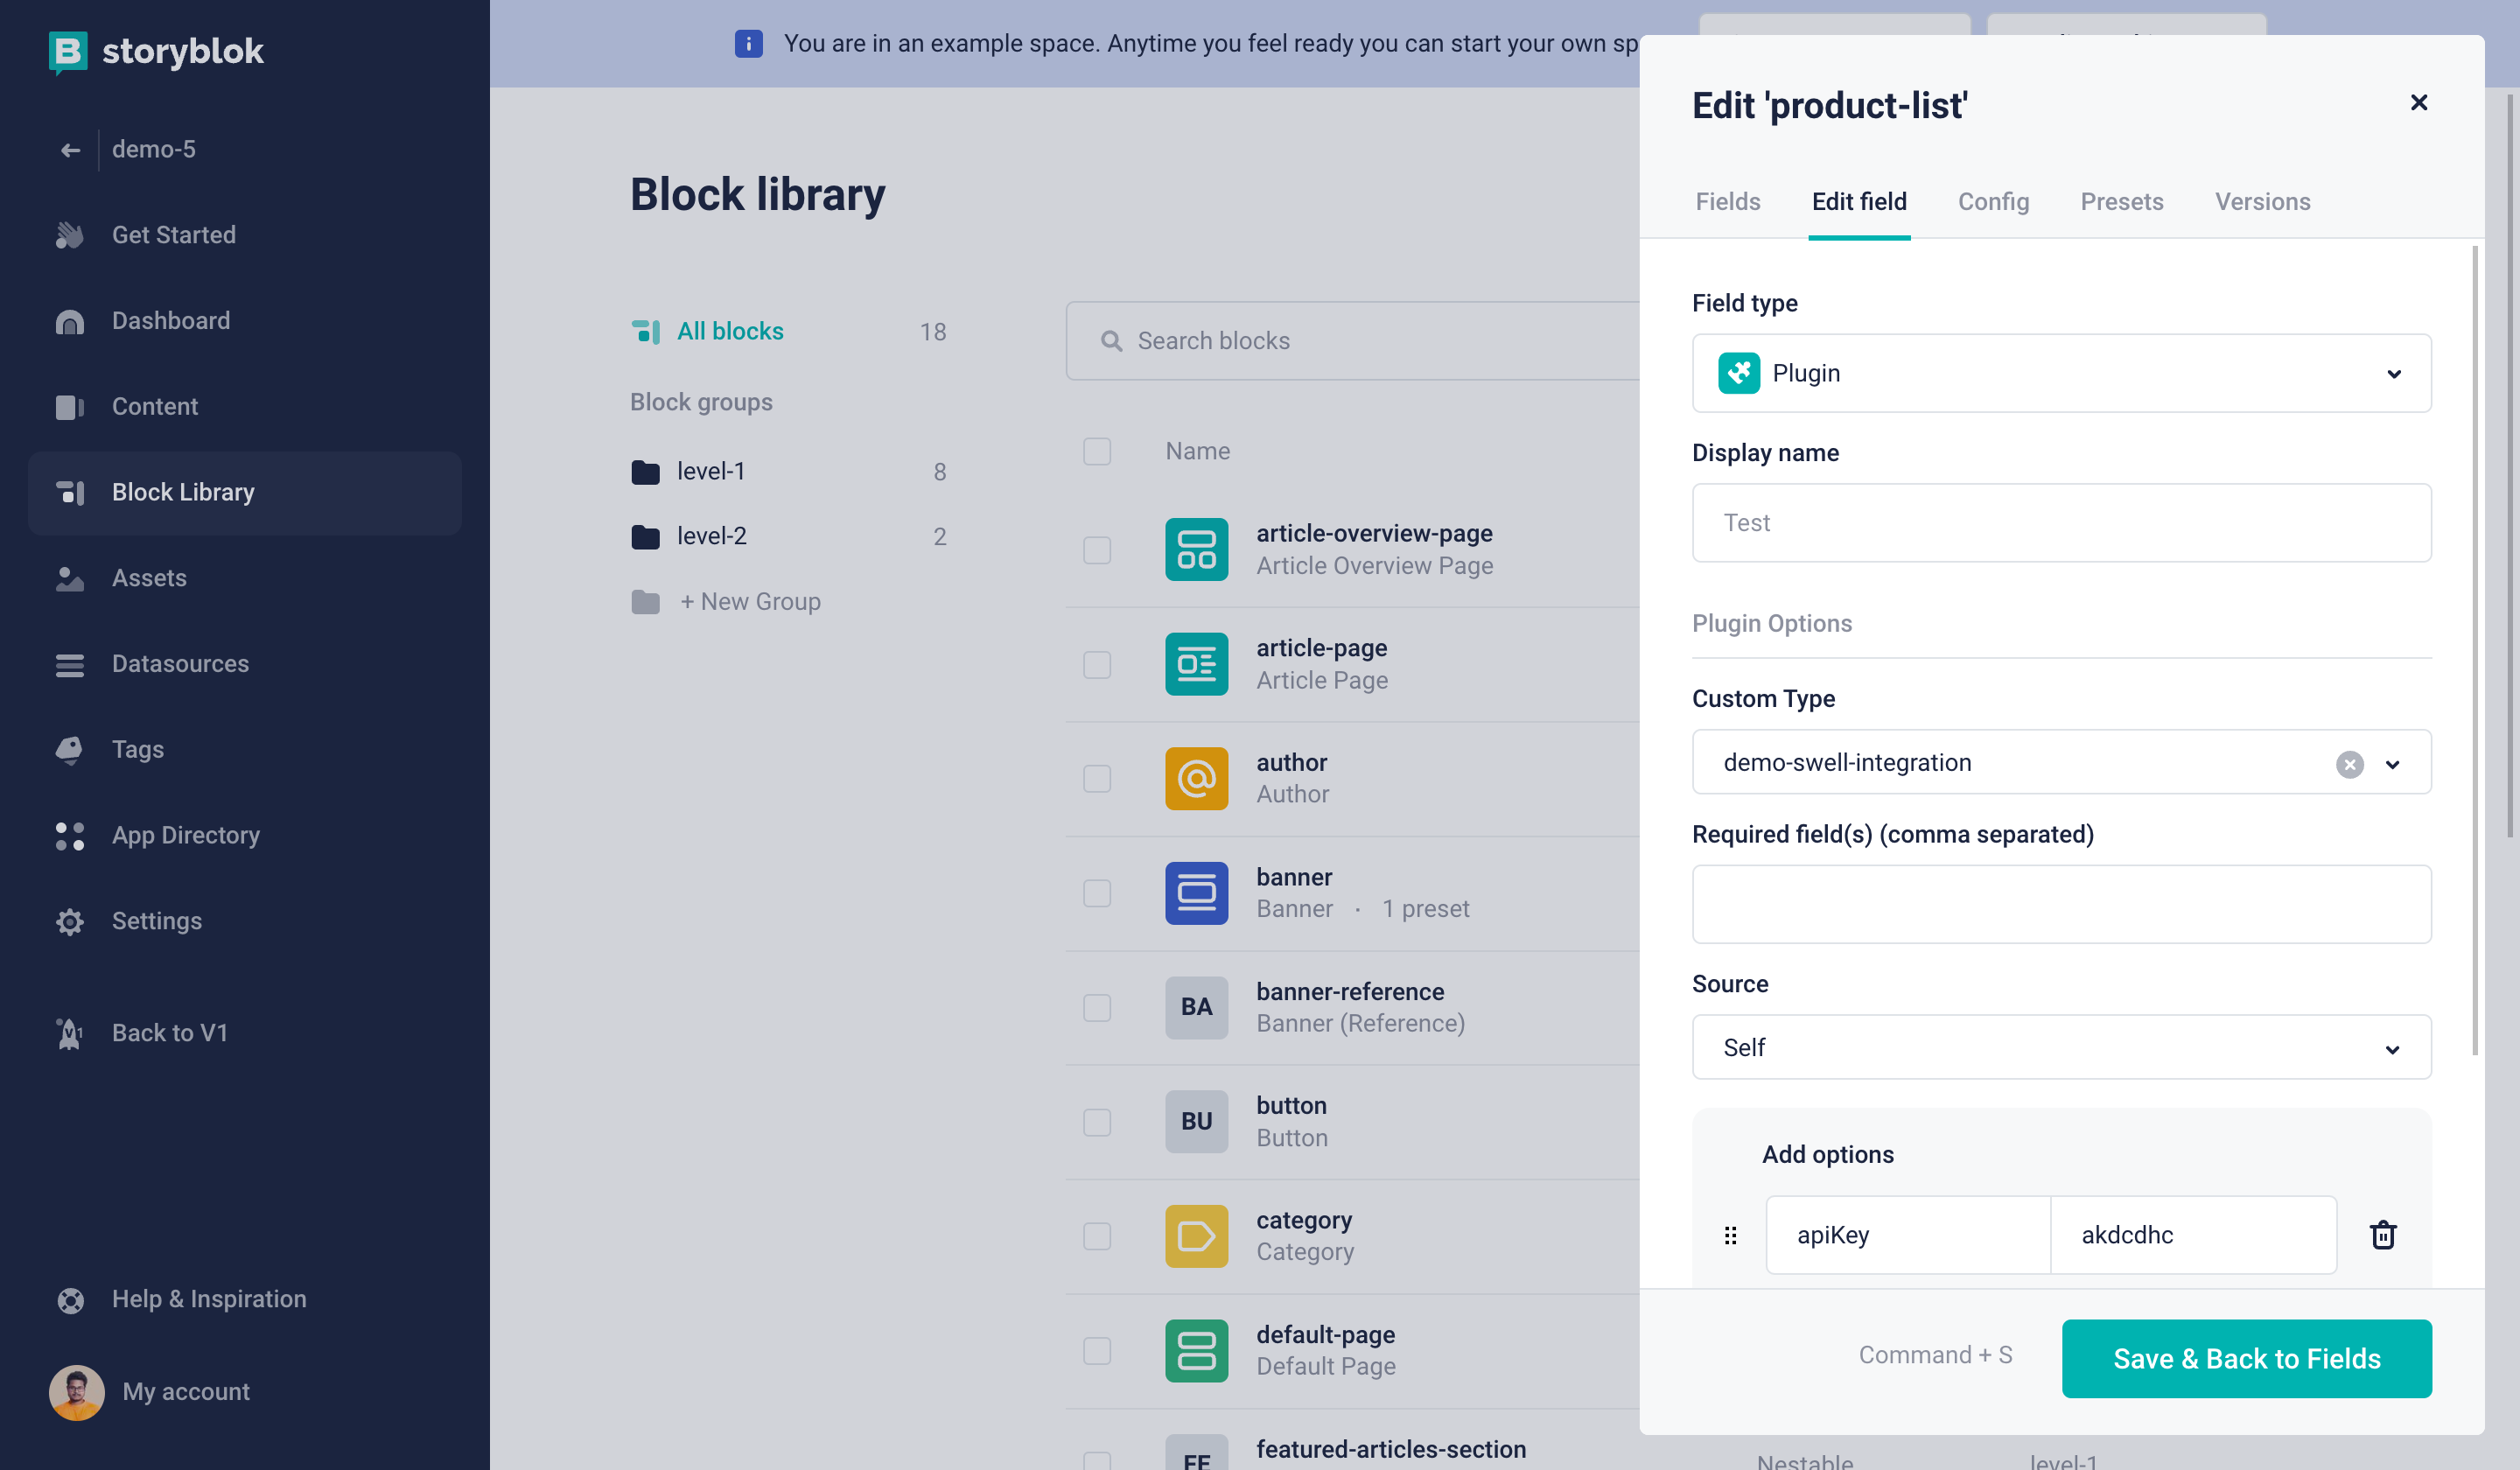
A partner account is necessary for this. Just click on become a partner and you are ready to go. Once signed up as a Partner, head over to the Field-Type section and create a new plugin.
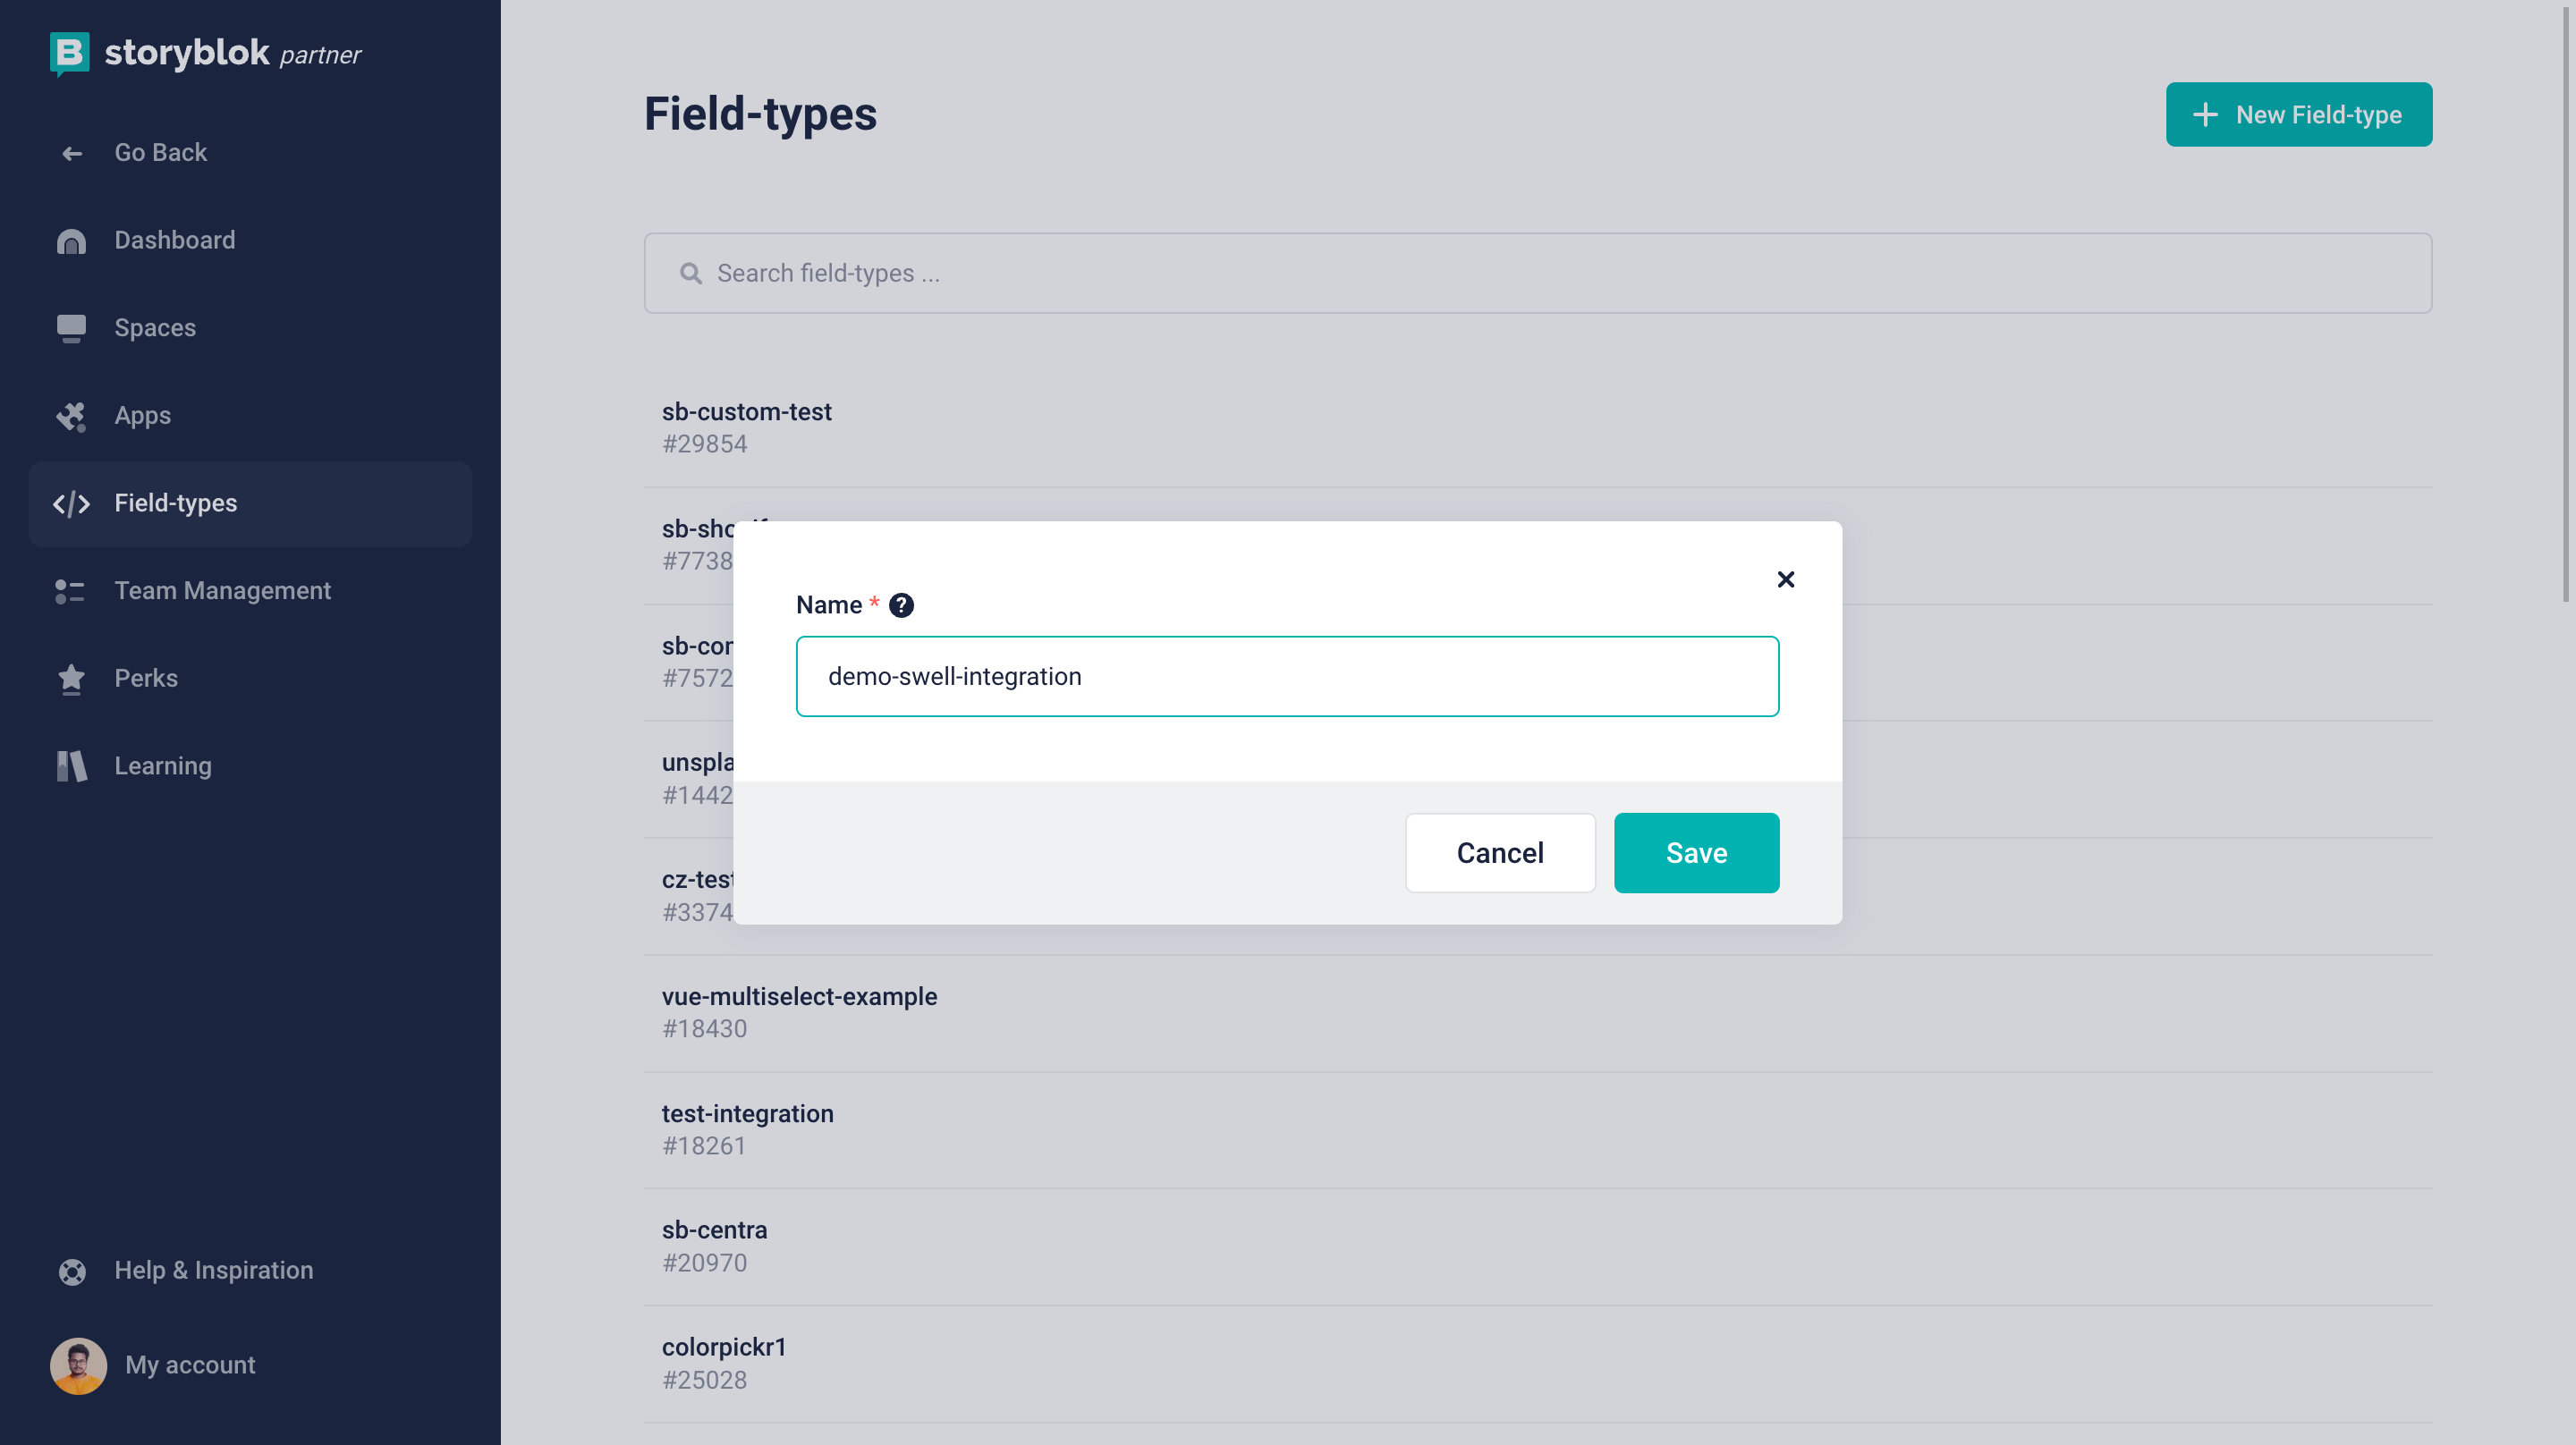
Creating a field type plugin for Swell in Storyblok
The plugin editor should open, allowing us to add two fields in the input section. The first one is apiKey and the second is storeId. Simply paste your API key and store ID in the value field of the two key-values pairs. You can find them under the Developers section in your Swell dashboard.
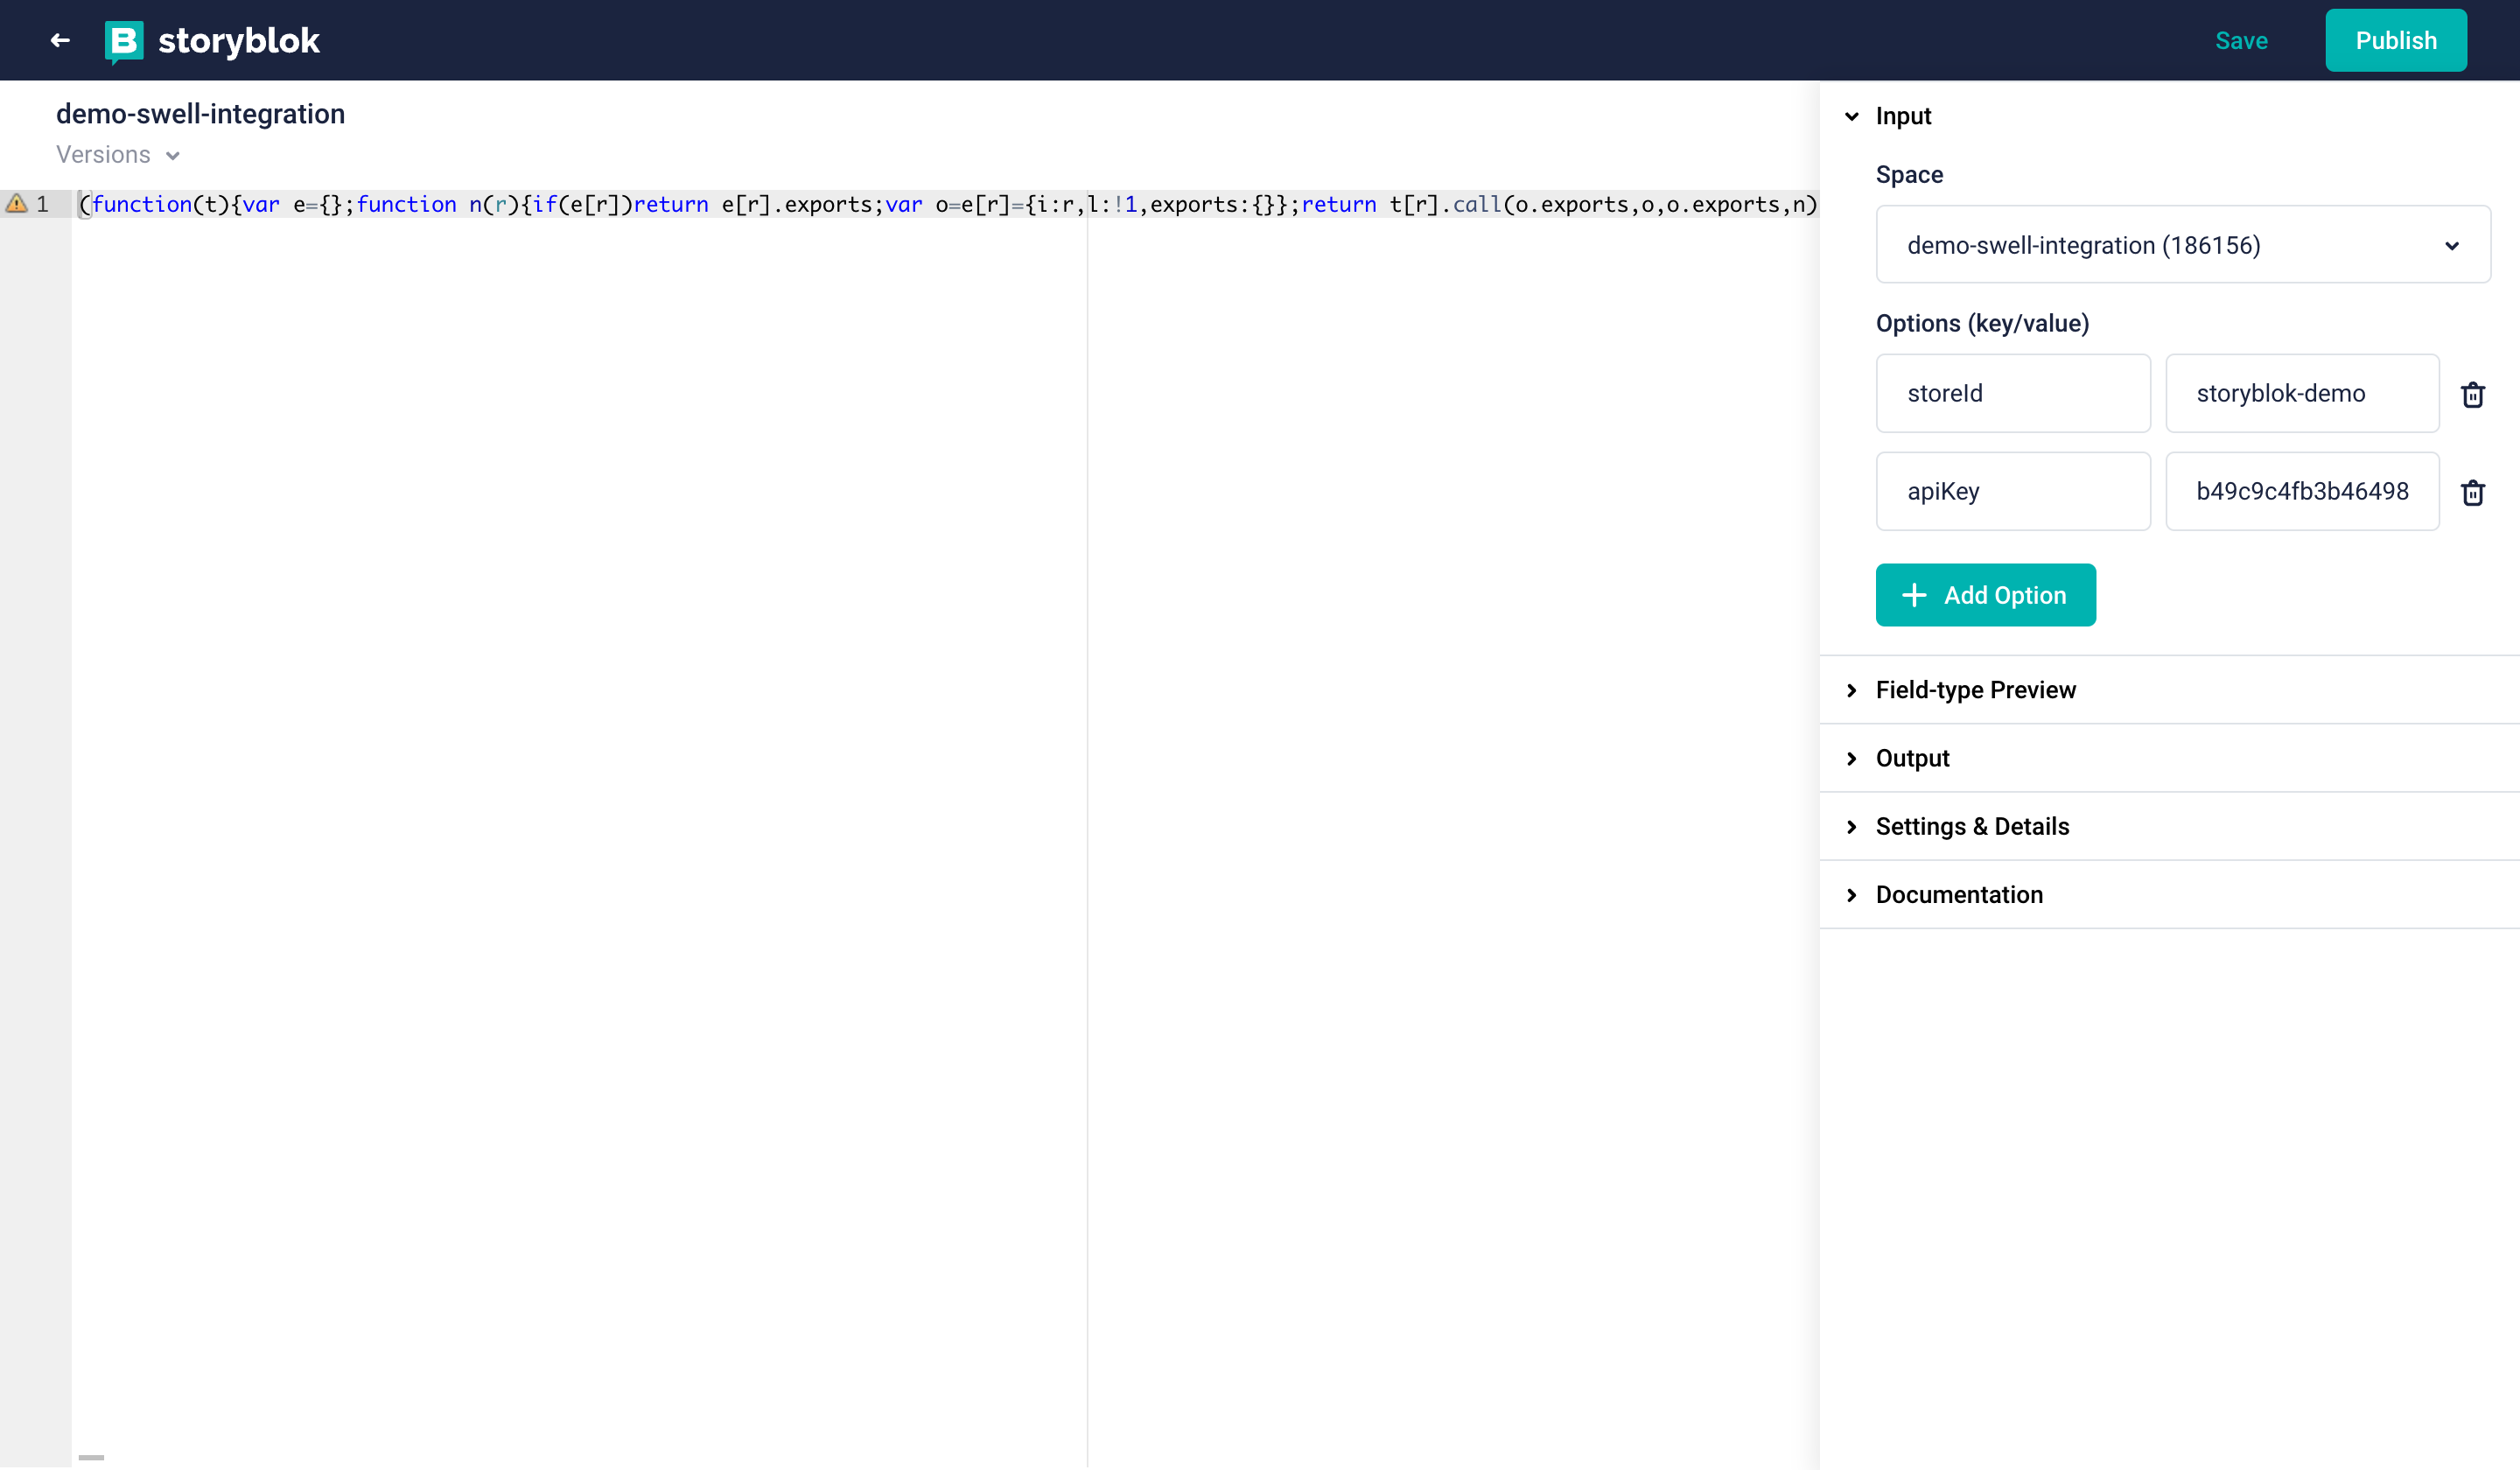
Storyblok plugin editor
Let's use Storyblok's field type starter so that we don't have to start completely from scratch. And to make things even easier for you, I’ve already created a field type plugin to integrate products. Fork or download the code from this repository (opens in a new window).
Type yarn install into your console and change the plugin name found under /src/Plugin.vue to match your custom field type plugin name.
initWith() {
  return {
    // needs to be equal to your Storyblok plugin name
    plugin: ‘demo-swell-integration’,
    items: null
  }
}
And that’s all! After you run the command yarn build, you can copy the output found under dist/export.js and paste it into Storyblok’s plugin editor. Hit save and publish and go back to your Storyblok space.
Here, let's create a component called product-list and add a field called products. The type should be Plugin and you should be able to select your custom field type plugin here. Add your apiKey and storeId credentials and save the plugin.
I also wanted to add a title, so my component consists of two fields, a title, and the products field created earlier.
Once created, go to any preferred story, and add the component to it.
Creating a new component in Storyblok
You can now select your products from Swell when clicking on Choose Product.
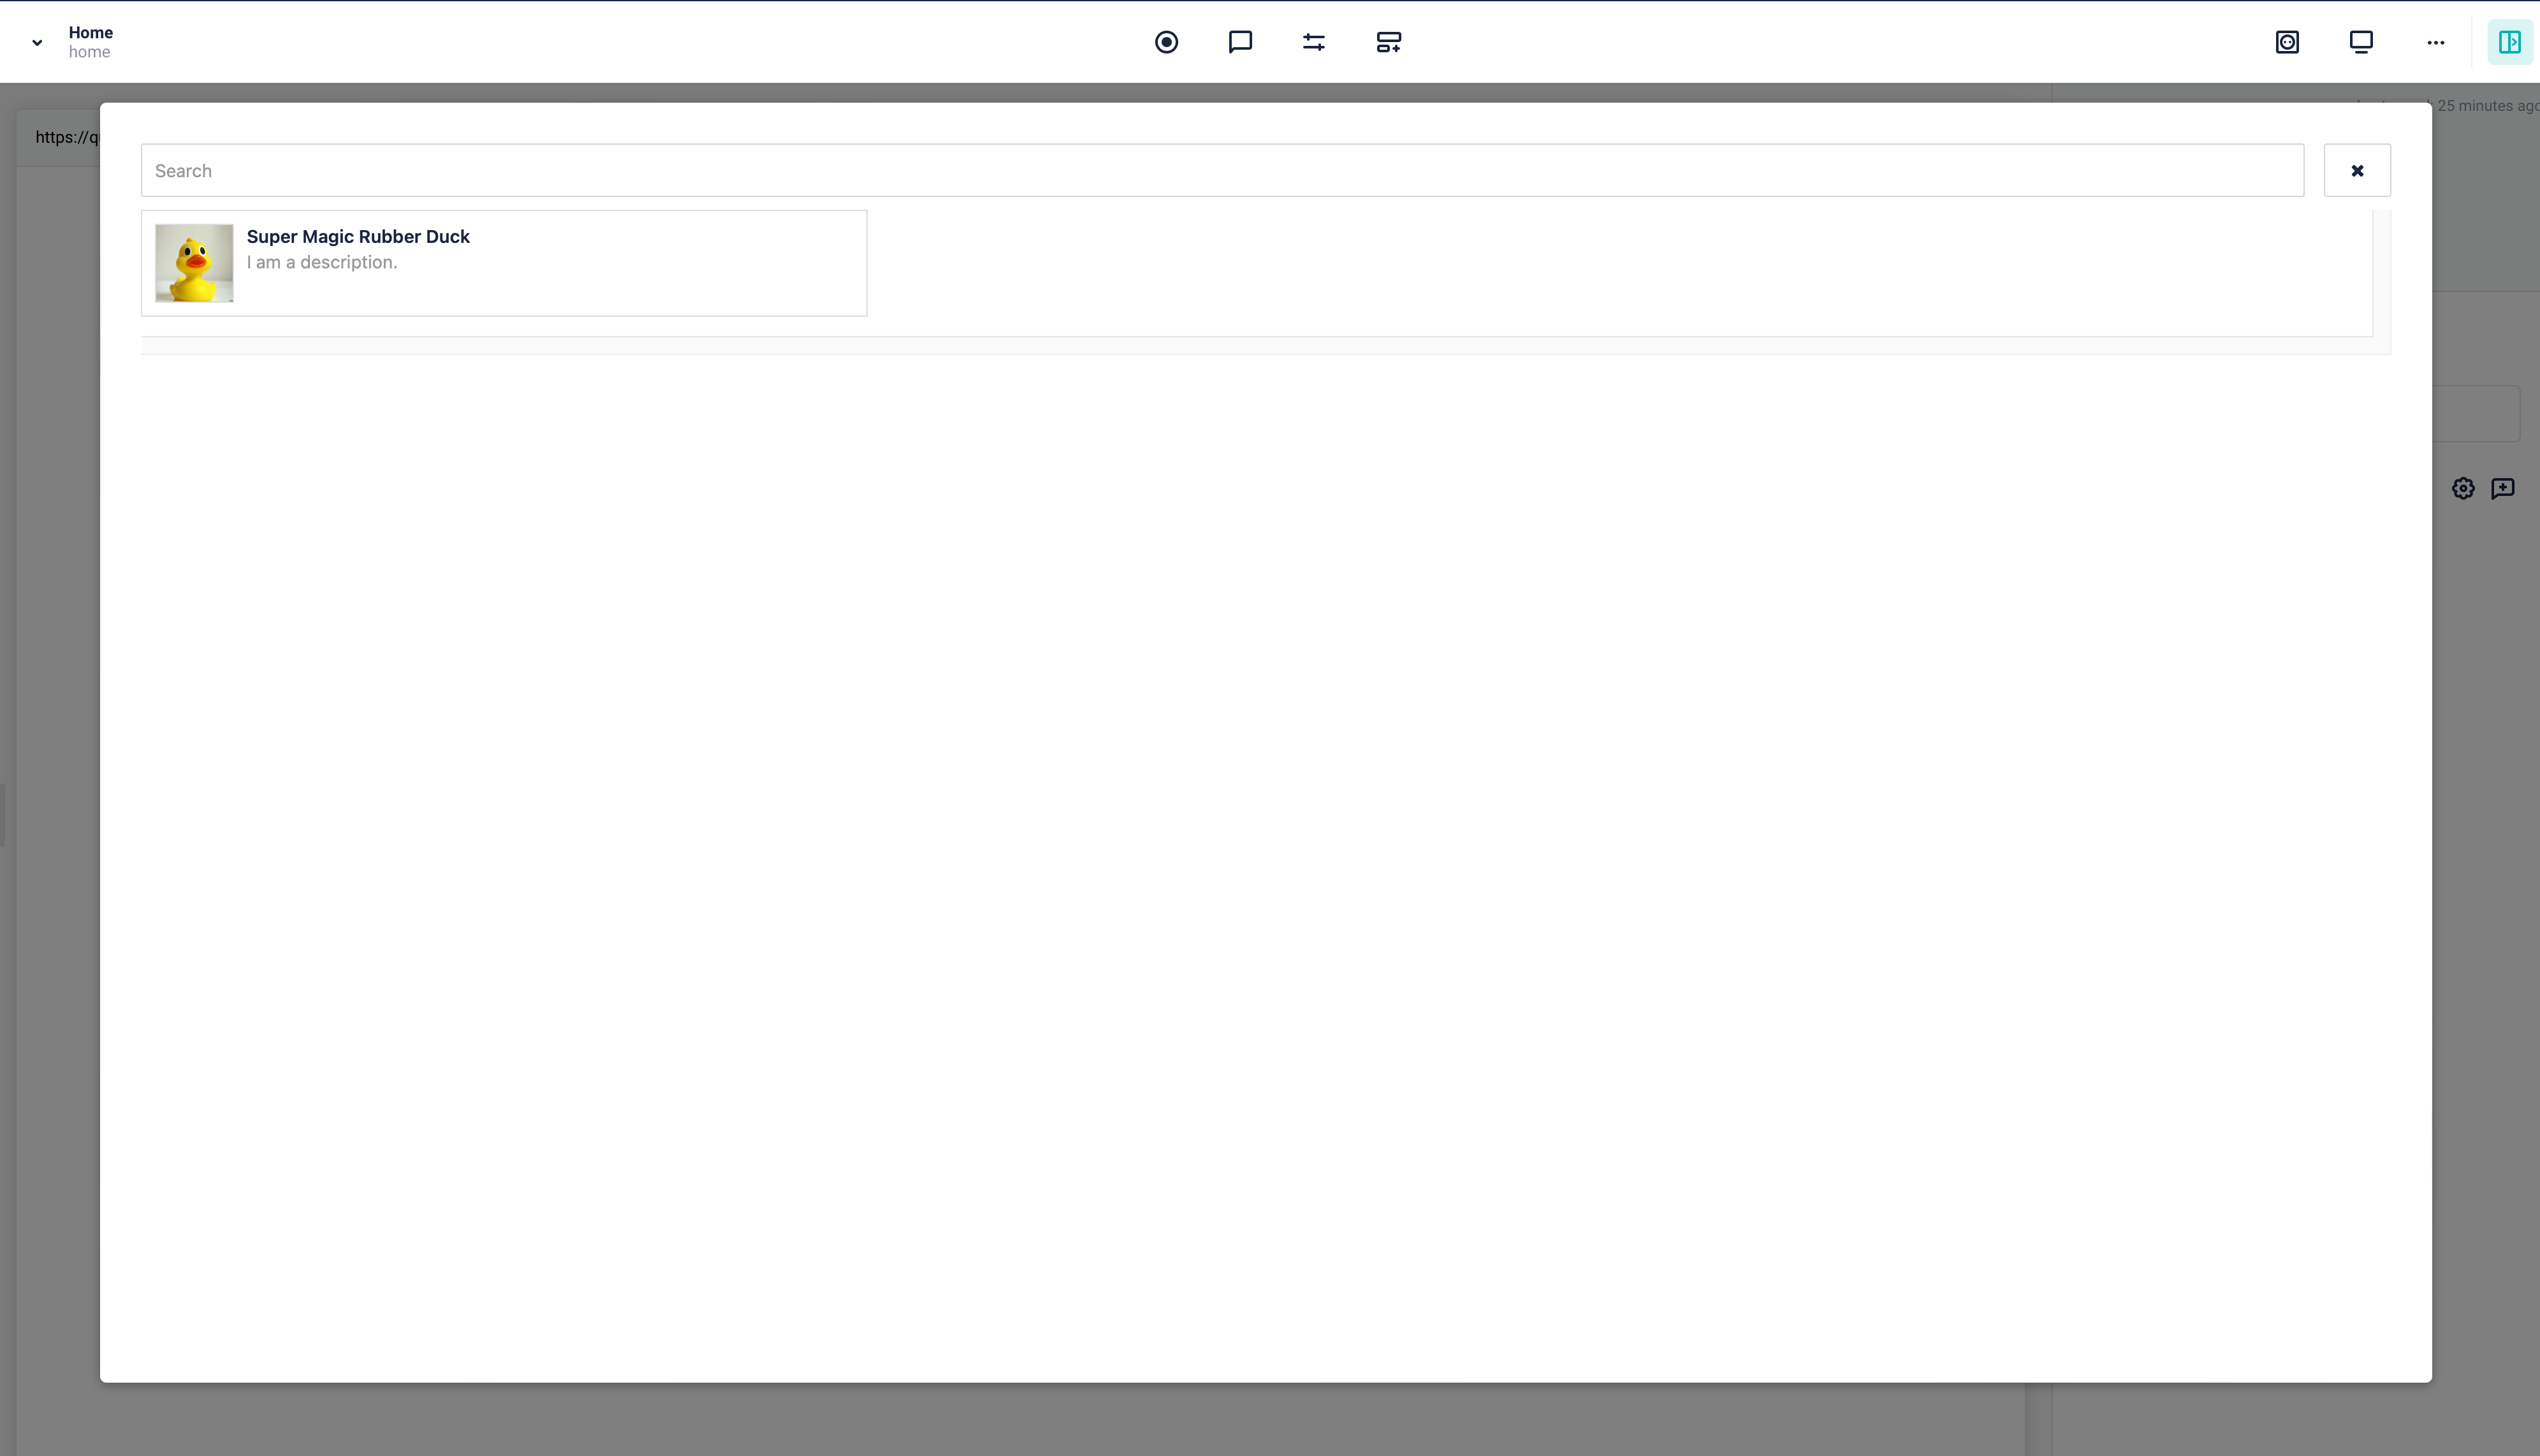
Selecting Swell products in Storyblok
Save your story and we are almost to go.
Connecting Nuxt 3 & Storyblok
We now have a Storyblok space with a product component from where we can fetch swell
products. Let's create a Nuxt 3 project and integrate Storyblok as well.
In order to learn more about how to use Storyblok with Nuxt 3, you can have a look at our Ultimate Tutorial for Nuxt.
For a fresh Nuxt 3 Setup, you can either follow the offical installation guide (opens in a new window) or just open a terminal and run npx nuxi init Nuxt-app followed by yarn install.
What we need next is @storyblok/nuxt and either swell-js or the corresponding Nuxt module nuxt-swell.
You should therefore be good with running the following command:
yarn add @storyblok/nuxt nuxt-swellWe like to keep things simple and straight-forward, so let's just add the following piece of code to your nuxt.config.ts and replace YOUR_ACCESS_TOKEN with your Storyblok API key.
export default defineNuxtConfig({
  modules: [
    [
      '@storyblok/nuxt',
      { accessToken: 'YOUR_ACCESS_TOKEN', useApiClient: true },
    ],
    'nuxt-swell',
  ],
  swell: {
    storeId: 'YOUR_STORE_ID',
    apiKey: 'YOUR_PUBLIC_ACCESS_TOKEN',
    options: {
      // optional
      useCamelCase: true,
    },
  },
})
Next, to keep things simple as well, we are going to use the built-in StoryblokComponent composable provided to us by storyblok/nuxt. Just replace your content in app.vue with:
<script setup>
const story = await useAsyncStoryblok('home', { version: 'draft' })
</script>
<template>
  <StoryblokComponent
    v-if="story"
    v-for="blok in story.content?.body"
    :blok="blok"
  />
</template>
Next, create a new component for the product list:
<template>
  <section>
    <h1>{{ blok.title }}</h1>
    <div class="grid">
      <div v-for="p in blok.products.items" :key="p.id">
        <img :src="p.images[0].file.url" :alt="p.name" class="product-image" />
        <p>{{ p.name }}</p>
      </div>
    </div>
  </section>
</template>
<script setup lang="ts">
defineProps({
  blok: {
    type: Object,
    required: true,
  },
})
</script>
<style scoped>
.grid {
  display: grid;
  grid-auto-columns: 1fr 1fr 1fr;
}
.product-image {
  width: 250px;
  object-fit: cover;
}
</style>
Besides stying the component we also successfully connected our three technologies.
Connecting Nuxt 3 & Swell
After fetching content from Storyblok and displaying swell products, we could make use of the nuxt-swell module we already installed while settings up the project.
As an example, we are going to query all available categories. The whole documentation around the nuxt-swell module can be found here (opens in a new window).
Listing all categories is quite simple. Using the useSwell() composable, we don't even need to import anything in a component or wherever we are using it.
In your script setup, you can just add the following code:
const swell = useSwell()
const categoryData = await useAsyncData(
  'categories',
  async () => await swell.categories.list({})
)
const categories = categoryData.data.value.results
To display it afterwards, we can iterate through the given result:
<ul>
    <li v-for="c in categories" :key="c.id">
      {{ c.name }}
    </li>
  </ul>
For example purposes, I did everything within the app.vue, which looks like the following now:
<script setup>
const story = await useAsyncStoryblok('home', { version: 'draft' })
const swell = useSwell()
const categoryData = await useAsyncData(
  'categories',
  async () => await swell.categories.list({})
)
const categories = categoryData.data.value.results
</script>

<template>
  <StoryblokComponent
    v-if="story"
    v-for="blok in story.content?.body"
    :blok="blok"
  />
  <ul>
    <li v-for="c in categories" :key="c.id">
      {{ c.name }}
    </li>
  </ul>
</template>
Wrapping up
We just learned how to integrate and make use of headless technologies.
Based on what has been written in this article, it is possible to build a production-ready storefront in Nuxt 3, manage the content via Storyblok and use the complete Swell eCommerce system based on your needs.
Have a look at our complete example storefront, the rubber duck store!
Feel free to contact me in case you have further questions.
A note on Swell shipping zones
When you first create a store, it is possible that the store currency is set to USD. If you change it, the shipping zones are not updated correctly and you would not be able to checkout (except if you build a custom checkout though) products. To resolve this issue, you need to hit the Backend API of Swell with a PUT request to update existing shipment zones with a valid currency. You can read more about it here (opens in a new window).
If you want to learn more about field type plugins, you can learn how to fetch data from Spotify in this tutorial (written by my buddy Wessel van der Pal).
