How to deploy to Gatsby Cloud Hosting
Storyblok is the first headless CMS that works for developers & marketers alike.
In this tutorial, we will explore how to deploy Storyblok & Gatsby.js site to Gatsby Hosting. Partially, we will use our Add a headless CMS to Gatsby.js in 5 minutes blog post. It will help you to understand the architecture that we have, to enable the real-time preview in the Visual Editor, gatsby-source-storyblok plugin, and the Storyblok Bridge.
Requirements
In order to follow this tutorial, here are the requirements:
- Basic knowledge of Gatsby.js and React
- Gatsby Cloud account (free plan)
- A Storyblok space with Gatsby.js
If you haven't yet tried out our Add a headless CMS to Gatsby.js in 5 minutes, we highly recommend you to take a look at this tutorial.
What is Gatsby Cloud?
Gatsby Cloud is a unified cloud platform specifically built for the Gatsby framework. The Gatsby framework combines a modern developer toolset and workflow.
In Gatsby Cloud, there are the benefits to enhance the DX:
- Incremental builds in the cloud
- Real-time CMS previews
- Build rich web experiences with Functions
- Powerful edge network to boost up deployments
- Instant feedback from Lighthouse reports
Why Gatsby Cloud Hosting?
Gatsby Cloud Hosting is a feature in Gatsby Cloud to host websites on Gatsby Cloud. It gives us access to a secure, scalable, and performant Edge Network.
Gatsby.js recommends using Gatsby Cloud Hosting to run the best Gatsby experience.
gatsby new storyblok-gatsby-cloud https://github.com/gatsbyjs/gatsby-starter-defaultNext up, install gatsby-source-storyblok, storyblok-react, and storyblok-js-client.
cd storyblok-gatsby-cloud
yarn add storyblok-react gatsby-source-storyblok storyblok-js-client
Make sure to install gatsby-plugin-gatsby-cloud before adding your site to Gatsby Hosting.
yarn add gatsby-plugin-gatsby-cloudNext up, we configure a plugin in gatsby-config.js file based on Gatsby's plugin documentation. Simply add the following code in the plugins part of the Gatsby configuration.
plugins: [
  {
    resolve: `gatsby-plugin-gatsby-cloud`,
    options: {
      // as your choice
    },
  },
]
Read this documentation to understand the configuration for gatsby-plugin-gatsby-cloud plugin.
If you take a look at this documentation page from Gatsby.js, you'll see that there are few headless CMSes in Gatsby Cloud that have automatic integrations. Storyblok works without automatic integrations in Gatsby Cloud. In this case, we can set up hosting integrations manually.
Add a project in Gatsby Cloud
First, sign in to Gatsby Cloud from this page. If you don't have an account yet, create an account first. After you signed in, click a button to Create new site or Add a site {1}.
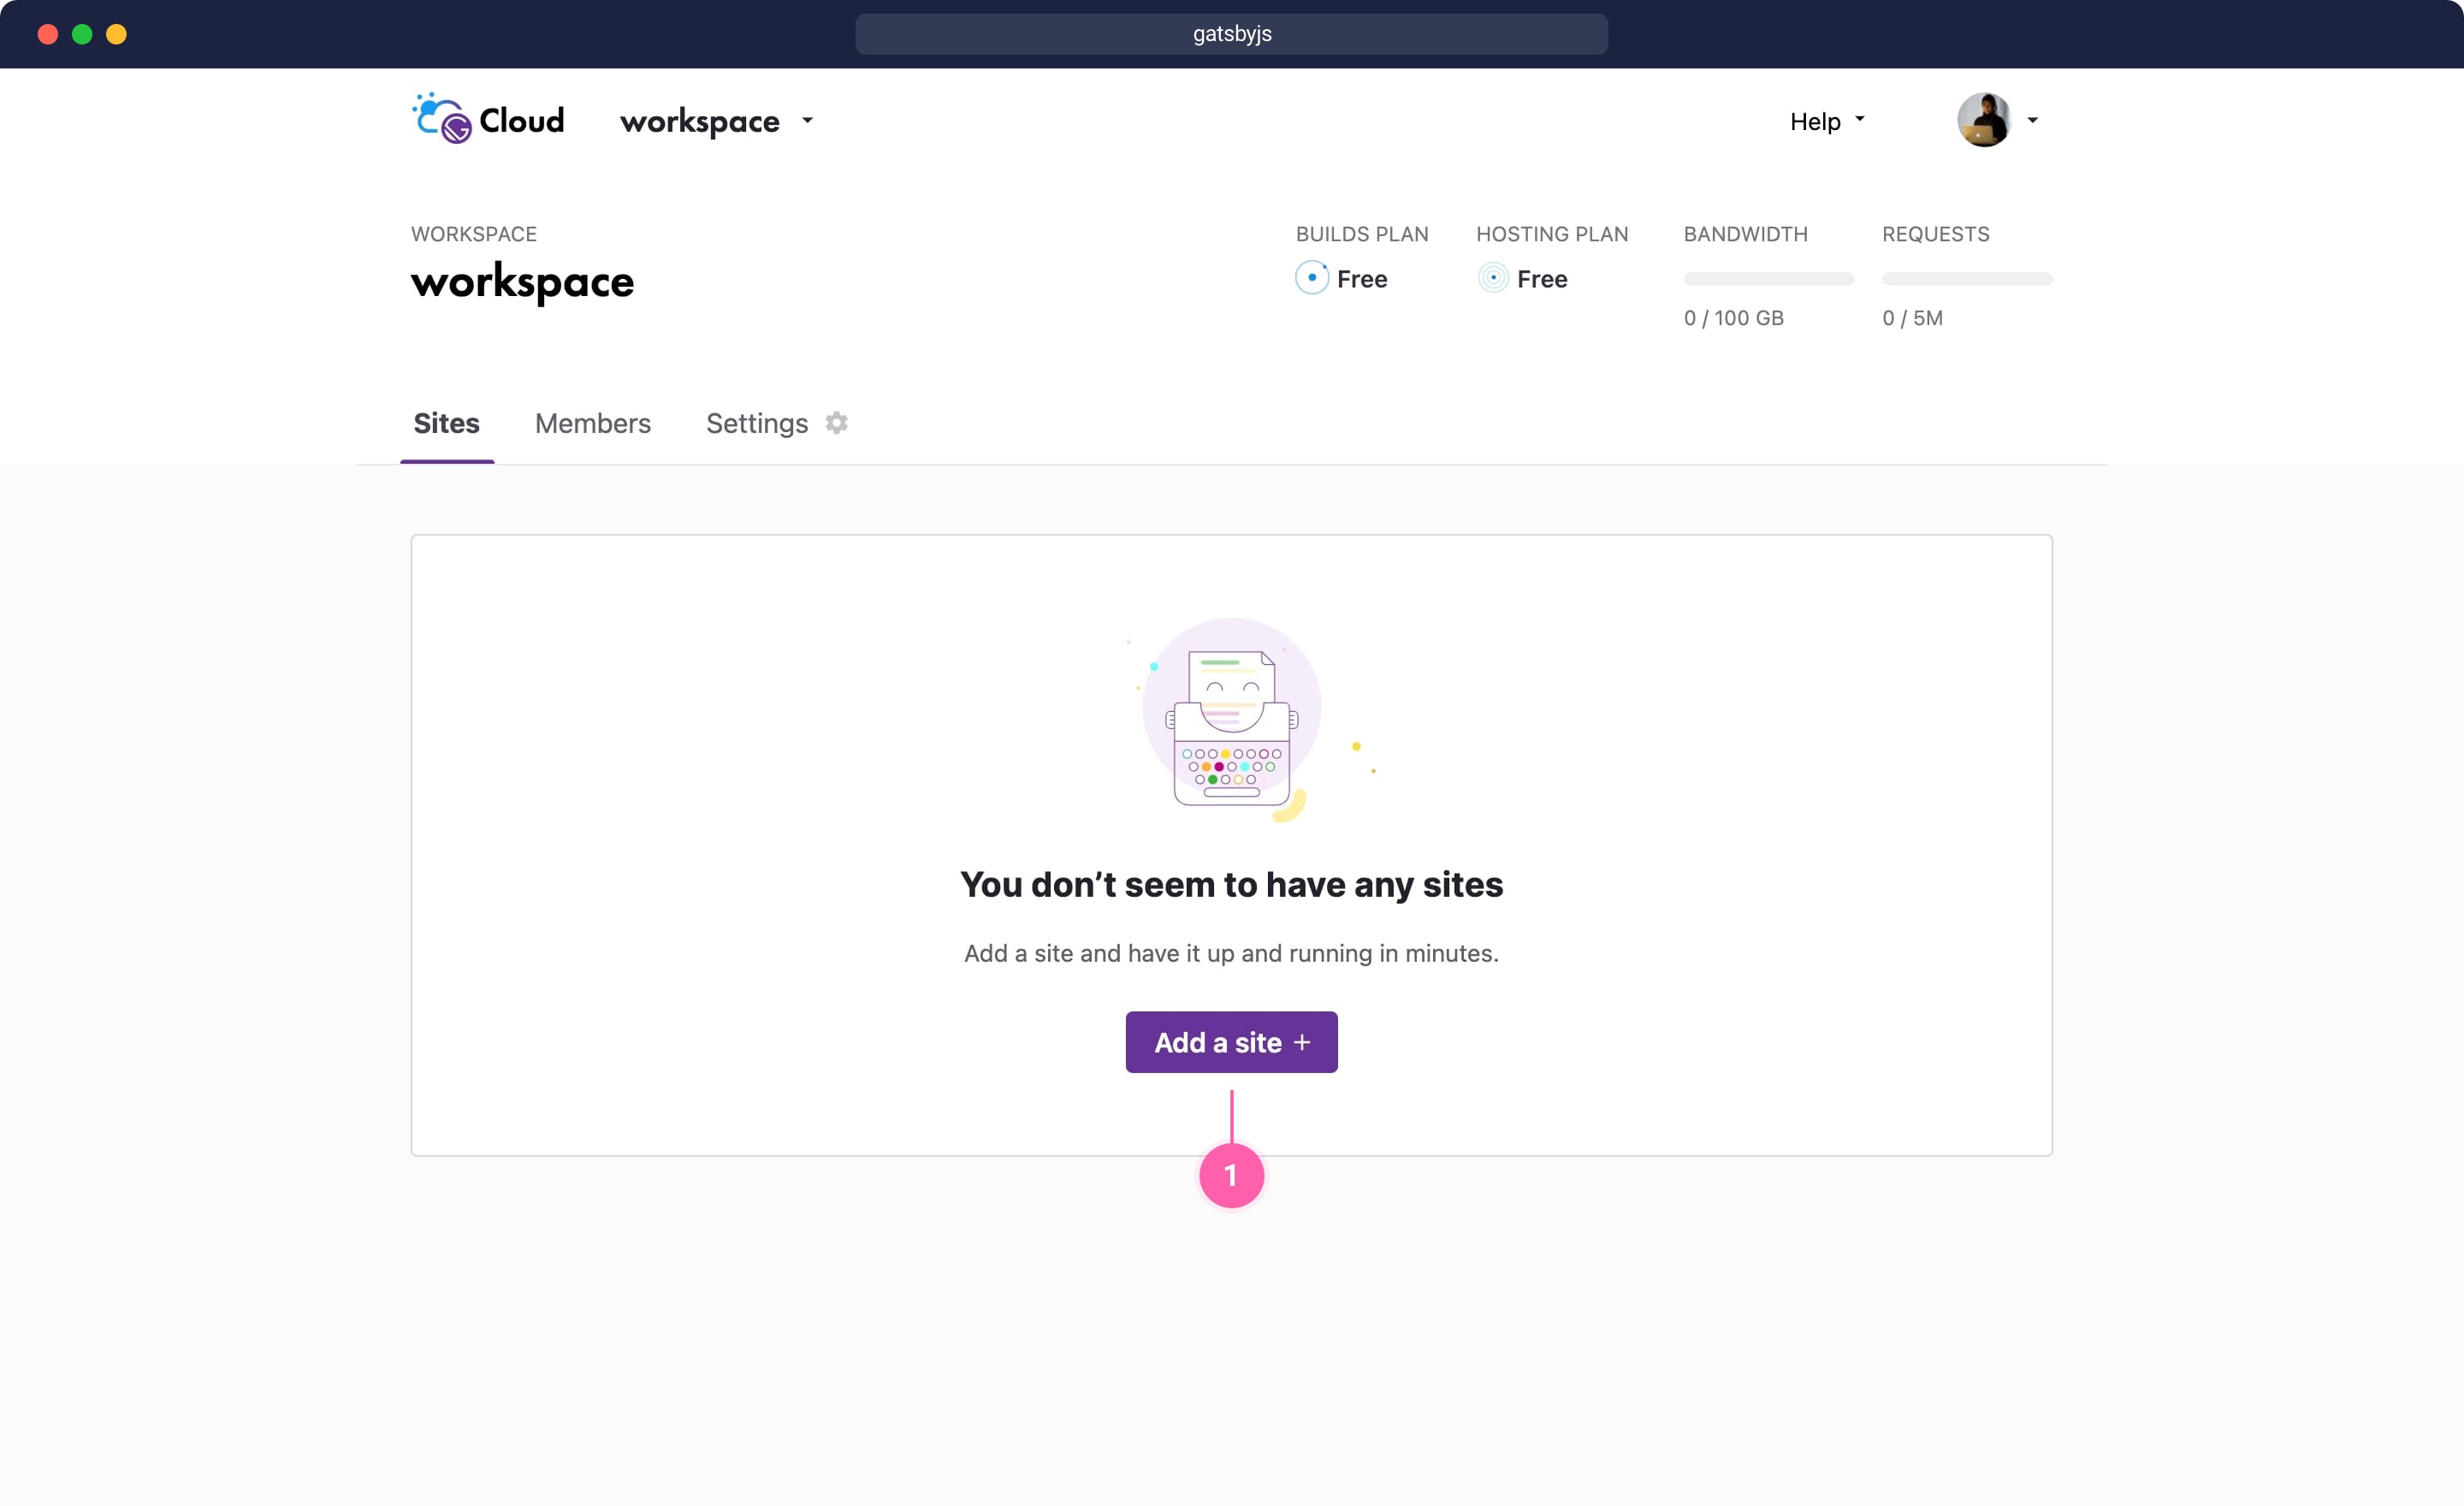
Add a site in Gatsby Cloud
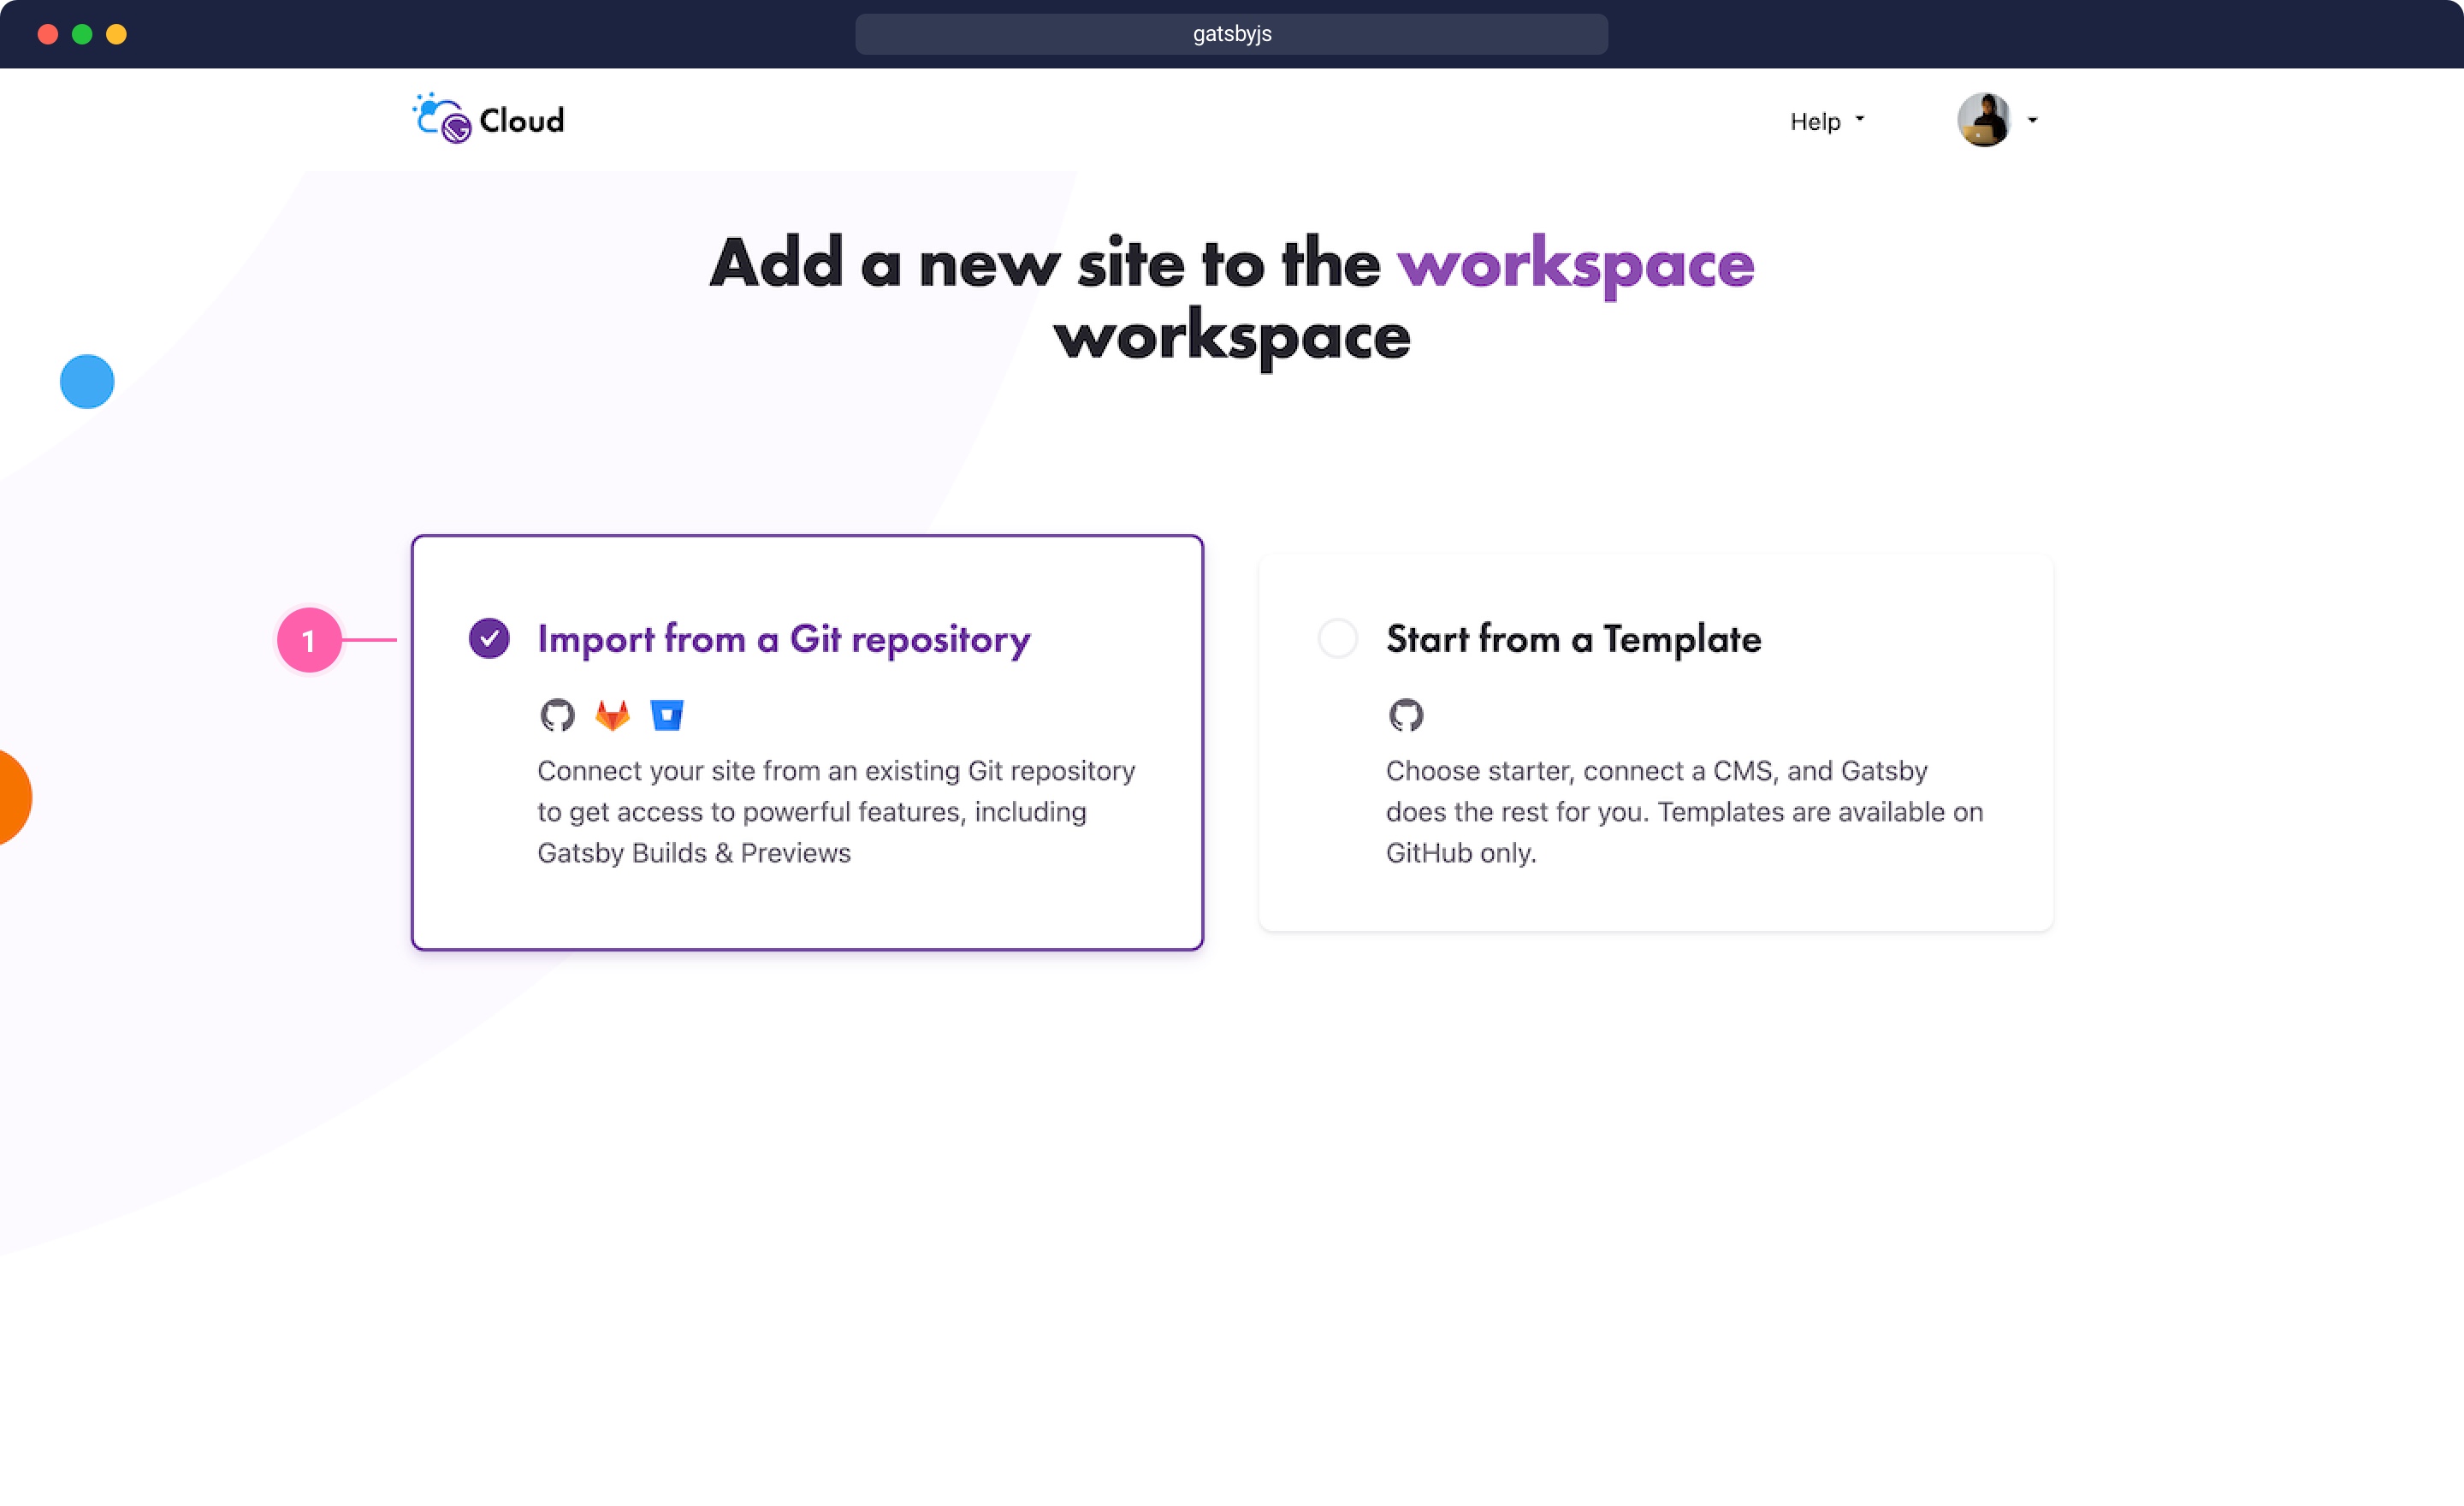
Choose Import from a Git repository
Next up, choose a Git provider. Since we will commit our changes in a GitHub repository, choose GitHub {1}.
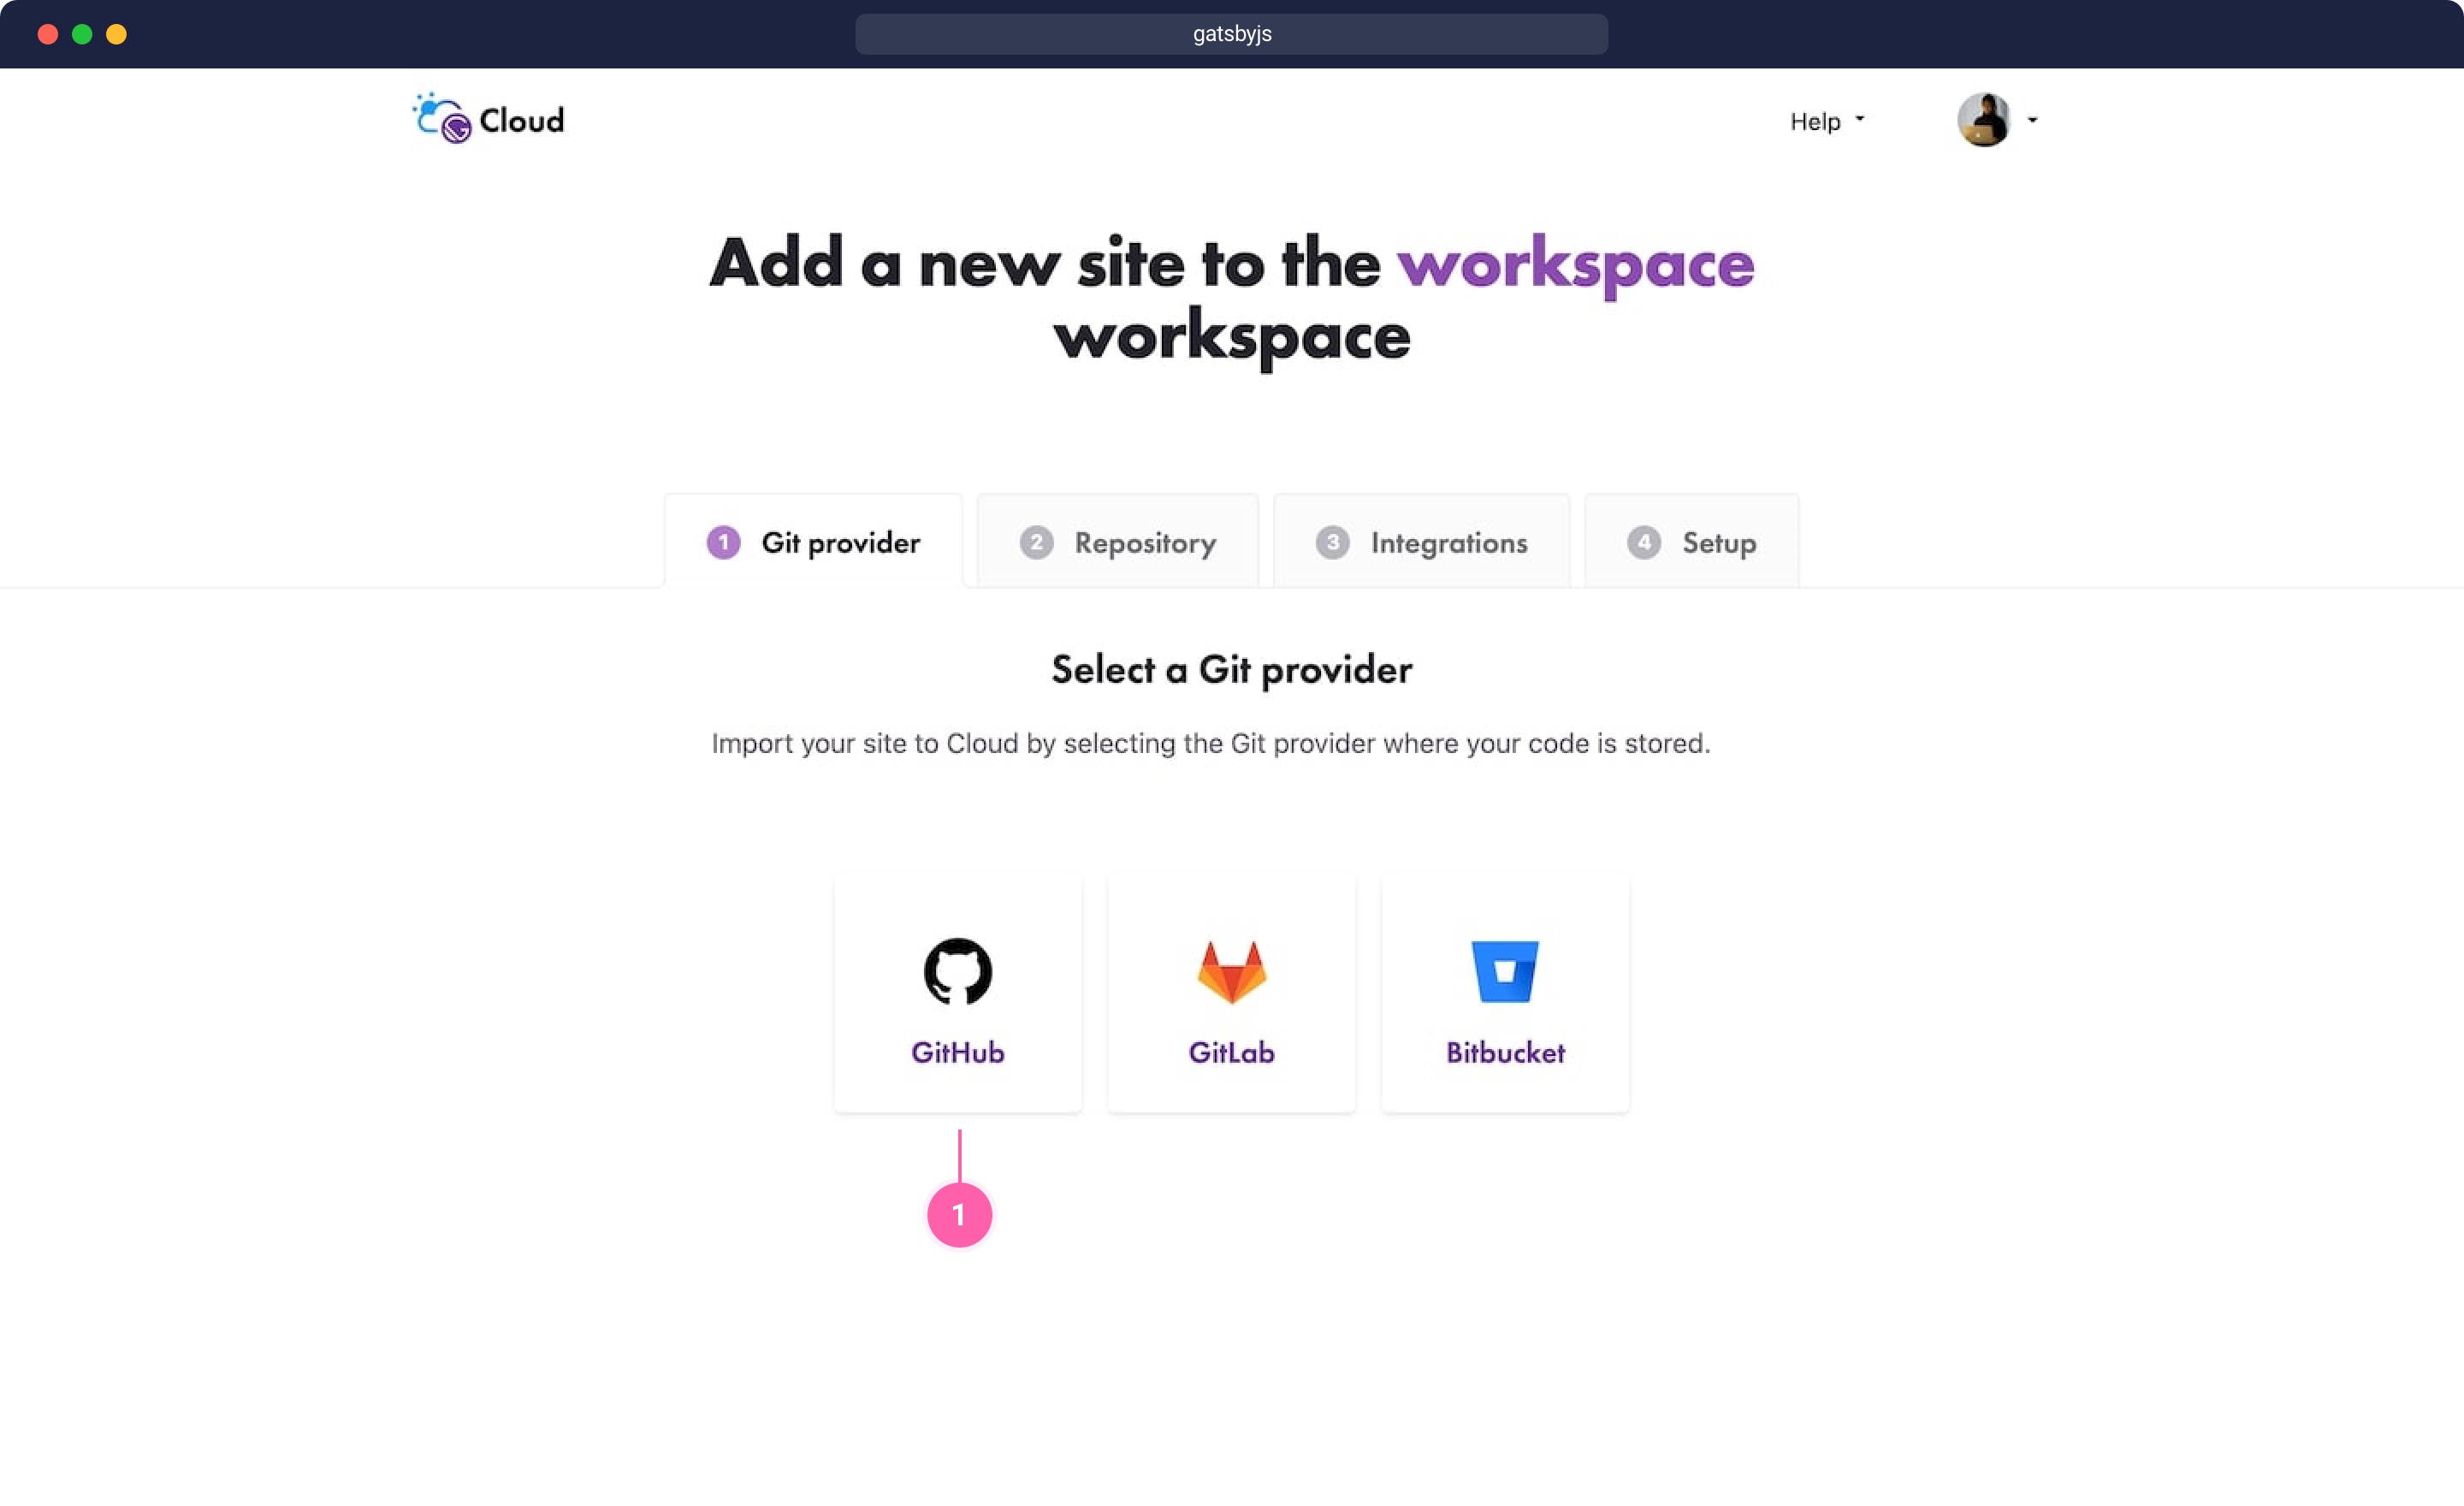
Choose a Git provider
On the next page, choose Select destination {1}.
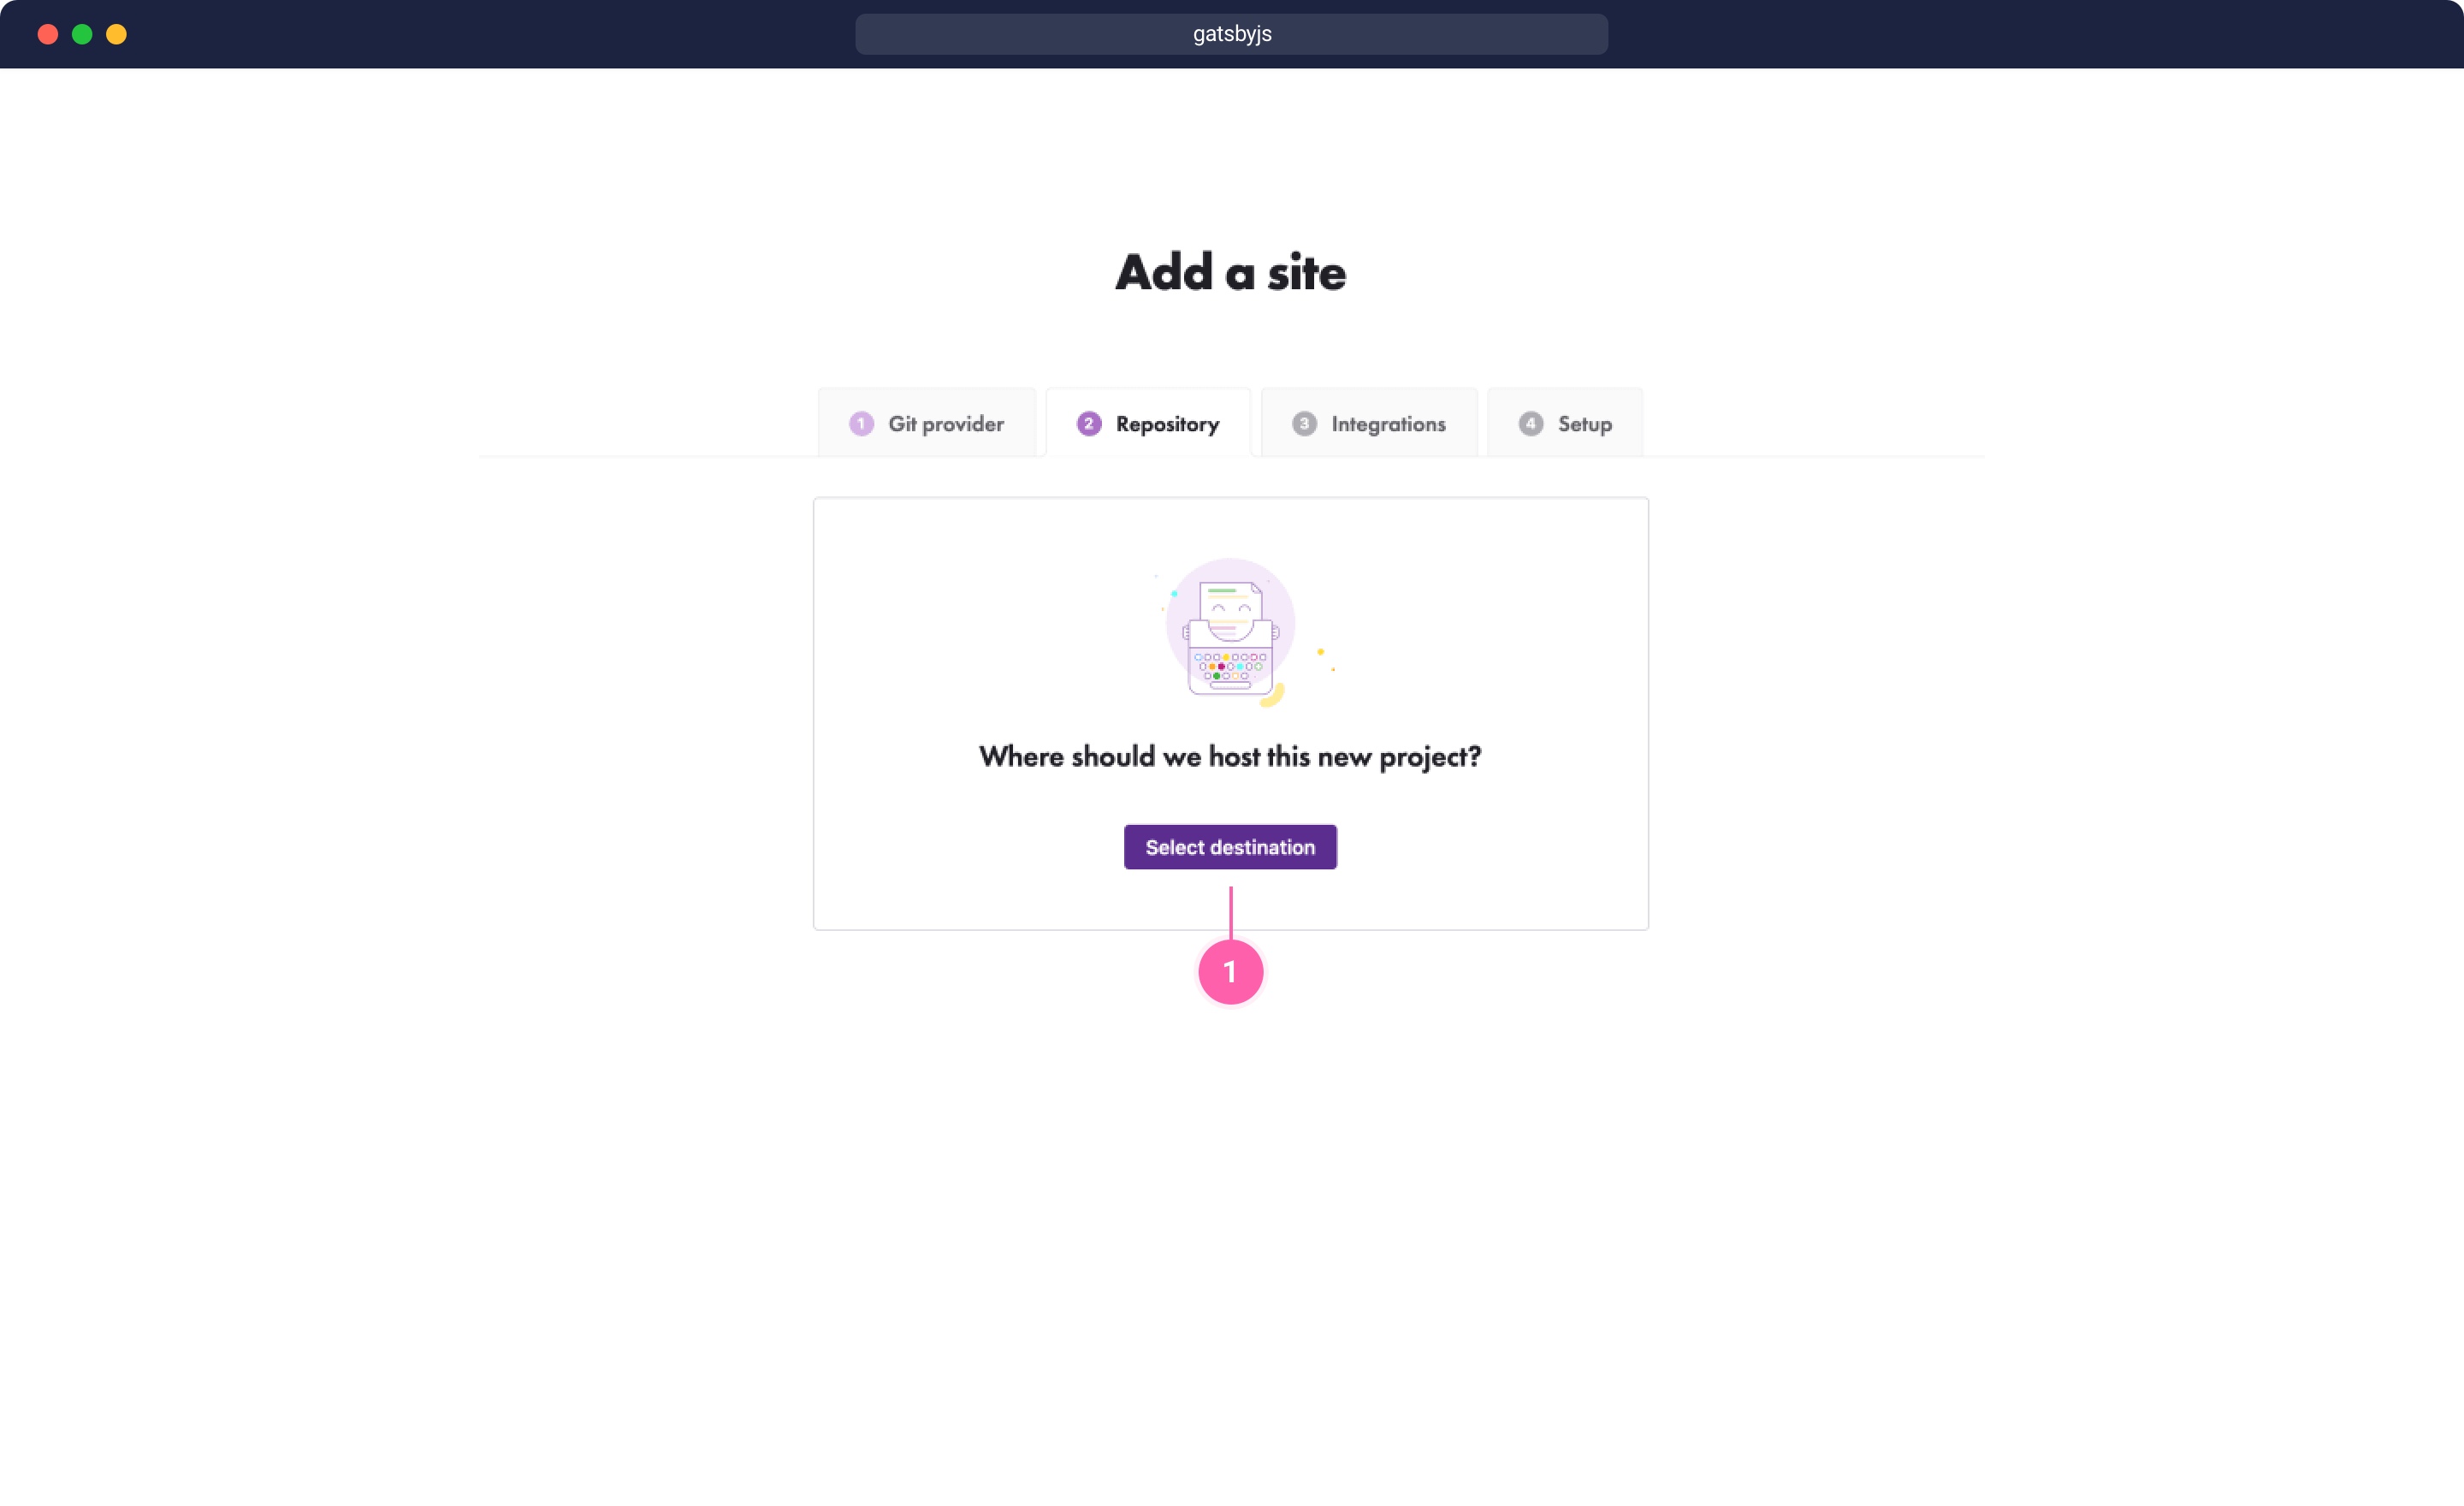
Select destination
After clicking this button, the browser page to install Gatsby Cloud in GitHub will be prompted- it comes up automatically. Install Gatsby Cloud in GitHub.
Select a GitHub organisation and repository dedicated to this project.
In the next step, choose a repository from Select a Repository {1}, select main branch from Base Branch {2}, and fill out the Site Name {3} to display in Gatsby Cloud dashboard.
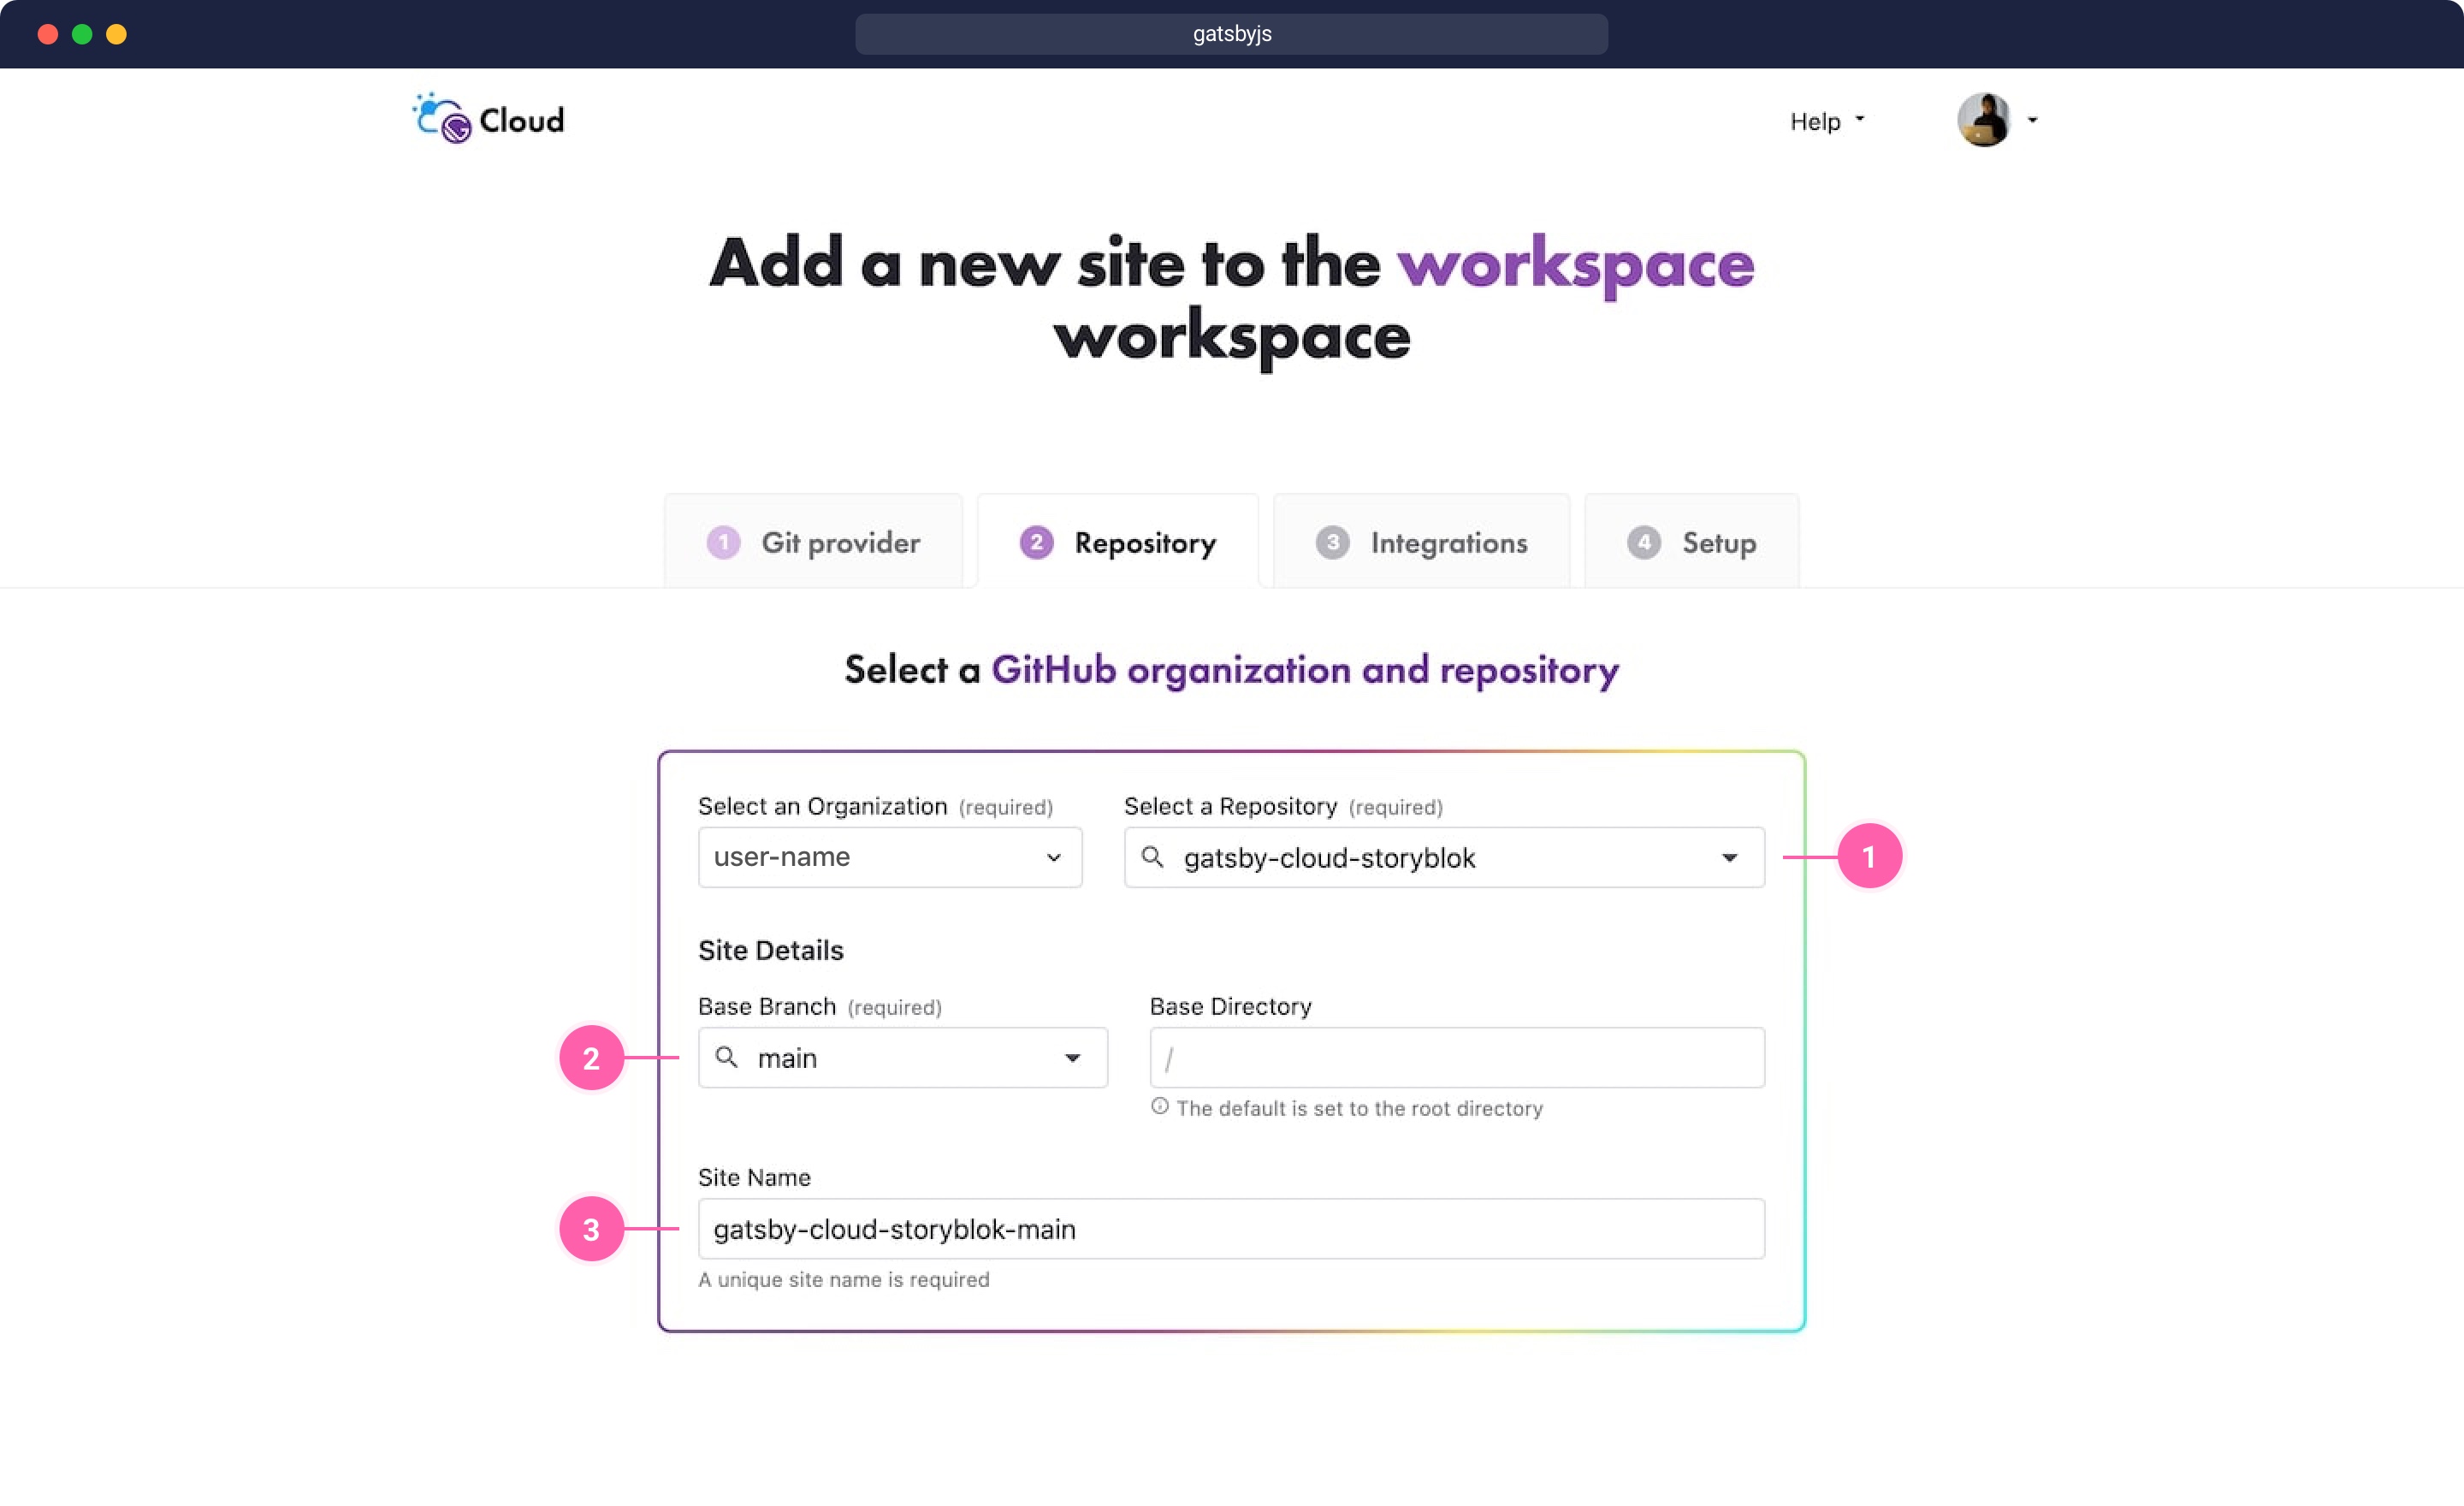
Select a GitHub organisation and repository
Skip an optional integration
On this page, we need to skip an optional integration. Click Skip this step at the bottom of the page.
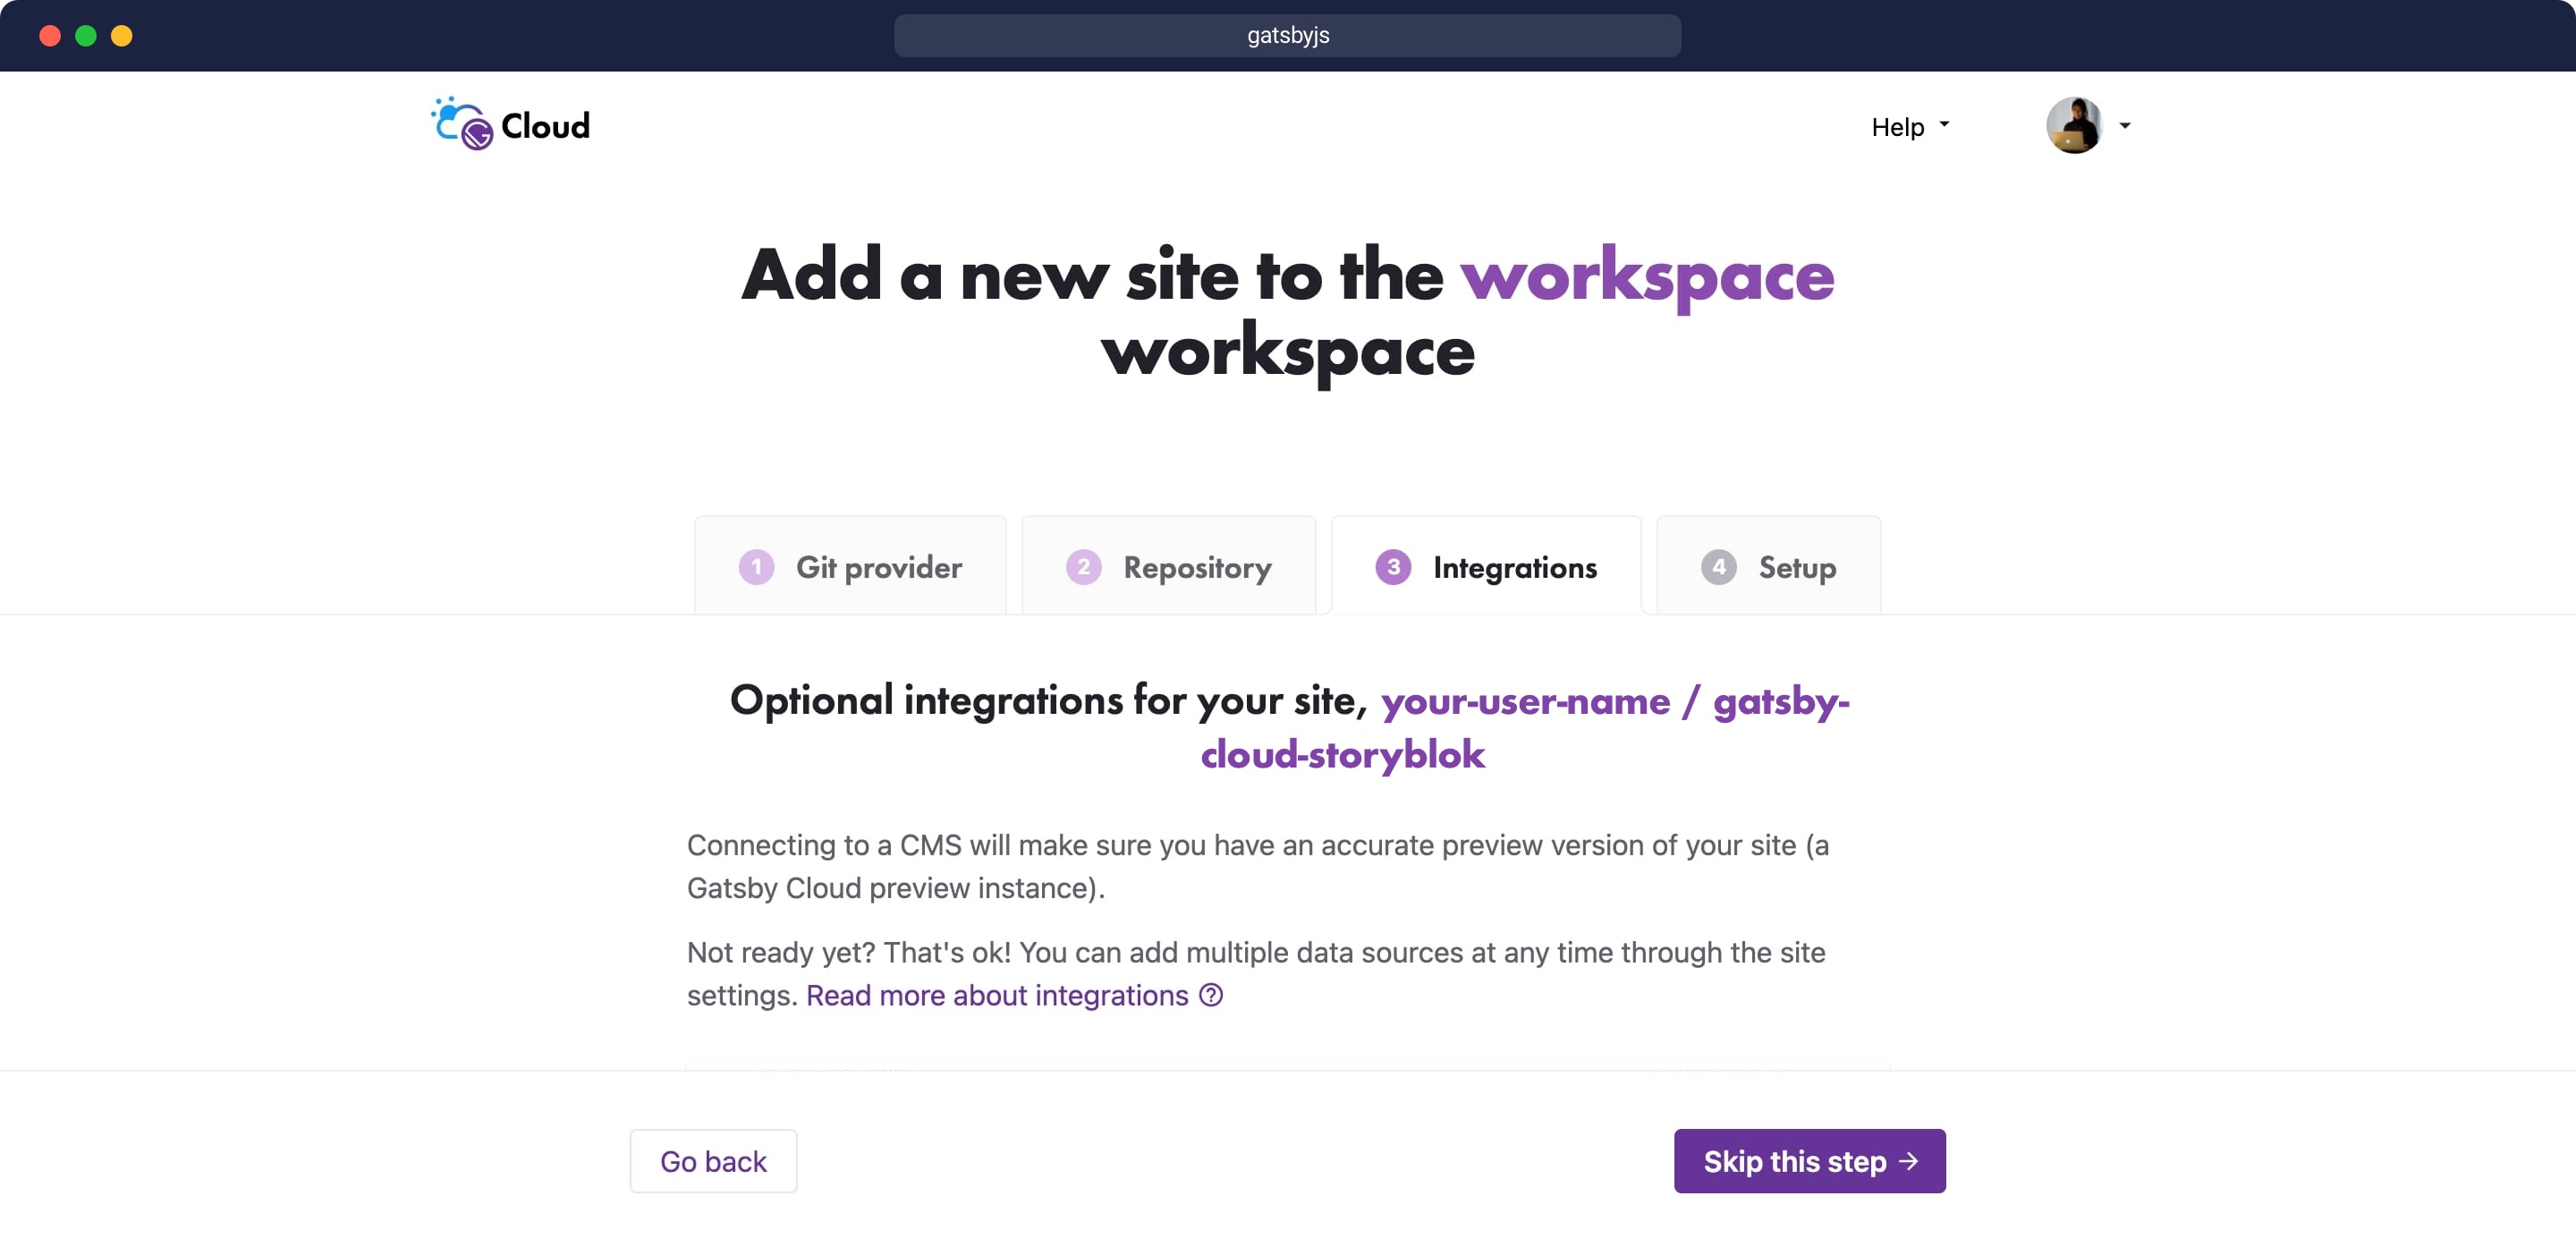
Skip an optional integration
Configure environment variables
After skipping the optional integration, configure the environment variables. Add the build variable {1} and preview variable {2} for API keys. Also, add a space ID from Add Variable + {3} button.
You can find out more from Gatsby.js documentation about build variable and preview variable.
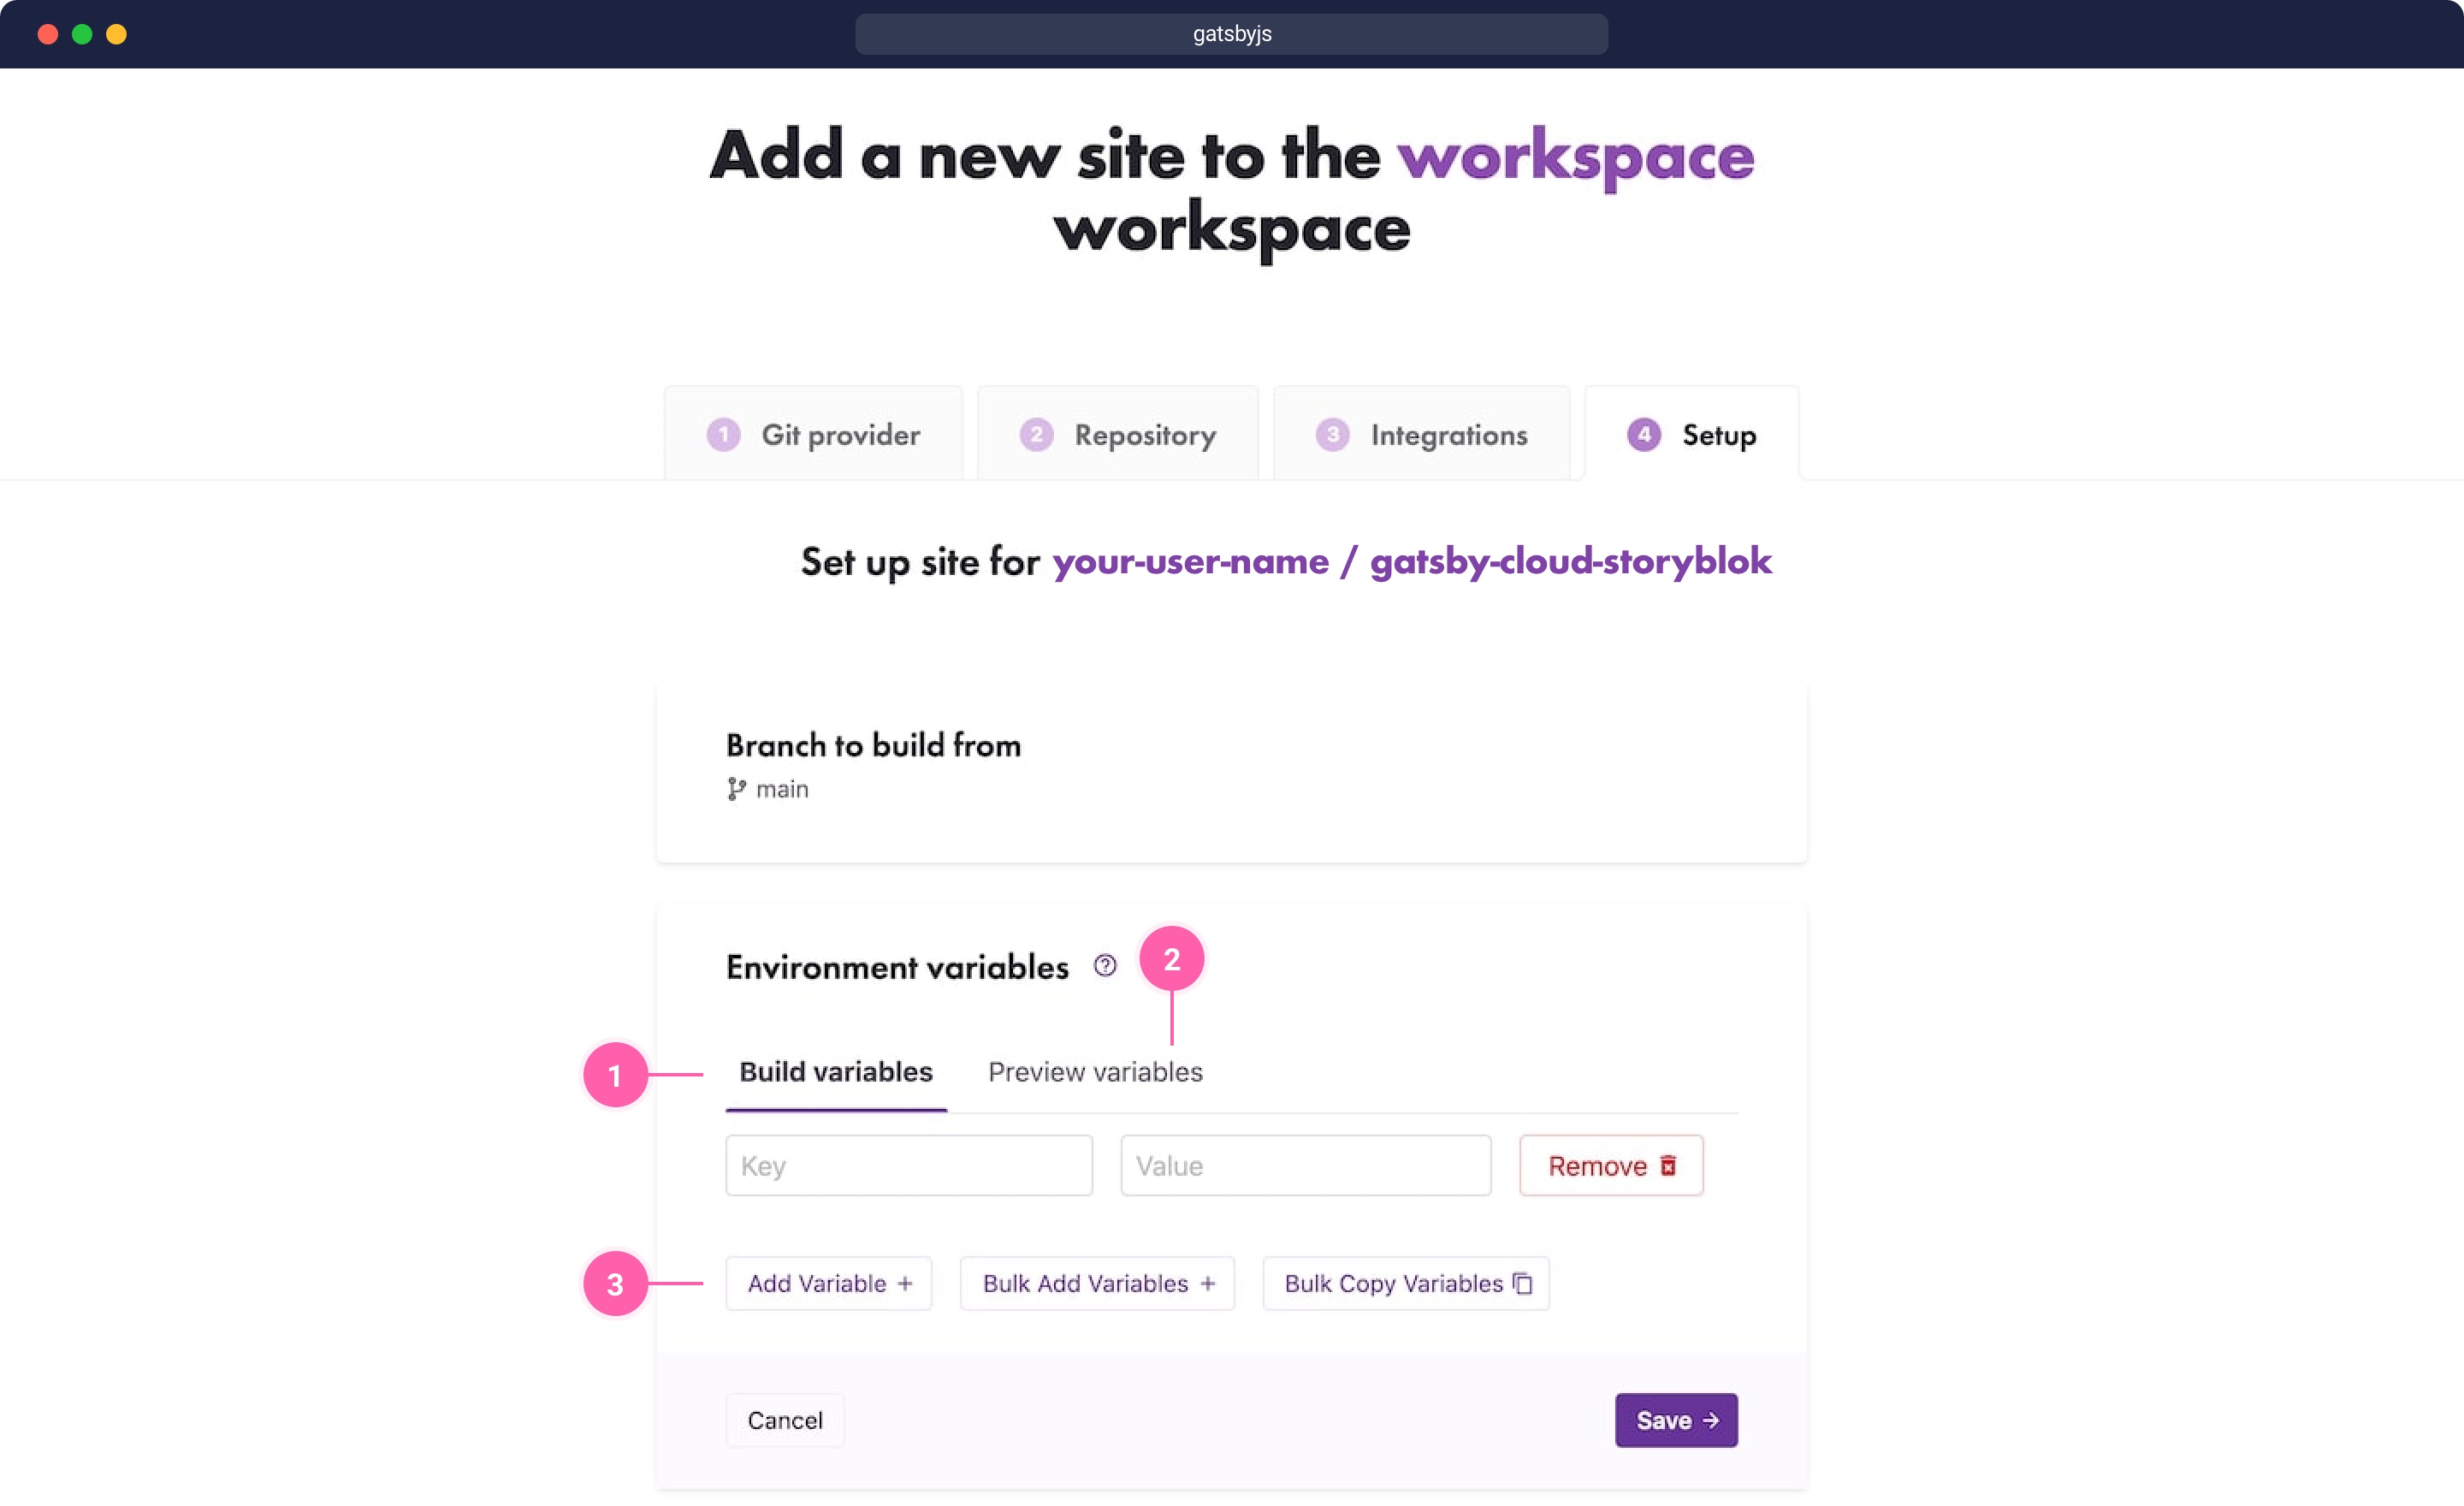
Add build variable, preview variable, and space ID
Here is an example of the environment variables.
| Key | Values |
|---|---|
| STORYBLOK_ACCESS_TOKEN | Your content delivery API access token |
| STORYBLOK_SPACE_ID | Your Storyblok space ID |
| Key | Values |
|---|---|
| STORYBLOK_PREVIEW_ACCESS_TOKEN | Your content preview API access token |
| STORYBLOK_SPACE_ID | Your Storyblok space ID |
Generate a public API key
By default, we have a preview API key. Let's generate a public API key for production builds. Go to Settings {1} and choose API-Keys {2}. We will use a preview API key too.
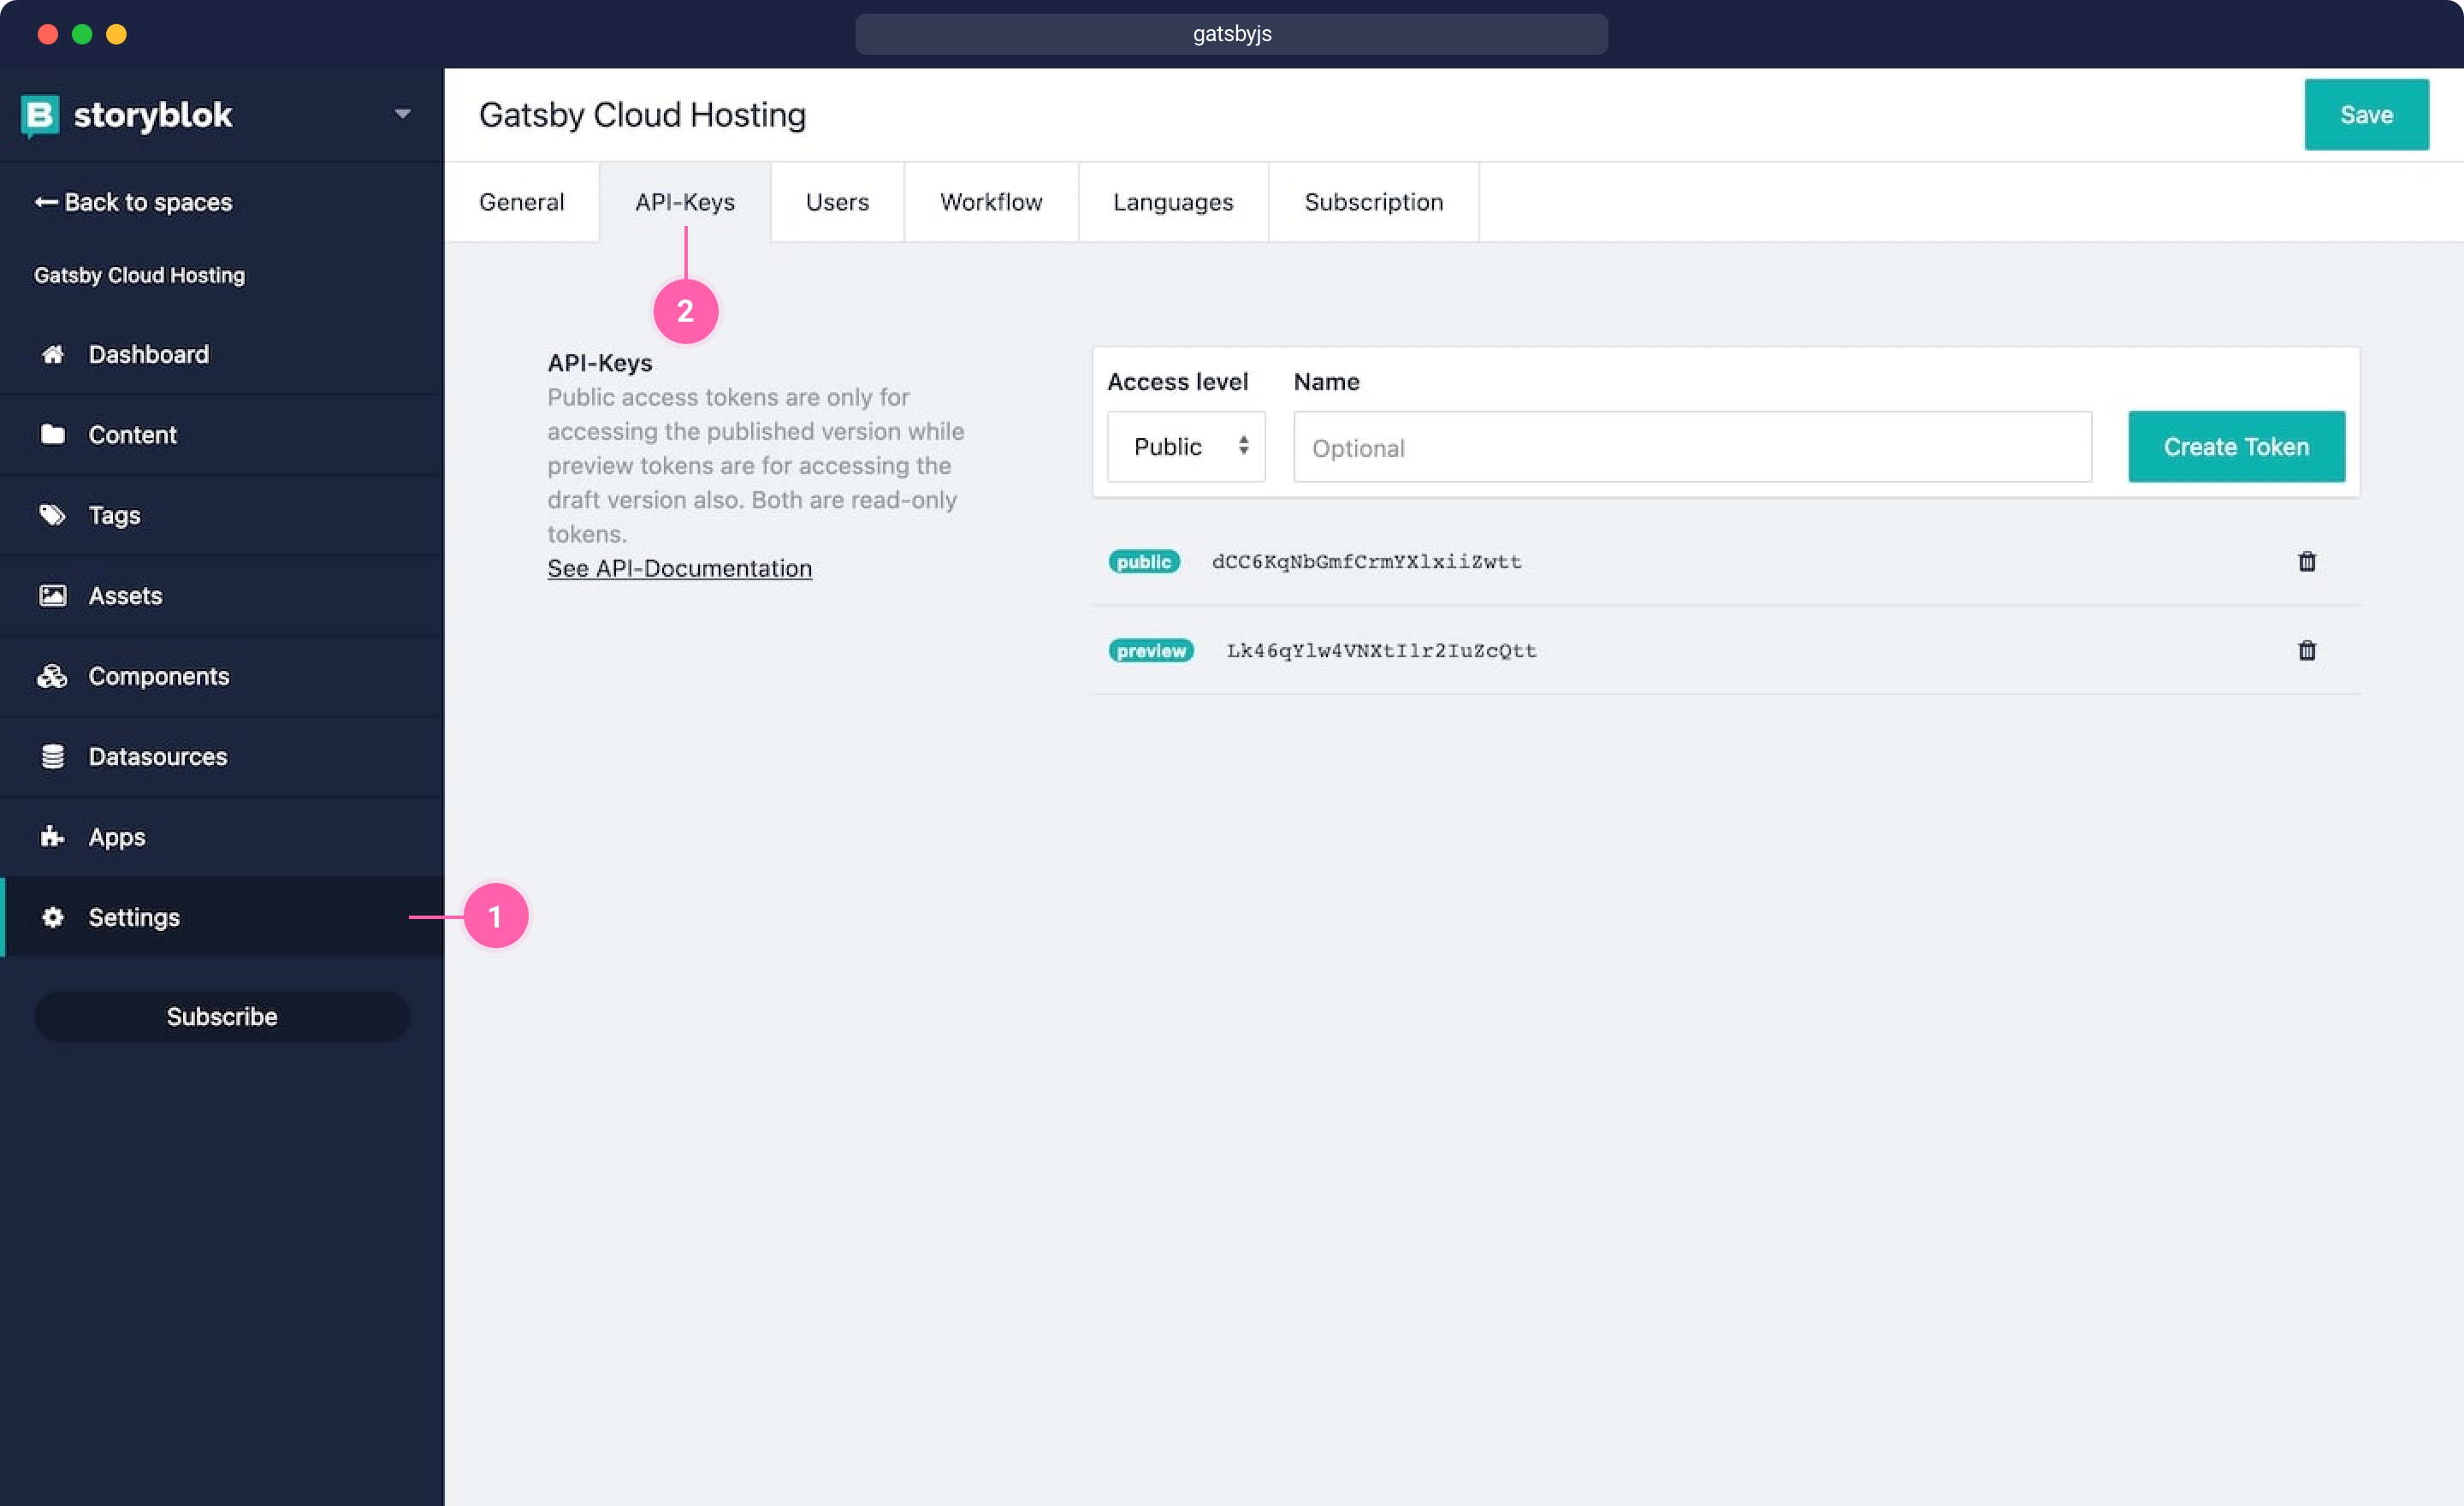
Generate a public API key
Get Webhooks from Gatsby Cloud
In this step, we go back to Gatsby Cloud dashboard. Go to Site Settings and go to Webhook {1}. Copy Preview Webhook {2} and Builds Webhook {3}.
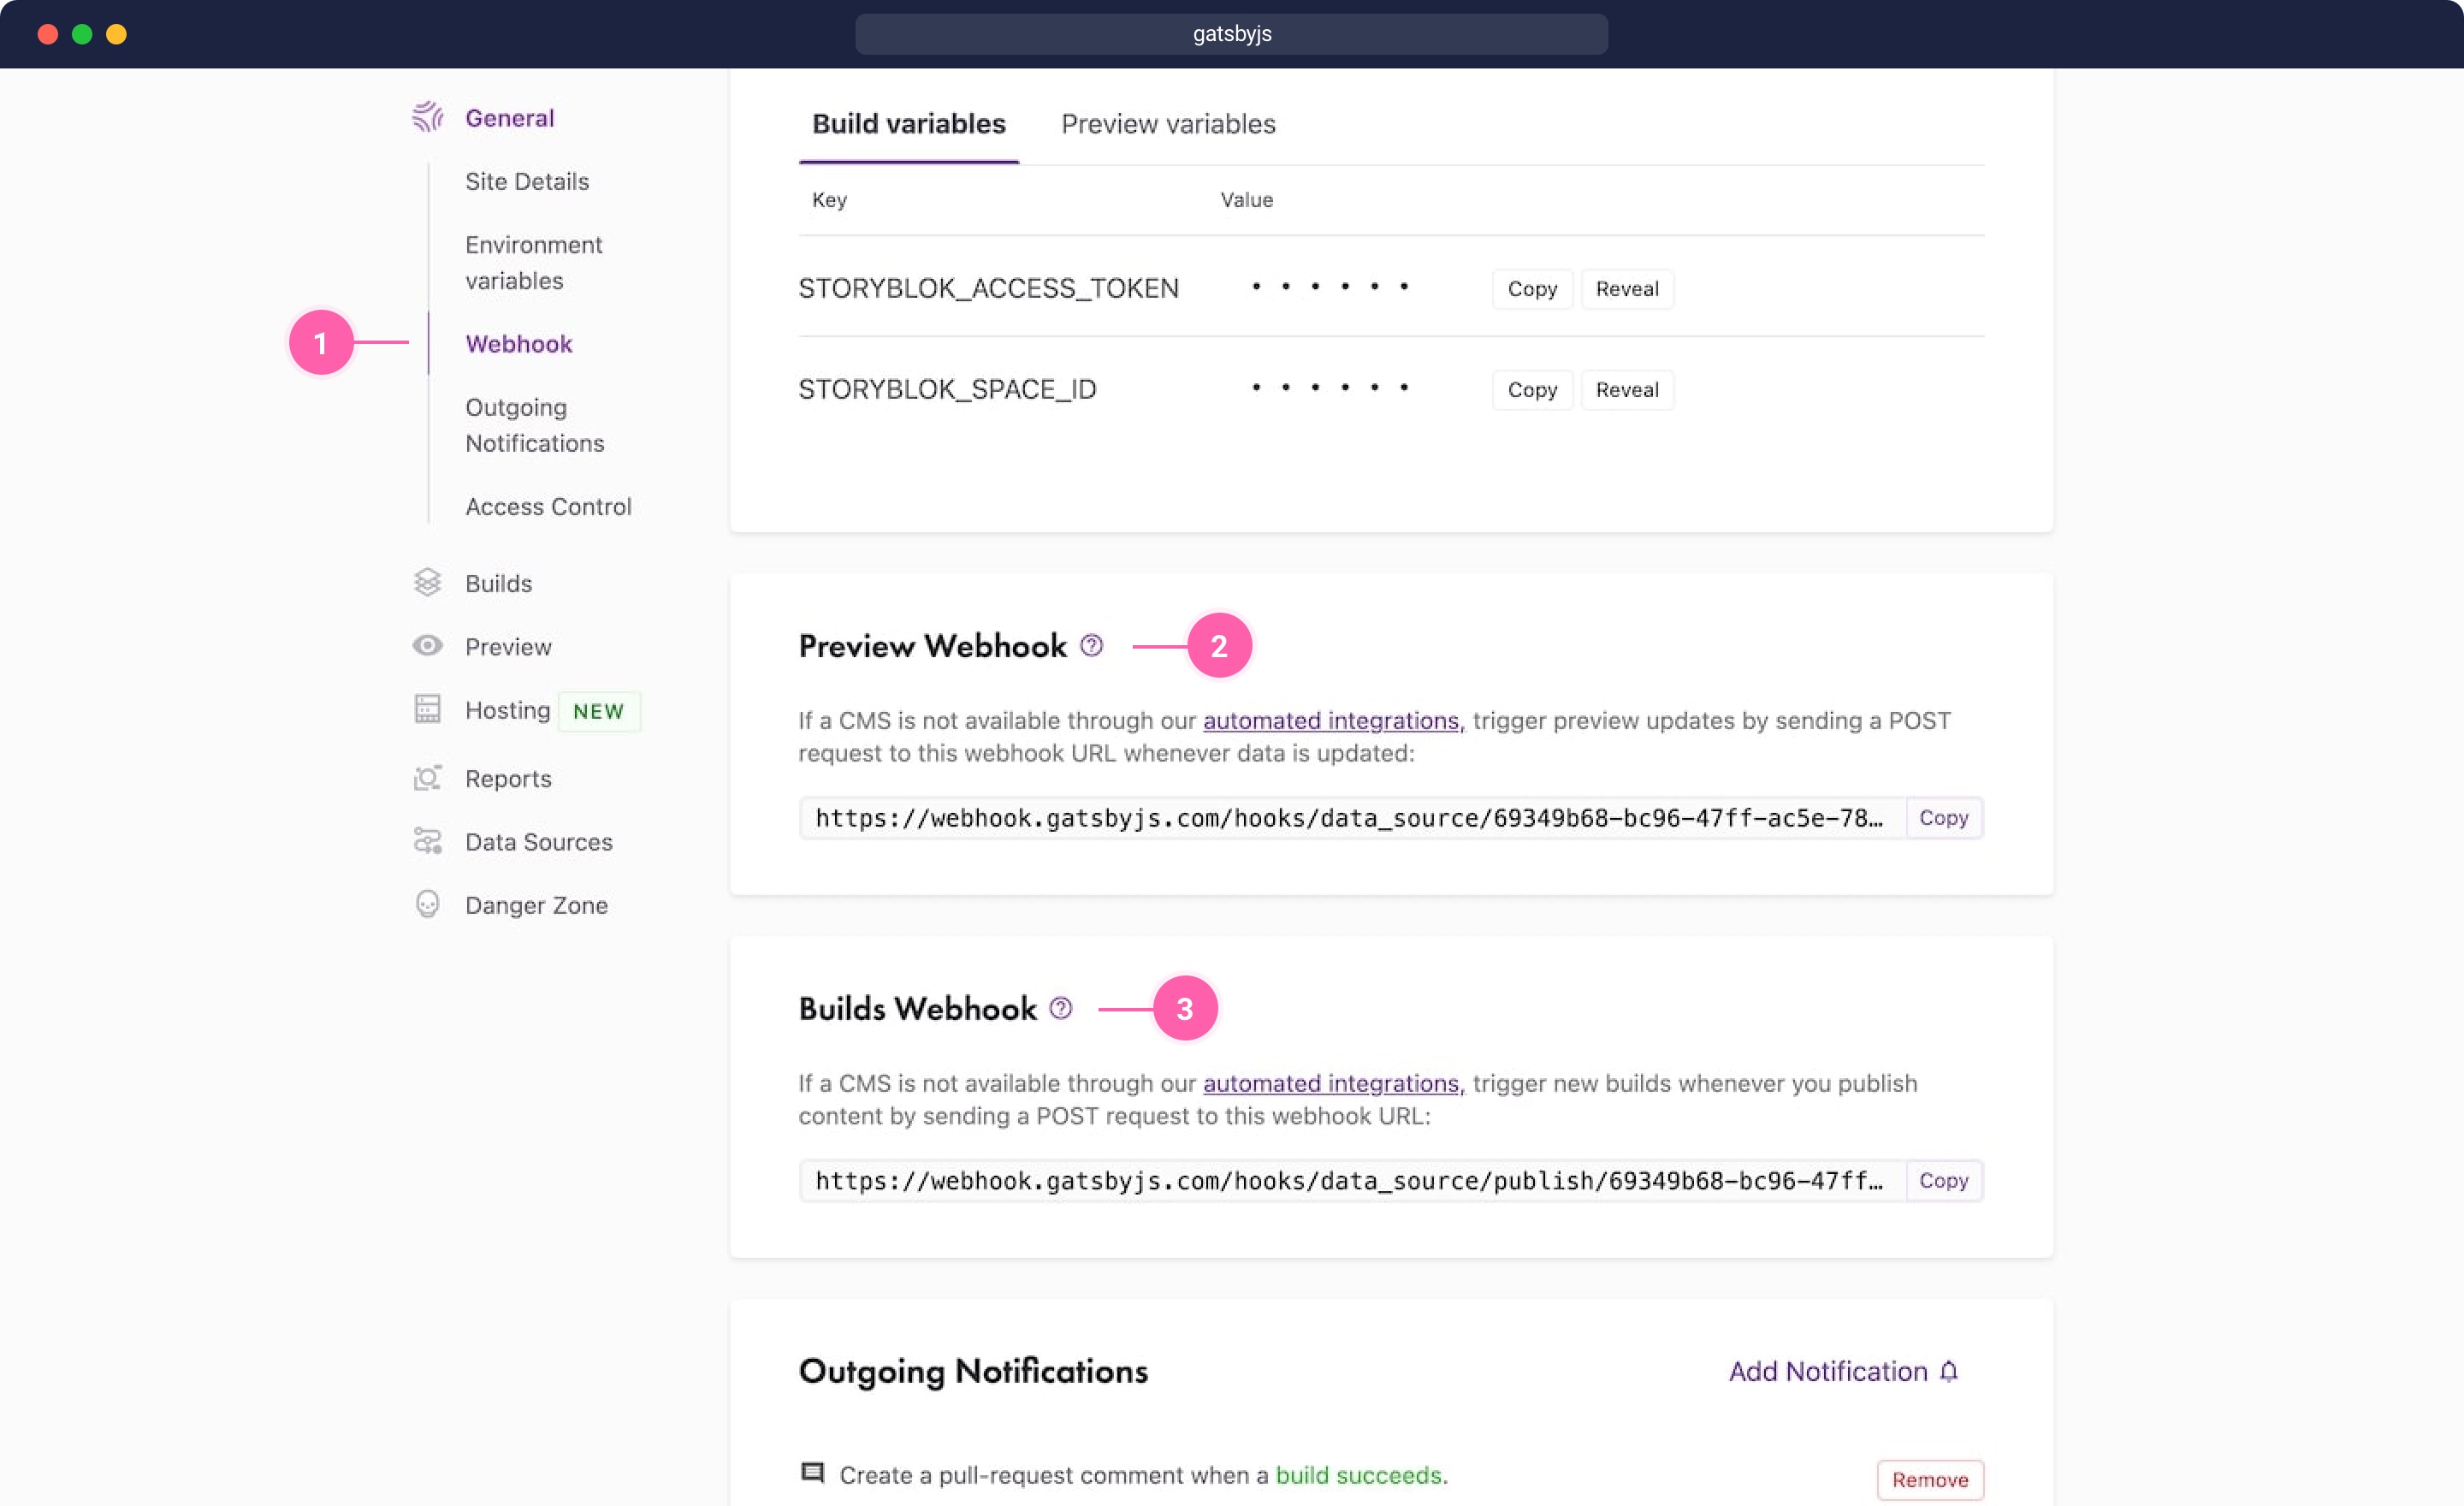
Get Webhooks from Gatsby Cloud
Add Webhooks to Storyblok
In Storyblok's main dashboard, go to Settings {1} and Webhooks {2}. Paste Builds Webhook from Gatsby Cloud that we copied in the previous step. Hit the Save button.
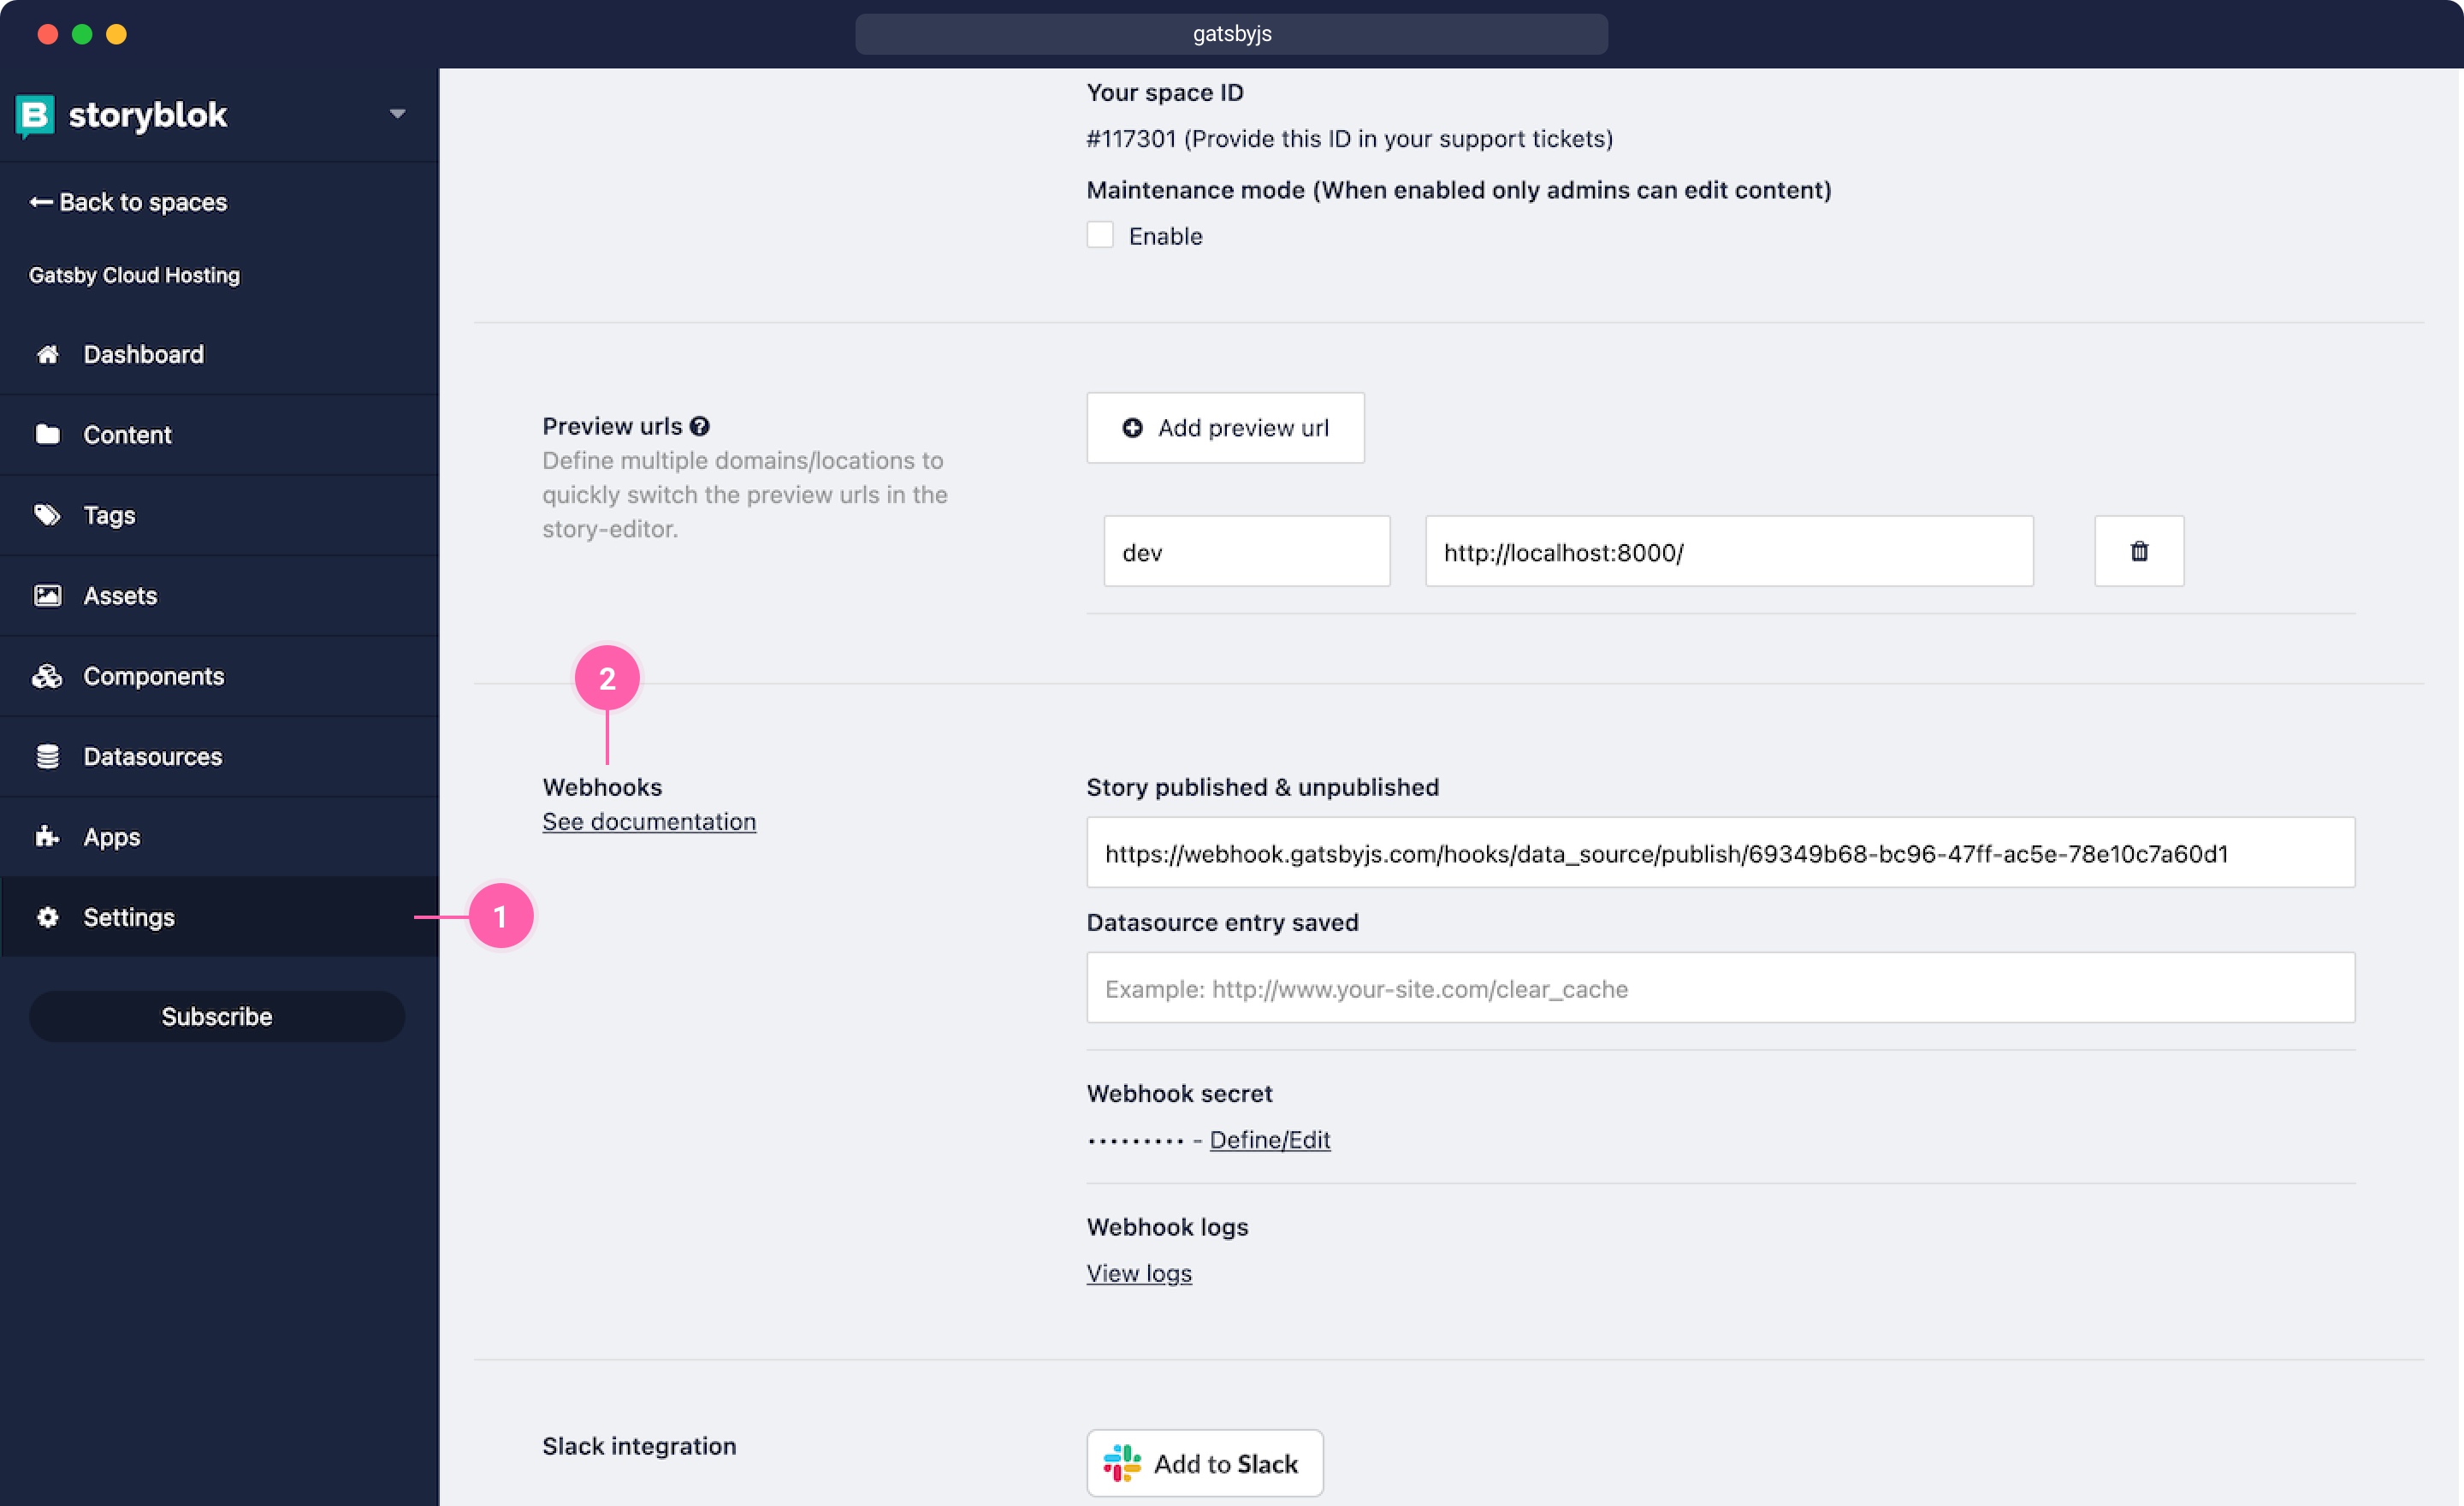
Add Webhooks to Storyblok
Once you save it, a POST request will be sent with story_id as JSON payload to the URL configured.
You can read our "How to use RequestBin.com to work with Webhooks" tutorial to see how webhooks work in Storyblok.
Check the generated preview URL in Gatsby Cloud
Let's look at the preview URL which is generated in Gatsby Cloud. Go to the Gatsby Cloud dashboard. Click the generated preview URL {1} under our project name. (gatsbycloudstoryblok.gatsbyjs.io)
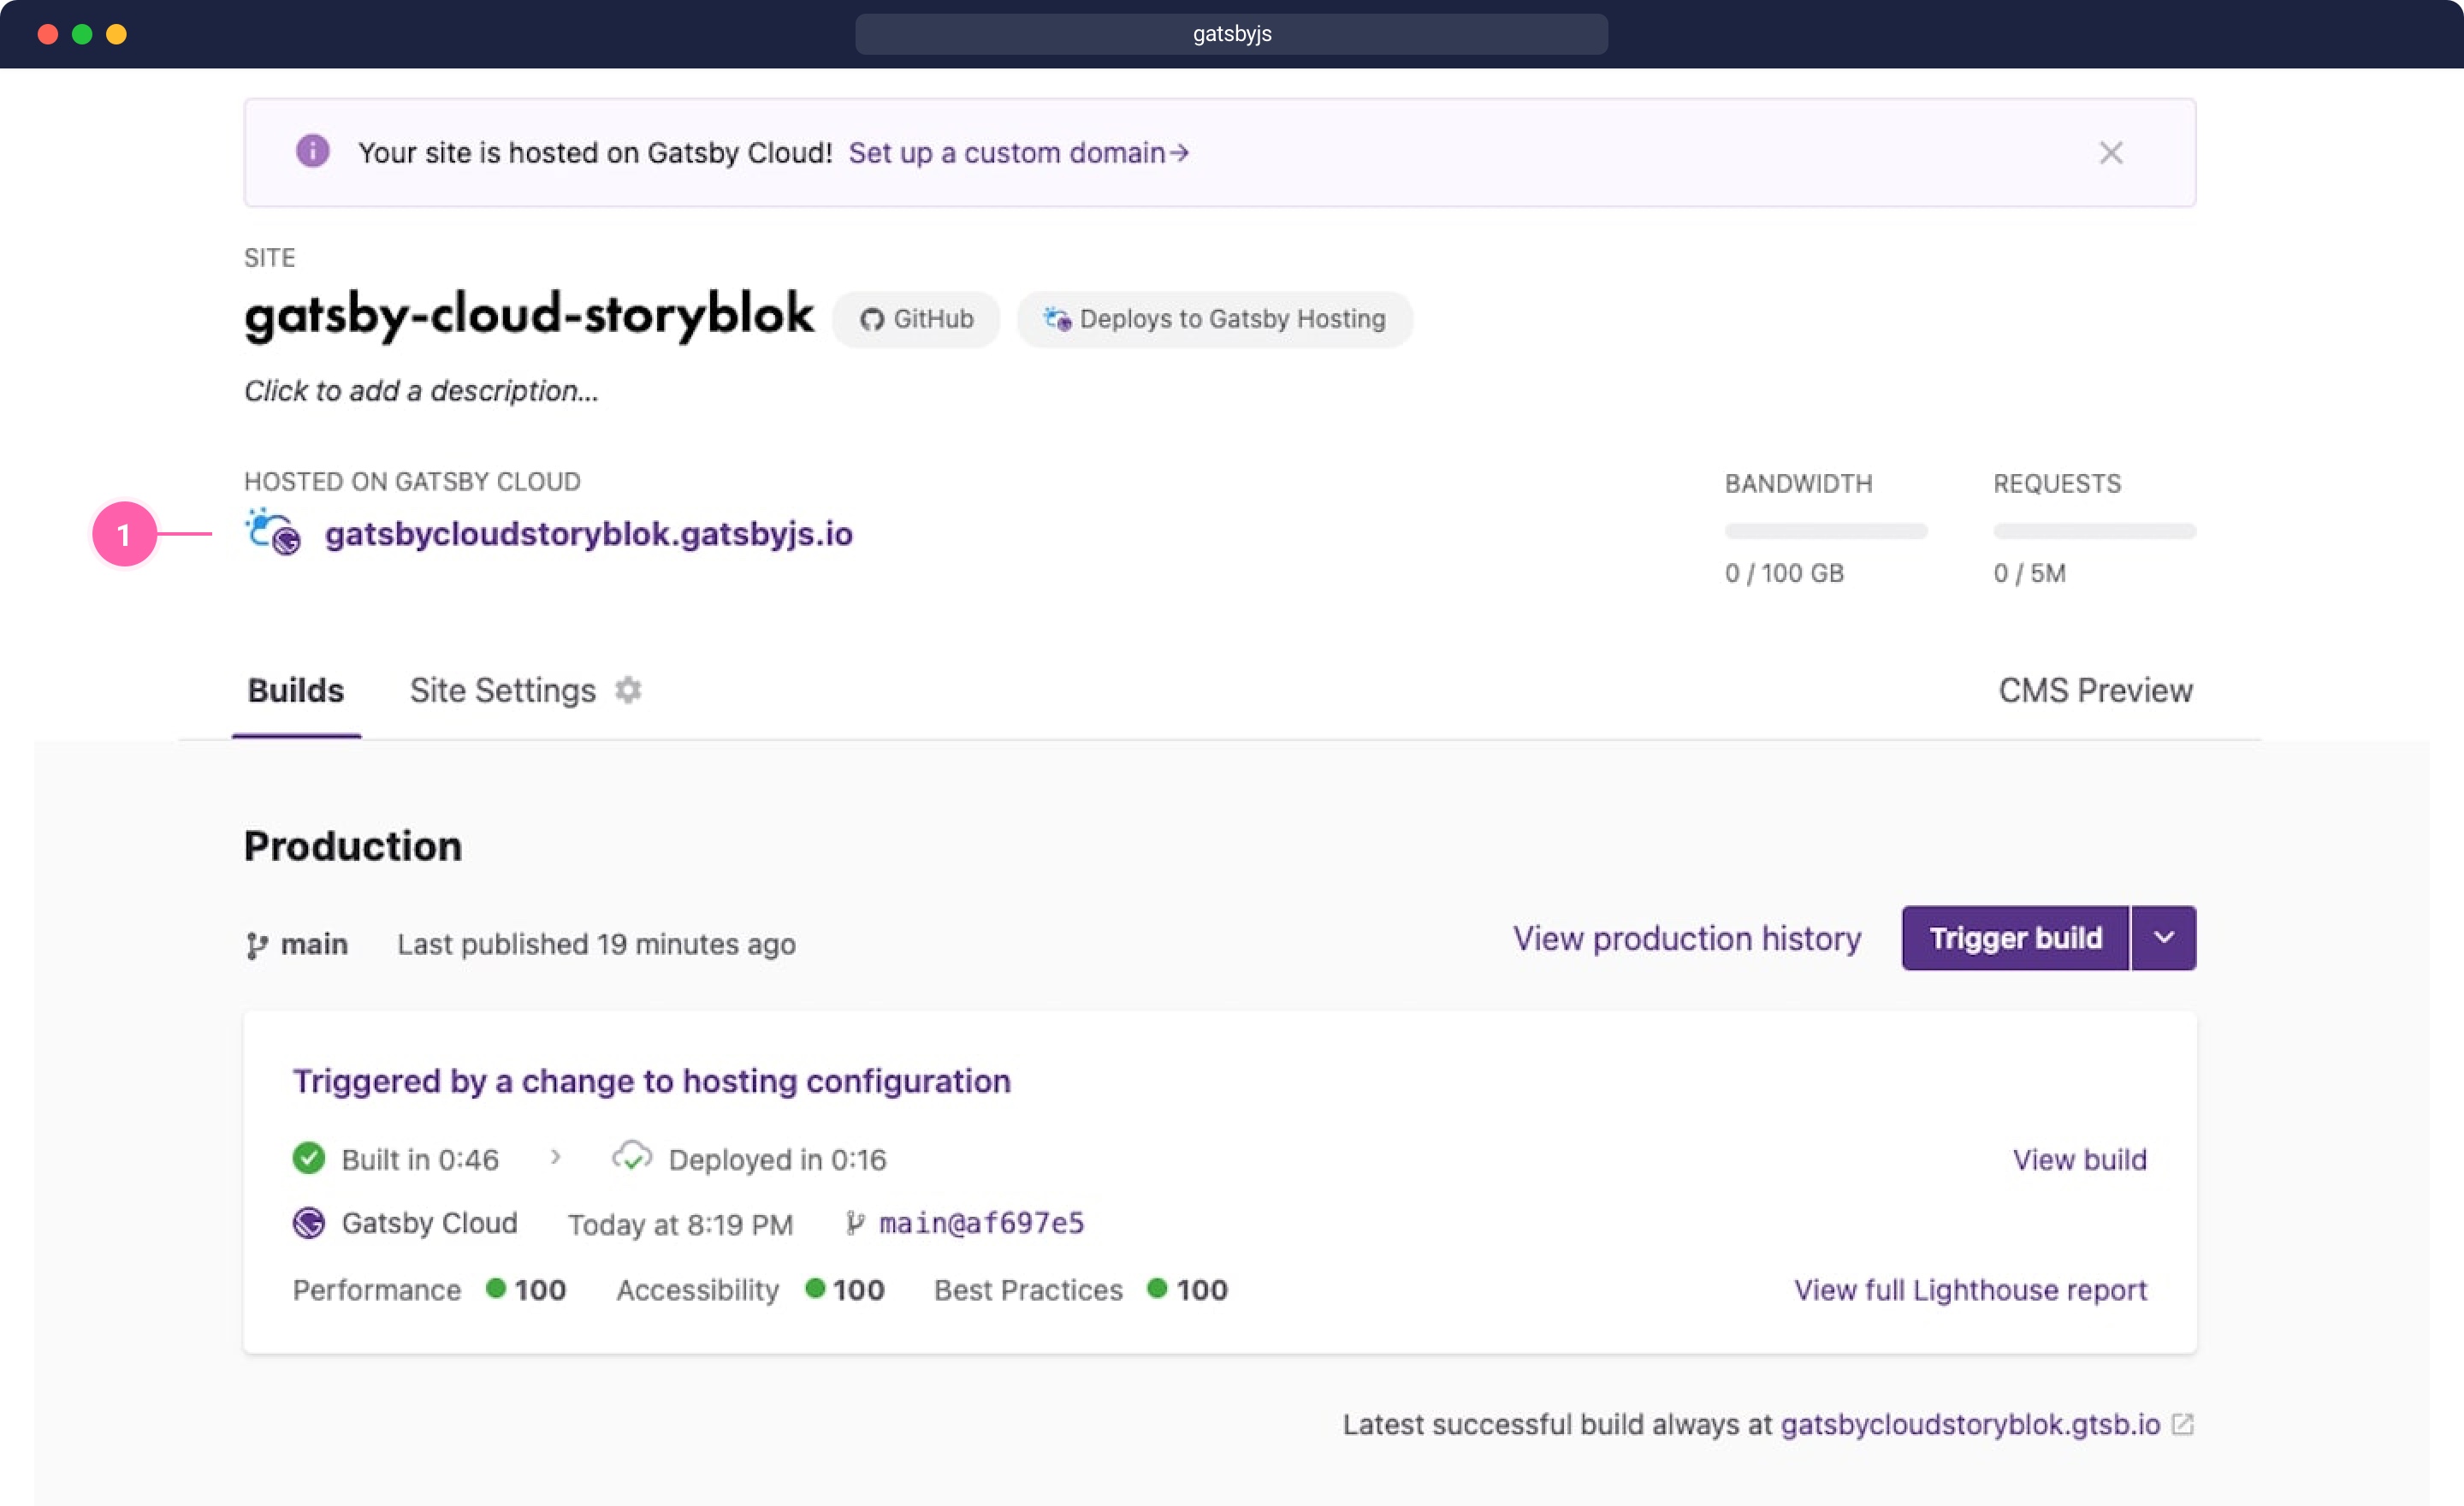
Find the generated preview URL in Gatsby Cloud
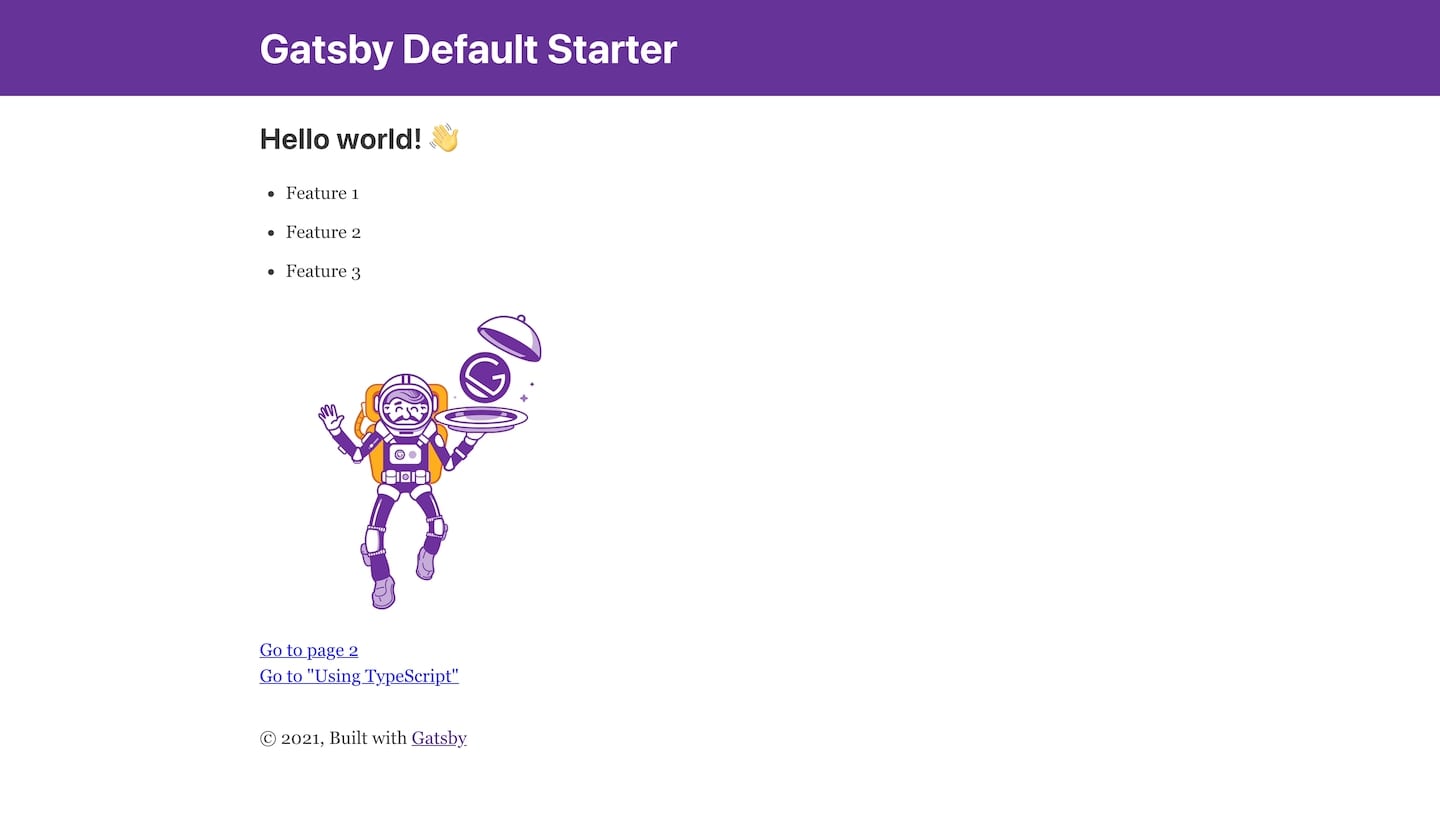
We see that our Gatsby project is up and running in the browser.
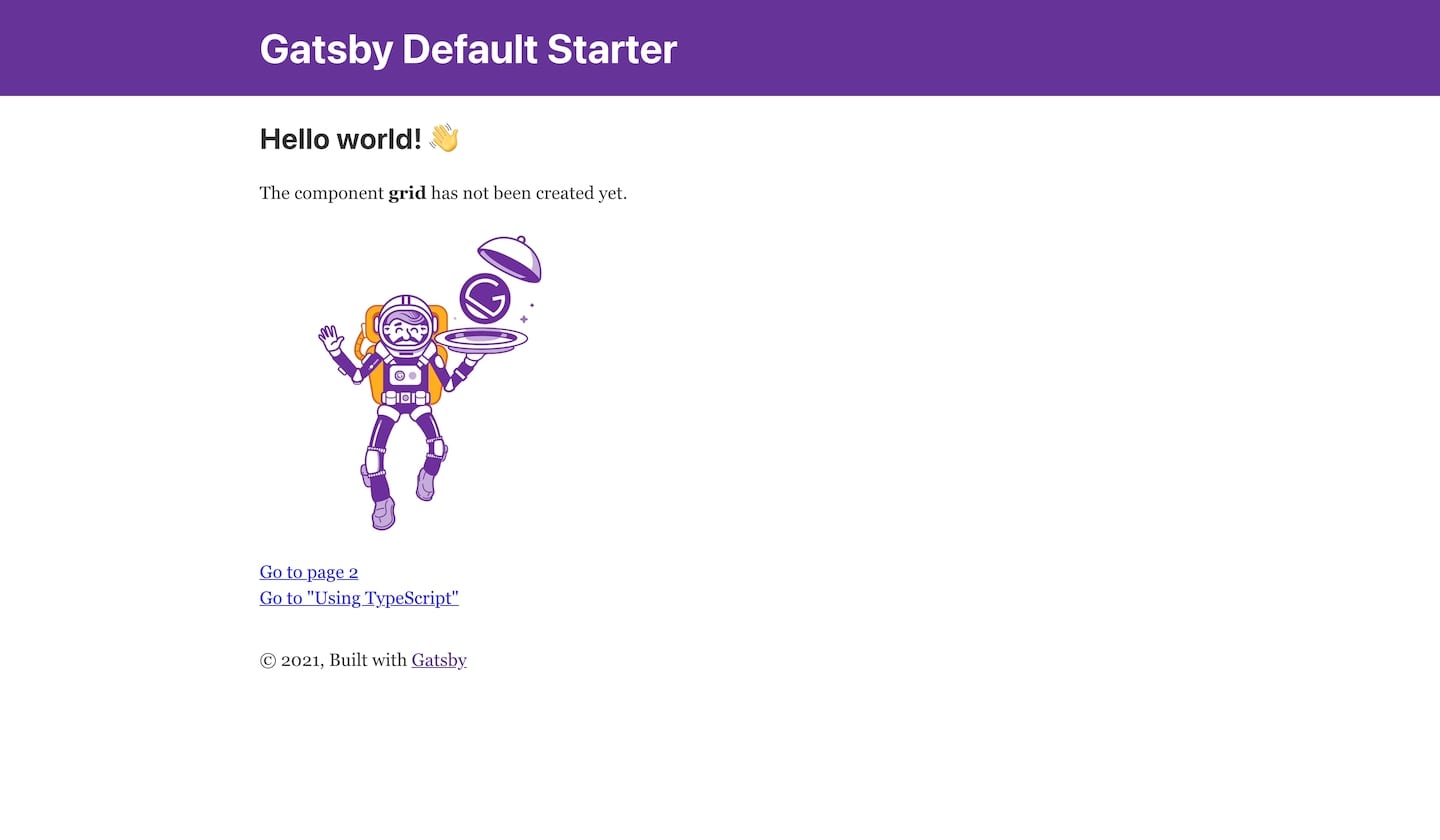
Gatsby default starter in the browser
In the previous step, we linked a build webhook in Storyblok. This means that it will be retried if the service succeeds in processing the event.
Make some changes for final check
To be able to make changes in our Gatsby project, add Grid and Feature. You can make other changes if you prefer. We only do this to see the changes in the Gatsby Cloud's CMS preview.
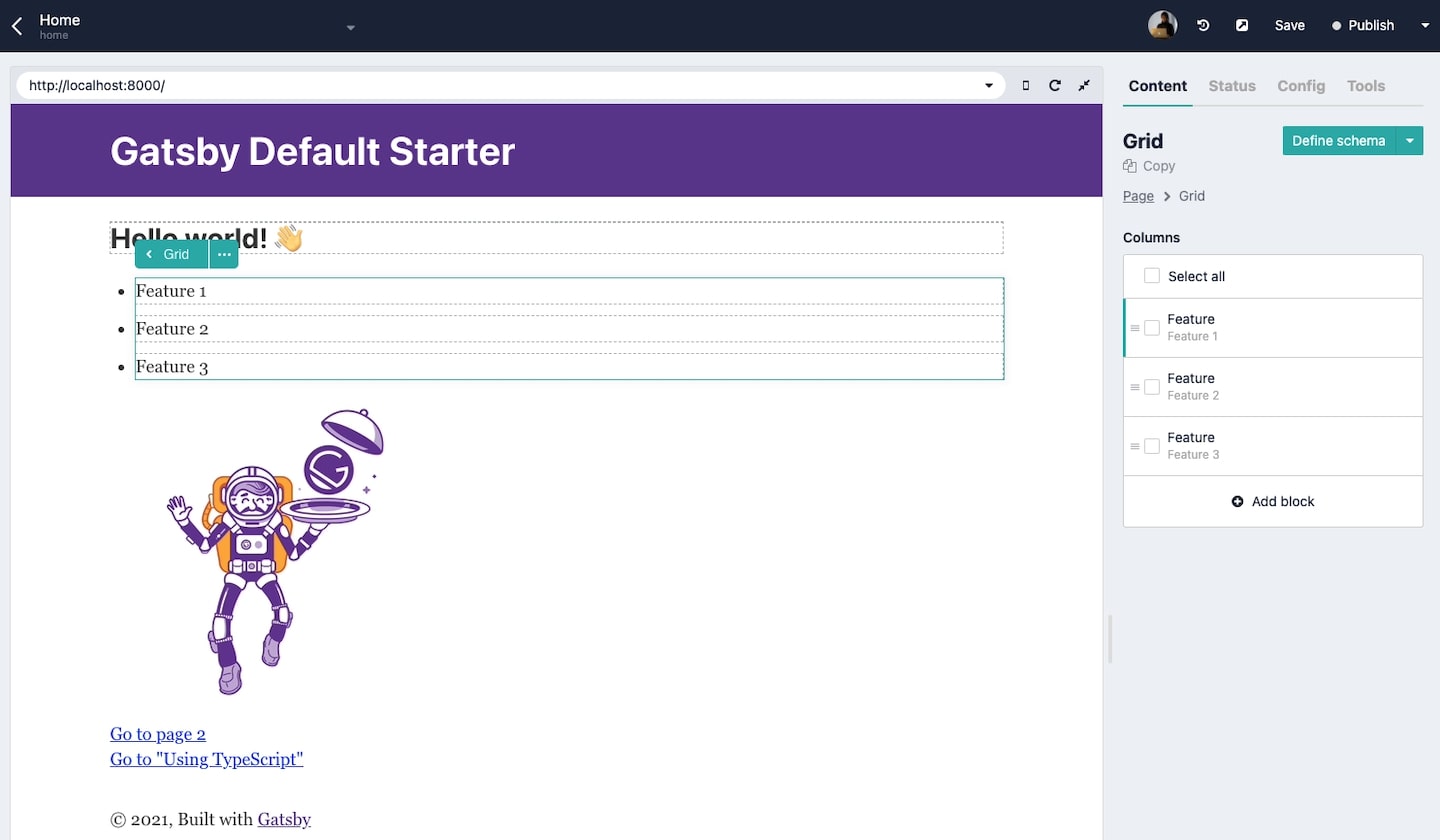
Add Grid and Feature
After we make a change, we can commit the changes in GitHub. Gatsby Cloud automatically detects the commit. When the process is completed, we can check again our preview URL generated by Gatsby Cloud.
Check again our preview URL in the browser
Change is detected! We can see that our new Grid and Feature components are visible in the preview URL.
If we take a look at the Site Settings and go to Hosting from the Gatsby Cloud dashboard, hosting is turned on.
We successfully hosted our Gatsby.js and Storyblok project into Gatsby Cloud Hosting!
| Resource | Link |
|---|---|
| gatsby-plugin-gatsby-cloud | https://www.gatsbyjs.com/plugins/gatsby-plugin-gatsby-cloud/ |
| Gatsby Cloud | https://www.gatsbyjs.com/products/cloud/ |
| Gatsby Cloud Hosting | https://www.gatsbyjs.com/products/cloud/hosting/ |
| Gatsby CMS Integration | https://www.gatsbyjs.com/docs/how-to/previews-deploys-hosting/deploying-to-gatsby-cloud/#cms-integrations |
| Gatsby Developing a first-class CMS integration for Gatsby Cloud | https://support.gatsbyjs.com/hc/en-us/articles/360052503494 |
| Storyblok Webhooks | https://www.storyblok.com/docs/guide/in-depth/webhooks |
