E-commerce
Storyblok’s official e-commerce integrations allow content creators to select products and categories from an existing e-commerce backend directly from the Visual Editor.
The e-commerce integrations are field plugins that fetch data directly from the e-commerce platform and access it in the Visual Editor. After one or more products or categories have been selected, a subset of the available data from the e-commerce platform is stored in the story object. The amount of data that is stored is limited deliberately, as the data is only intended as a reference. When fetching stories using Storyblok’s Content Delivery API, the included product and/or category IDs can be used for a subsequent API request, fetching the required data directly from the e-commerce platform. This approach ensures that the most up-to-date data is retrieved.
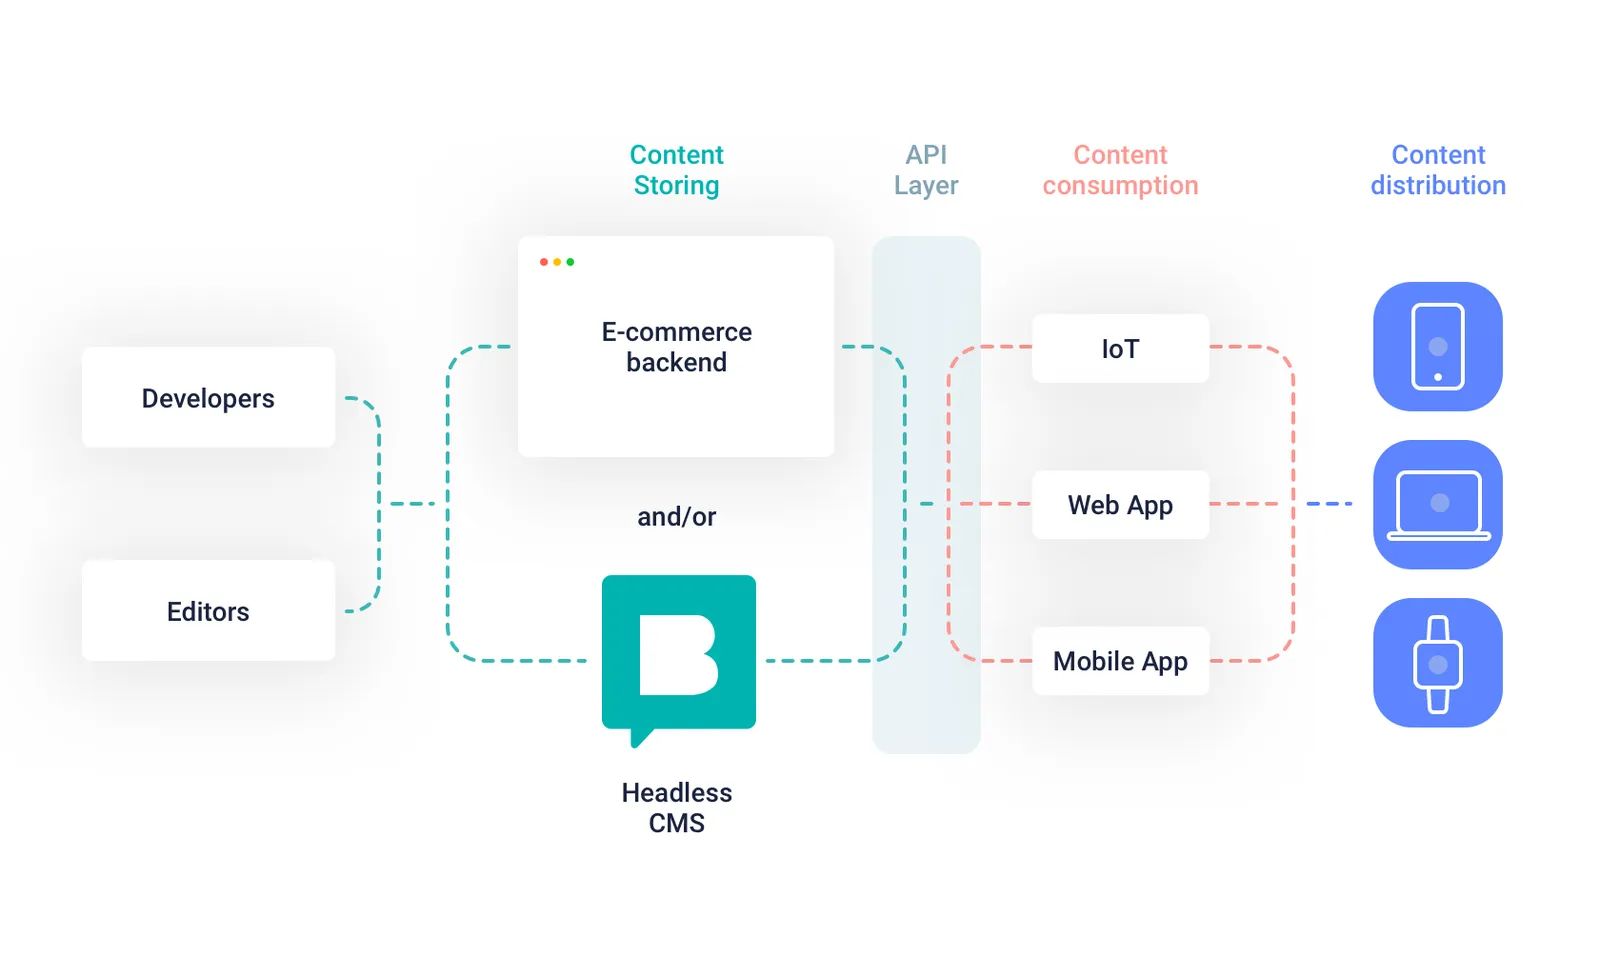
A visual representation of developers and editors using an e-commerce backend and Storyblok to distribute content across multiple channels through an API layer.
Official integrations
Section titled “Official integrations”Our official e-commerce integrations are developed, maintained, and supported in-house.


Community integrations
Section titled “Community integrations”The following e-commerce integrations are created and maintained by our developer community. Support is provided by the creator, not our team.


Magento 2 module by Wind & Kite.
Setup and application
Section titled “Setup and application”The following steps describe generically how to set up an official e-commerce integration and retrieve data. For more specific setup instructions, please refer to the available integrations linked above.
In the Block Library, create a new nestable block with the technical name featured_products. Add the following fields to the schema:
title: Textproducts: Plugin
In the Custom Type dropdown of the products field, select one of the e-commerce integrations, e.g. sb-shopify or sb-centra. In the Source section, provide the API credentials of your e-commerce platform.
The API response from the single-story endpoint includes the product data in the items array of the featured_products field of the story.
{ "featured_products": { "items": [ { "id": "gid://shopify/Product/7788021645465", "sku": "product-001", "name": "Product 001", "type": "product", "image": "https://cdn.shopify.com/s/files/1/0501/4120/0537/files/product-001.jpg", "handle": "product-001", "variants": false, "description": "A description for Product 001." }, // ... ], "plugin": "sb-shopify" }}The following example in JavaScript illustrates how product data can be fetched on the frontend using subsequent API requests to Storyblok and, in this example, Shopify.
import { storyblokInit, apiPlugin } from '@storyblok/js'import Client from 'shopify-buy'
const { storyblokApi } = storyblokInit({  accessToken: 'your-storyblok-access-token',  use: [apiPlugin],})
const shopifyClient = Client.buildClient({  domain: 'your-shop-name.myshopify.com',  storefrontAccessToken: 'your-storefront-access-token',})
try {  const { data } = await storyblokApi.get('cdn/stories/home', {    version: 'draft',  })
  const { story } = data
  const productId = story.content.body[0].featured_products.items[0].id
const product = await shopifyClient.product.fetch(productId) console.log(product)} catch (error) { console.log(error)}Moving beyond the fundamentals, several additional approaches with or without using Storyblok’s e-commerce integrations are conceivable, for example:
- Fetch a selection of products from a category ID selected in Storyblok and add filtering methods provided by the e-commerce API to enhance the UX
- Allow content creators to overwrite product metadata, such as the title or description, directly in Storyblok
- Manually map a single product to a dedicated product story
- Fetch products by matching story slugs, circumventing the requirement to manually select a product in a designated field (this approach can be particularly attractive when dealing with large quantities of products)
- Create blocks without designated e-commerce fields that automatically render a selection of products based on metrics (e.g., best-selling, latest, most expensive) or meta attributes (e.g., tags, collections, categories)
Related resources
Section titled “Related resources”Get in touch with the Storyblok community