Visual Editor
Storyblok’s editor is where you spend most of your time as a content editor: creating your copy, collaborating with your team members, publishing and maintaining content all take place here.
- Editing modes: Visual and Form Only
- Understanding the Visual Editor
- Adding a new block
- Choosing the preview screen size
- Rich text editor
- Entry configuration and page settings
- Navigation between different entries
- Stacked views
- Commenting, discussing, and collaboration
- Workflow stages
- Single Story Scheduling
Editing modes: Visual and Form Only
Storyblok allows you to edit your content in 2 different ways: Visual, or Form Only. The Form Only mode allows you to create your content by simply filling out content blocks. The Visual editor gives you a real-time preview of the content you are creating, and allows you to edit/create your content as you browse the page
The default view is set to the Visual mode, however you can always switch between the two modes by clicking on the highlighted button at the top right of your screen:
Here is the view of the same entry in Form Only view:
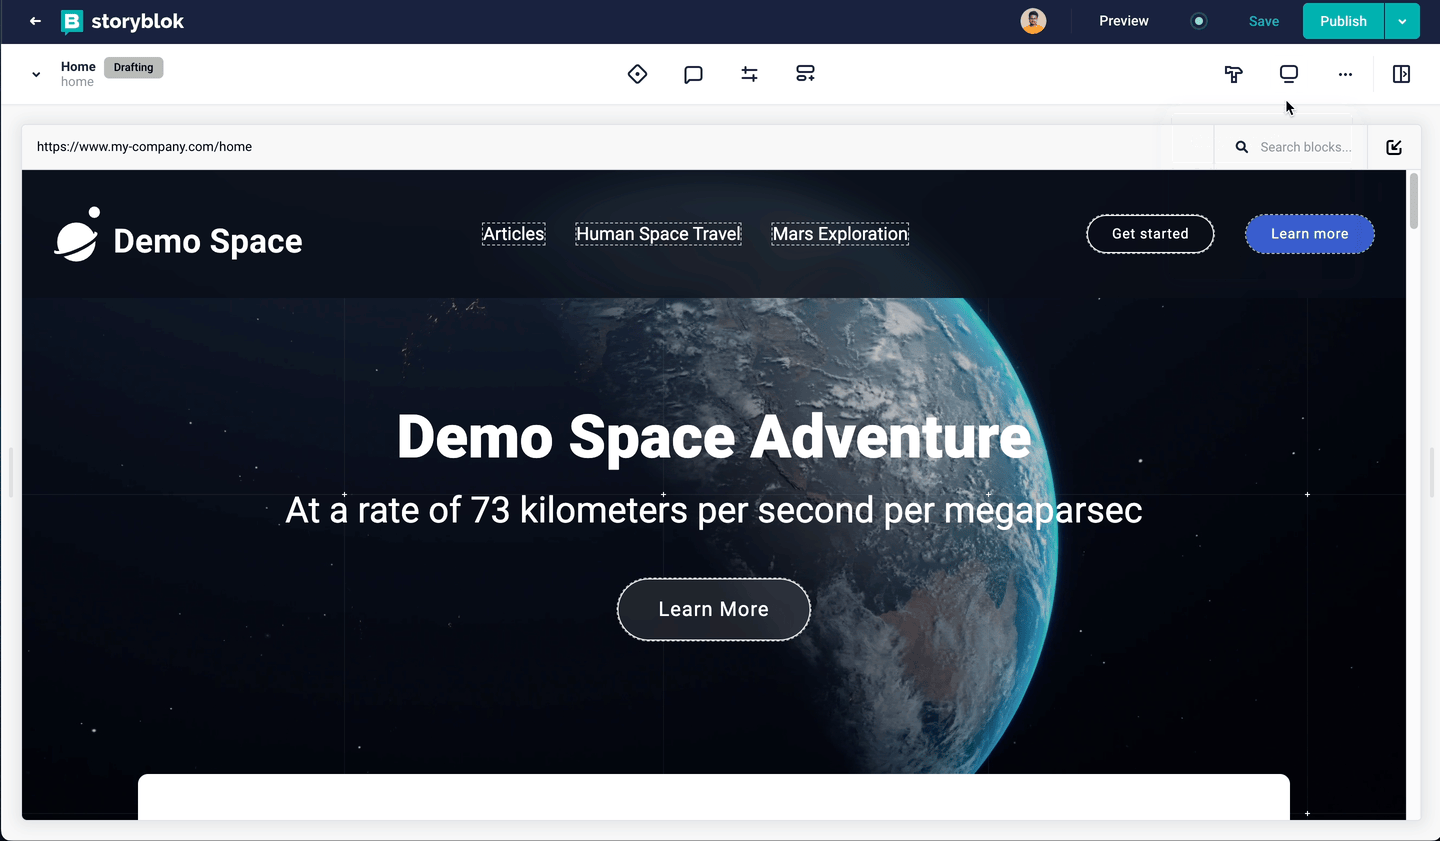
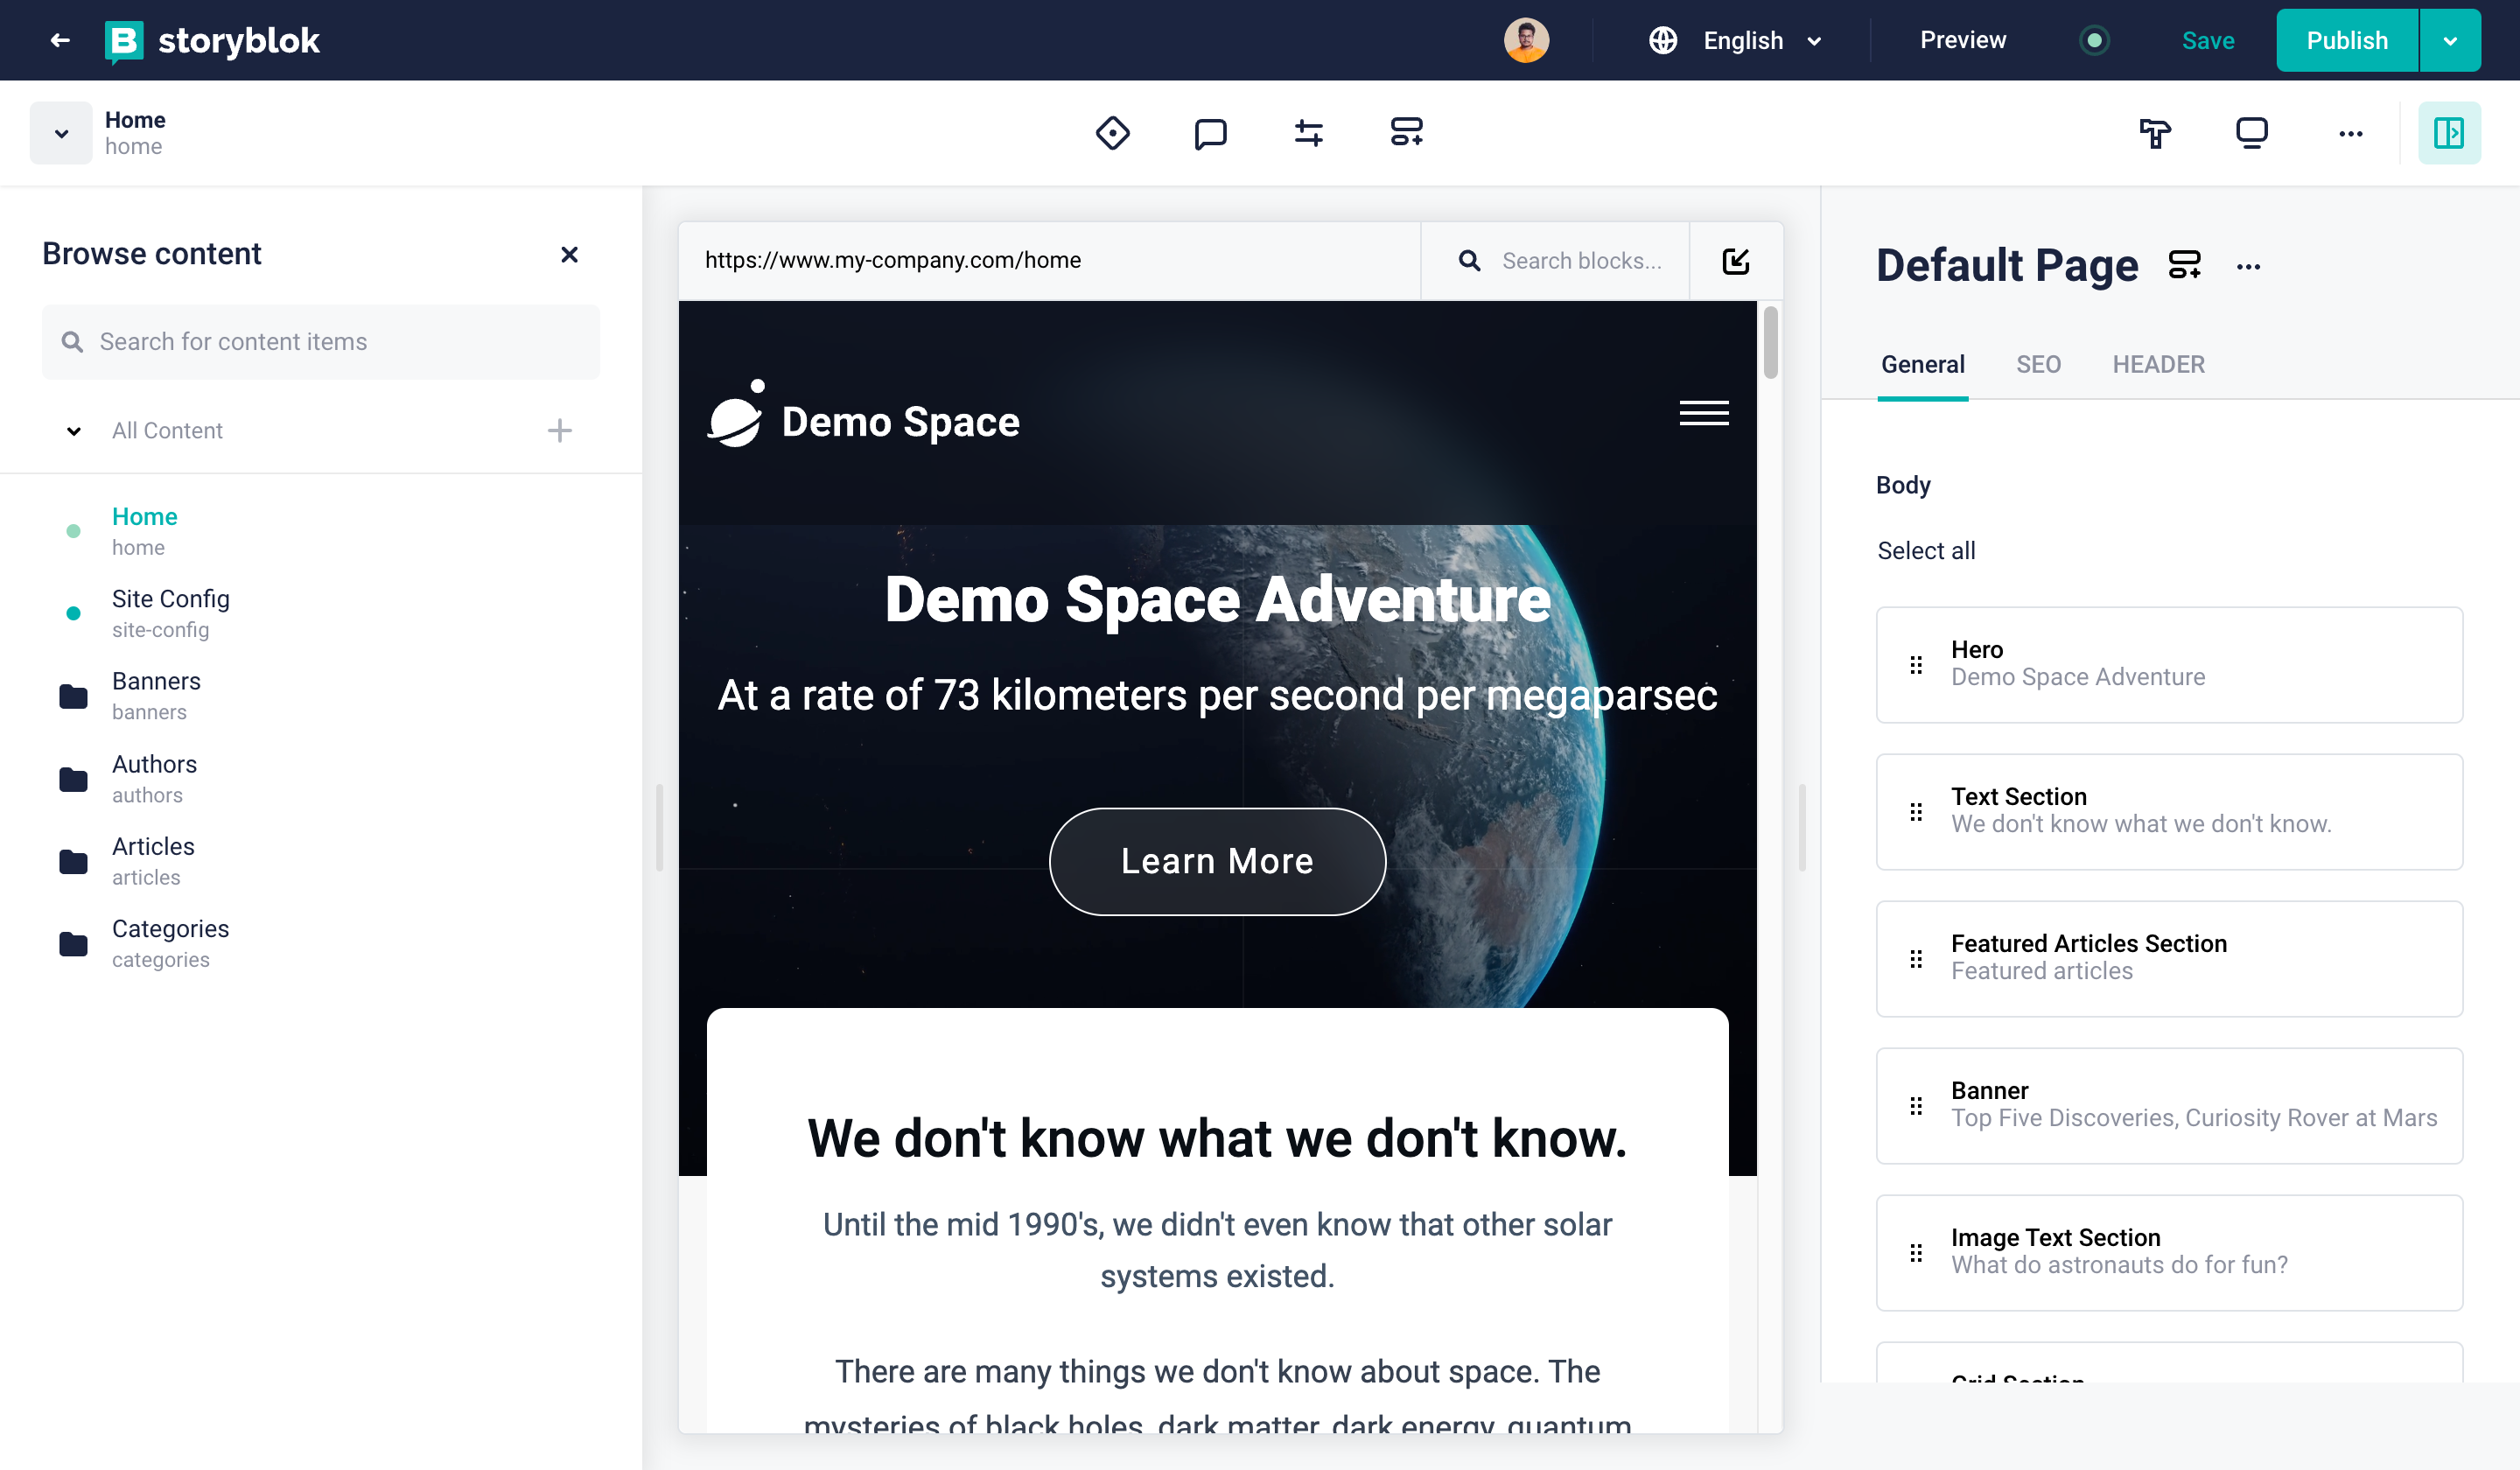
Understanding the Visual Editor
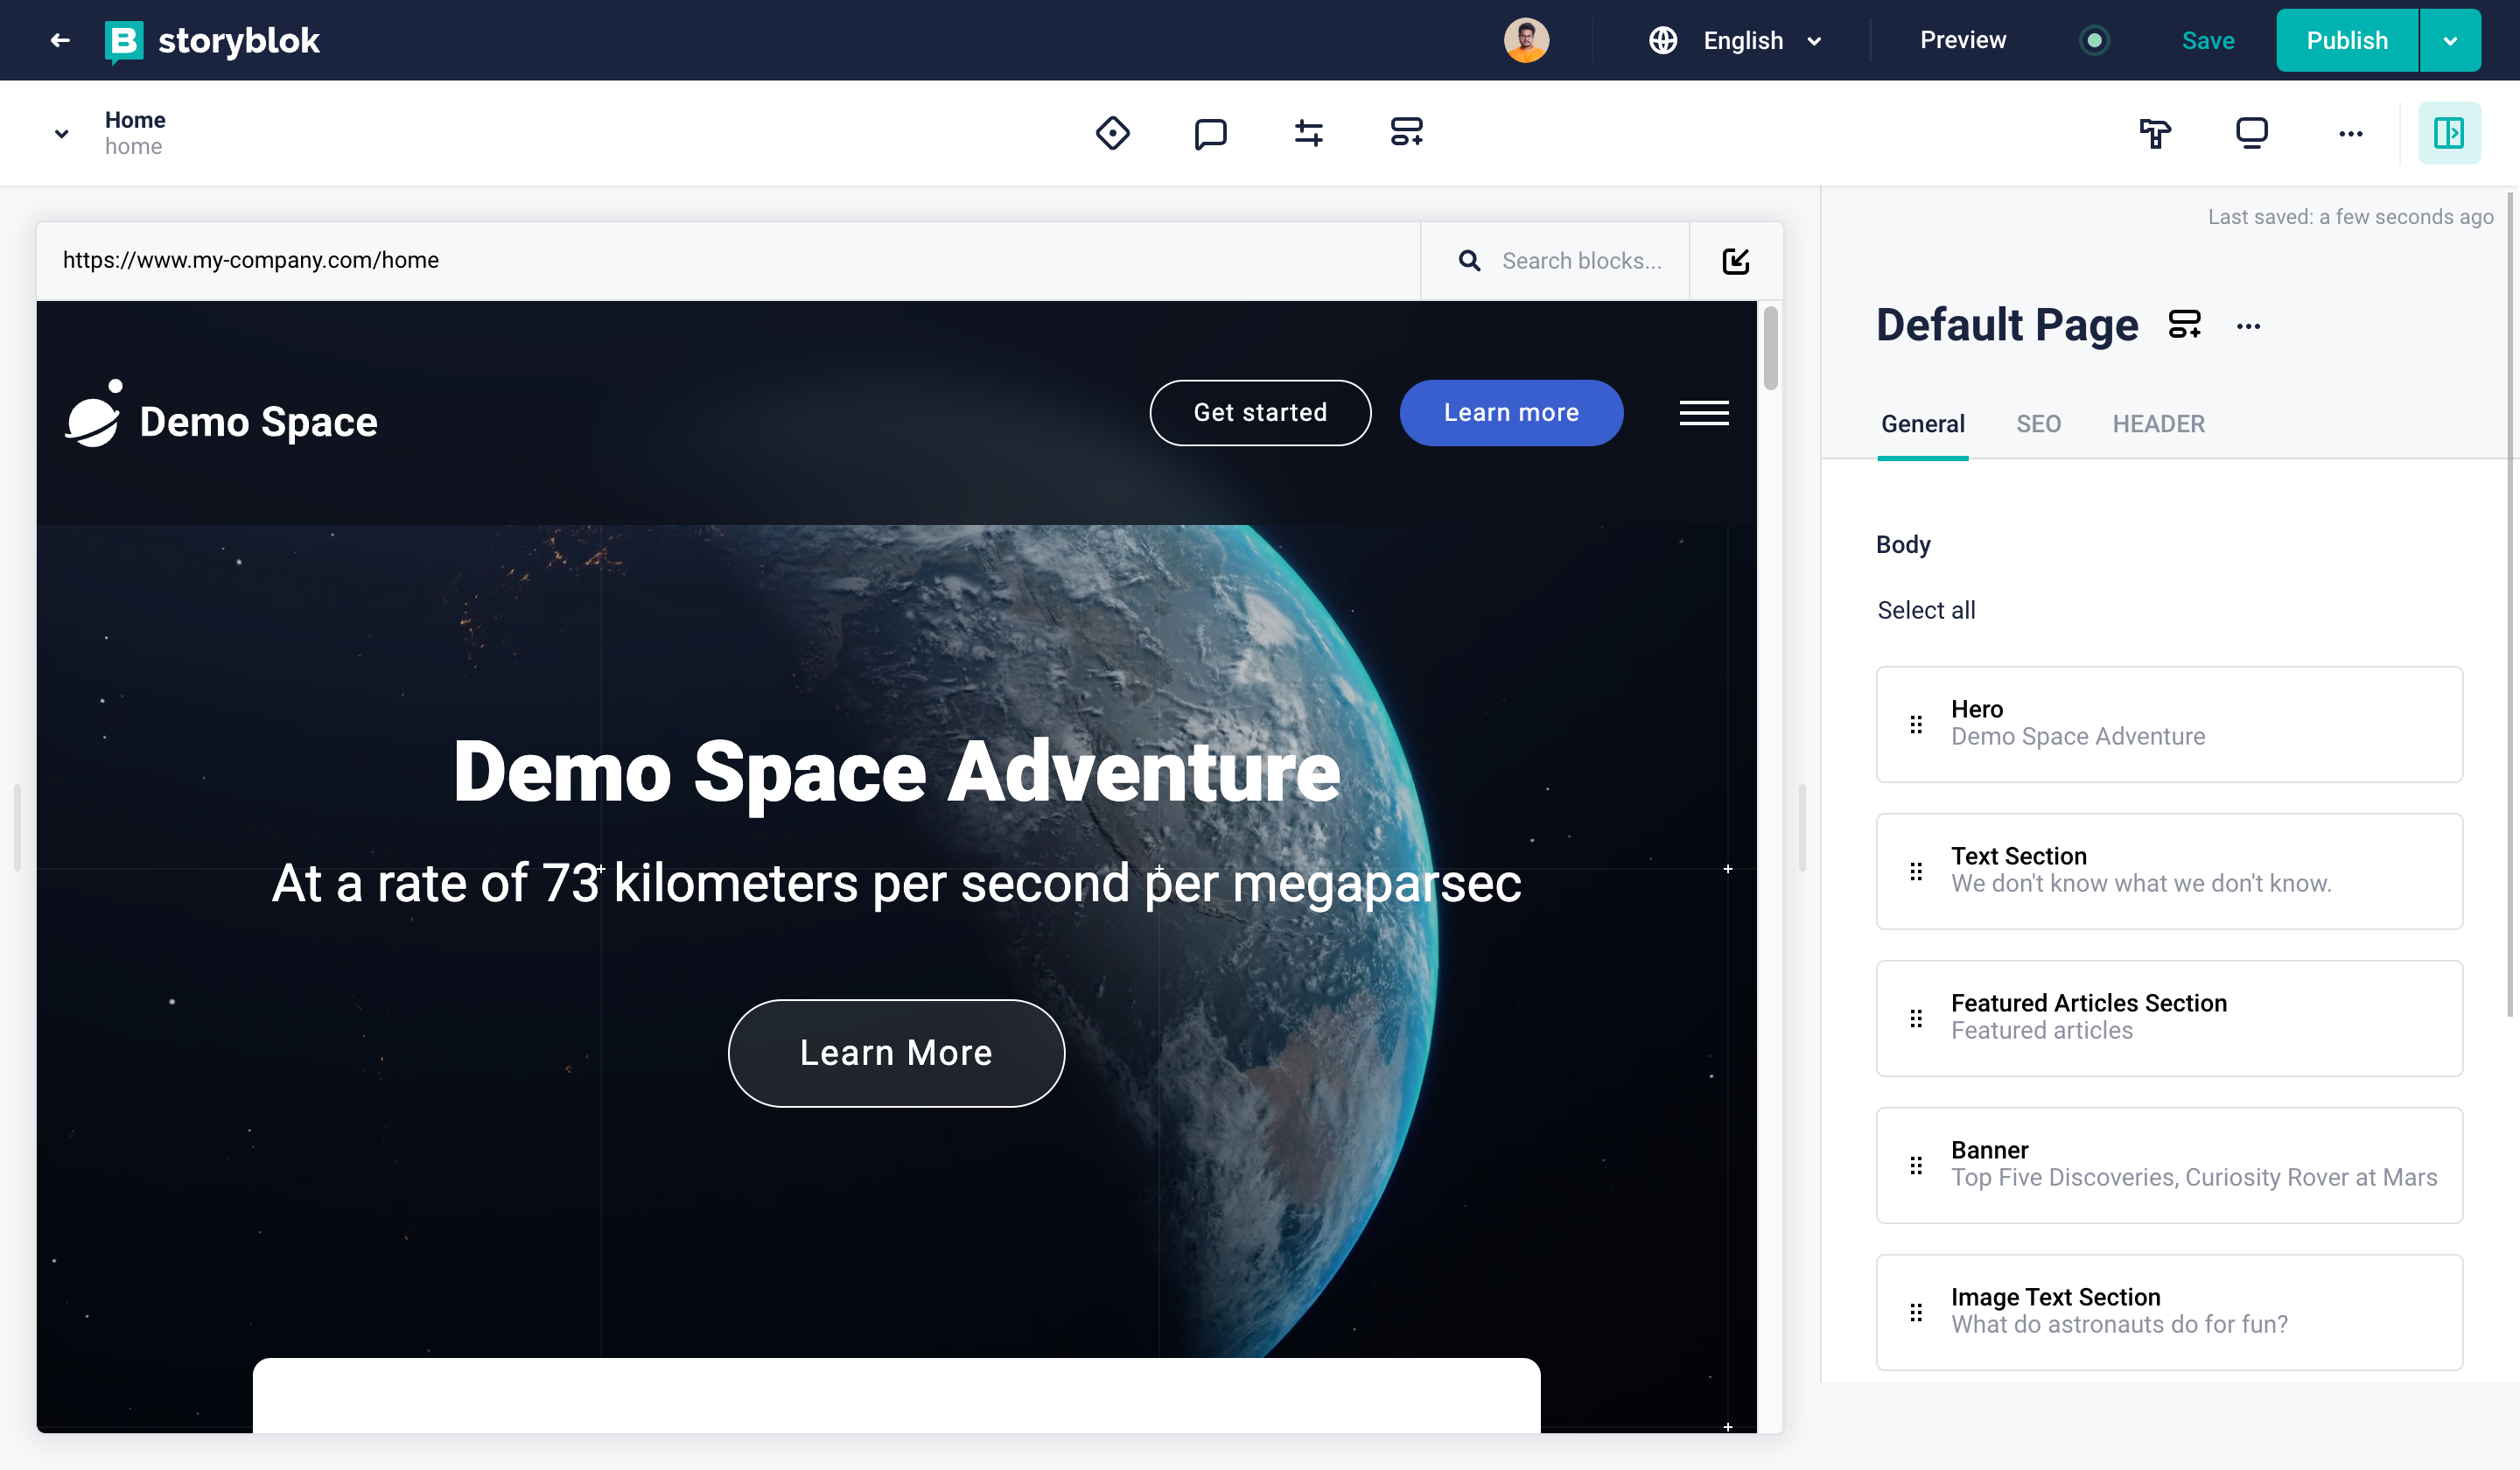
The visual editor is a live preview of the current page that you are working on. You can simply click on any part of the preview to edit its content.
Clicking on any part of the preview will open up the corresponding Content Block in a new panel on the right side of your screen <span class="marker">{1}</span>. Here, you can edit the content and make all the changes that apply to that specific block. Alternatively, you can always open/close the Content panel by clicking on the Content button at the top-right of your screen <span class="marker">{2}</span>.
The Content panel lets you easily rearrange your content by dragging and dropping your content blocks and putting them in a new order.
You can also have quick access to all the blocks used in an entry by clicking on the Search blocks button at the top-right of your preview panel <span class="marker">{3}</span>.
Every change you make to your content must be saved if you want it to stay there after leaving the editor. Also note that saving and publishing are two different actions. Saved content is only saved in Storyblok, and not visible to your visitors - all saved content will go live as soon as you hit Publish.
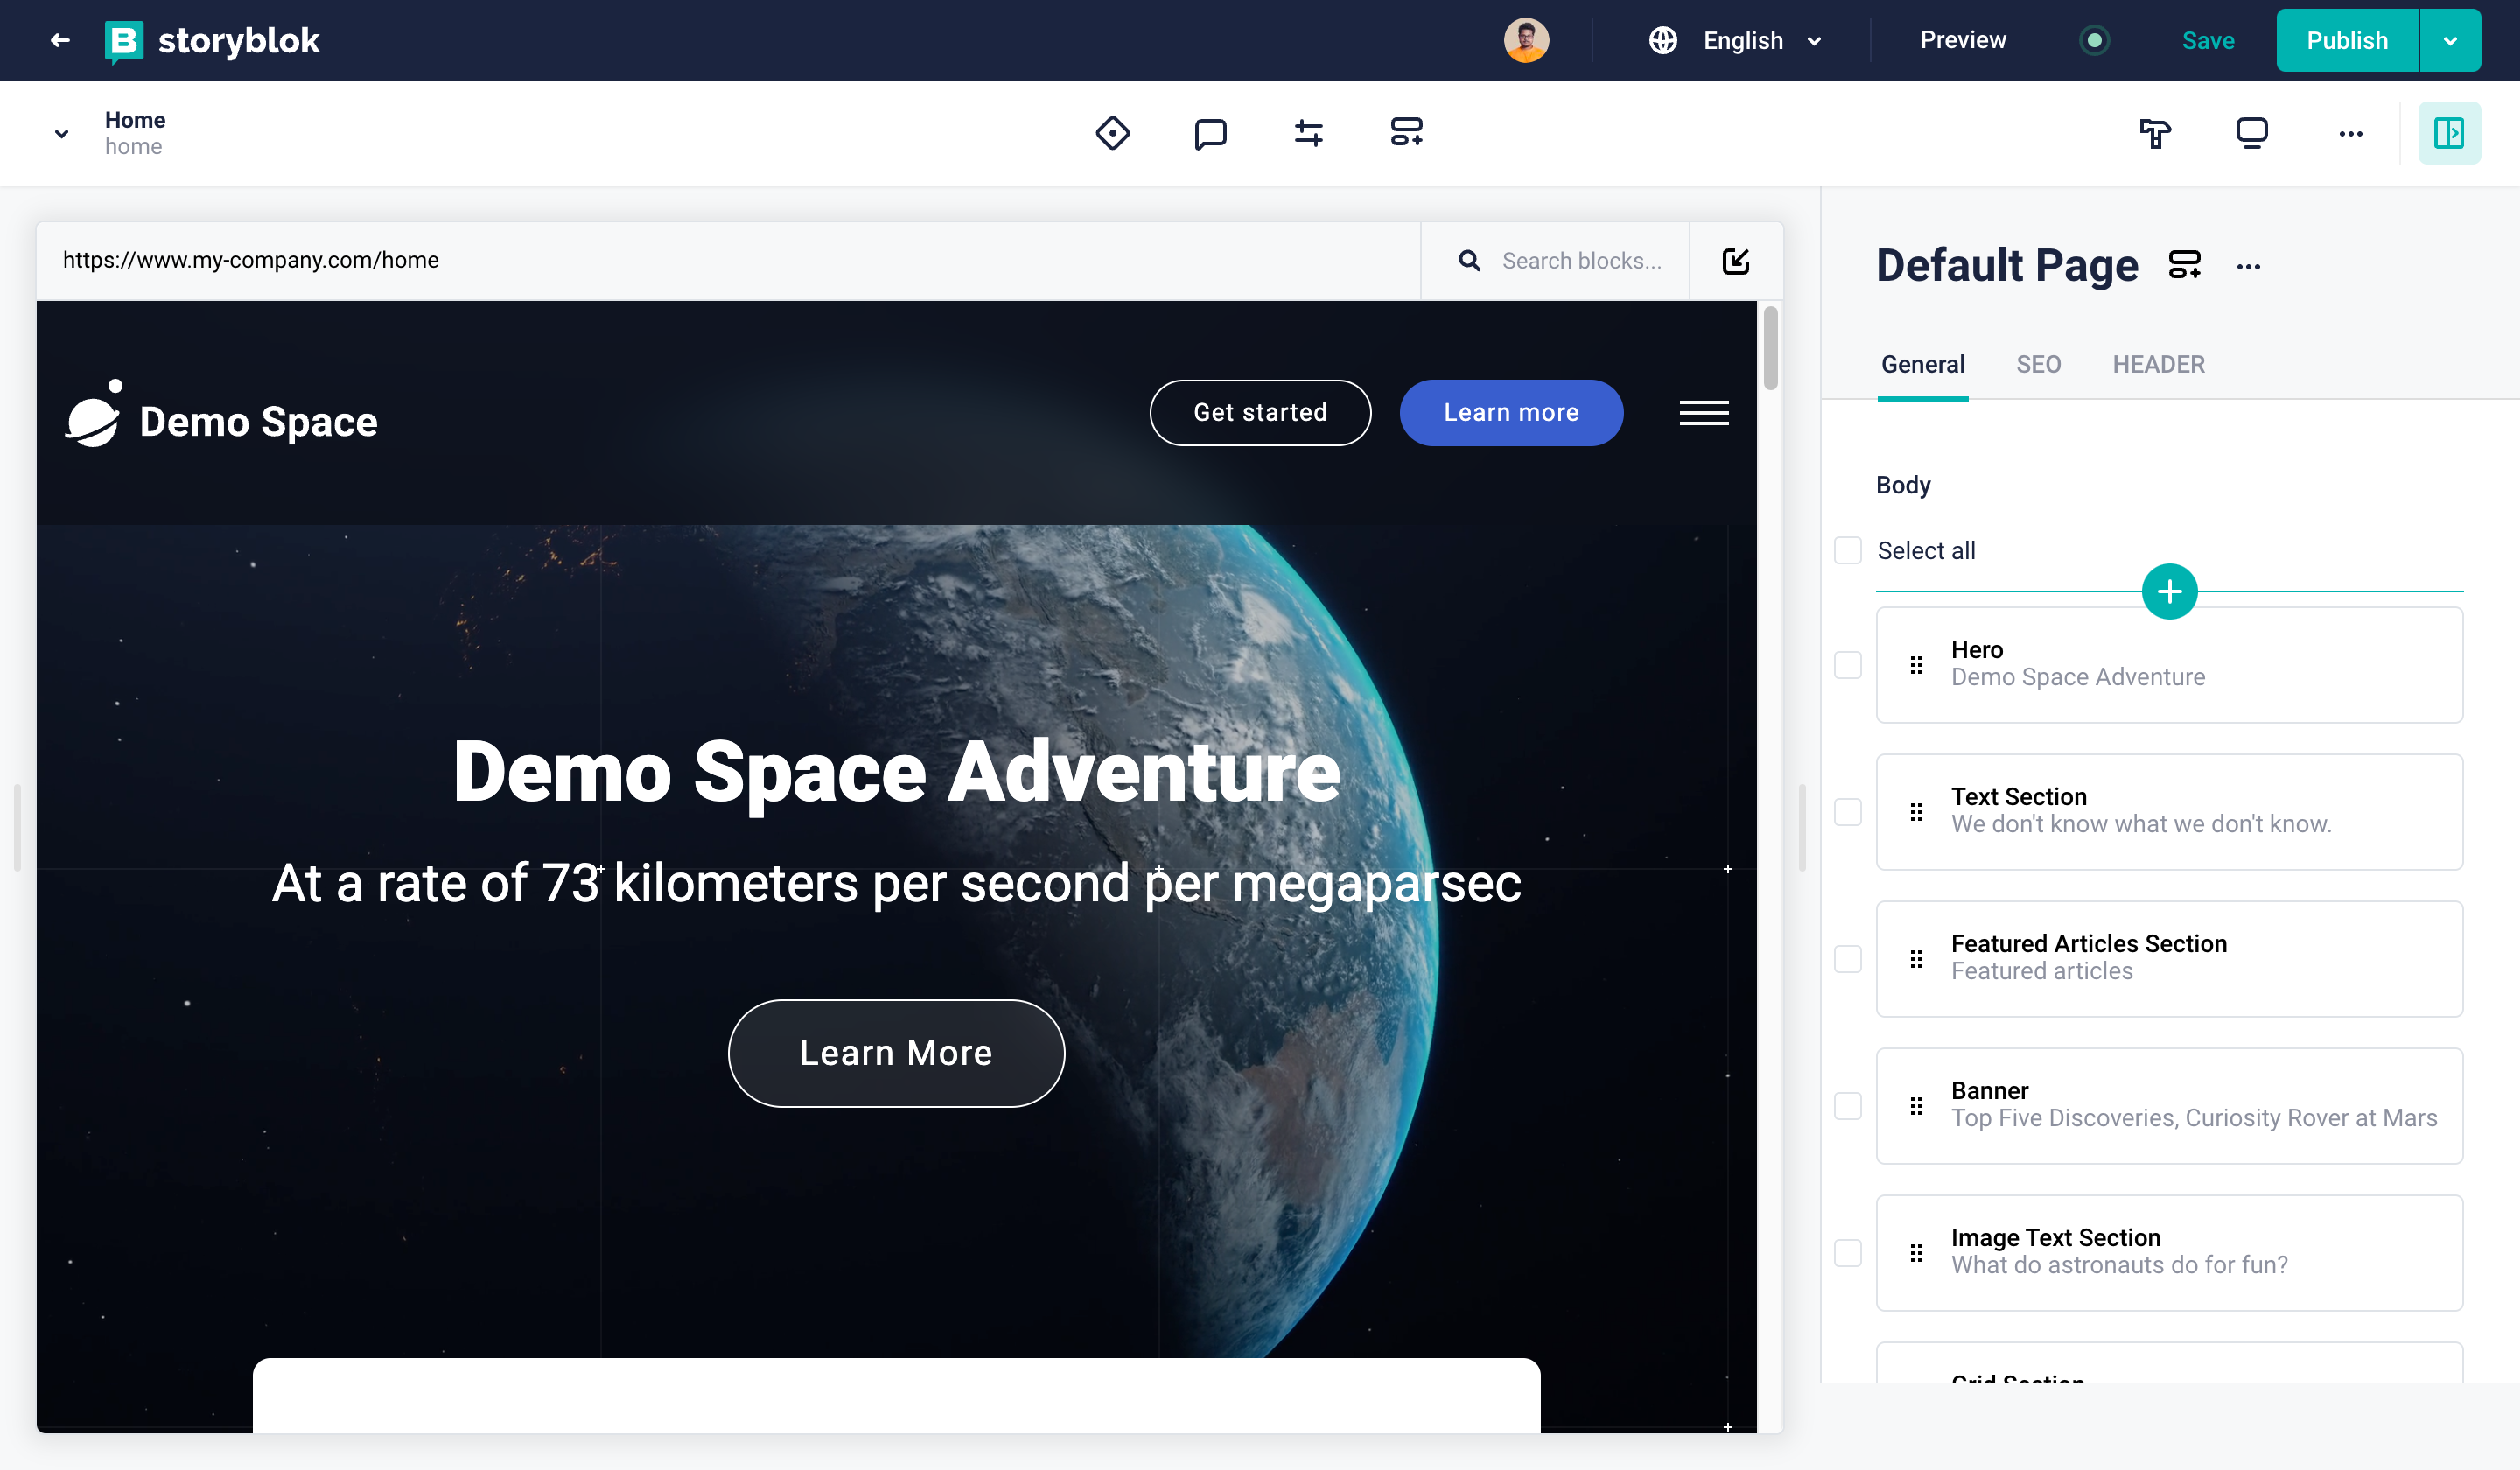
Adding a new block
With the Content panel open on the right side of your screen, select the first possible location on the navigation bar <span class="marker">{1}</span>, which in this case is Page. You can add a new block either at the bottom of the list, or in between two other blocks by moving your mouse cursor there and clicking on the green + sign <span class="marker">{2}</span>.
Choosing the preview screen size
The visual editor allows you to view your content on different screens. You can do so by one of the 2 following methods:
- Use the Responsive view button to change the screen size to one of the default views (desktop, tablet, or mobile).
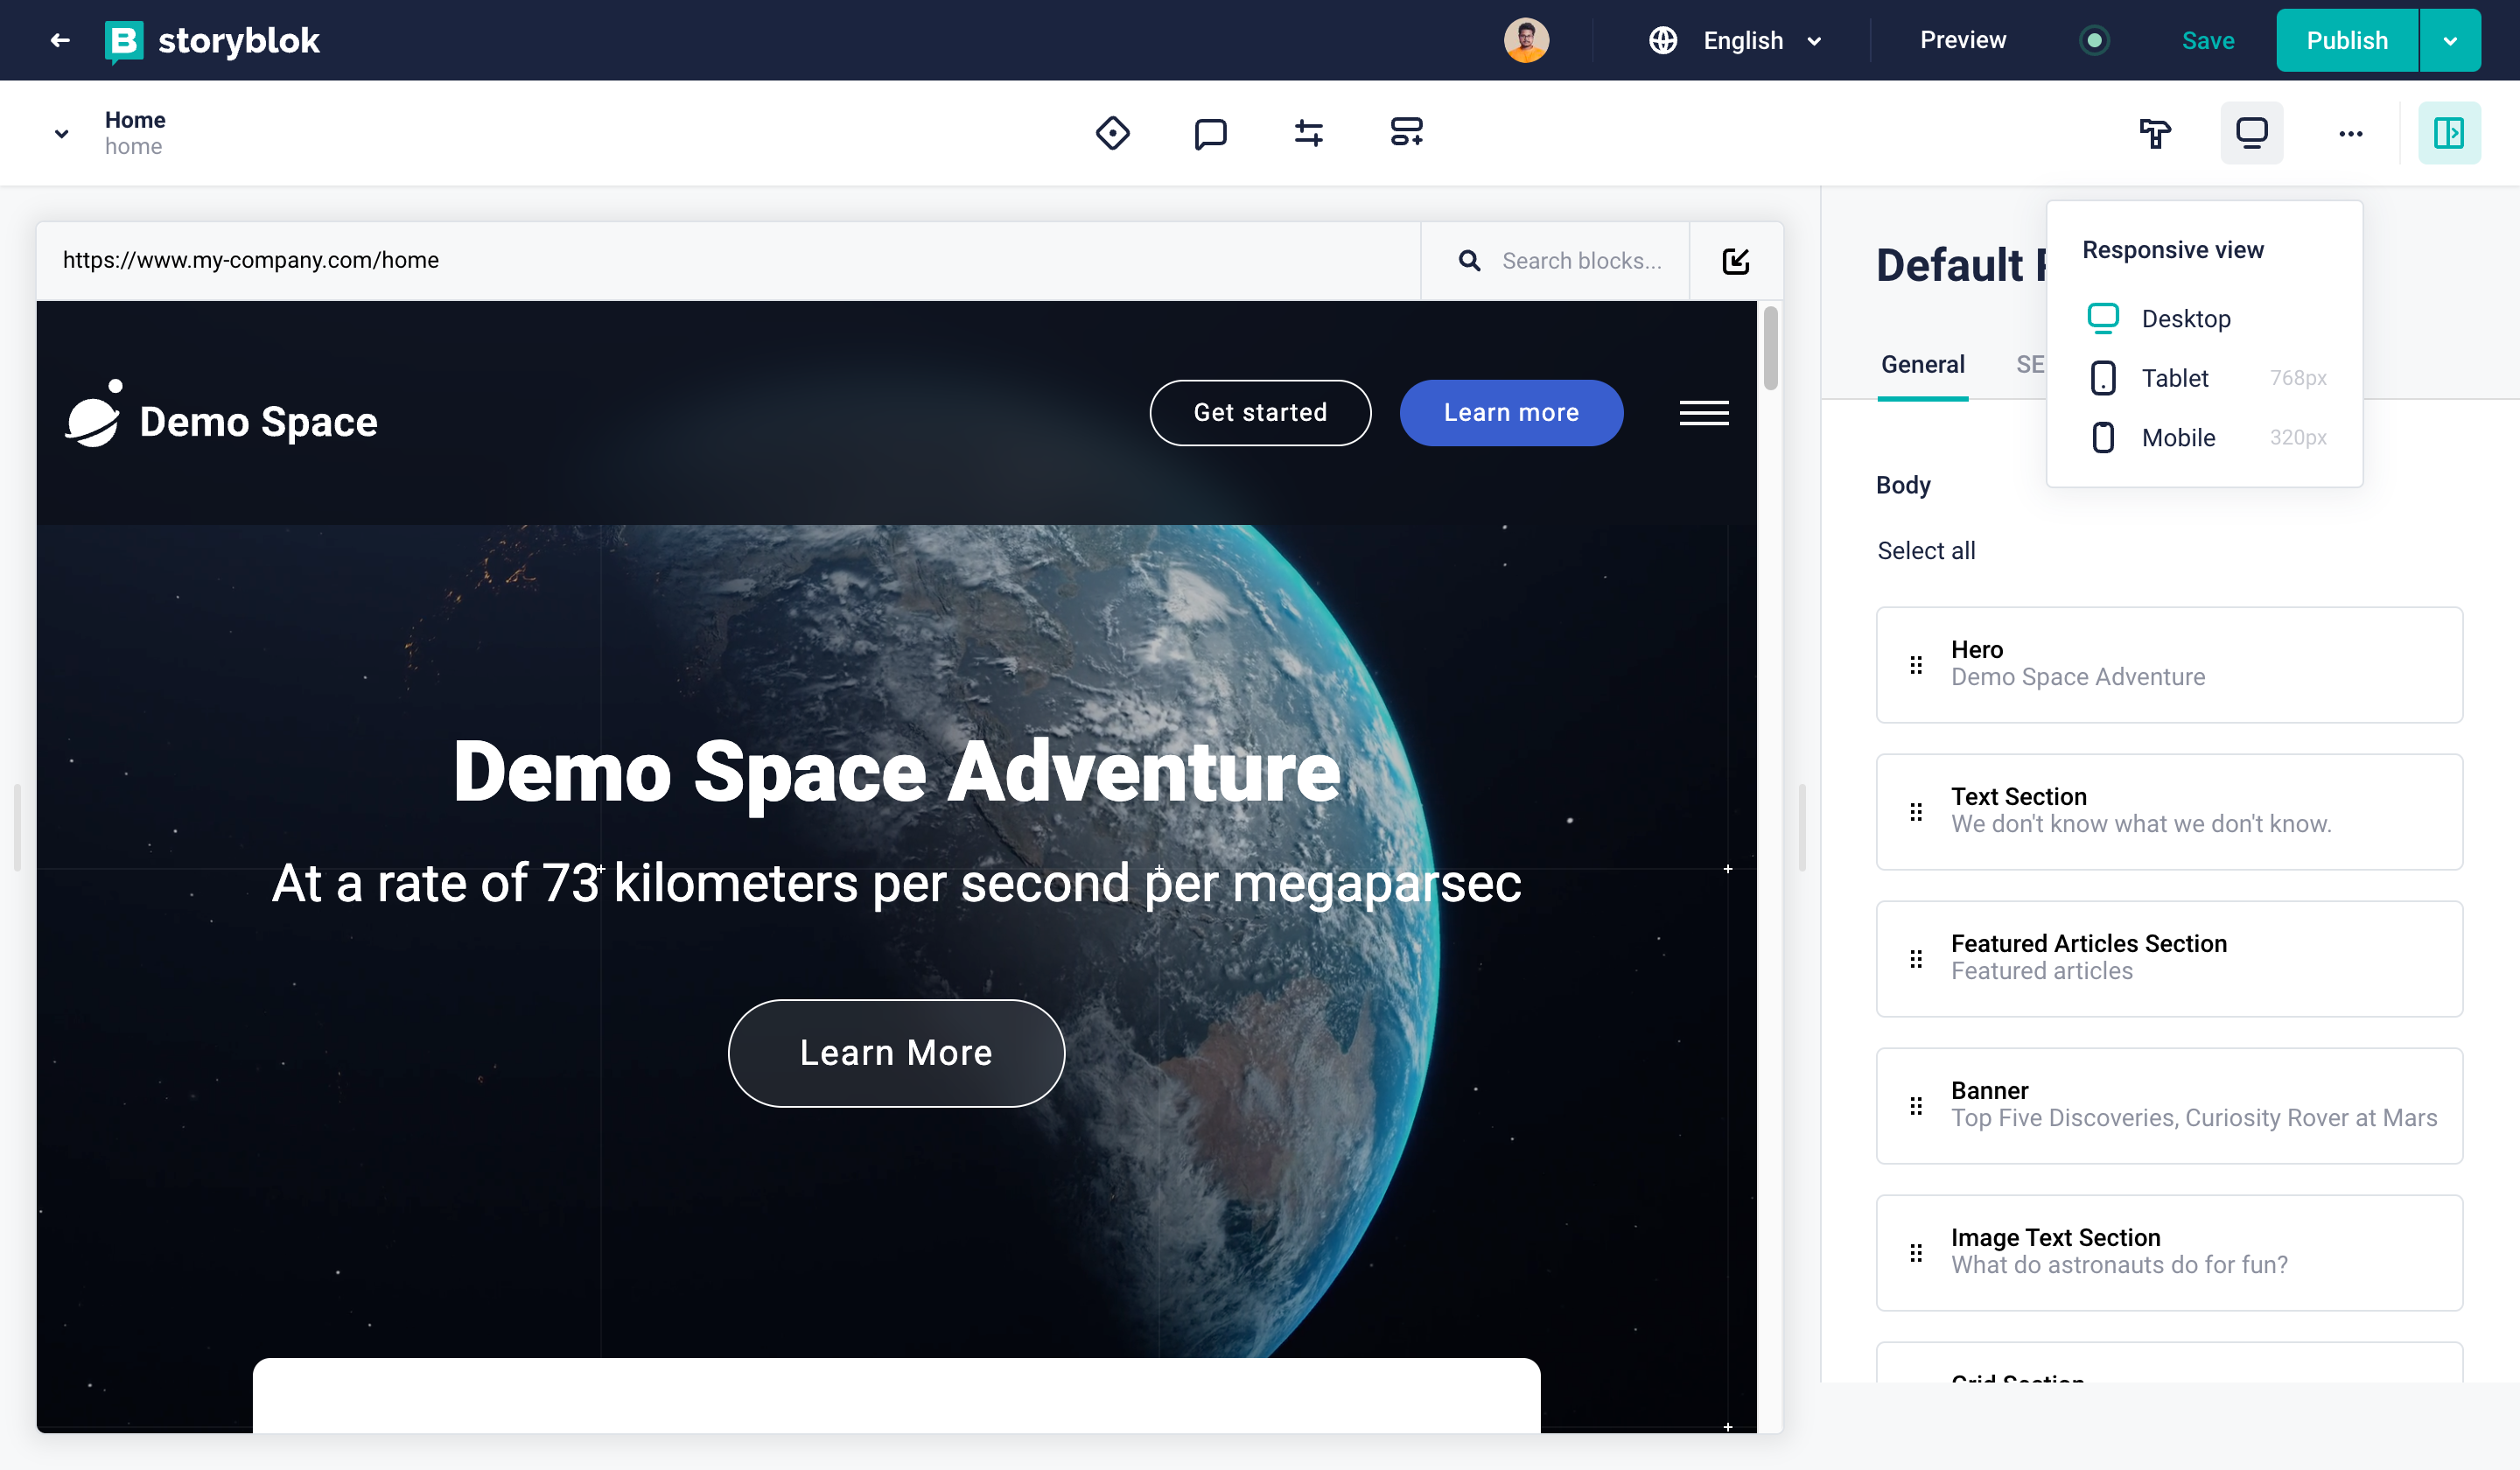
- Use the slider on the right side of the preview screen and change the size to anything you like.
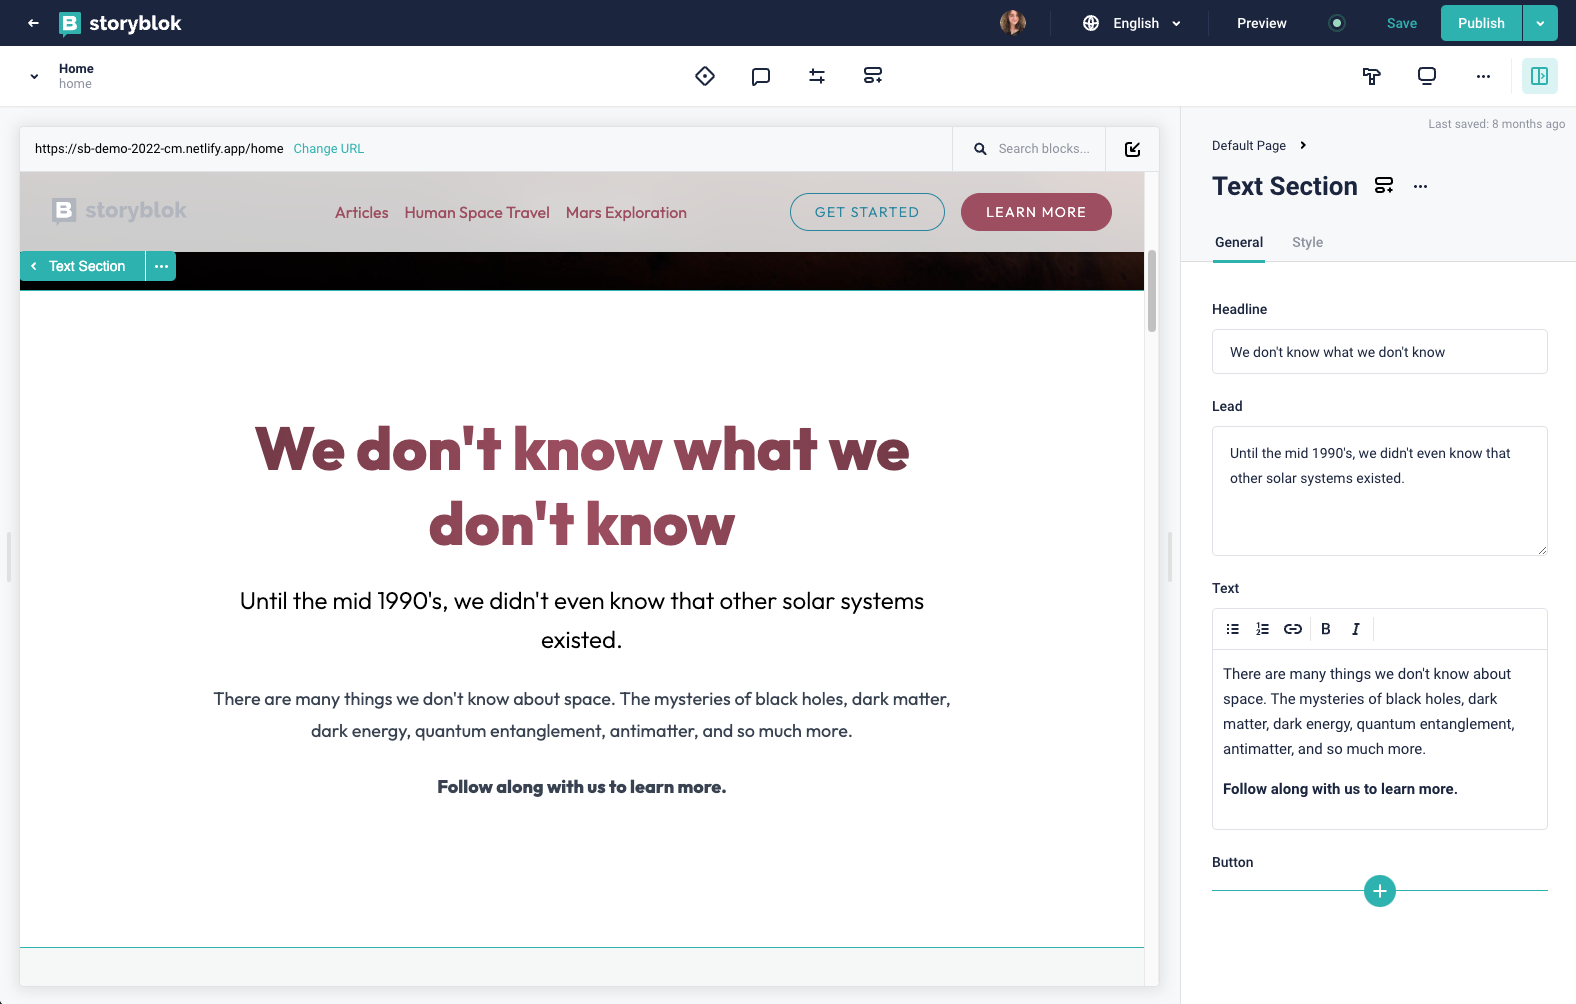
Rich text editor
Storyblok’s rich text editor is an interface where you can input text alongside advanced styling options. These include headings, bolding, italics, underlining, linking, bullet points, and more. With Storyblok, users can also undo and redo changes in one click.
Just like with the Visual Editor, this rich text editor makes it easy to see what your results will look like before you publish. It also offers features like Emoji support, subscripts, superscripts, text highlighting, and text color.
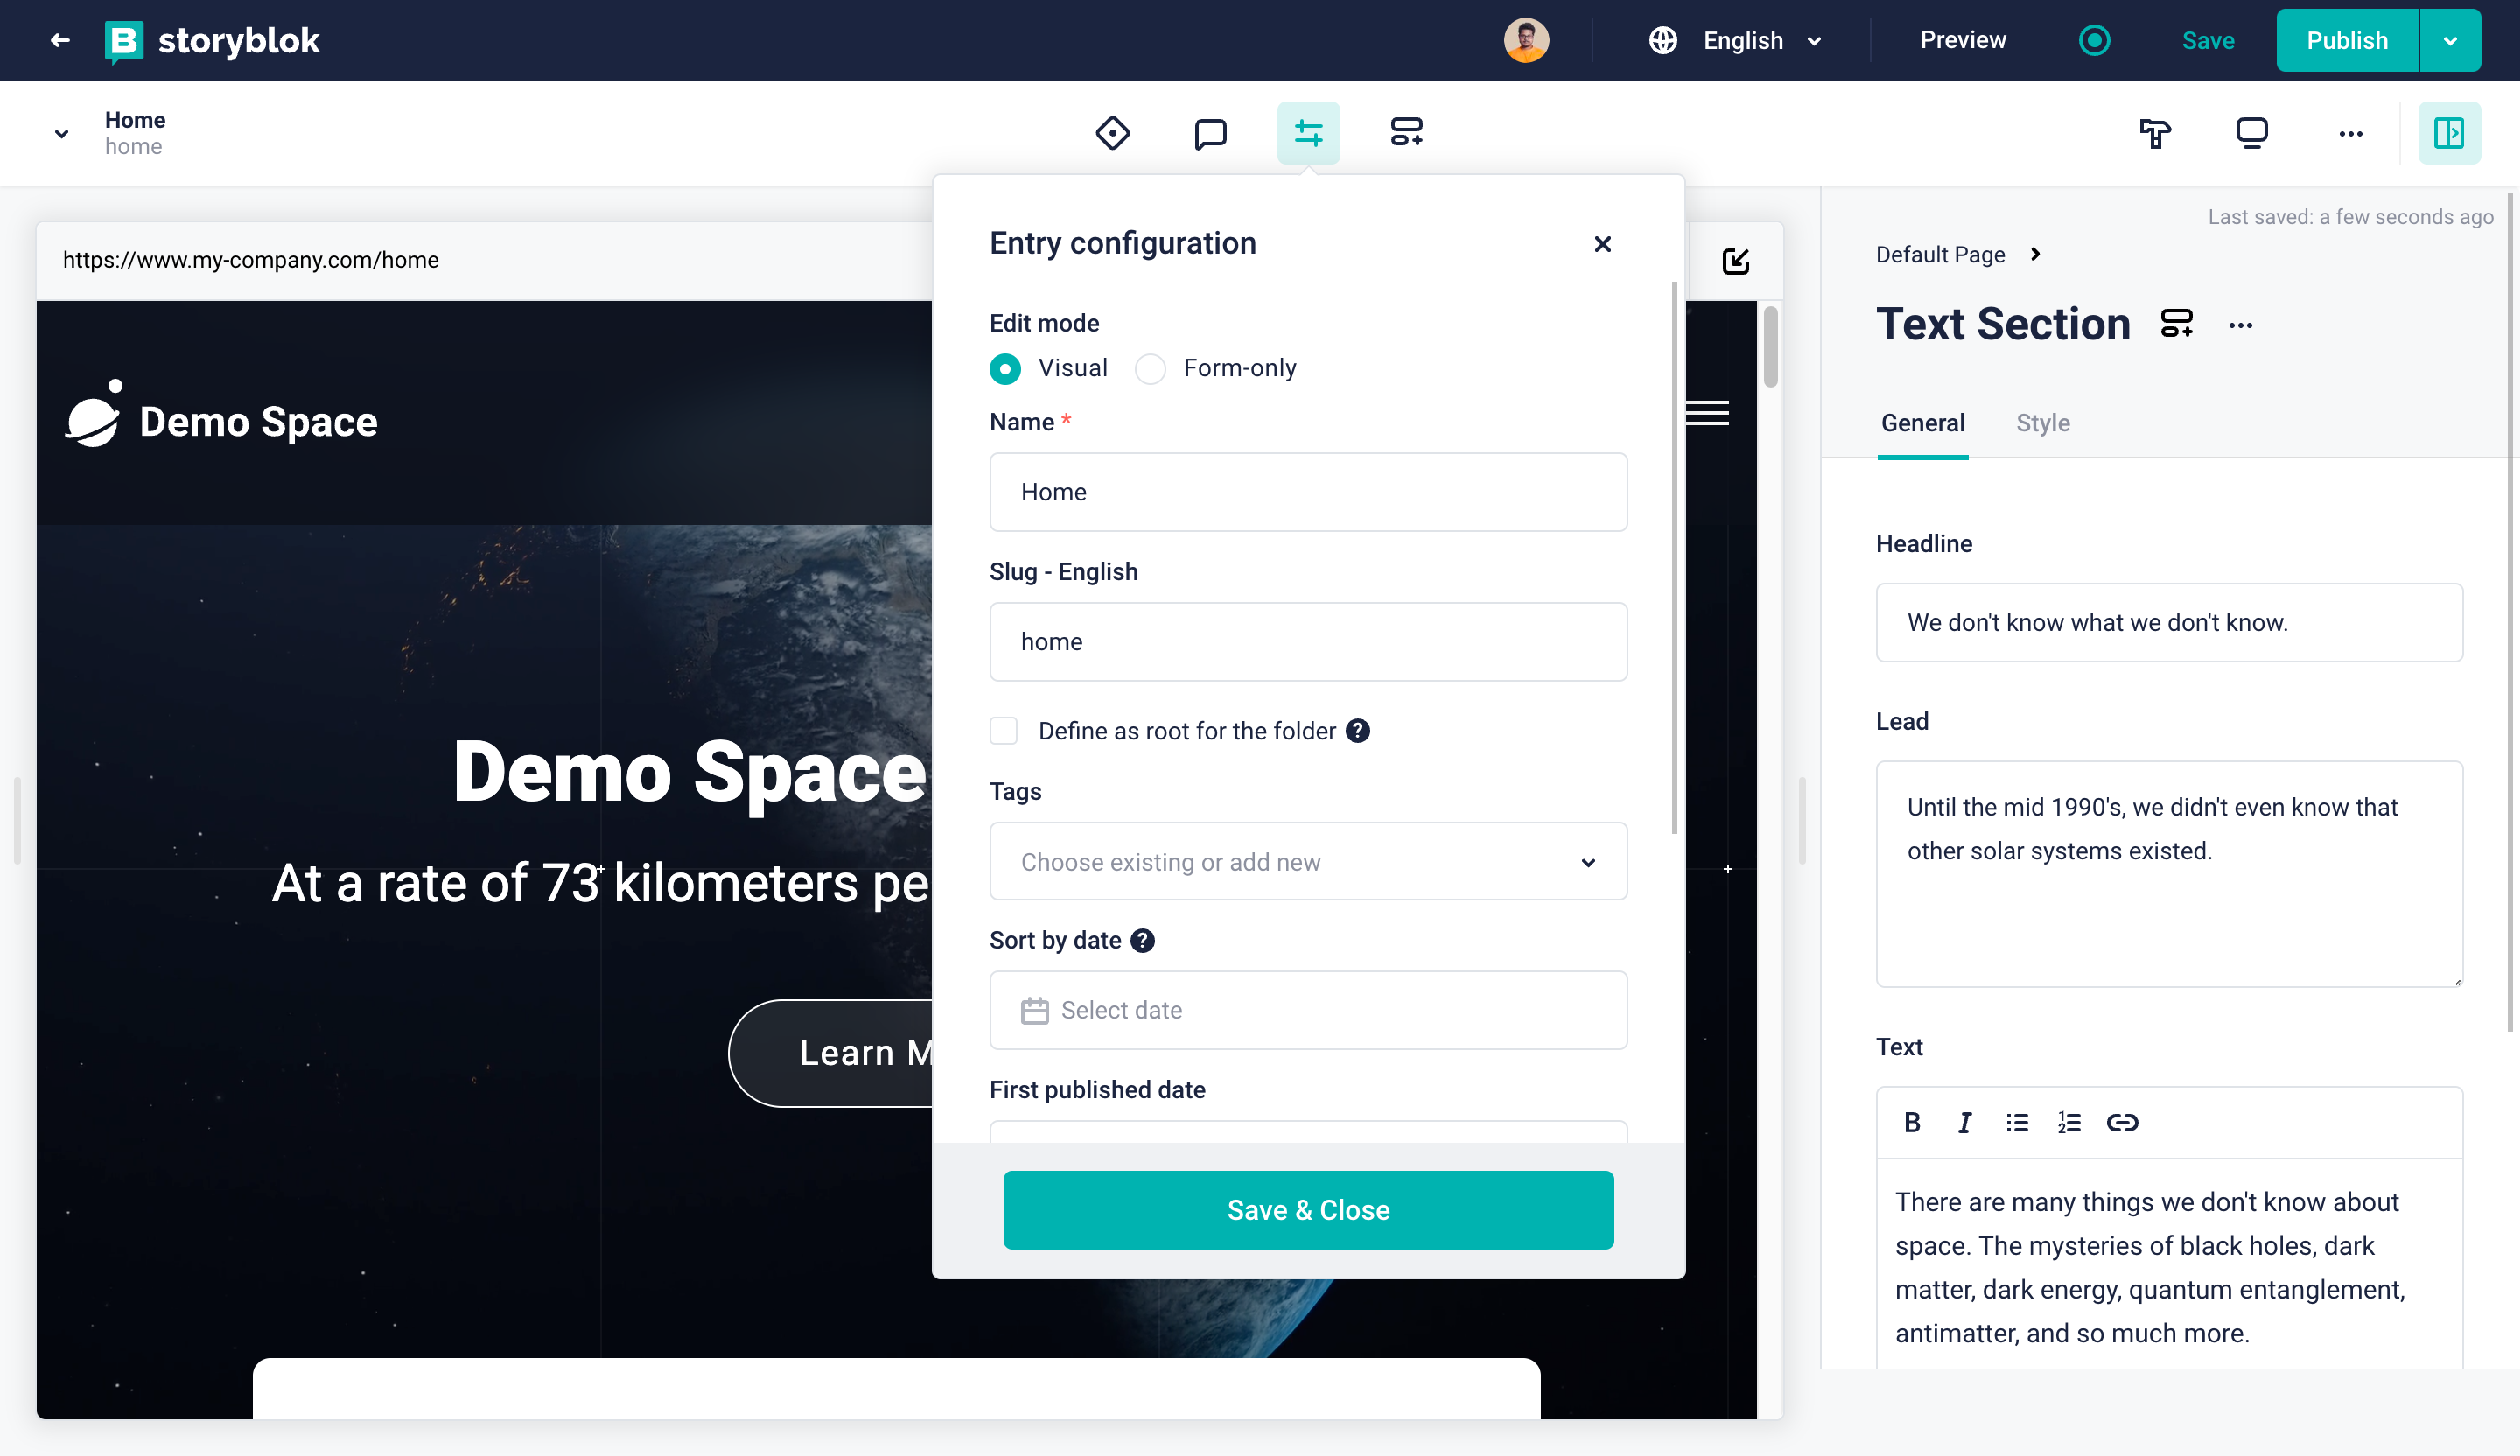
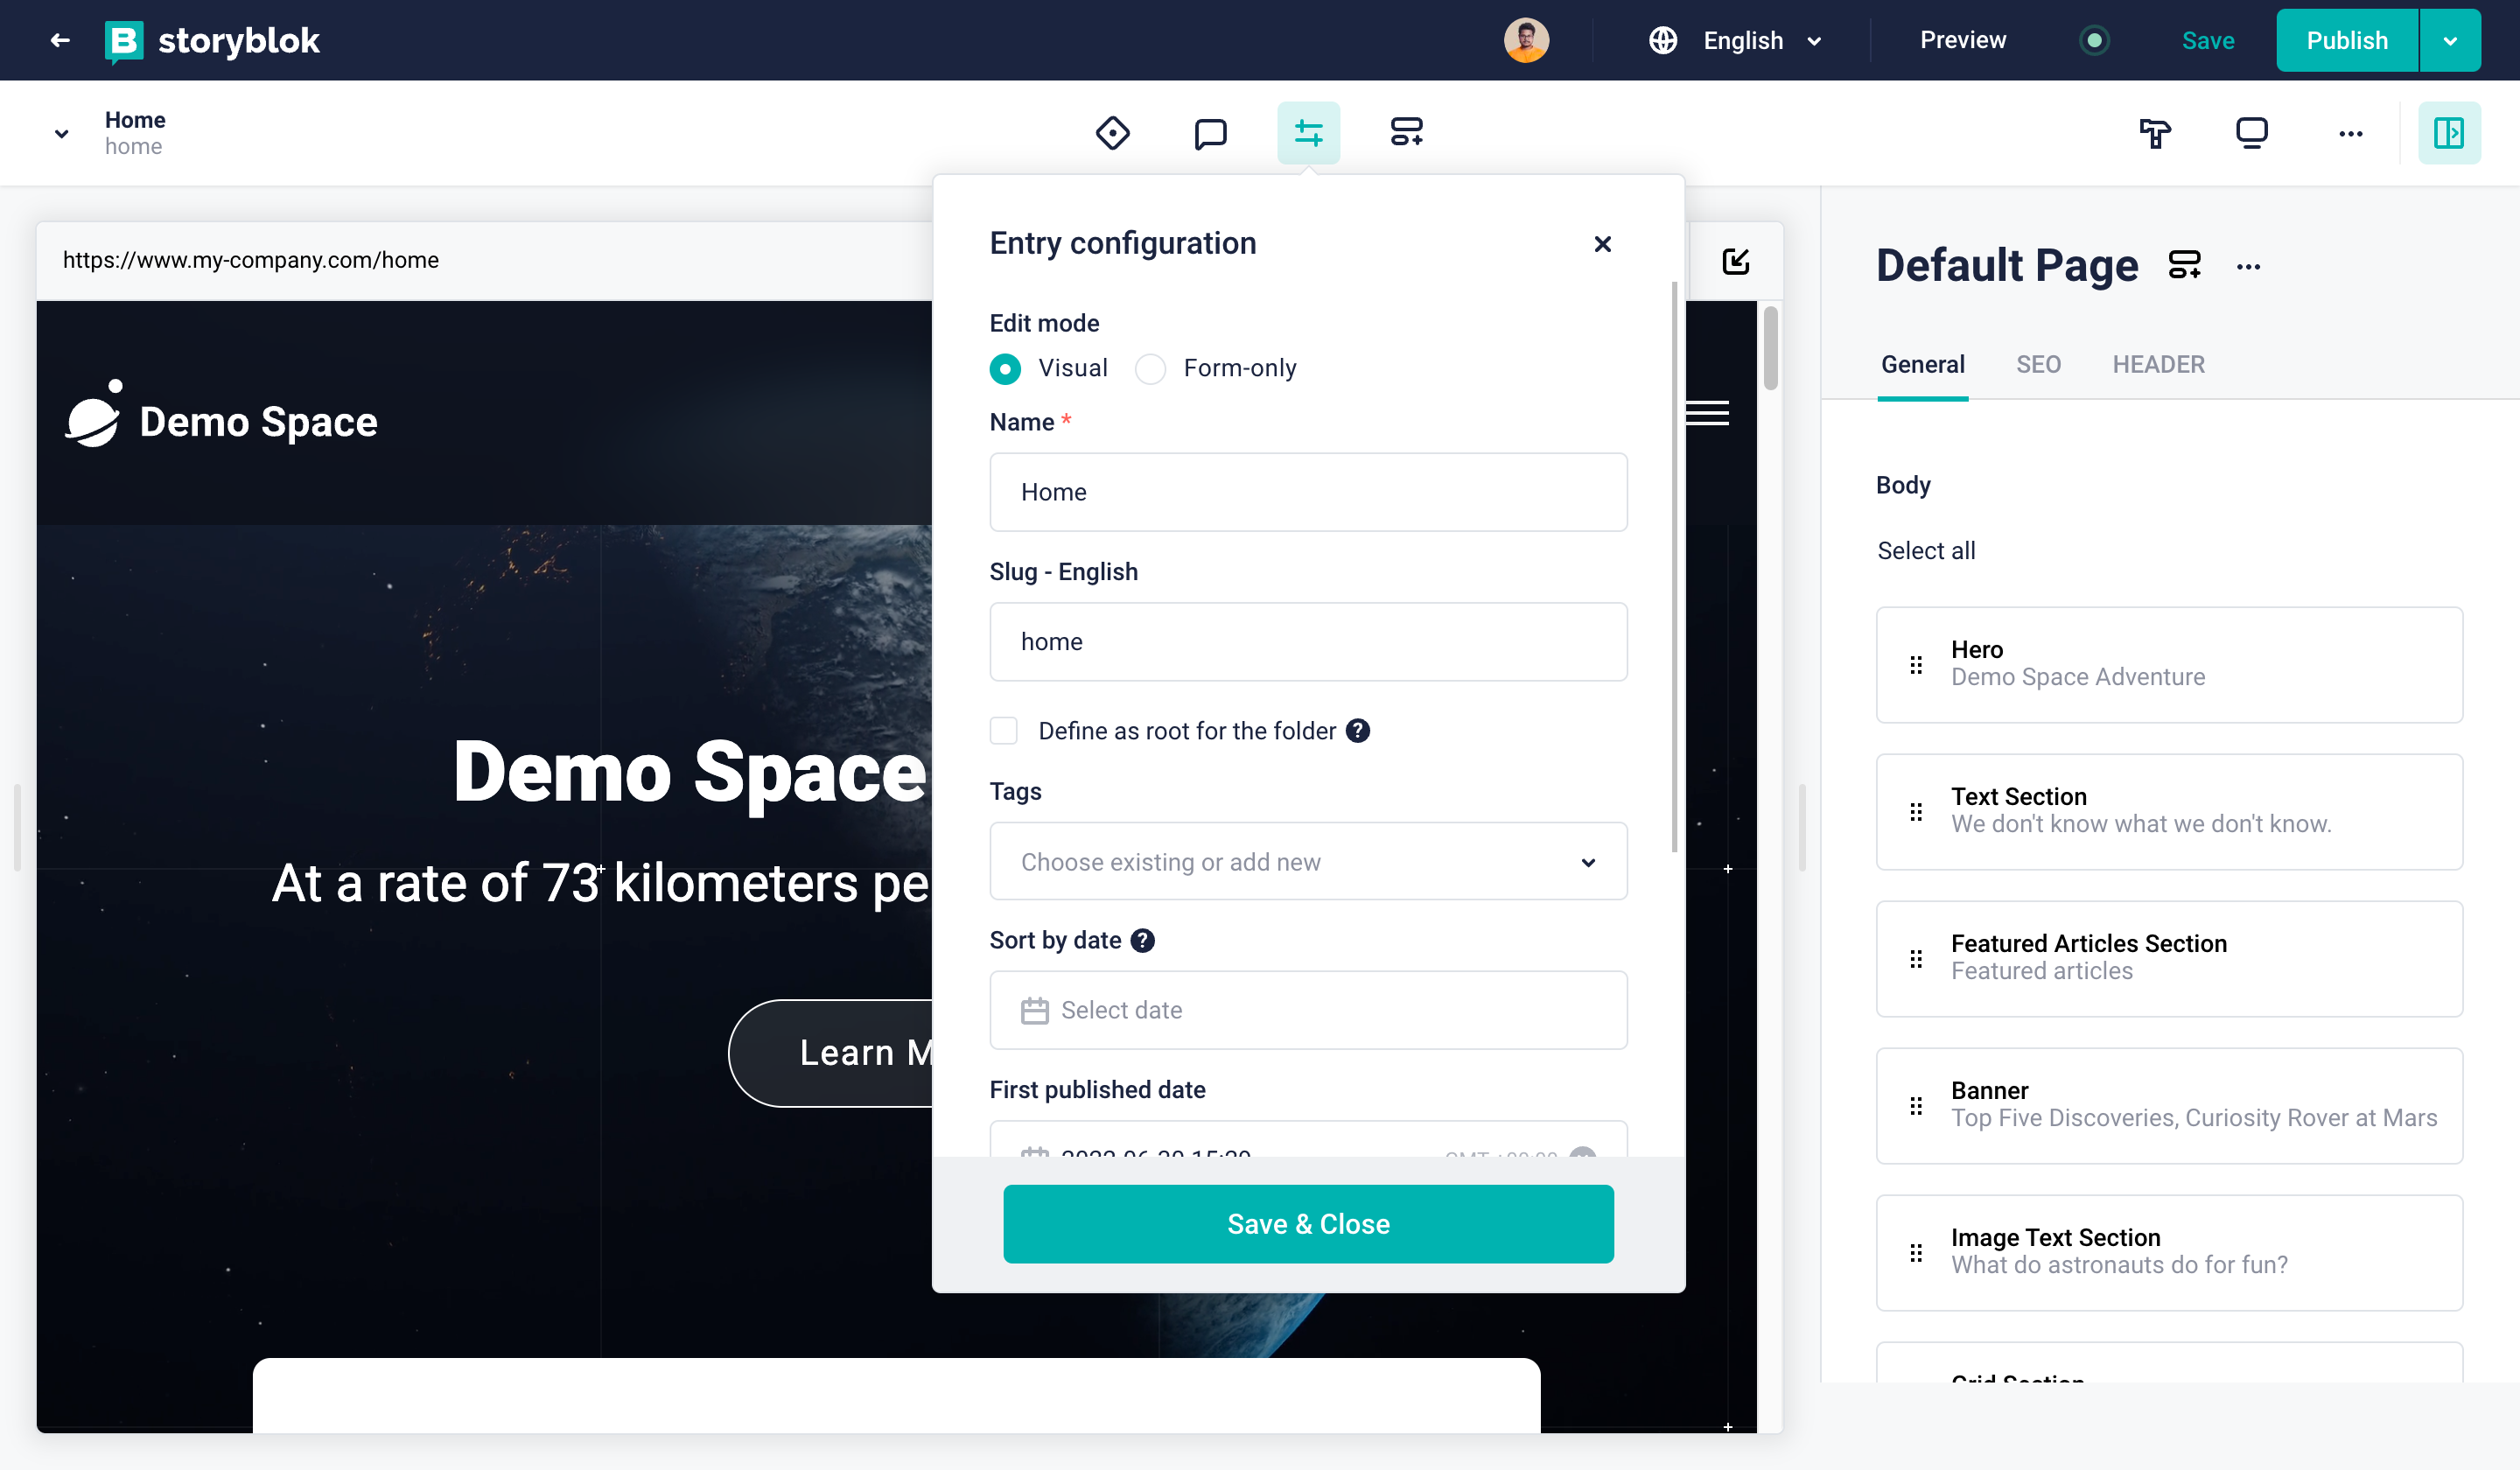
Entry configuration and page settings
While you can already set some of the settings for your Story in the content areas when creating it, you can also change them inside the Story itself.
Click on the Entry configuration button at the top-center of your screen to open up the page settings. Here you can change all the key configurations of your current Story.
Navigating between different entries
With Storyblok, you can navigate between different content entries (Stories) without having to leave your current one. This is extremely useful when you want to copy content from a different entry and reuse your already-made content.
To do so, simply click on the small arrow on the top left of the screen, right next to the entry name ( in this case "Home" - make sure you are clicking on the correct arrow!) and navigate your way through all your content entries. You can also use the search function to find your content easier.
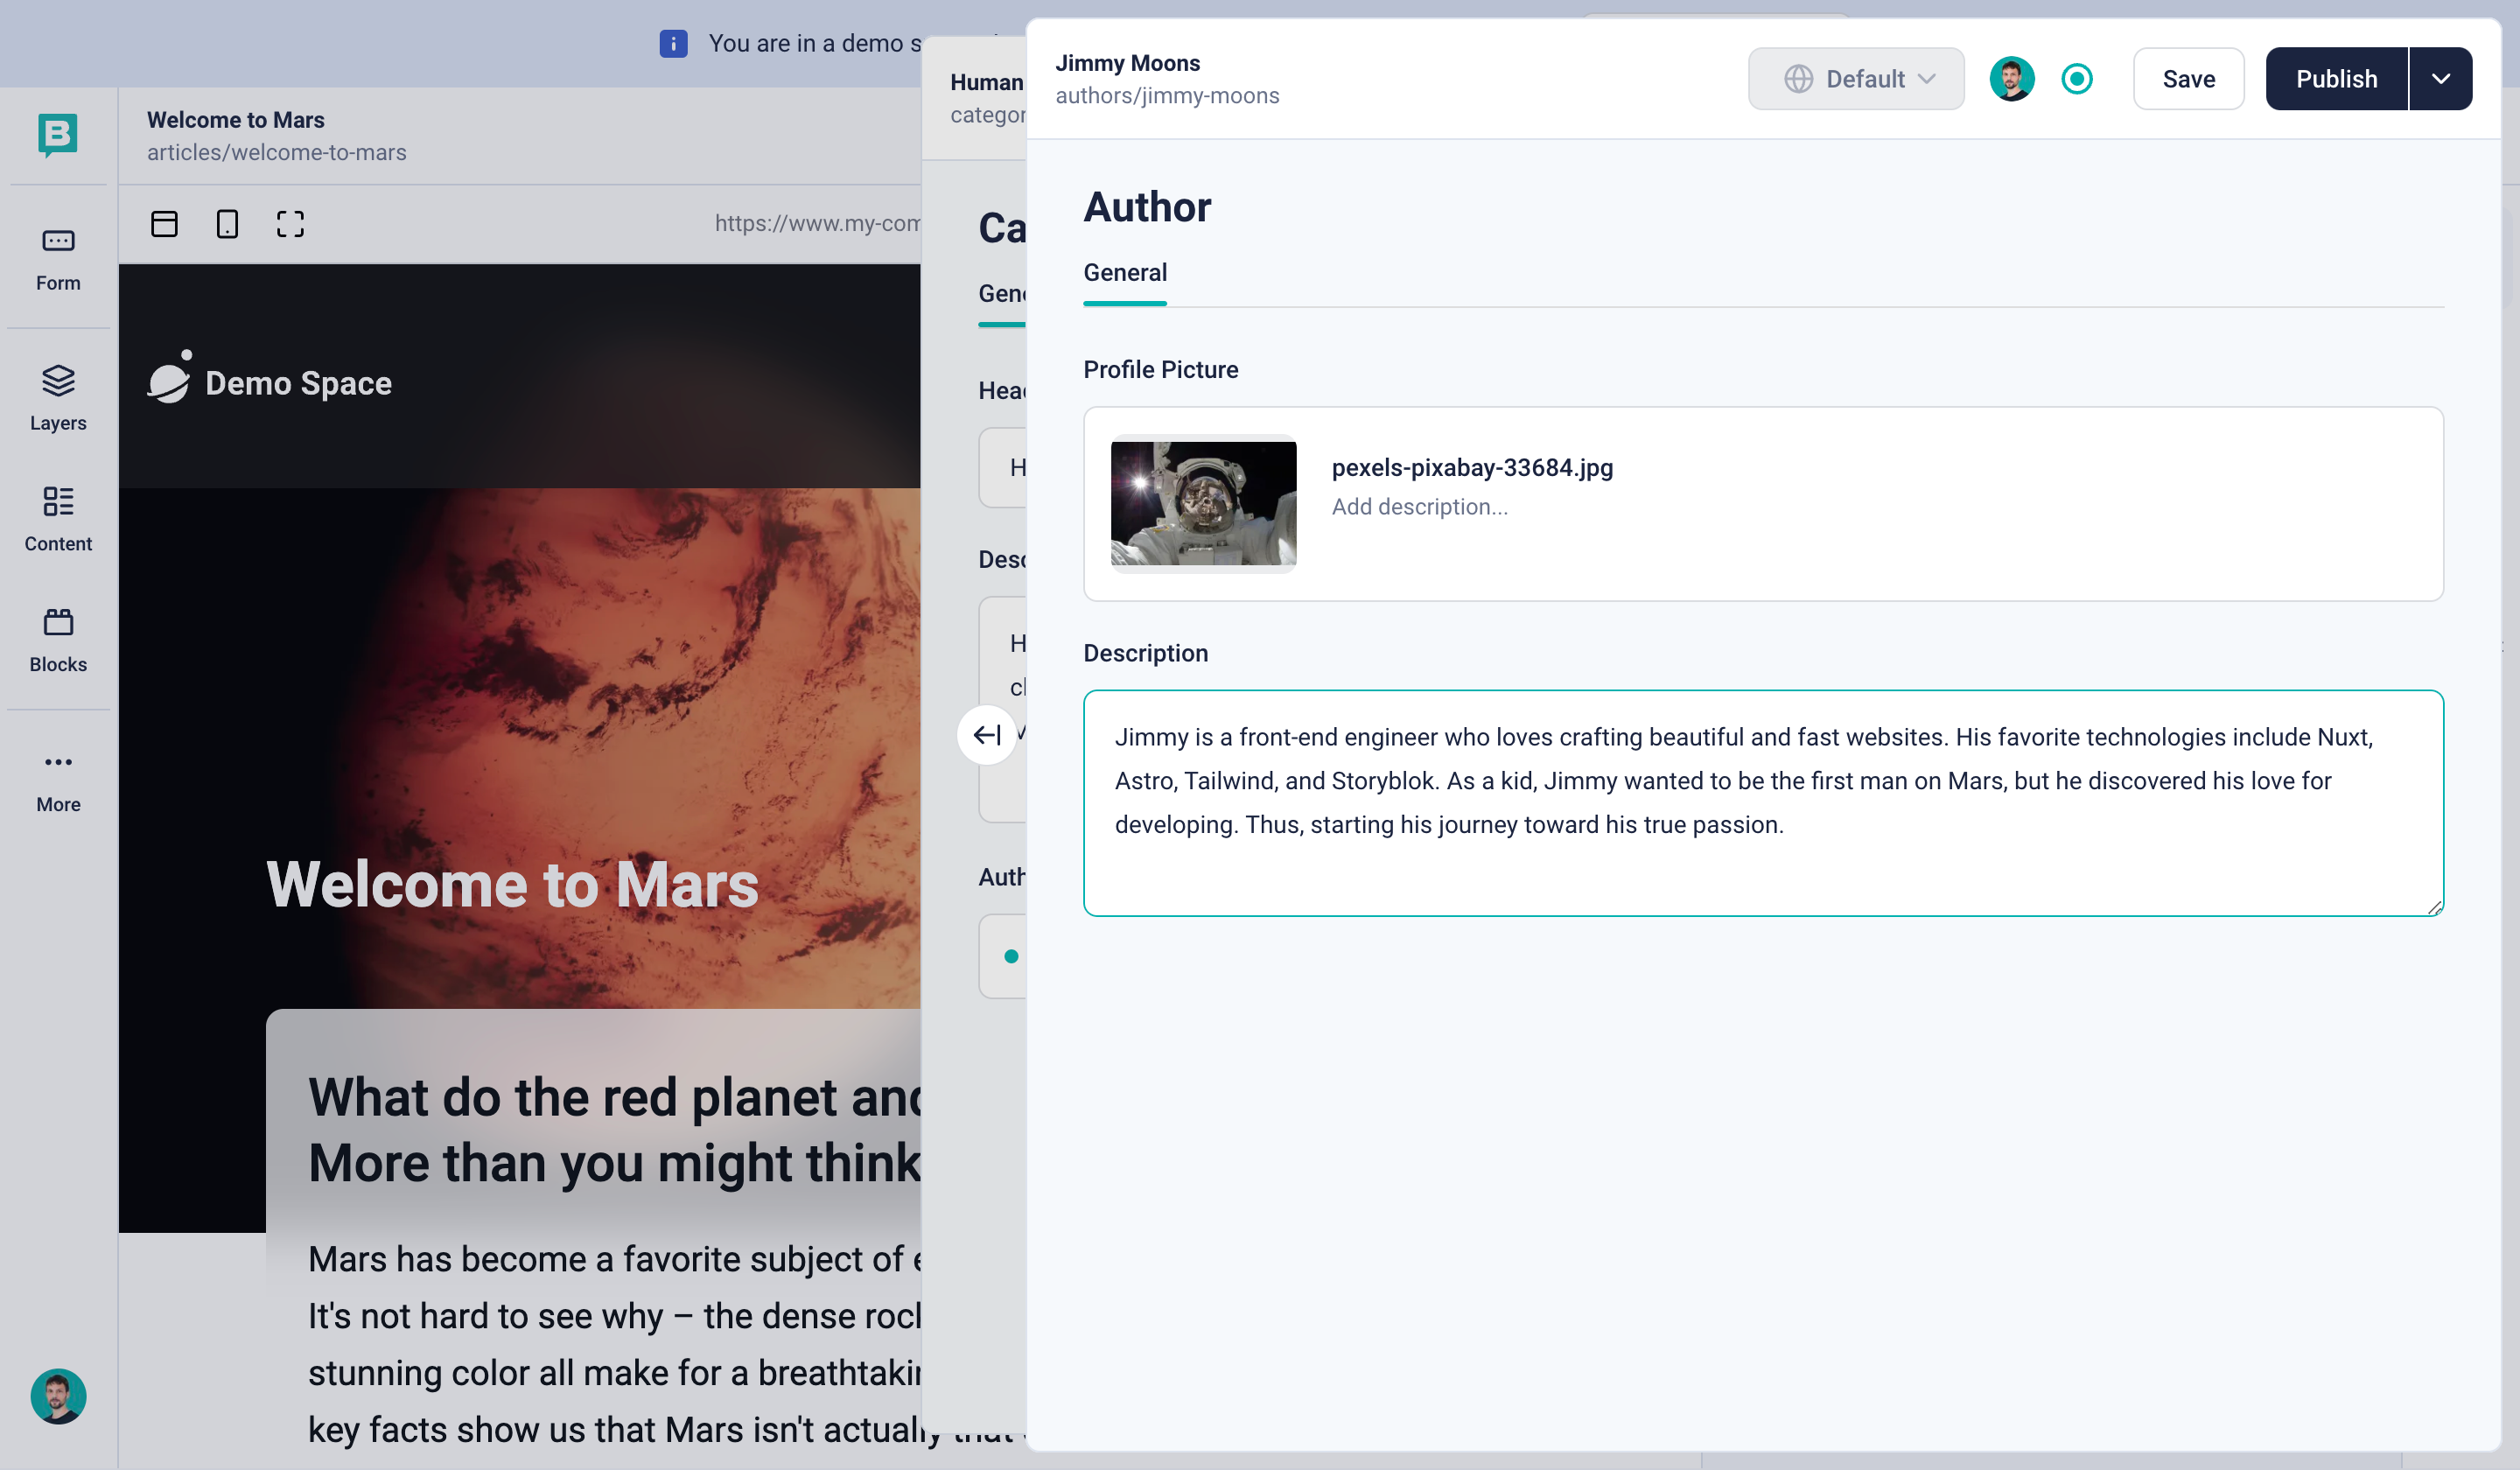
Stacked views
This feature enables you to stack stories on top of each other so you can view and edit nested or referenced stories – without opening them in a new tab.
To access stacked views, go to any story with a linked entry. Select the stacked view icon <span class="marker">{1}</span>. This will stack that entry on top of the one you’re currently viewing. You can close a view by clicking the icon on the middle left <span class="marker">{2}</span>.
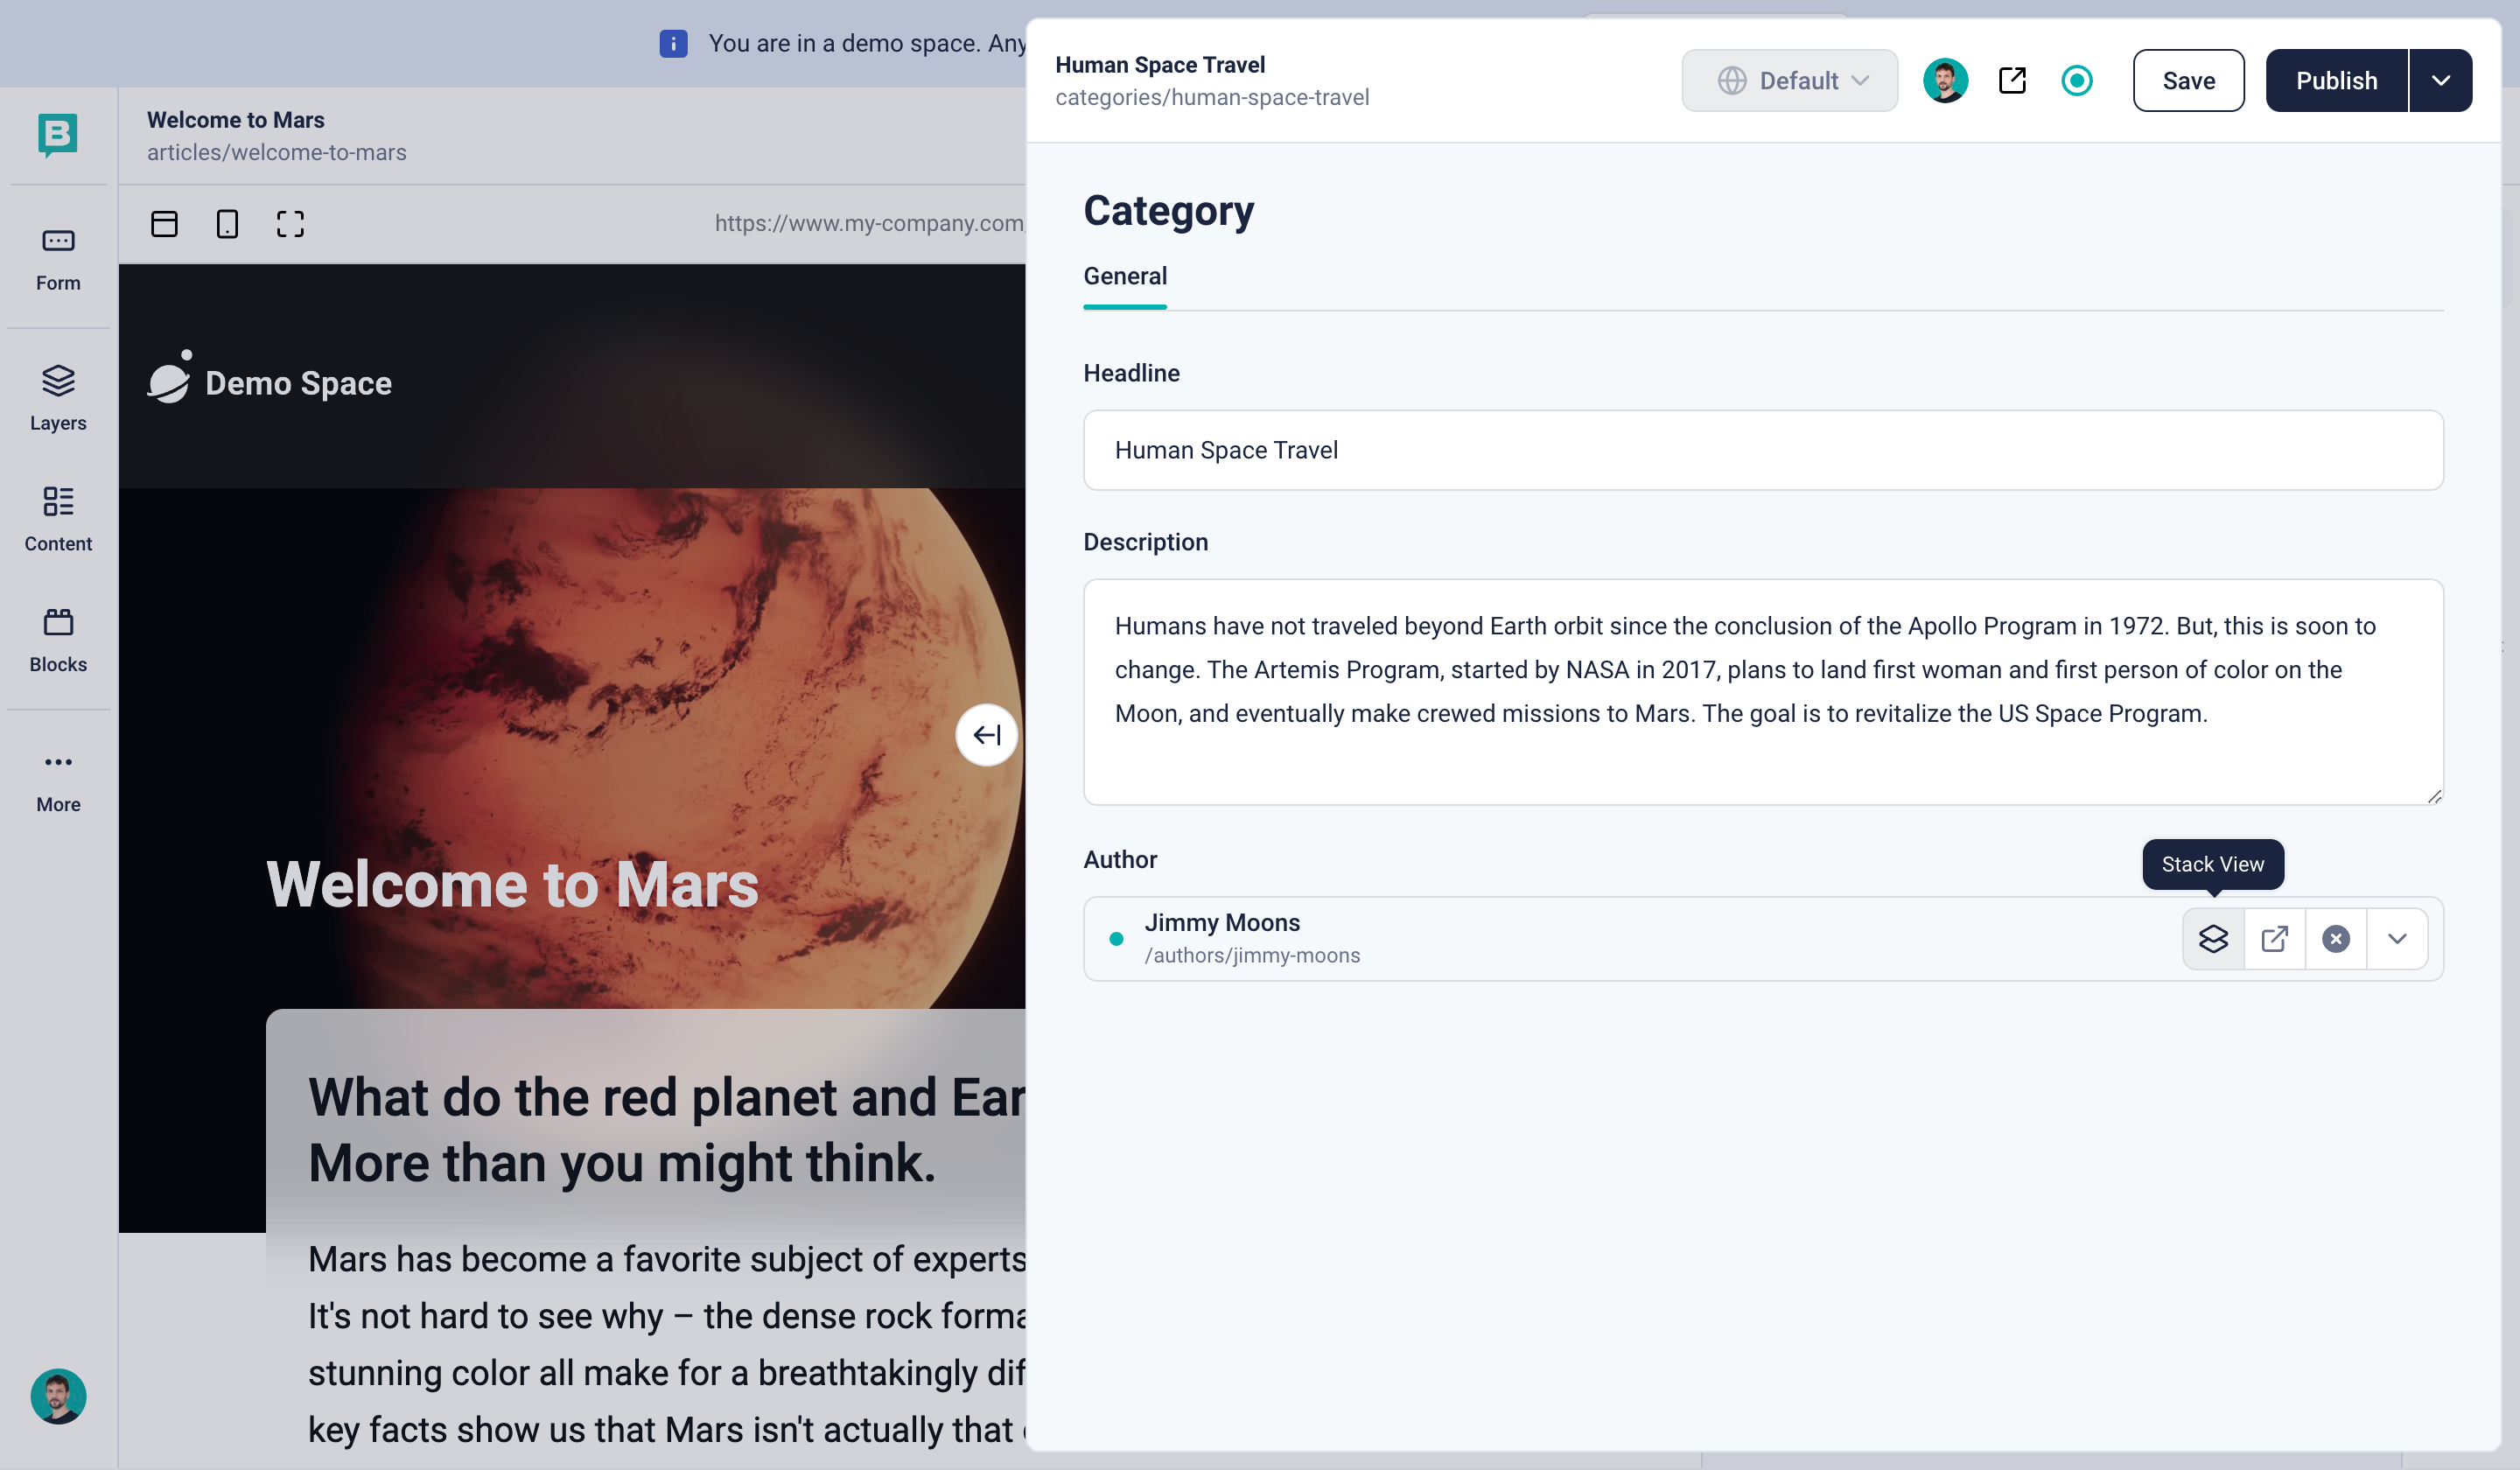
You can repeat this action within the stacked view to open an additional one, and continue up to the limit of your plan. When multiple views are stacked, the more recent ones will be lighter and on top.
The availability of stacked views depends on your pricing plan. Please refer to Storyblok's pricing for further information.
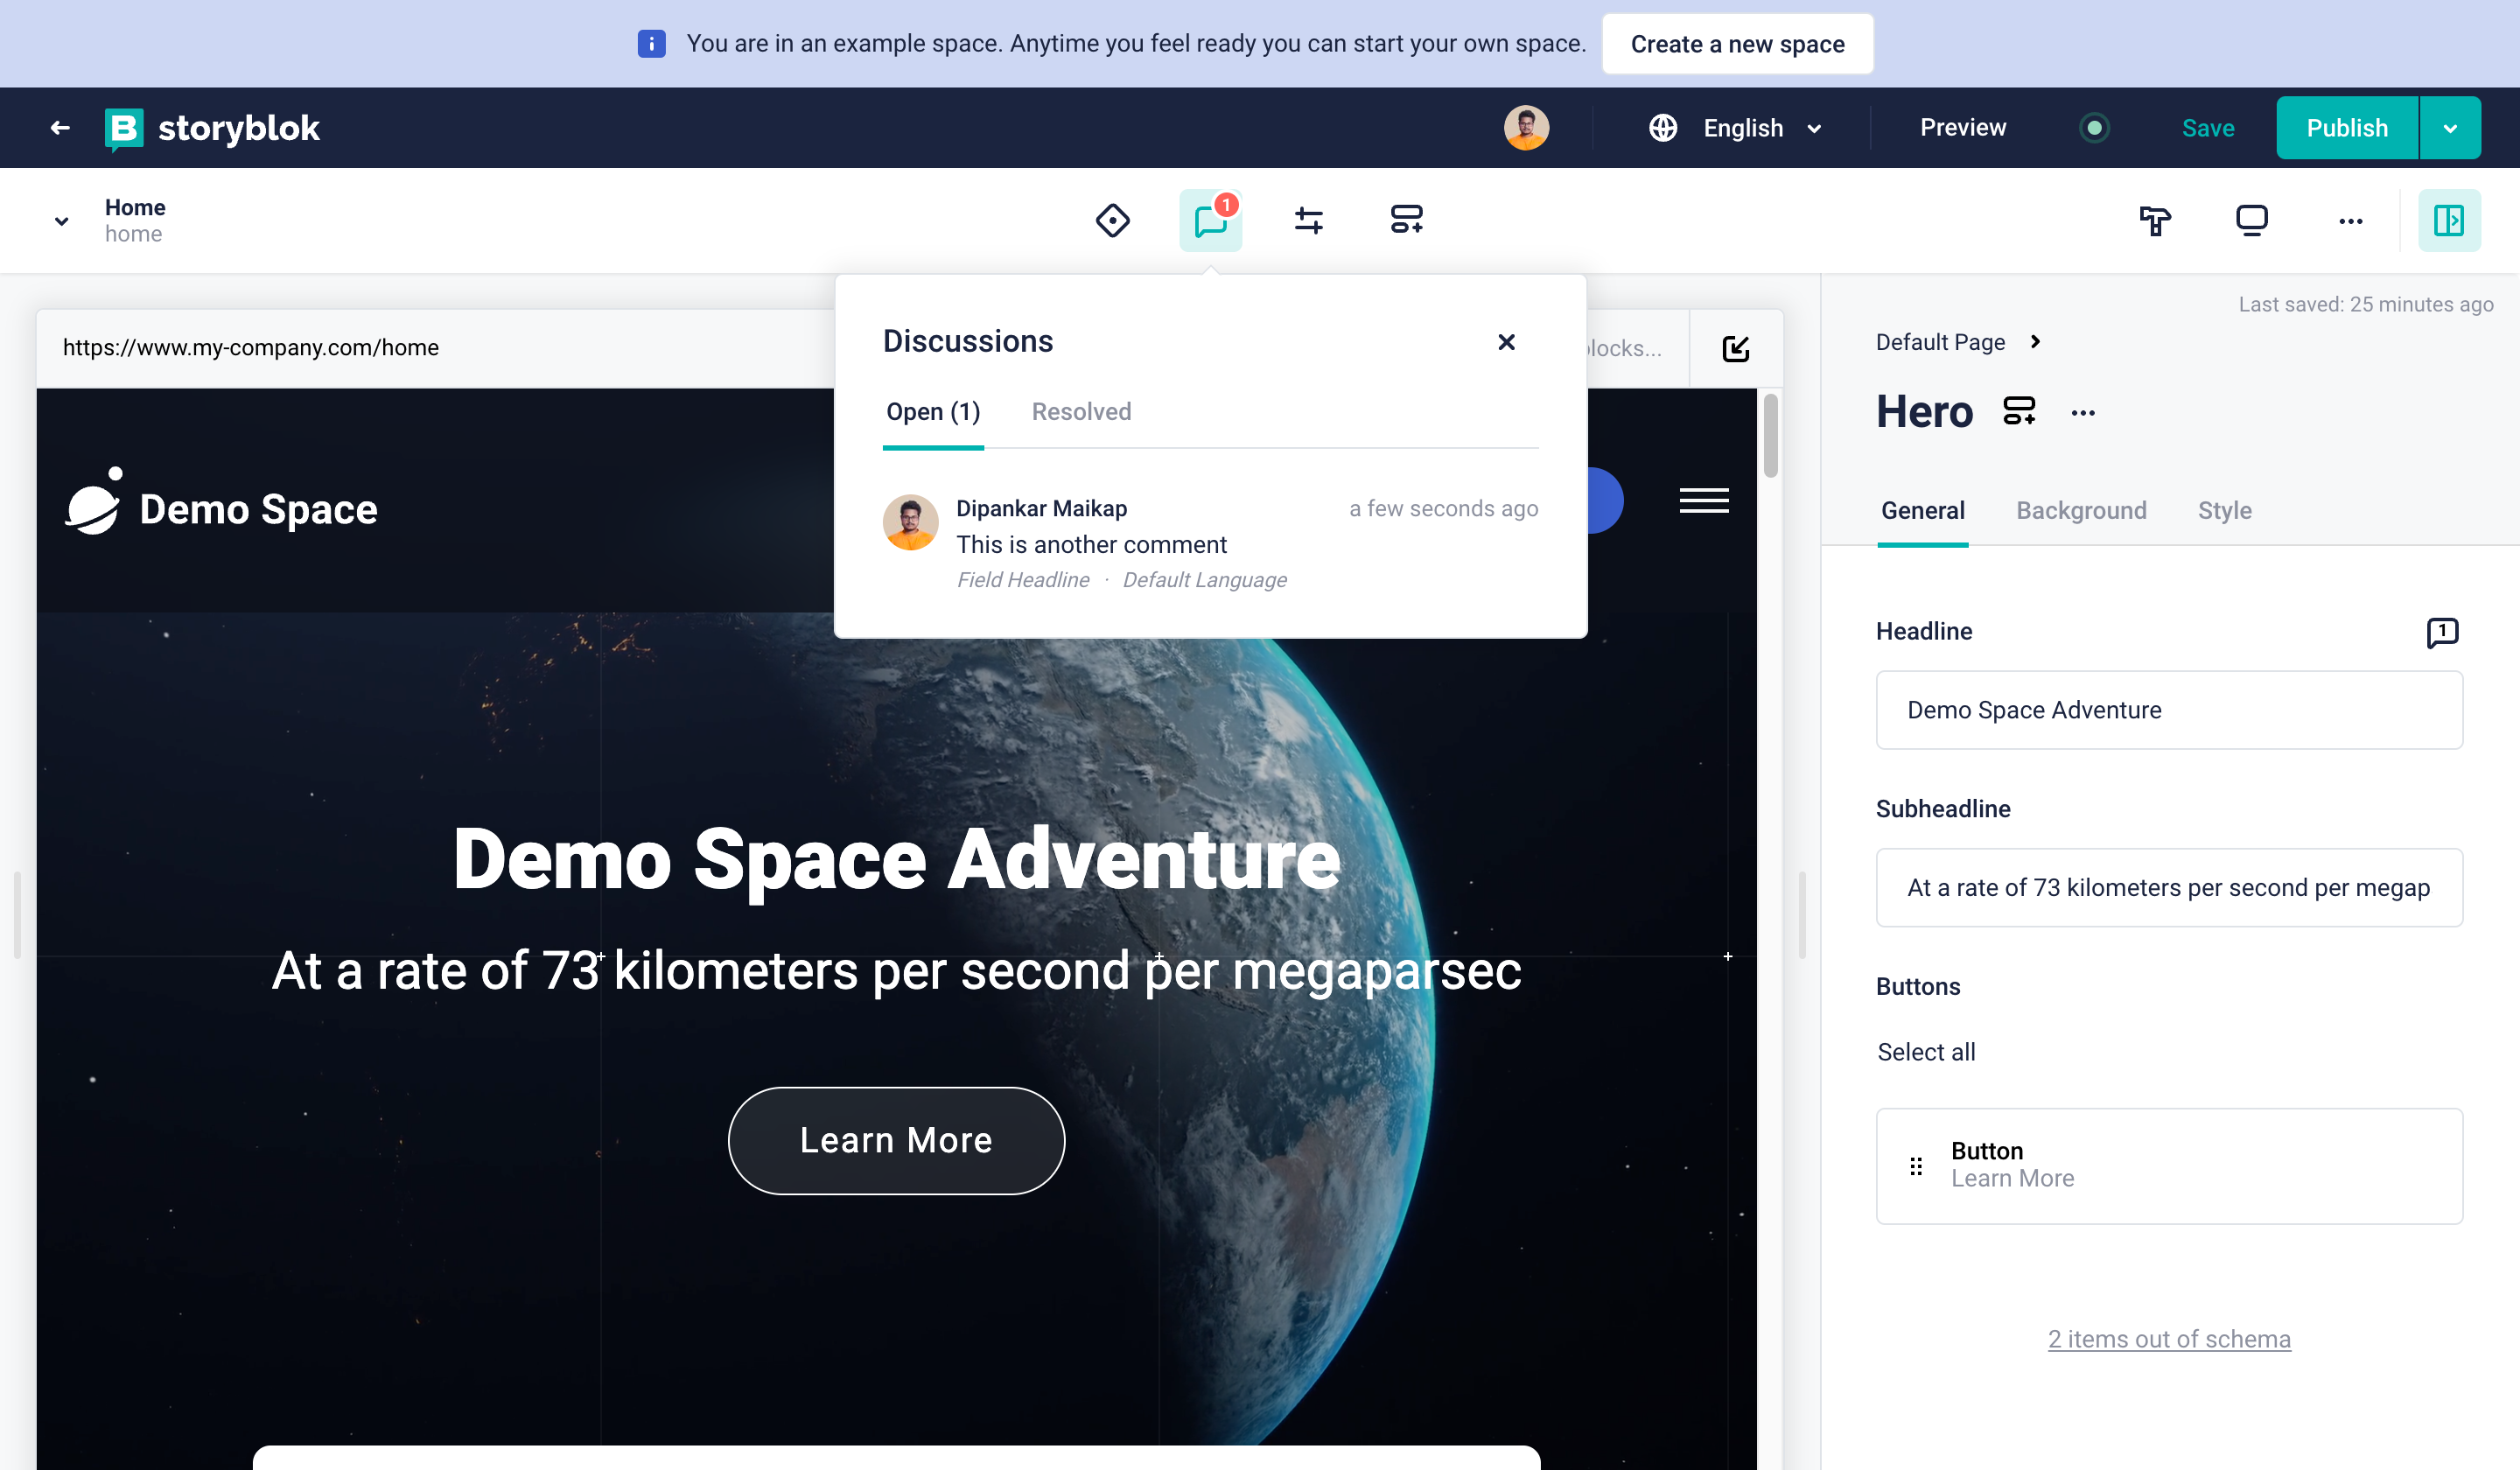
Commenting, discussions, and collaboration
With Storyblok, you can comment on any part of a content entry and start discussions with your team members. This means, you don’t have to rely on emails, Slack massages, or Google Docs discussions to run a feedback loop. Everything can be done at the same place!
With your Content panel open on the right side, simply hover your mouse over any particular block and then click on the Start a discussion button to comment on that specific block. You can also add a comment/start a discussion for the whole page, by simply doing the same process at the Page level in your Content panel.
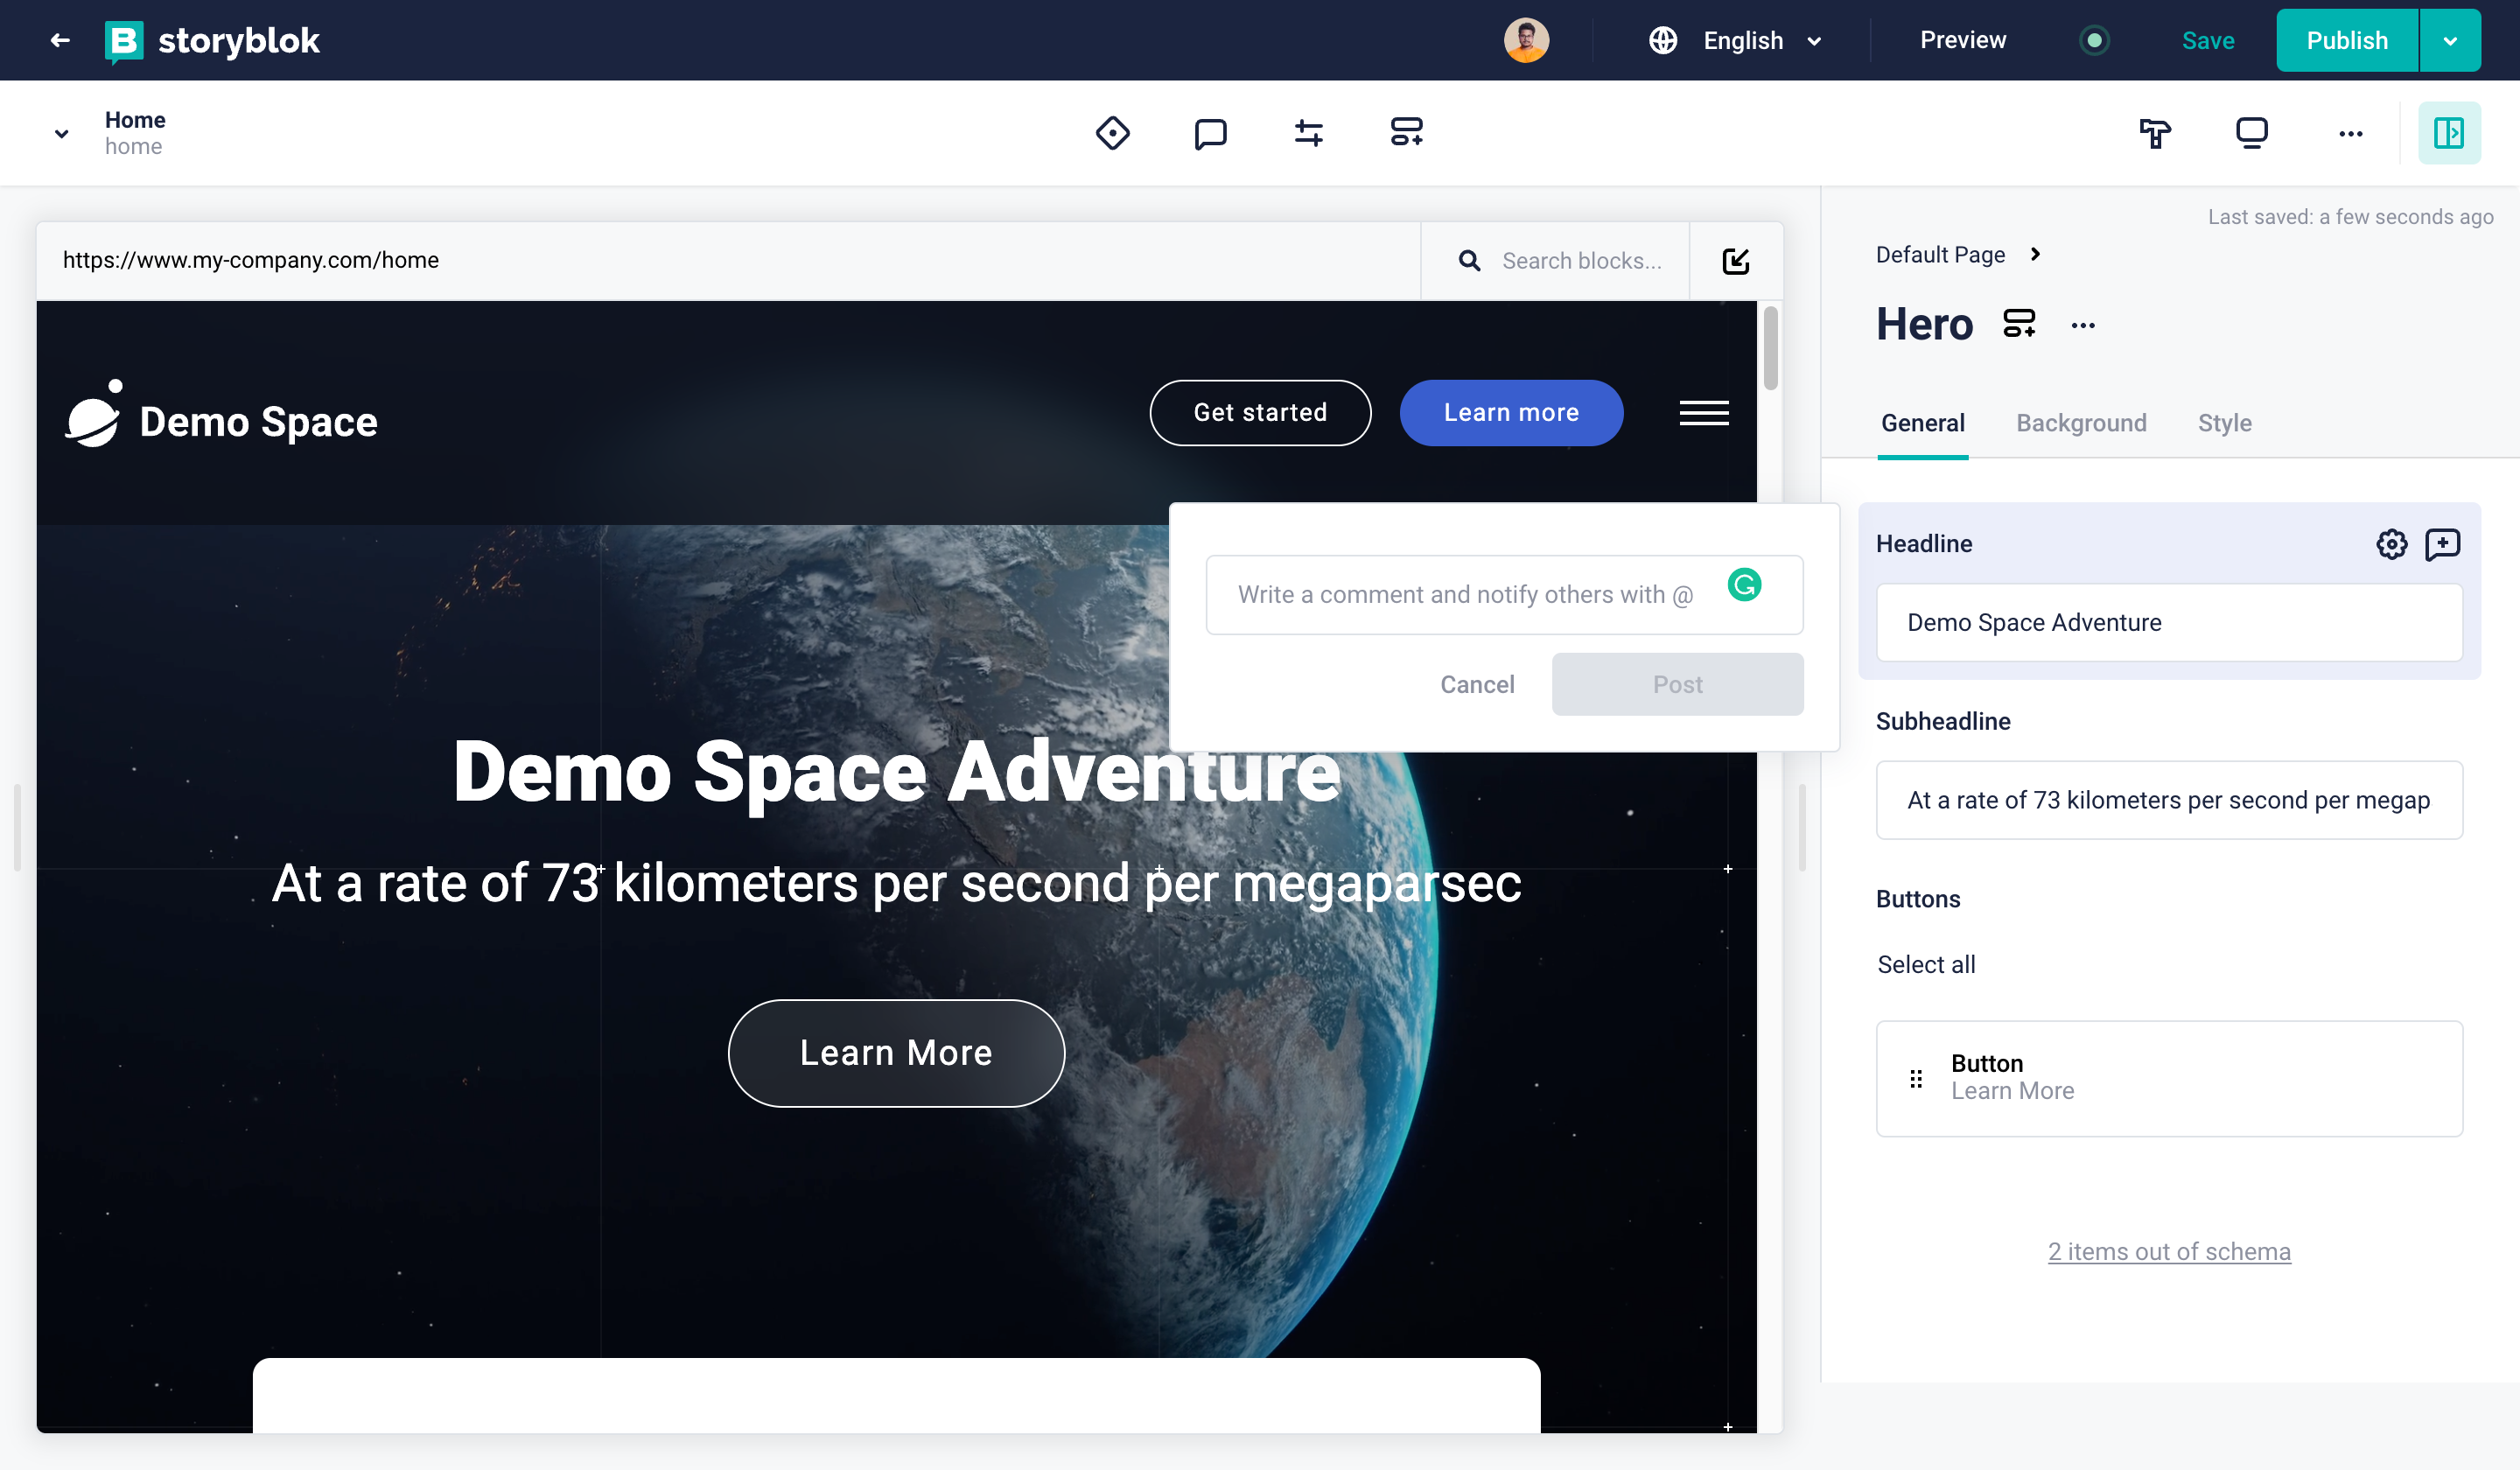
You can create as many discussions as you may like in any entry. A block with a comment/discussion attached to it has a permanent icon next to it which shows how many comments are currently in that specific thread <span class="marker">{1}</span>.
Additionally, you can check every single thread of an entry by clicking on the Discussions button at the top-center of the visual editor <span class="marker">{2}</span>.
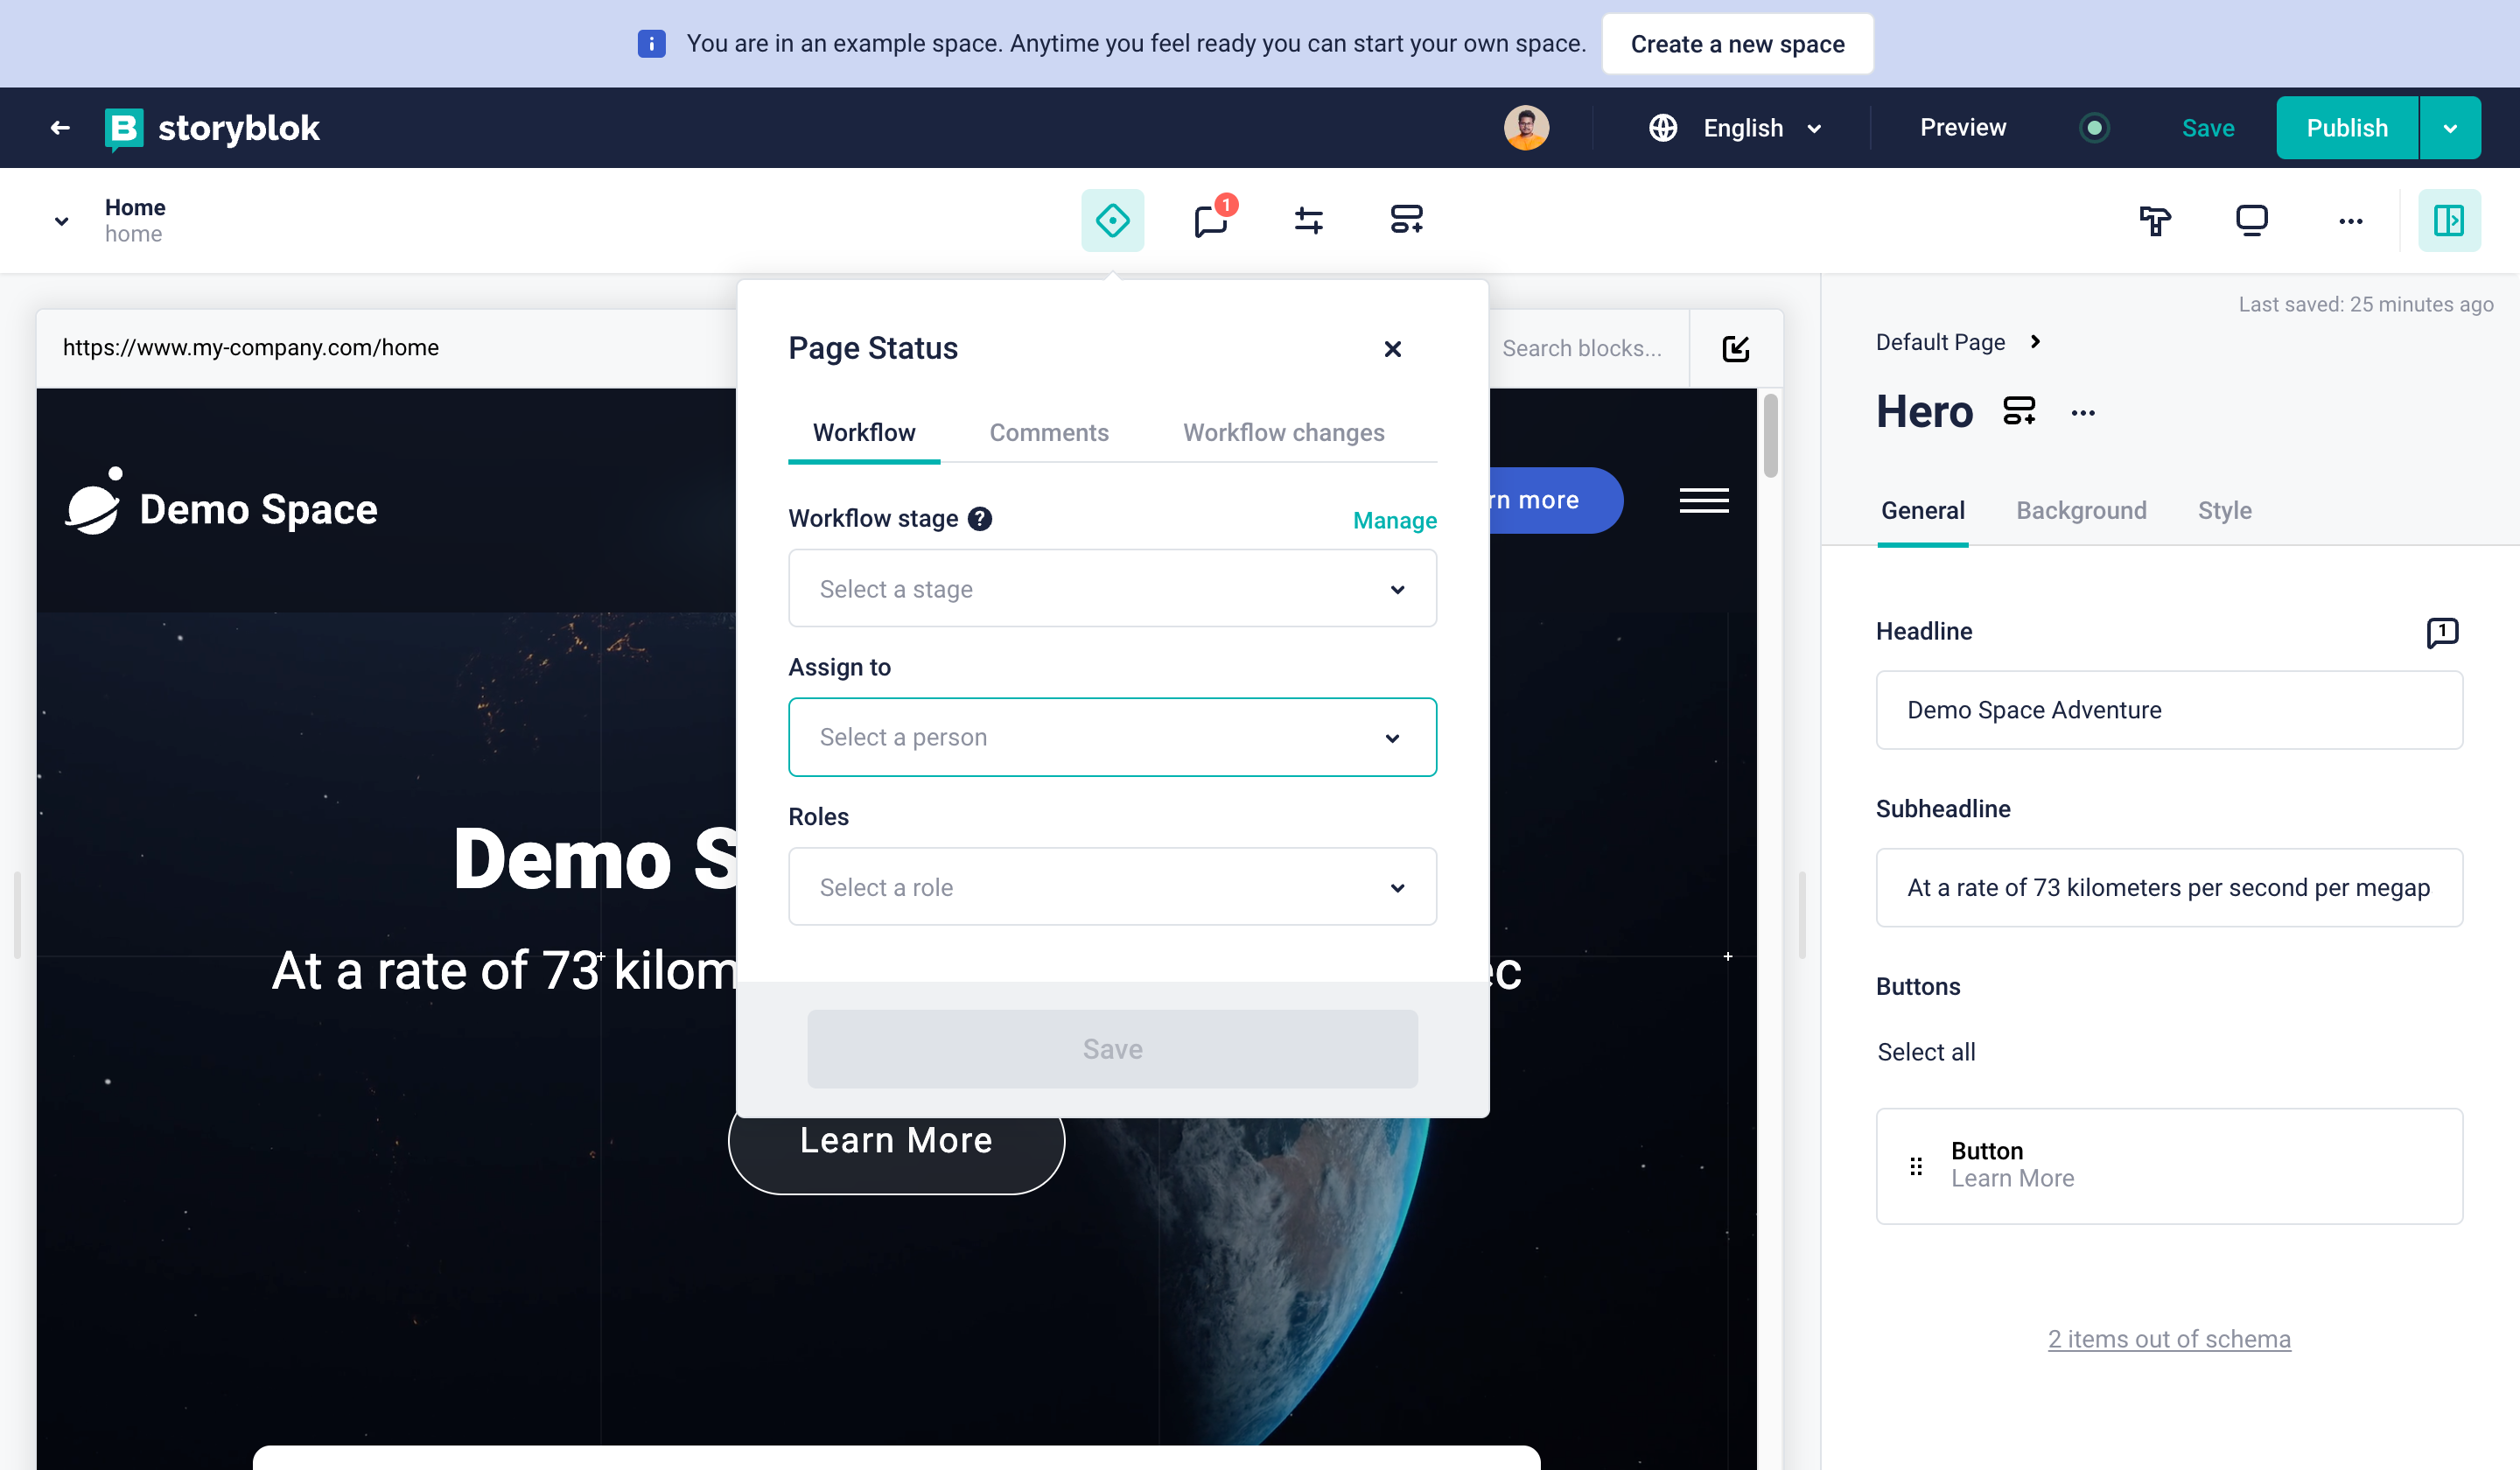
Workflow stages
You can always check the workflow status of a page by clicking on the Workflow stages button at the top-center of your editor. Here you can change the workflow stage, assign, and set roles.
Based on your subscription plan, your workflow options can vary. Please take a look here for a detailed explanation of workflows
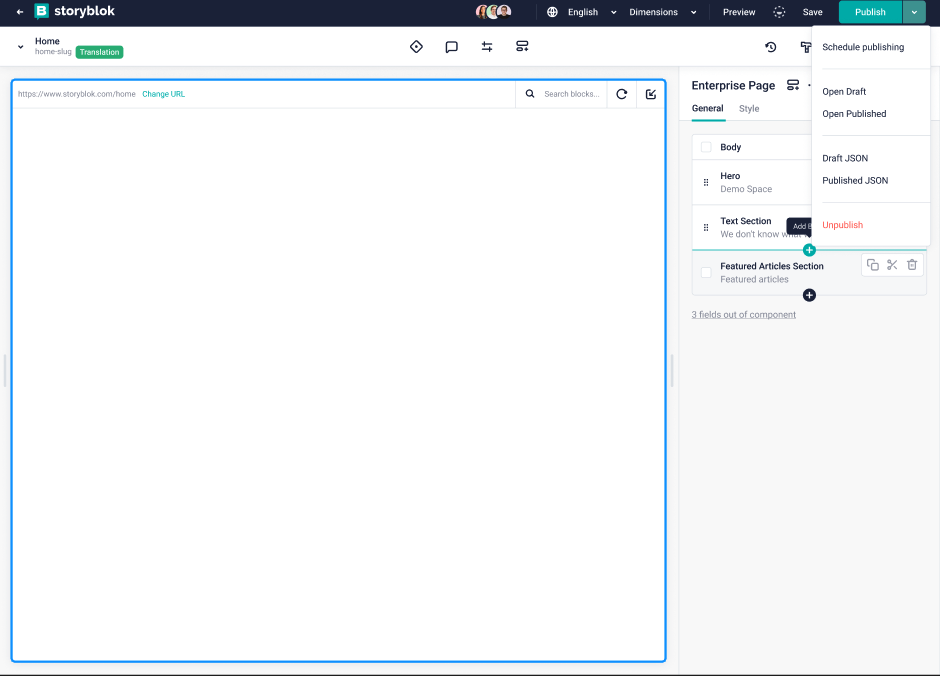
Single Story Scheduling
Single Story Scheduling allows you the schedule the publication of one Story straight from the visual editor. To use this feature, click on the drop-down arrow of the Publish button {1} and select Schedule publishing {2}.
For more information on how to use Single Story Scheduling, please see the dedicated Scheduling editor guide (opens in a new window).