Figma to Storyblok
The Figma to Storyblok plugin enables you to export Figma components directly into your Storyblok space with a single click. Each component is automatically converted into a structured, ready-to-use content block, streamlining the design-to-development workflow.
How to Use the Figma to Storyblok Sync Plugin
1. Install the Plugin
Navigate to the Figma to Storyblok Community page.
From there, you can run the plugin in any Figma file, or use our Playground file by clicking Open in {1} and navigating to the {2} Playground file.

Figma to Storyblok Community Page
After opening the plugin in the Playground file, click Run {1} to launch it and connect it to your Storyblok account.
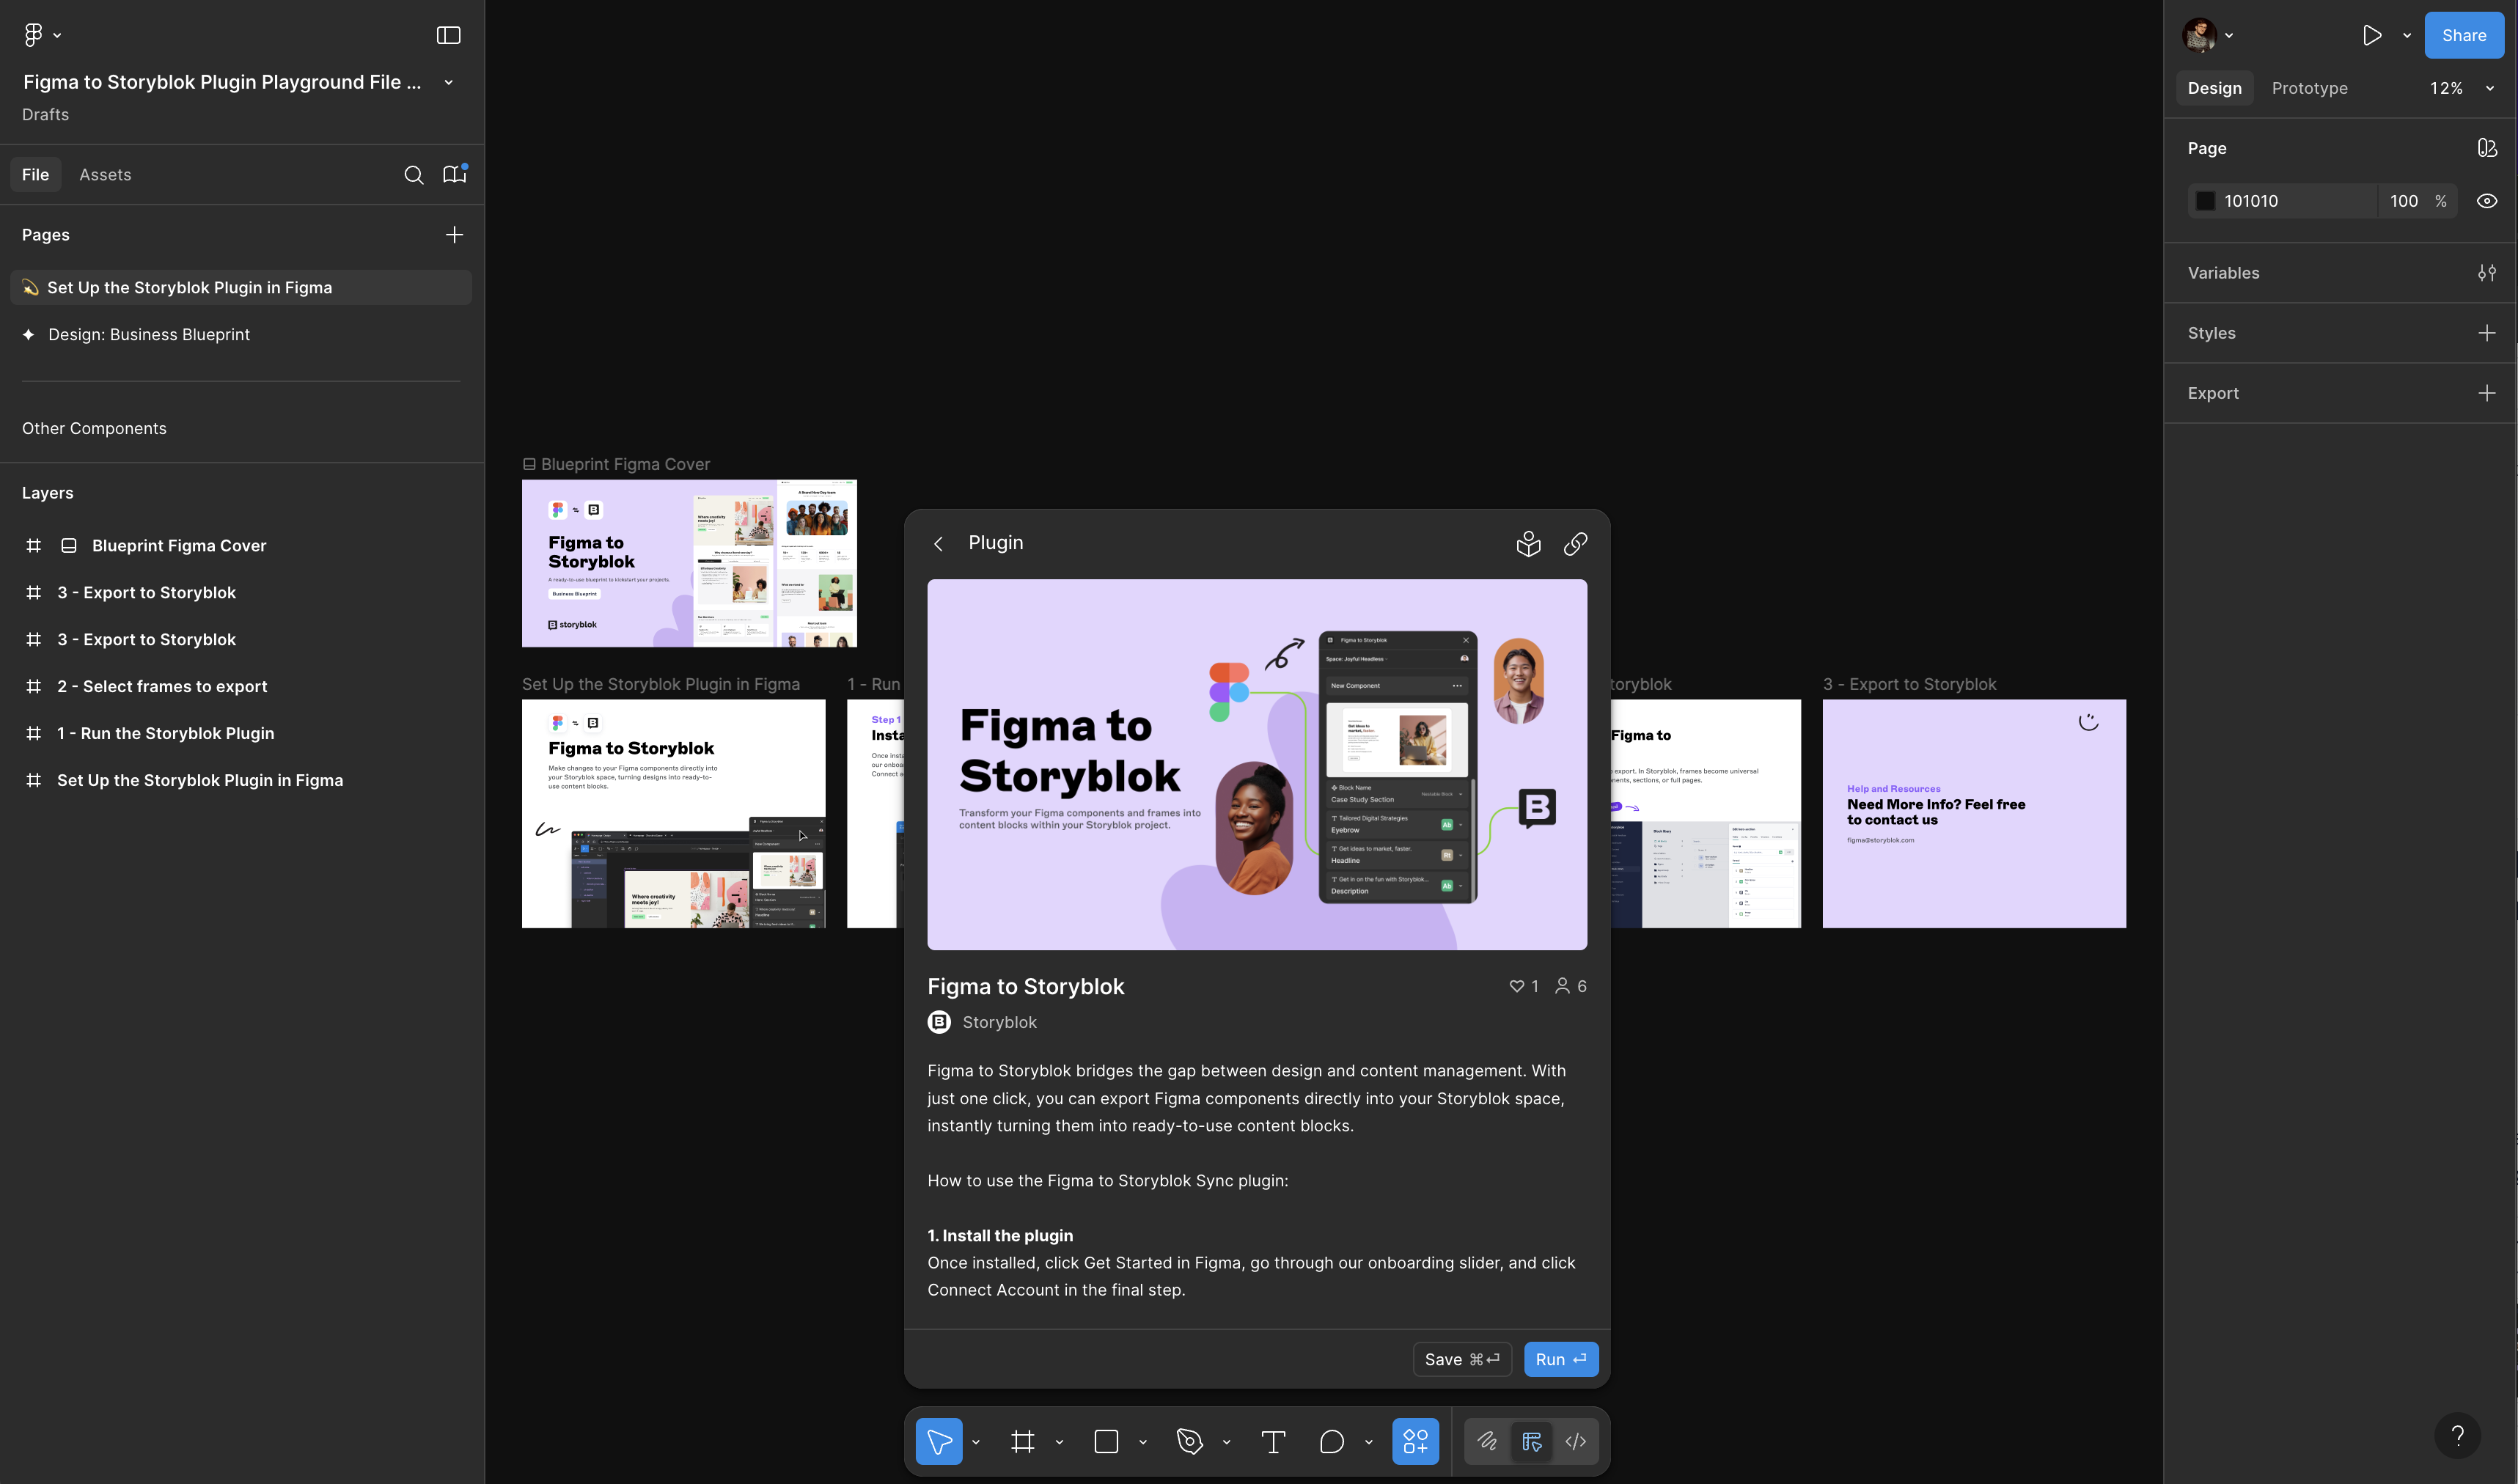
Figma to Storyblok Plugin inside Playground file
2. Connect Your Account
To connect the plugin, use a Personal Access Token generated in your Storyblok account for secure and seamless integration.
Click {1} Get Started and follow the steps in the Getting Started guide.

Figma to Storyblok Plugin - Get Started
At the final step, you'll be prompted to enter your token. Simply {1} paste it and click {2} Connect using token to proceed.

Figma to Storyblok - Connect using token
3. Export from Figma to Storyblok
Select {1} and export one frame at a time.
The plugin will automatically detect fields and allow you to {2} assign names to them.
Once ready, click {3} Export to Storyblok.

Figma to Storyblok Export
Each frame will be converted into a universal block in Storyblok, complete with an auto-updated image preview.

Exported component view inside the Storyblok Block Library