How to create simple dynamic forms using Storyblok as a Form Builder
Storyblok is the first headless CMS that works for developers & marketers alike.
This article will go through the steps you can take to create a simple custom/dynamic form section as a reusable component in Storyblok. To keep things clear: Storyblok will not be used to store the final submissions of the form or any of its data, but will use so marketers can create dynamic forms in an easy to understand manner.
Requirements
- A Storyblok Account & Space https://app.storyblok.com
- You've read https://www.storyblok.com/docs/concepts/blocks
- You know that we're a headless CMS: https://www.storyblok.com/technologies
Component Set-up in Storyblok
We're going to create just two components that will allow us to create a simple version of a form builder, feel free to extend that with more components and fields as needed. For us, two components, namely "form-section" and "form-input" will be enough to get started. Components you might want to extend could be "form-select" or other field-types that have a different configuration option.
Setting up the form-section component
Navigate into your Components area in your space and locate the New button at the top right corner. Pressing that will allow you to create our first component definition.

The name of this component will be form-section. We will go for Nestable as a type because we will not create new Stories from this component as we're only going to use it in existing pages, posts or general other content types.

Press Next at the top right corner to continue configuring the fields we will need for our form-builder set-up.
We're not going to configure the form fields for our website at this point; instead we're creating a data structure that we can use so the user of Storyblok, e.g. your editors/marketers will be able to make the forms with the components we defined for them.
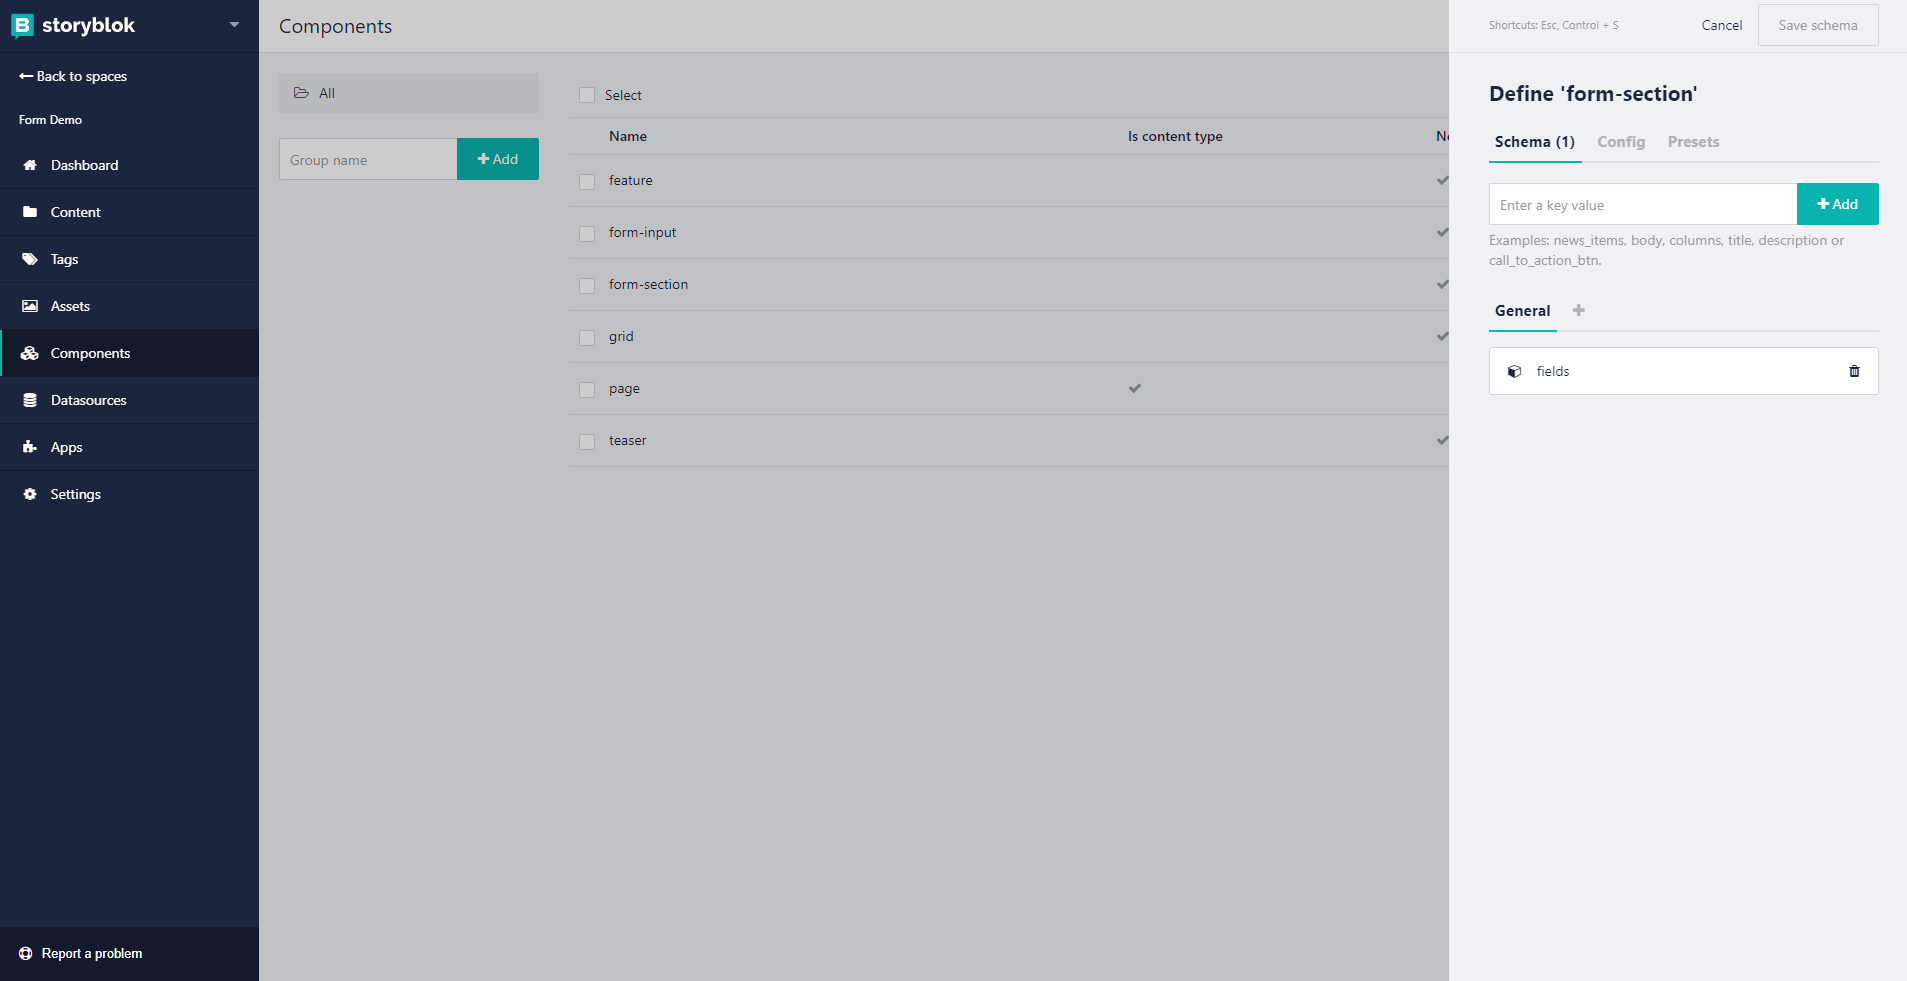
Now we're able to set-up the fields for the form-section component. We will add a key with the name fields as this will contain the definition of input fields for our forms. After hitting Add next to the input, you can click on the field fields that just got added.
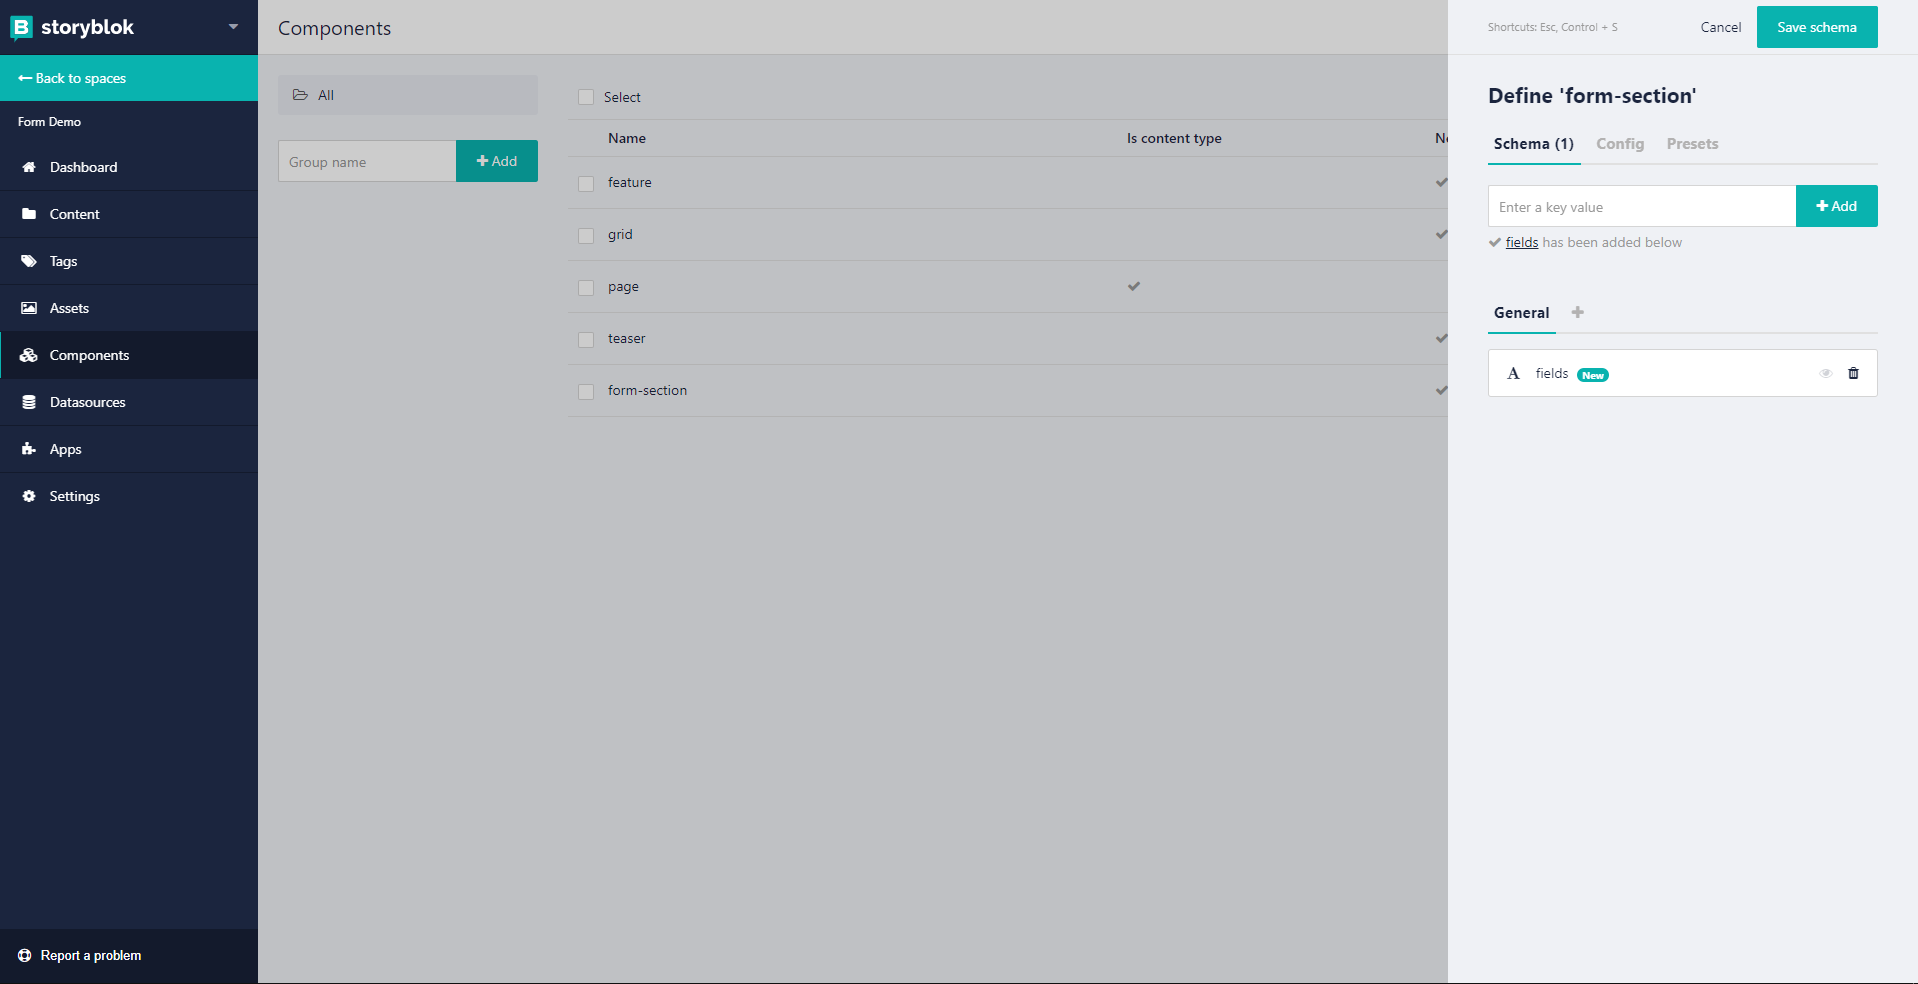
Click on the fields field to define a dynamic area that allows us to add other nestable components within the current form-section component we will use the Blocks field type. Once you've clicked on Blocks, we will only hit Save schema to save the definition of the form-section field. We will have to come back here one more time later on.

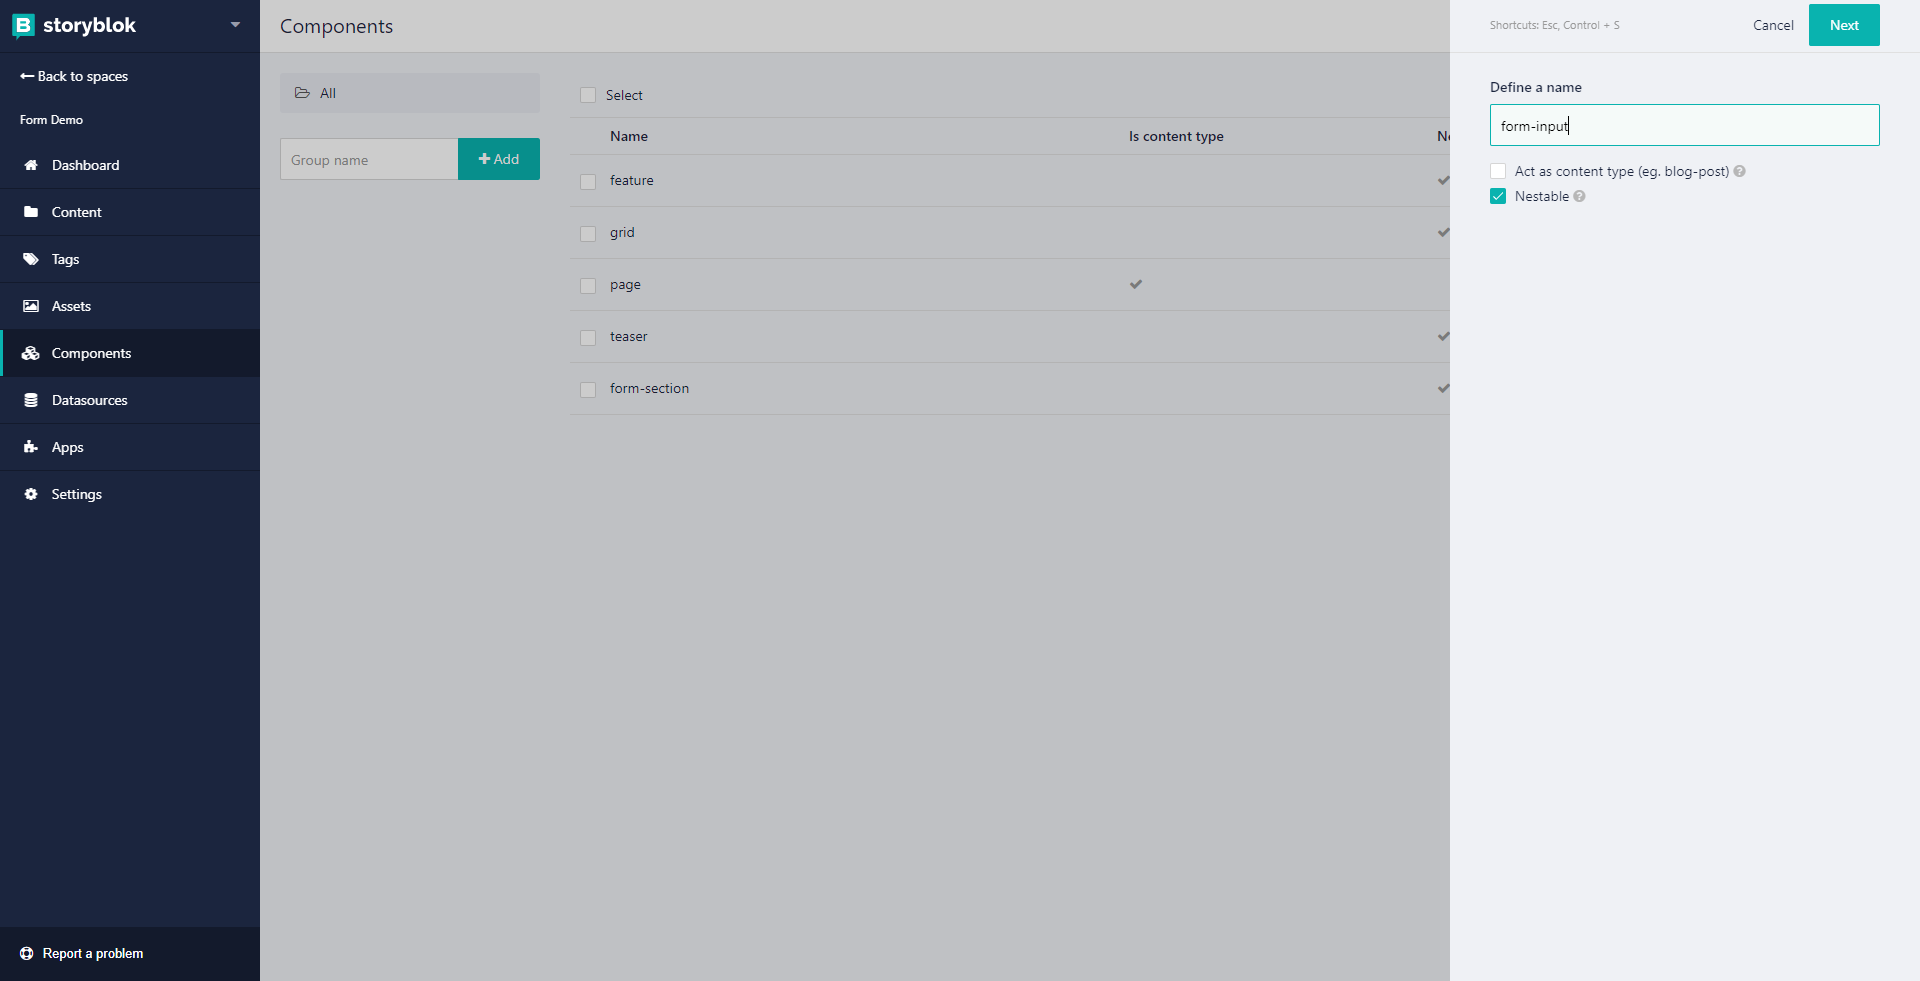
Setting up the form-input component
Since we will need a form-section and the fields in the form itself, we will define the component we want to use for that form-input. For this we will go back into our Components area and select the New on the top right corner again, followed by adding form-input as the name of our second component. Since the form-input will be used inside an existing component, we can keep the default Nestable setting.
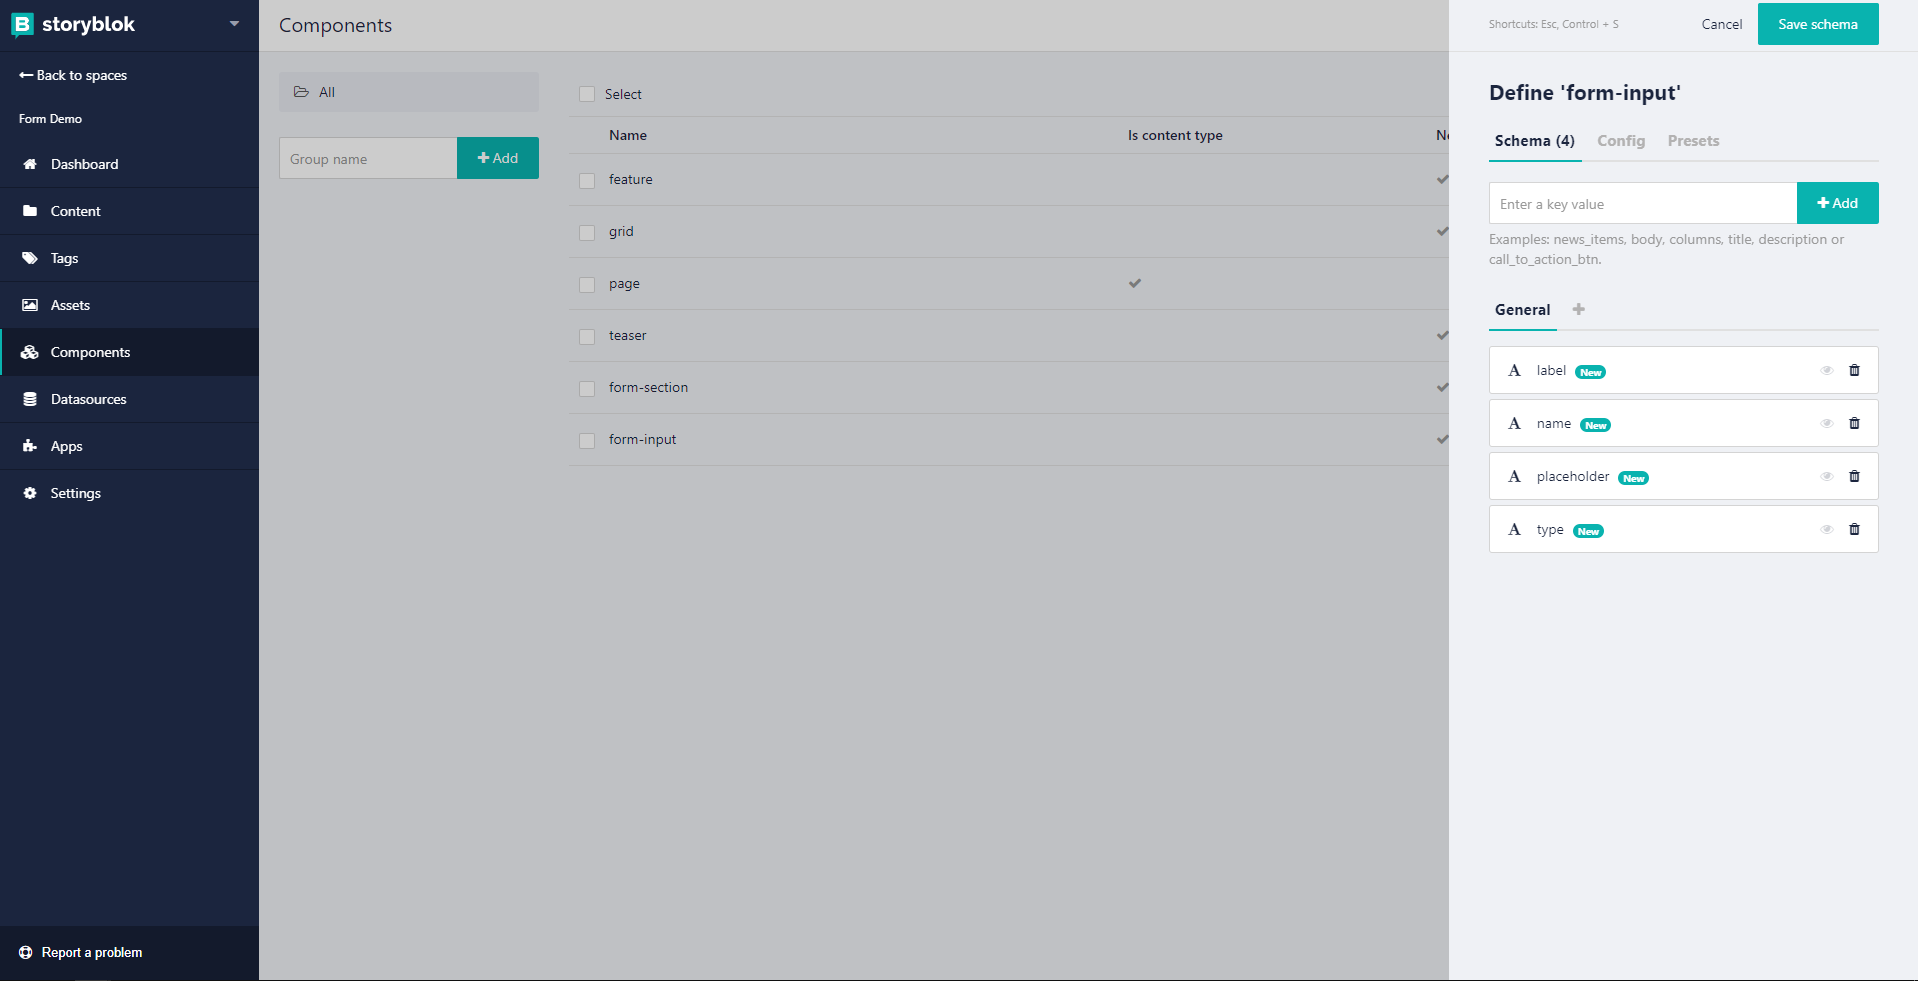
Similar to what we've done in the form-section before, we will now add new fields to our form-input definition. The fields we will use in this example will be label (type: text; to set the label for our form input), name (type: text; to define the name attribute for our form field), placeholder (type: text; to set the placeholder of our input), and type (type: single-option, to select the type of input it should display later on).
Since the type field is unique as we don't want our editors/marketers to add any value to the type of our input, we will go for a set of predefined values from which they can choose one option. To do this, you can use a single-option field type by clicking on the type field and select Single-Option in the Type option.
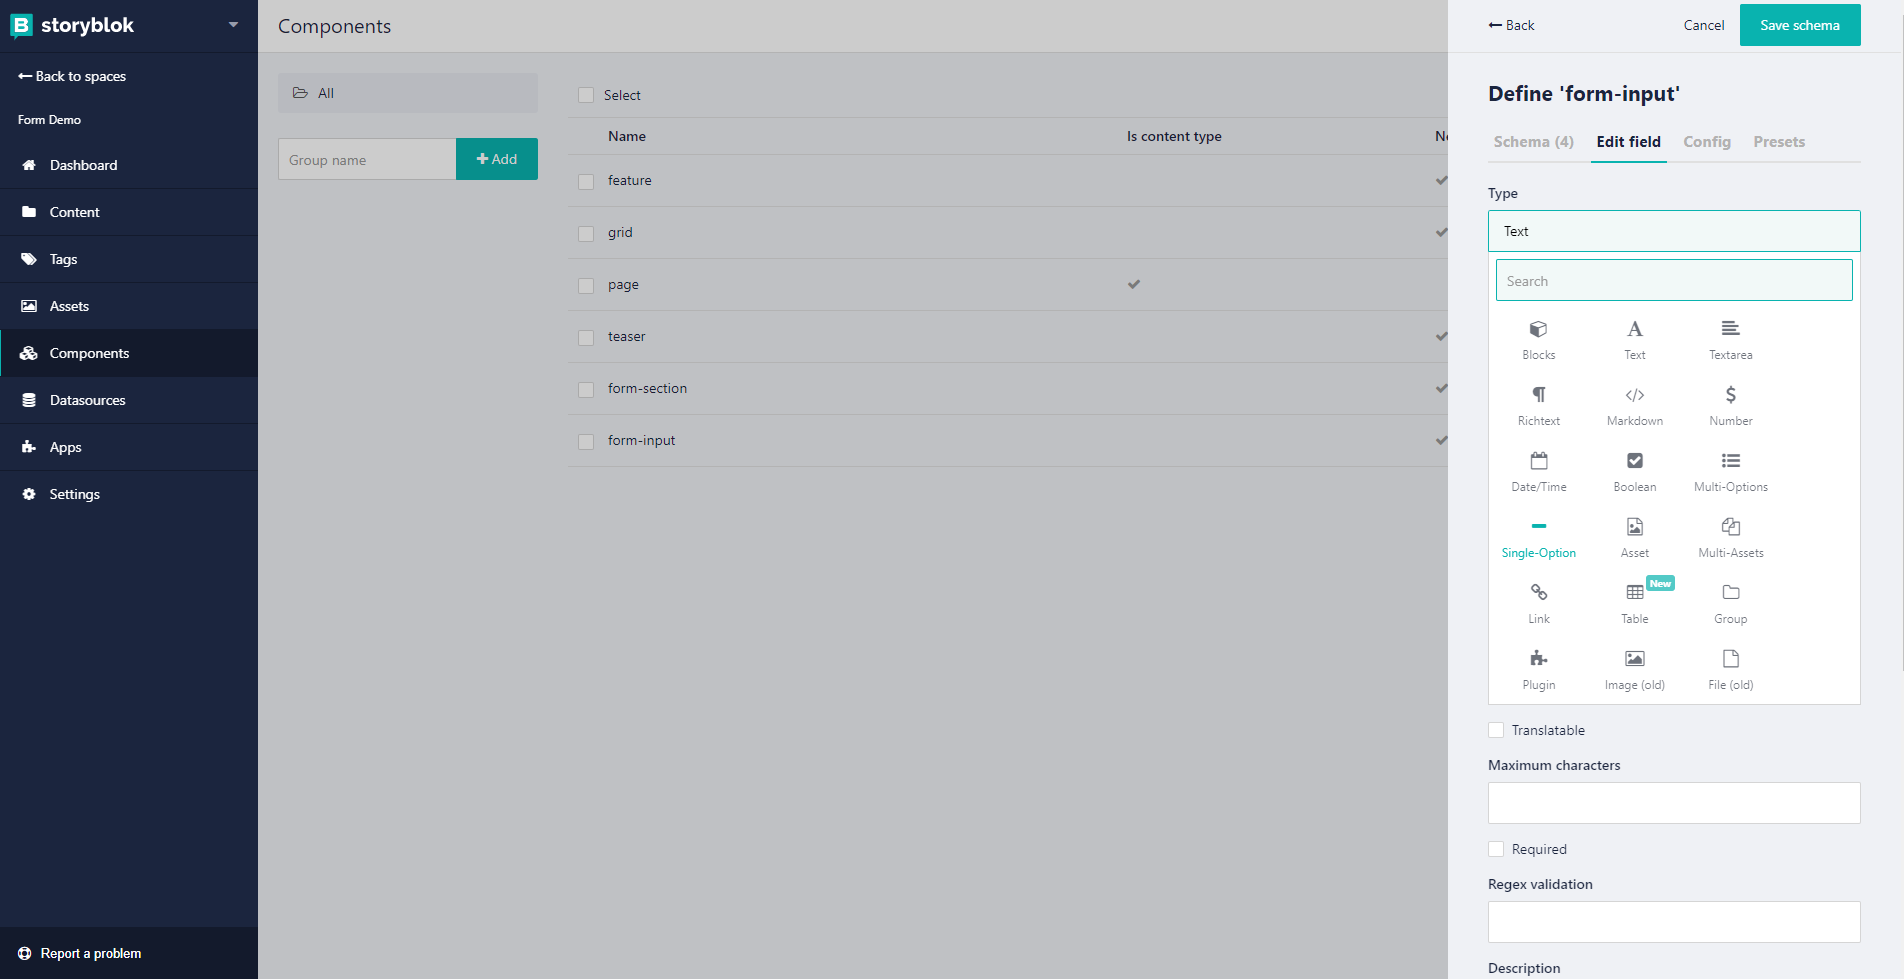
After selecting single-option, you will see a new configuration field called Options with an Add button right below it. Press the Add button to add more options your editors should be able to use. Below you can find a list of those that we've used in the next screen.
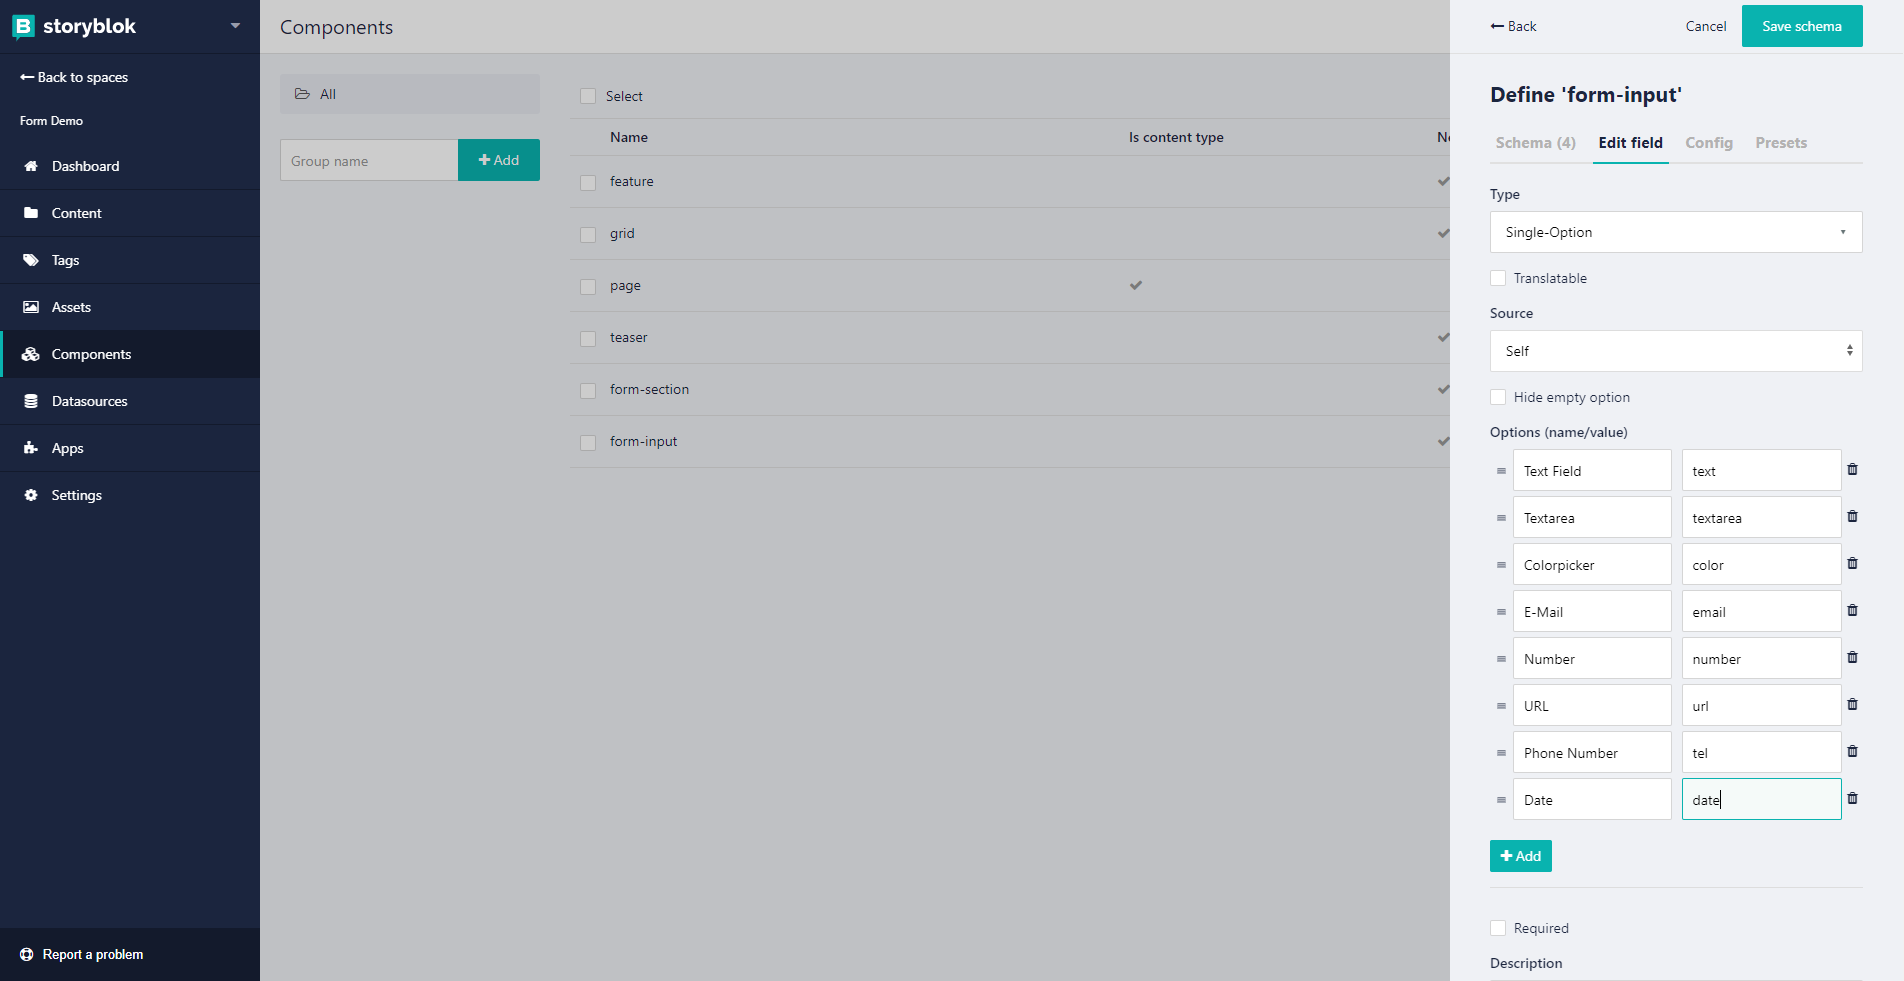
| Name | Value |
|---|---|
| Text Field | text |
| Colorpicker | color |
| Number | number |
| URL | url |
| Phone Number | tel |
| Date | date |
Only allow form-input in form-section
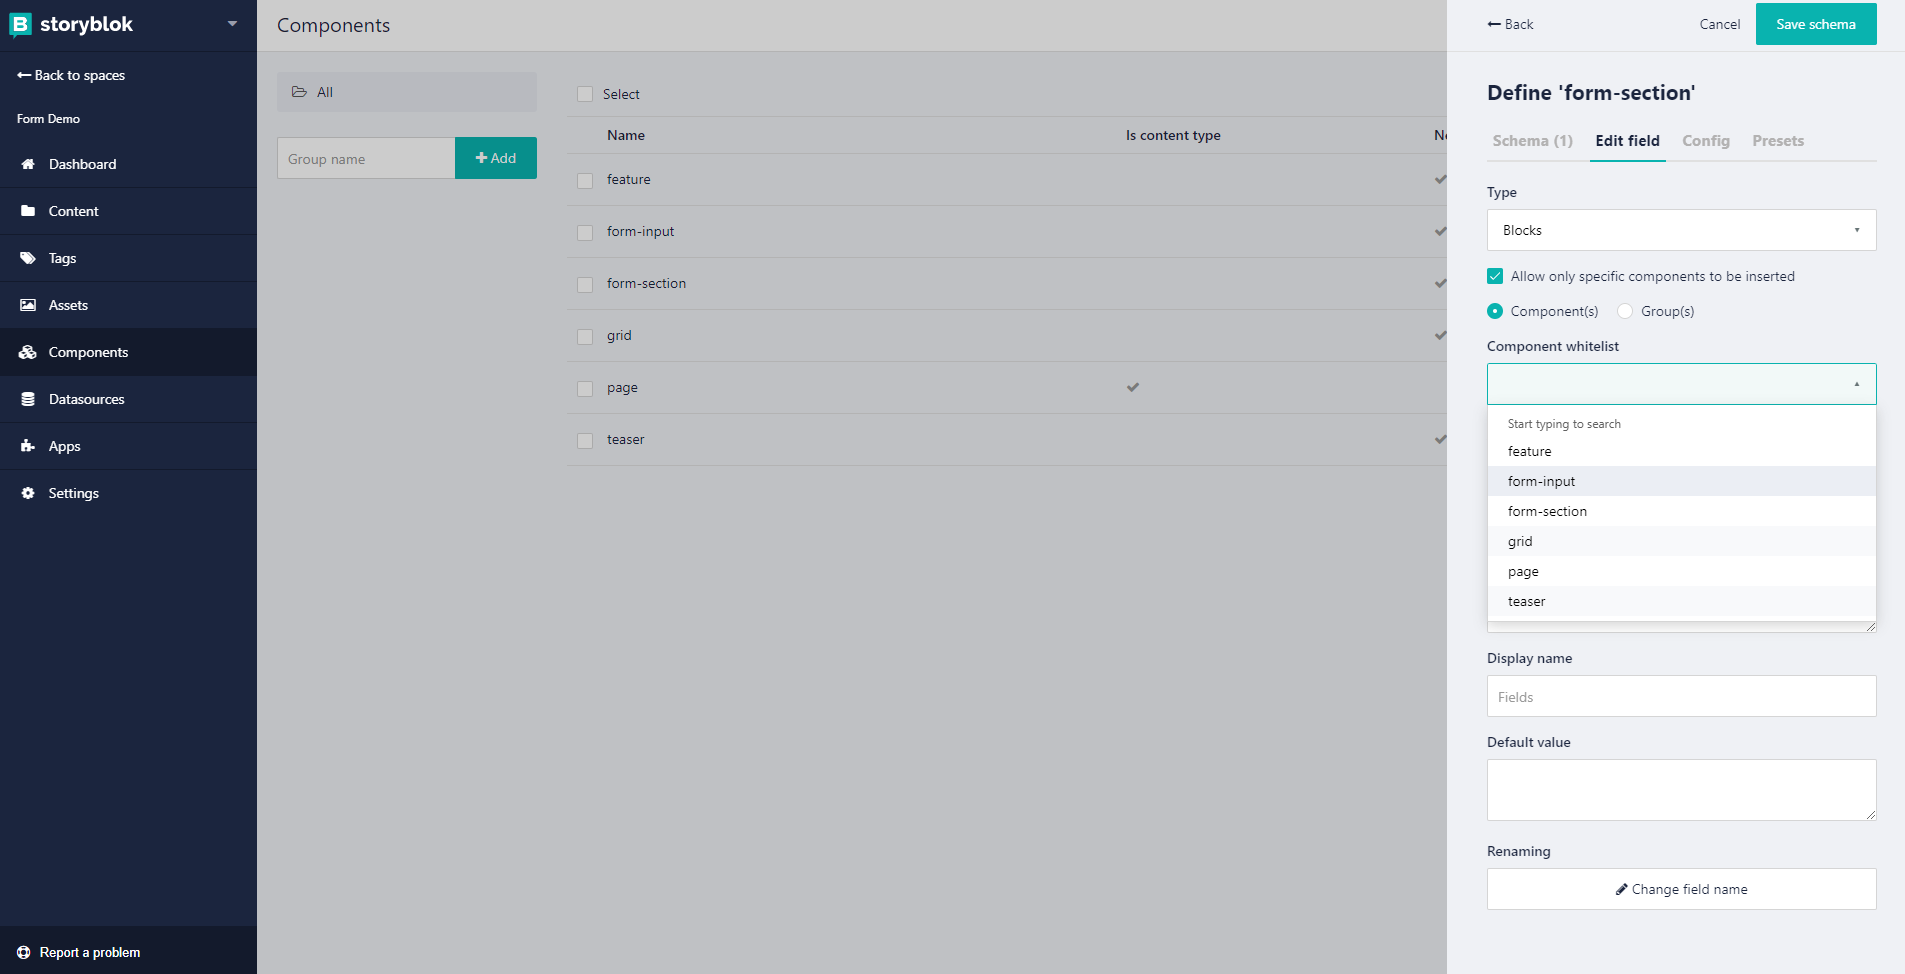
To make the editors' life a bit easier, you can define the form-section field fields of the type Blocks to allow specific components to add. For this form builder example, we're going to use form-input as the only option. To achieve this, we will jump into our Components area one more time and locate our form-section. Click on the component in the overview so the side panel with the field configuration option will open.
We will now click on fields to enter the field configuration for this key and check the checkbox for Allow only specific components to be inserted, enabling us to select either specific Component(s) or Group(s). We will stay on Component(s) and in the Component Whitelist we will select form-input as this should be the only component we want to include. Finally, we will hit the Save schema and we're ready to add our form-section component in an existing entry.
Using the new Components in our Stories
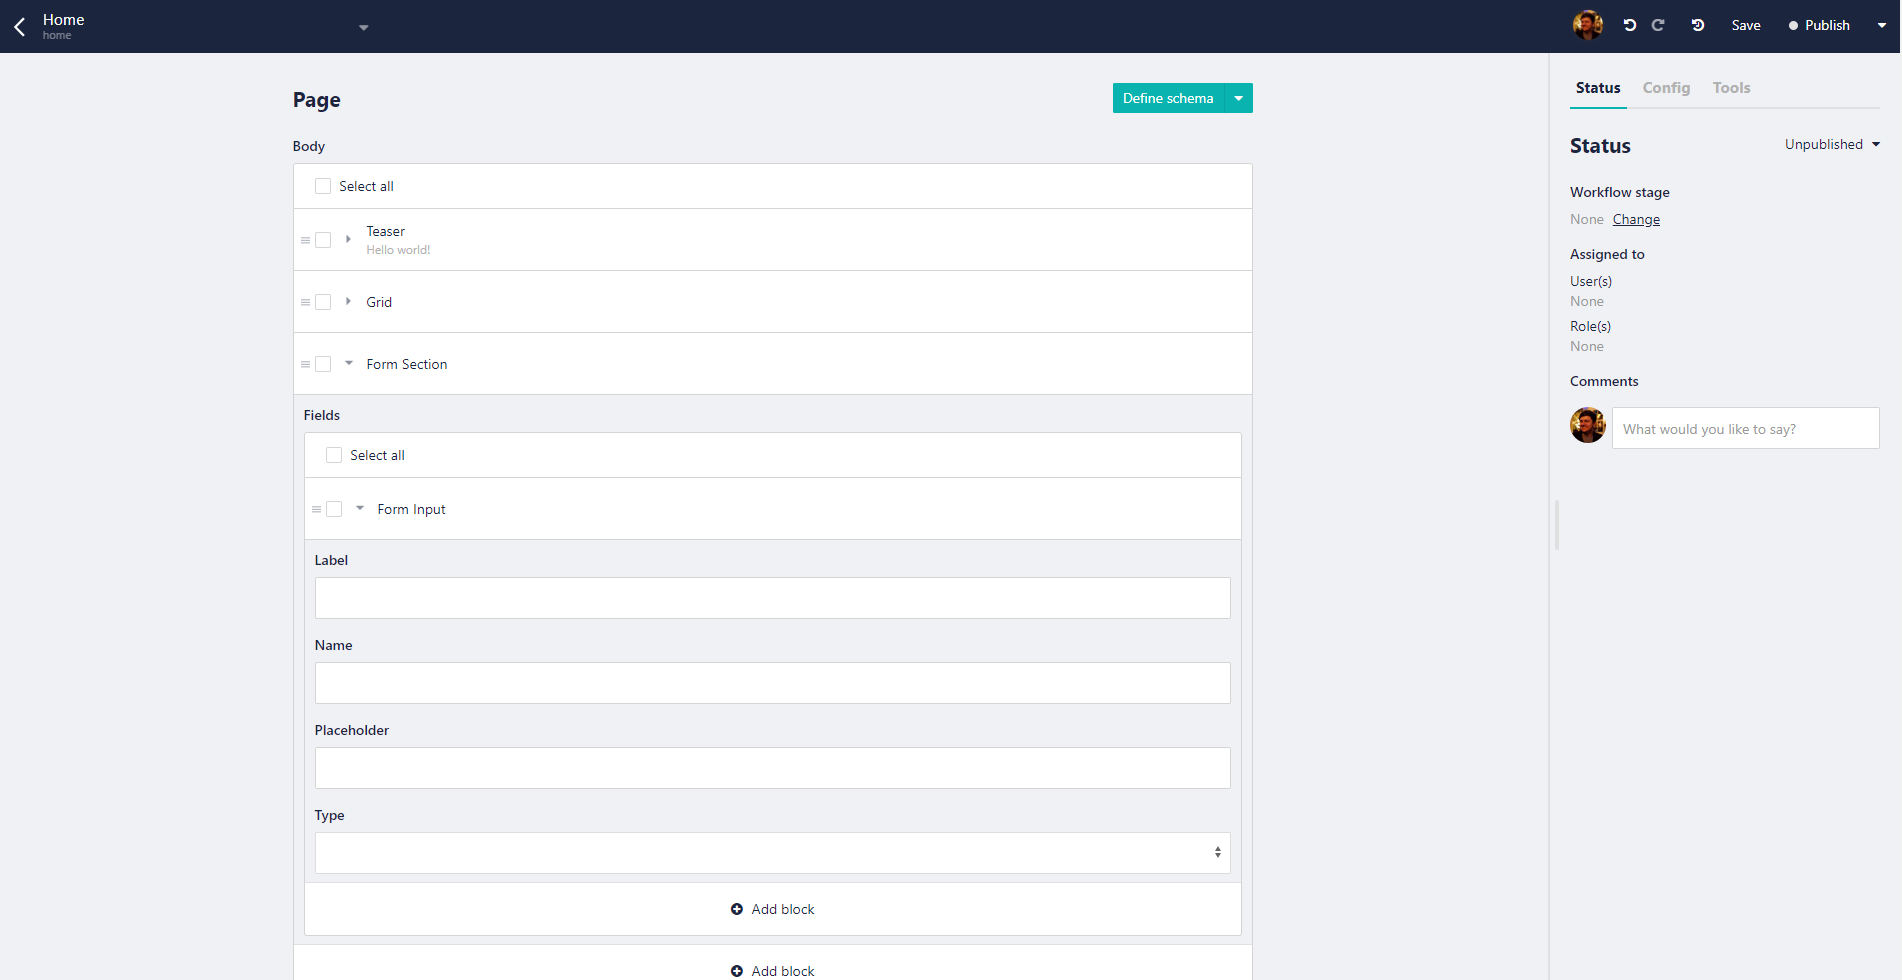
To use the two new components, we can now navigate into one Story that allows us to insert components. In a new blank space you will be able to use the Home Story to test this. Find your entry and enter the edit mode. In the field, you want to add your form to click on Add Block and select the form-section.
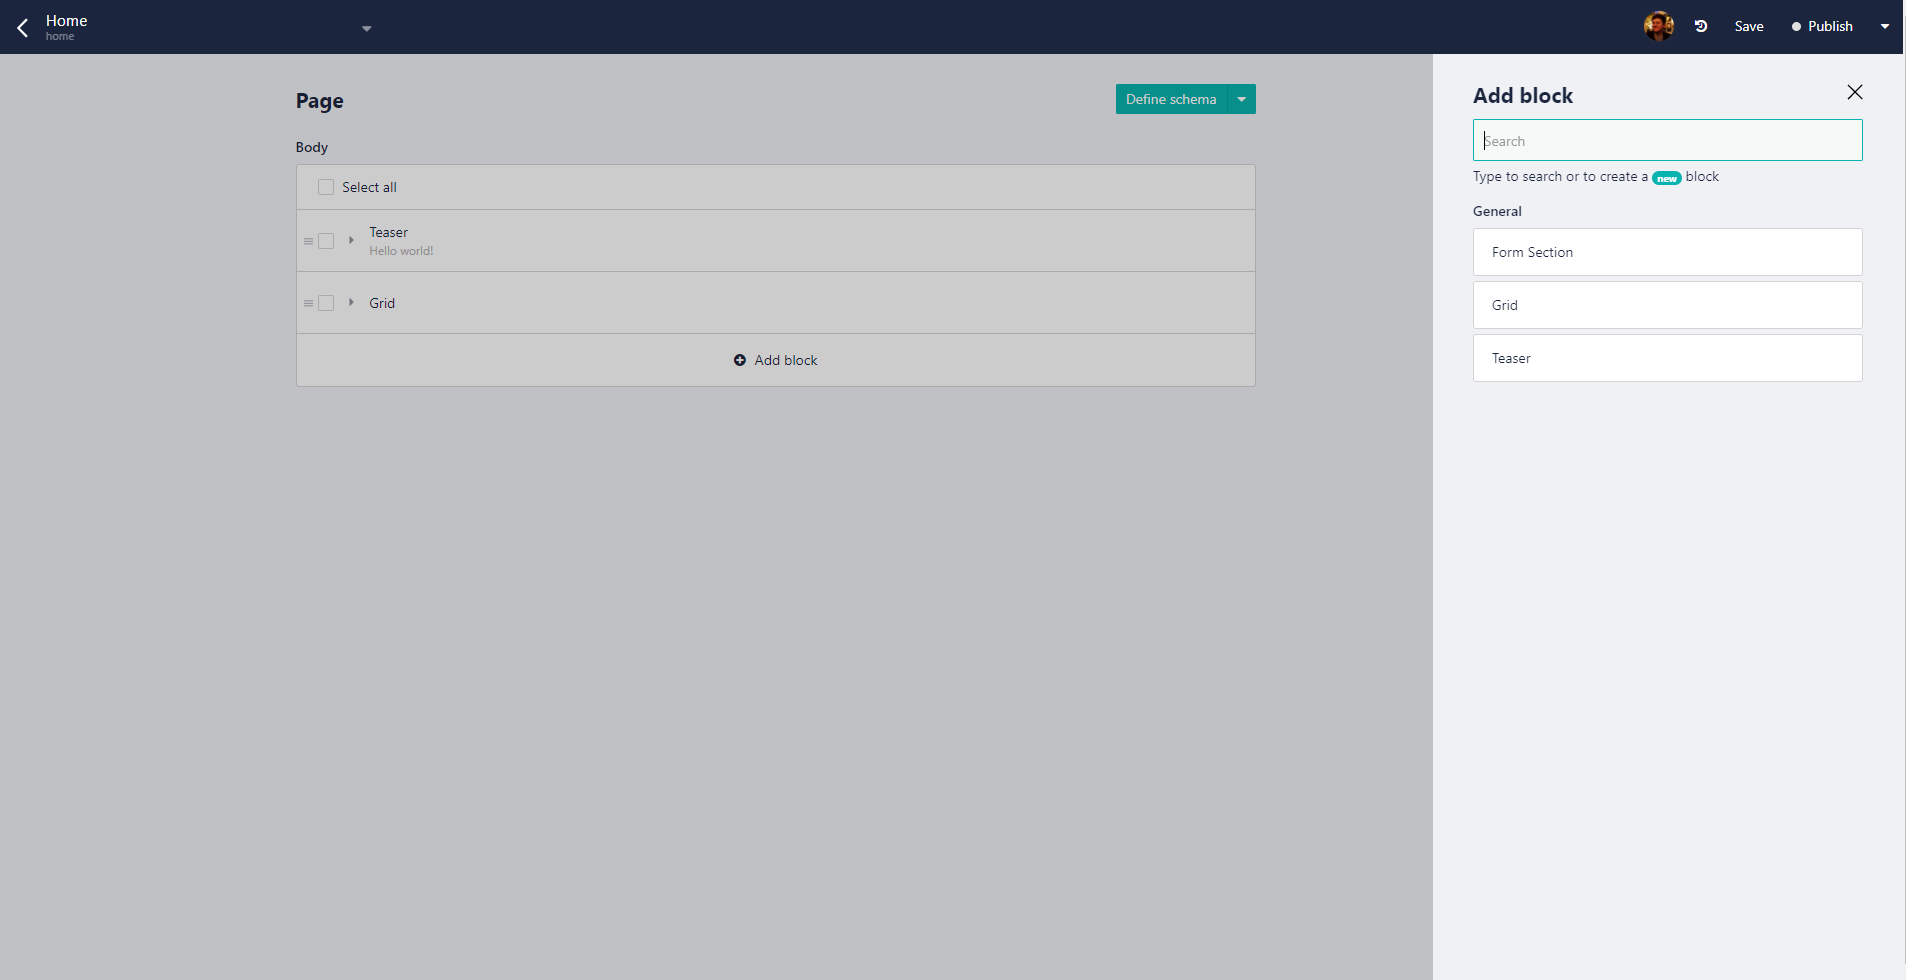
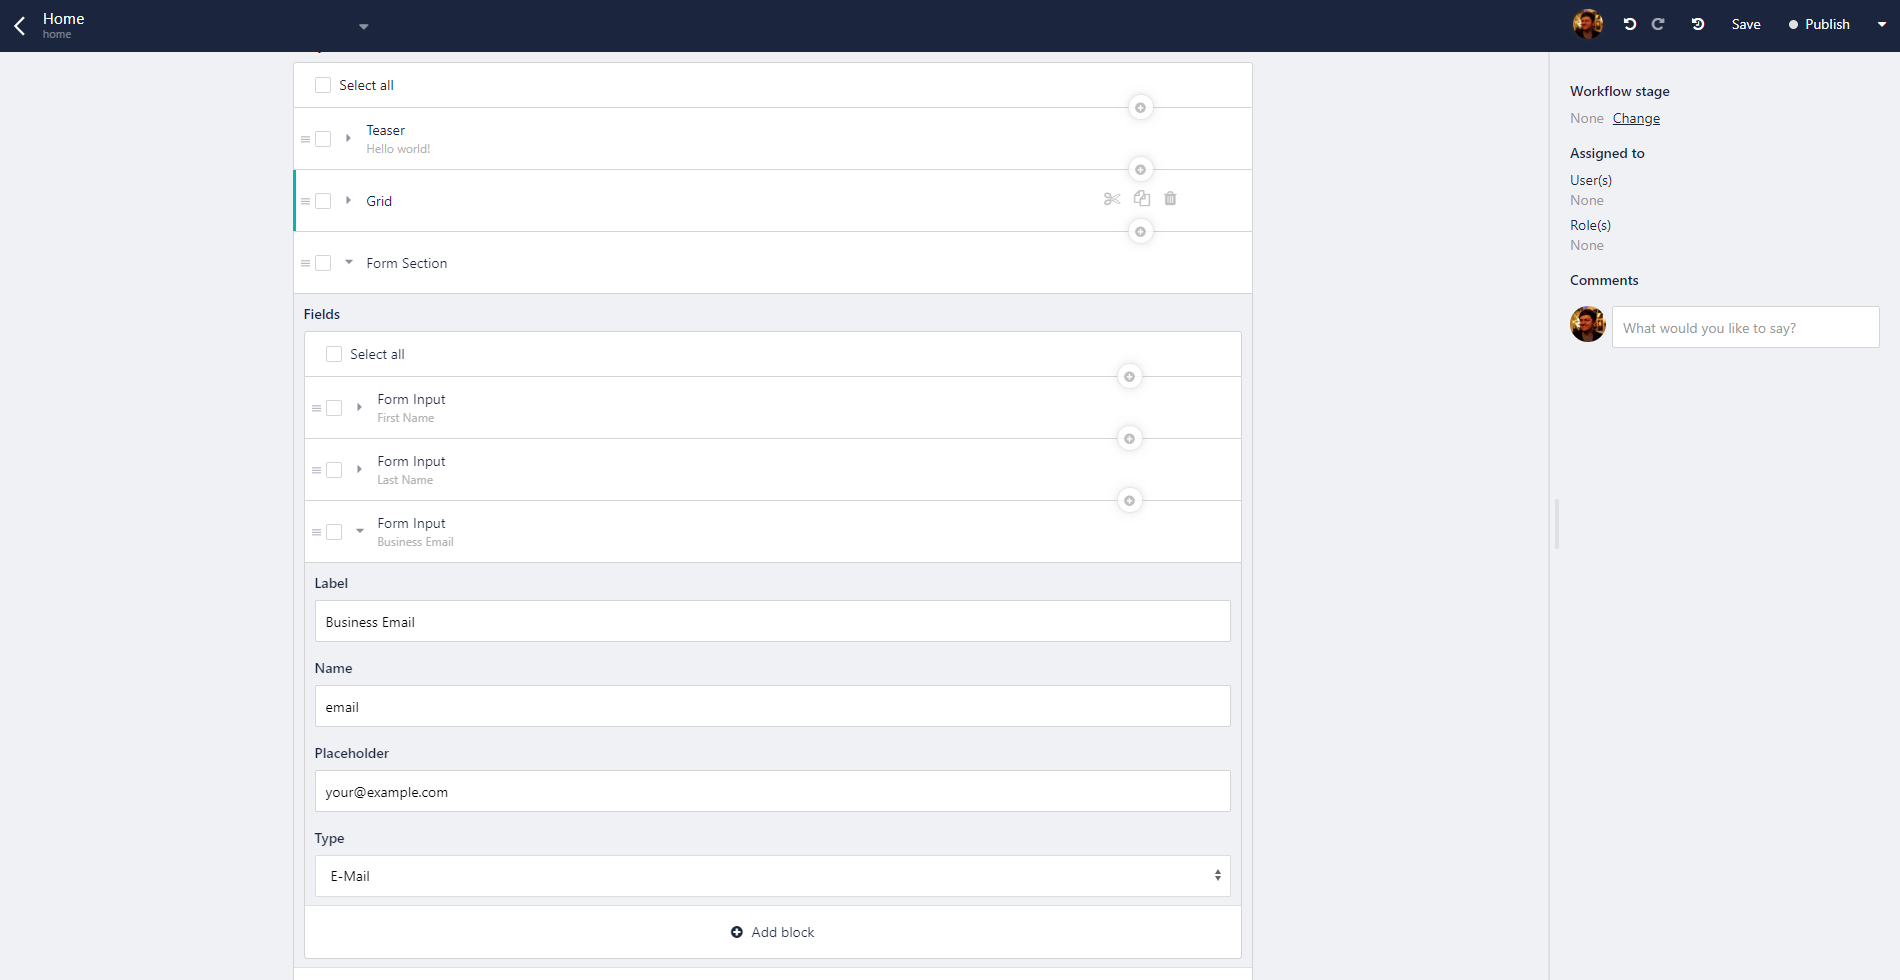
Since the form-section also contains a field with the type Blocks you can now add form-input components inside the freshly added form-section. We're going to create a form with three fields First Name, Last Name and Business E-Mail so we will have to add three form-input components configure the label, name, placeholder and type accordingly.
Below you can find an example of how we've configured the Business E-Mail we want to display in our website.
After adding the fields you want, you should hit the Save button on the top right corner to persist your changes. Once saved, you can click on the arrow on the top right to open a submenu which will allow you to access the JSON data of the current Story. Here is also the result of our Demo Space for you:
{
    "_uid": "5446d7ca-ea24-4a1e-b59c-b778d92b9e95",
    "fields": [
        {
            "_uid": "6304e74d-4f68-4c76-bb3f-5620baaf7807",
            "name": "firstname",
            "type": "text",
            "label": "First Name",
            "component": "form-input",
            "placeholder": "Jane"
        },
        {
            "_uid": "0f87763c-b73c-4ec2-93e7-d9c0667c408c",
            "name": "lastname",
            "type": "text",
            "label": "Last Name",
            "component": "form-input",
            "placeholder": "Doe"
        },
        {
            "_uid": "1df7ba0a-8348-4091-ab89-da31de62b84d",
            "name": "email",
            "type": "email",
            "label": "Business Email",
            "component": "form-input",
            "placeholder": "your@example.com"
        }
    ],
    "component": "form-section"
}
Display the components dynamically
Depending on the technology you've chosen for your project, you can now use the above JSON to render your form fields. We've written tutorials on how to render dynamic components with Vue.js or dynamic components with React in the past. It is quite similar to that with every other technology, below you can find a quick and dirty implementation that uses default JavaScript ES6 and the JavaScript fetch API.
fetch('https://api.storyblok.com/v1/cdn/stories/home?version=published&token=dJ8n310WTXLPmkxp6bRYxwtt&cv=1611167735')
  .then(response => response.json())
  .then(data => {
        // normally you would interate through all your components and include them dynamically.
        let formSection = data.story.content.body[0]
        let inputs = []

        formSection.fields.forEach((formInput) => {
            // loop through all formInput components in the `fields` field of the formSection component.
            inputs.push(`<label for="${formInput.name}">${formInput.label}</label>
            <input type="${formInput.type}" id="${formInput.name}" name="${formInput.name}" placeholder="${formInput.placeholder}">`)
        })

        // include all inputs in form
        let form = `<form class="form-section">
            <fieldset>
                <legend>Form Section</legend>
                ${inputs.join('<br>')}
                <button type="submit">Submit</button>
            </fieldset>
        </form>`

        // display the form wherever we want (at the end of the body maybe?)
        document.body.insertAdjacentHTML('beforeend', form)
  })
What's next?
You can now adjust the above-created component with your additional fields, maybe define an endpoint where your form should be sent to? A headline in the legend by adding a field on the form-section or perhaps just allowing dynamic form-select and nest options. We hope this tutorial could get you one step closer the free your marketers and editors from repetitive work by just creating dynamic forms using a headless CMS. I can also highly recommend reading through our tutorial on How to create dynamic forms with custom validation in Storyblok and Nuxt.js.
