Create a dynamic form with Storyblok and Netlify
Storyblok is the first headless CMS that works for developers & marketers alike.
This article will guide you through building a dynamic form using Storyblok and receiving the submitted form directly in your email. The tutorial will cover creating input fields in Storyblok, deploying the form on Netlify, and setting up a hook to retrieve the form data.
Create your Storyblok component
Create a nestable block FormWrapper that takes the property forms as blocks and navigationSuccess as a link, we can choose where the user will be redirected after filling out the form.
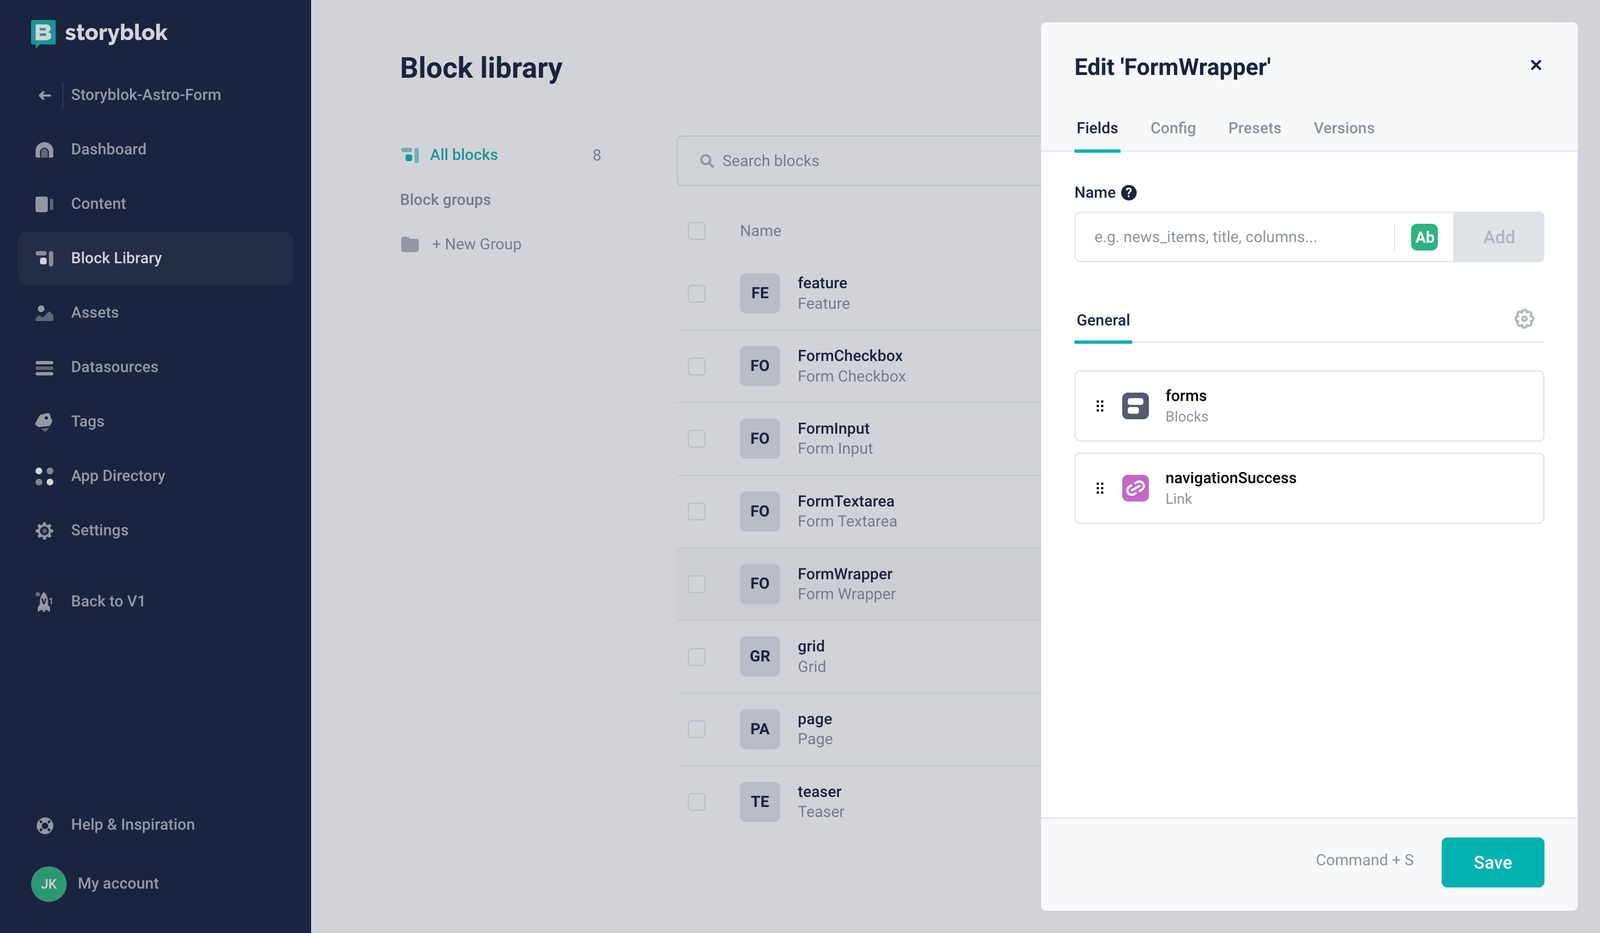
FormWrapper component
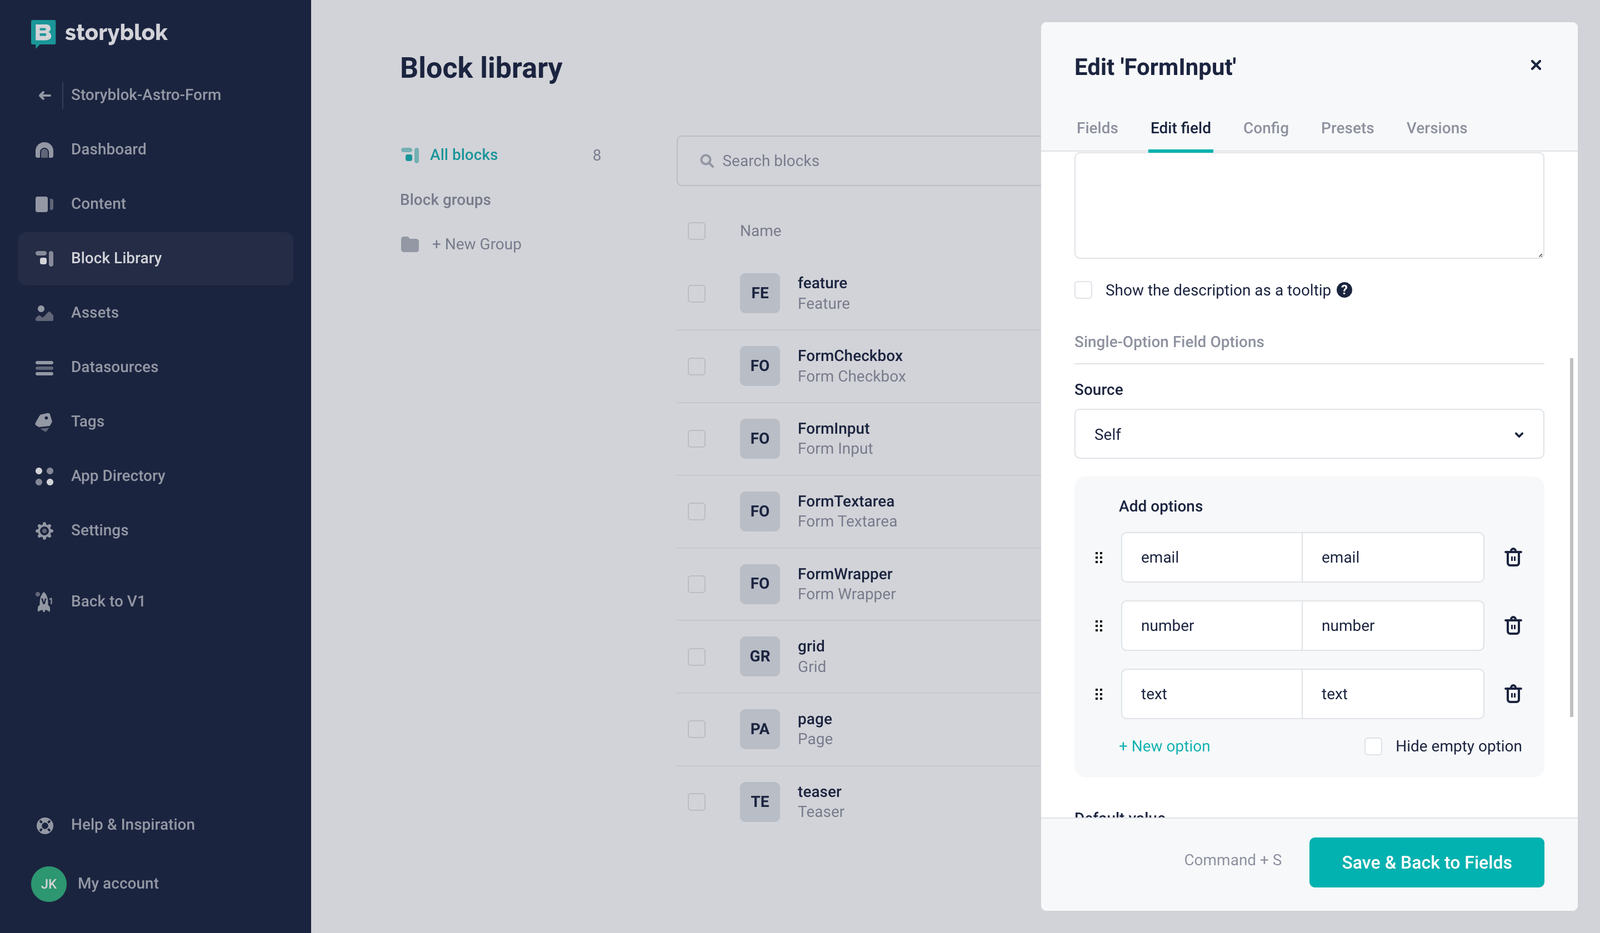
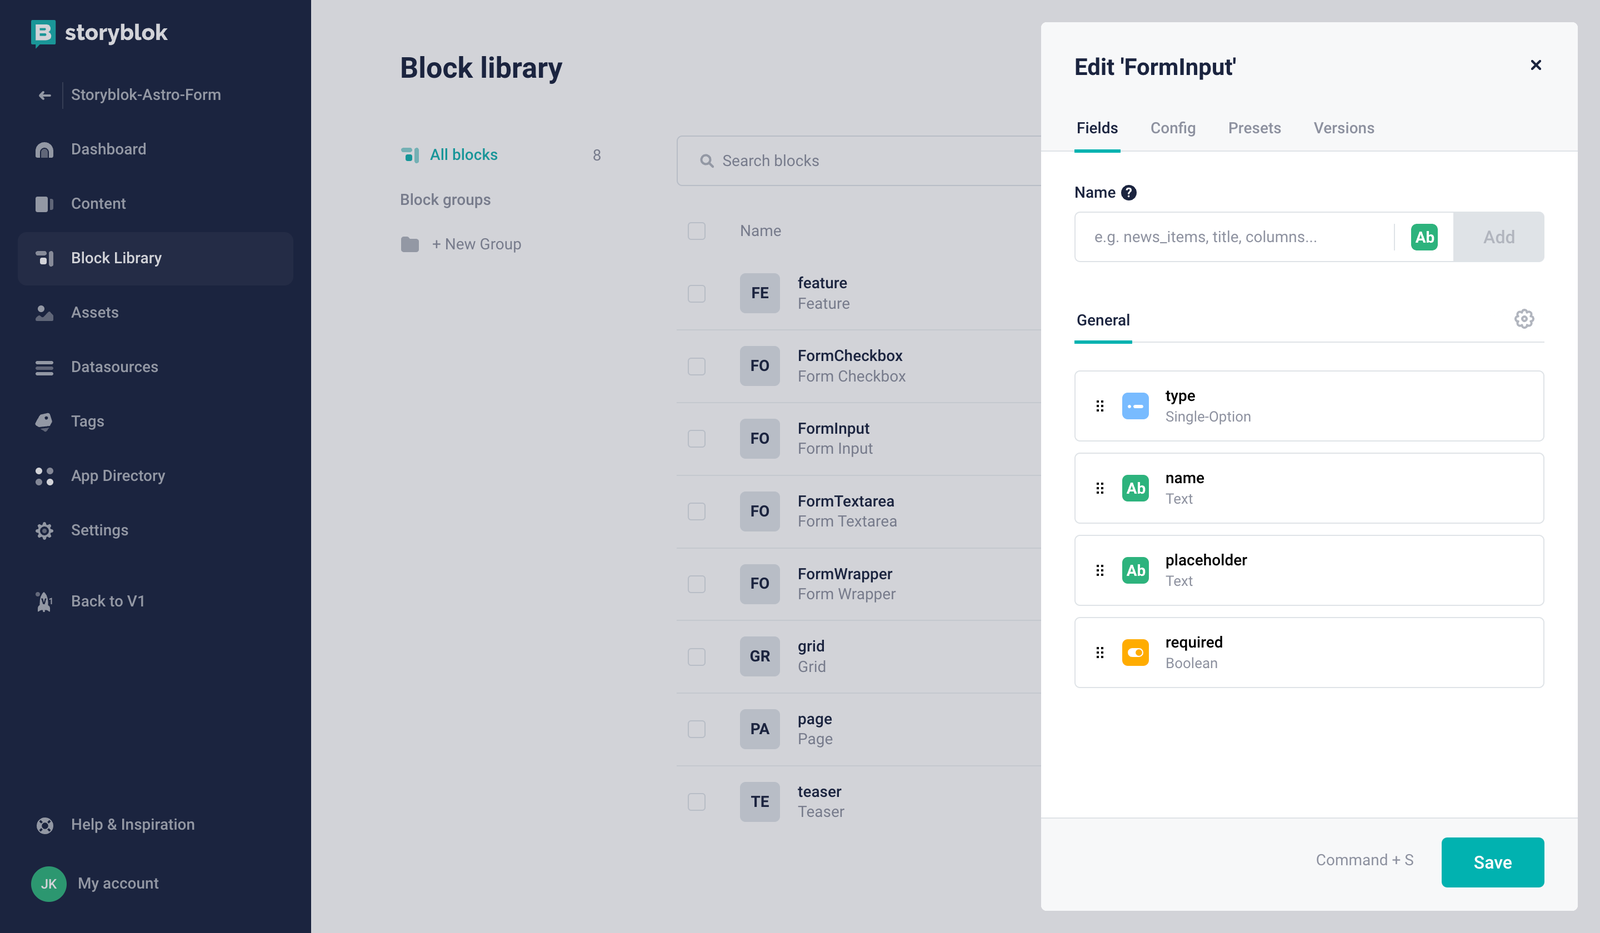
Create a nestable block FormInput as a single-option. Add Self as the source type with different options: email, number, text.
FormInput component
Add other properties like the name as text to identify the value, placeholder as text to describe the input value, and required as a Boolean to specify if the value is needed.
Form Input fields
We will create one for Textarea and Checkbox but you can create a specific one or add it to FormInput for other types of inputs (file, date, radio…).
For the Textarea, create a nestable block for FormTextarea with the following properties: name and placeholder as Text, required as Boolean and rows as Number.

FormTextarea block
For the Checkbox, create a nestable block for FormCheckbox with the following properties: name and label as Text, and required as Boolean.
Create a Storyblok component in Astro
I will work with Astro, but the logic remains the same in all the other front-end frameworks.
If you have any issues, you can check my repository here (opens in a new window), or you can start a new one from my template (opens in a new window).
Create a FormWrapper.astro file and add the code below. FormWrapper is a form with a submit button. Also, in the code, the form name is contact and has an attribute data-netlify=true. This parameter is important. It will tell Netlify to enable the form function. When a user fills out the form, the answer will be attached as a contact in Netlify. Additionally, we can specify where the user will be redirected in the action attribute.
---
import { storyblokEditable } from "@storyblok/astro";
import StoryblokComponent from "@storyblok/astro/StoryblokComponent.astro";
const { blok } = Astro.props;
---
<div class="flex justify-center p-12">
    <form name="contact" method="POST" data-netlify="true" action={`/${blok.navigationSuccess.cached_url}`} class="flex flex-col w-[400px]" {...storyblokEditable(blok)}>
        {
            blok.forms?.map((blok) => {
              return <StoryblokComponent blok={blok} />;
            })
          }
        <button
            type="submit"
            class="w-full rounded-[8px] bg-primary px-6 py-2.5 text-xs font-medium uppercase leading-tight text-white shadow-md transition duration-150 ease-in-out bg-[#00b3b0] hover:bg-[#009f9c] hover:shadow-lg focus:bg-[#009f9c] focus:shadow-lg focus:outline-none focus:ring-0 active:bg-[#009f9c] active:shadow-lg"
            >Send</button
        >
    </form>
</div>
Create a FormInput.astro and add the code below.
---
import { storyblokEditable } from "@storyblok/astro";
const { blok } = Astro.props;
---
    <div class="form-group mb-6" {...storyblokEditable(blok)}>
        <input
            type={blok.type}
            name={blok.name}
            class="form-control m-0 block w-full rounded-[8px] border border-solid border-gray-300 bg-white bg-clip-padding px-3 py-1.5 text-base font-normal text-primary transition ease-in-out focus:border-primary focus:bg-white focus:text-primary focus:outline-none"
            id={blok.name}
            placeholder={`${blok.placeholder} ${blok.required ?'':'(optional)'}`}
            required={blok.required}
        />
    </div>
Do the same for FormTextarea.astro
---
import { storyblokEditable } from "@storyblok/astro";
const { blok } = Astro.props;
---
    <div class="form-group mb-6" {...storyblokEditable(blok)}>
        <textarea
            name={blok.name}
            class="form-control m-0 block w-full rounded-[8px] border border-solid border-gray-300 bg-white bg-clip-padding px-3 py-1.5 text-base font-normal text-primary transition ease-in-out focus:border-primary focus:bg-white focus:text-primary focus:outline-none"
            id={blok.name}
            placeholder={`${blok.placeholder} ${blok.required ?'':'(optional)'}`}
            required={blok.required}
            rows={Number(blok.rows)}
        />
    </div>
Also, the FormCheckbox.astro
---
import { storyblokEditable } from "@storyblok/astro";
const { blok } = Astro.props;
---
    <div class="form-group mb-6 flex" {...storyblokEditable(blok)}>
        <input
            type='checkbox'
            name={blok.name}
            class="mr-4"
            id={blok.name}
            required={blok.required}
        />
        <label for={blok.name}>{blok.label}</label>
    </div>
Don’t forget to add the previous components to the astro.config.mjs as below:
import { defineConfig } from "astro/config";
import storyblok from "@storyblok/astro";
import tailwind from "@astrojs/tailwind";
import netlify from "@astrojs/netlify/functions";
import { loadEnv } from "vite";
const { PUBLIC_ENV, STORYBLOK_TOKEN_ACCESS} = loadEnv(import.meta.env.MODE, process.cwd(), "");
import basicSsl from '@vitejs/plugin-basic-ssl'
export default defineConfig({
  output: PUBLIC_ENV === 'preview' ? 'server' : 'static',
  adapter: PUBLIC_ENV === 'preview' ? netlify() : undefined,
  integrations: [
    storyblok({
      accessToken: STORYBLOK_TOKEN_ACCESS,
      bridge: PUBLIC_ENV !== 'production',
      components: {
        page: "storyblok/Page",
        feature: "storyblok/Feature",
        grid: "storyblok/Grid",
        teaser: "storyblok/Teaser",
        FormWrapper: 'storyblok/FormWrapper',
        FormInput: 'storyblok/FormInput',
        FormTextarea: 'storyblok/FormTextarea',
        FormCheckbox: 'storyblok/FormCheckbox',
      },
    }),
    tailwind(),
  ],
  vite: {
    server: {
      https: true,
    },
    plugins: [basicSsl()],
  },
});
Create a contact form page
Now that we have set up the component in Storyblok and our project, we can create our contact form!
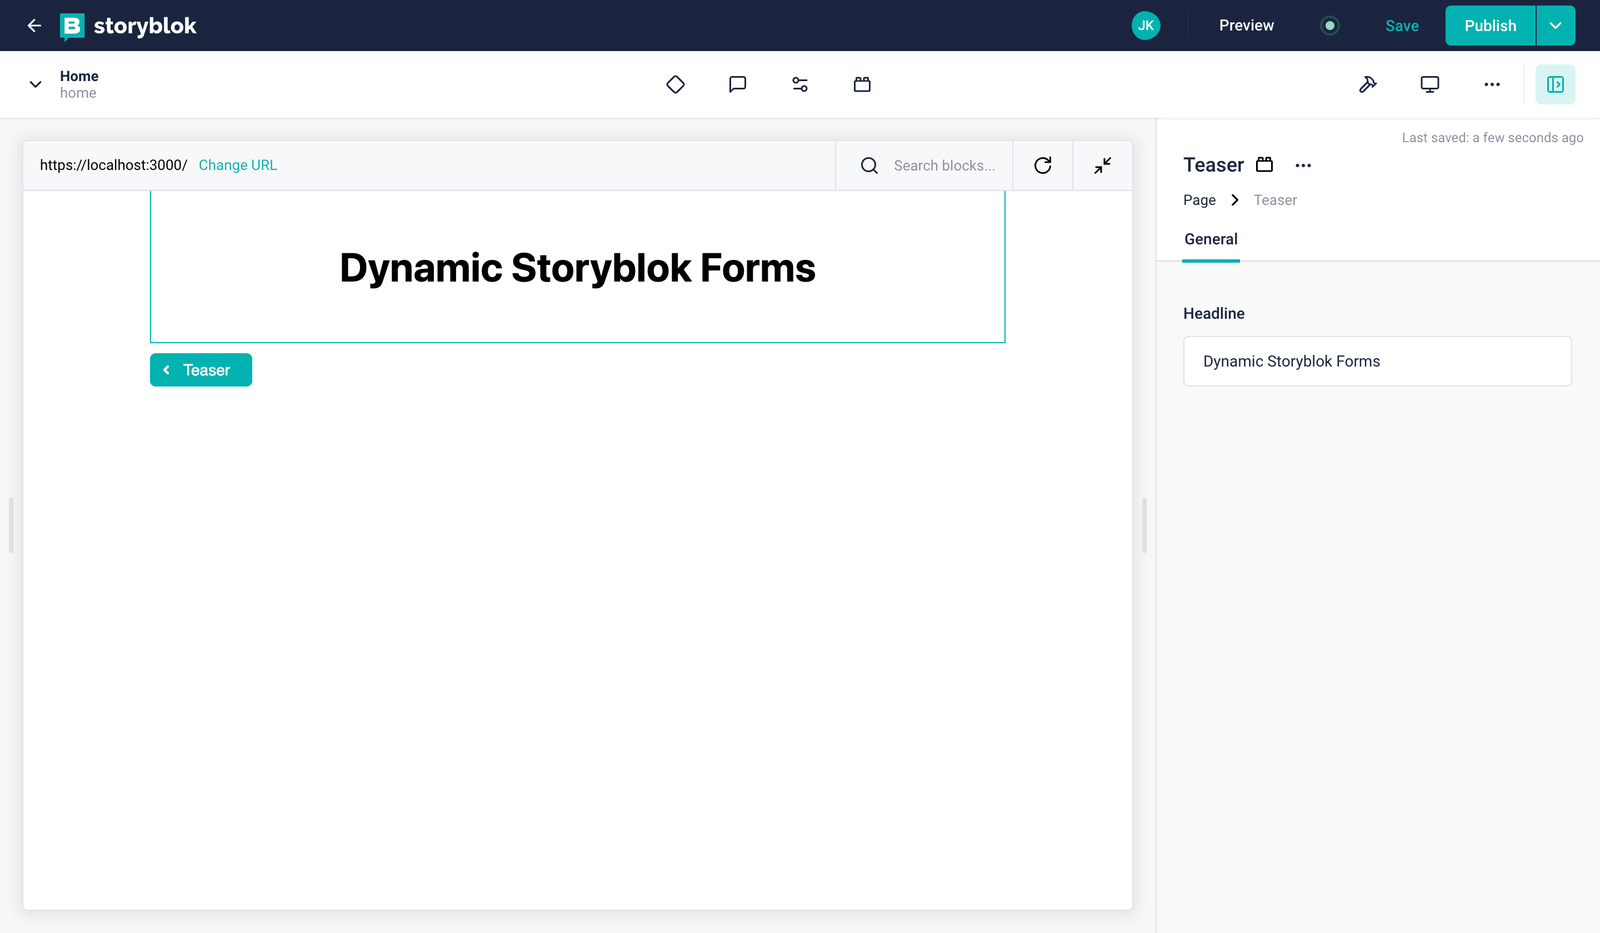
Let’s use the Teaser and add a nice Headline : Dynamic Storyblok Forms
Now add a new block Form wrapper by clicking on +
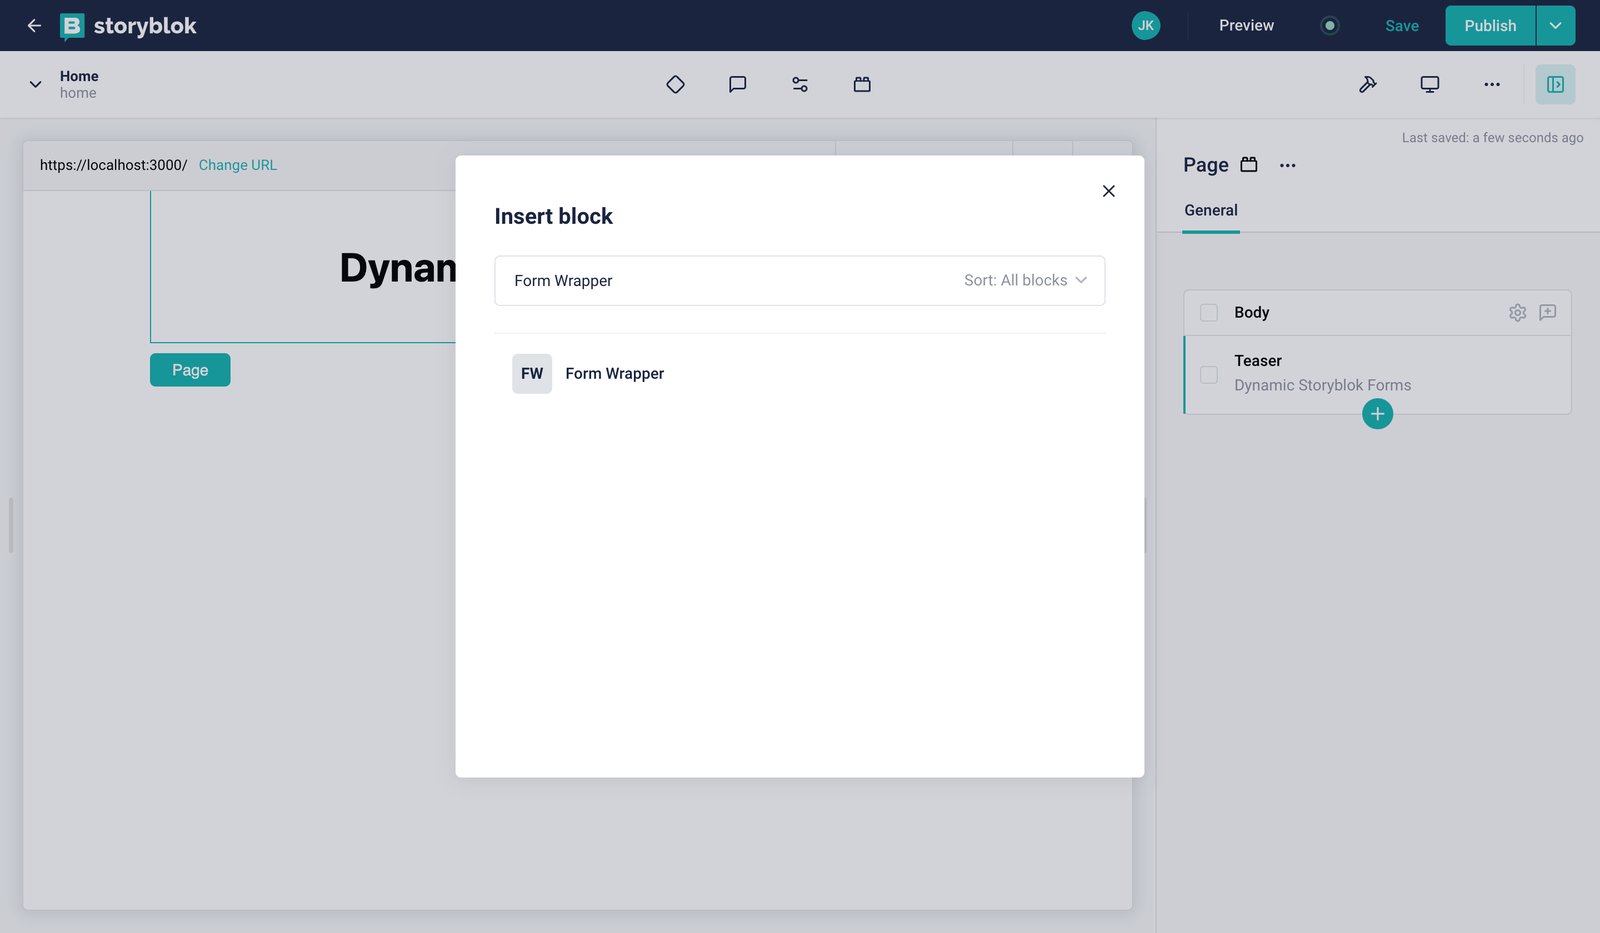
Insert form wrapper block
By clicking on Save, you should see a button SEND.
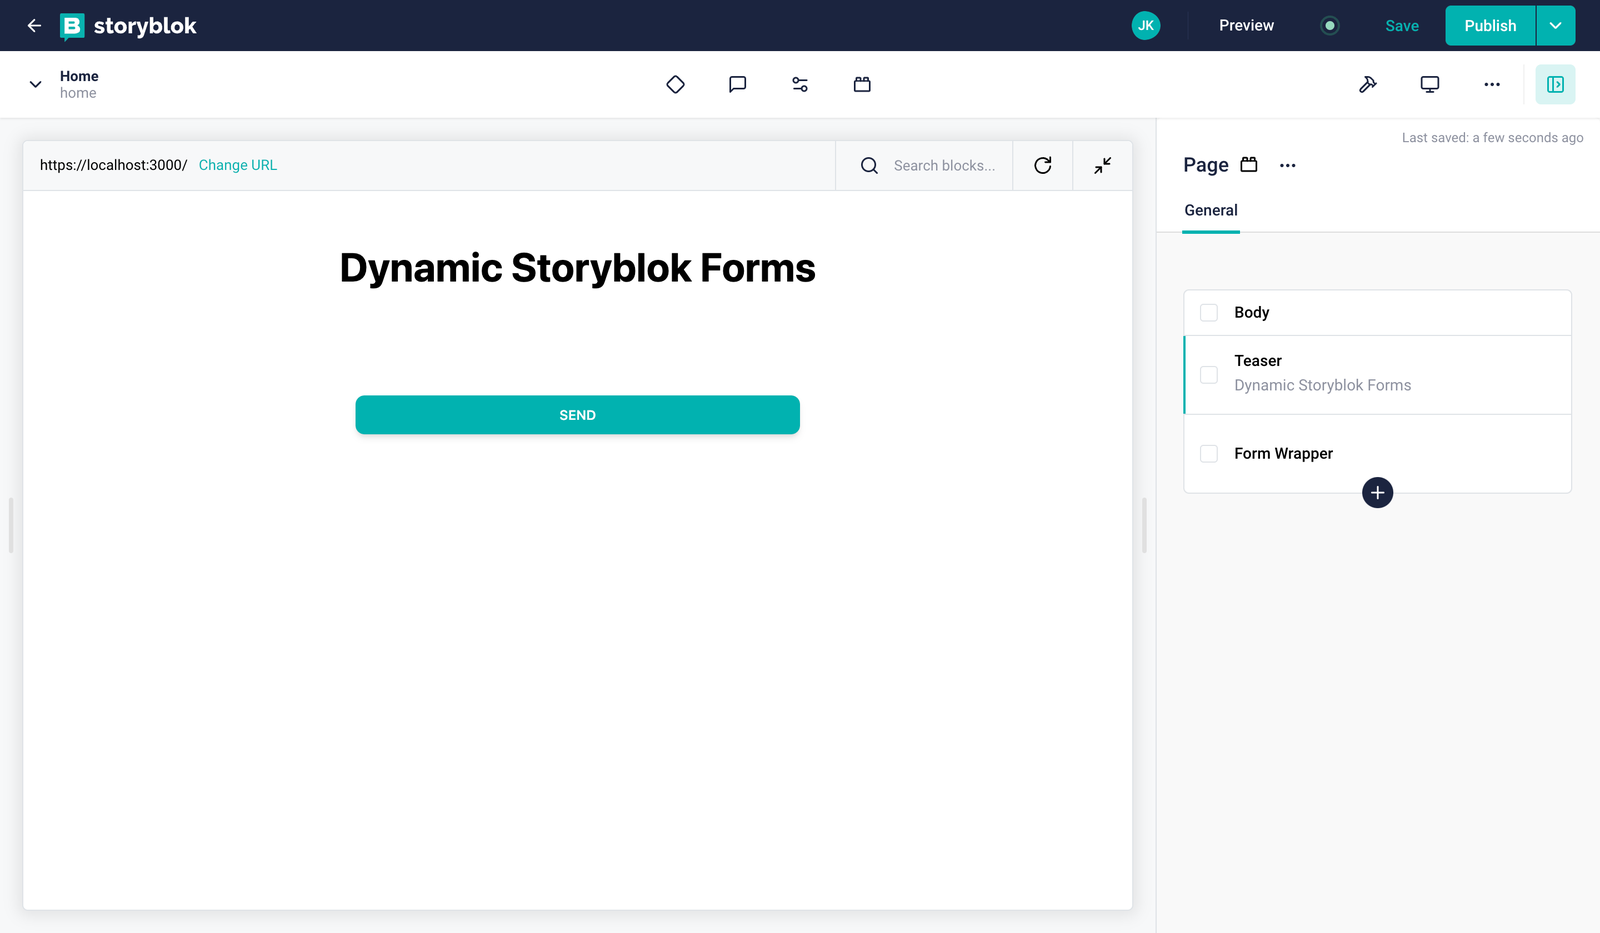
Storyblok dynamix forms
Now add a new block Form Input inside the Form Wrapper
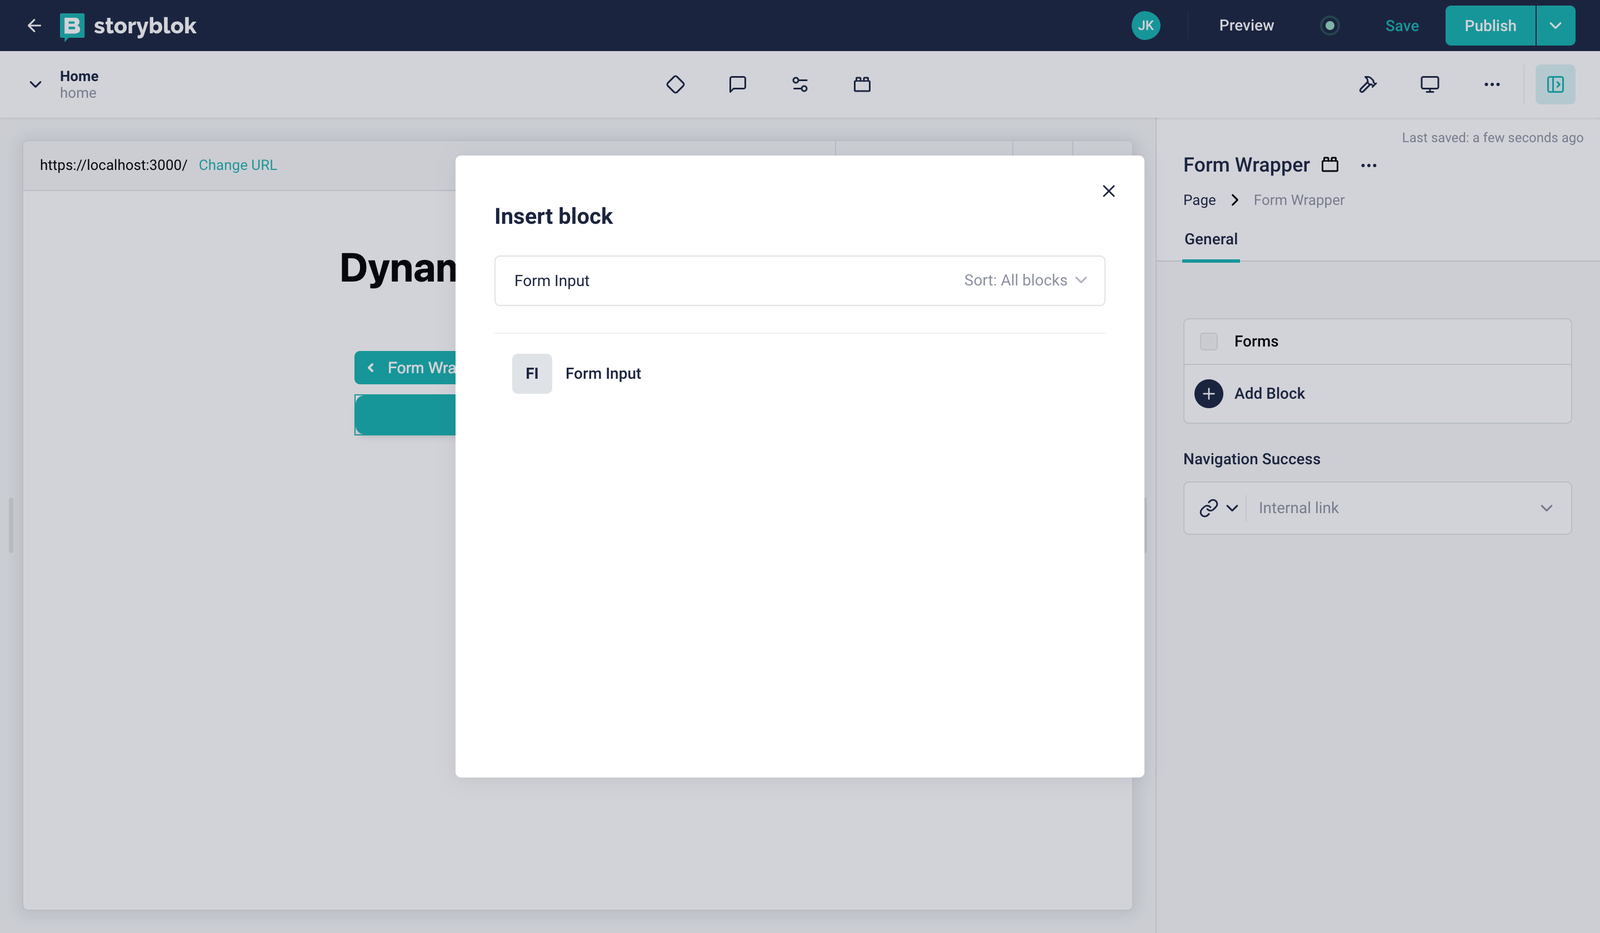
Storyblok Form Input block
You should have now a Form Input inside your Form Wrapper block.
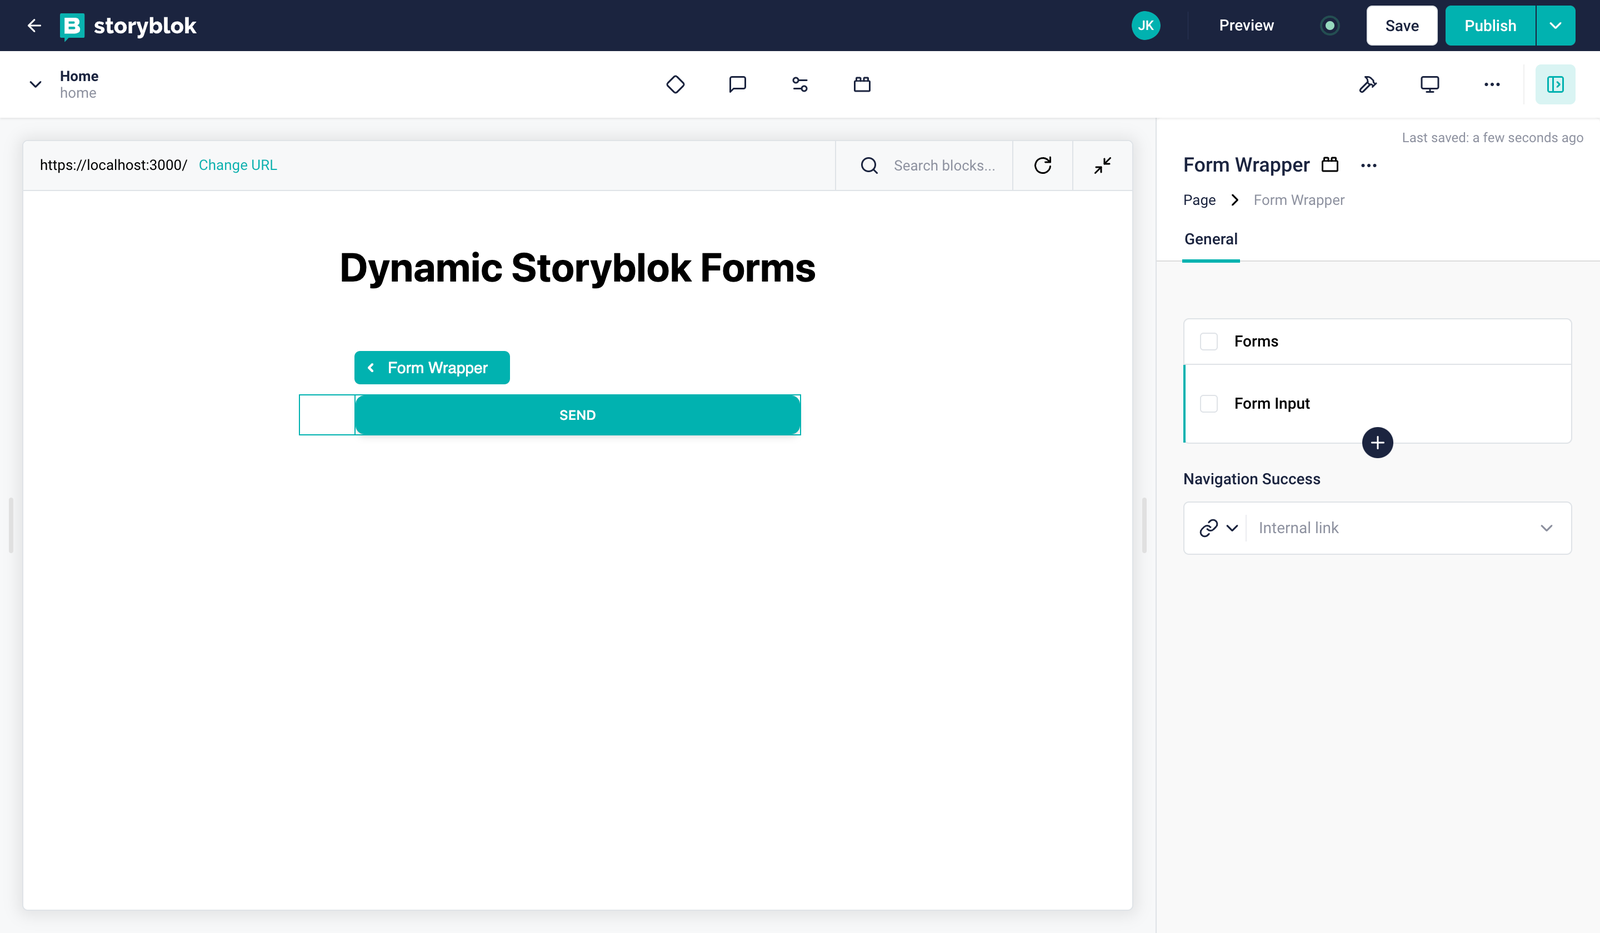
Storyblok dynamic form page
Let’s customize our first Form Input. Let's create one for the name.
To do that, select text for the type, enter name for the value, and Your name for the placeholder. Then, by clicking on 'save,' you should have something like the example below:
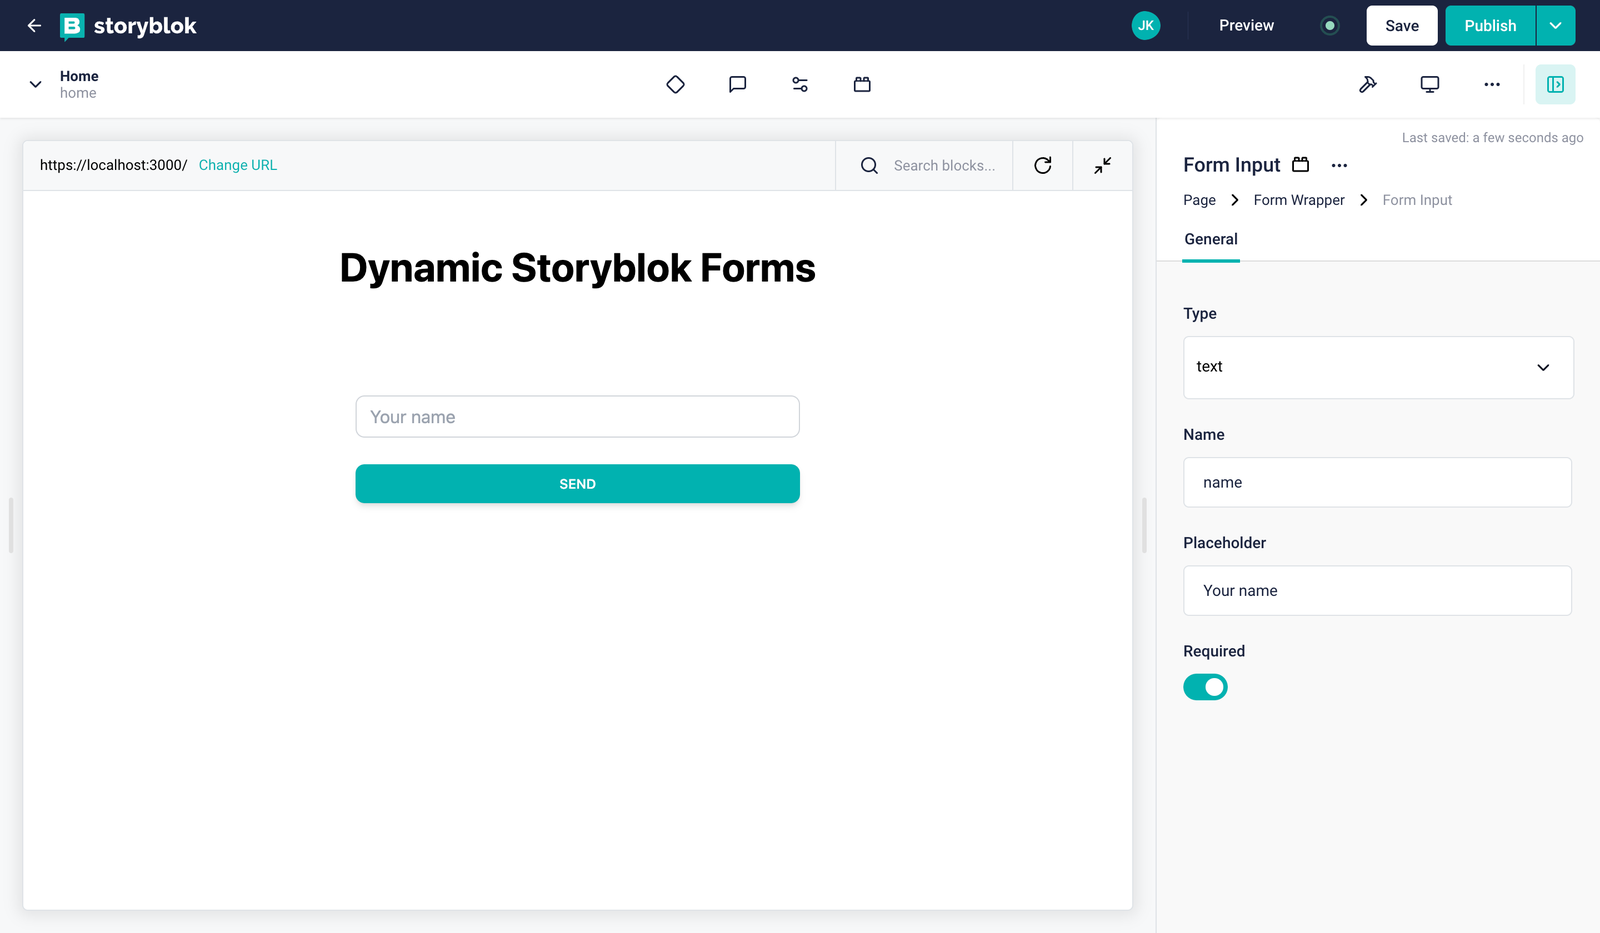
Entering values in form
Let's do the same for the email. Select text for the type, enter email for the value, and Your email for the placeholder.
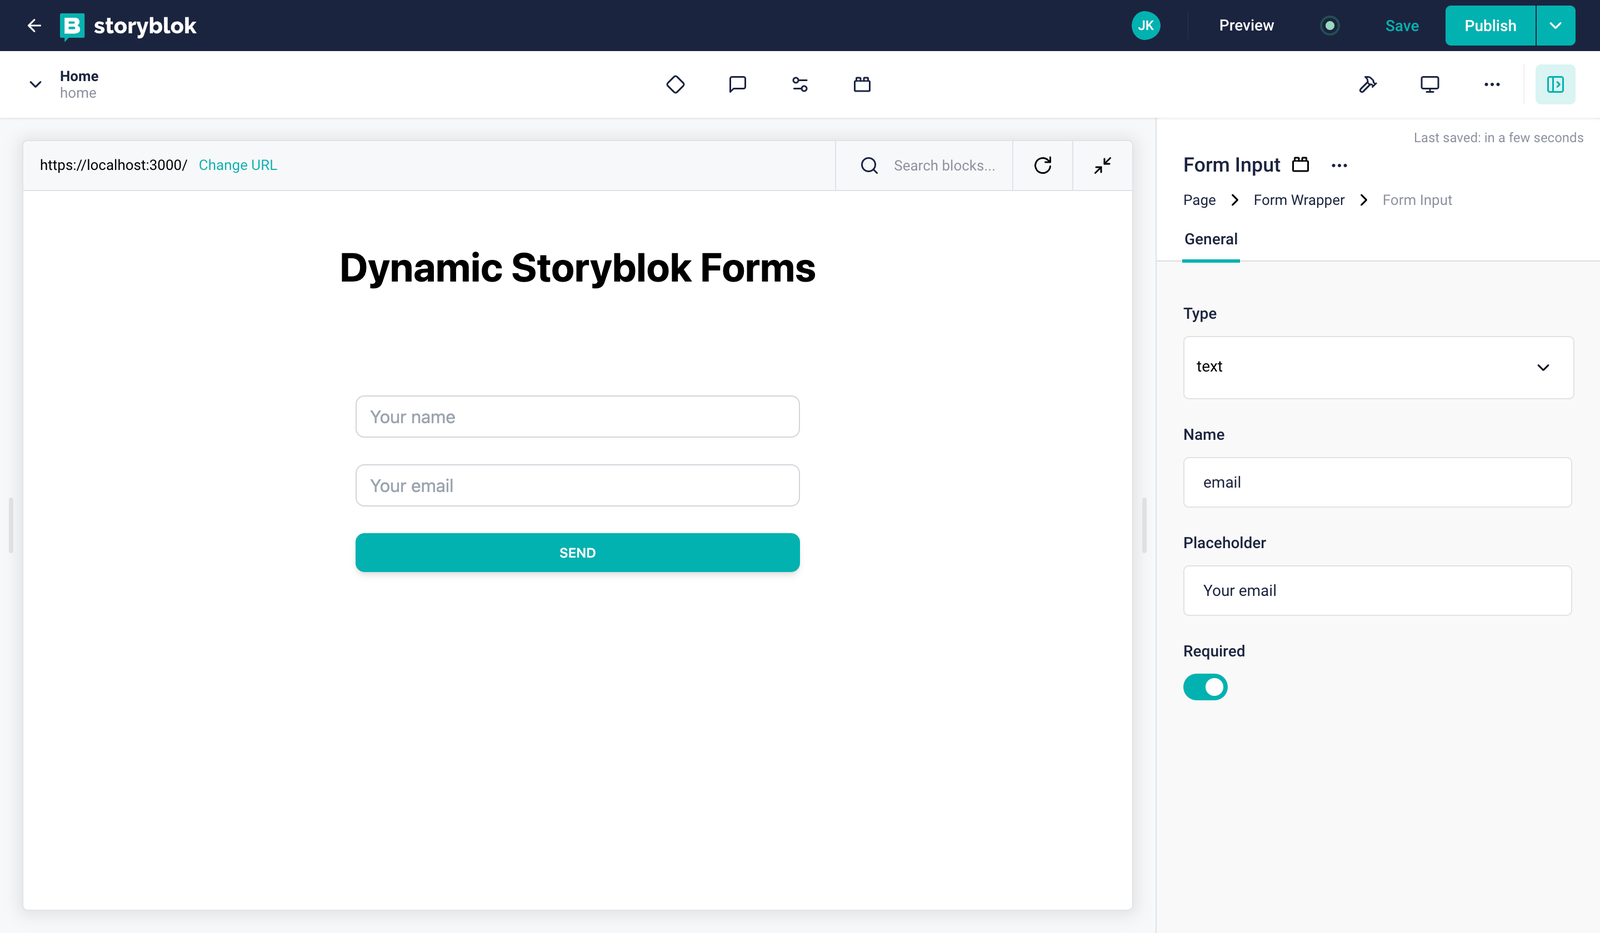
Form input with email
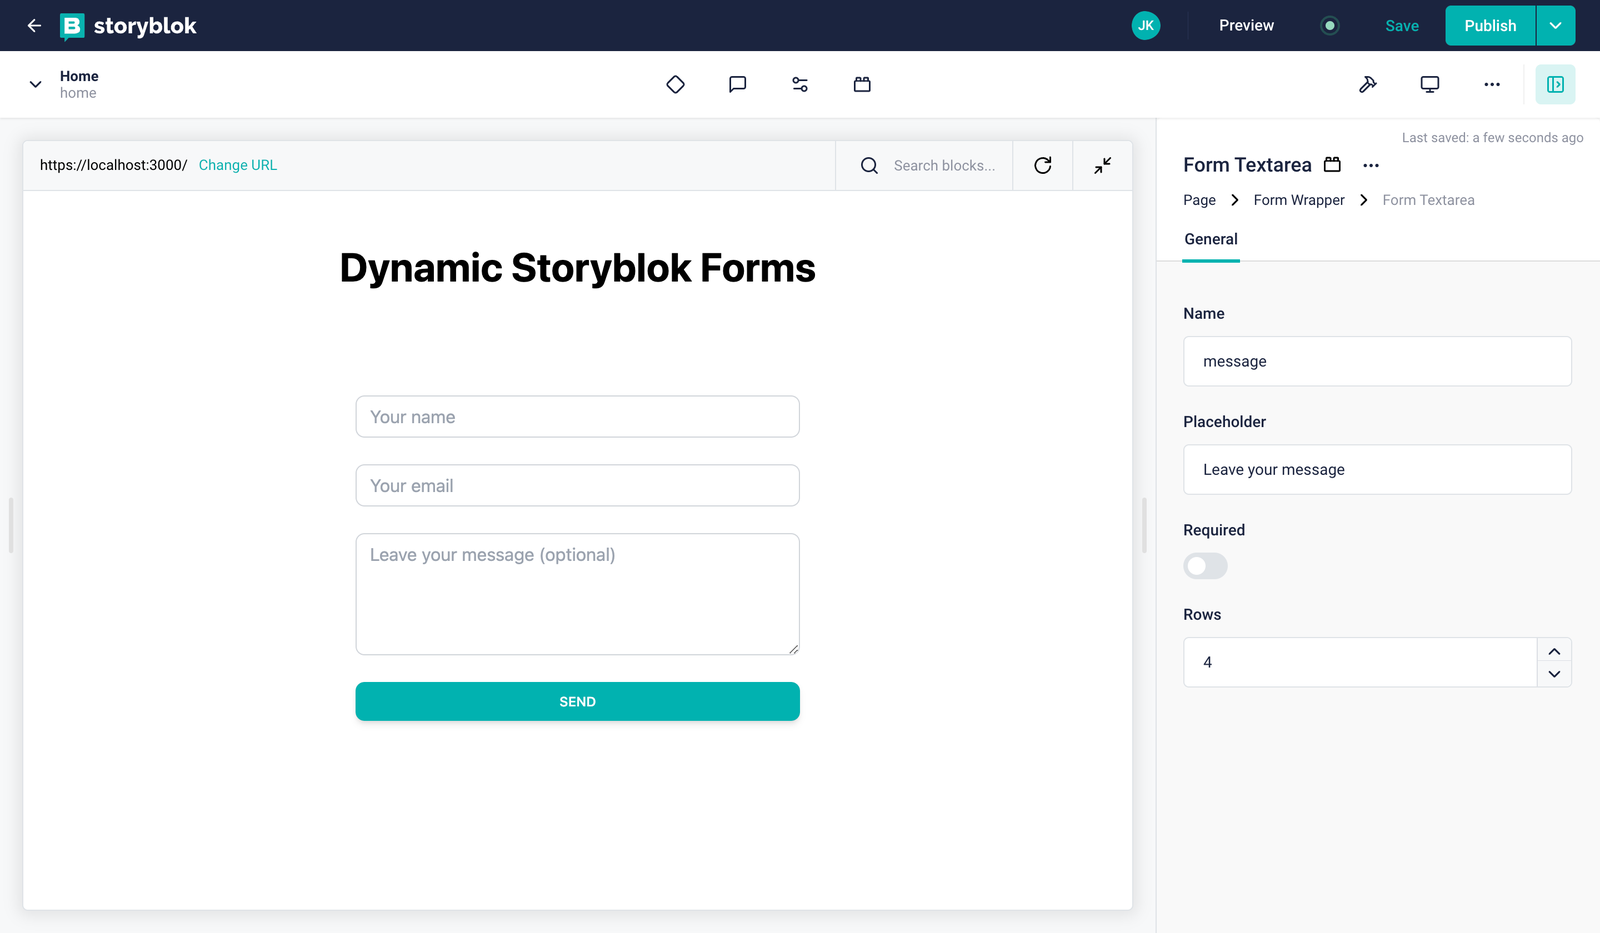
Now, add a new block, Form Textarea, to the Form Wrapper. Enter the message for the name's value, Leave your message for the placeholder, and set the row value to 4.
Form input with description
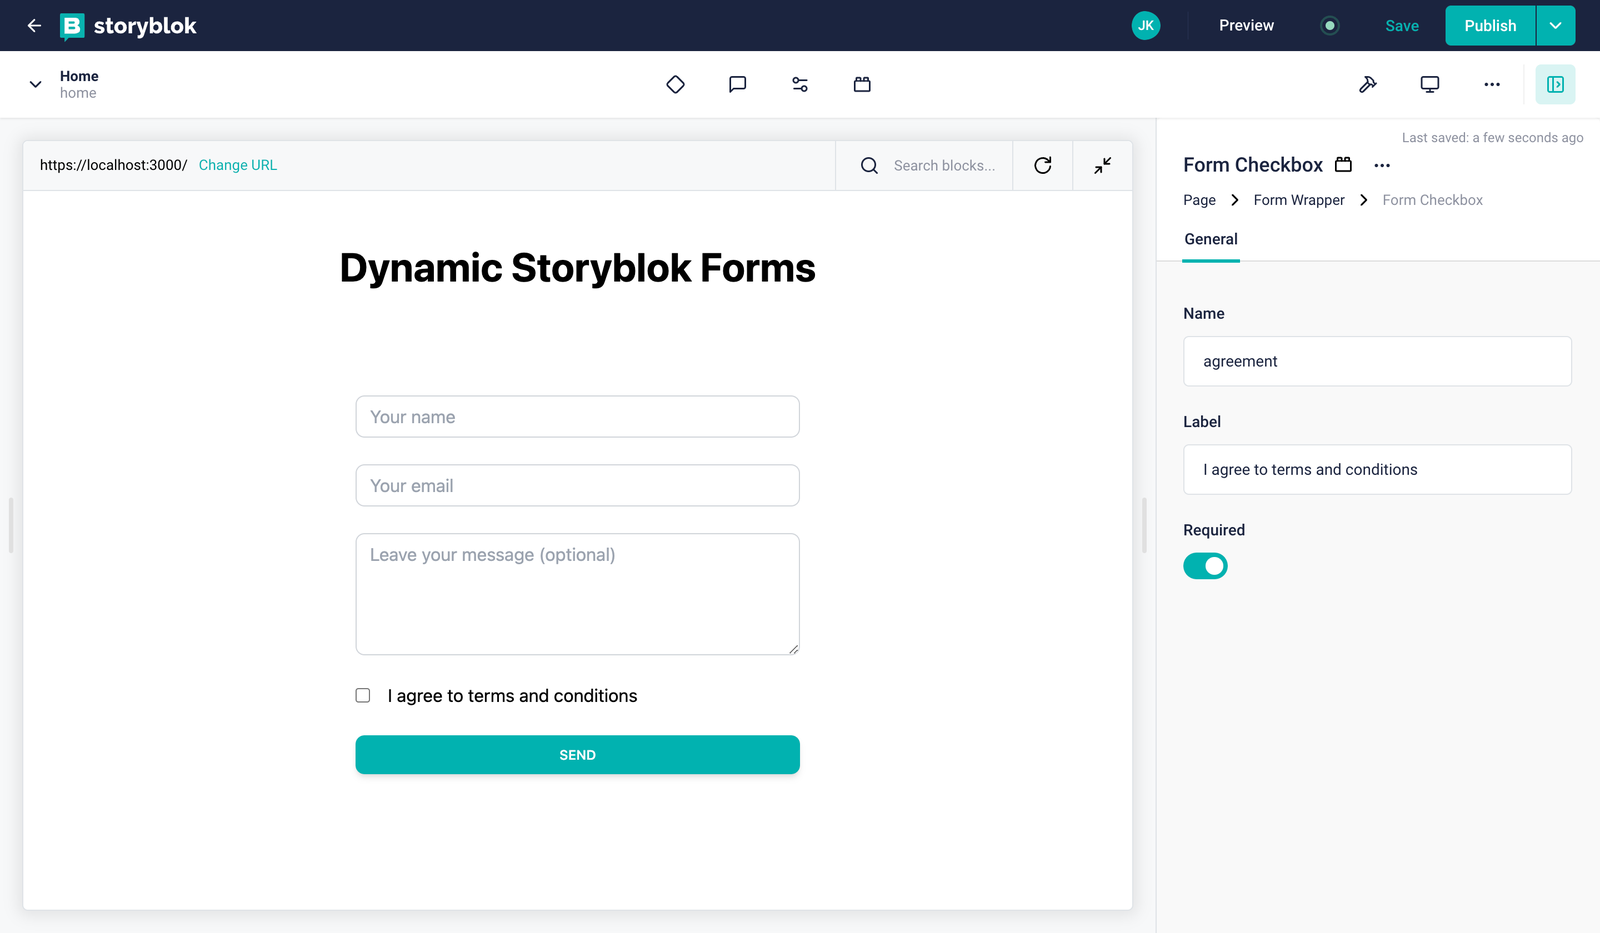
And finally, add a Form Checkbox to the Form Wrapper. Enter agreement as the name's value set required to true, and provide the label "I agree to the terms and conditions."
Form checkbox with a required field
Create a success page
We will create a simple success page so that after a user fills out the form, we can redirect them to this page.
Let’s create a success page by clicking to + Create new.
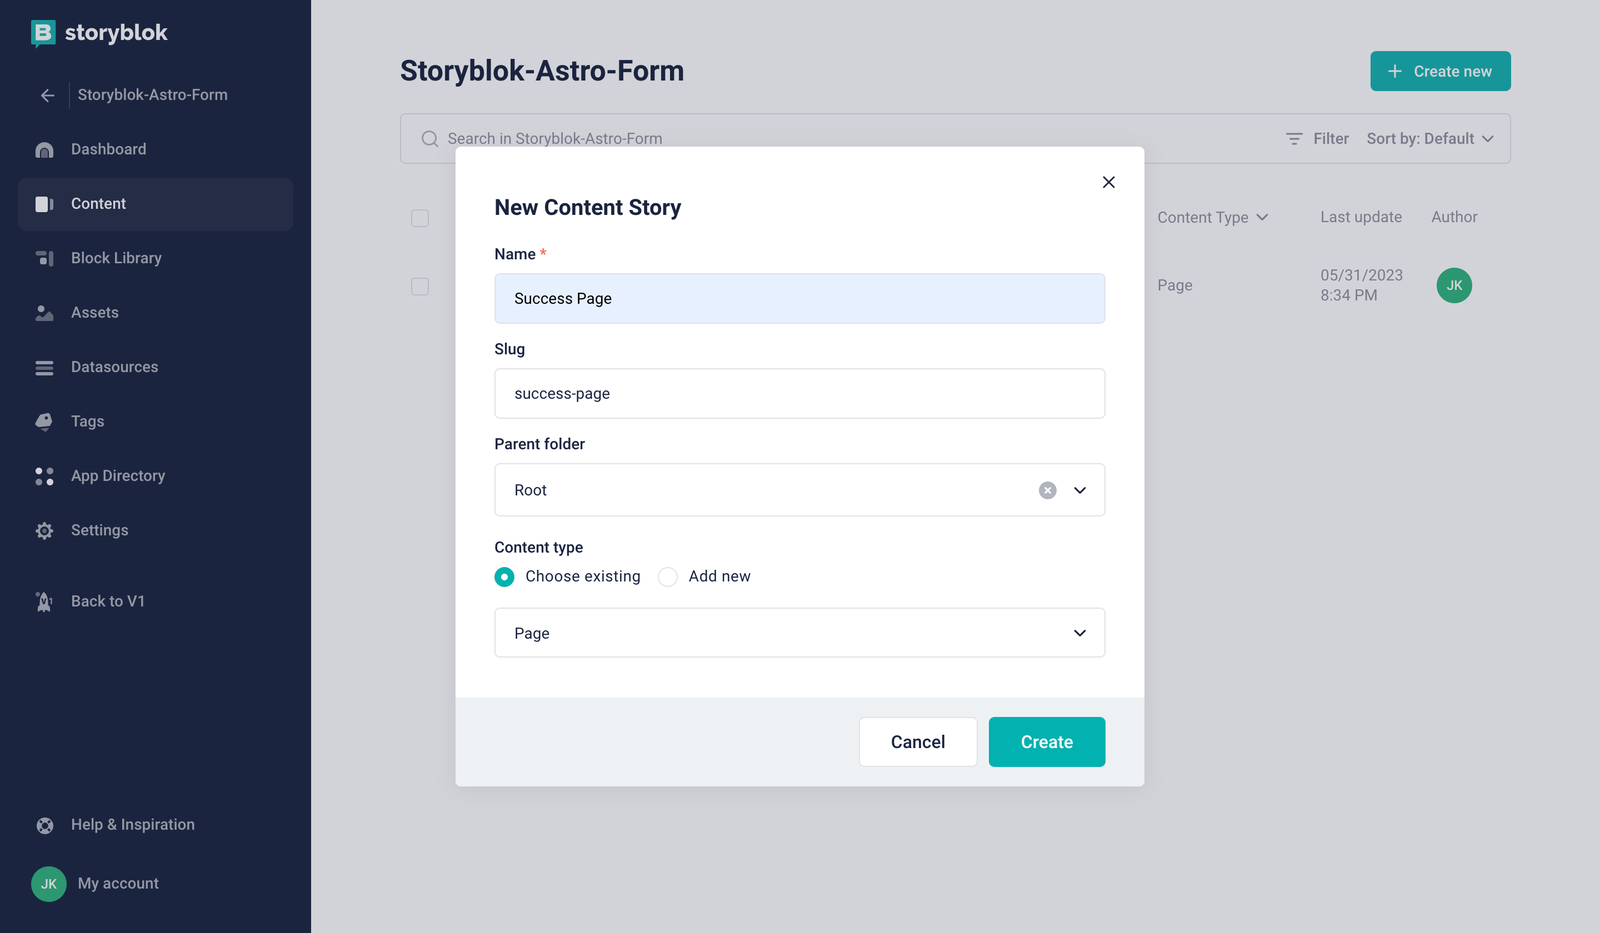
Create new content story
Add a block FeatureSet Success Page as name’s value for example.
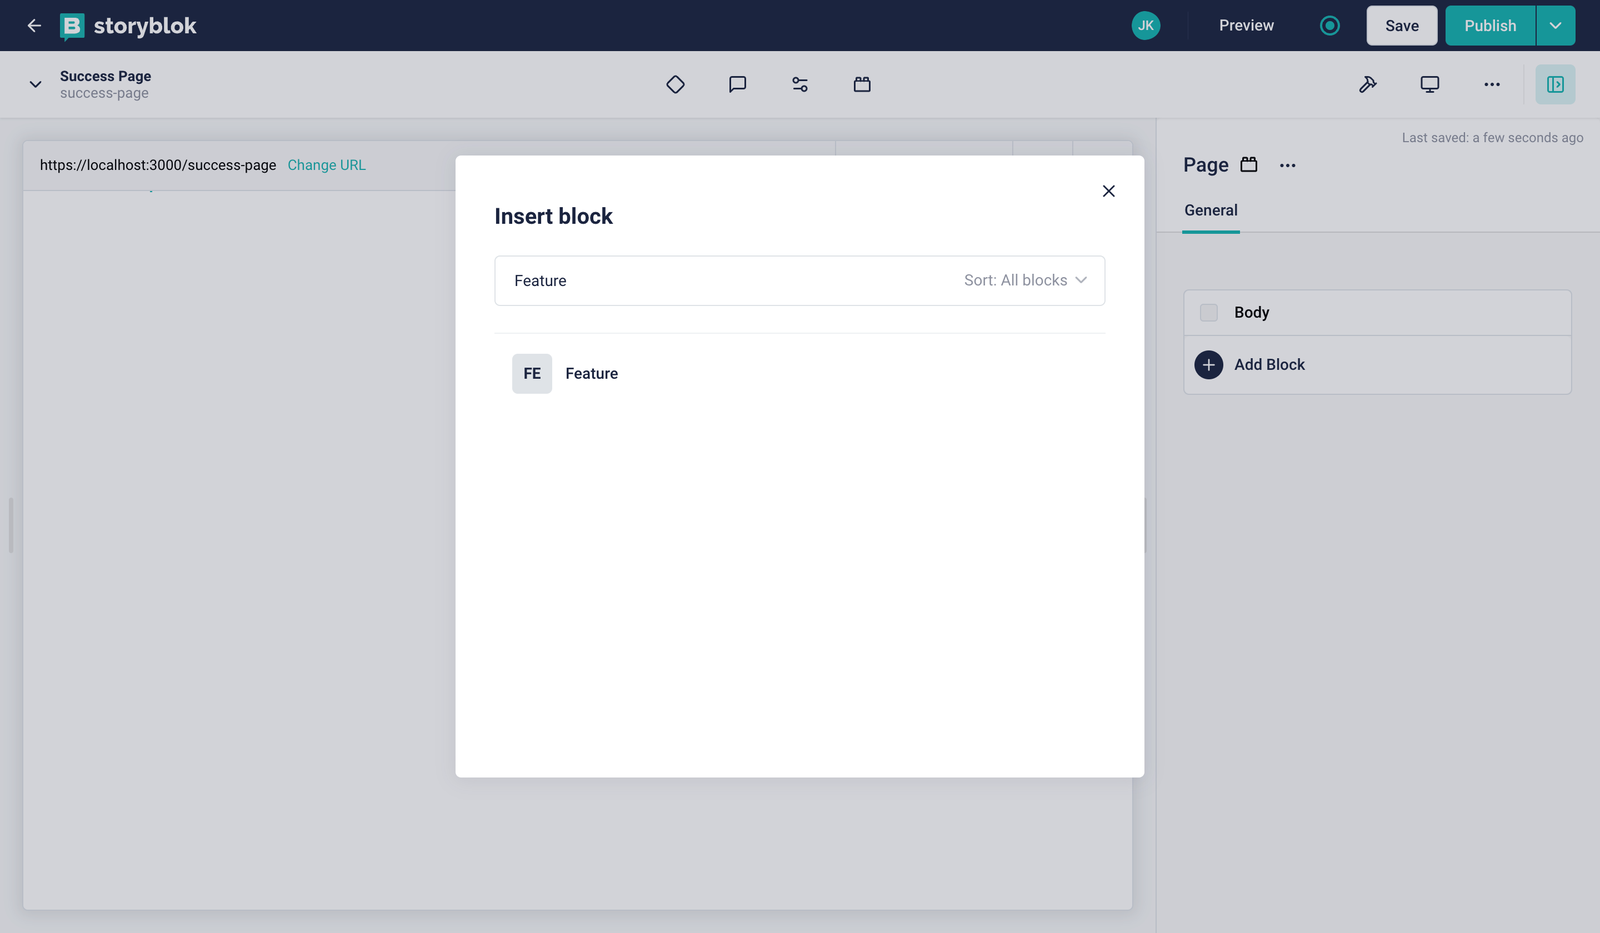
Insert block feature
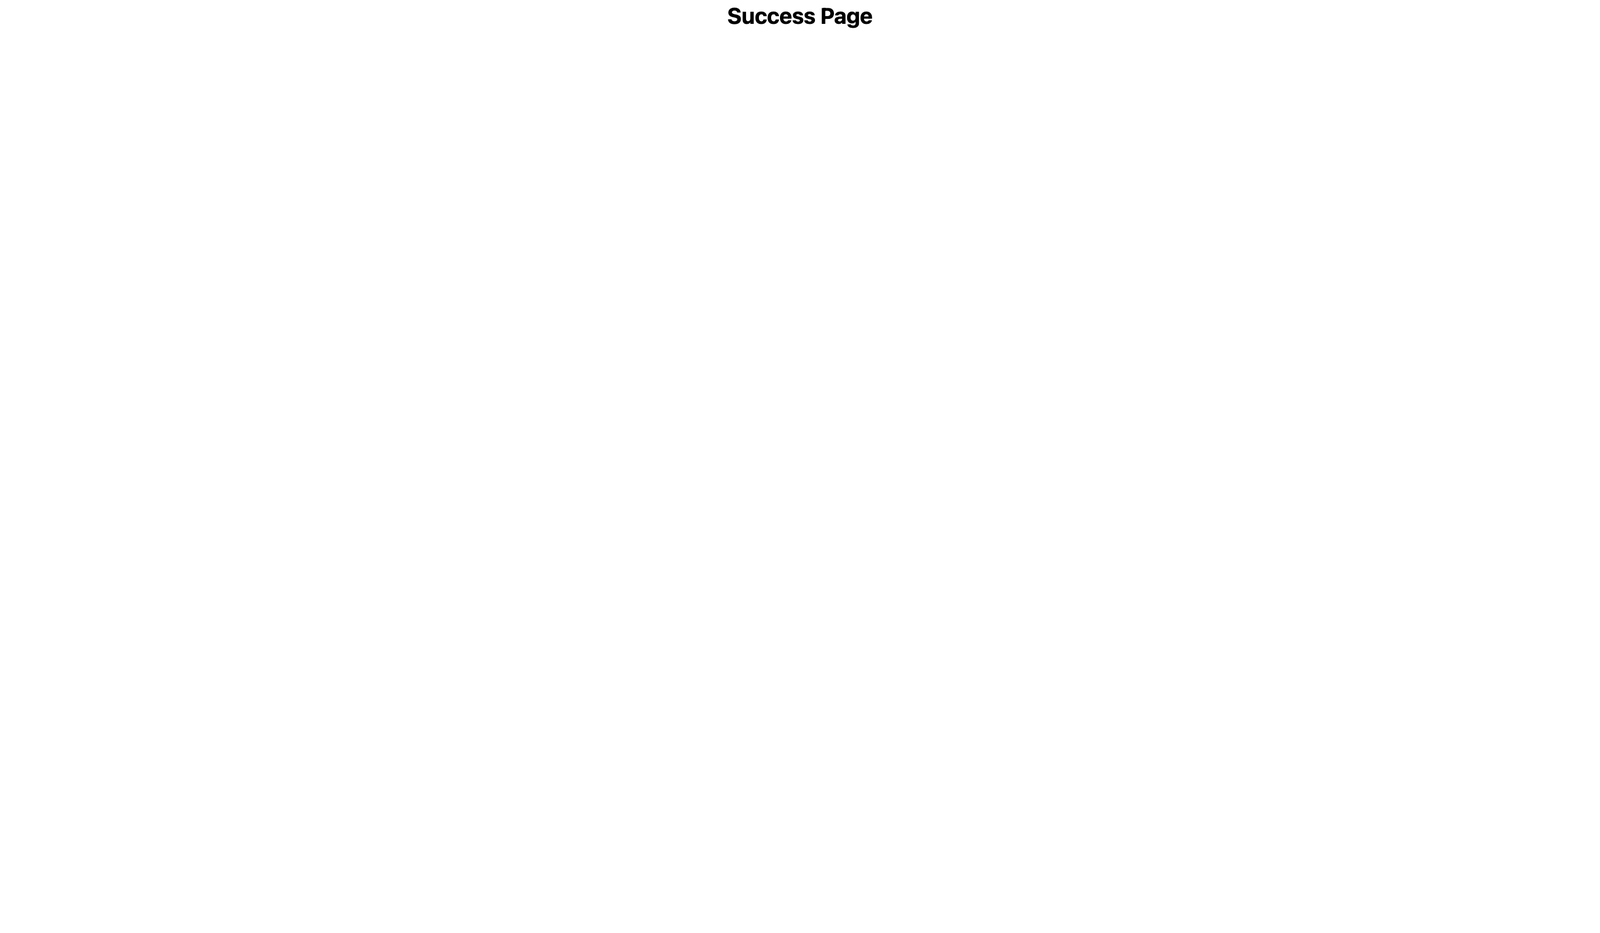
Set Success Page as name’s value, you can see the example below.
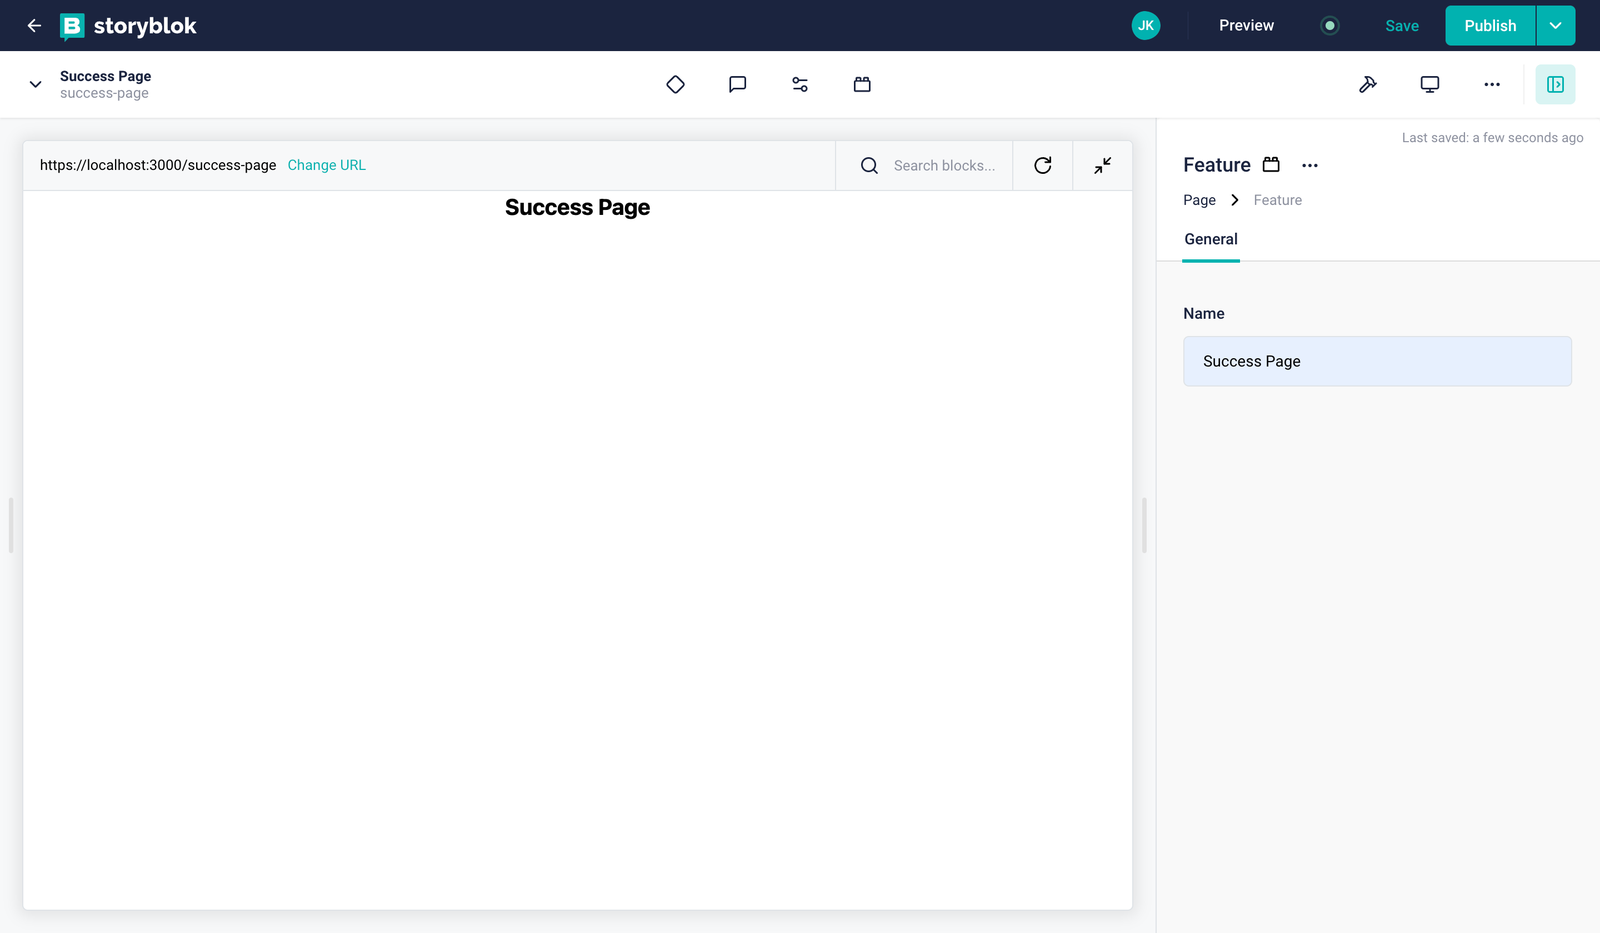
Success page
Let's go back to our home page, and set the Success Page we have just created as the value for the navigation success.

Dynamic form success page
At the end you should have like the example below:
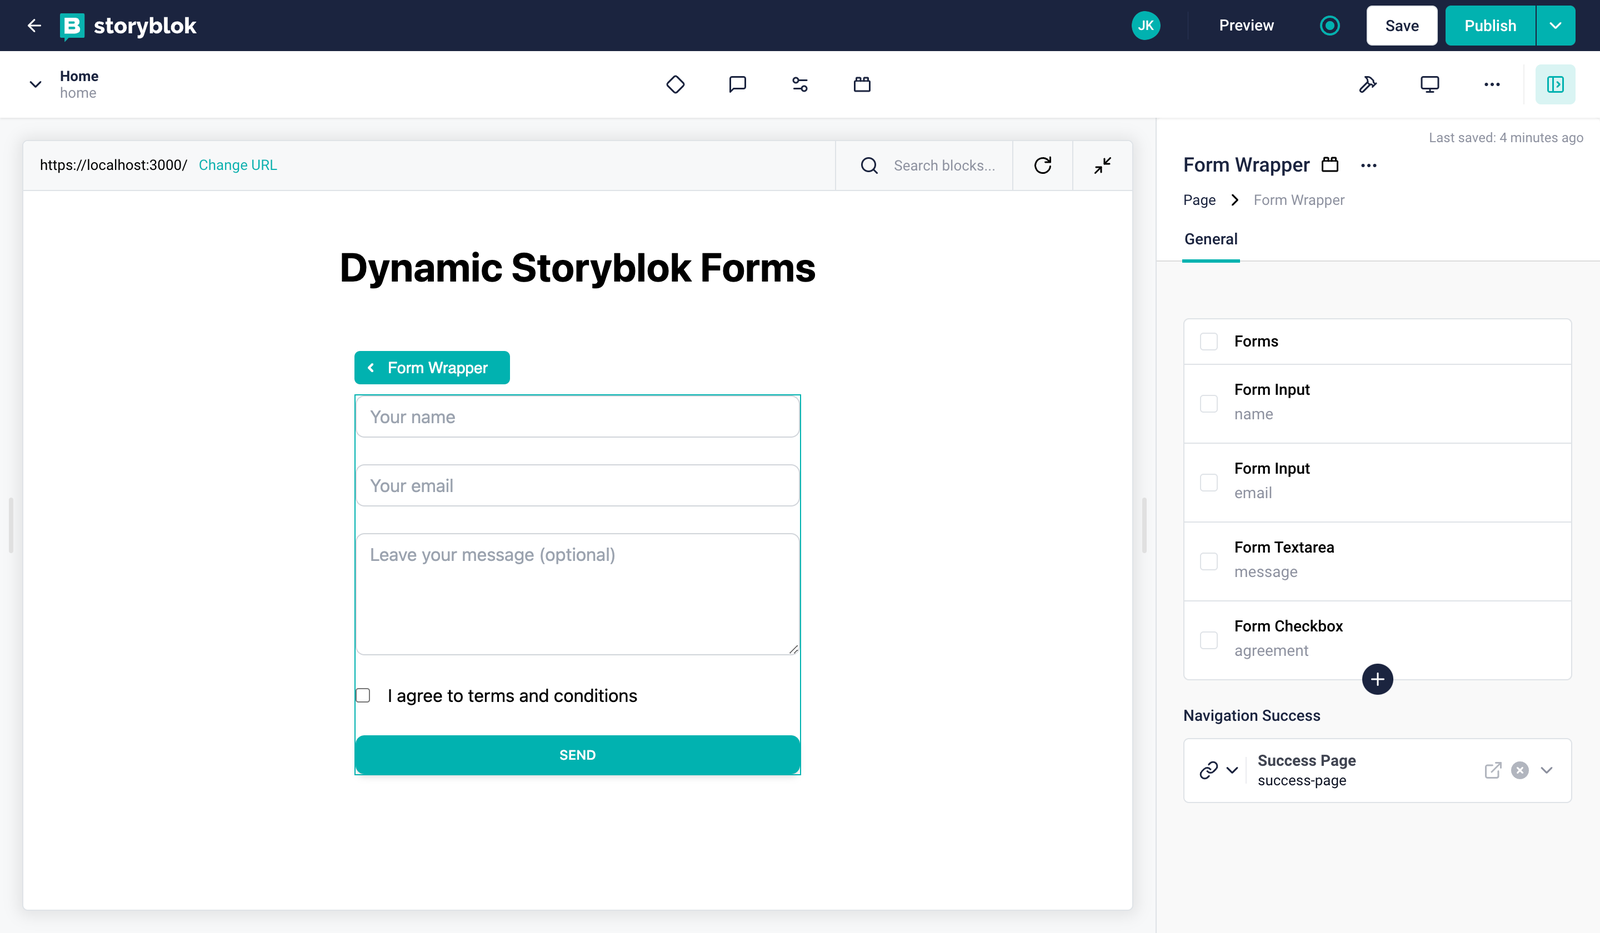
complete Storyblok dynamic form
Deploy to Netlify and create a hook.
Add your new site in Netlify by clicking on Add new site.
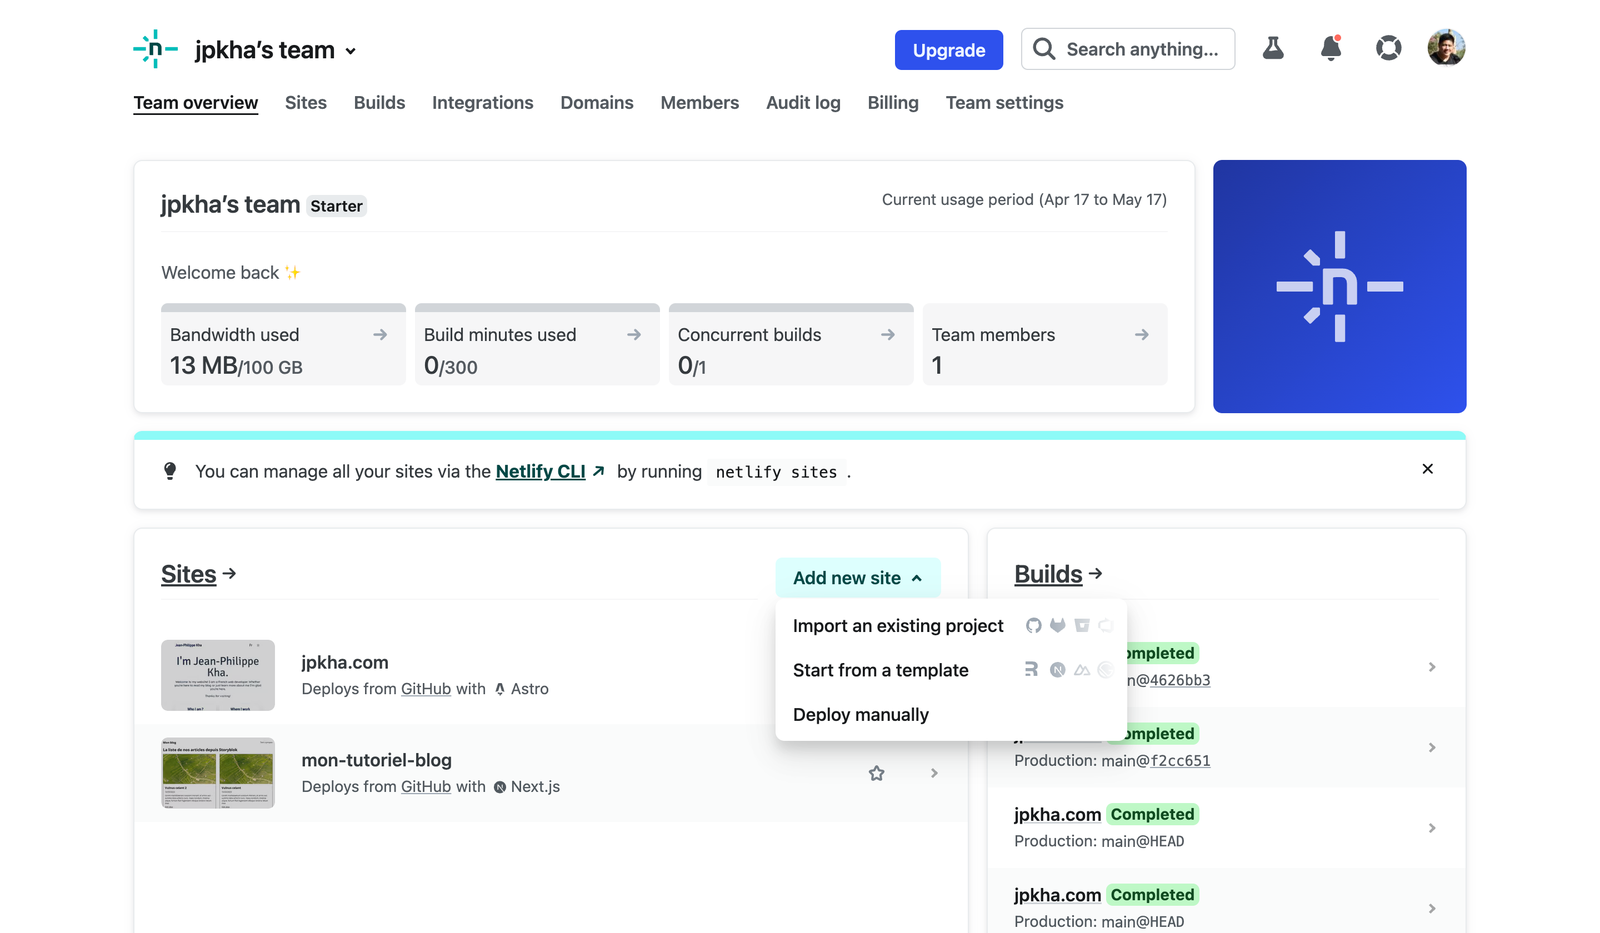
deploying to netlify
Add the different variable PUBLIC_ENV and STORYBLOK_TOKEN_ACCESS
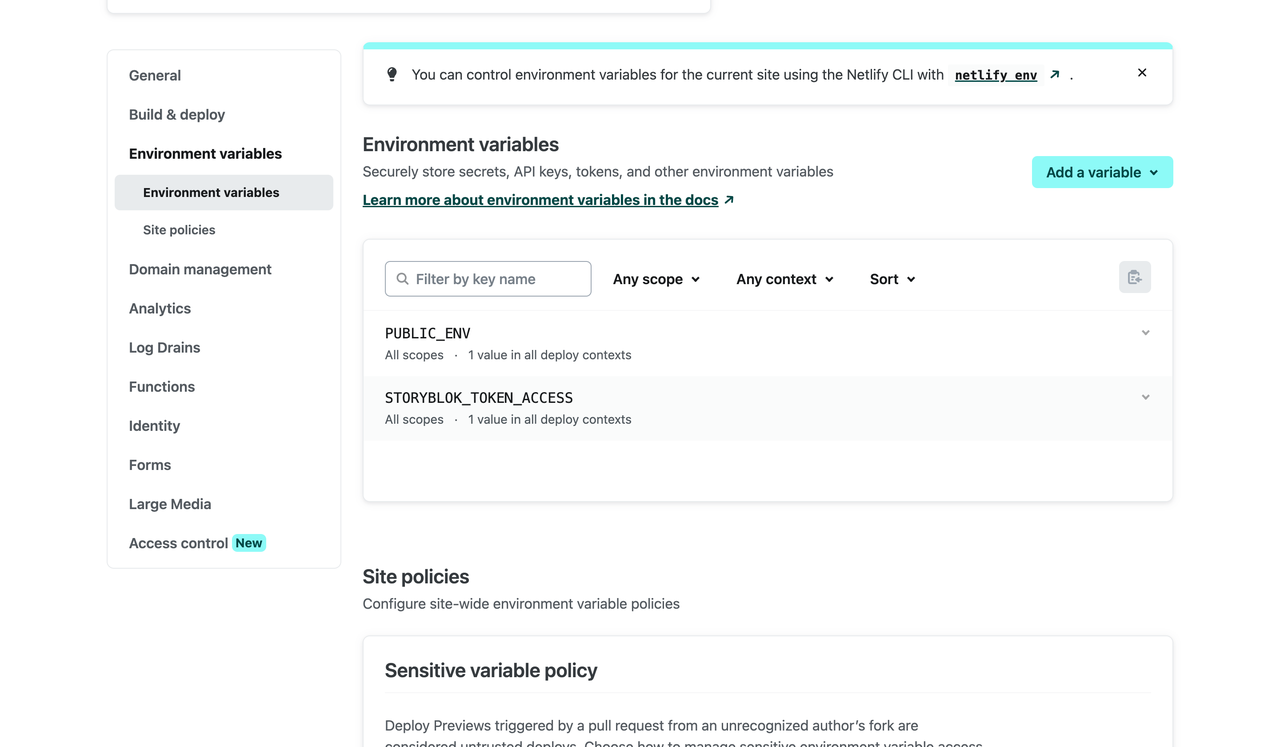
Netlify environmental variables
Make sure that your build is completed and deployed. If not, trigger a new deployment.
If everything is ok, go to Forms, you should have something similar to the image below:
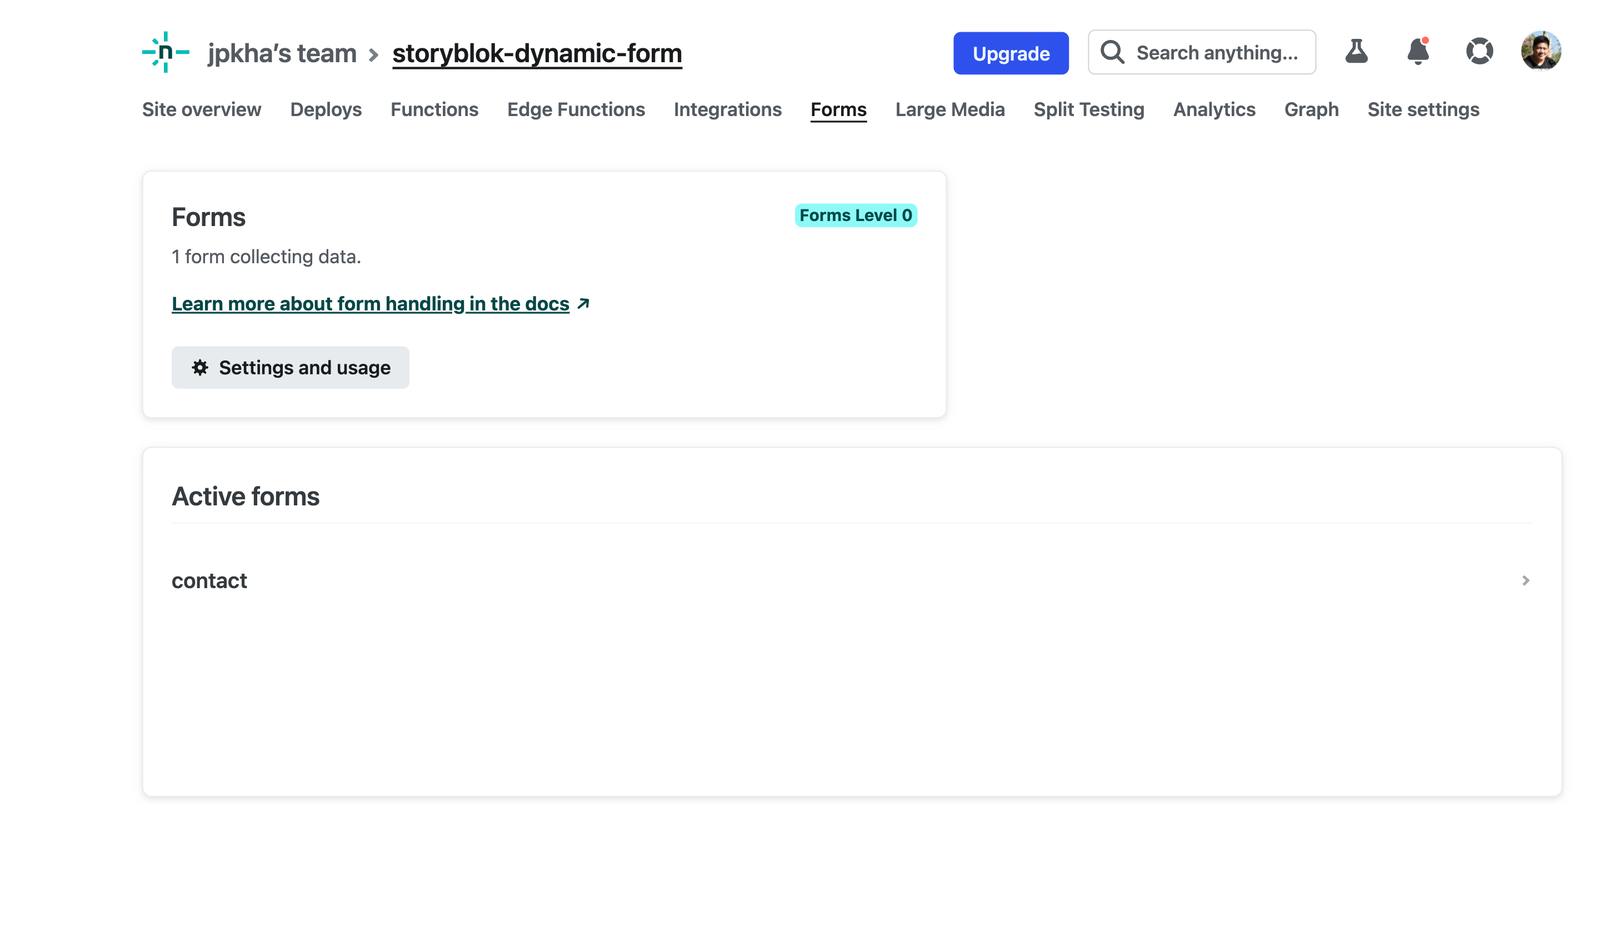
Storyblok netlify form
Add a notification by Email, so you can get a mail when someone fills out the form.
Let’s try our dynamic form
Now you can test on your website, which is deployed.
Fill out the form, and you will get some errors if you do not fill required input.
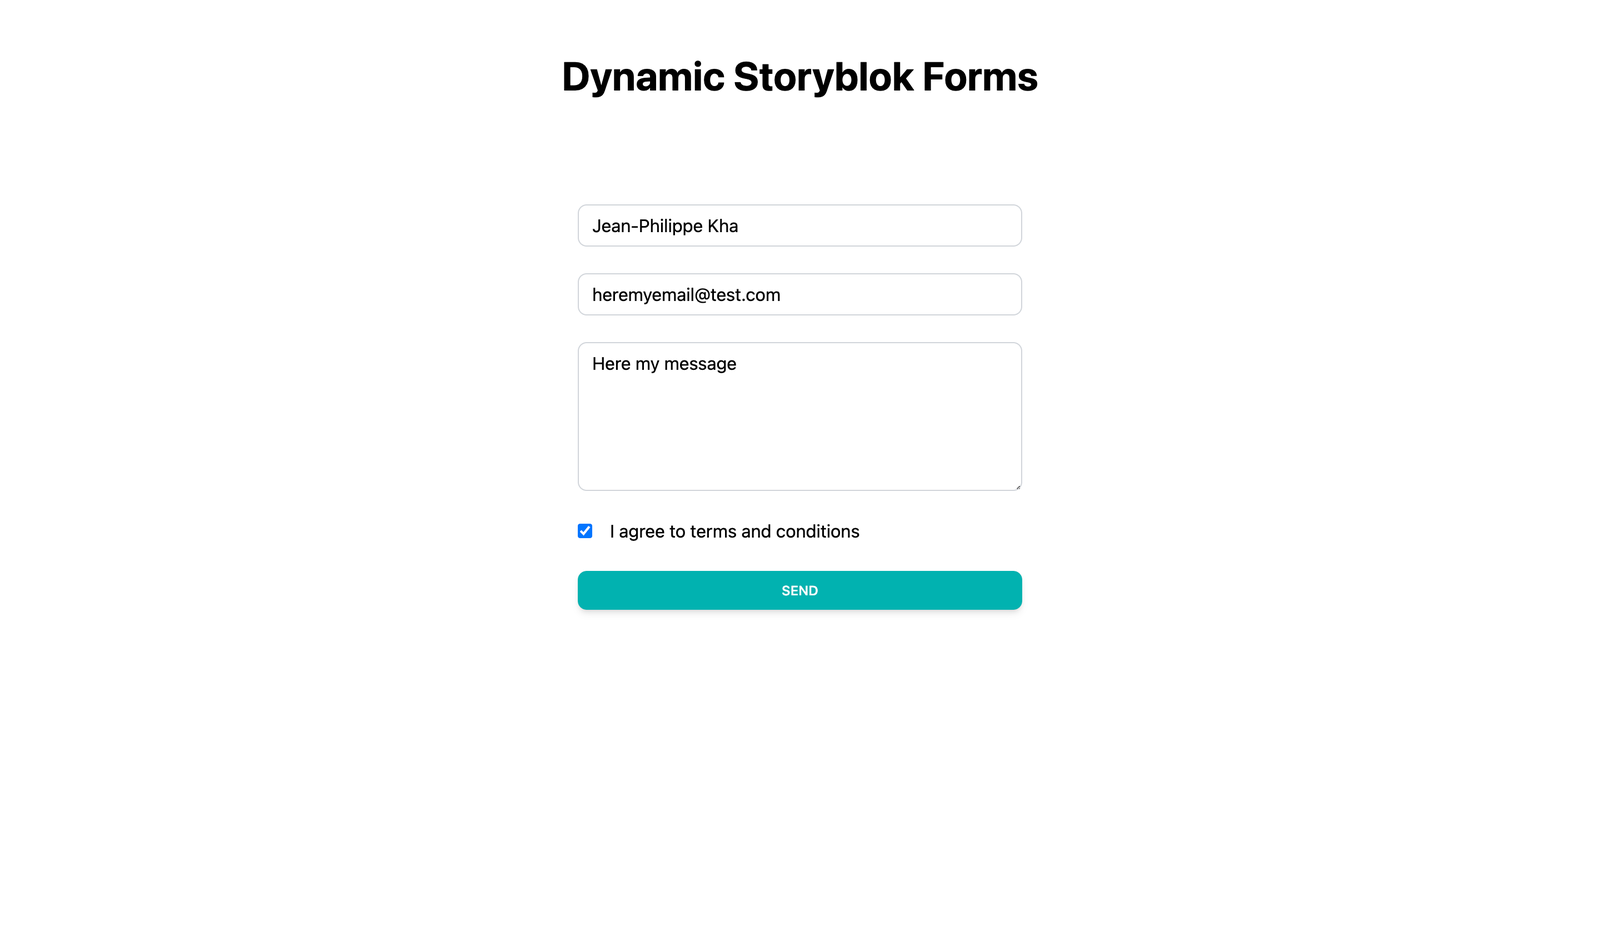
complete storyblok dynamic form
Then, when you fill out the form you should be redirected to the Success Page we create.
Form success page
Now you can check in your mailbox that you received a new mail with the date you used to fill the form.
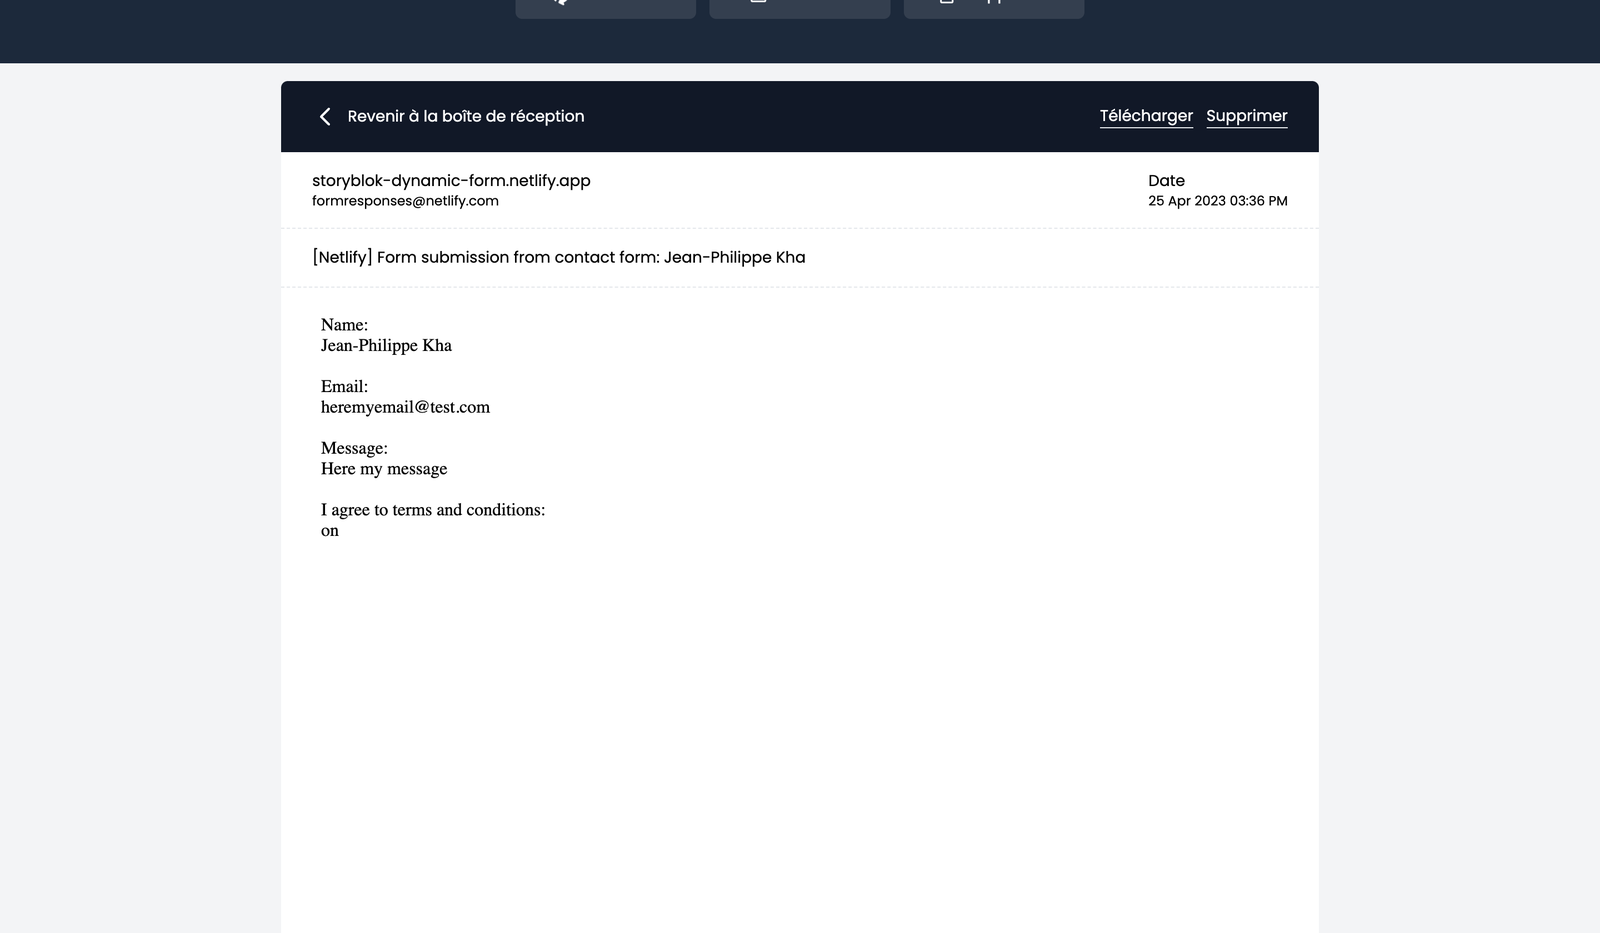
confirmation mail
Wrapping up
This tutorial introduces users to managing dynamic forms with Storyblok and utilizing the Netlify email hook to receive form submissions. You learn how to create a simple form, and also how to incorporate additional input fields such as date, file, and hours, and customize a visually appealing success page to enhance the user experience. With Netlify, you can enjoy the convenience of up to 100 free form submissions per month, making it a great option for small businesses in early stages.
