No code, no problem: How to manage AR content with Storyblok
Storyblok is the first headless CMS that works for developers & marketers alike.
AR is a big thing now, but how do you manage that kind of content? Do you need to be a developer for that? Our answer is no.
My name is Brandon, and I will show you how easy it is to use Storyblok for your no-code apps in Bubble.io. We will build a page containing content from our VR retail-store proof of concept. We will include a logo, some product details, 3D objects, and even augmented reality capabilities – all without writing a single line of code.
Watch the step-by-step tutorial or read the details below.
How to manage AR/VR content without coding: Step-by-step tutorial using Bubble.io and Storyblok
First of all, there is a perception that managing AR is very complicated, and you need a developer for that. However, if you already have content tailored for the augmented reality experience, you can manage it without any coding skills. Here is how to do that as a non-technical person:
Step 1: Get started with Bubble.io
Bubble.io is a no-code platform for creating digital products. We'll use it to add the content we already have in our CMS to build new experiences.
So, let's jump into Bubble. First, we'll need a couple of plugins for that. The first is a 3D model viewer, which is available for purchase within Bubble. The second one is the API connector. This is the key way we are getting a connection to Storyblok so we can get content to work with.
Step 2: Use the API to create a connection between the CMS and Bubble
Let's go ahead and get an API to start building something. In the Bubble app, we are connecting the existing API and adding a call to it, so it can transfer data between two apps.
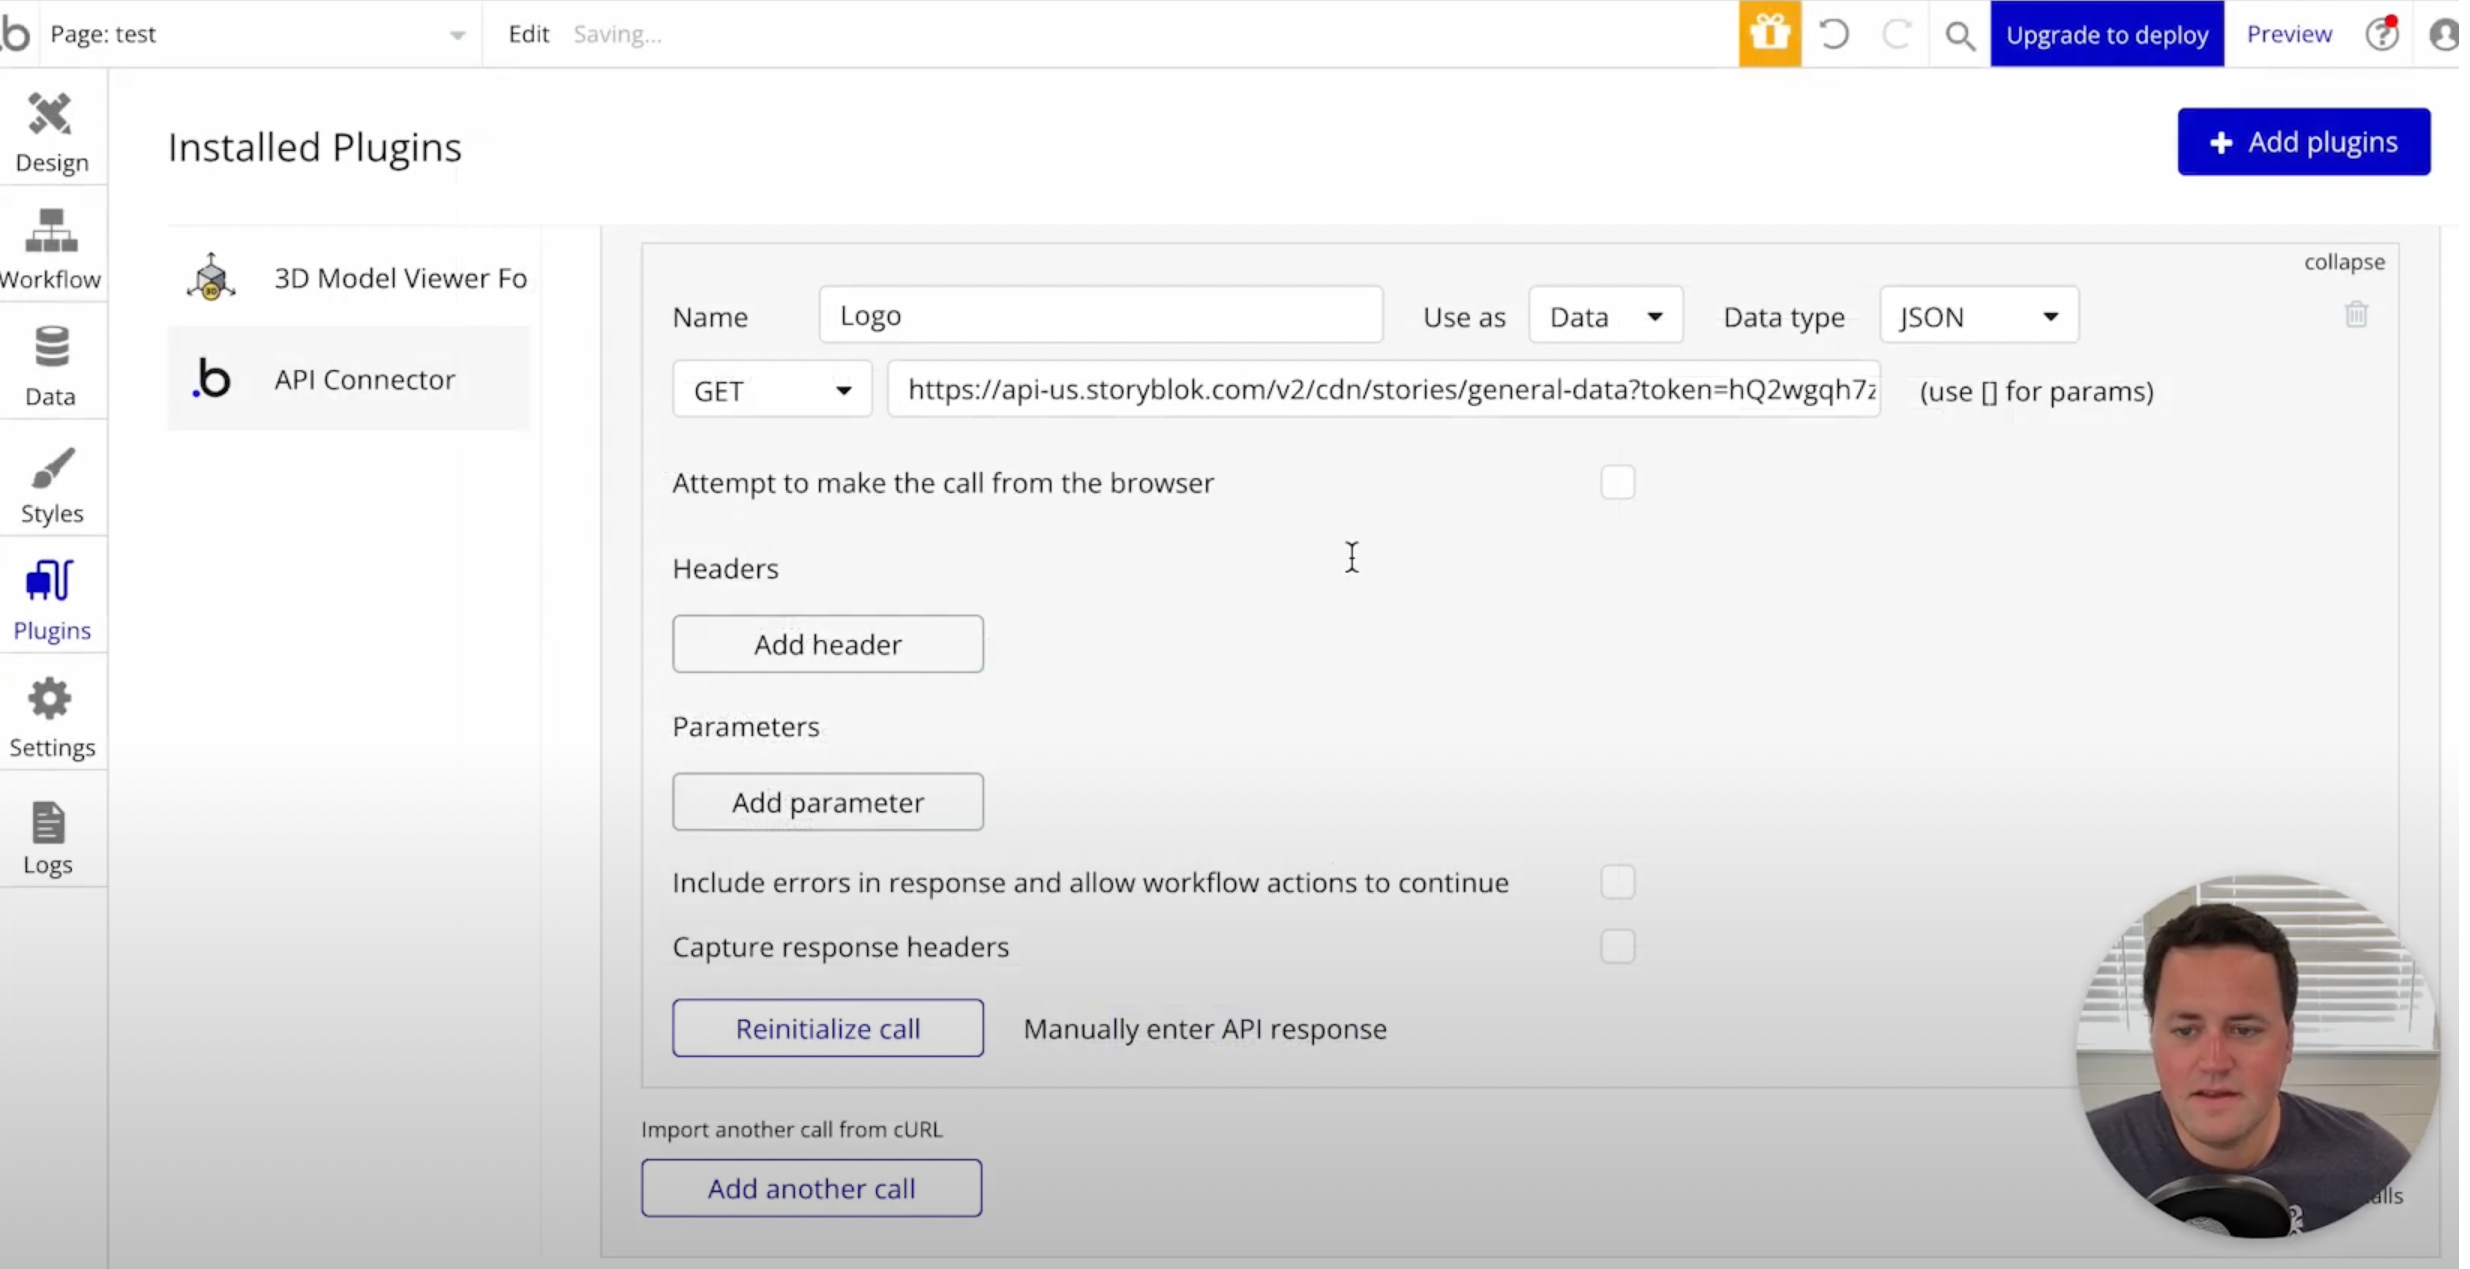
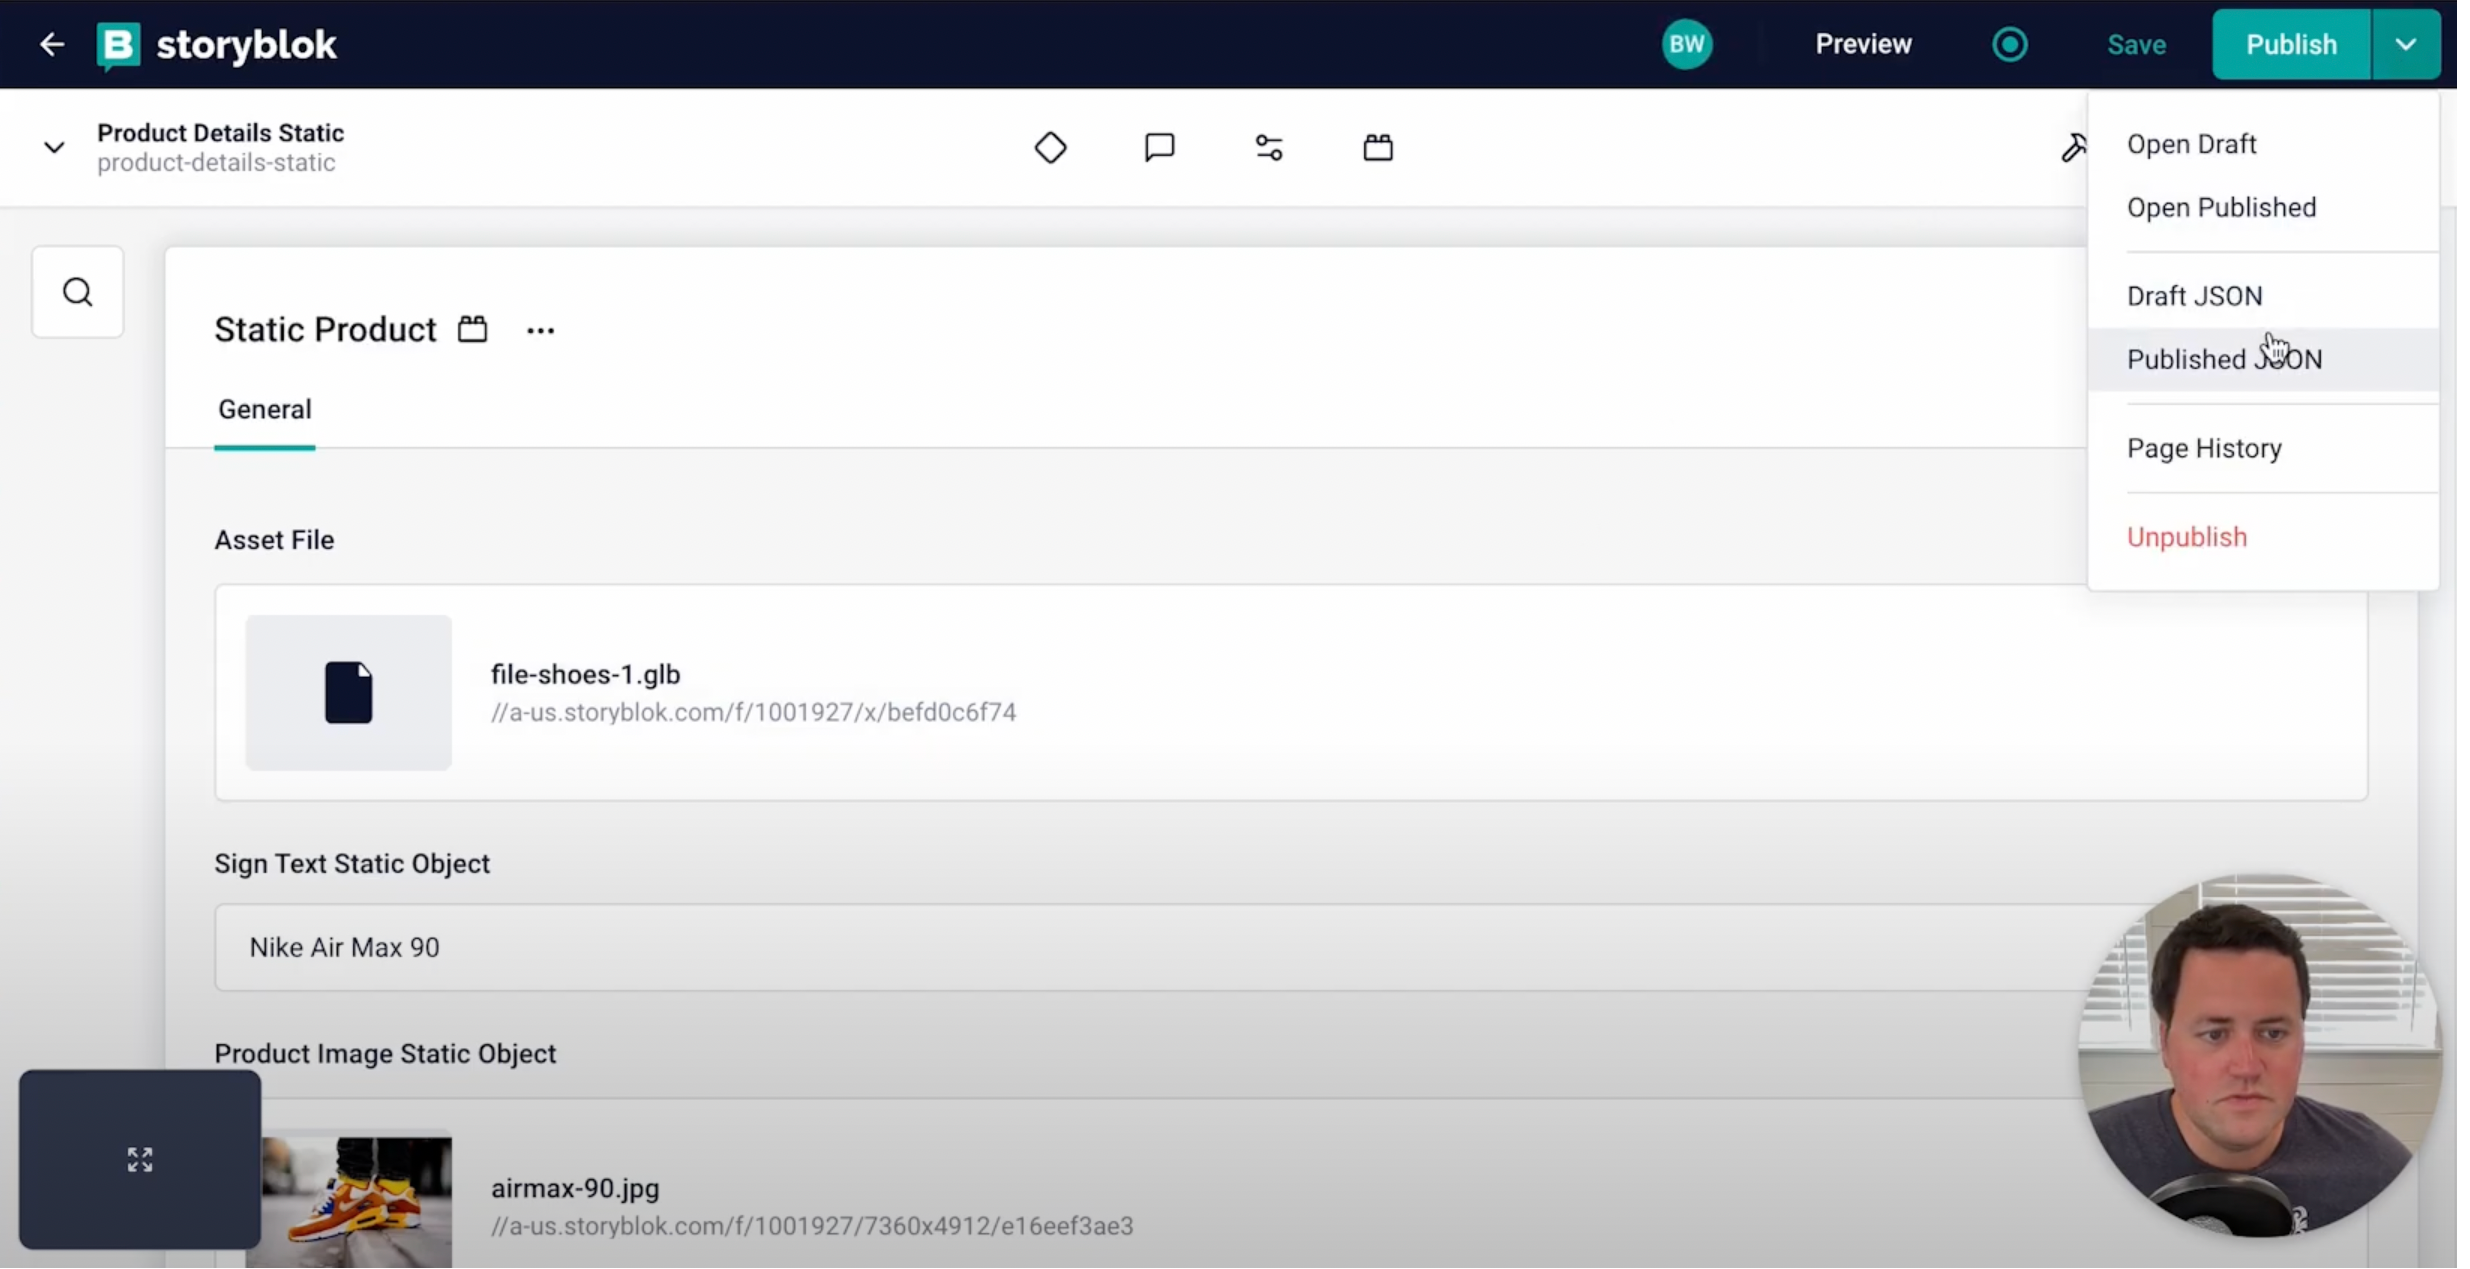
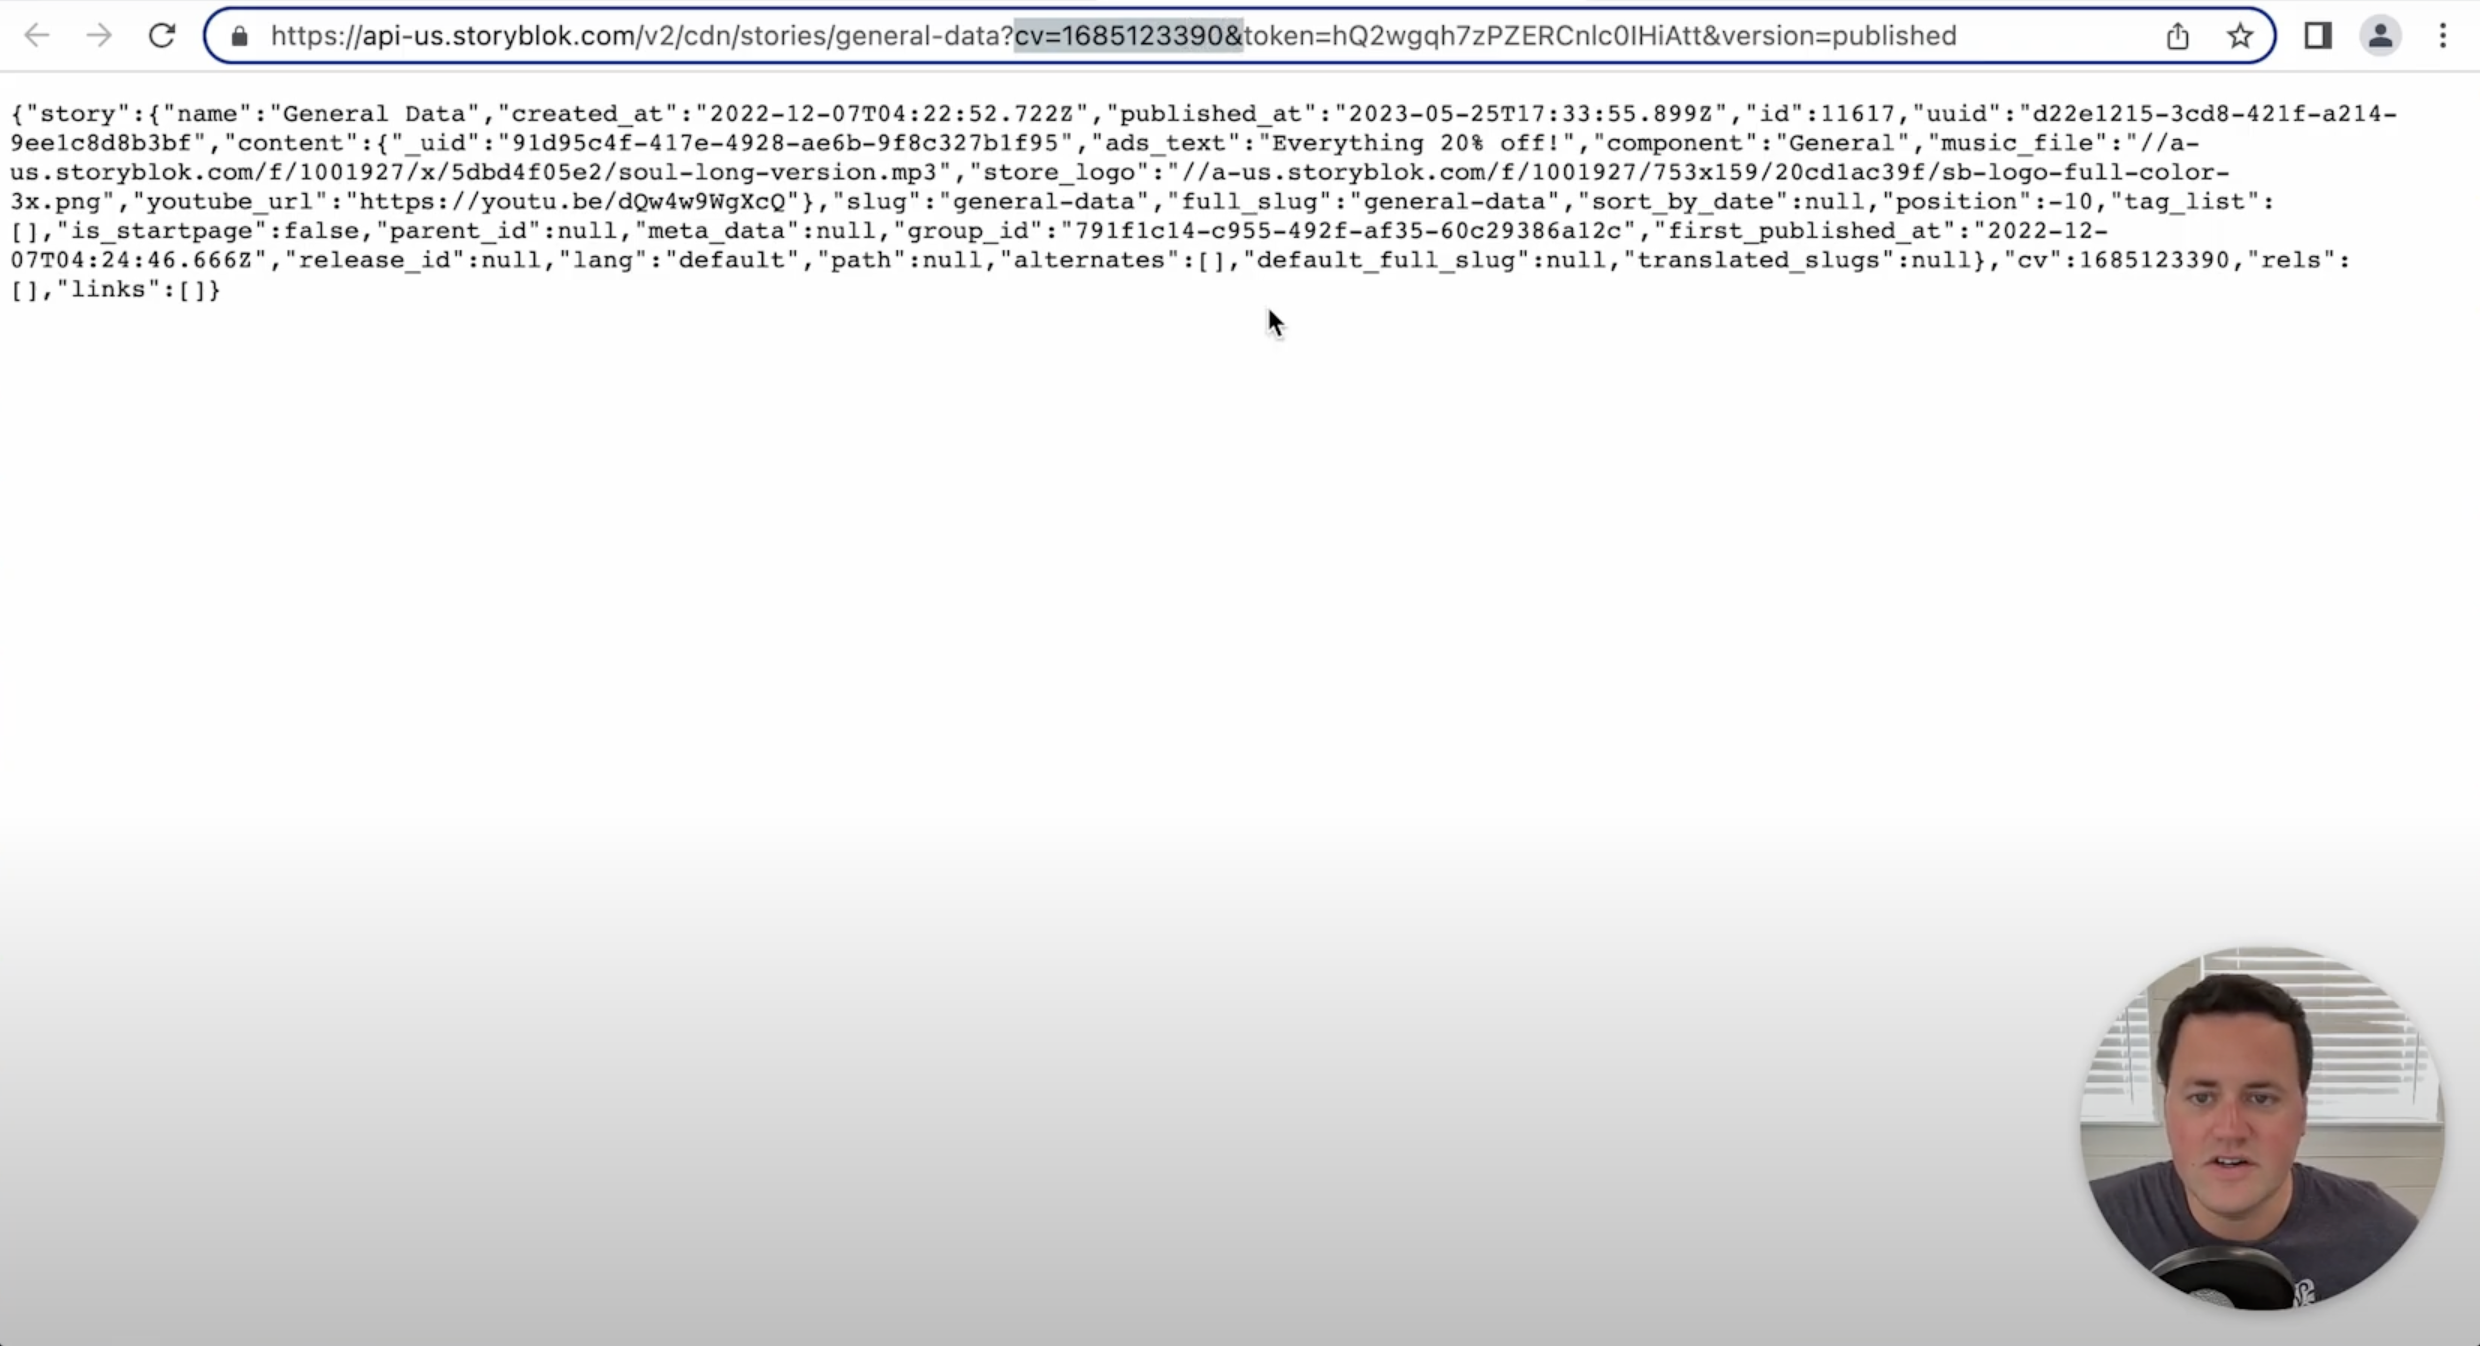
The first thing I want to add is a logo, so we'll create a call for that. How do we get information here? We'll go back to Storyblok, to General Data. This is where our logo exists. To get it from here, we'll go to the "Published JSON," and delete the versioning information from the URL. We can copy this URL, paste it into the API connector section, and simply initialize the call.
So Bubble parsed the data from Storyblok using the API, and now this data can be used within Bubble.
Step 3: Transferring more data from the CMS to Bubble via an API
Now we need an API call to get the product information. This time, I'll give it a "Product" name and again, return to Storyblok, find the one we're going to use – in our case, it's the static one. Again, we will view the published JSON and remove the versioning from the URL. We'll repeat the copy-pasting of the link to Bubble and initialize the call as before.
Step 4: Use the transferred data to build an AR experience
Now let's start building something. First, there is a blank canvas, so we'll add the logo that comes from the Storyblok API. That is an image element, so you'll find it in the appropriate section. We'll select the dynamic version and add the data from the external API – the one that we connected. Now, we can pick which field to pull into the app in the Dynamic Image section. Obviously, it's the Store Logo in our case. We can also adjust the layout, for example, center the logo as it appears on the canvas.
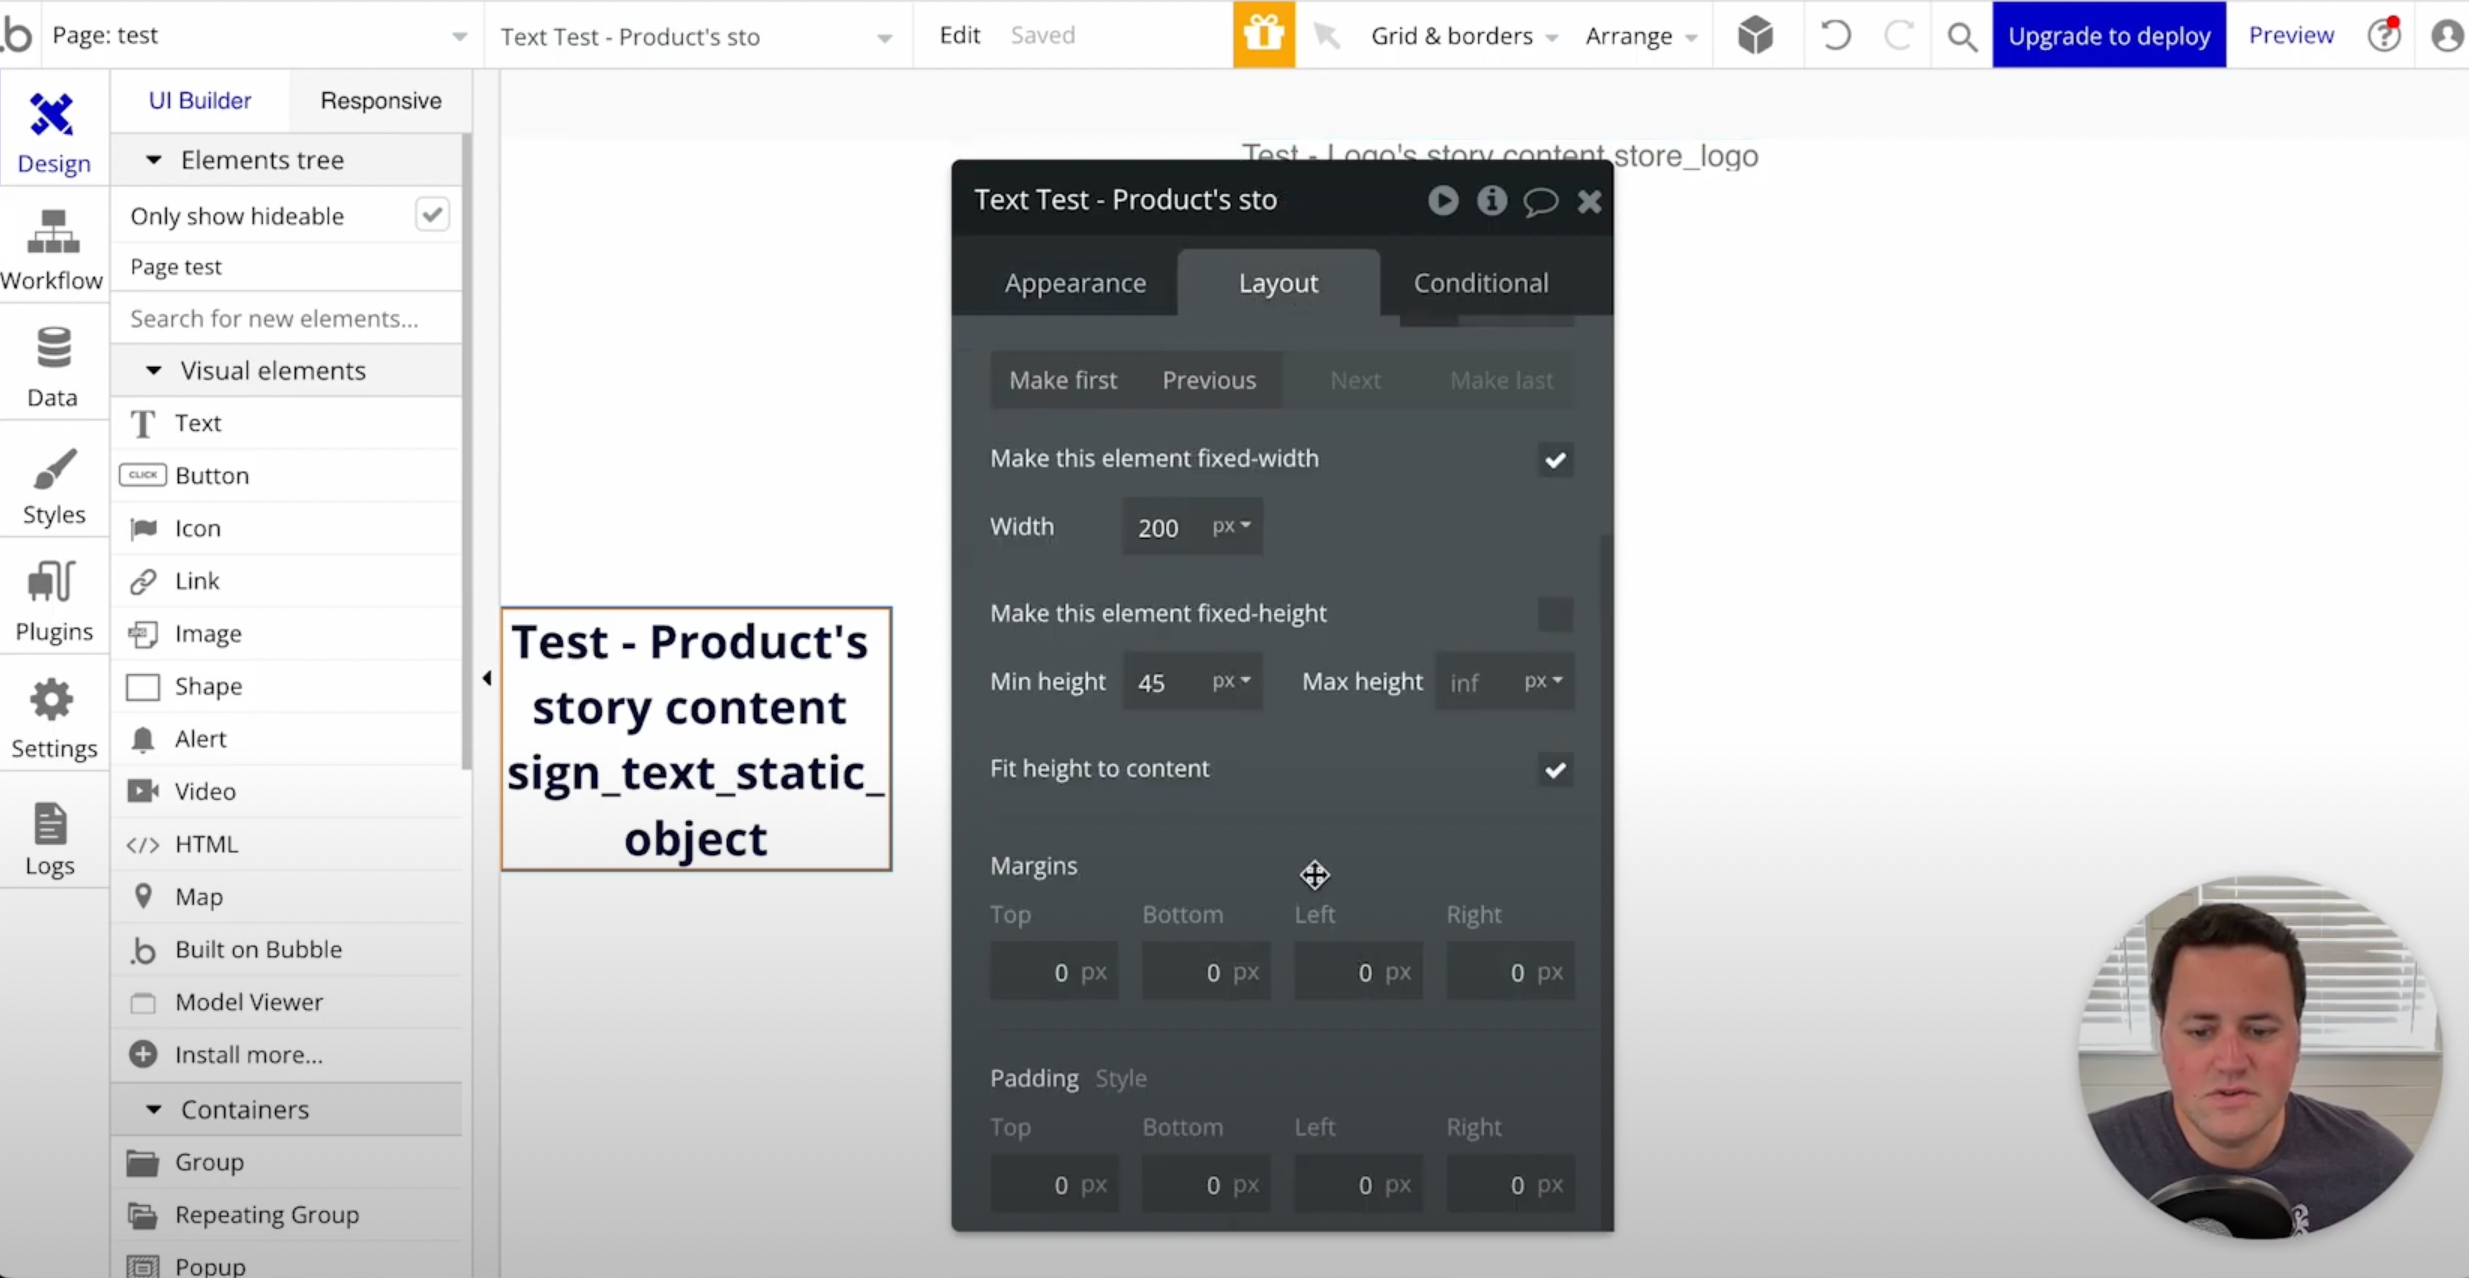
After that, we will add the product name. That will be the text field. So we continue by repeating the same steps as with the logo, but now we'll select the product field in the dynamic content. Here we can also change it differently, for example, by making it bigger or placing it in any position on the canvas.
The next step will be to add the 3D model. It can be included in the Model Viewer plugin that we added previously. The model URL is, of course, coming from the API. With the 3D model, we can do the same things as with the image or text, for instance, changing the size, layout, and much more.
Step 5: Preview the AR experience
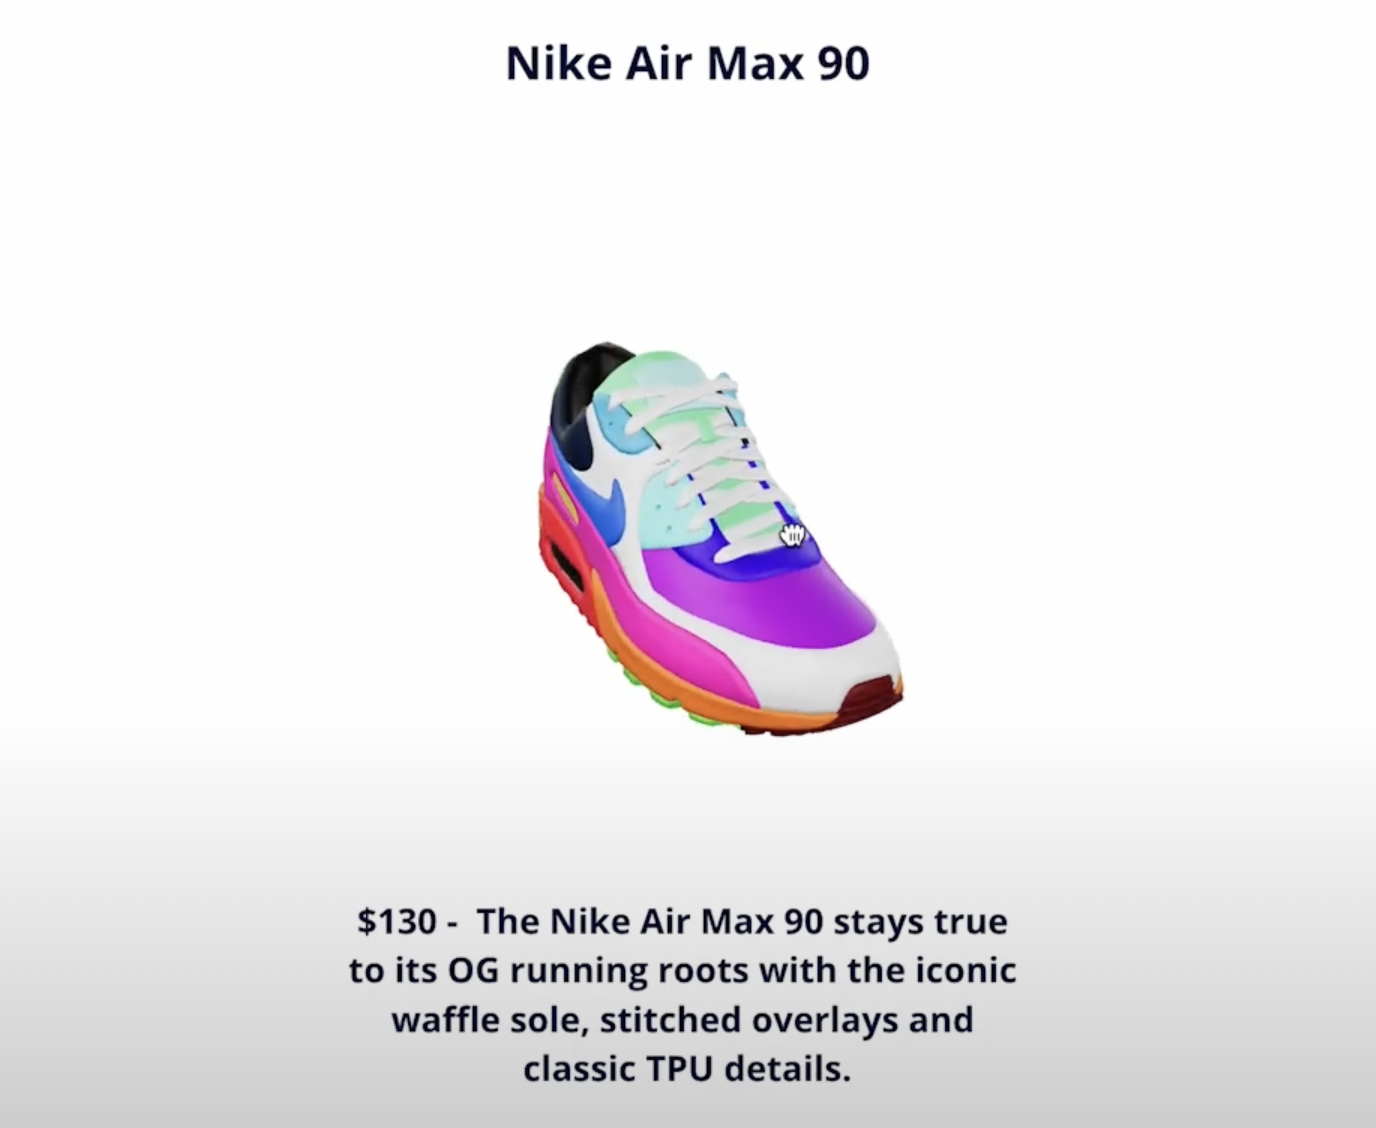
After adding all the information we wanted, we can easily preview the content directly in the Bubble app. Just click the preview button, and here we go. All the content is on the page, and you can even manipulate the 3D object and look at it from any direction to check all the details.
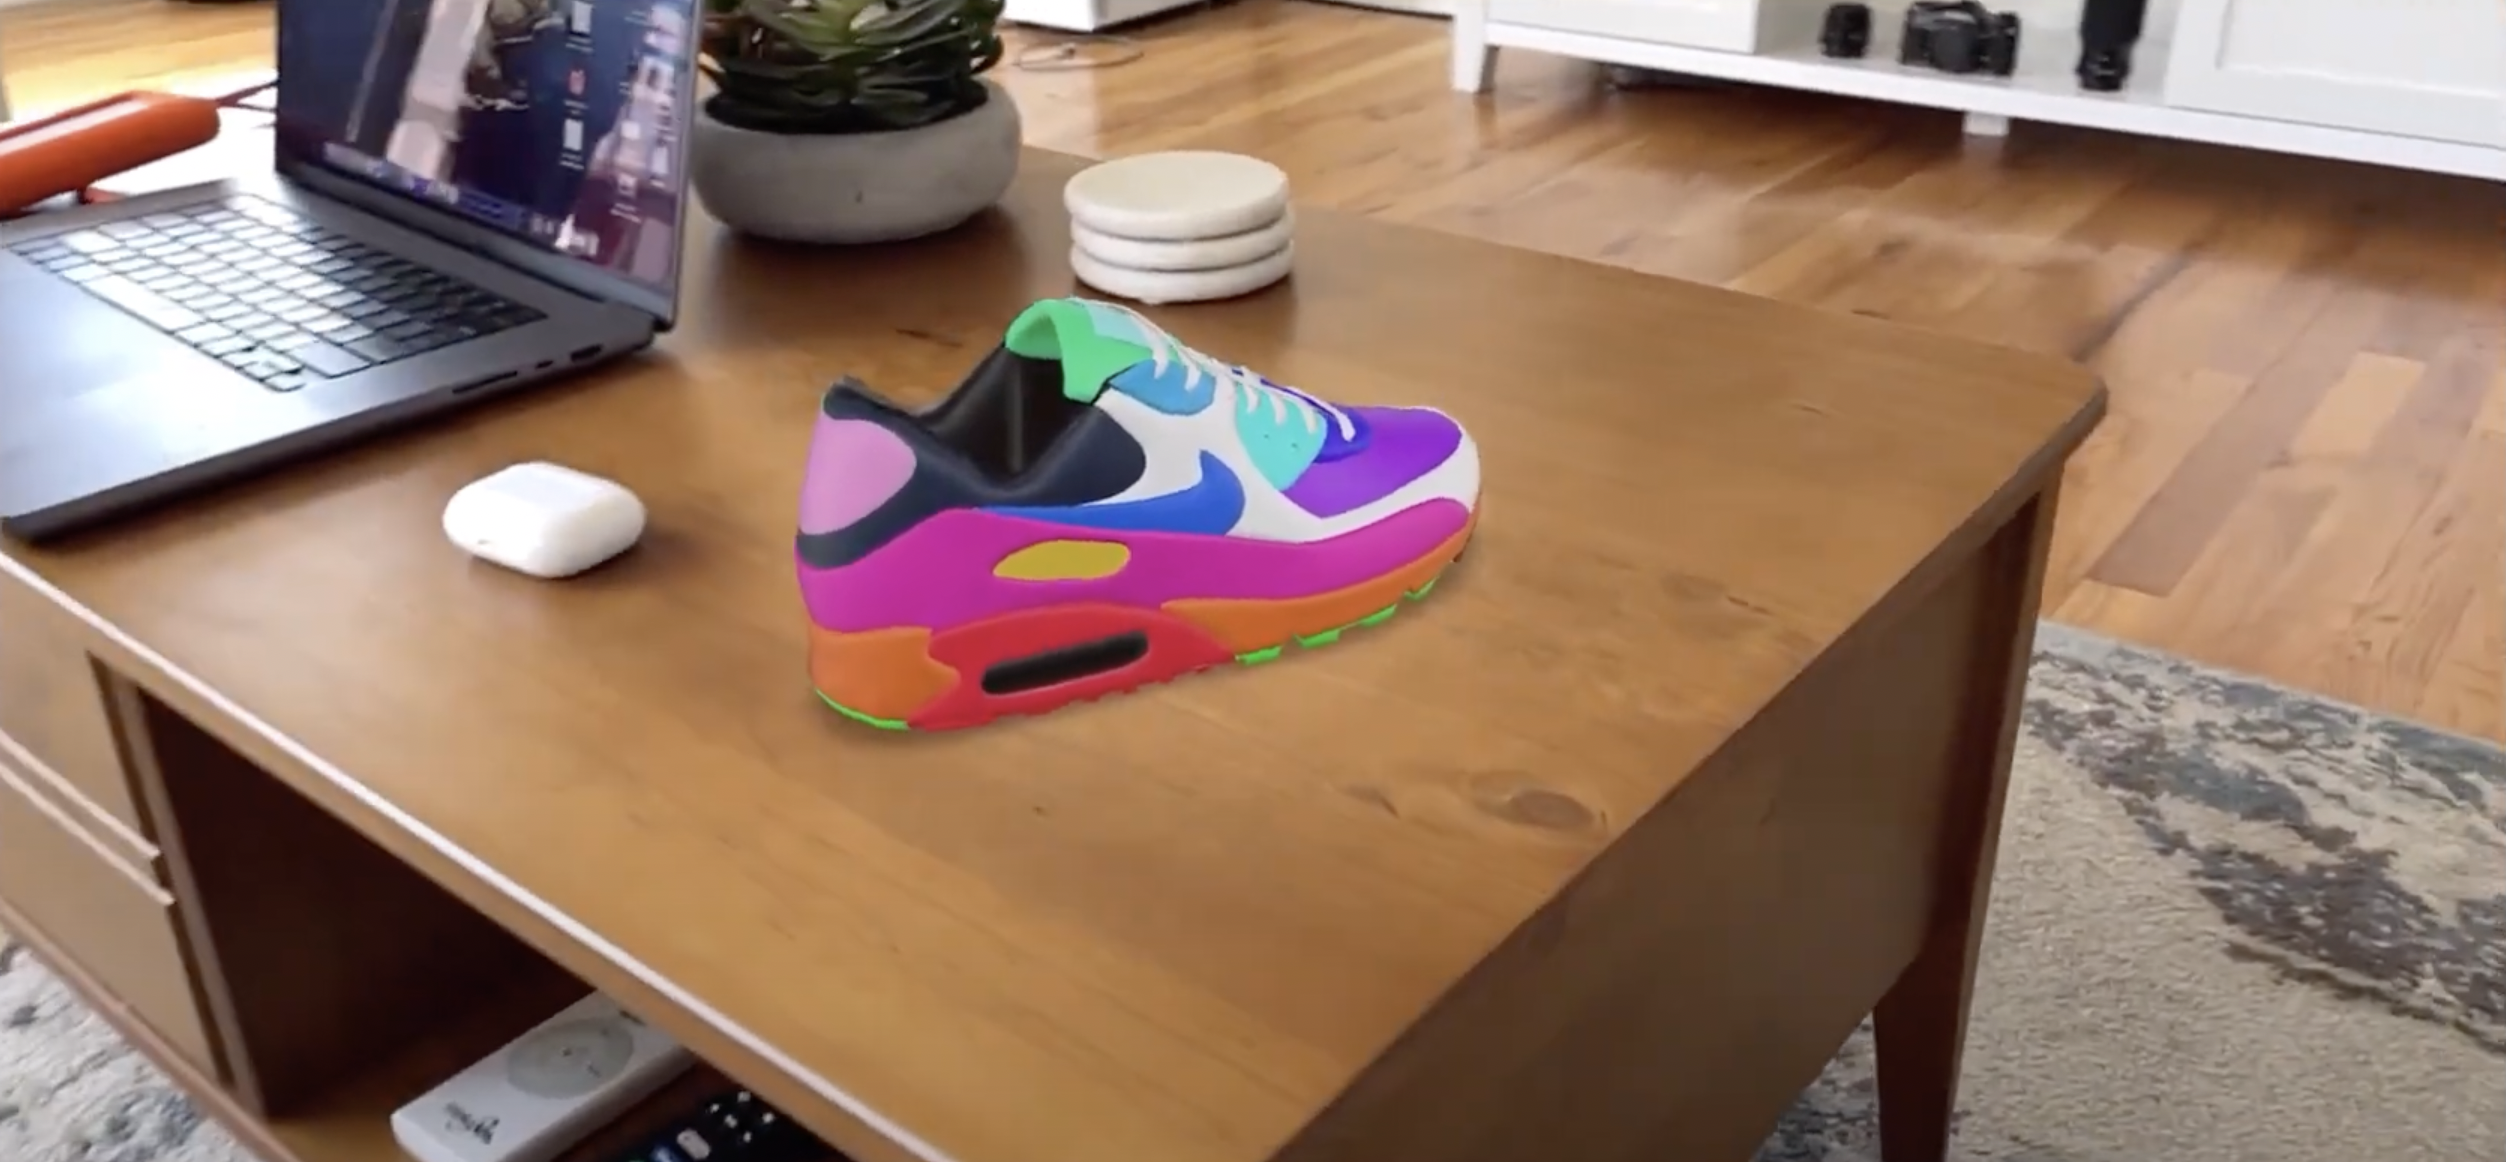
However, the most exciting part is not the desktop version but the mobile one. You can instantly check how everything will look in augmented reality. Here is what the 3D object looks like in my living room.
We hope this tutorial was helpful, and we highly encourage you to try Storyblok for your no-code projects.
With Storyblok - a headless CMS, you can manage any content and publish it across various channels, be it a website, mobile app, AR, VR, IoT, etc.