How to schedule content with Nuxt.js and Storyblok using Releases
Storyblok is the first headless CMS that works for developers & marketers alike.
Storyblok is a really cool Headless CMS with lots of great features. One awesome feature is being able to make scheduled content releases. This is useful for product launches or new campaigns.
There are two great benefits of releases:
- Being able to do scheduled releases at a given time or manually
- Deploy changes from all of your website together
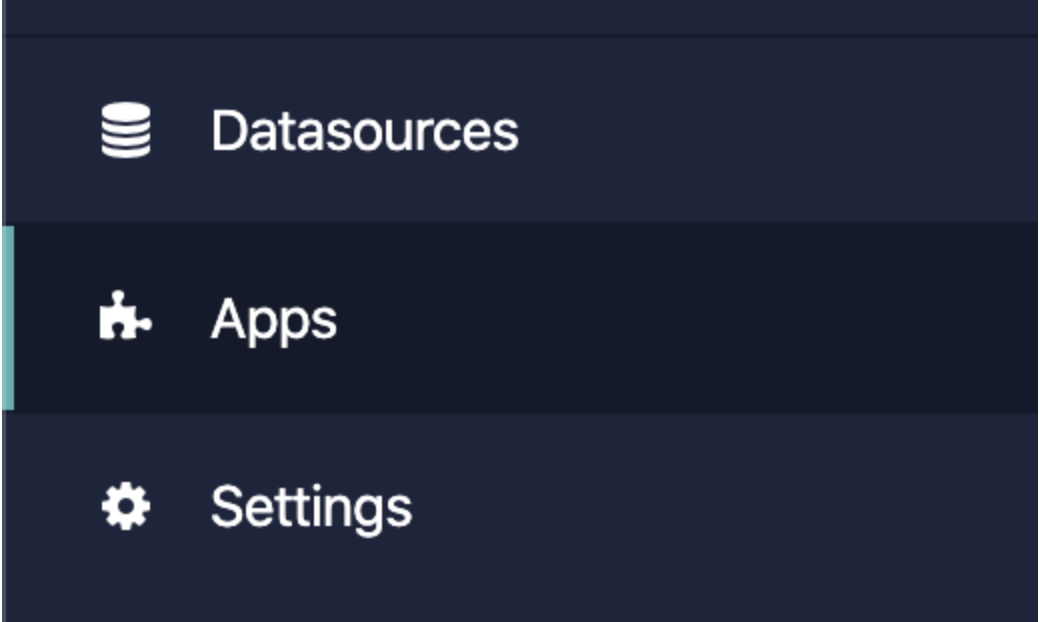
You can find and install the Releases functionality in your Storyblok Apps menu.
Steps to install the Releases app
- Click on the ‘Apps’ item in your sidebar
2. Find the Releases app on the list.
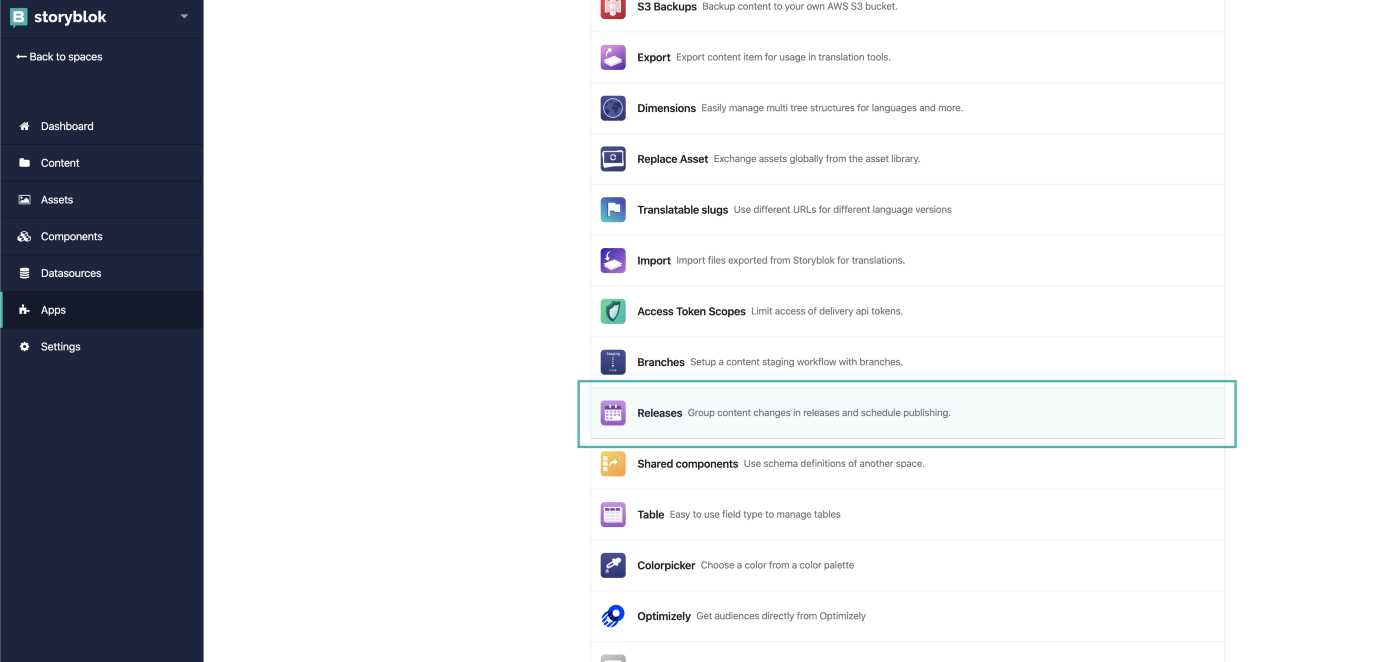
3. Once clicked, it will show a preview and a description of the App functionality.
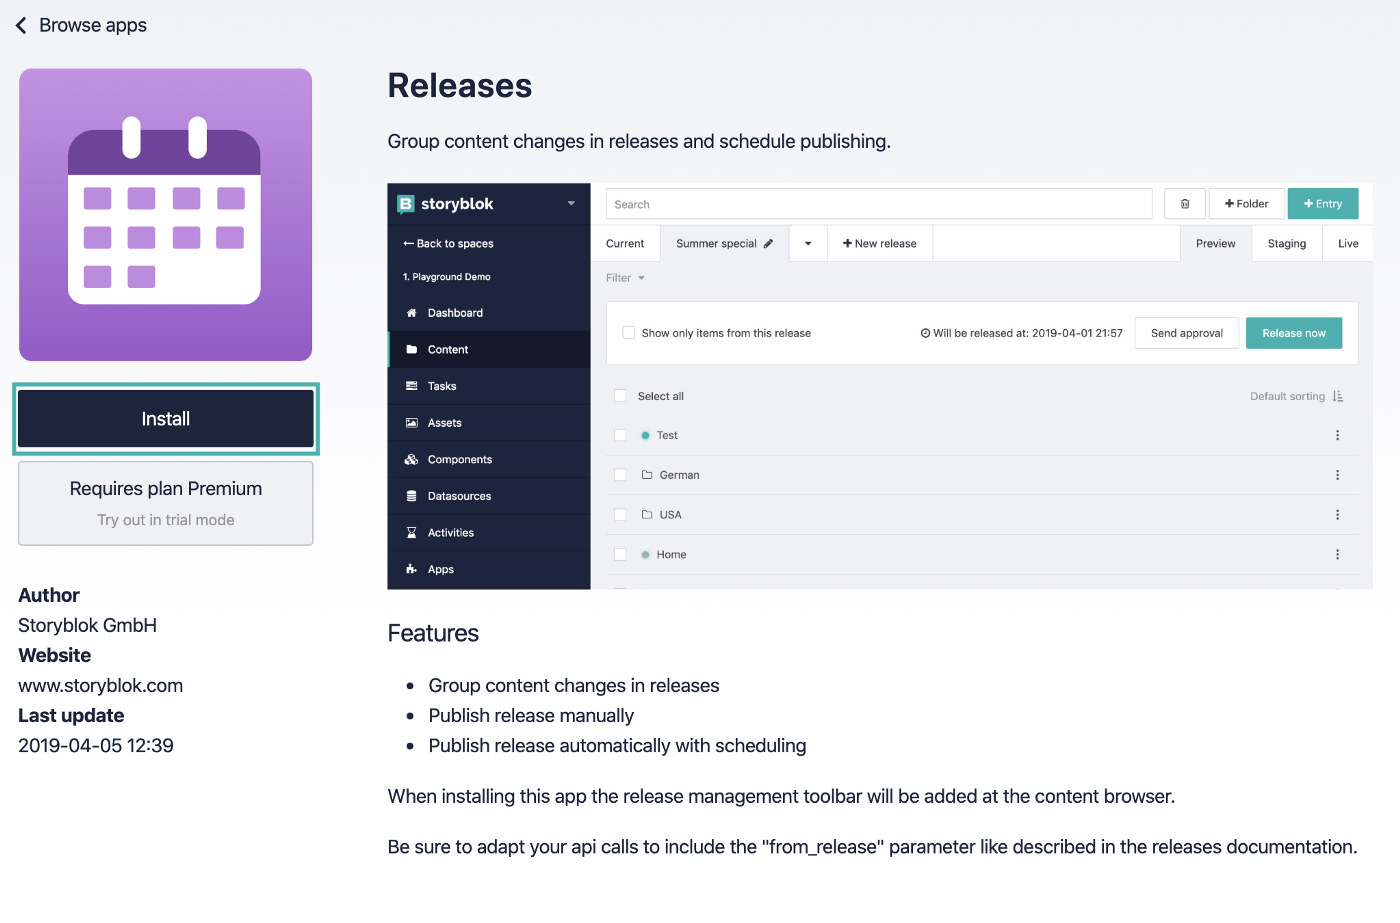
The only requirement is to have the Storyblok Premium plan. You can install it by clicking the ‘Install’ button.
Prepare your code
If you are using Storyblok’s Visual Editor for previewing your content and the Storyblok Nuxt boilerplate project, you will find that the visual preview doesn’t represent your Release changes.
The description of Storyblok Releases even mentions the implementation needed.

The Storyblok Nuxt boilerplate doesn’t include an implementation out of the box. You can implement the Releases into your project by following these steps.
You will need to extend your function of loading Storyblok content in your project. If you are using the boilerplate, you can change this in the /pages/_.vue file the following way.
...
const loadData = function({api, cacheVersion, errorCallback, version, path, releaseId}) {
  return api.get(`cdn/stories/${path}`, {
    version: version,
    from_release: releaseId,
    cv: cacheVersion
  }
}
...
const releaseIdRegex =
  new RegExp('_storyblok_release=(\\d+)')
const releaseMatchResult =
  releaseIdRegex.exec(context.route.fullPath)
...
return loadData({
  version: version,
  api: context.app.$storyapi,
  cacheVersion: context.store.state.cacheVersion,
  errorCallback: context.error,
  path: path,
  releaseId: releaseMatchResult ? releaseMatchResult[1] : null
})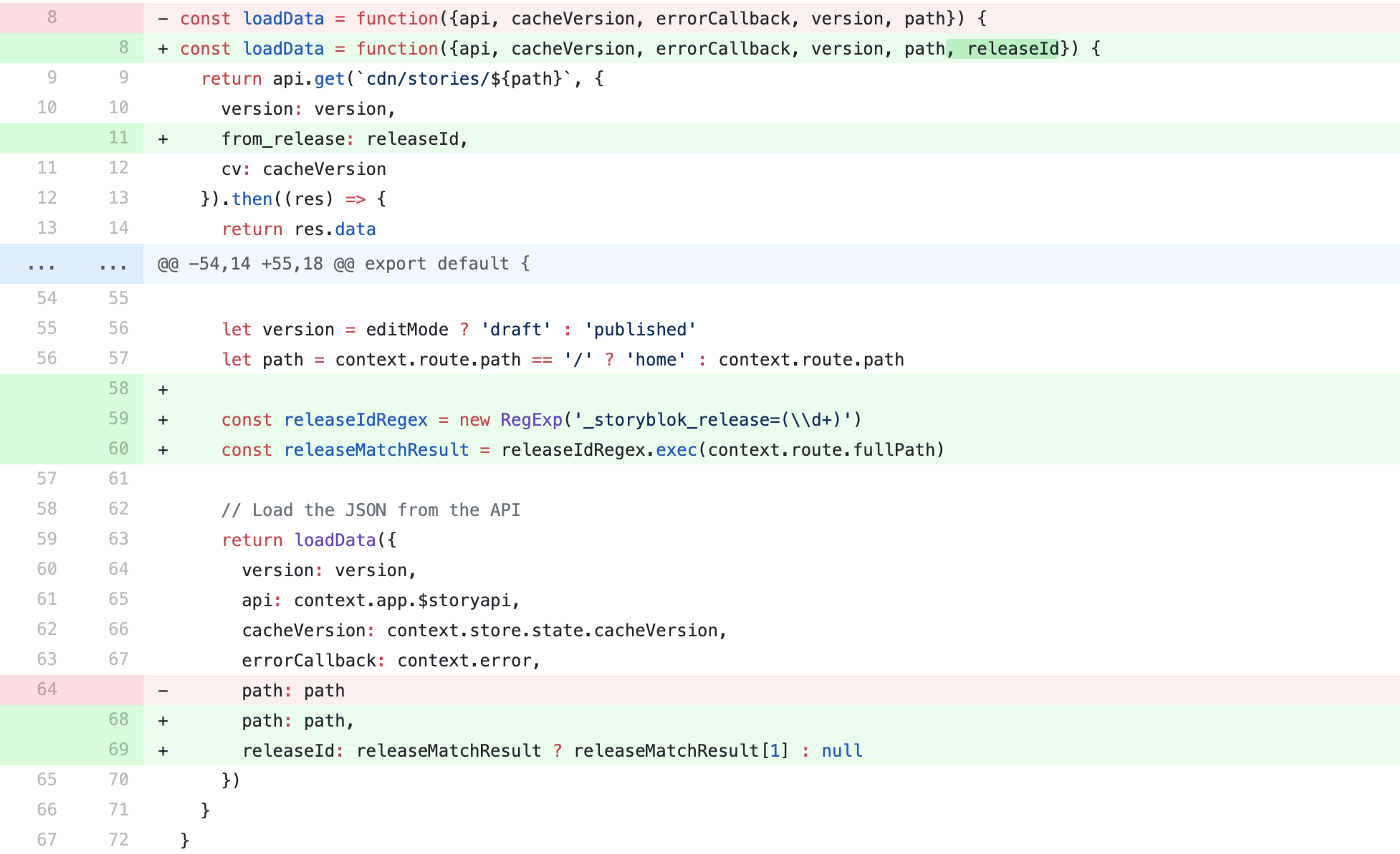
We are adding the from_release object parameter to Storyblok’s API .get call, where we are requesting the current story. To get the Release ID from the path of the given story, we’ve created a Regex pattern.
Storyblok adds hidden URL parameters to your story URL, which you cannot see in your Visual Editor. Upon opening stories in a new window, you will see the full path of the story with every parameter, with _storyblok_release included in the case of using the Releases app. The fallback value for the from_release attribute is null if there isn’t such a URL param.
Creating a new release in Storyblok
Once you install it into your space, you will be able to set up your content releases as separate tabs in your Content board.
- Click the “+ New release” button

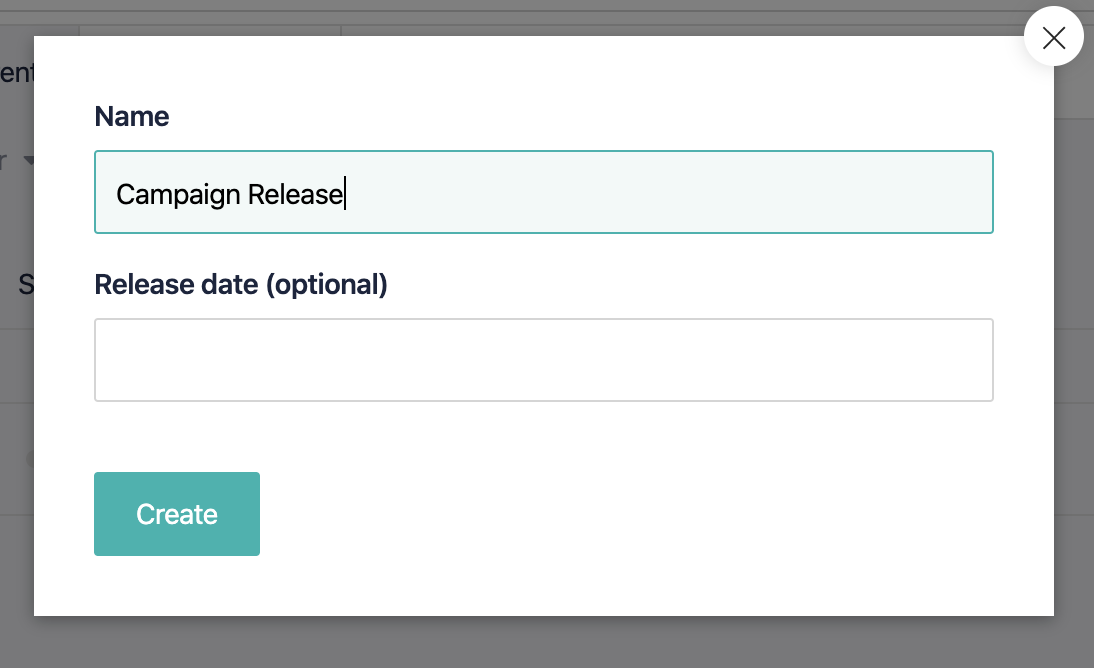
2. In the popup window you can set the Name and optional schedule time of the release, which you can set later on as well.
3. After creating a Release version, you will see your new Release as a new option in the dropdown on mouse hover.
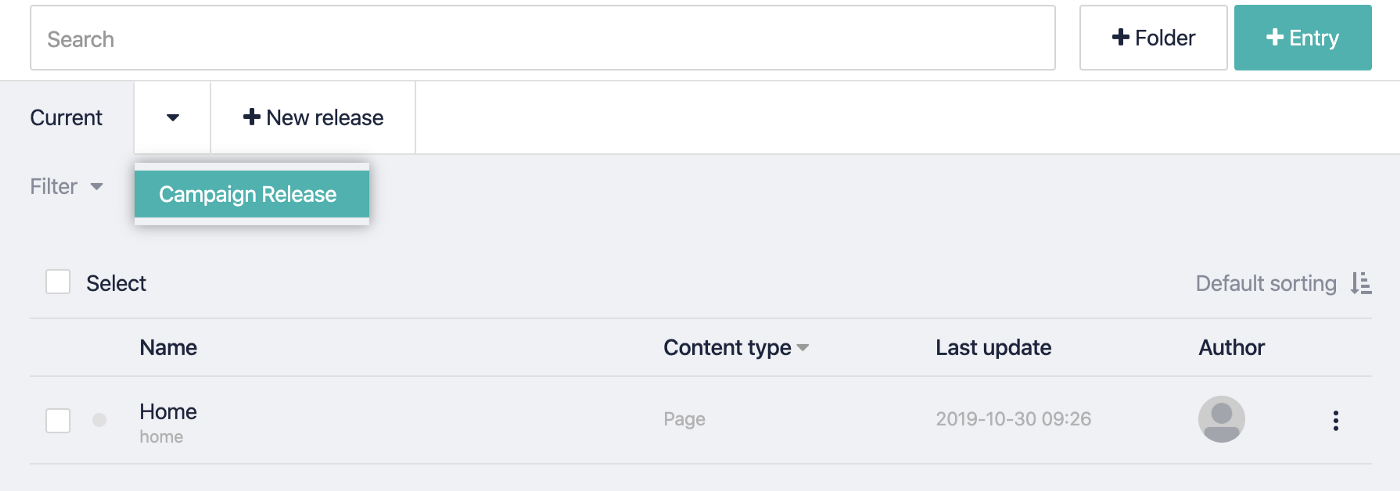
4. Upon clicking the release you have additional options for the specific Release.
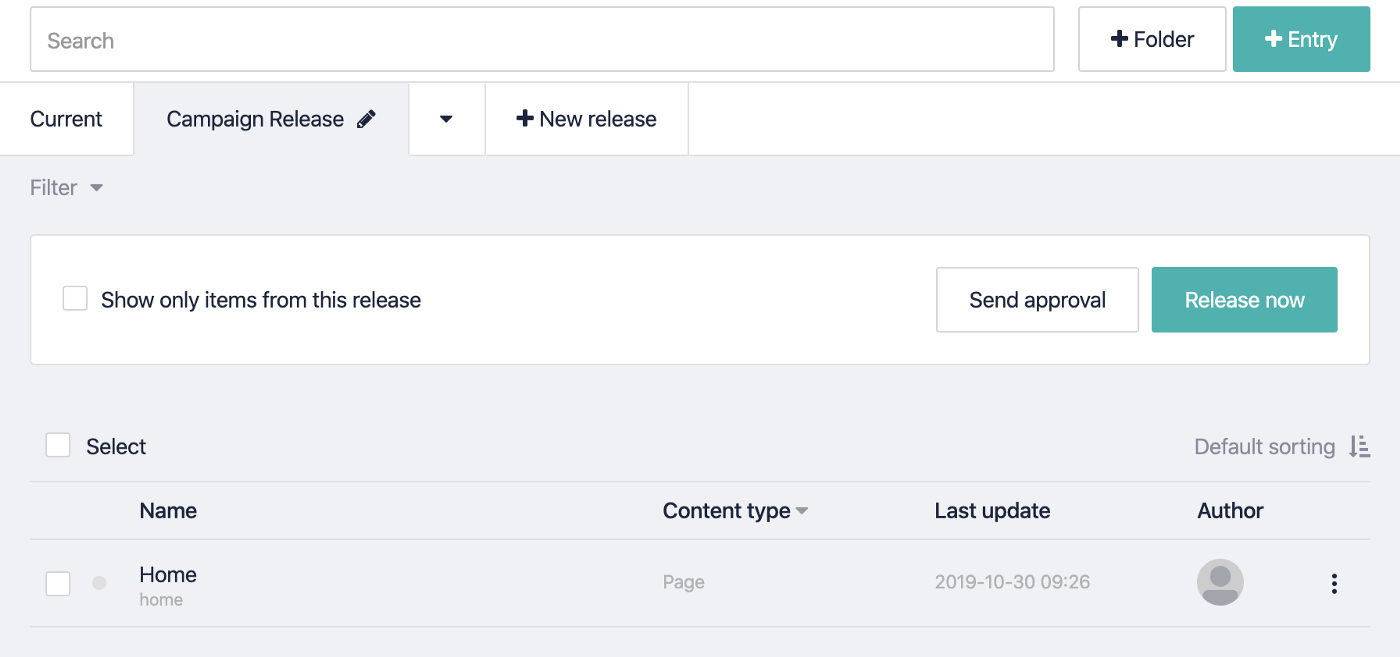
When you change the content on a page and save the changes, you will see a new releases label on the changed content entries. If you want, you can filter out only changed items by checking the “Show only items from this release” option.

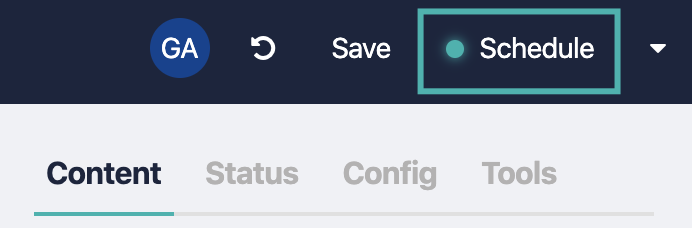
5. To approve your changes for release, you need to do one extra step. In the content page, click on the “Schedule” button in the top-right corner after saving your newest changes.
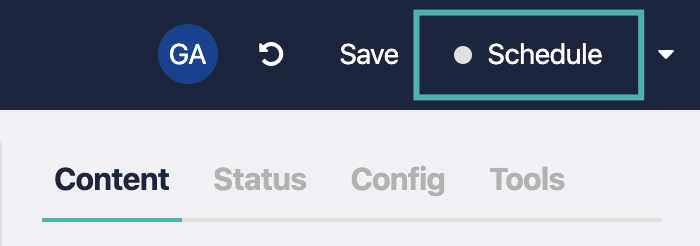
Upon scheduling your content, the indicator changes its color to cyan as well, thus indicating content scheduled for release.
In addition, you can double-check the status in the list of contents.

Bonus: As we mentioned before, you can set a schedule for your release after creating. You need to click the Pencil icon on your release, which opens the popup for editing the schedule.

Conclusion
By implementing these changes, your Visual Editor will be able to render the correct Release version of your content. Scheduled content is a handy addition to an already great CMS. We hope you will implement Releases into your Storyblok project with the help of this guide.
| Source | URL |
|---|---|
| Setup of the Releases app | https://www.storyblok.com/docs/setup-releases |
| Releases App | https://www.storyblok.com/apps/releases_only |
