Add a CMS to Salesforce® in 5 minutes
Storyblok is the first headless CMS that works for developers & marketers alike.
In this tutorial, I will show you how to install and use Storyblok in Salesforce® to manage content and create awesome layouts.
1. Install the managed package
First, you will need a Salesforce developer account and install the CMS as a managed package. The package will install two visual force pages for the admin interface, a custom object for the content storage, and Install managed package. (opens in a new window)
2. Create a Visualforce page
Navigate to the Custom Code {1} section of your Salesforce dashboard and click on Visualforce Pages {2}.
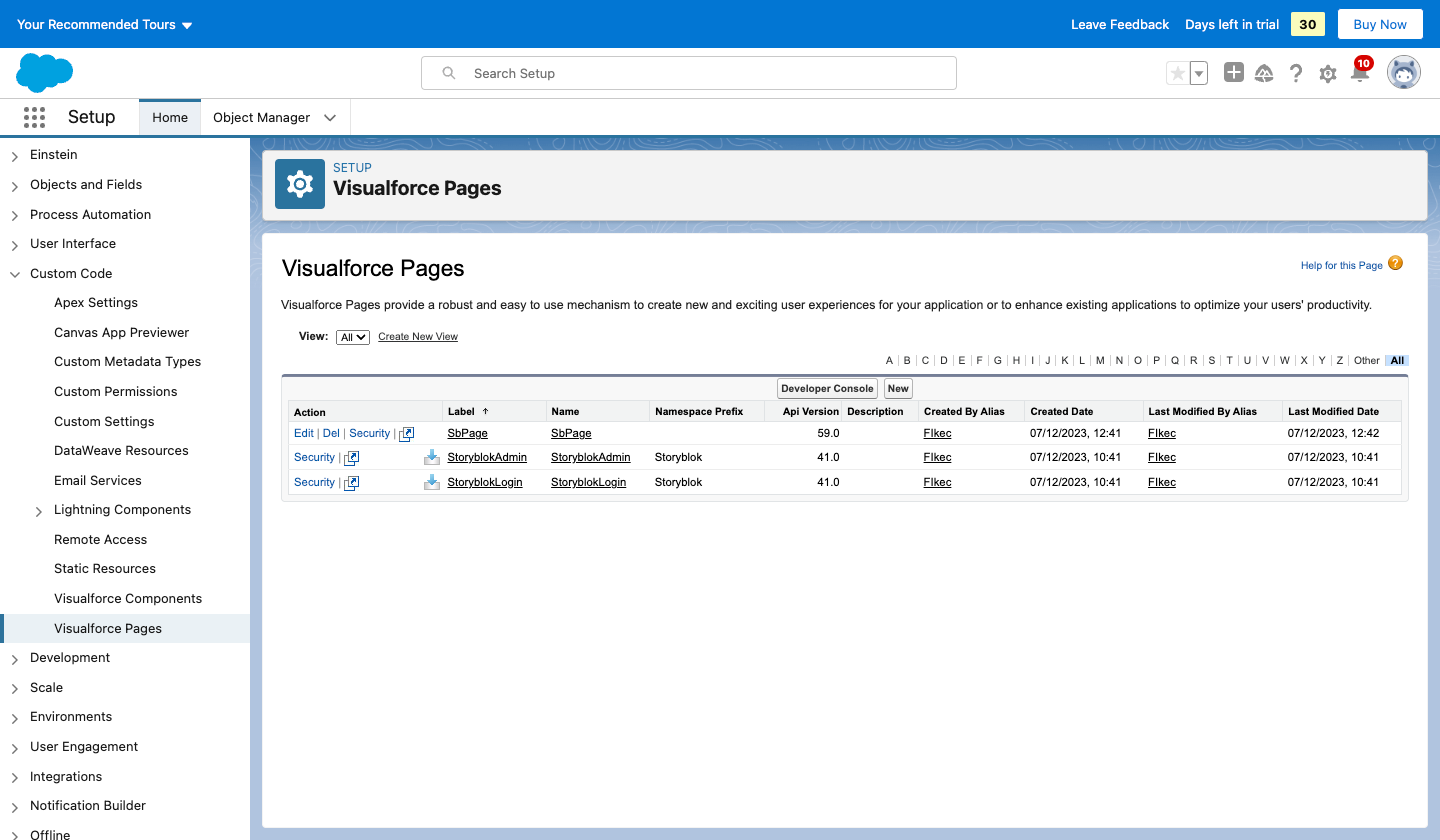
Click on the New {3} tab and then Create a Visualforce page with the name SbPage.page and insert the code below:
<apex:page showHeader="false" standardStylesheets="false" docType="html-5.0">
  <script type="text/javascript" src="https://cdnjs.cloudflare.com/ajax/libs/jquery/2.1.4/jquery.min.js"></script>
  <script type="text/javascript" src="https://cdnjs.cloudflare.com/ajax/libs/handlebars.js/4.0.5/handlebars.min.js"></script>
  <script src="https://cdnjs.cloudflare.com/ajax/libs/popper.js/1.12.3/umd/popper.min.js" integrity="sha384-vFJXuSJphROIrBnz7yo7oB41mKfc8JzQZiCq4NCceLEaO4IHwicKwpJf9c9IpFgh" crossorigin="anonymous"></script>
  <script src="https://maxcdn.bootstrapcdn.com/bootstrap/4.0.0-beta.2/js/bootstrap.min.js" integrity="sha384-alpBpkh1PFOepccYVYDB4do5UnbKysX5WZXm3XxPqe5iKTfUKjNkCk9SaVuEZflJ" crossorigin="anonymous"></script>
  <link rel="stylesheet" href="https://maxcdn.bootstrapcdn.com/bootstrap/4.0.0-beta.2/css/bootstrap.min.css" integrity="sha384-PsH8R72JQ3SOdhVi3uxftmaW6Vc51MKb0q5P2rRUpPvrszuE4W1povHYgTpBfshb" crossorigin="anonymous" />

  <div class="content-container"></div>

  <script type="text/template" data-storyblok-template="page">
    <div class="container mt-5">
      {{#each body}}
        {{component this}}
      {{/each}}
    </div>
  </script>

  <script type="text/template" data-storyblok-template="teaser">
    <div class="jumbotron">
      <h1>{{ headline }}</h1>
    </div>
  </script>

  <script type="text/template" data-storyblok-template="grid">
    <div>
      <div class="row">
        {{#each columns}}
          {{component this}}
        {{/each}}
      </div>
    </div>
  </script>

  <script type="text/template" data-storyblok-template="feature">
    <div class="col-md-4">
      <h2>{{name}}</h2>
    </div>
  </script>

  <apex:remoteObjects jsNamespace="StoryBlok">
    <apex:remoteObjectModel name="Storyblok__Content__c" fields="Id,Storyblok__body__c,Storyblok__slug__c"/>
  </apex:remoteObjects>

  <script type="text/javascript" src="//app.storyblok.com/f/storyblok-latest.js"></script>
  <script type="text/javascript" src="{!$Resource.Storyblok__StoryblokRenderer}"/>

  <script type="text/javascript">
    StoryblokRenderer.init({
      accessToken: 'YOUR_TOKEN',
      customParent: 'https://storyblok.eu9.visual.force.com'
    });

    var StoryblokPage = StoryblokRenderer.bridge.getParam('page') || 'home';
    StoryblokRenderer.render('.content-container', StoryblokPage, function() {
      // Callback after rendered
    });
  </script>
</apex:page>
This should look similar to the image below.
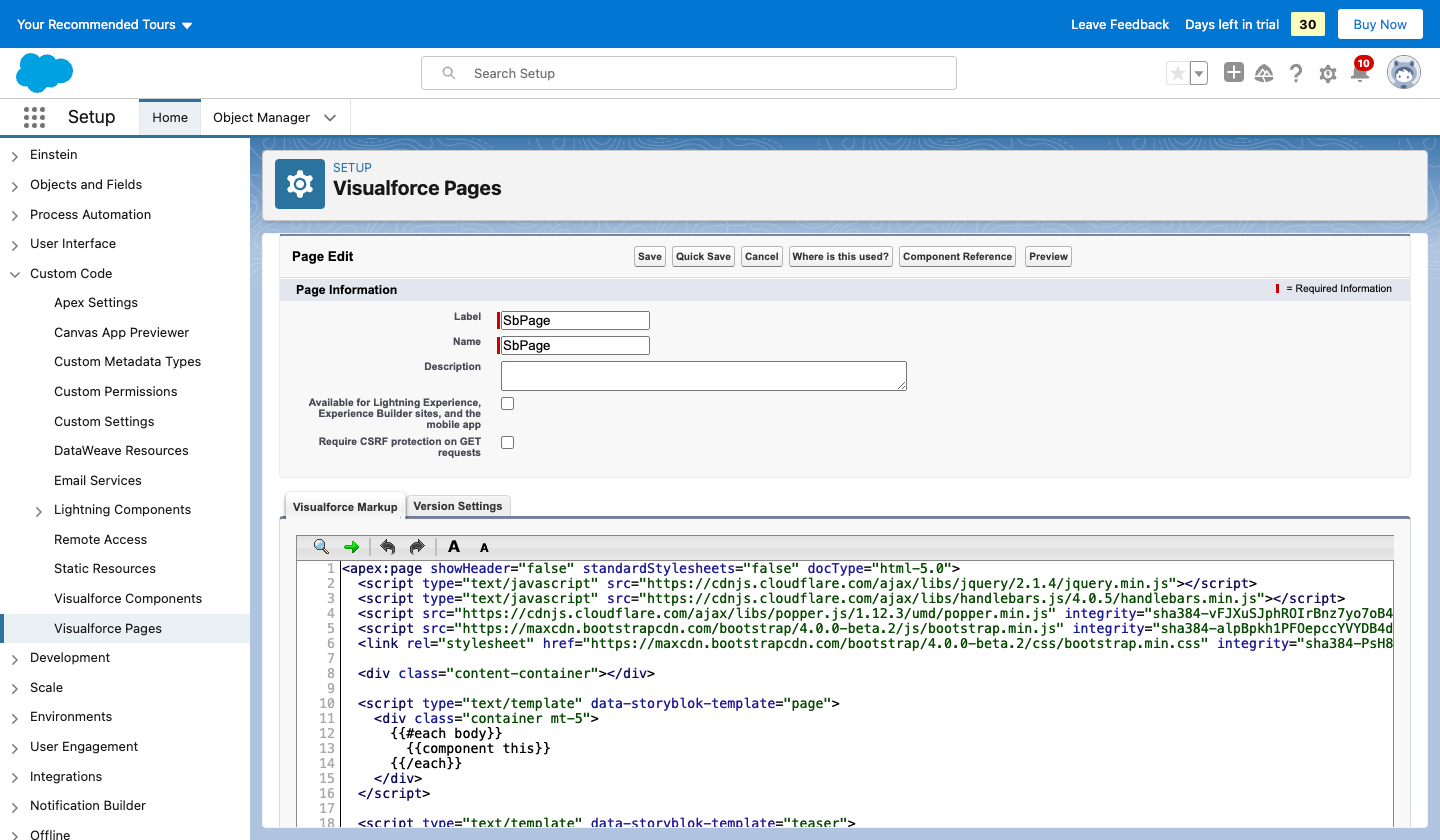
Creating a new Visualforce page
3. Create a space in Storyblok
Create a new Storyblok space using this guide (opens in a new window), or log into an existing Storyblok space.
Insert your token
After you have created your space, replace YOUR_ACCESS_TOKEN with your token on the Visualforce page:

You can see how to get your access token here.
Insert the Visualforce page URL
After creating your space, navigate to your Storyblok space Settings {1}, click on Visual Editor {2}, and add the Visualforce page URL as your default environment {3}.
Insert the URL of the Visualforce page created in step two.
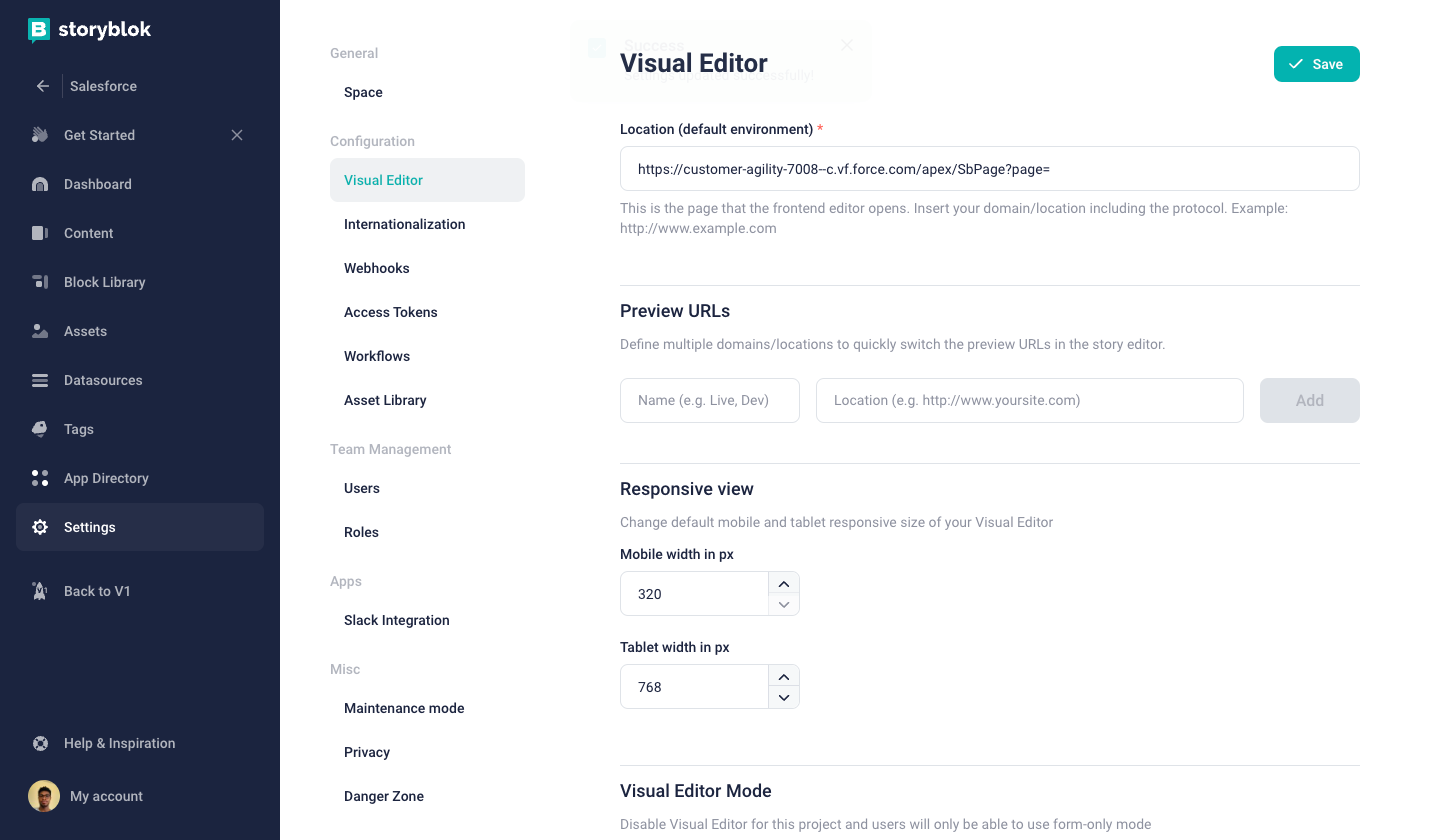
When adding your Visualforce URL to Storyblok, it is essential to append ?page=.
4. Build the content structures you need
Now that everything has been setup you can start build your custom components. Start by creating schema definitions for your blocks, and then add the template code to your Visualforce page.
Check the Storyblok documentation to get started on creating Components/Schema.

