The Complete Guide to Build a Full-Blown Multilanguage Website with Gatsby.js
Storyblok is the first headless CMS that works for developers & marketers alike.
If you'd like to build a website without implementing internationalization logic with Gatsby, please follow Ultimate Tutorial series instead. If you'd like to build a multilanguage website, please keep following the rest of this article.
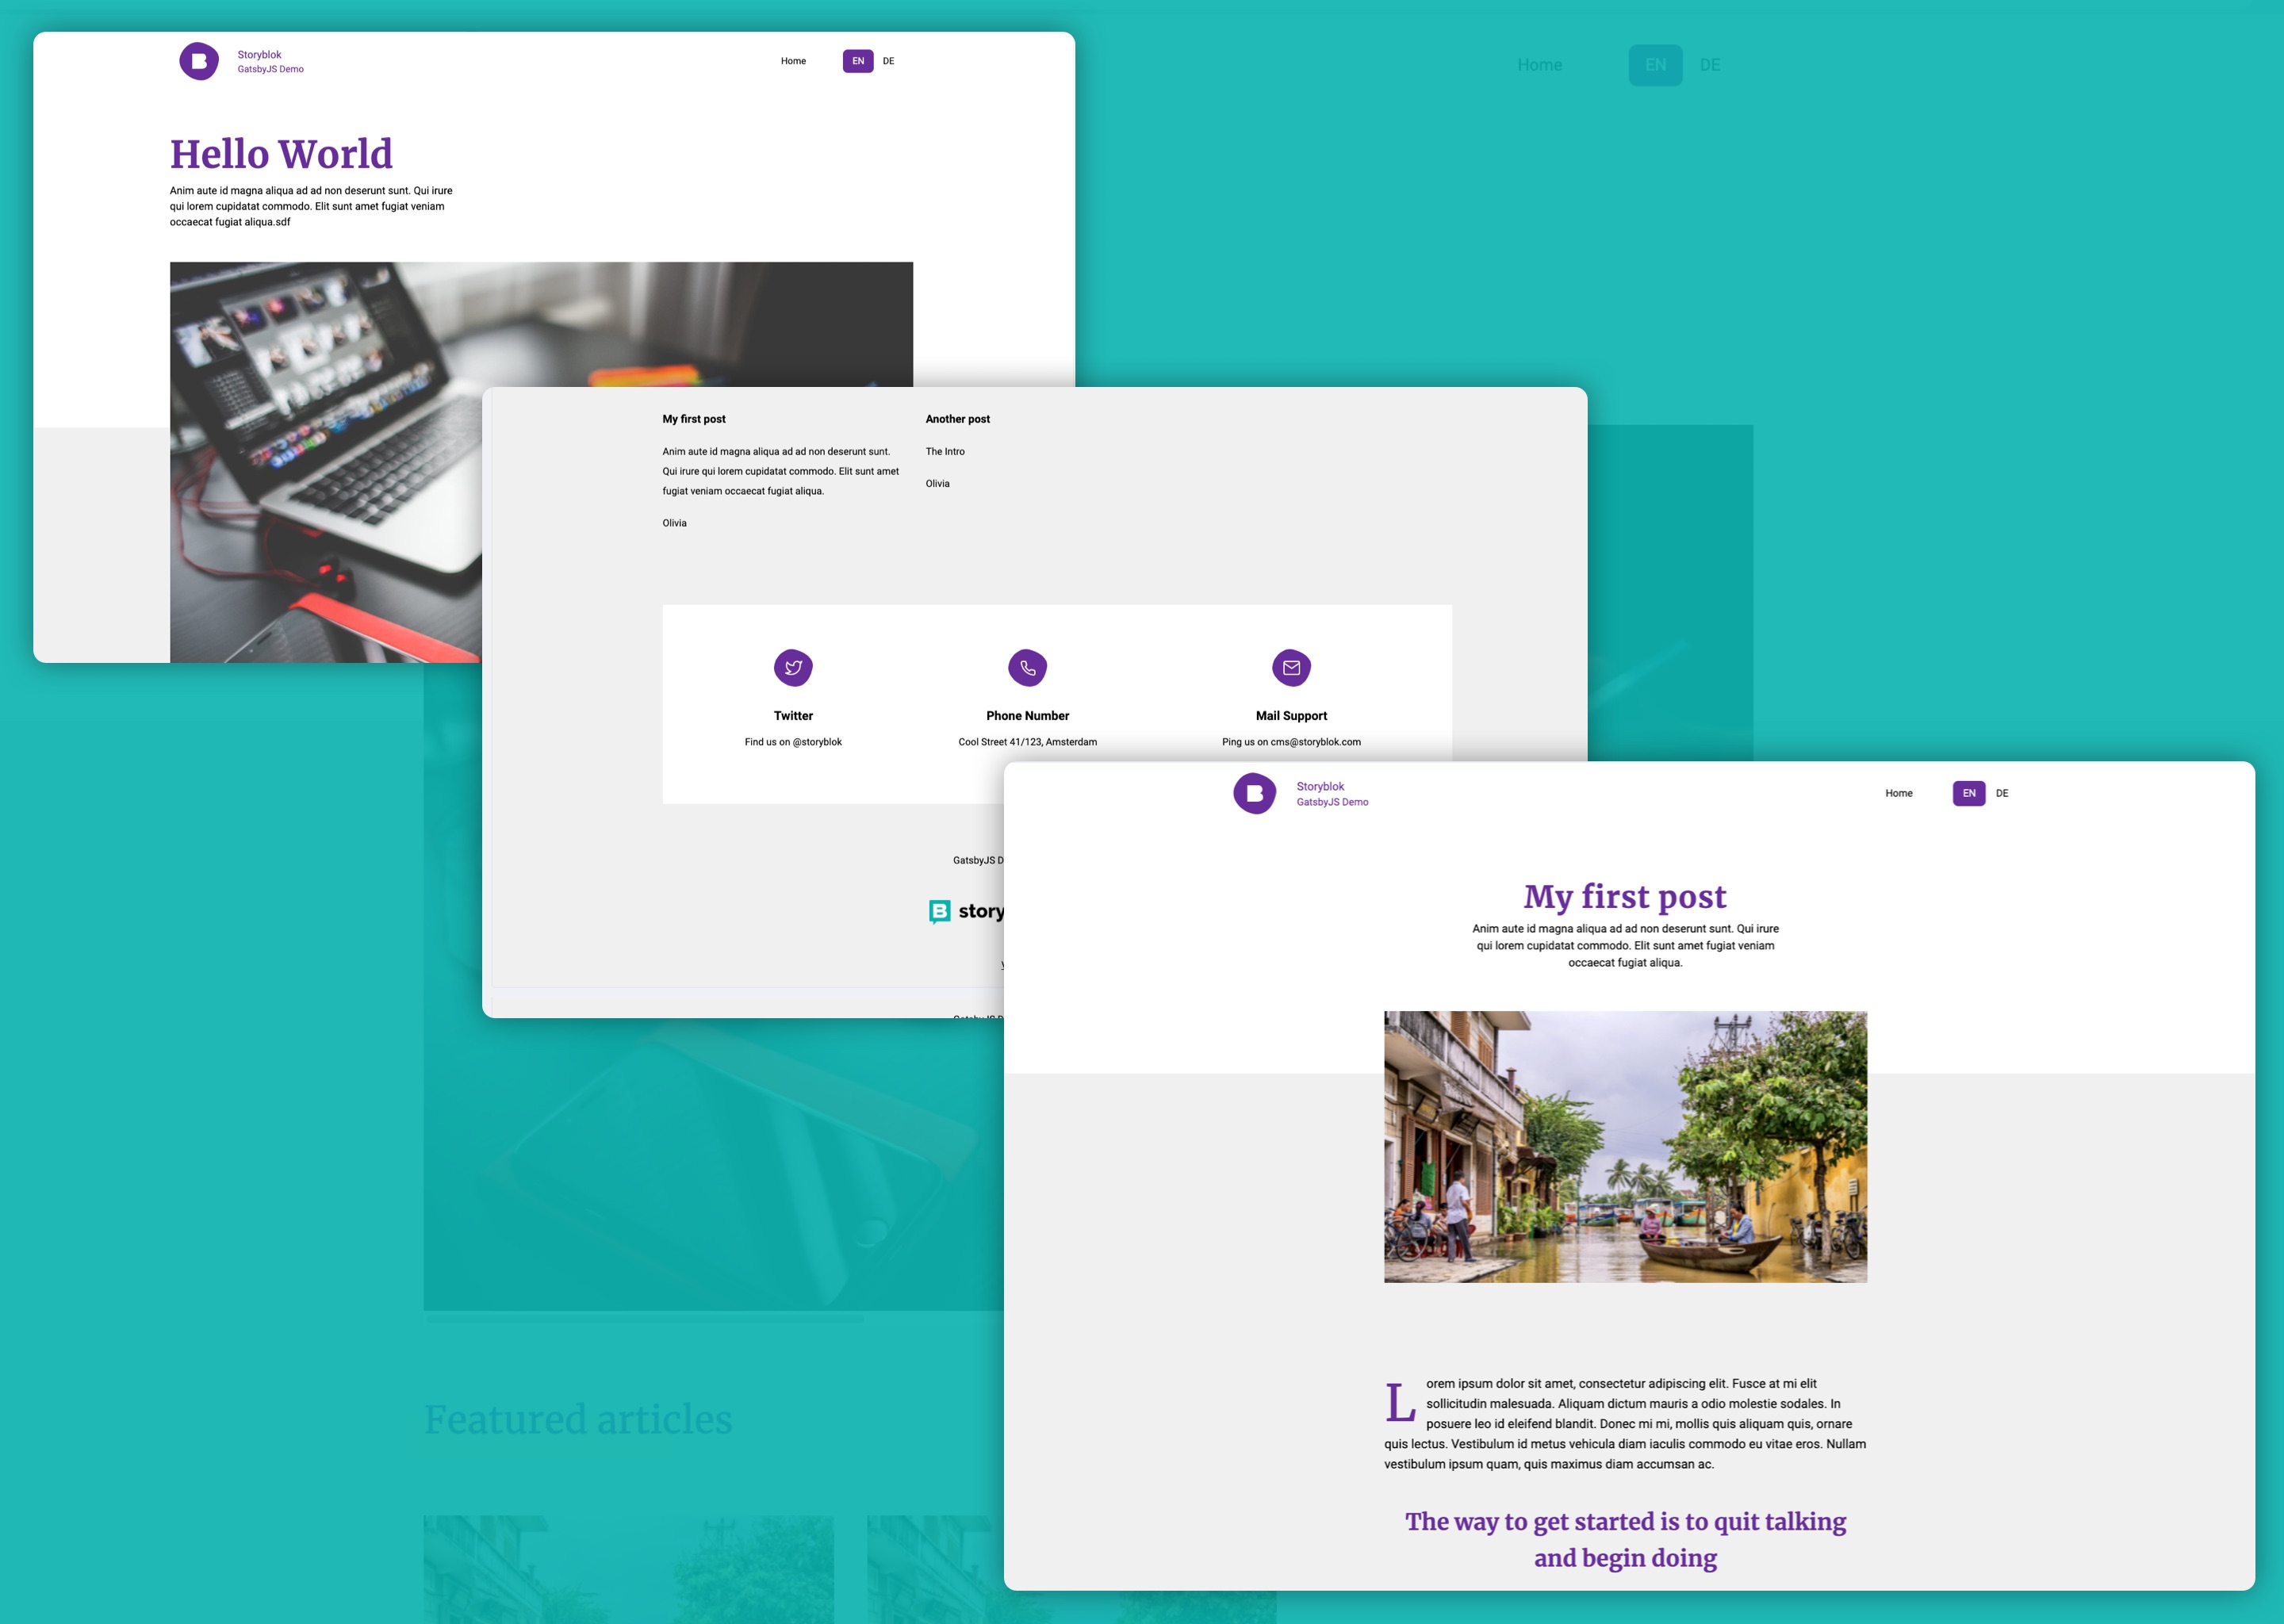
This guide is for beginners and professionals who want to build a full-blown multilanguage website using Gatsby.js. You can take a look at the deployed Demo project here.
With this step-by-step guide, you will get a Gatsby website using Storyblok's API for the multilanguage content and a live preview.
If you are in a hurry you can download the whole source code of the project at Github github.com/storyblok/gatsbyjs-multilanguage-website (opens in a new window).
This tutorial uses createPages API from Gatsby, and folder-level translation to implement internationalization. Unlike Gatsby's File System Route API, createPages API has a feature to modify slugs.
The project in this article was developed using the following versions of these technologies:
- Gatsby ^4.21.1
- Nodejs v16.13.2
- npm v8.1.2
Keep in mind that these versions may be slightly behind the latest ones.
Requirements
To continue with this tutorial, we don't expect you are an expert web developer, but you should understand a few basic concepts listed under this paragraph. We will guide you through most topics of this tutorial, but if you are beginning with Gatsby.js & Storyblok, you should consider checking out our Getting Started with Gatsby.js Tutorial first.
- What is headless CMS - explanation in 5 min
- Basic understanding of
- Gatsby.js
- NodeJS
- NPM
- An account in Storyblok App to manage content
Environment setup
If you haven't done so already, install Node.js, NPM and the Gatsby.js CLI on your machine. Start with running the following shell commands. This will clone our example repository for a multi-language blog.
$ npm install -g gatsby-cli
$ git clone https://github.com/storyblok/gatsbyjs-multilanguage-website.git
$ cd gatsbyjs-multilanguage-website
$ npm install
$ gatsby develop
Cloning the Storyblok Template
To get the correct space setup for the Github repository, click the following link to duplicate our example multi-language space: https://app.storyblok.com/#!/build/95016 (opens in a new window)
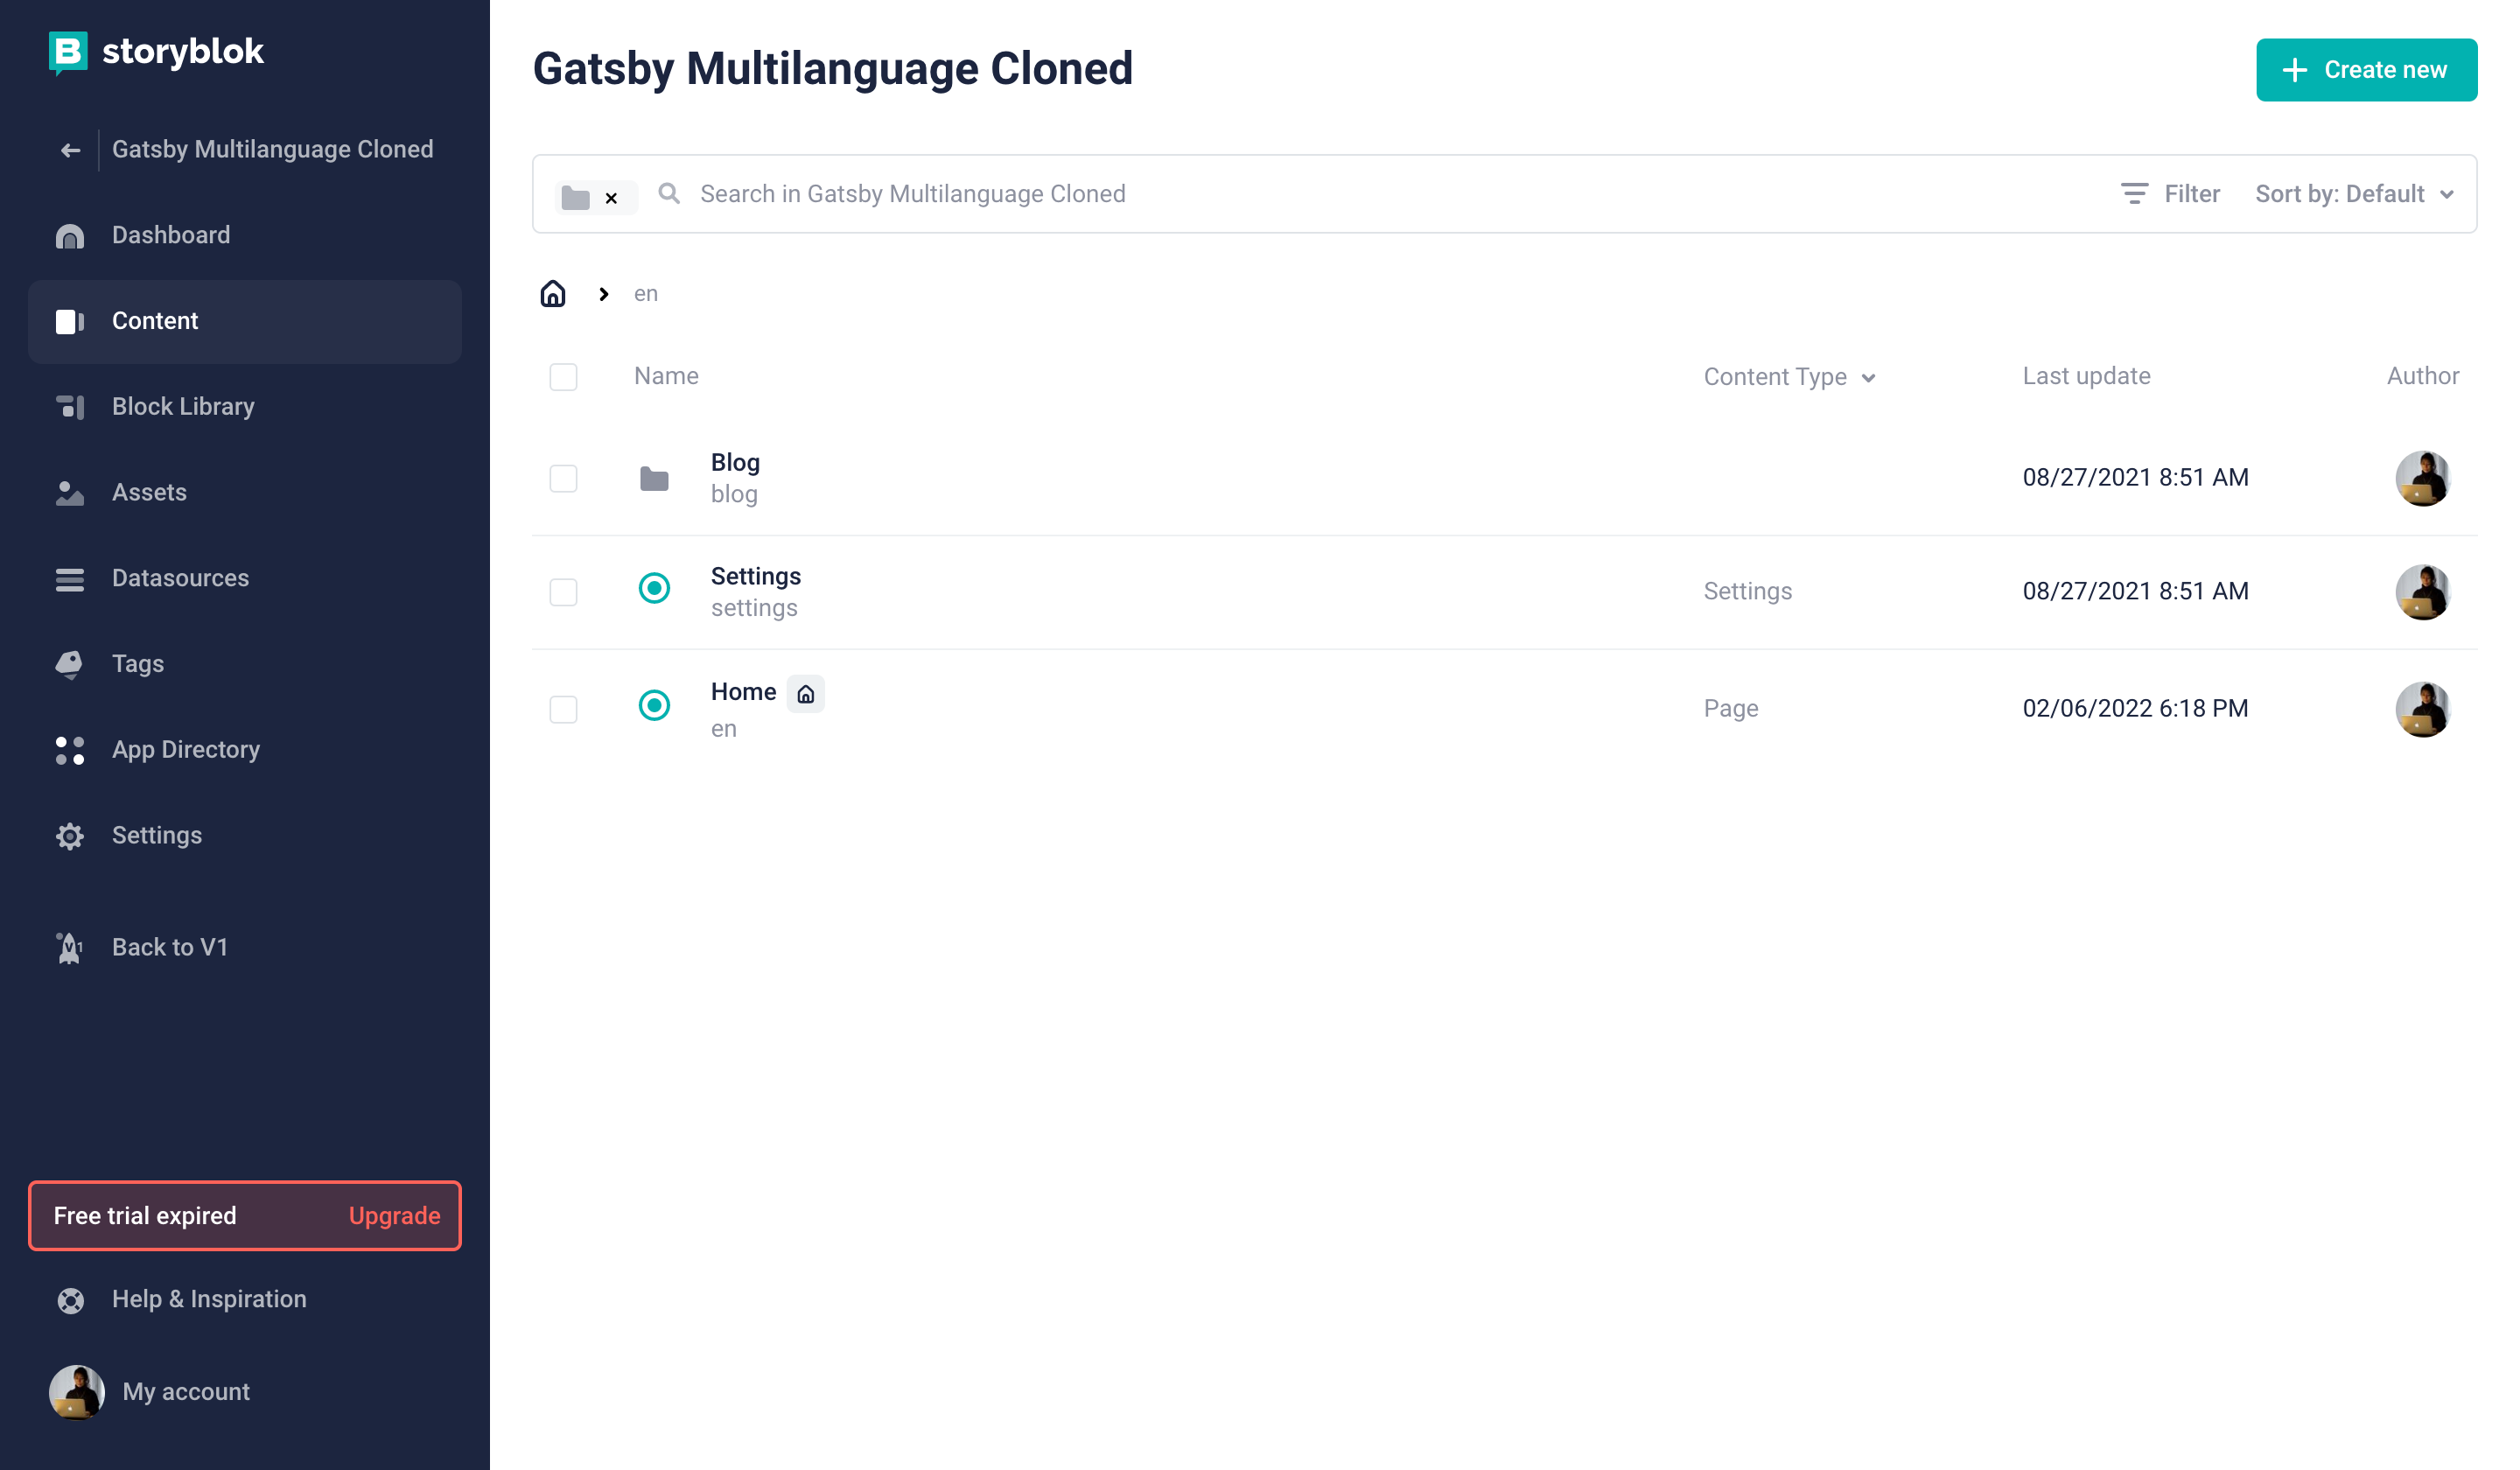
This will clone the space, if you click on Content {1}, you should already see a folder for German de {2} and English en {3} set up. If you click on Components in the sidebar, there are also already all the components, that are used in the Github repository, that we just cloned.

Connect Storyblok
In the next step, we need to go to the Settings of our Storyblok space and retrieve our preview_token from the Access Tokens section {1} {2} {3}.

Access tokens shouldn't be exposed by pushing into Git. You can learn how to use environment variables from our 5 minutes tutorial.
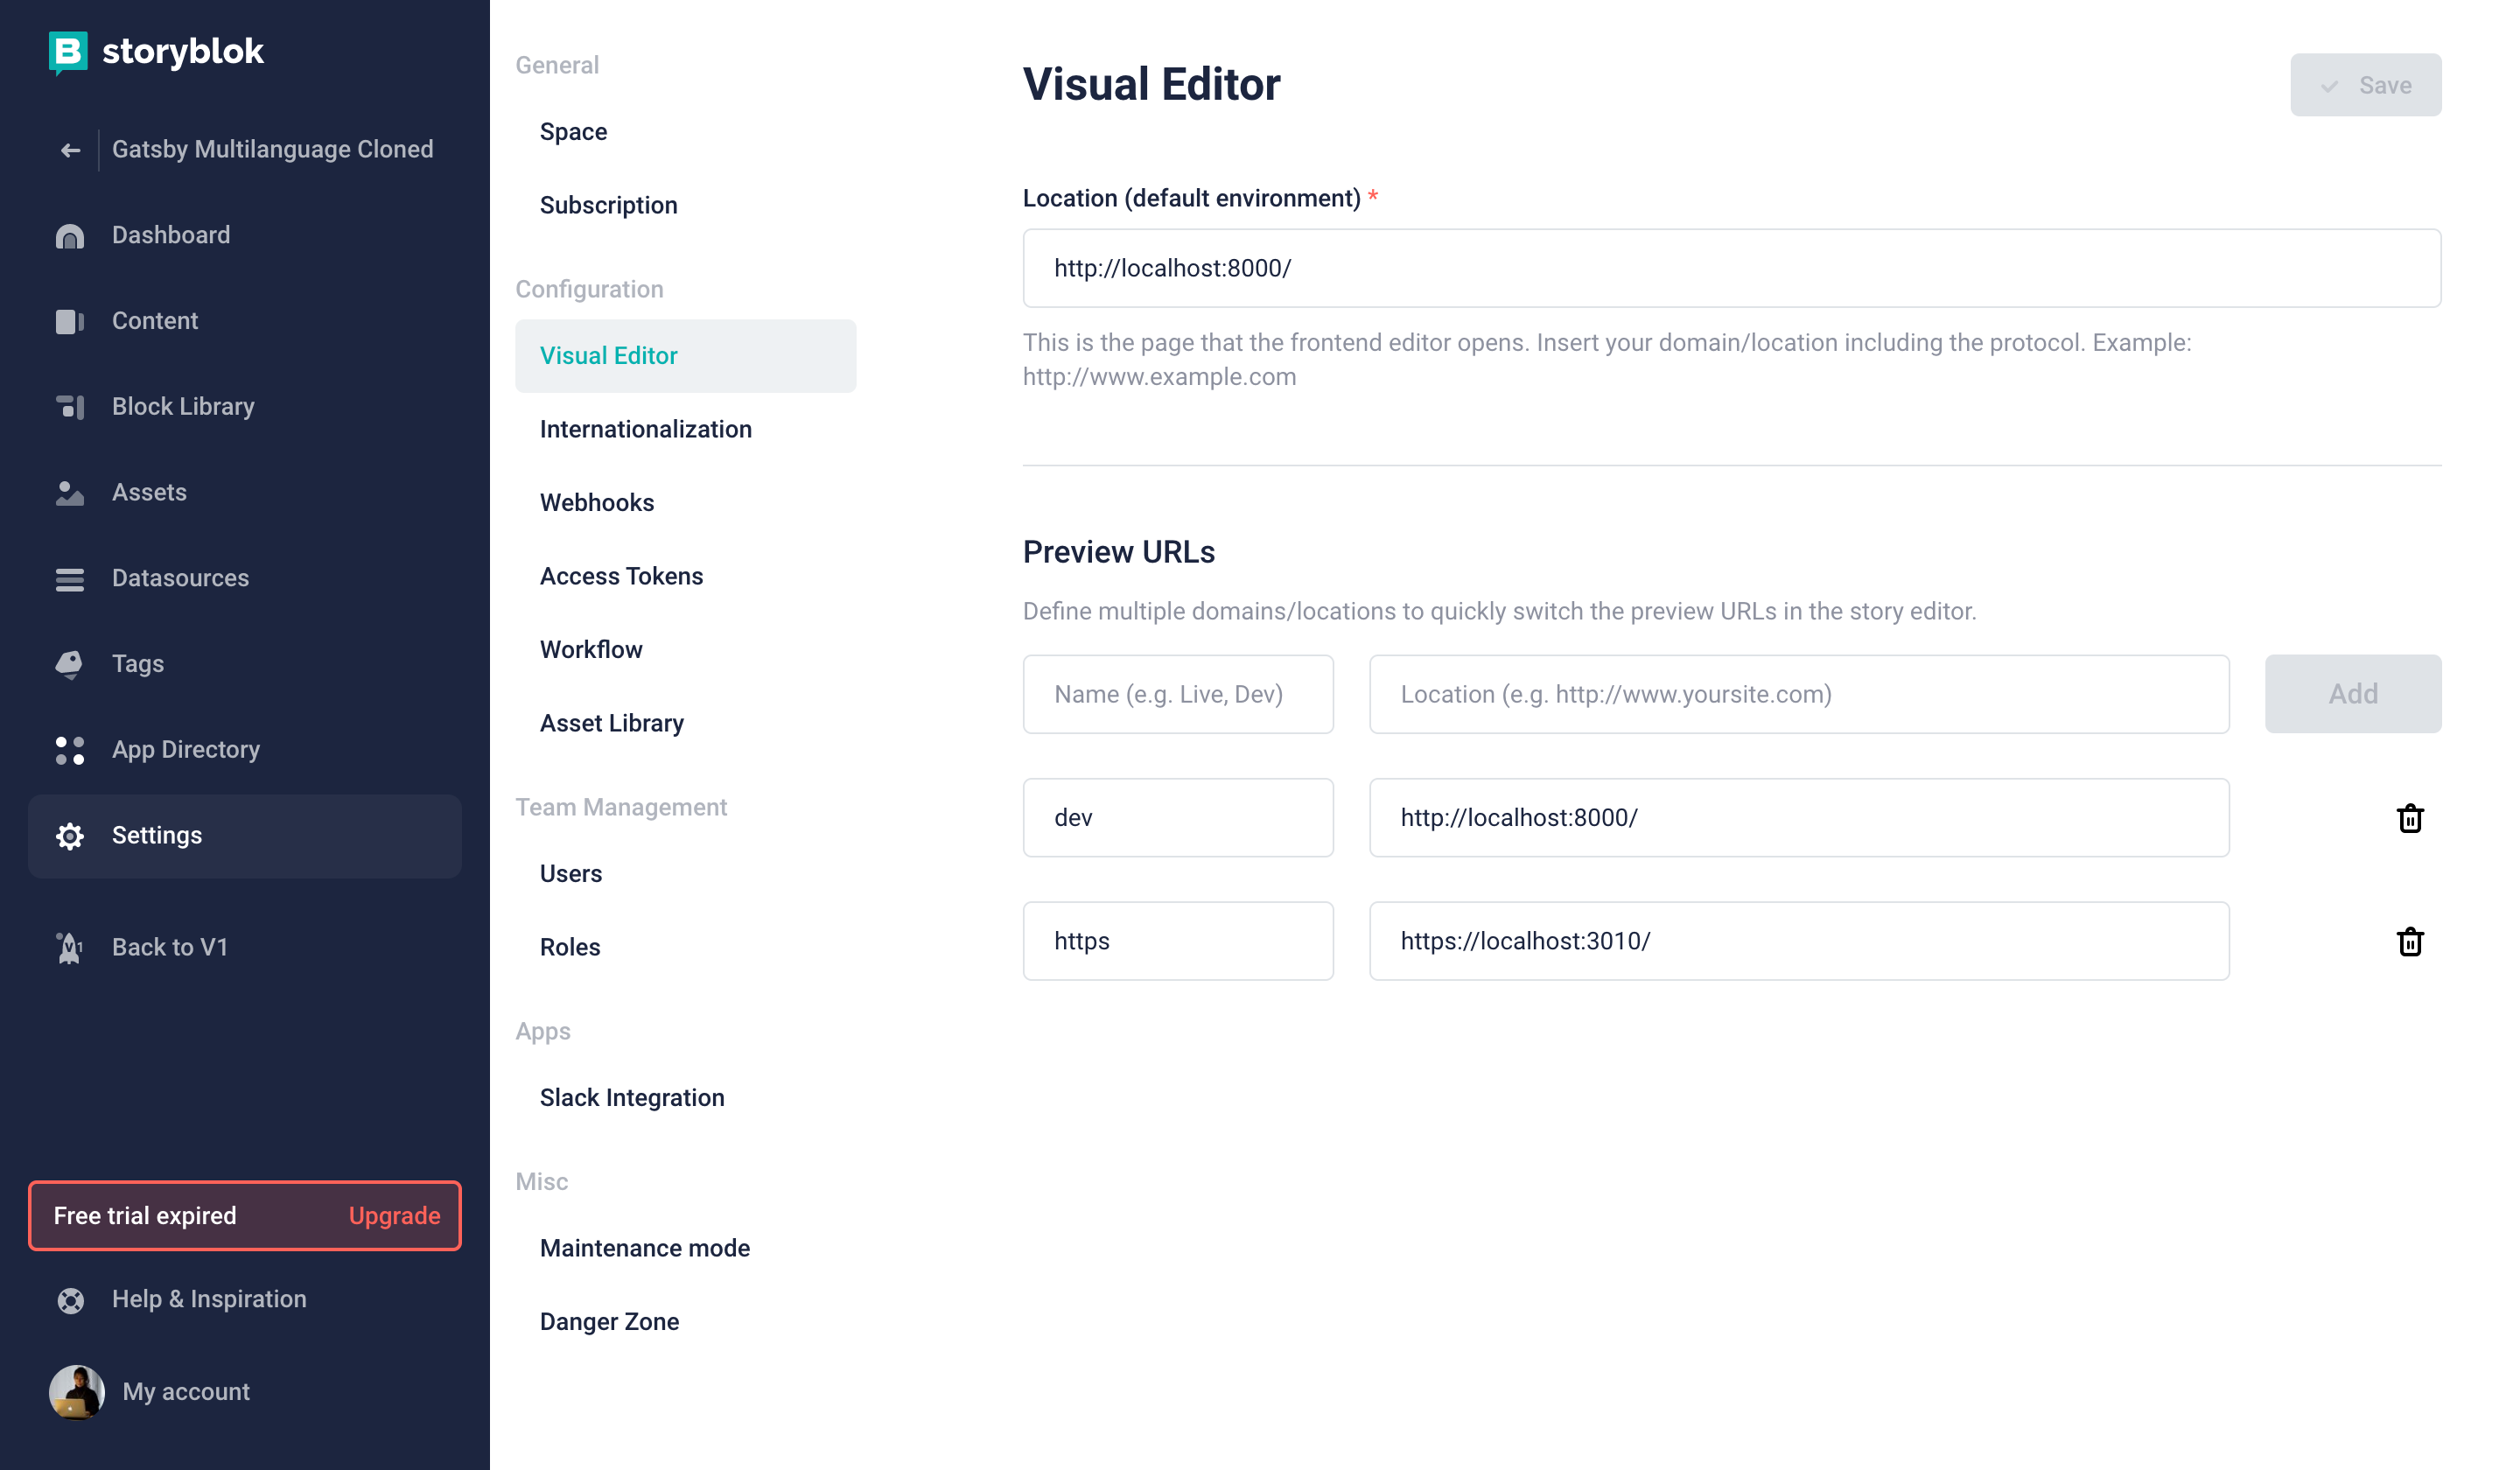
Fill the Location (default environment) {1} as well as the Preview URLs {2} field with your localhost URL https://localhost:3010/ .
Copy the preview token into the gatsby.config.js file. Exchange the accessToken with the preview token of your space.
require("dotenv").config({
  path: `.env.${process.env.NODE_ENV || "production"}`,
})

module.exports = {
  siteMetadata: {
    title: 'Gatsby Default Starter',
  },
  plugins: [
    {
      resolve: 'gatsby-source-storyblok',
      options: {
        accessToken: process.env.GATSBY_PREVIEW_STORYBLOK,
        homeSlug: 'home',
        version: process.env.NODE_ENV === 'production' ? 'published' : 'draft'
      }
    },
    ...
  ]
}GATSBY_PREVIEW_STORYBLOK=YOUR_TOKENGATSBY_PREVIEW_STORYBLOK=YOUR_TOKENGatsby requires both .env.development and .env.production files. Missing either one of them could lead to potential errors.
npm run develop

local-ssl-proxy --source 3010 --target 8000 --cert localhost.pem --key localhost-key.pem
Now let's start the Gatsby.js server on port 3010 (https) to see if everything is working.
Let's see that inside Storyblok. Go to Content {1}, click on the en {2} folder and click on Home {3}.
If your accessToken and default location {1} were set up correctly, you should see your development server inside of Storyblok {2}. If you're inside of Storyblok, you should also be able to click specific components and live-edit them {2}.
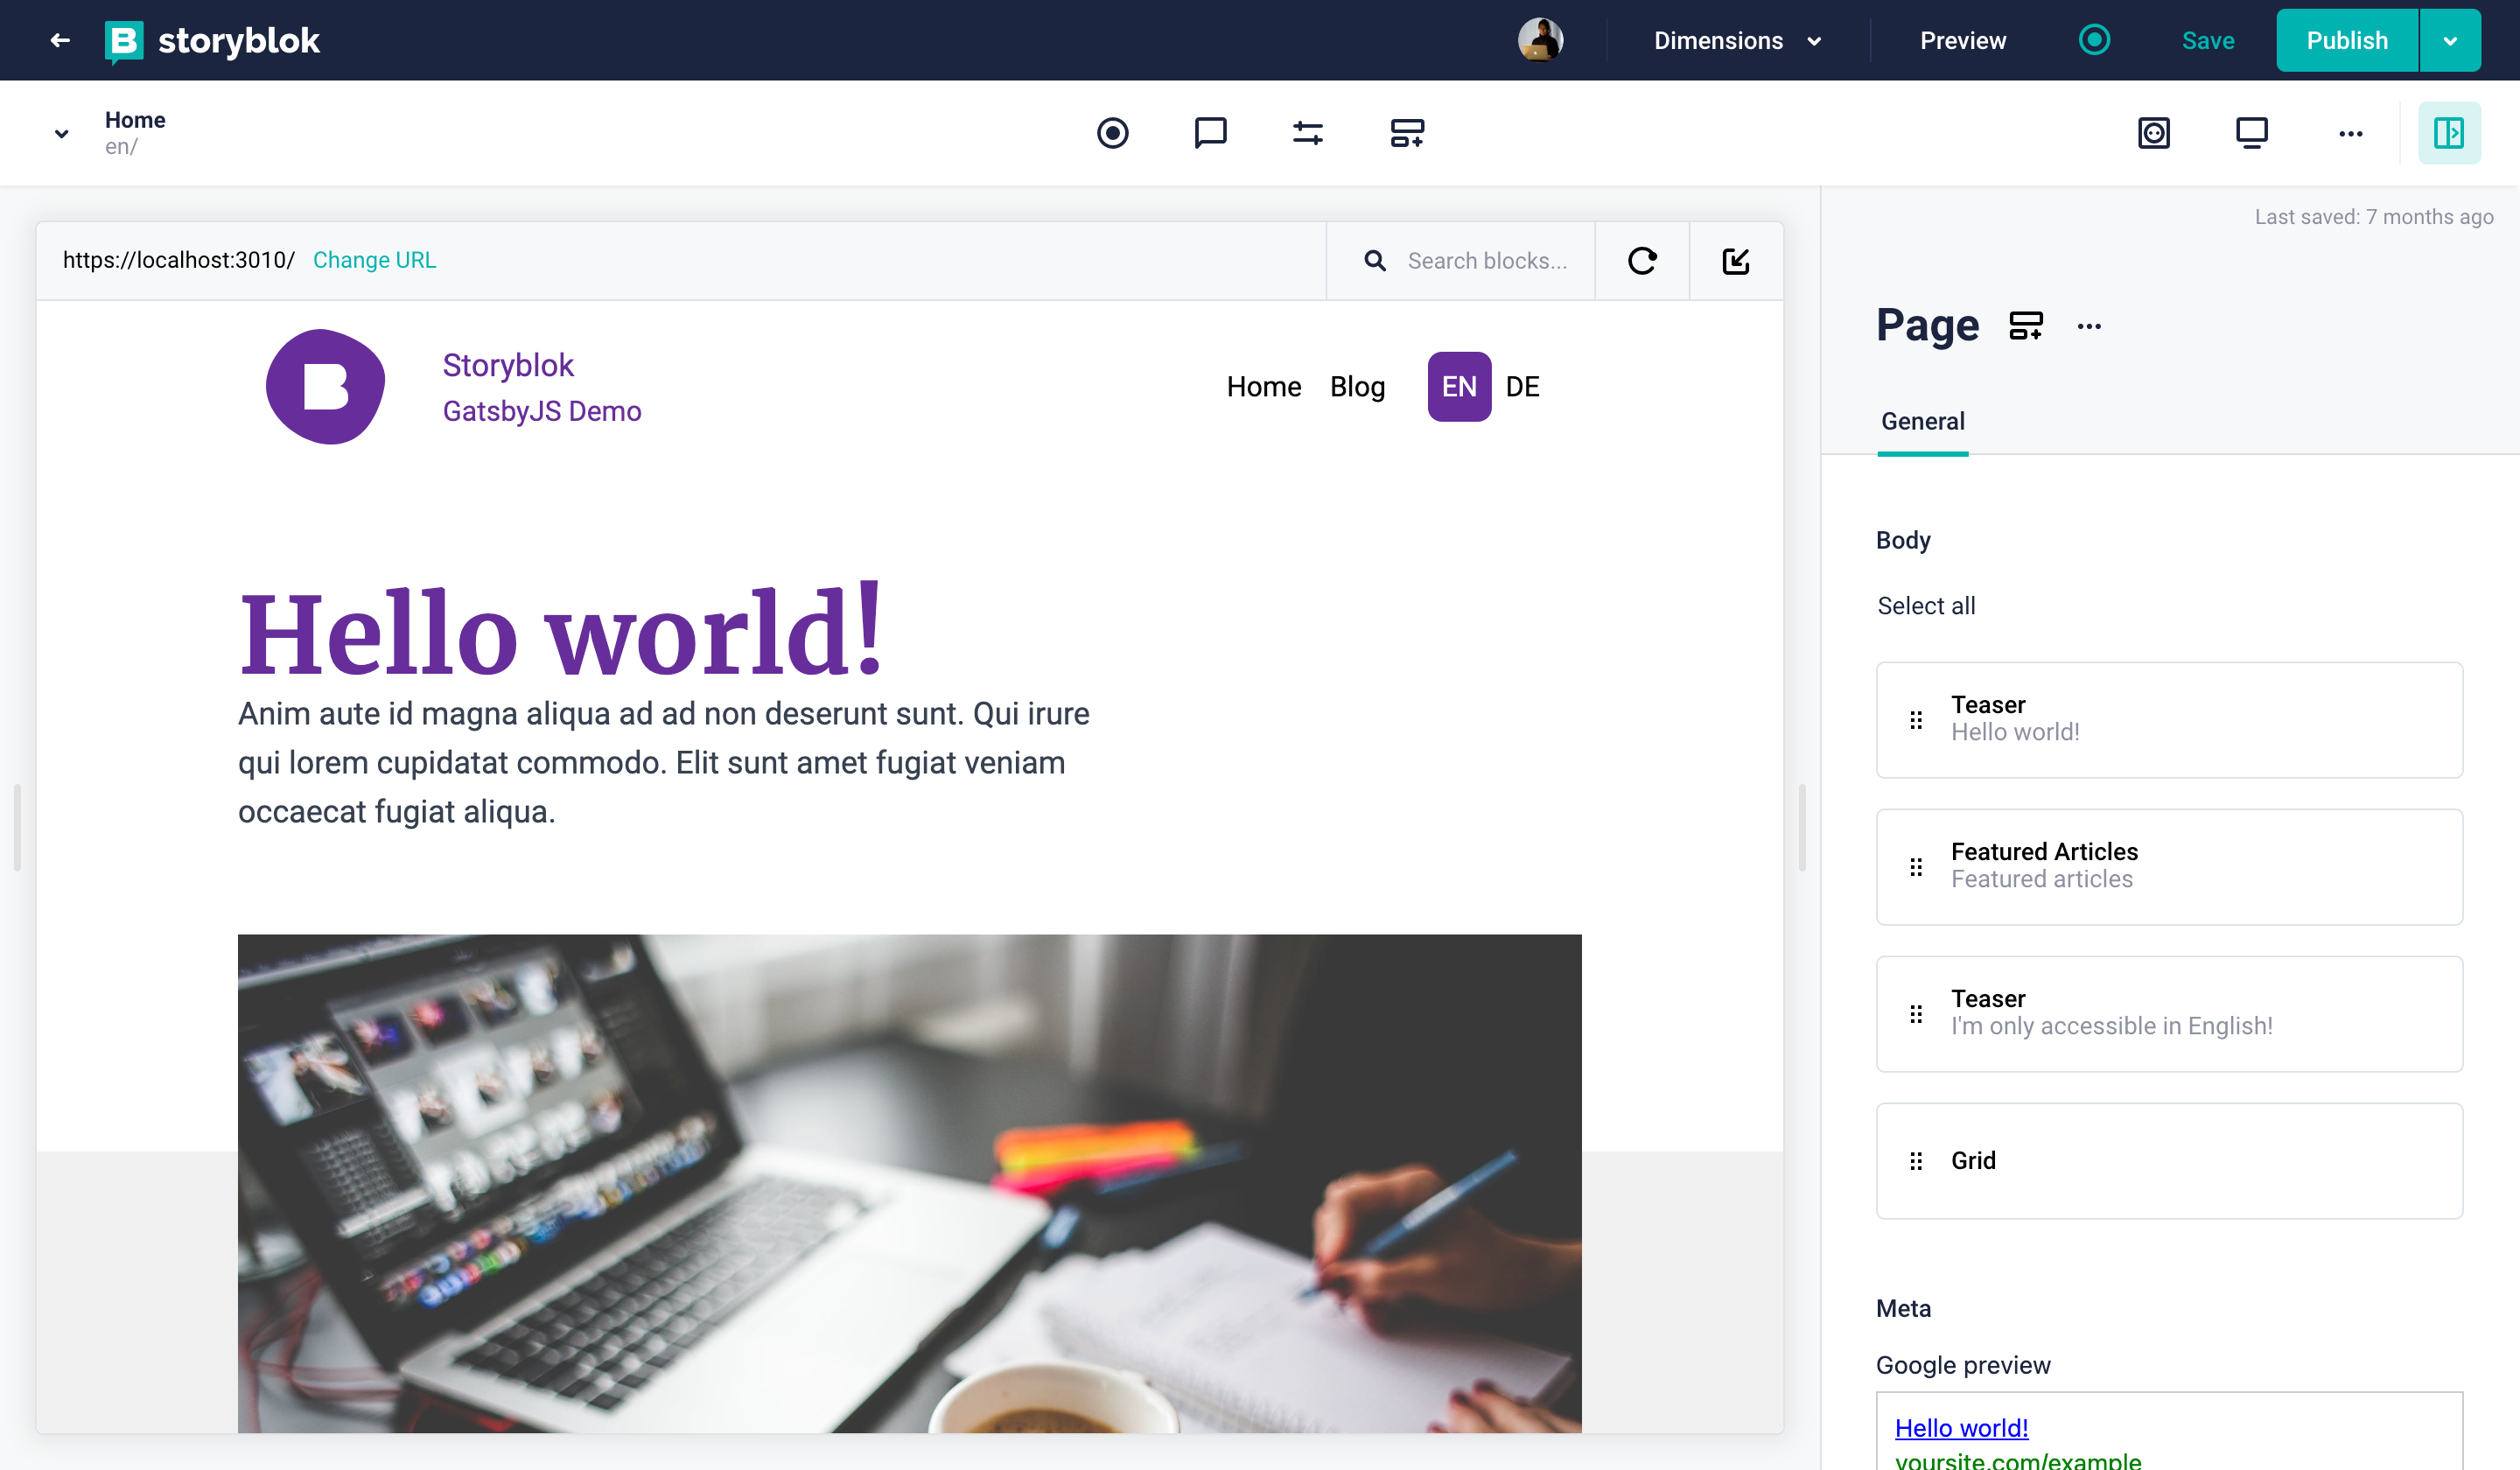
In the next steps, we will explain step by step how this setup works, so you can adapt it to your needs.
Dynamic Component Linking
Since Storyblok works with a component approach, you will normally find the same components in Storyblok and your local project. To resolve the relationship between local React components and Storyblok components, we use the StoryblokComponent API along with storyblokInit API. Whenever you want to add a new component to be resolved you will need to add it to the components object property from storyblokInit. The key will be the technical component name from Storyblok, the value will be the import of the actual component.
import React from "react"
import { storyblokInit, apiPlugin } from "gatsby-source-storyblok"
import ArticleTeaser from './ArticleTeaser'
import BlogPost from './BlogPost'
import Feature from './Feature'
import FeaturedArticles from './FeaturedArticles'
import Footer from './Footer'
import Grid from './Grid'
import Navigation from './Navigation'
import PostsList from './PostsList'
import Slide from './Slide'
import Teaser from './Teaser'
import { useStaticQuery, graphql } from "gatsby"

storyblokInit({
  accessToken: process.env.GATSBY_PREVIEW_STORYBLOK,
  use: [apiPlugin],
  components: {
    slide: Slide,
    teaser: Teaser,
    grid: Grid,
    feature: Feature,
    blogpost: BlogPost,
    'article-teaser': ArticleTeaser,
    'featured-articles': FeaturedArticles,
    'posts-list': PostsList
  }
});

// ...
These dynamic components allow us to inject the right component based on our Storyblok content automatically. You can see example usage in the components/Page.js file, where we map over all the blok.body elements and inject the right component based on the component name.
import React from "react"
import { StoryblokComponent, storyblokEditable } from "gatsby-source-storyblok"

const Page = ({ blok }) => {
  const content =
    blok.body &&
    blok.body.map(childBlok => <StoryblokComponent blok={childBlok} key={childBlok._uid} />)
  const hasTitle = blok.title && blok.title.length ? (<h1 className="text-5xl font-bold font-serif text-primary tracking-wide text-center py-8">{blok.title}</h1>) : null
  return (
    <div {...storyblokEditable(blok)}>
      {hasTitle}
      {content}
    </div>
  )
}

export default Page
Requesting Content from Storyblok
With all the components ready, let's take a look at our pages/index.js, our homepage, with the code below. We're loading our home content through the gatsby-source-storyblok plugin. Keep in mind that the Gatsby.js source plugin is loading content at build time, so whenever you change the GraphQL query, you will need to restart your server. You can find more information on this in our Getting Started with Gatsby.js & Storyblok (opens in a new window) tutorial. The most important part is the use of the Storyblok hook in Line 9 from the useStoryblokState from gatsby-source-storyblok.
import React from "react"
import Page from '../components/Page'
import Layout from "../components/Layout"
import { graphql } from 'gatsby'
import { useStoryblokState } from "gatsby-source-storyblok"

export default function PageIndex({ data, location }) {
  let story = data.storyblokEntry
  story = useStoryblokState(data.storyblokEntry, {
    resolveRelations: ["posts-list.posts"],
    language: location,
  })

    return (
      <Layout location={location}>
        <Page blok={story.content} />
      </Layout>
    )
}

export const query = graphql`
  {
    storyblokEntry(full_slug: { eq: "en/" }) {
      name
      content
      full_slug
      uuid
      id
      internalId
    }
  }
`
Build a multi-language navigation
To build dynamic navigation, you have several options. One approach is to use the links API to generate the navigation automatically from your content tree. Another option, the one our example space is using, is to create a global content entry/item which will contain the global configurations of our website.
In both of the language folders, you will find a Settings story. If you open the story en/settings {1} in the form-only mode {2}, you will see the navigation entries {3}, which can set an internal link to other stories. Because you have two duplicated stories for German and English, you can create a custom navigation for each language, including whichever pages you want to have in a specific language.
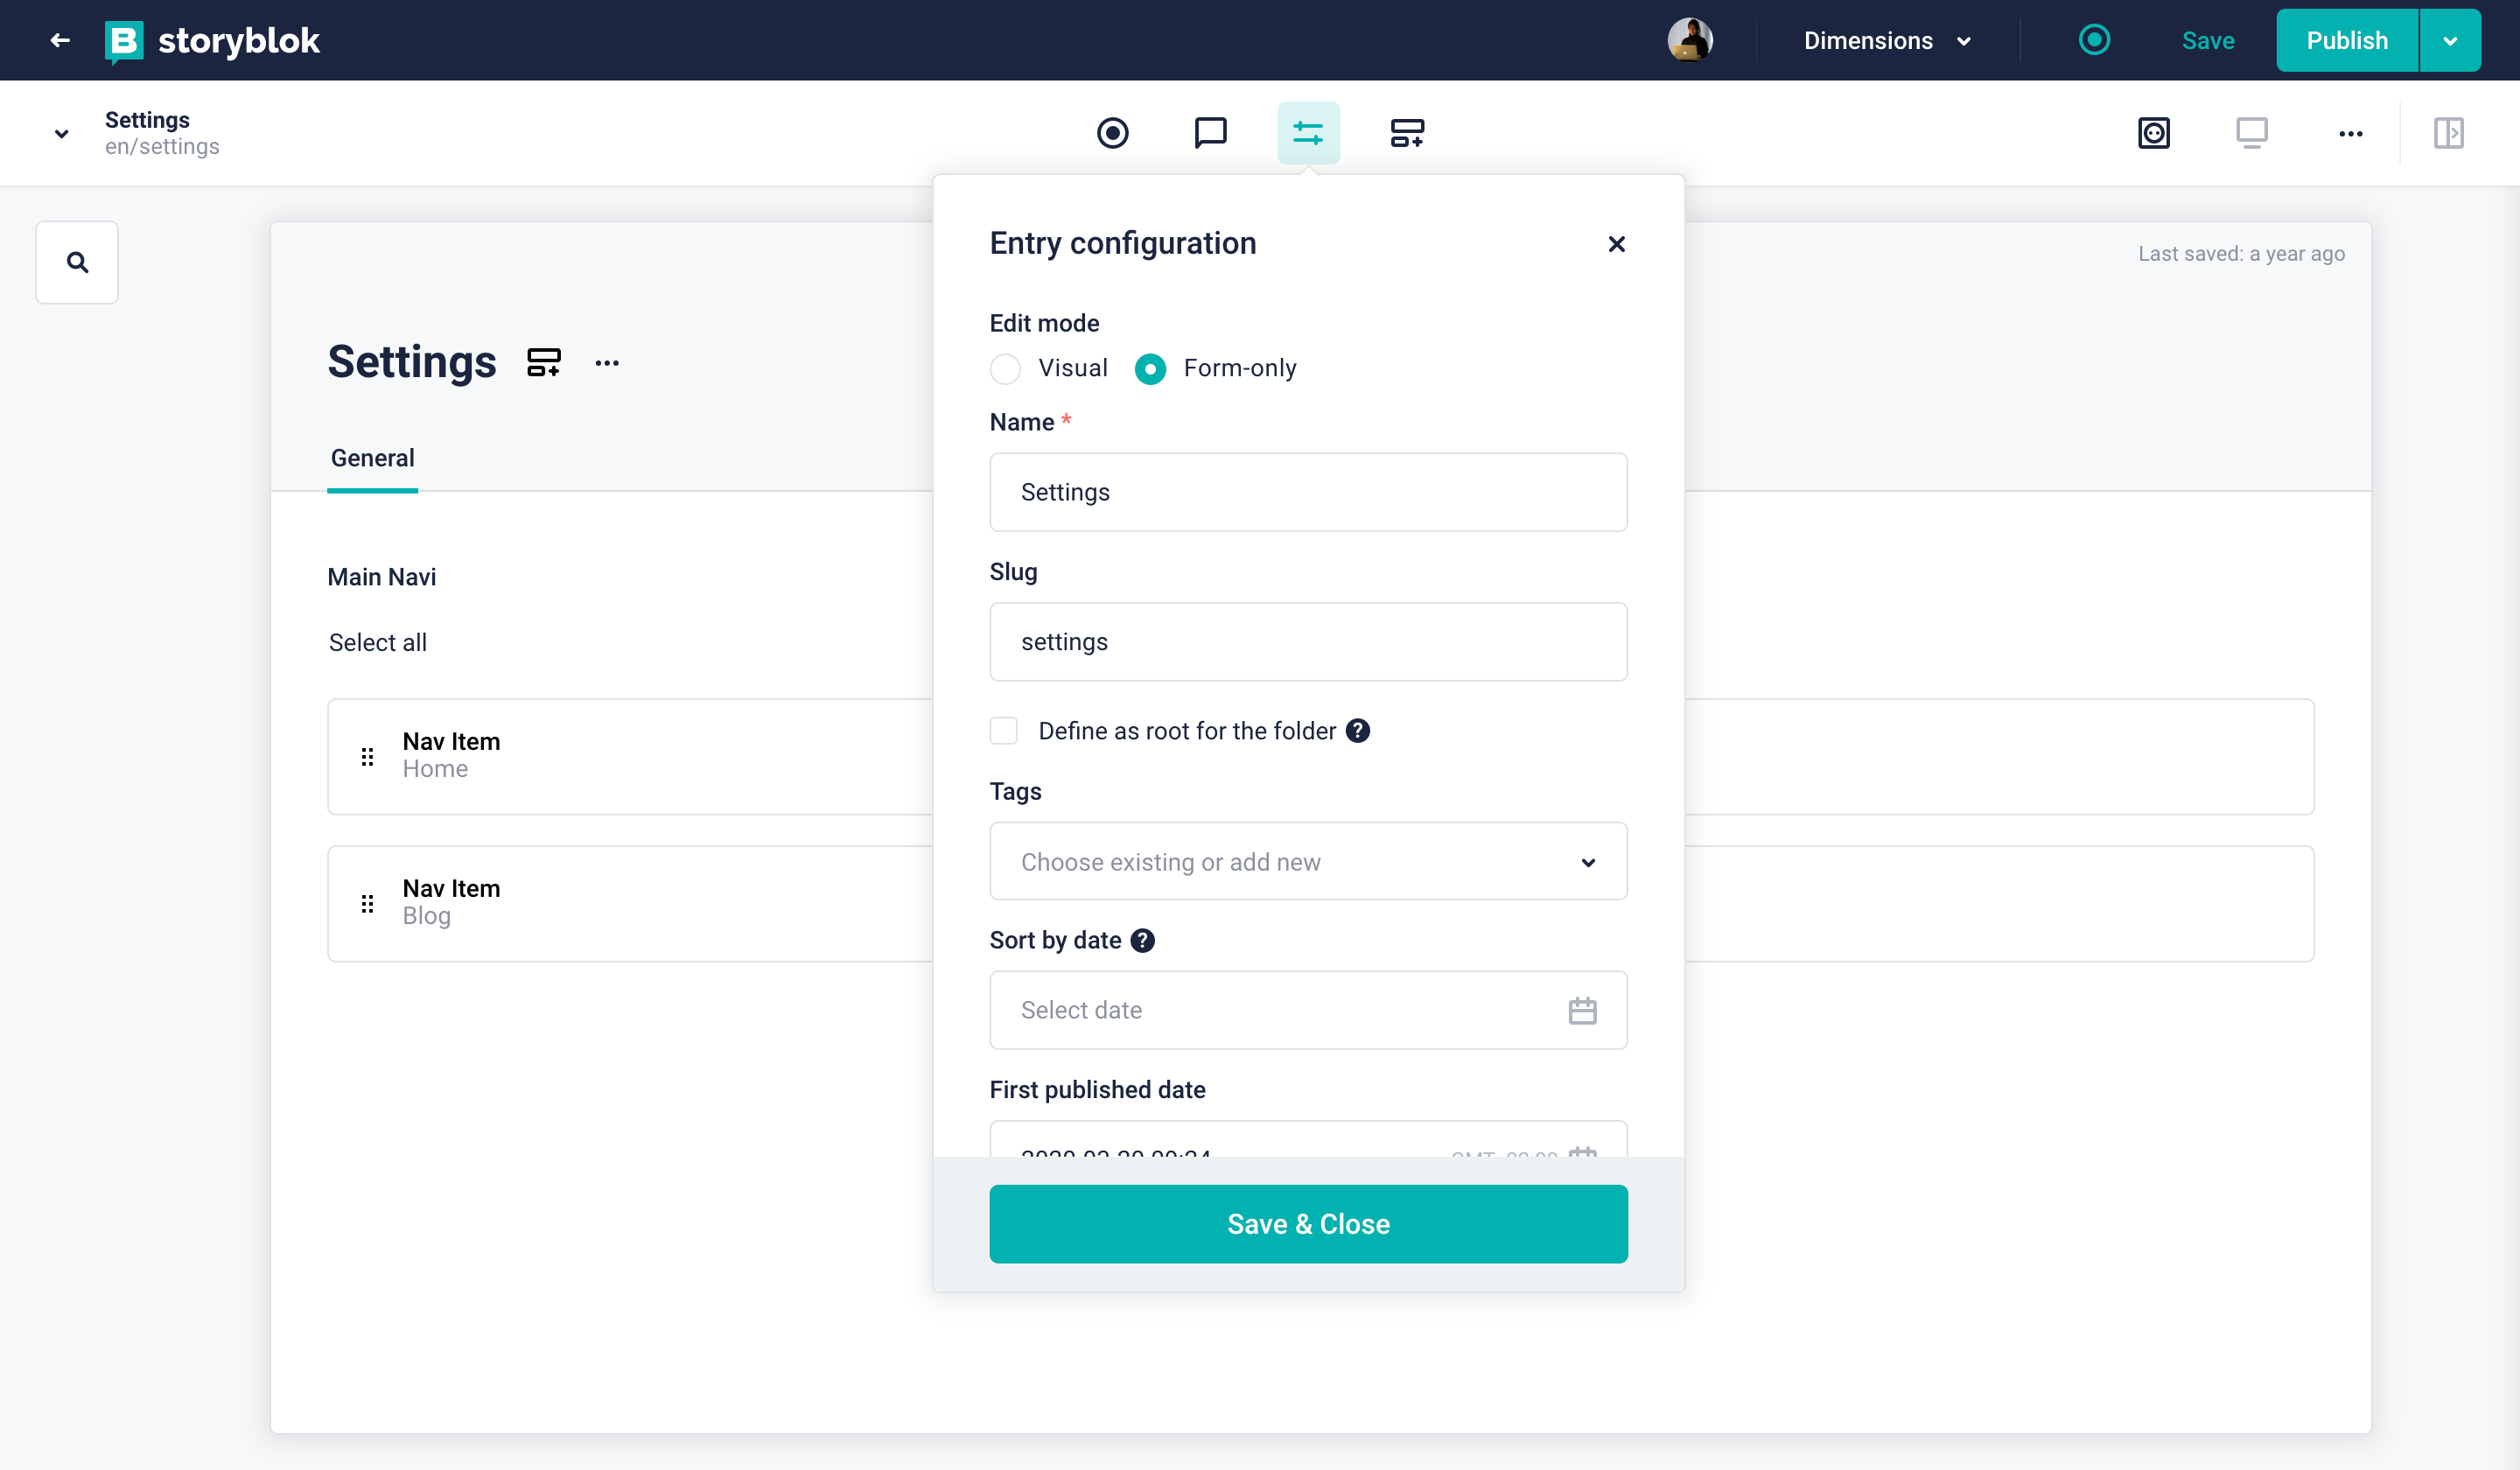
The real path of the Settings entry is set to /, since it doesn't have its own page.
The next step is to load the settings for all languages via GraphQL inside our components/Layout.js file. In Gatsby.js we can use the location object, that is passed to all pages to find out what the current language is. We then filter for the correct settings object for that language and pass it to our navigation component.
import React from "react"
import Navigation from './Navigation'
import Footer from './Footer'
import { useStaticQuery, graphql } from "gatsby"

export default function Layout({ children, location, lang }){
  const { settings } = useStaticQuery(graphql`
  query Settings {
    settings: allStoryblokEntry(filter: {field_component: {eq: "settings"}}) {
      edges {
        node {
          name
          full_slug
          content
        }
      }
    }
  }
  `)
  let { pathname } = location
  let language = pathname.split("/")[1].replace('/', '')
  let activeLanguage = ['de', 'en'].includes(language) ? language : 'en'
  let correctSetting = settings.edges.filter(edge => edge.node.full_slug.indexOf(activeLanguage) > -1)
  let hasSetting = correctSetting && correctSetting.length ? correctSetting[0].node : {}
  let content = typeof hasSetting.content === 'string' ? JSON.parse(hasSetting.content) : hasSetting.content
  let parsedSetting = Object.assign({}, content, {content: content})

  return (
    <div className="bg-gray-300">
      <Navigation settings={parsedSetting} lang={activeLanguage} />
      <main>
      { children }
      </main>
      <Footer />
    </div>
  )
}
Automatic generation of multi-language pages
This tutorial uses createPages API from Gatsby to generate pages.
In most cases, you would want to automatically generate the pages from the content you have set up in Storyblok. To do that with Gatsby, we can follow this tutorial (opens in a new window). You can attach your token to the following URL to see what the API returns for the content type Page:
You will see the different page stories with their full slugs: de, de/blog, en and en/blog. What we need to do to generate those pages and the blog posts, is to add two template file: templates/page.js for general pages and templates/blog-entry.js for blog posts. Then we need to change the gatsby-node.js file to create all stories with the content type Page or Blogpost to use those templates.
Let's take a look at the gatsby-node.js file:
const path = require('path')

function rewriteSlug(slug) {
  const defaultLanguage = 'en/'
  let newSlug = slug
  // replaces /de/home with /de
  newSlug = newSlug.replace('home', '')
  // replaces /en/blog/first-post with /blog/first-post
  newSlug = newSlug.replace(defaultLanguage, '')
  return newSlug
}

exports.createPages = ({ graphql, actions }) => {
  const { createPage } = actions

  return new Promise((resolve, reject) => {
    const blogPostTemplate = path.resolve('src/templates/blog-entry.js')
    const pageTemplate = path.resolve('src/templates/page.js')

    resolve(
      graphql(
        `{
          posts: allStoryblokEntry(filter: {field_component: {eq: "blogpost"}}) {
            edges {
              node {
                id
                name
                slug
                field_component
                full_slug
                content
              }
            }
          }
          pages: allStoryblokEntry(filter: {field_component: {eq: "page"}}) {
            edges {
              node {
                id
                name
                slug
                field_component
                full_slug
                content
              }
            }
          }
        }`
      ).then(result => {
        if (result.errors) {
          console.log(result.errors)
          reject(result.errors)
        }

        const allPosts = result.data.posts.edges
        const allPages = result.data.pages.edges

        allPosts.forEach((entry) => {
          const slug = rewriteSlug(entry.node.full_slug)
          const page = {
            path: `/${slug}`,
            component: blogPostTemplate,
            context: {
              story: entry.node
            }
          }
          createPage(page)
        })

        allPages.forEach((entry) => {
          let slug = rewriteSlug(entry.node.full_slug)
          const page = {
            path: `/${slug}`,
            component: pageTemplate,
            context: {
              story: entry.node
            }
          }
          createPage(page)
        })
      })
    )
  })
}
On Line 17 & 18 we're loading the correct template files. Then we're using the GraphQL API to get all our stories with the content type blogpost and page on Line 23 and 35. On Line 57 we're iterating over all the posts and getting the full_slug.
We're making use of a helper function rewriteSlug (Line 3) to remove all the home parts for the root entries, so for our German home page we're generating the path de instead of de/home. We're also replacing the default language, so if English is our default we want the base path for blog posts to be blog/first-post instead of en/blog/first-post. We're using this helper function also in our components/Navigation.js and in the components/PostLists file, so we're generating the correct links from the full slugs that are returned by the API.
Finally, our pages are generated with the correct slugs on Line 66 and 78. To the templates we pass a context object (Line 74), that can be used to load our Storyblok content per page. If you open templates/page.js, you can see that on Line 6, we're using pageContext instead of the data used in the pages/index.js file.
import React from "react"
import Page from '../components/Page'
import Layout from "../components/Layout"
import { useStoryblokState } from "gatsby-source-storyblok"

export default function PageIndex({ pageContext, location }) {
  const story = useStoryblokState(pageContext.story, location)

  return (
    <Layout location={location}>
      <Page blok={story.content} />
    </Layout>
  )
}
Resolving Relations on Multi-Options fields
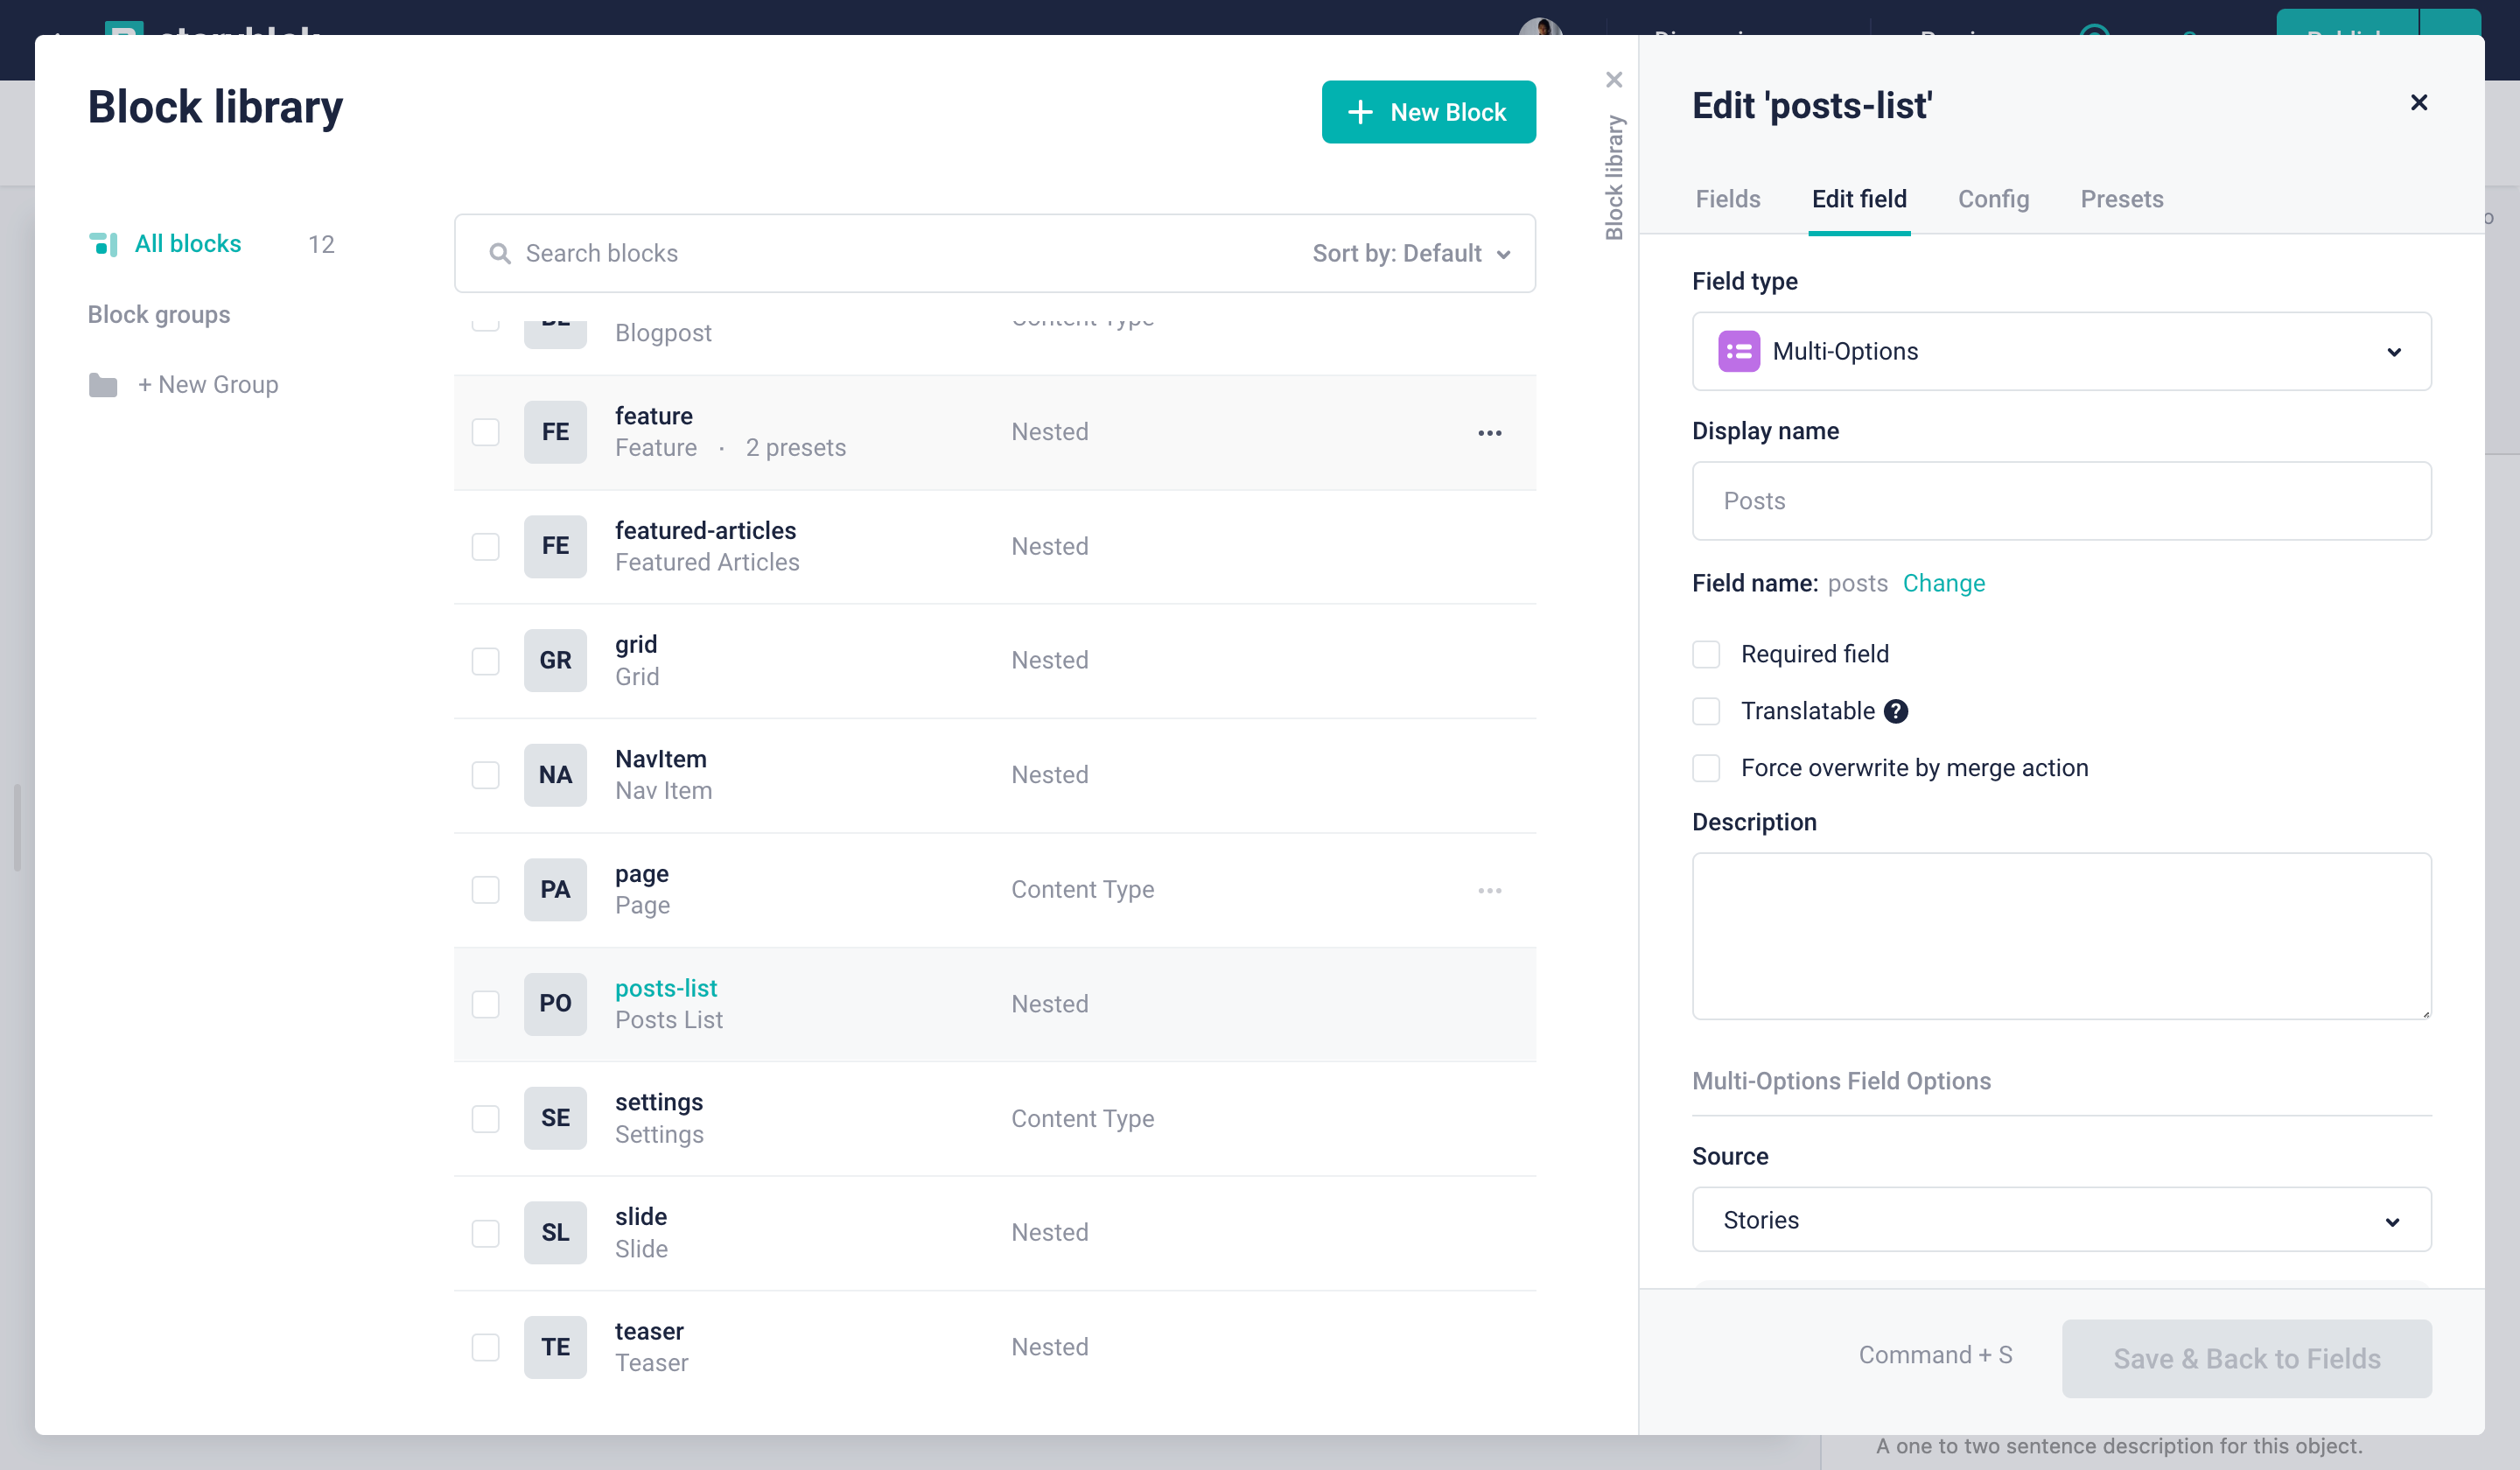
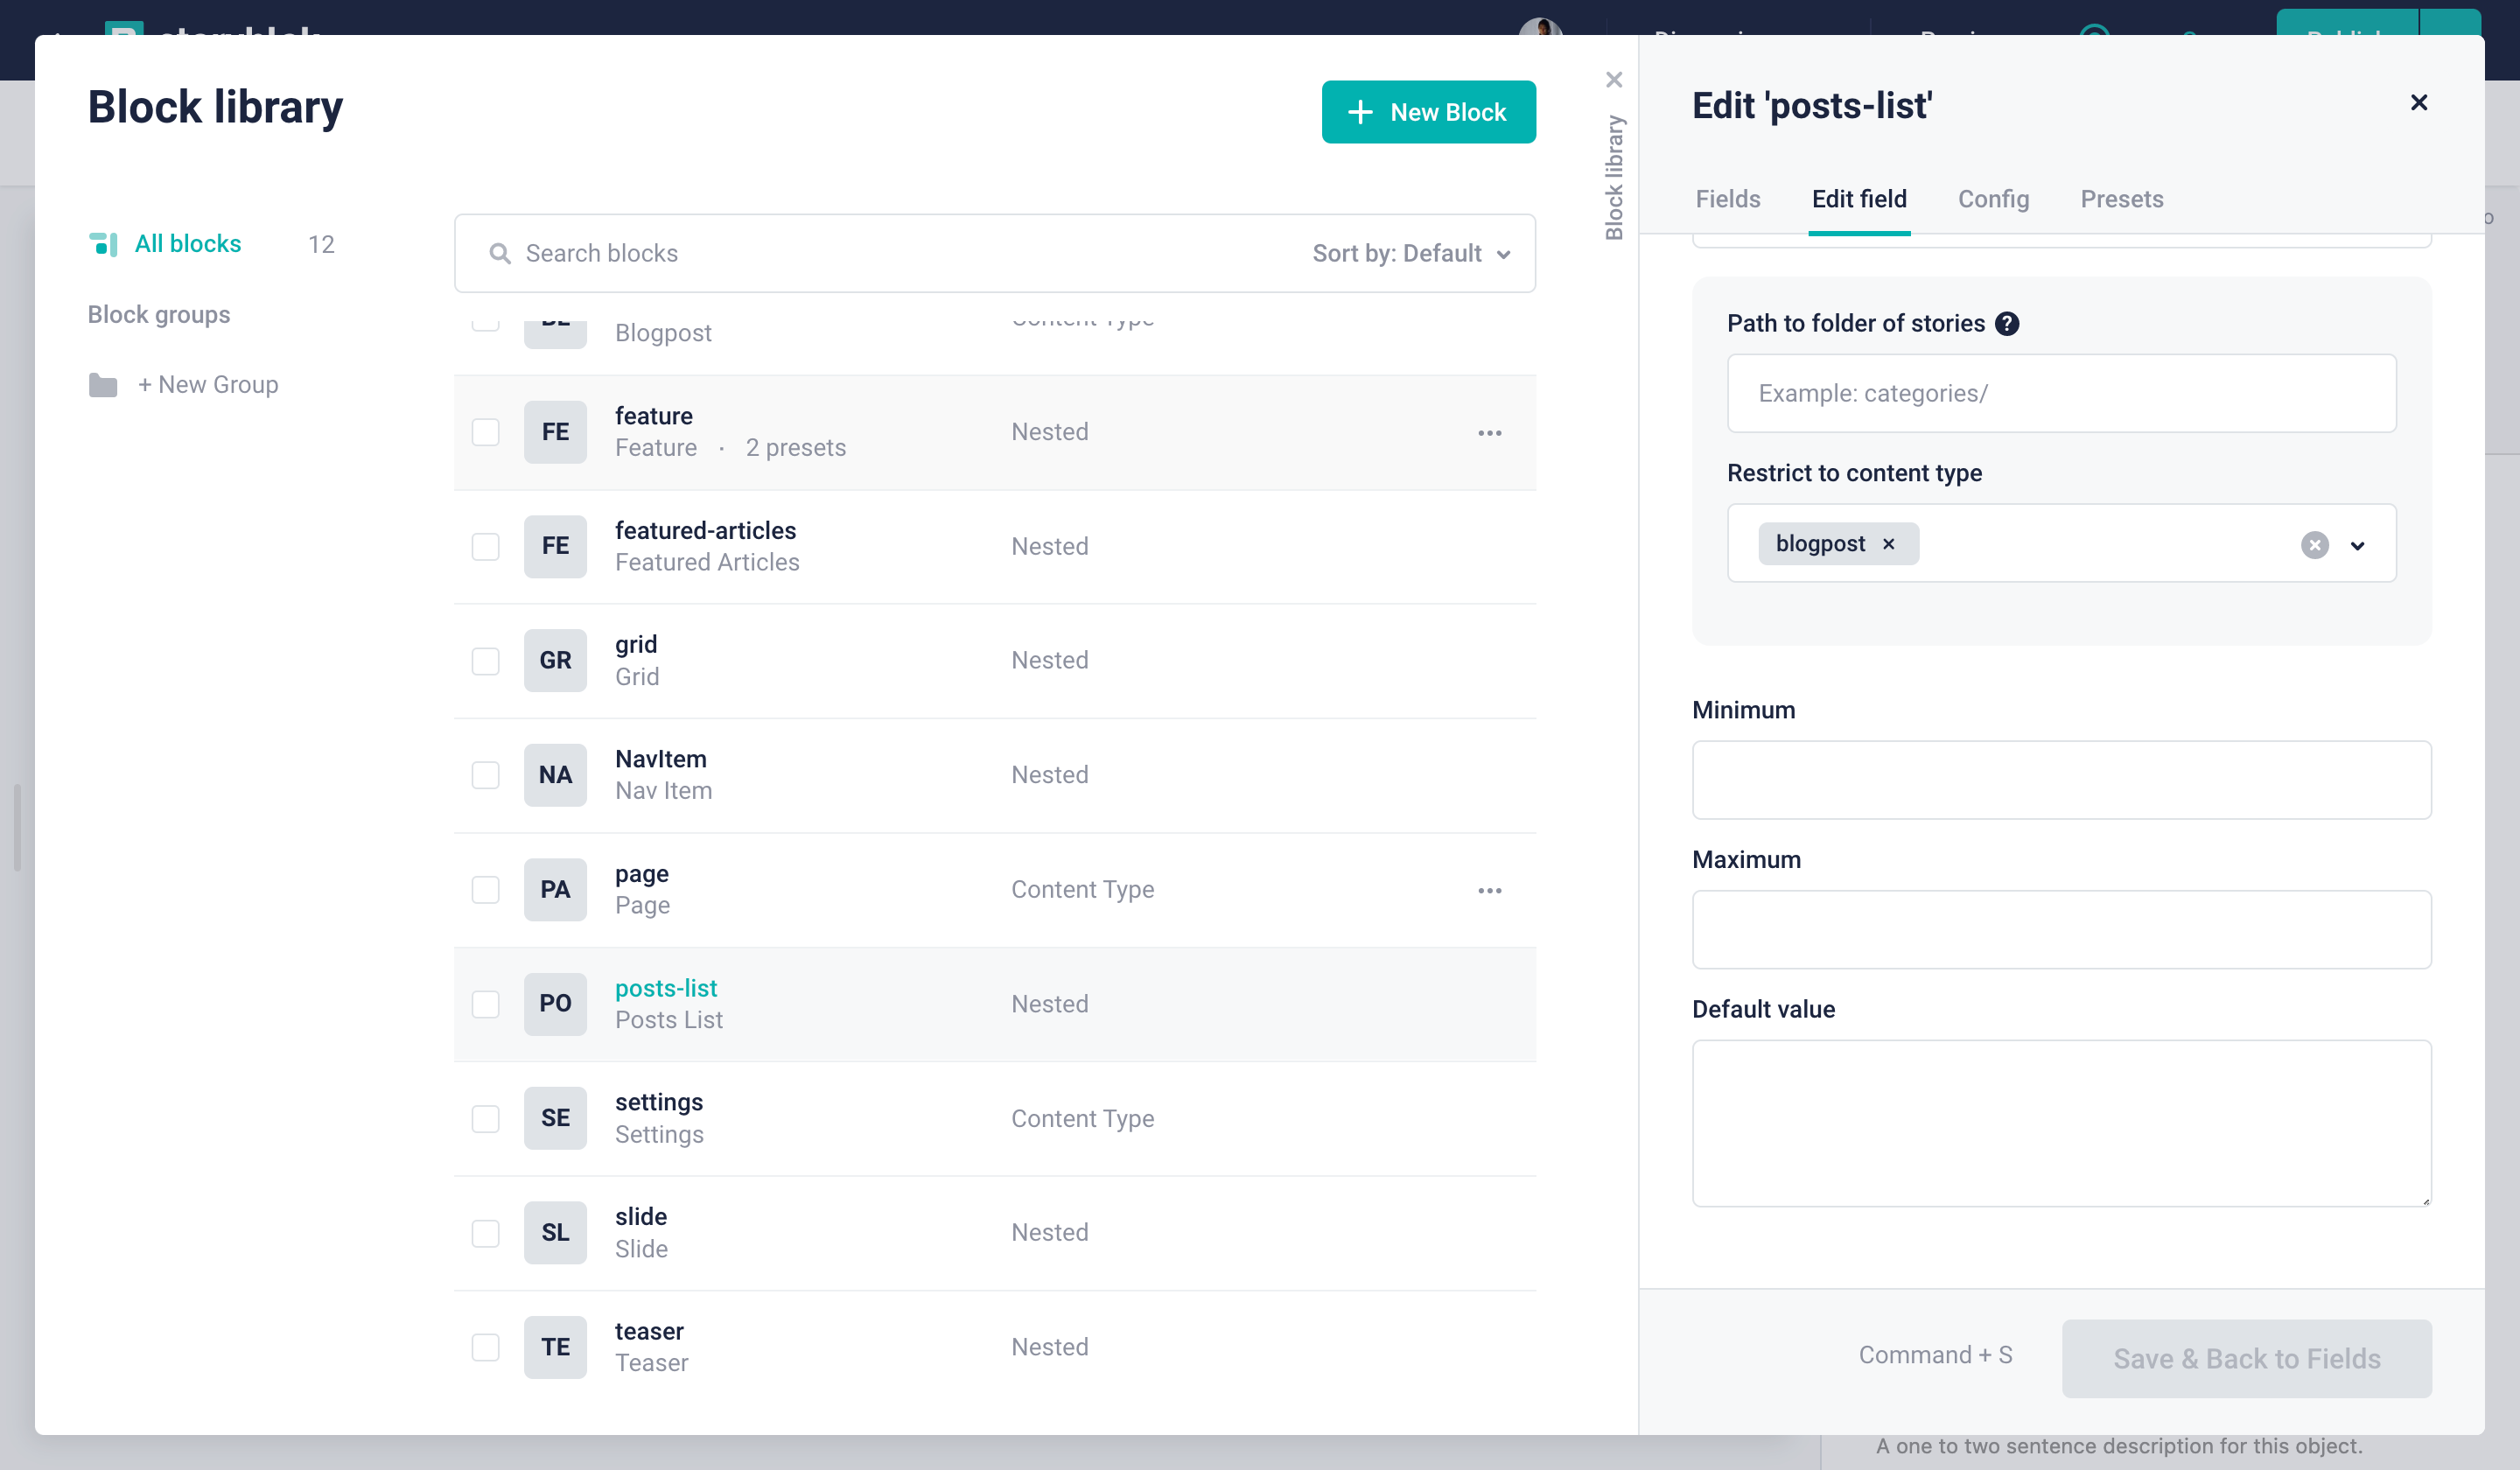
If you open the en/blog/home story, you will see the posts-lists component. This component is set up with a multi-option field-type {1}, that allows referencing other story entries {2}. In this example, since we only want blog posts, we're limiting it to the content type blogpost {1}. Open the following link with your preview token to see what it returns:
If you take a look into story.content.body[0].posts, you will see, that it includes a list of uuids. To actually get the full story objects, we have to resolve the relations first. Take a look at the following link with your preview token attached:
By using the resolve_relations (opens in a new window) option of the Storyblok API, we can get the full story objects of those related objects.
Inside of the pages/index.js file, you can find where the relations are already resolved. Once directly on the Storyblok Bridge:
  let story = data.storyblokEntry
  story = useStoryblokState(data.storyblokEntry, {
    resolveRelations: "posts-list.posts",
    language: location,
  })
And on the client call as well, but this is handled by gatsby-source-storyblok.
Since the gatsby-source-storyblok module isn't able to resolve these deep relations yet, we're resolving the relations manually in the components/PostsList.js file on Line 11.
import React from "react"
import { storyblokEditable } from "gatsby-source-storyblok"
import { useStaticQuery, graphql } from "gatsby"

import rewriteSlug from '../utils/rewriteSlug'

const PostsList = ({ blok }) => {
  let filteredPosts = [];
  const isResolved = typeof blok.posts[0] !== 'string'

  const data = useStaticQuery(graphql`
    {
      posts: allStoryblokEntry(
        filter: {field_component: {eq: "blogpost"}}
      ) {
        edges {
          node {
            id
            uuid
            name
            slug
            full_slug
            content
            created_at
          }
        }
      }
    }
  `)
  if (!isResolved) {
    filteredPosts = data.posts.edges
      .filter(p => blok.posts.indexOf(p.node.uuid) > -1);

    filteredPosts = filteredPosts.map((p, i) => {
      const content = p.node.content
      const newContent = typeof content === 'string' ? JSON.parse(content) : content
      p.node.content = newContent
      return p.node
    })
  }

  const arrayOfPosts = isResolved ? blok.posts : filteredPosts
  return (
    <div {...storyblokEditable(blok)}>
      <div className="container mx-auto">
        <ul className="flex flex-col justify-center items-center">
          {arrayOfPosts.map(post => {
            return (
              <li
                key={post.name}
                className="max-w-4xl px-10 my-4 py-6 rounded-lg shadow-md bg-white"
              >
                <div className="flex justify-between items-center">
                  <span className="font-light text-gray-600">
                    {`
                    ${new Date(post.created_at).getDay()}.
                    ${new Date(post.created_at).getMonth()}.
                    ${new Date(post.created_at).getFullYear()}`}
                  </span>
                </div>
                <div className="mt-2">
                  <a
                    className="text-2xl text-gray-700 font-bold hover:text-gray-600"
                    href={`/${rewriteSlug(post.full_slug)}`}
                  >
                    {post.content.title}
                  </a>
                  <p className="mt-2 text-gray-600">{post.content.intro}</p>
                </div>
                <div className="flex justify-between items-center mt-4">
                  <a
                    className="text-blue-600 hover:underline"
                    href={`/${rewriteSlug(post.full_slug)}`}
                  >
                    Read more
                  </a>
                </div>
              </li>
            )
          })}
        </ul>
      </div>
    </div>
  )
}

export default PostsList
Deploying to Vercel
You have multiple options for the deployment of your website/application to go live or to preview the environment. One of the easiest ways is to use Vercel and deploy using the command line or their outstanding GitHub Integration (opens in a new window).
First, create an account on Vercel and install their CLI application.
npm i -g vercelDeploy your website by running the vercel in your console.
vercelTake a look at the deployed Demo project.
Multi-language setup complete!
Congratulations! You now have a multi-language Gatsby website with automatic page and post generations as well as a live preview.
Conclusion
Gatsby.js and Storyblok make it super easy for your content editors to manage content. With this setup, Storyblok’s true live preview can be mounted on your statically generated website so you don’t even need to run a server in the background.
| Resource | Link |
|---|---|
| Github repository of this tutorial | github.com/storyblok/gatsbyjs-multilanguage-website |
| Demo Project | gatsby-multilanguage-website.vercel.app |
| Gatsby.js | gatsbyjs.org |
| React.js | reactjs.org |
| Storyblok App | Storyblok |
Question or Feedback?
Author
