Build a Markdown Editor with Next.js and Storyblok
Storyblok is the first headless CMS that works for developers & marketers alike.
Introduction
One of your options for developing a code-driven website is to use markdowns to create content when creating a blog publication site. In this tutorial, we’d learn to create a markdown editor with Next.js and Storyblok.
What is Markdown?
Markdown is a markup language that can add formatting properties to typically plain text documents. Markdown uses simple syntaxes in the text to effect specific changes to it. These changes could be in headings, bold text, and bullets for creating lists. Its syntax doesn’t require prior programming language experience; it uses symbols to denote specific properties. For example, words can be bold by placing the text between asterisks. Two before and two after, such as **A bold Text**.
Markdown can be used for writing notes, creating presentations, technical documentation, and blog posts.
You can find the final version of the code used in this tutorial here.
What is Storyblok CMS?
Storyblok (opens in a new window) is a headless CMS with a visual editor (opens in a new window) that allows users to create and manage content. The visual editor (opens in a new window) has a simple user interface to enable users to view a website’s components and manage its content. With this in place, content creators and end-users can manage their application’s content without contacting the site’s developers.
Why use Storyblok?
Below are a few reasons why you should use Storyblok CMS:
- Quickly develop web applications for clients, enabling them to create new content and manage existing content independent of the developer.
- A simple way to understand and integrate a Headless Content Management System.
- Simple User Interface to create and manage content.
- Storyblok CMS is used via simple API requests.
We will build a markdown editor using the Next.js (opens in a new window) framework. To set it up, navigate to a working directory, clone the GitHub repo (opens in a new window) and run npm install to install the necessary dependencies. The previous command will create a project folder with the starter code in the current working directory.
The Editor component houses the Nav component and FileList component. It’s also the component that will contain markdown functionalities. The Nav component returns a navigation bar with two buttons to “create a new file" {1} and “save” {2}. The FileList component will display a list of all saved markdown files from Storyblok CMS.
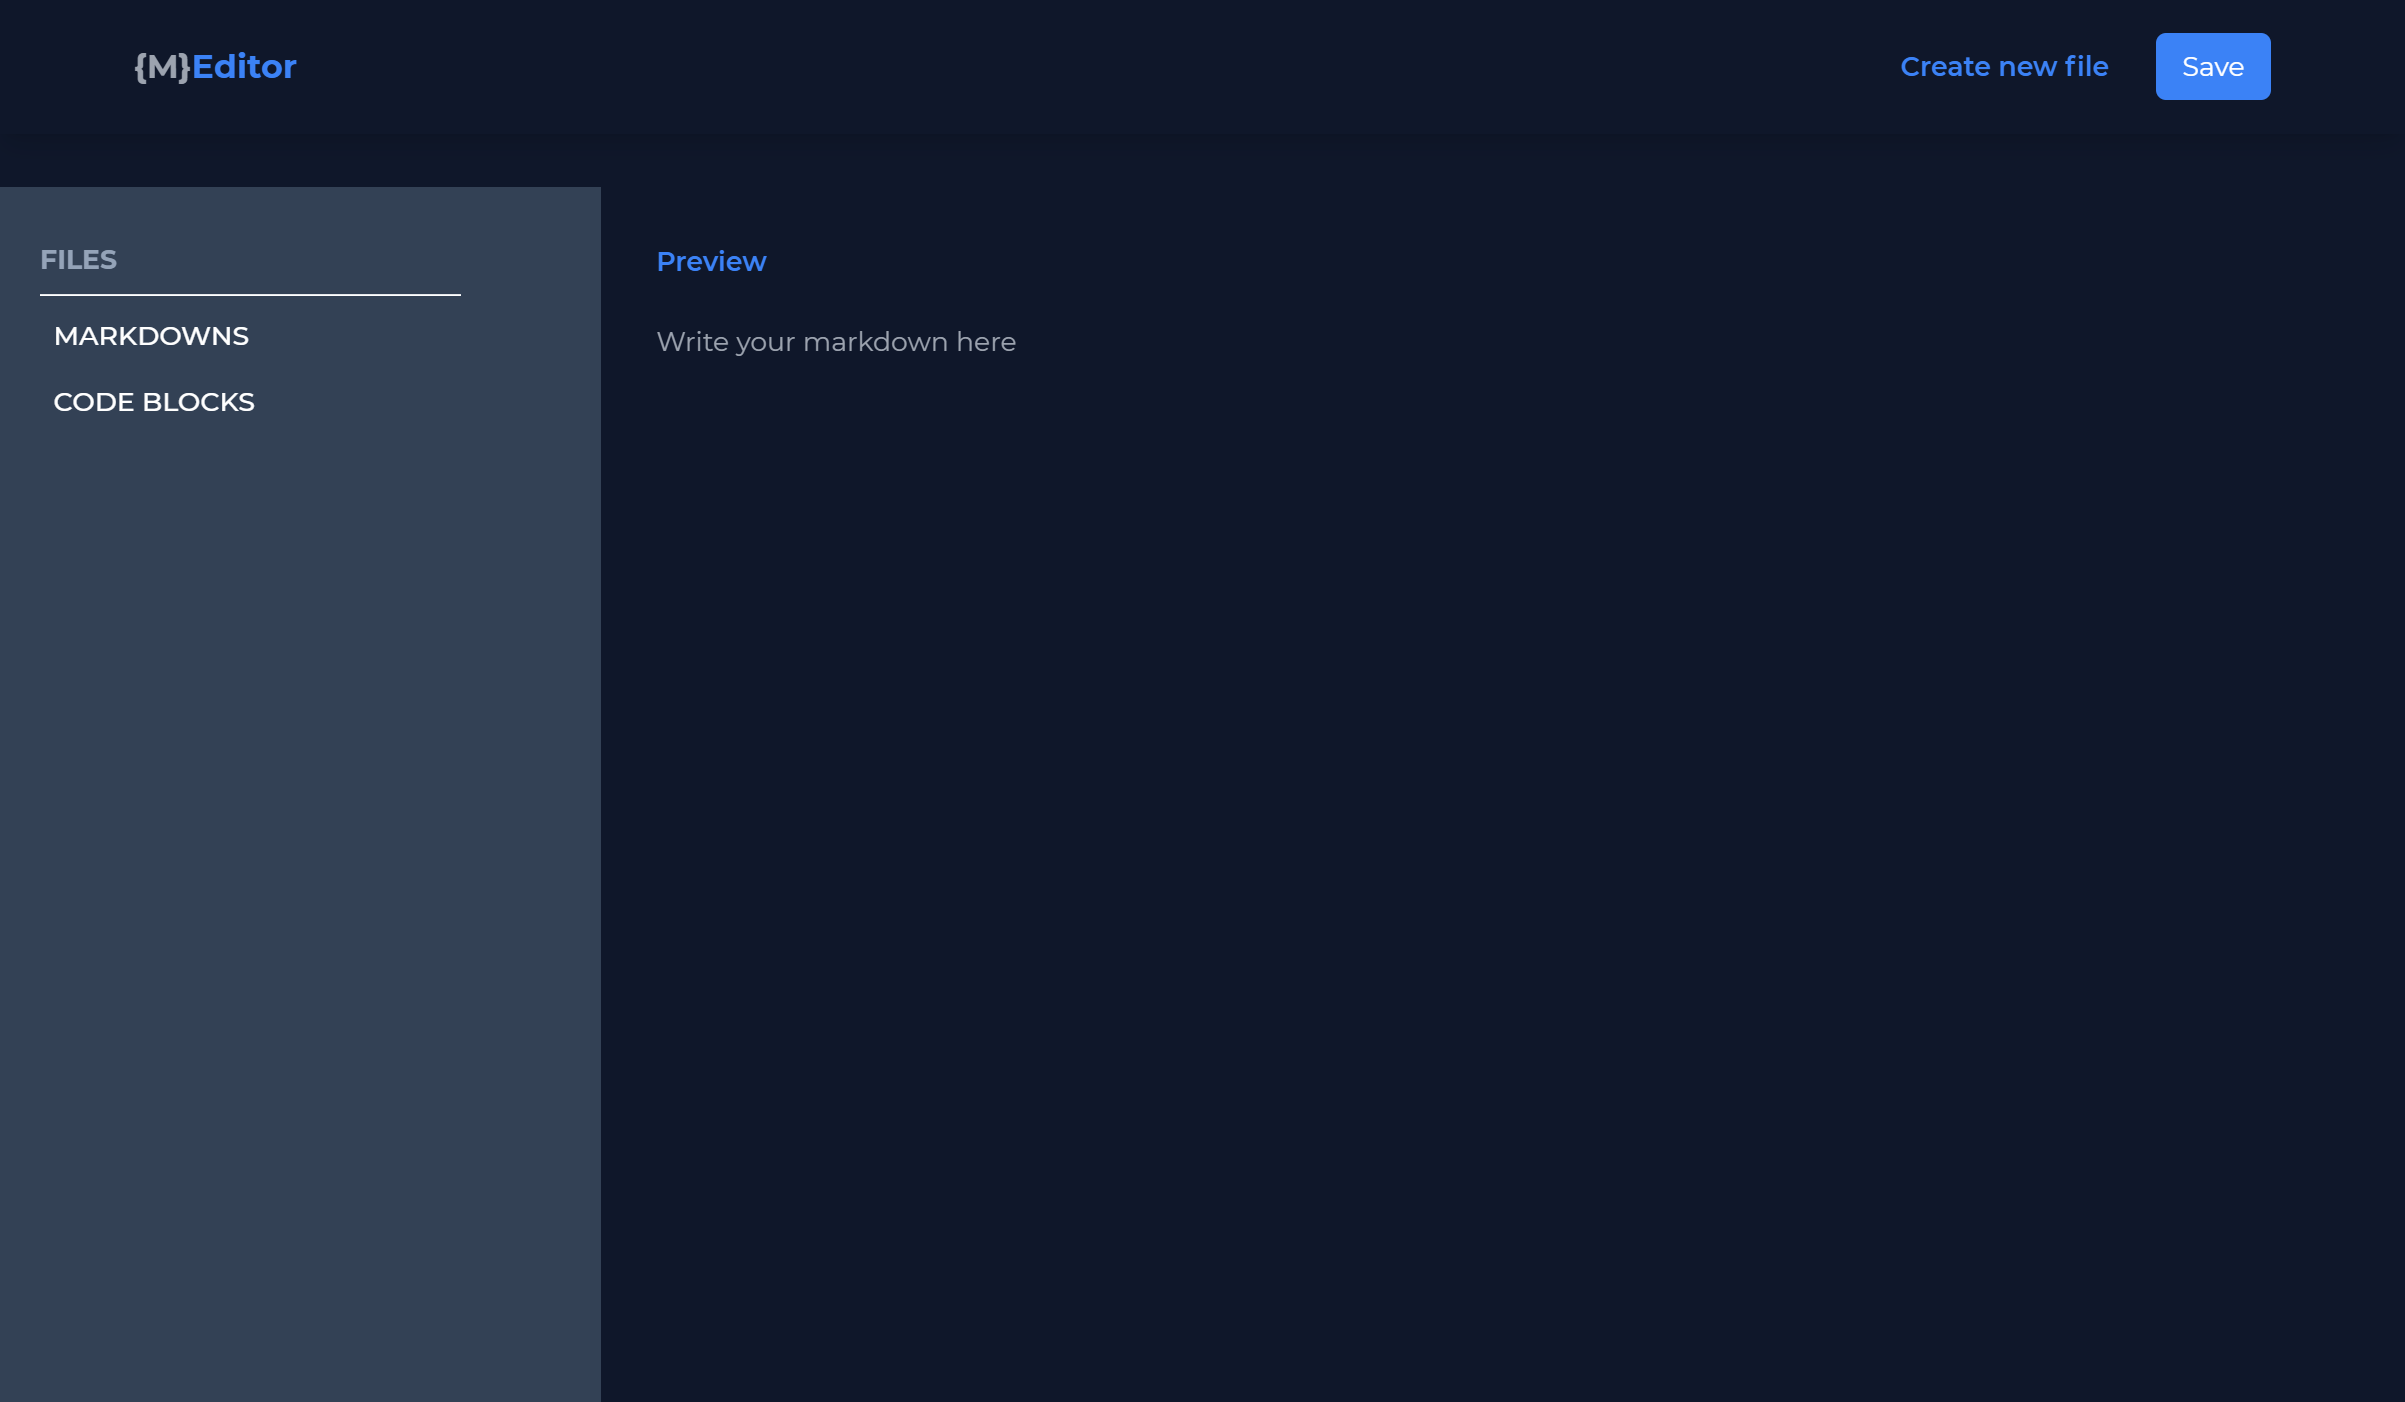
If you run the npm run dev command in your terminal, you will get a result similar to the image below:
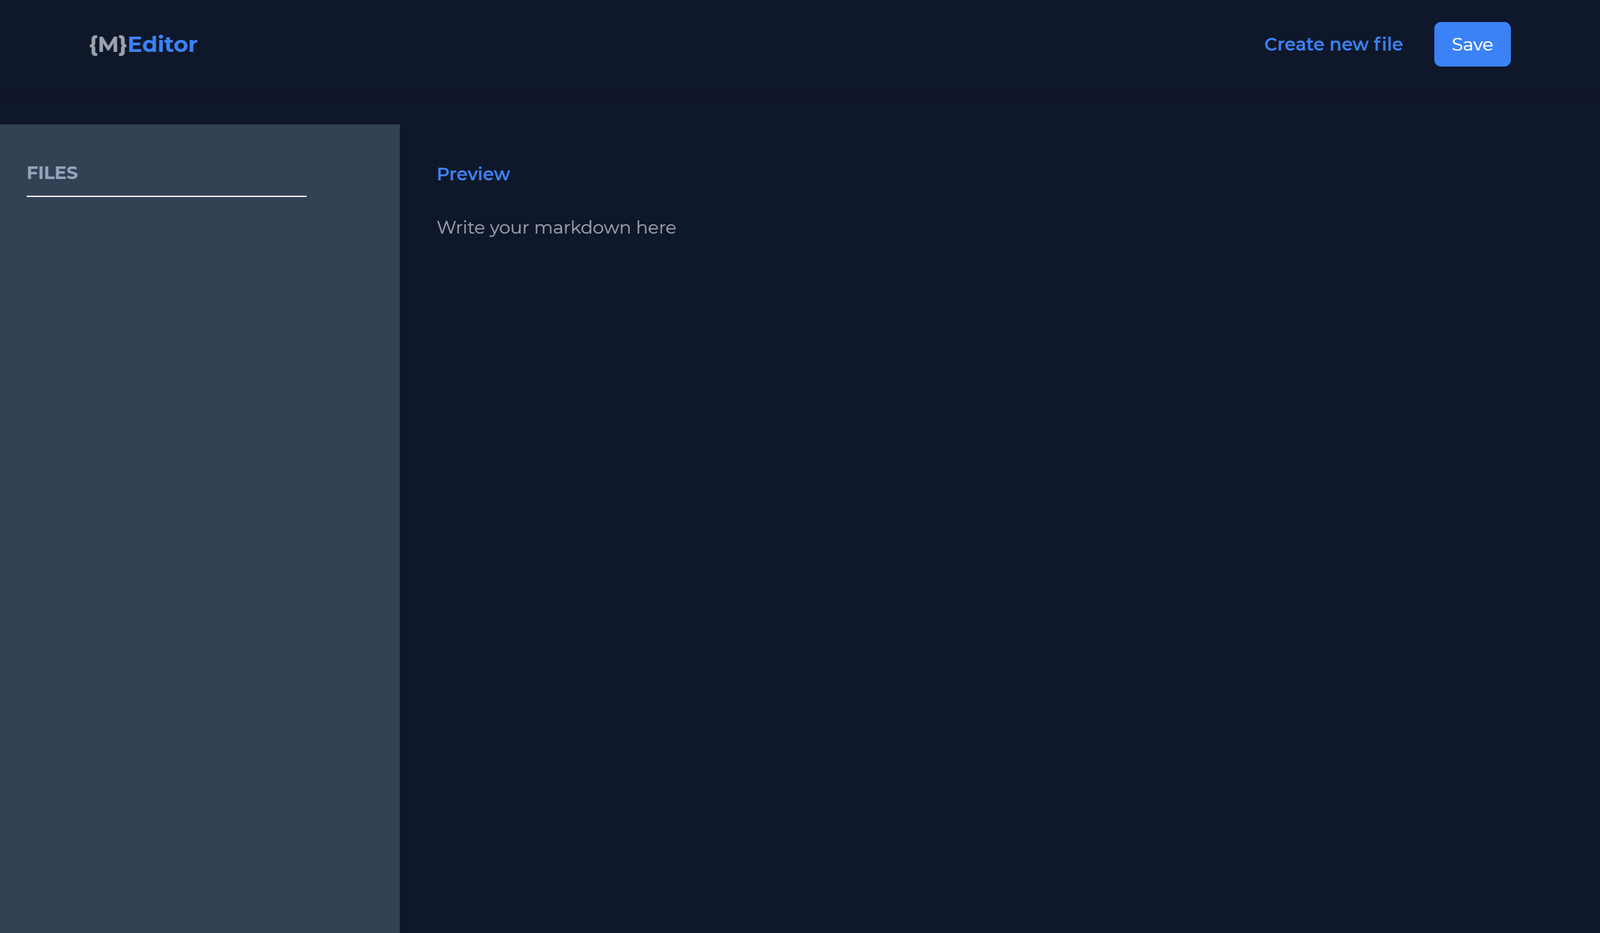
FileList component of markdown editor
Above is the layout of the application. There is a section to preview created markdown files and another area to enter content. The second section has a toggle button to switch between preview and edit modes.
Adding Markdown Functionality
For the markdown, we will need to take in the user input from textarea in our Editor.js file and convert it to markdown to be displayed in the preview section. To do this, we will first create a state variable to handle input changes for text:
const [value, setValue] = useState("");
const handleInputChange = (e) => {
    setValue(e.target.value);
  }
Then we assign this value to the textarea value property and pass this function to the onChange event.
<textarea
    className=" bg-slate-900 fullheight w-full relative outline-none text-white border-0 pt-6"
    placeholder="Write your markdown here"
    value={value}
    onChange={handleInputChange}
/>
We will use the reactMarkdown, remarkGfm, and React-syntax-highlighter npm packages to render markdowns. Since these modules are pre-installed, we need to add imports:
//...
import ReactMarkdown from "react-markdown";
import remarkGfm from 'remark-gfm';
import { Prism as SyntaxHighlighter } from 'react-syntax-highlighter';
import atomDark from 'react-syntax-highlighter/dist/cjs/styles/prism/atom-dark';
For the preview window, add the code block below:
  // preview window
  <div className="bg-slate-900 h-full w-full text-white editor">
    <ReactMarkdown remarkPlugins={[remarkGfm]}>
      {value}
    </ReactMarkdown>
  </div>
The ReactMarkdown component renders whatever text is passed to it as markdown. RemarkGfm adds support for URLs, strikethroughs, tables, and lists.
To better style the markdown appearance, add the following styles to global.css:
.editor tr {
  border-top: 1px solid #c6cbd1;
  /* background: #fff; */
}
.editor th,
.editor td {
  padding: 12px 55px;
  border: 1px solid #dfe2e5;
}
.editor table tr:nth-child(2n) {
  /* background: #f6f8fa; */
}
.editor h1{
  font-size: 2em;
}
.editor h2{
  font-size: 1.5em;
}
.editor h3{
  font-size: 1.17em;
}
.editor h4{
  font-size: 1em;
}
.editor h5{
  font-size: .83em;
}
.editor h6{
  font-size: .67em;
}
.editor h1, h2, h3, h4, h5, h6{
    font-weight: bolder;
}
.editor blockquote {
  color: #fff;
  margin: 10px;
  padding-left: 1.2em;
  border-left: 0.2em #666 solid;
  font-style: italic;
}
.editor a{
  color: rgb(46, 46, 233);
}
.editor li{
  list-style-type: square;
}
.fullheight{
  height: 92vh;
}
Now, if we run our application with the npm run dev command, we can add markdowns in the textarea and preview it.
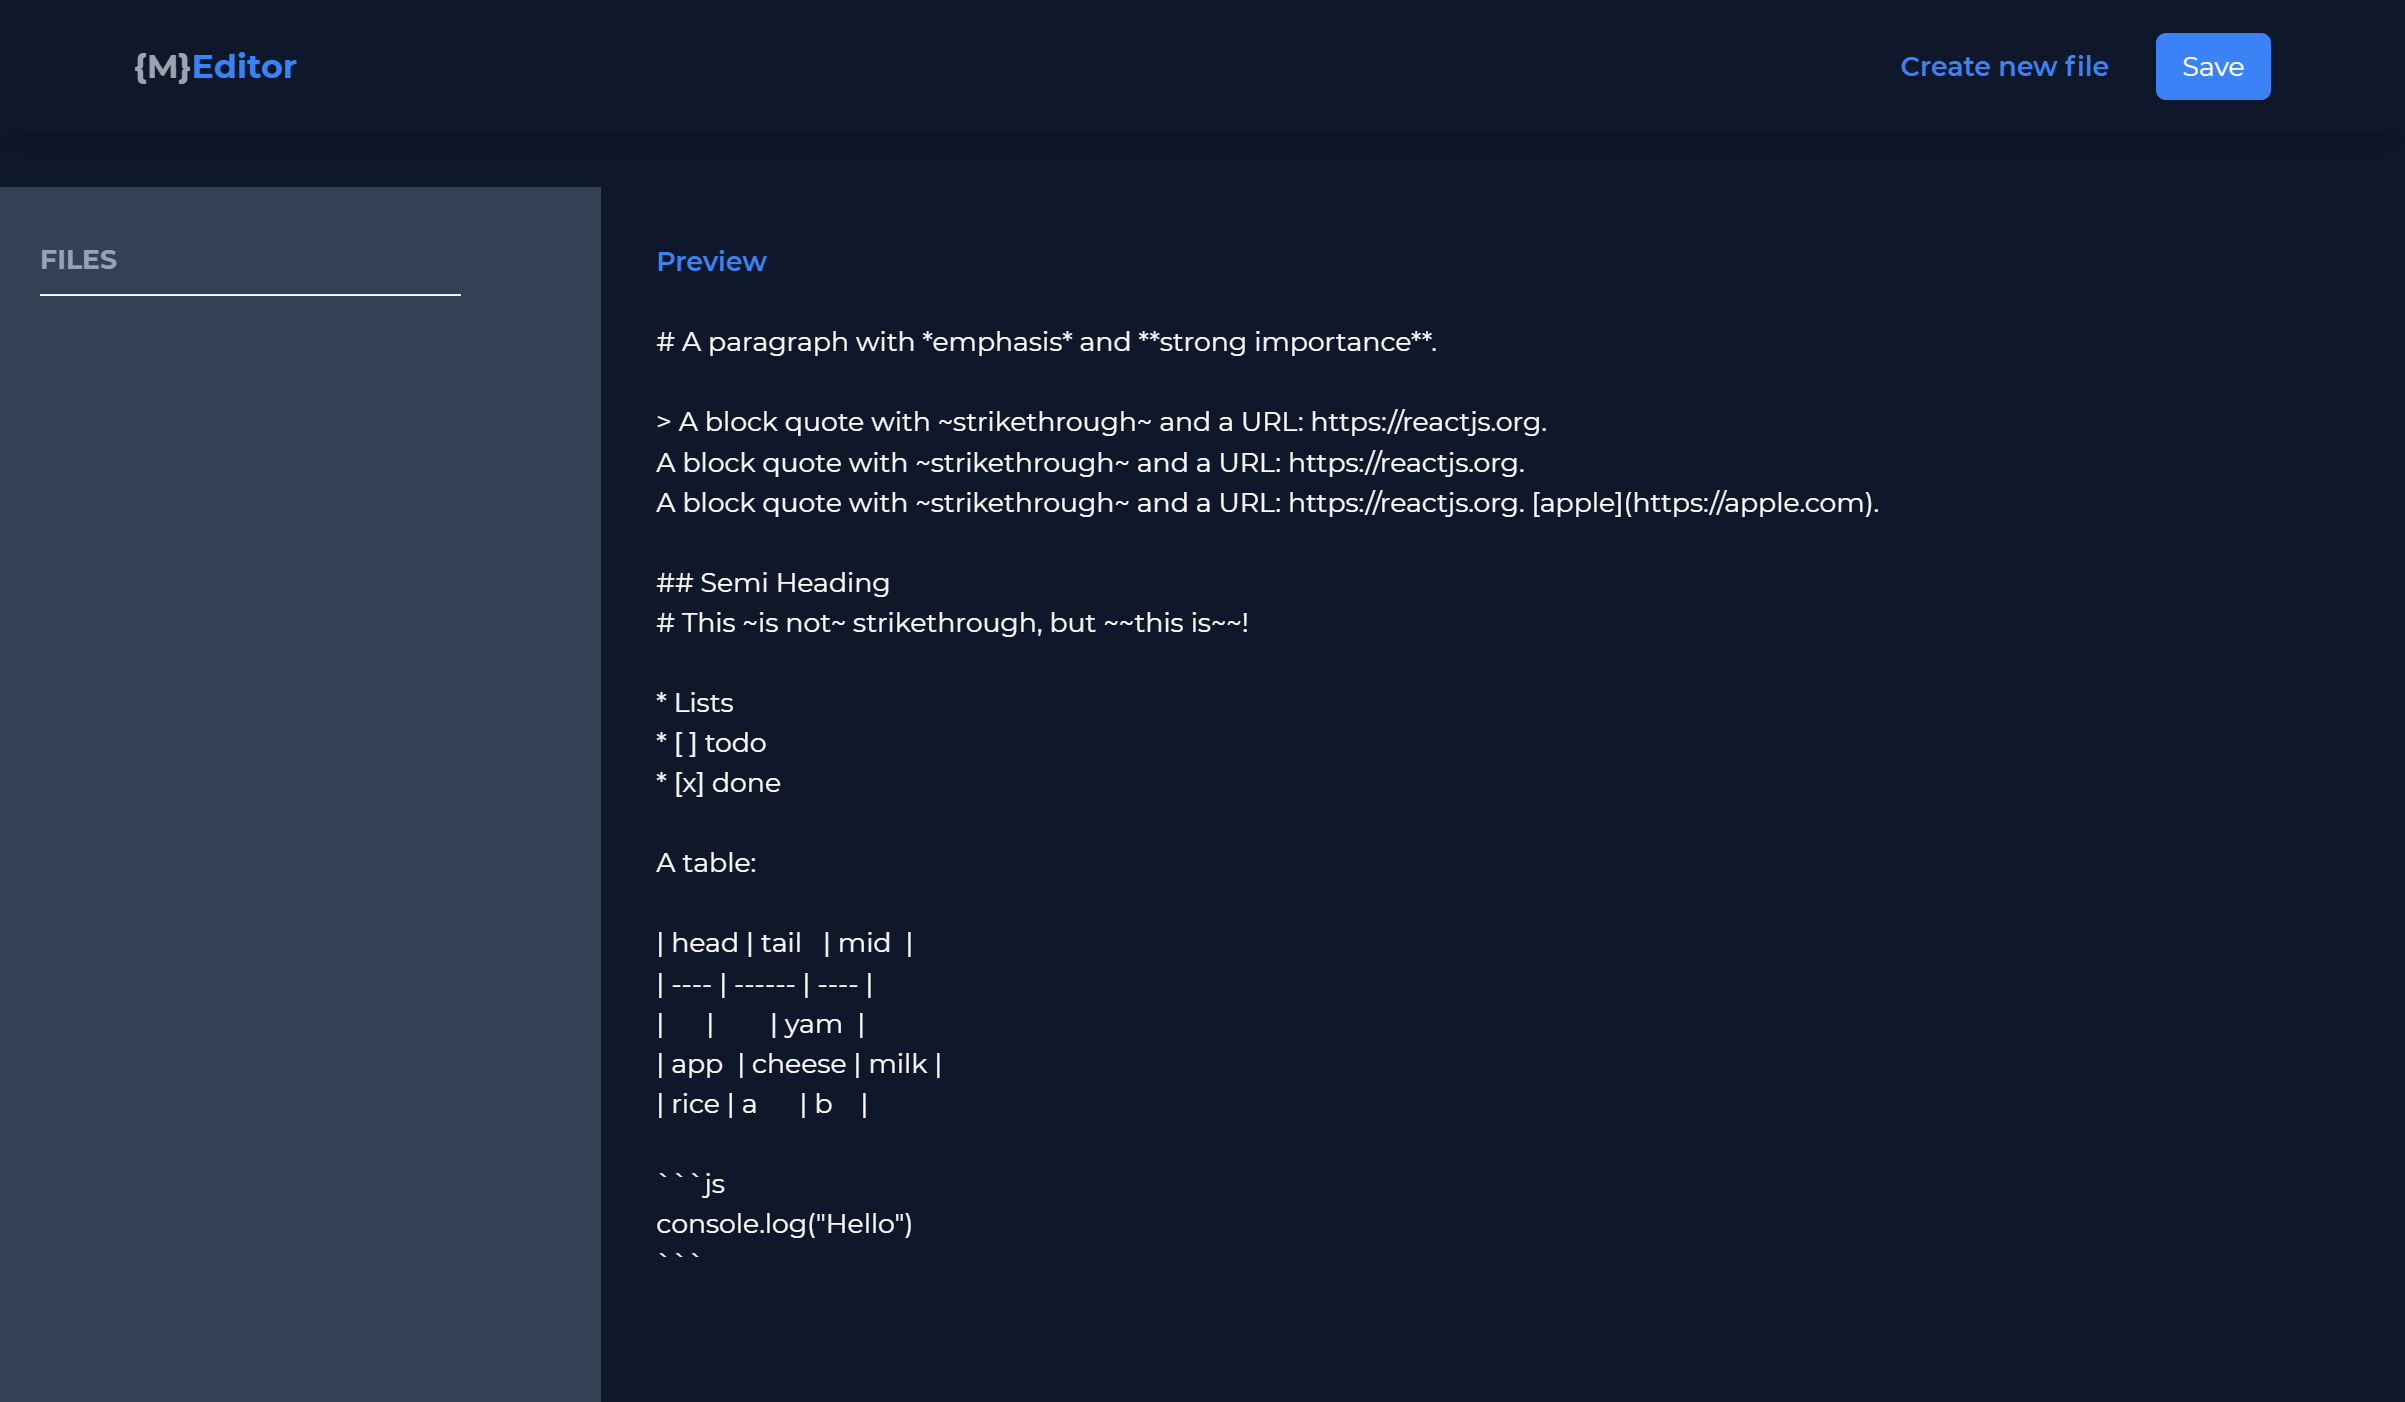
A typed markdown from the markdown editor
In the image above, the markdown entered is rendered and displayed in the preview window. The code block, however, is not properly formatted. To do this, we will use React-syntax-highlighter. We will automatically detect code blocks denoted by ``` followed by language name, this will be rendered following the syntax highlighting style for the language.
<ReactMarkdown remarkPlugins={[remarkGfm]}
    components={{
      code({node, inline, className, children, ...props}) {
        const match = /language-(\w+)/.exec(className || '')
        return !inline && match ? (
          <SyntaxHighlighter
            children={String(children).replace(/\n$/, '')}
            style={atomDark}
            language={match[1]}
            PreTag="div"
            {...props}
          />
          ) : (
            <code className={className} {...props}>
              {children}
            </code>
          )
        }
      }}
     >
   {value}
</ReactMarkdown>
With this in place, syntax highlighting will be carried out on code blocks.
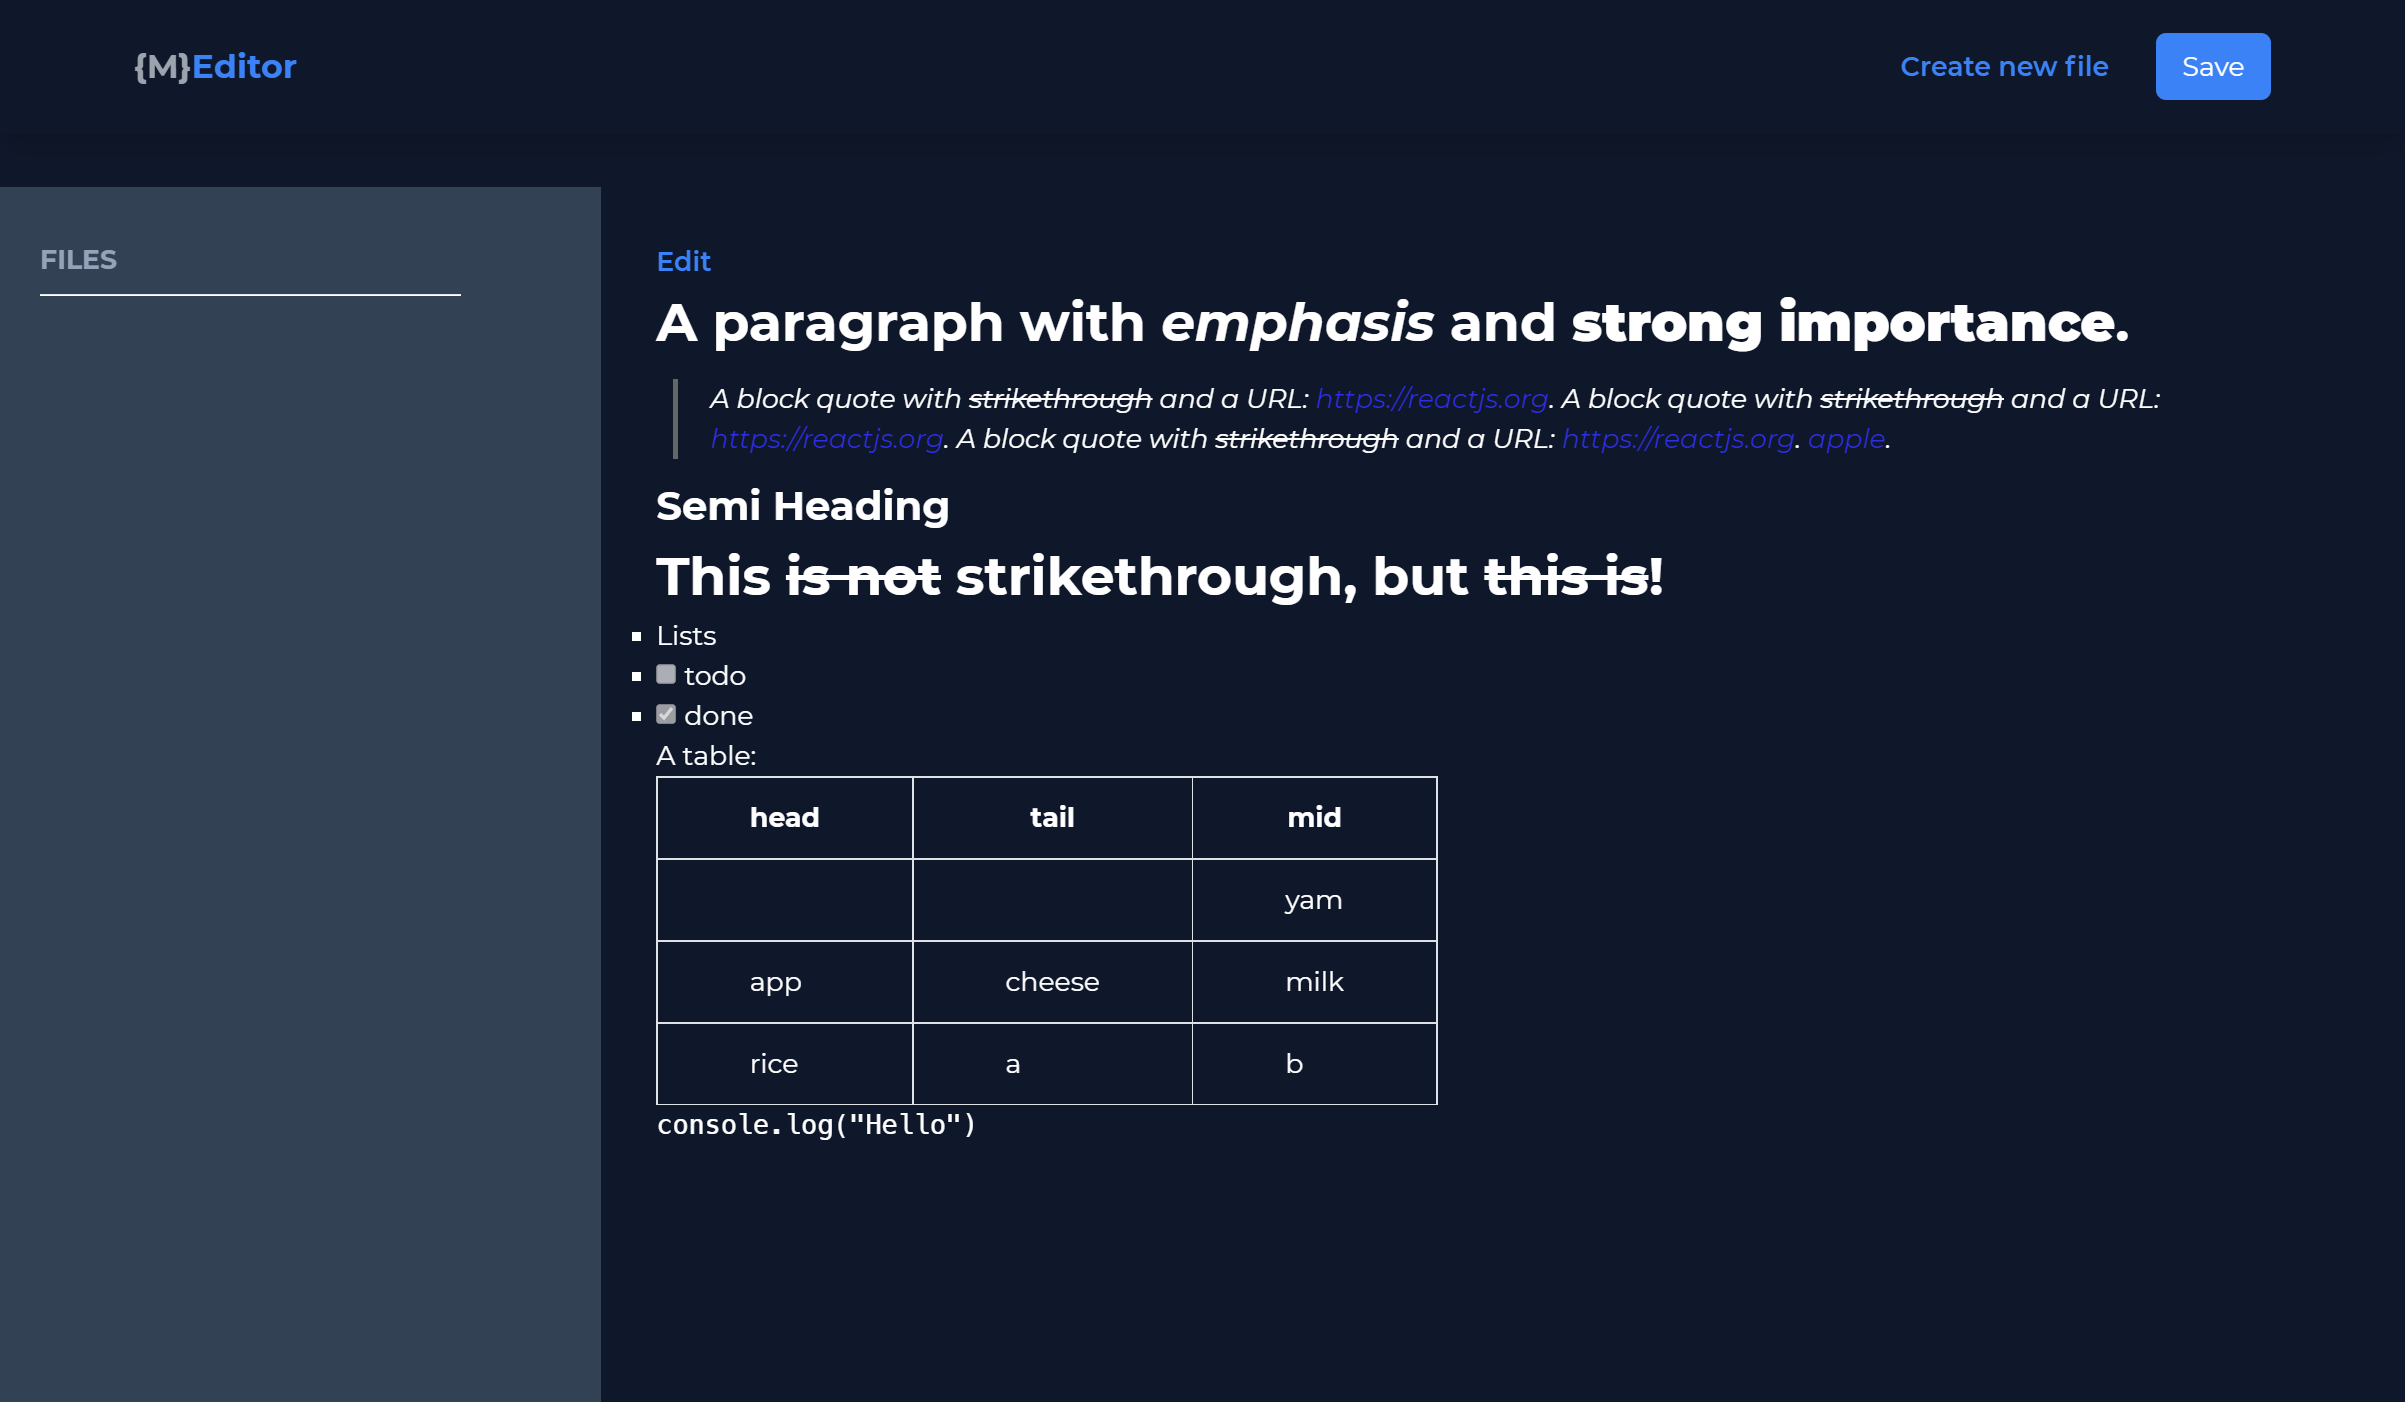
Previewing text with the markdown editor
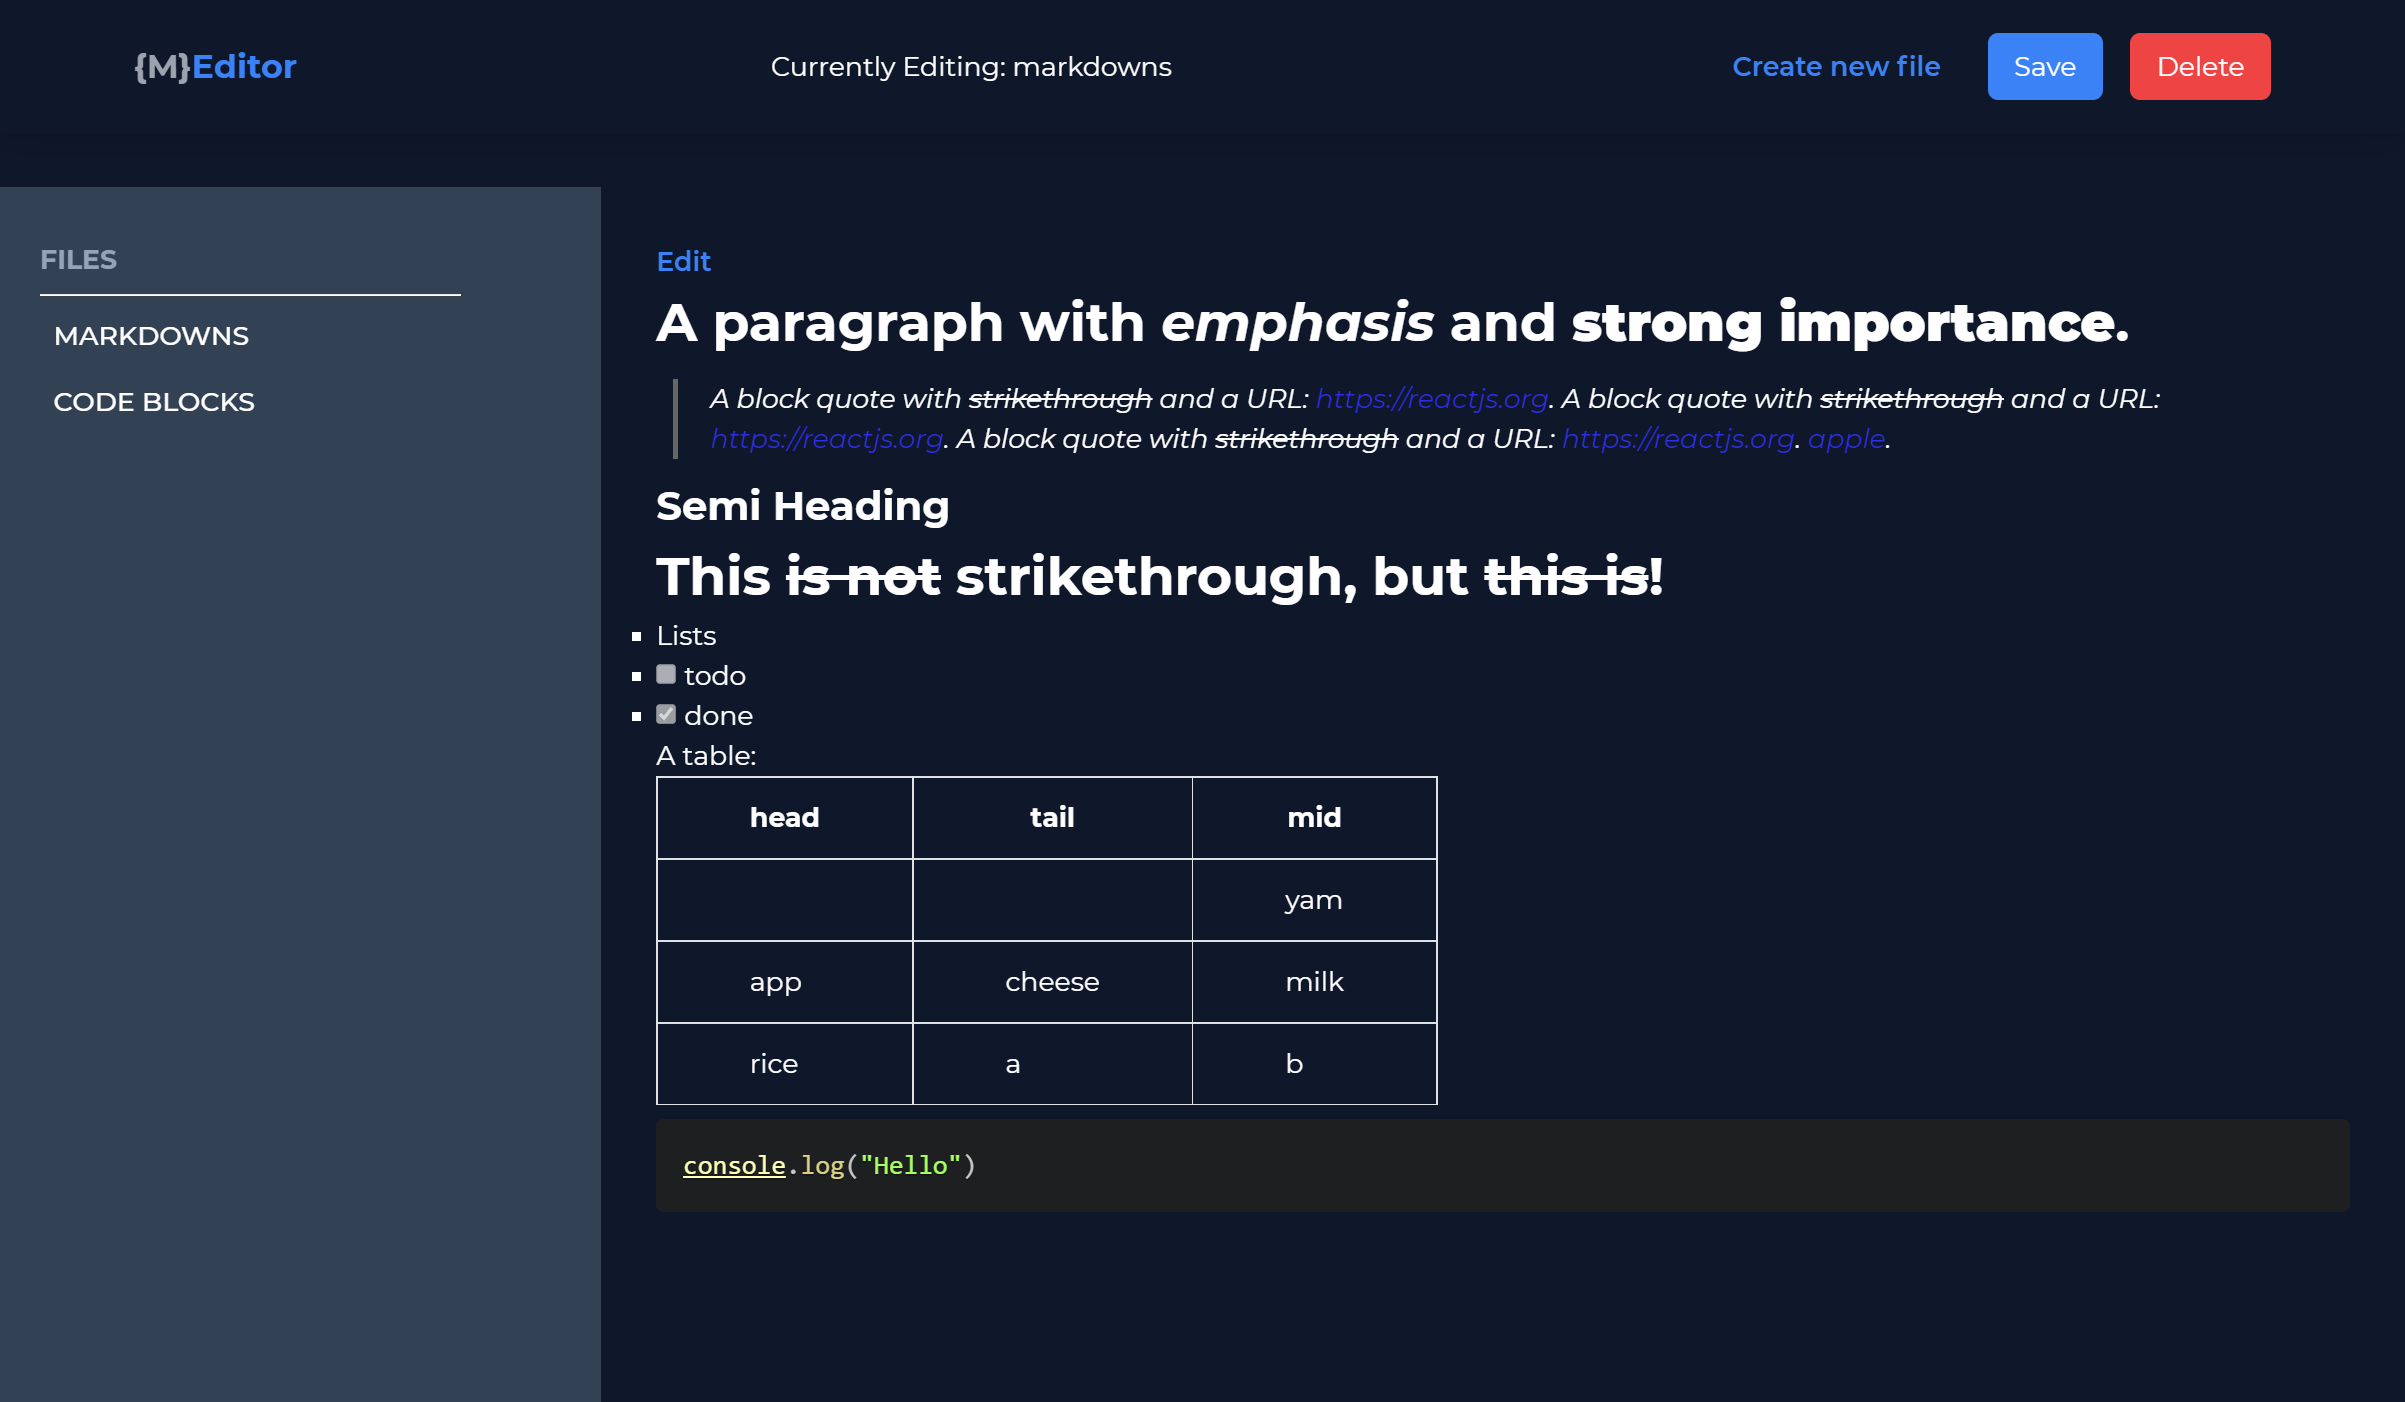
When we toggle to the preview window using the preview button, we can view the formatted markdown below:
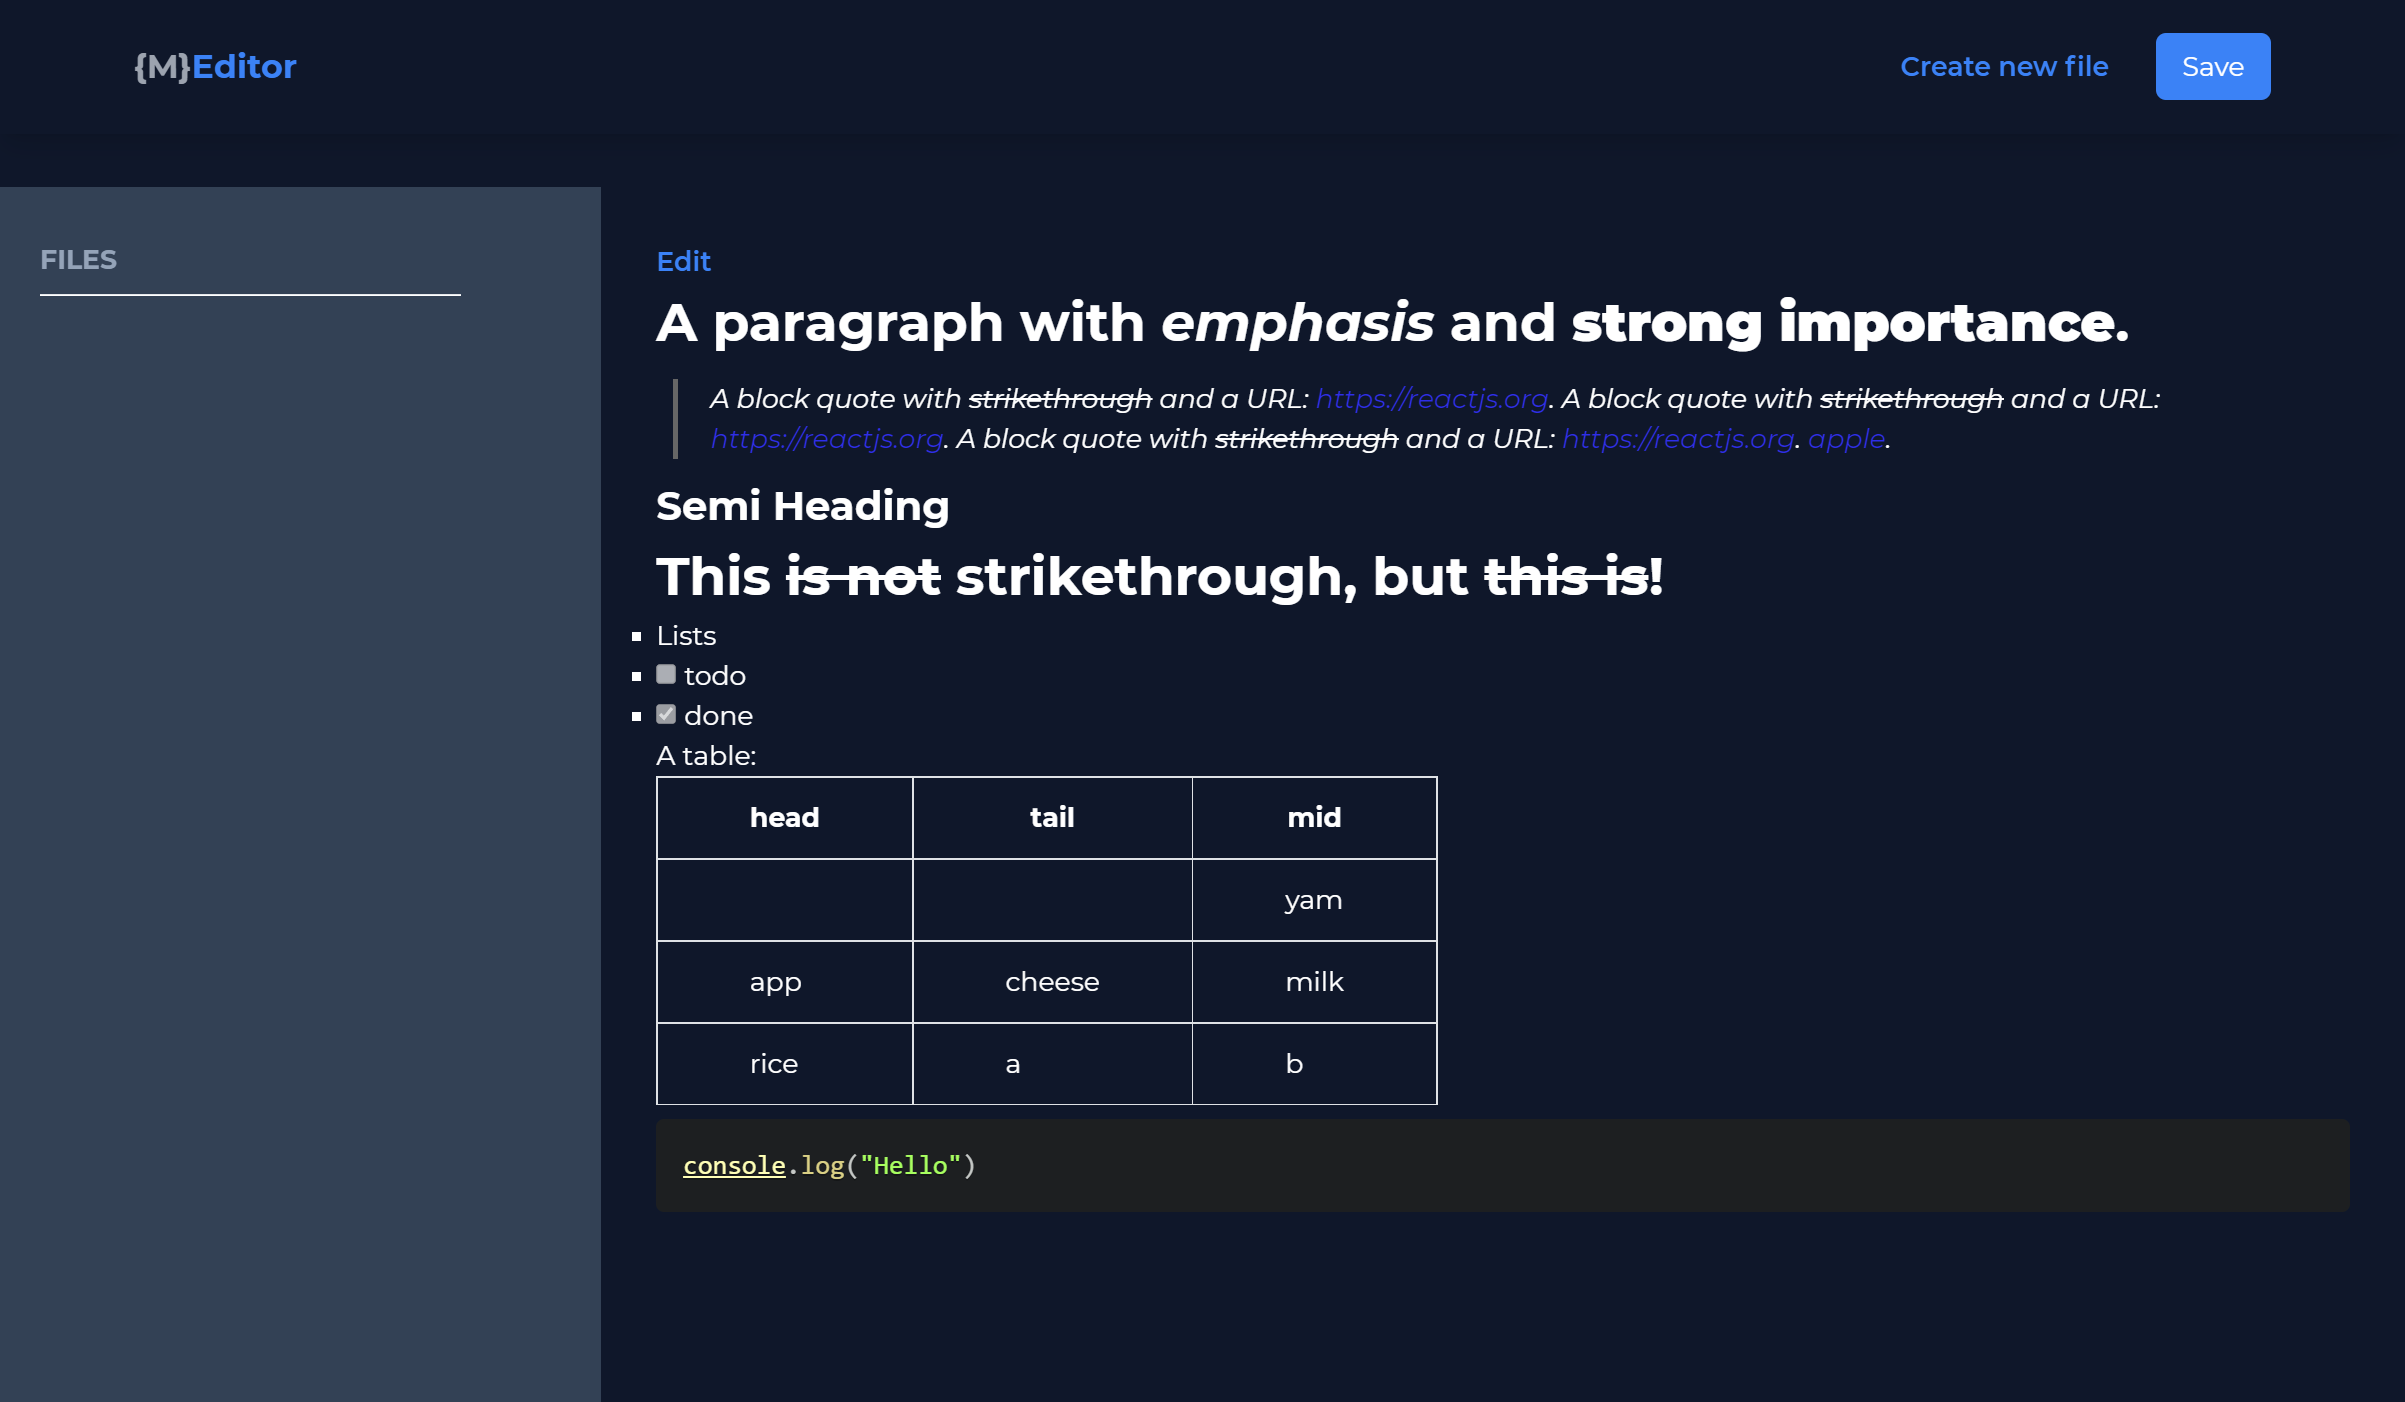
Preview of markdown editor
Setting up Content Structure
With the Markdown Editor built, the next step is to set up the content structure for our application on Storyblok. Navigate in a browser to Storyblok (opens in a new window) and log in if you have a pre-existing account or otherwise create a new user account.
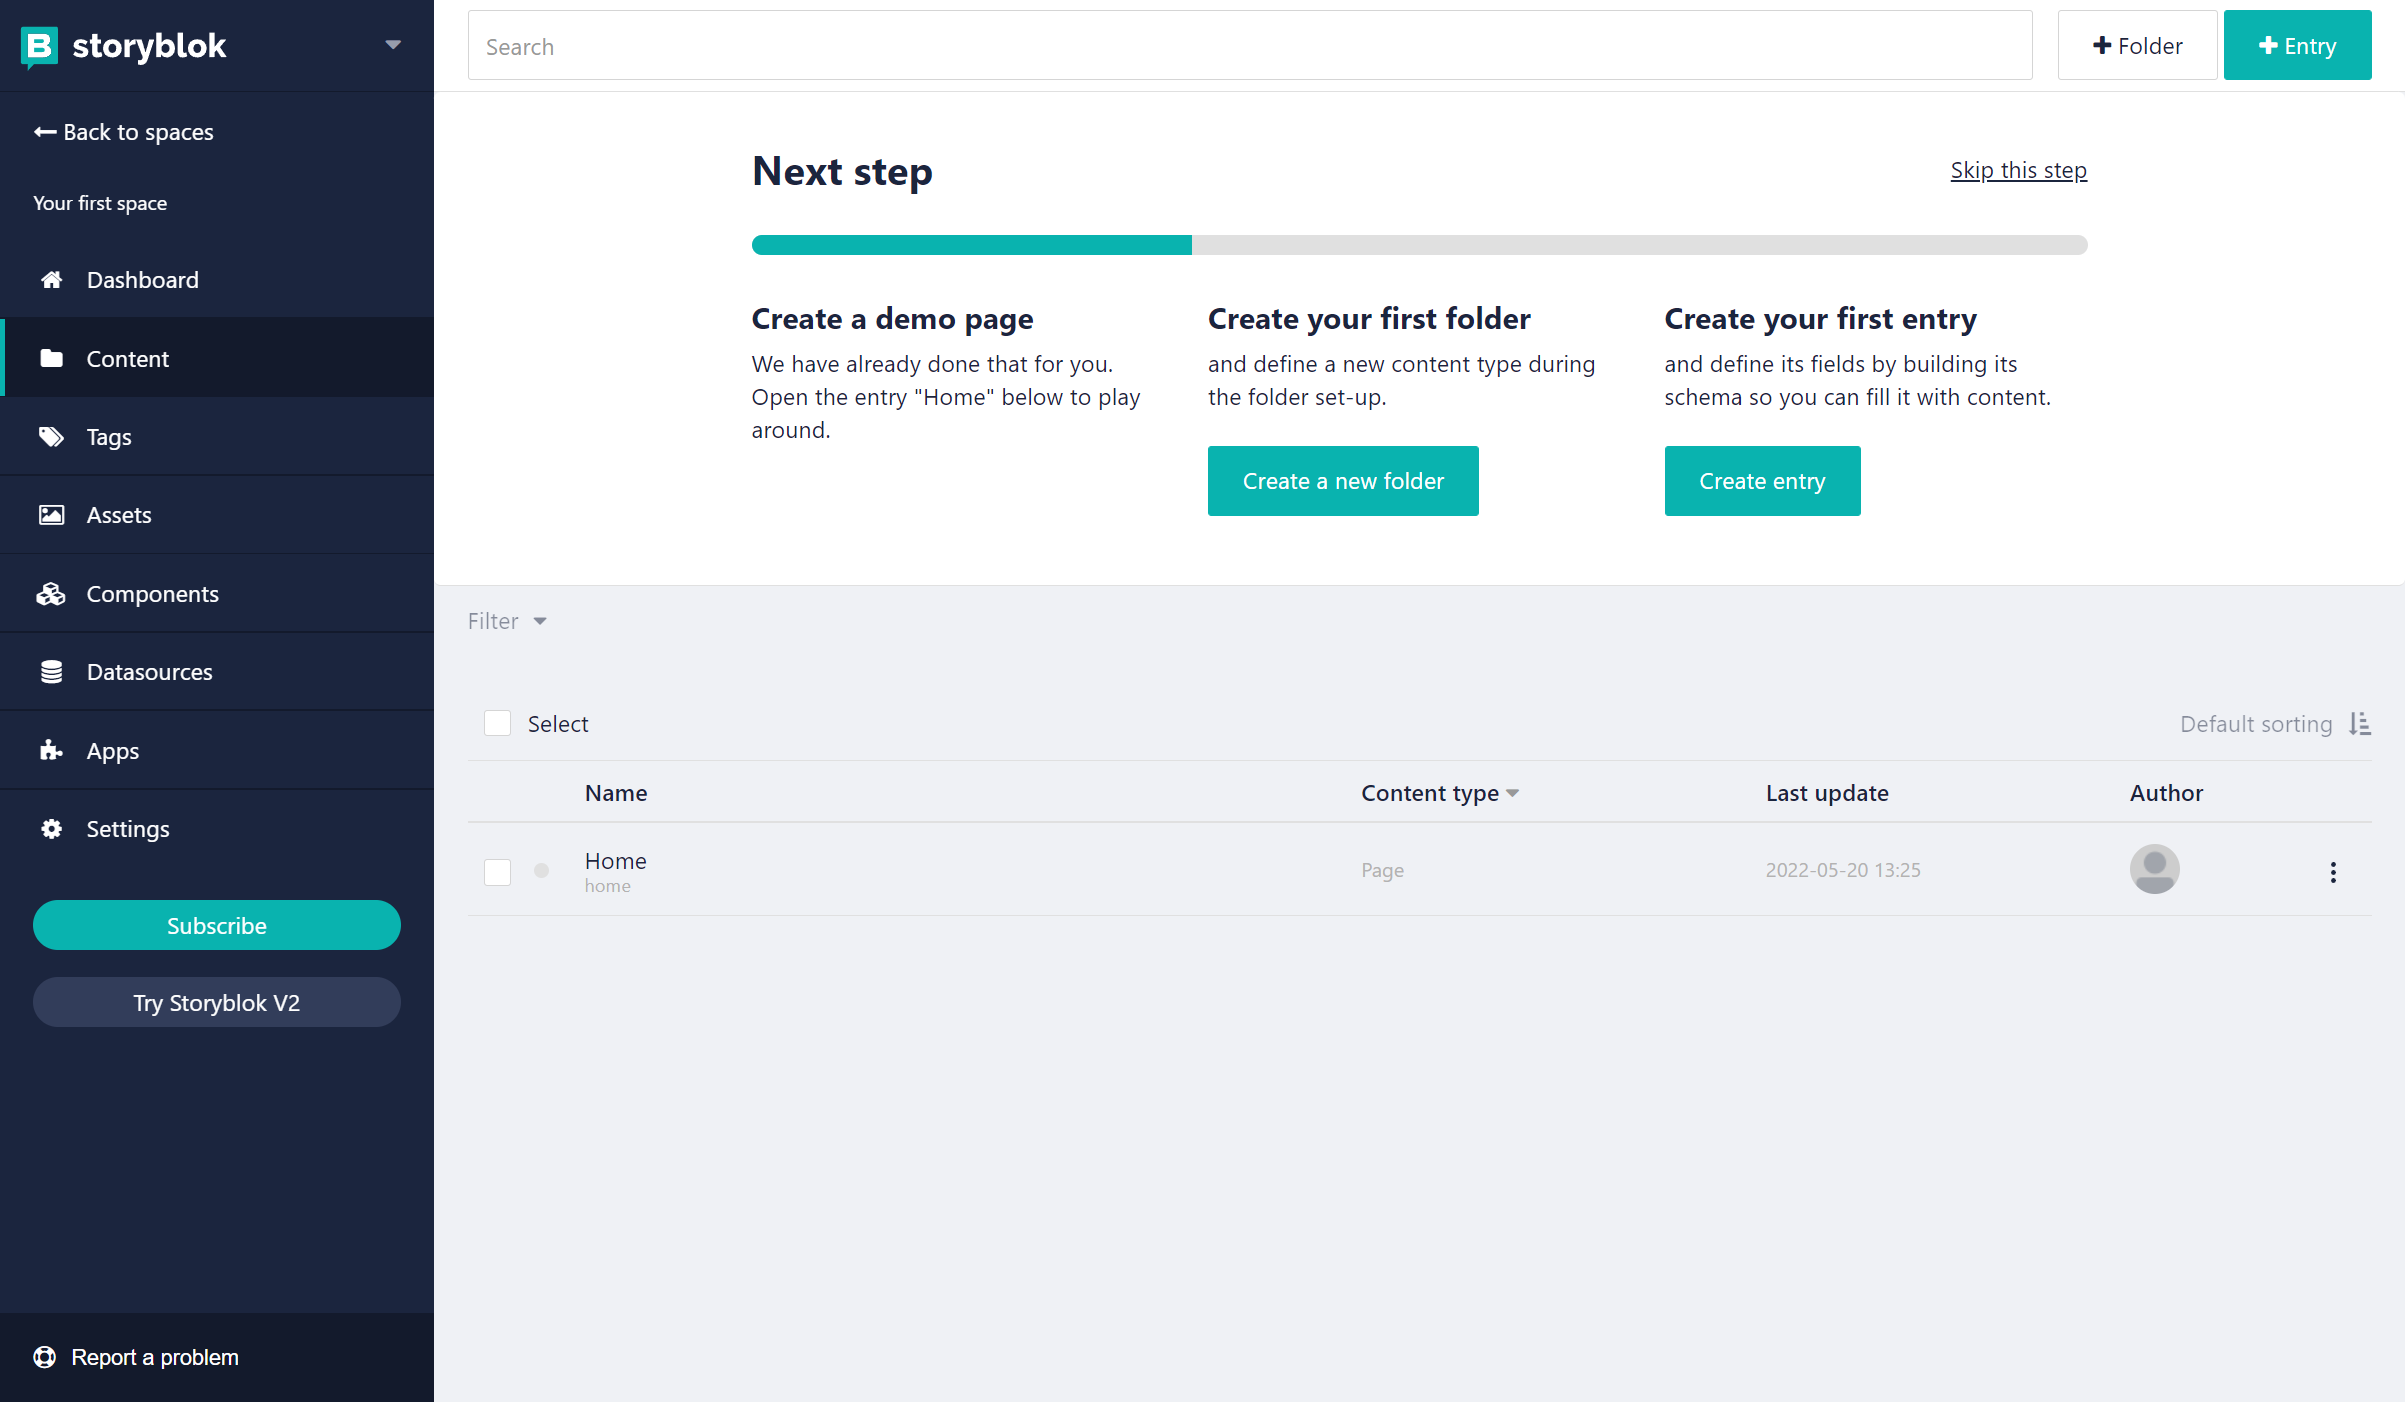
Storyblok user dashboard
On the dashboard, click on “Try Storyblok V2” to use the latest version of Storyblok.
A new page opens up similar to the image above. On this page, a custom space Home is created by default. Click on the “Create new” {1} button in the top right corner and create a story.
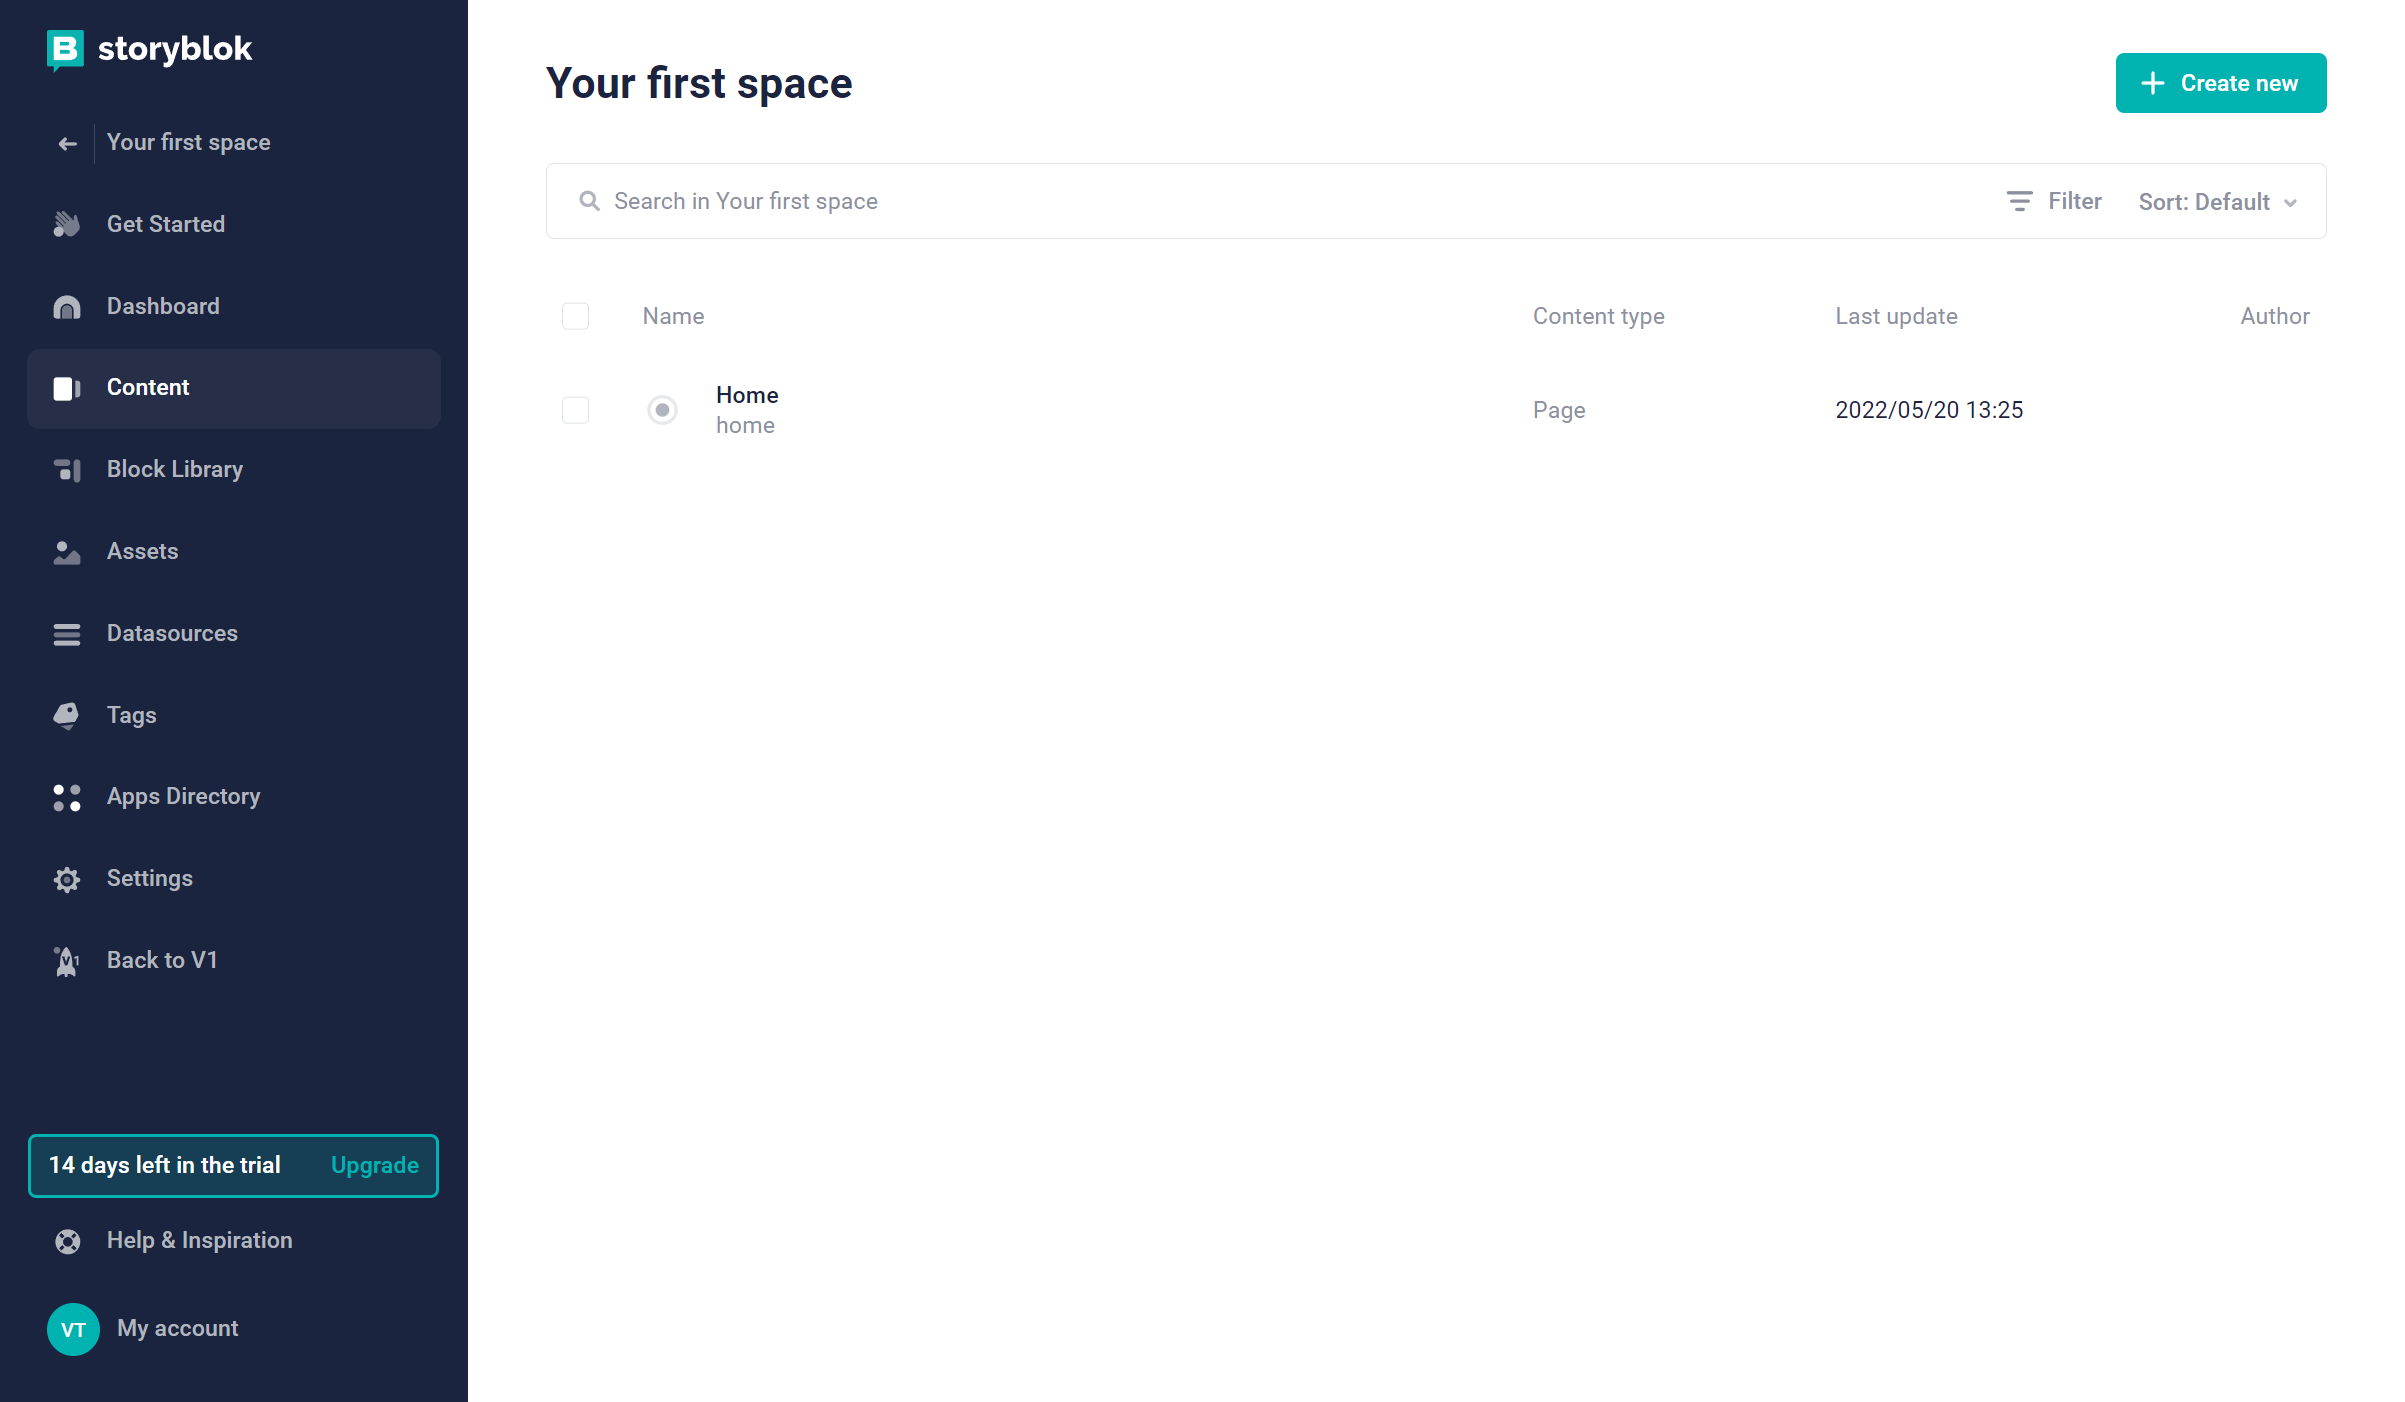
Creating a story on Storyblok
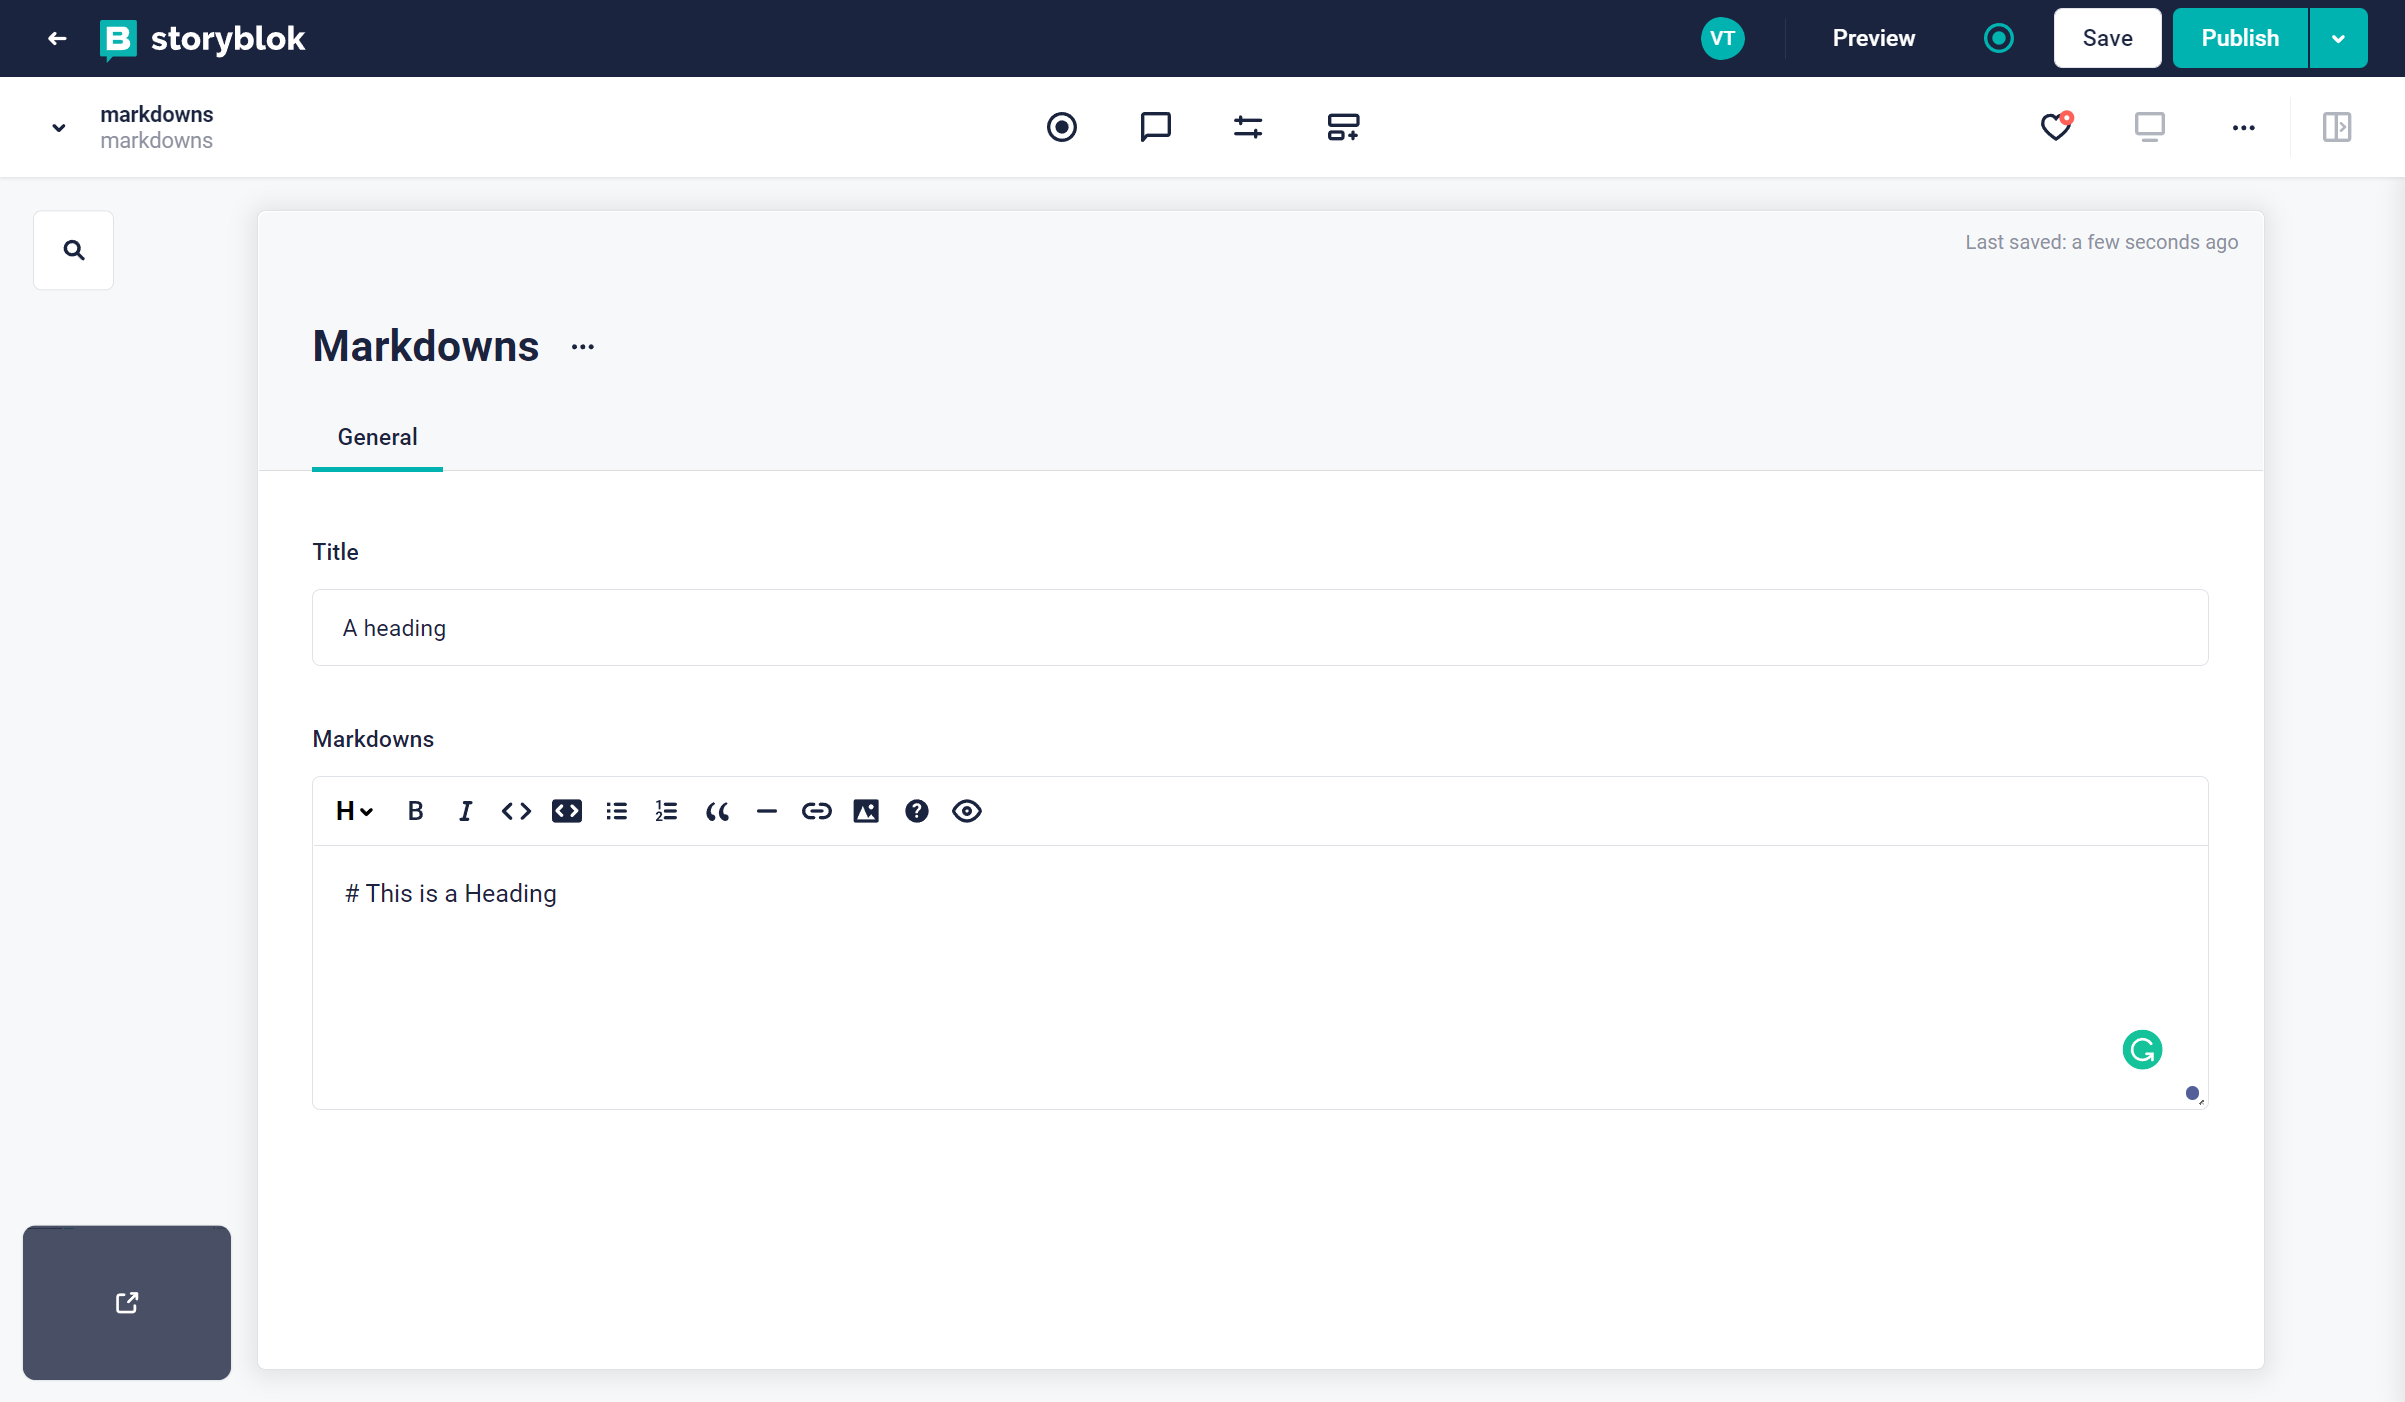
After creating the story, a new window displays authentication credentials in the visual editor window, alongside a form for adding content. Finally, we will create two fields in the form: a title field of type Text and a markdown field of type Markdown.
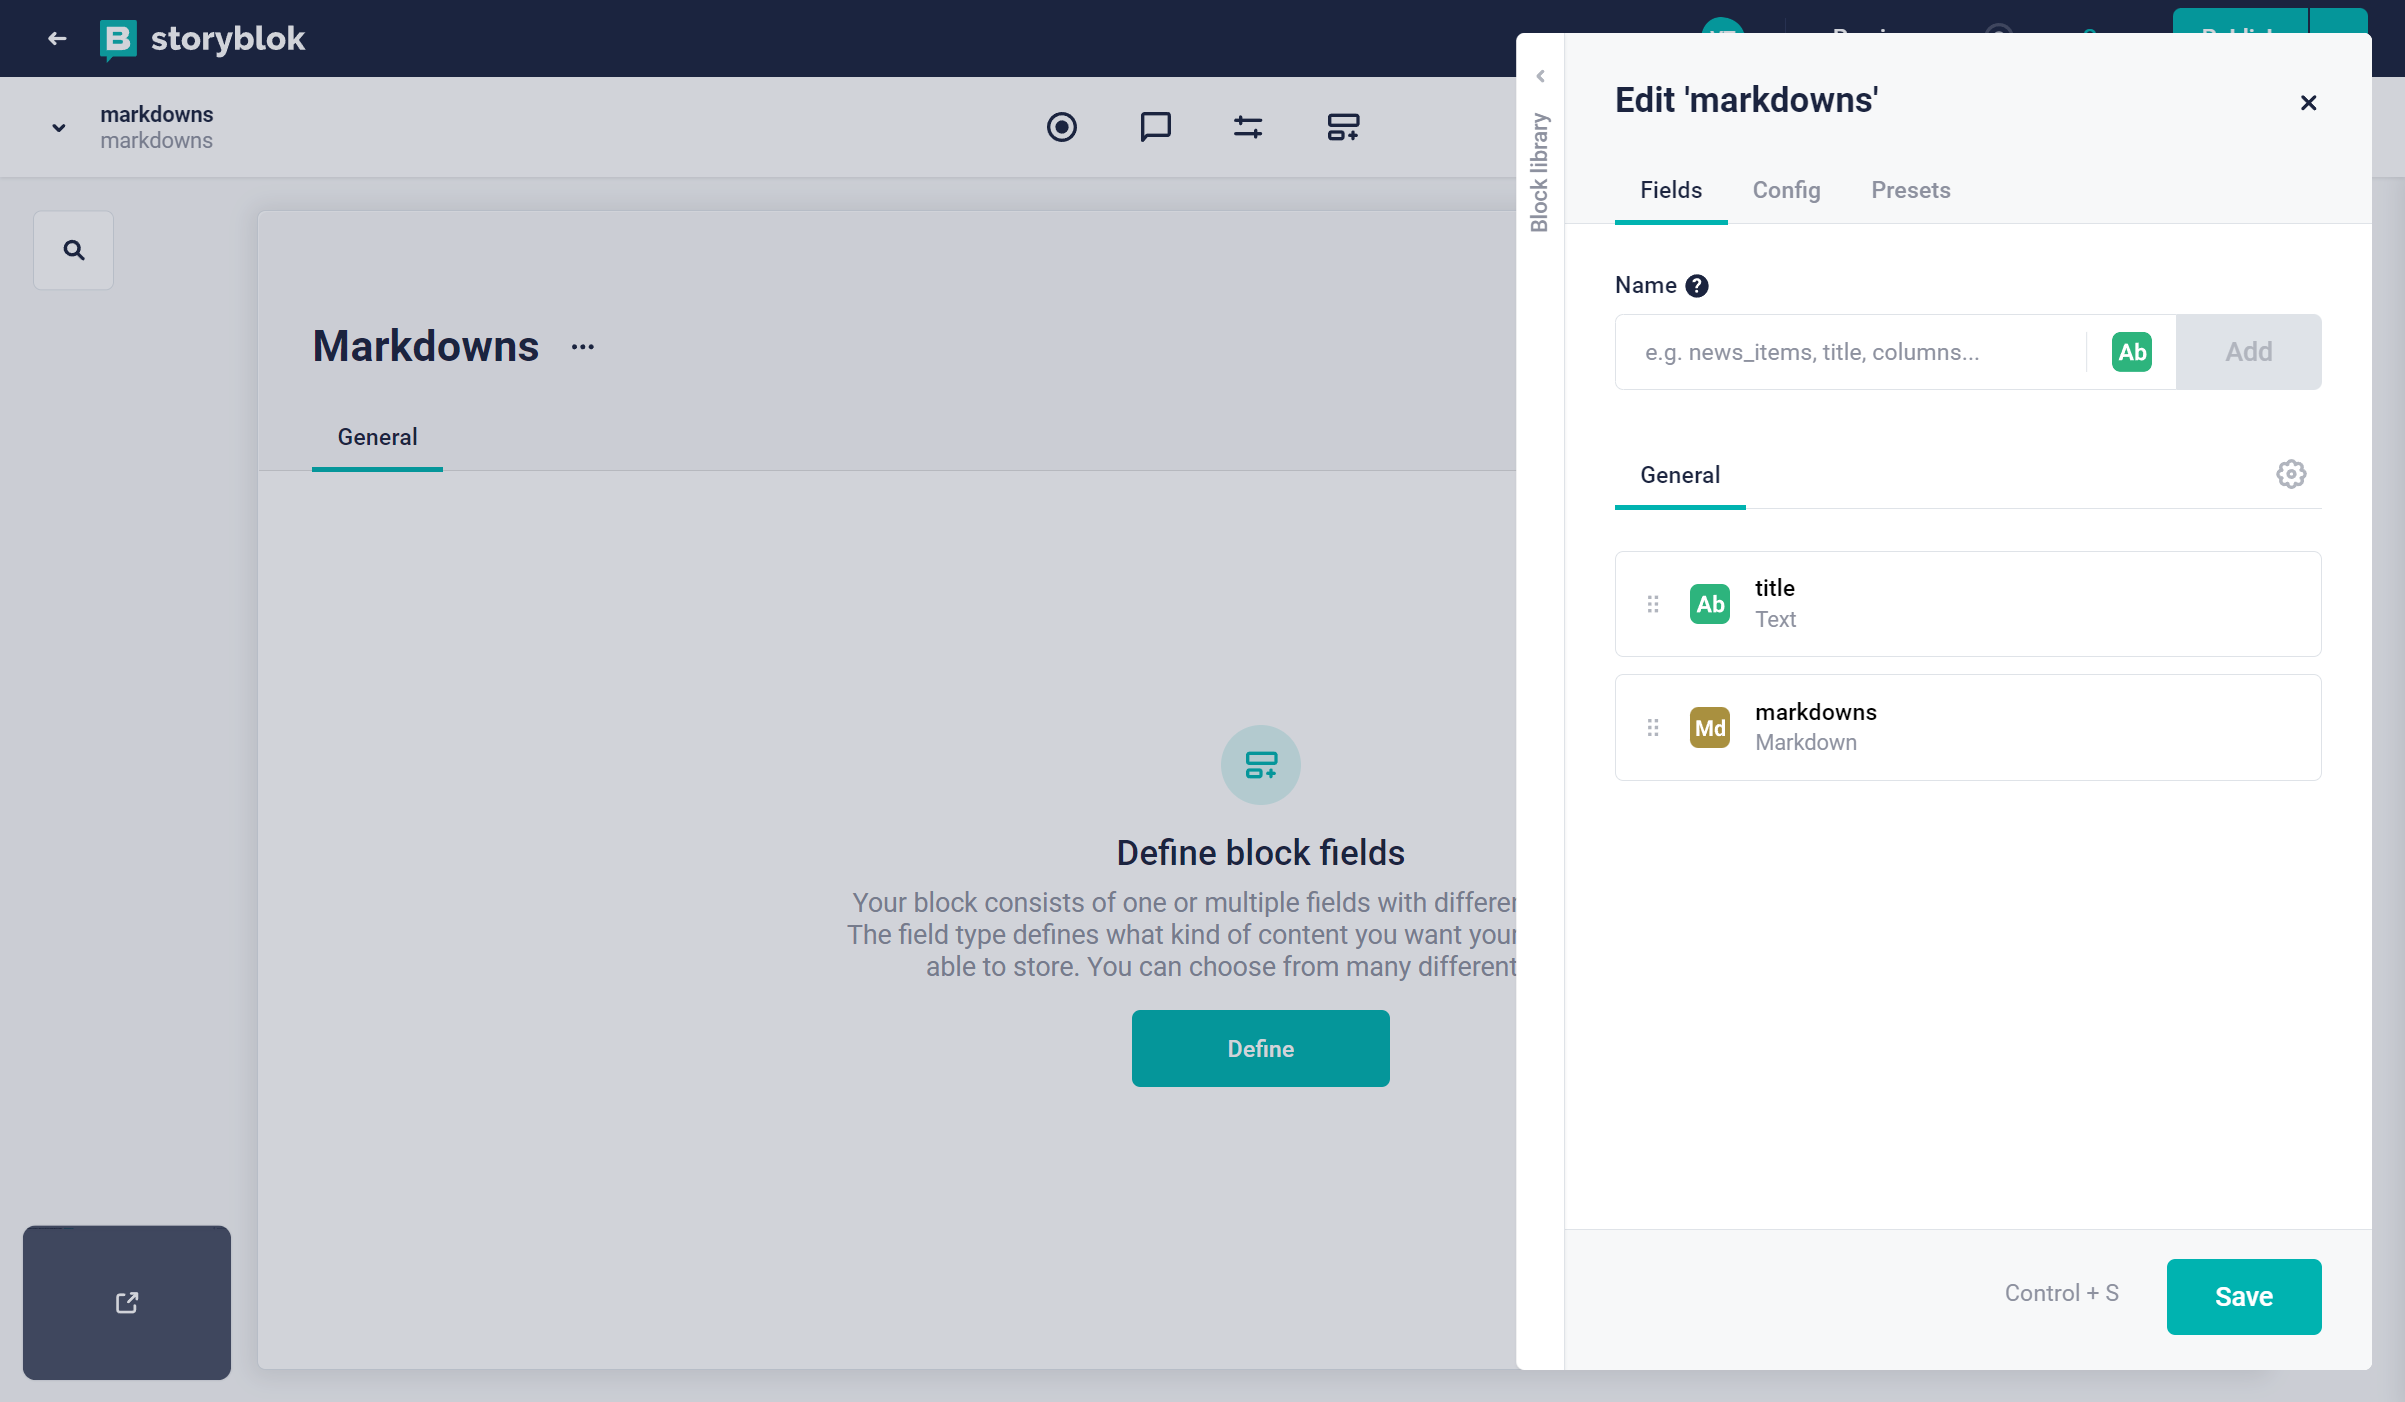
Create a markdown field type
Click on the save {1} and publish {2} buttons to finalize these changes. If we create an entry in the form as shown below:
Save markdown component in Storyblok
Save and publish. There’s a dropdown menu beside the publish button which allows us to view the published data. Creating an API request for the published URL will return the data of the story as JSON. To return all stories in the space, we will use Storyblok dependency.
Connecting the Application to Storyblok
To use Storyblok in our application, we need to install the @storyblok/react dependency along with axios to instantiate our request:
npm install @storyblok/react axiosThen we can add an import for this dependency in our Editor.js and initialize it using the authentication token.
import { storyblokInit, apiPlugin, getStoryblokApi } from "@storyblok/react";
//...
const [stories, getStories] = useState([]);
storyblokInit({
    accessToken: "YOUR OAUTH TOKEN",
    use: [apiPlugin],
  });

useEffect(() => {
   storyblokApi.get("cdn/stories", {})
  .then(response => {
    getStories(response.data.stories);
  }).catch(error => {
    console.log(error)
  })
}, [])
The above code will return all stories created in our space. We can pass this from Editor.js to the FileList component to display the titles.
<FileList list={stories} />And in FileList.js:
const FileList = ({list}) => {
  return (
    <div className=" relative w-1/4 bg-slate-700 h-screen pt-8 pl-6">
      <div className=" text-white">
        <span className=" uppercase text-slate-400 font-medium">
          <h2>Files</h2>
          <hr className=" bg-white w-3/4 mt-2" />
          {list && list.map((file, index) => {
            return (
              <div key={index} className=" my-2 hover:cursor-pointer">
                <div>
                  <span className="text-white">{file.name}</span>
                </div>
            </div>
            );
          })}
        </span>
      </div>
    </div>
  );
};
Below are the stories in my Storyblok content.
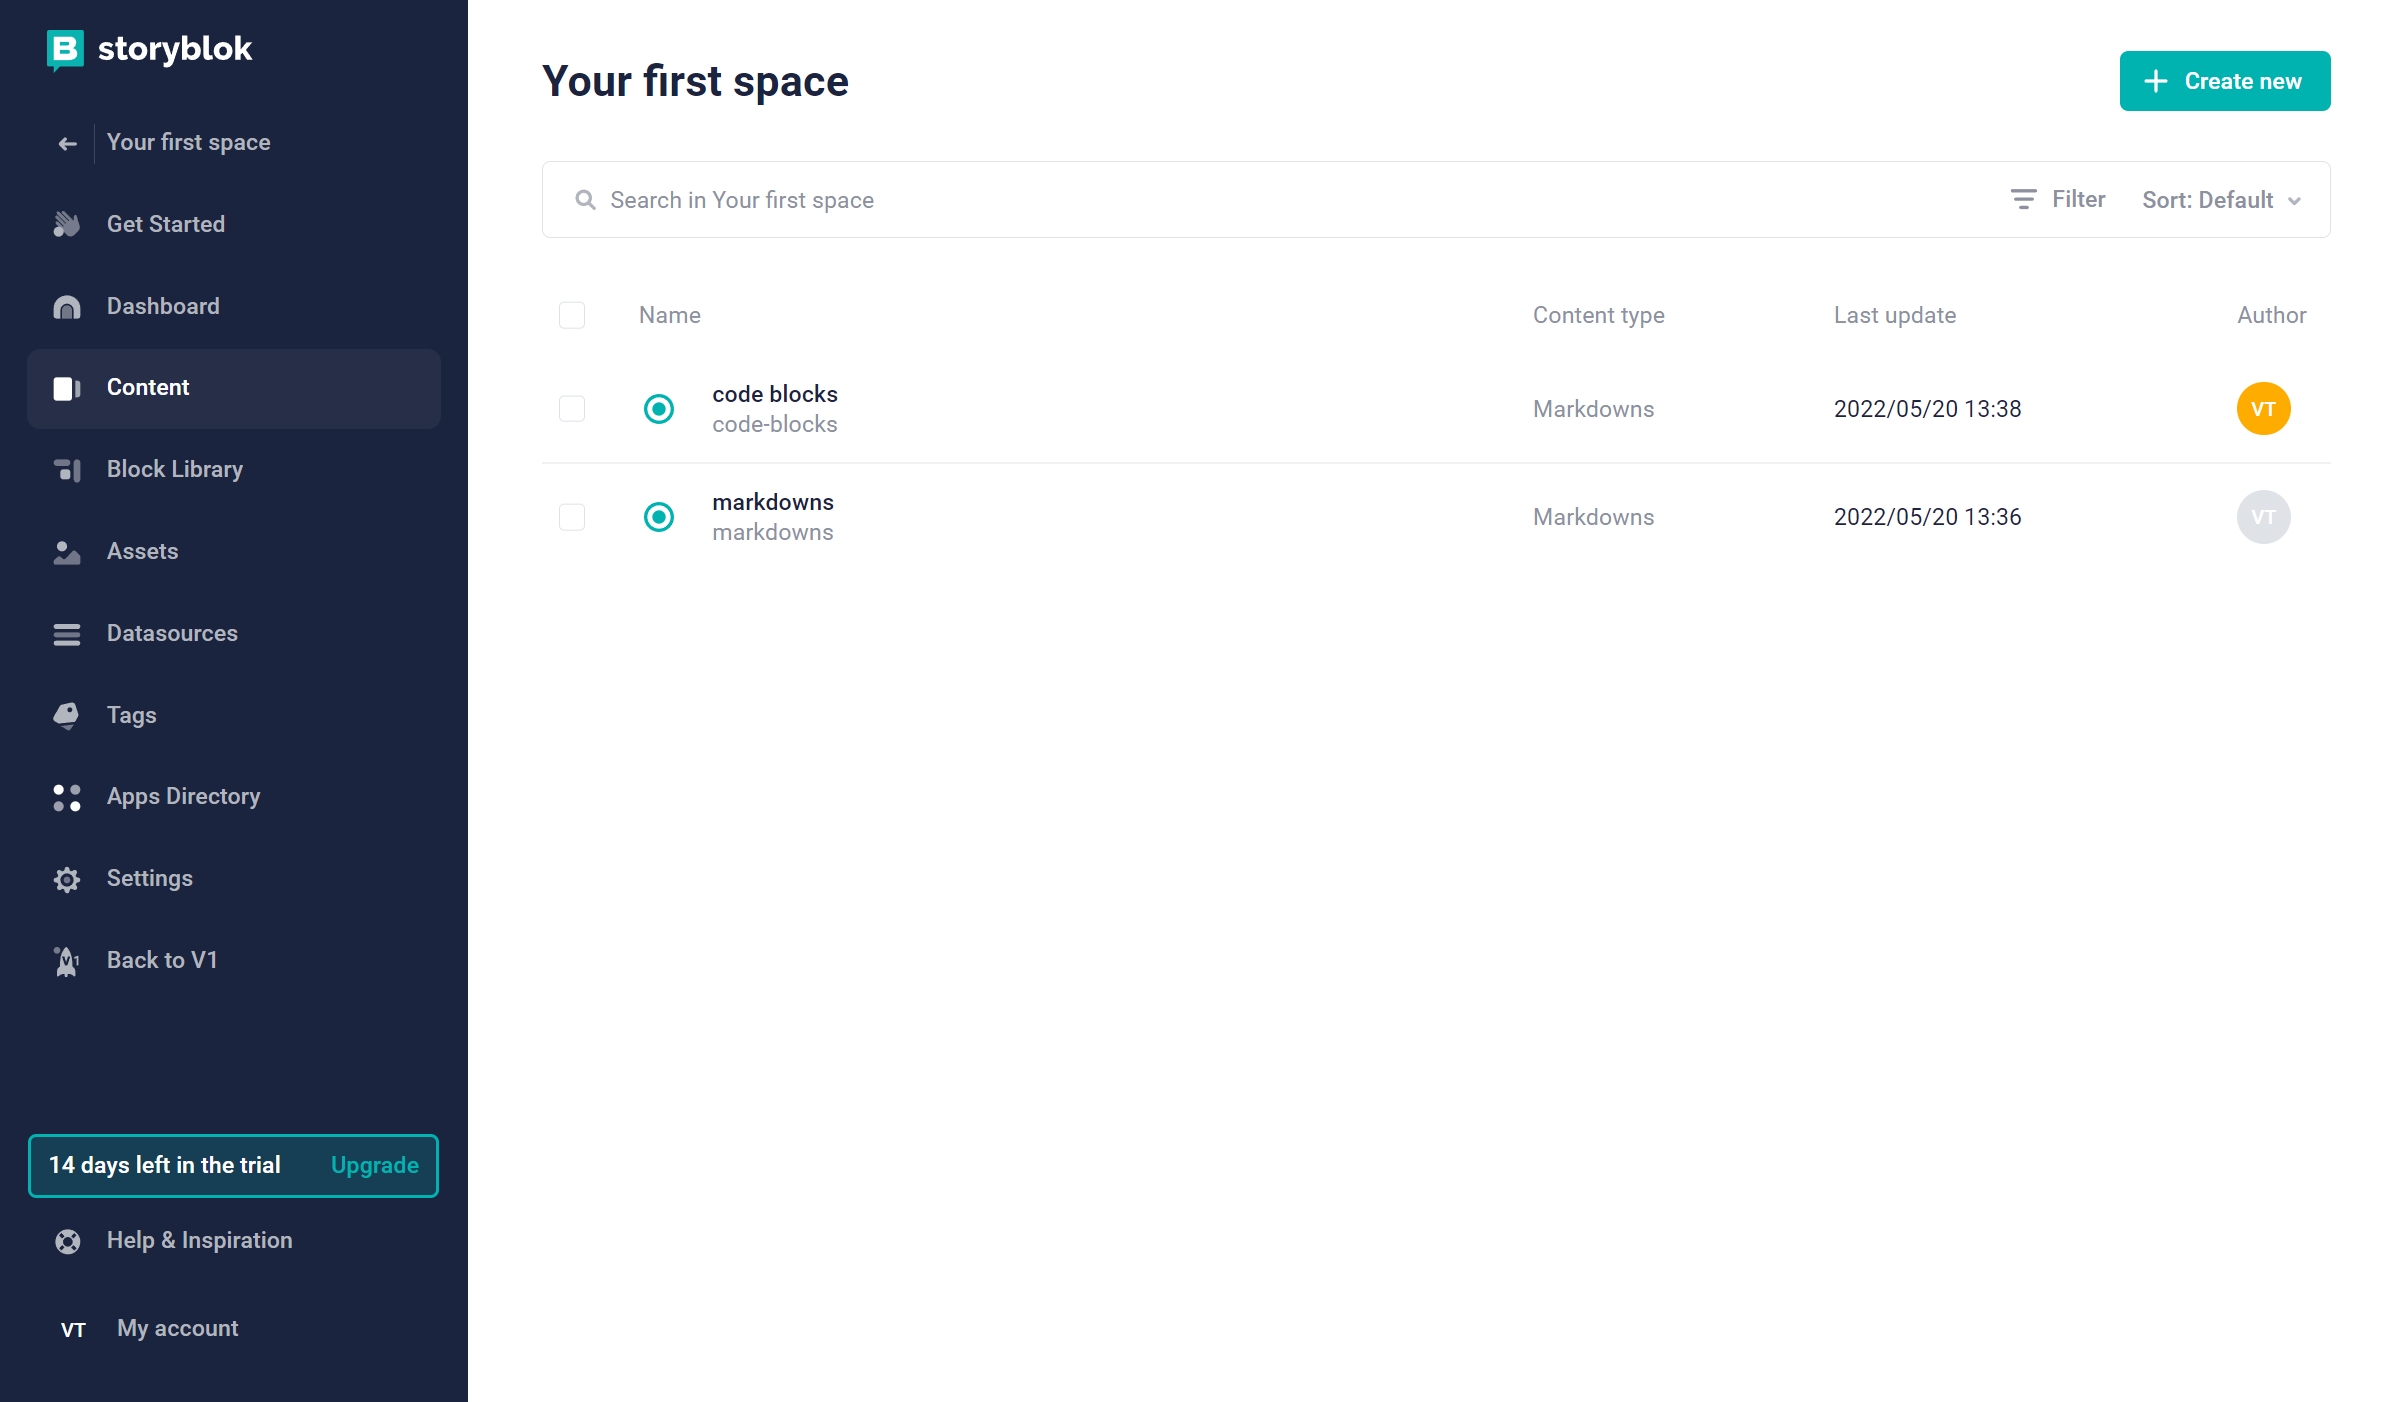
Viewing stories in a Storyblok space
The named attributes of the Stories are returned by the FileList component as shown below:
returning file names on markdown editor
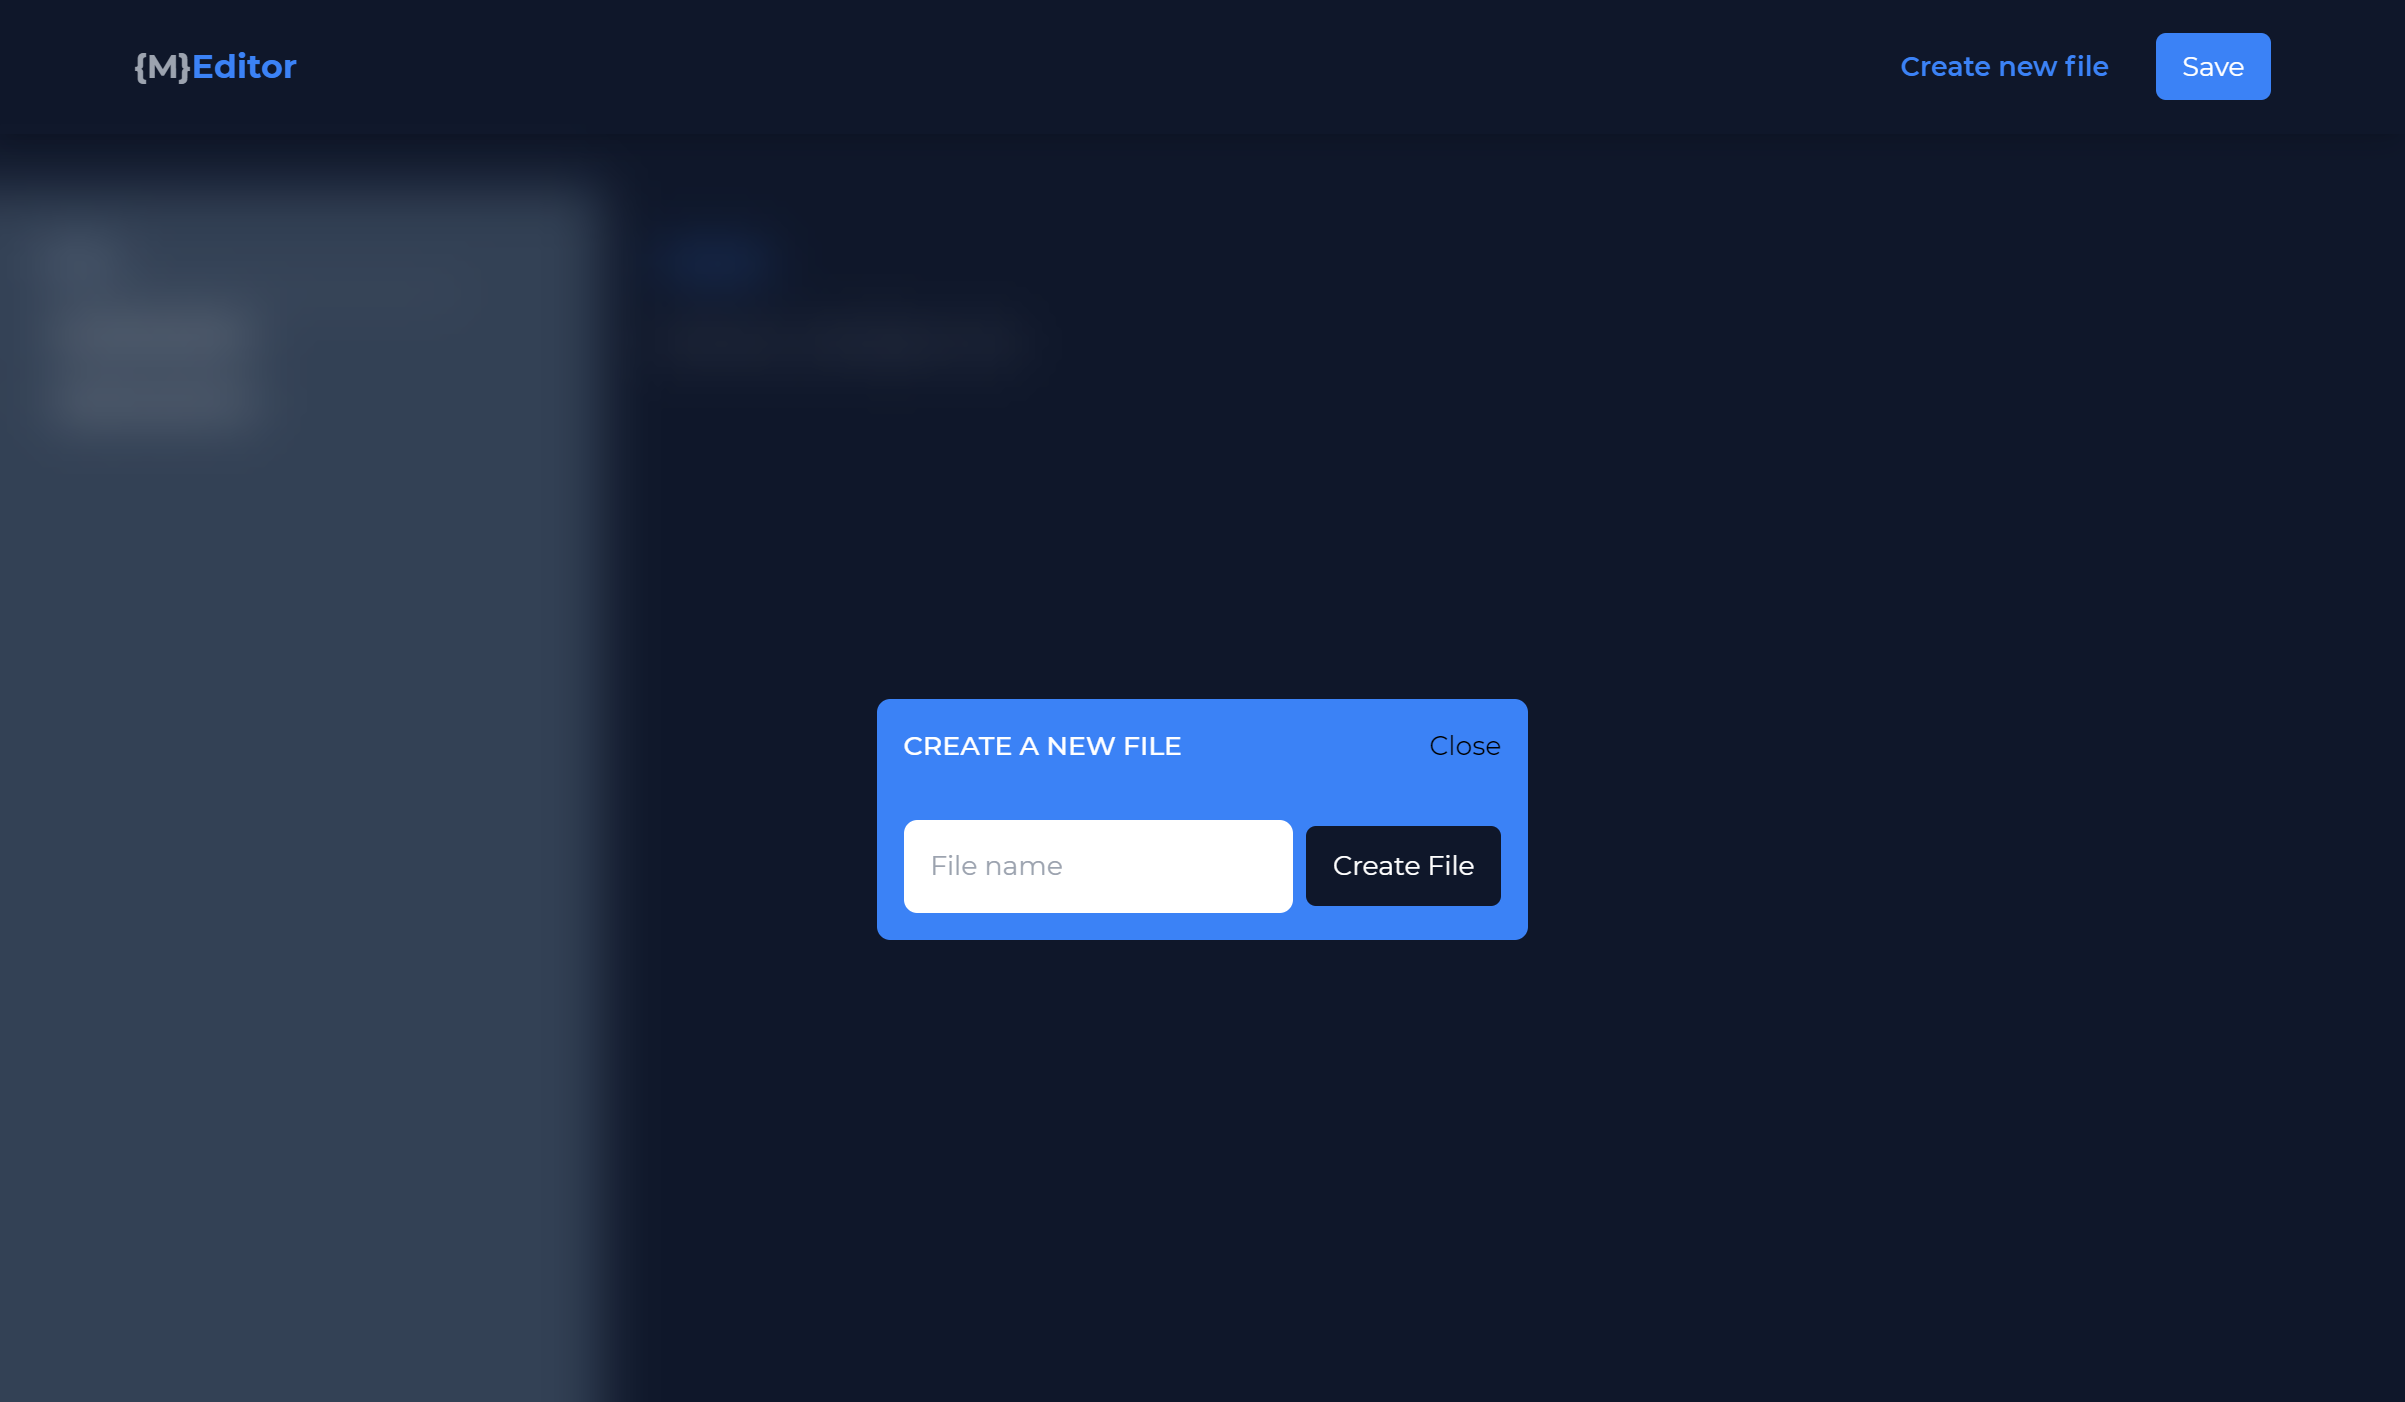
Adding a New File Creation Window
In Editor.js, we will first create a pop-up window that appears when the create new file button is clicked to create new files. This window will have an input field for the file's name to be created.
{/* new file creation window */}
      <div className=" absolute h-full w-full flex justify-center items-center top-0 backdrop-blur-lg">
        <div className="bg-blue-500 rounded-lg p-4">
          <div className="flex flex-col justify-center items-center gap-8">
            <div className=" relative w-full flex flex-row justify-between">
              <h1 className=" font-medium uppercase text-white">
                Create a New File
              </h1>
              <button>Close</button>
            </div>
            <div className="flex flex-row gap-2 justify-center items-center">
              <div className="flex-1">
                <input
                  className=" rounded-lg p-4 text-black"
                  type="text"
                  placeholder="File name"
                />
              </div>
              <div className="flex-1">
                <button className="text-white bg-slate-900 px-4 py-3 rounded-md">
                  Create File
                </button>
              </div>
            </div>
          </div>
        </div>
      </div>
We can view this change in our browser:
file creation using the markdown editor
Still on the Editor.js, to toggle the created window, we will create a boolean variable and use the Create file button to change the value of this button.
const [displayWindow, setDisplayWindow] = useState(false);Set the create a new file window to only show if displayWindow is true:
{/* new file creation window */}
    {displayWindow ? (
      //code here
) : null}
We can use the create new file button to set this value to true with the onClick event handler:
const setFile =(dat)=>{
// a function to set the value of the display window
    setDisplayWindow(dat)
}
//the above function is passed to the Nav component as shown below
<Nav display={setFile}/>
In Nav.js, we take this prop and use the create new file button to toggle its value.
const Nav = ({ display }) => {
  const [open, isOpen] = useState(false);
  let toggler = false;
For the onClick event handler, add the display prop:
<button
    className="cursor-pointer text-blue-500 font-semibold px-3 py-2 text-md"
    onClick={() => {
      display(!toggler);
      toggler = true;
    }}
  >
    Create new file
</button>
To set this value to false, add an onClick event listener to the display window close button in Editor.js:
<button onClick={()=>{setDisplayWindow(false)}}>Close</button>To create a new File functionality, navigate to the Editor.js component and we will take in the value from the input field using the state variable.
const [newFile, setNewFile] = useState("");
// a function to handle change in the fields input
const handleChange = (e) => {
    setNewFile(e.target.value);
}
//...
// add the function and the value to the input field
<input
  className=" rounded-lg p-4 text-black"
  type="text"
  placeholder="File name"
  value={newFile}
  onChange={handleChange}
/>
Displaying Markdowns from Saved Files
Aside from displaying the names of the stories from Storyblok in the FileList component, we can display the data from these stories in the markdown editor. To do this, in Editor.js we will pass the data from the selected file onClick:
const getFileData=(dat)=>{
    setValue(dat.content.markdowns)
  }
// ...
//pass this function to the File Component
<FileList returndata={getFileData} list={stories} />
In File.js. we can return the values from the selected file:
const FileList = ({list, returndata}) => {
//...
<div>
  <span className="text-white" onClick={()=>{
    returndata(file)
  }}>{file.name}</span>
</div>
Now, when any listed item is clicked, the corresponding markdown is displayed. We will also display the current file being edited in the Nav component for ease of use. First, we pass a prop to the Nav component in Editor.js:
const [currentFile, setCurrentFile] = useState("");
//..
const getFileData=(dat)=>{
  setValue(dat.content.markdonwns);
  setCurrentFile(dat);
}
//...
// Pass this value to the Nav component
<Nav display={setFile} current={currentFile}/>
In Nav.js we will get the passed data and render it in the navigation bar:
const Nav = ({ display, current }) => {
//...
 {`{M}`}
      <span className=" text-blue-500">Editor</span>
    </h1>
  </span>
  <span className=" text-white">Currently Editing: {current.name}</span>
Creating new Stories
To create new stories, in Editor.js, we will create a function that takes the input from the new file window and pass it in a post request, as shown below:
const createStory = async () => {
    await fetch("https://mapi.Storyblok.com/v1/spaces/(space id)/stories", {
      method: "POST",
      headers: {
        "Content-Type": "application/json",
        Authorization: accessToken,
      },
      body: JSON.stringify({
        story: {
          name: newFile,
          slug: newFile.replace(/ /g, ""),
          content: {
            component: "Markdown",
            title: newFile,
            markdonwns: "",
          },
        },
        publish: 1,
      }),
    }).then((response) => {
      console.log(response);
    });
    setDisplayWindow(false);
    setNewFile("");
    setValue("");
    setCurrentFile("");
  };
The authorization token and space id can be obtained from the Storyblok settings. With this in place, we can call this function in the Create File button in Editor.js.
<button
  className="text-white bg-slate-900 px-4 py-3 rounded-md"
  onClick={() => {
    createStory();
  }}
>
  Create File
</button>
Updating a Story
Since the current story’s data is passed to the Nav component, we need to return this data `onClick` of the save button. To do this, we will first create a function to update stories in our Editor Component and pass it from Editor.js to the Nav component:
const handleSave = async (dat) => {
  await fetch(`https://mapi.Storyblok.com/v1/spaces/(space id)/stories/${dat.id}`, {
    method: "PUT",
    headers: {
      "Content-Type": "application/json",
      Authorization: accessToken,
    },
    body: JSON.stringify({
      story: {
        name: dat.name,
        slug: dat.slug,
        id: dat.id,
        content: {
          component: "Markdown",
          title: dat.content.title,
          markdonwns: value,
        },
      },
      publish: 1,
    }),
  }).then((response) => {
    console.log(response);
  });
};

//...
//pass this function to the nav component
<Nav display={setFile} current={currentFile} save={handleSave} />
In Nav.js, we will pass a value from the save button, which will be the current file being edited.
const Nav = ({ display, current, save, Delete }) => {
//...
<button
  className="bg-blue-500 inline-flex items-center justify-center py-2  px-4 rounded-md text-white outline-none "
  onClick={() => {
    save(current)
  }}
>
  Save
</button>
Deleting a Story
With the above, we can read our stories from Storyblok, create new stories and update them. The final functionality for our markdown editor would be a feature to delete a selected story. We will build this just like the Save button functionality. In Nav.js, we will add a button after the Save button for the delete functionality:
<button
  className="bg-red-500 inline-flex items-center justify-center py-2  px-4 rounded-md text-white outline-none "
  onClick={() => {
    Delete(current);
  }}
>
  Delete
</button>
In Editor.js we will create a function to function that will make a delete request to Storyblok, with the data passed by the Delete button:
const handleDelete = async (dat) => {
  await fetch(`https://mapi.Storyblok.com/v1/spaces/(space id)/stories/${dat.id}`, {
    method: "DELETE",
    headers: {
      "Content-Type": "application/json",
      Authorization: accessToken,
    },
  }).then((response) => {
    console.log(response);
  }
  );
}
Above is our delete request. We just need to pass this from Editor.js to the Nav component.
<Nav display={setFile} current={currentFile} save={handleSave} Delete={handleDelete} />Below is the final look of our application with the delete button:
Storyblok markdown editor
