Integrating Storyblok with Lokalise
Storyblok is the first headless CMS that works for developers & marketers alike.
In this article, you’ll learn how to integrate Storyblok with Lokalise to make your content translation process faster and more convenient. But what is Lokalise? I hear you ask. It is a feature-rich localization and translation management platform that offers tools for translators, managers, developers, and designers, namely:
- The ability to manage translations using a convenient graphical user interface across your team.
- The ability to assign tasks to team members, define various automation and quality assurance rules, create project branches, and much more.
- A vast array of integrations with third-party services and software include GitHub, Amazon S3, Trello, Figma, Adobe XD, and Storyblok.
- Software development kits for mobile applications and client libraries for our API.
Lokalise is here to get your translations done and offers flexible subscription plans. Intrigued? Then let’s begin!
Preparations
Registration
To get started, you will need to create a new account with Lokalise if you don’t have one already. Grab your free trial here (no credit card is required), enter your details, like your name and email, and complete the registration.
After logging in to the system, you’ll see the following page:
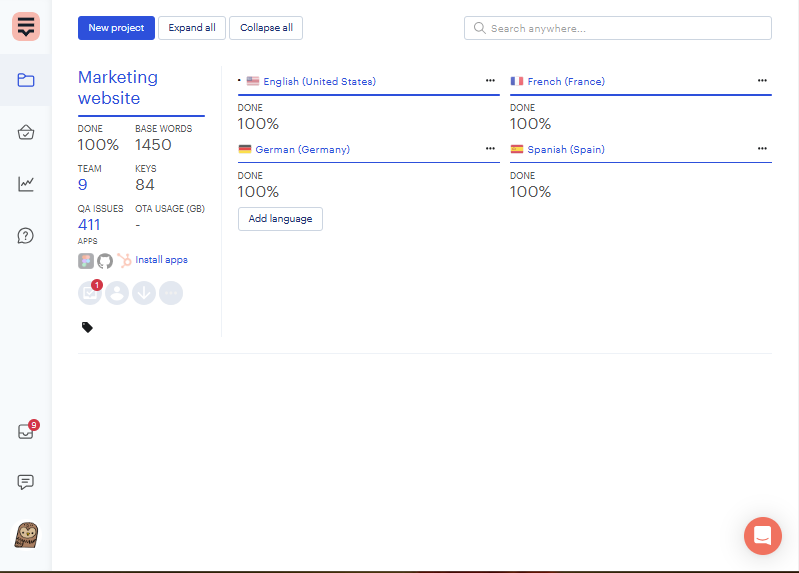
Lokalise dashboard
This is your dashboard, and it lists all the available translation projects in your current team. What’s the difference between a team and a project? Nothing too complex, really:
- A team includes projects, global settings, and members (users). Once you have registered on Lokalise, a new team is automatically created for you; initially, only your account is added as a member of this team. As a team creator, you can access all team settings and projects. Later, you may invite more users and grant them certain access rights. Finally, each team has its own subscription plan that you may upgrade or downgrade as needed.
- A project belongs to a team. It includes your translations, languages, screenshots, glossary entries, integration settings, quality assurance rules, and other data. Usually, one project contains all the translations for a single website or a mobile application. As mentioned above, you have full access to all projects within your team. Inviting additional users and granting them certain access rights to specific projects is also possible. You can create as many projects as you require within a team.
The screenshot above shows that I have one project called “Marketing Website”. Each project has a list of associated languages, and the current translation progress is displayed for each language.
Creating a new project
Go ahead and create a new translation project by clicking the New project button or pressing the Ctrl + P (Cmd + P) shortcut.
Select the “Marketing and support” project type.
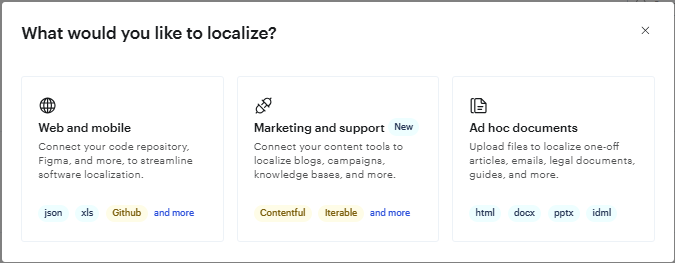
Select the type of project
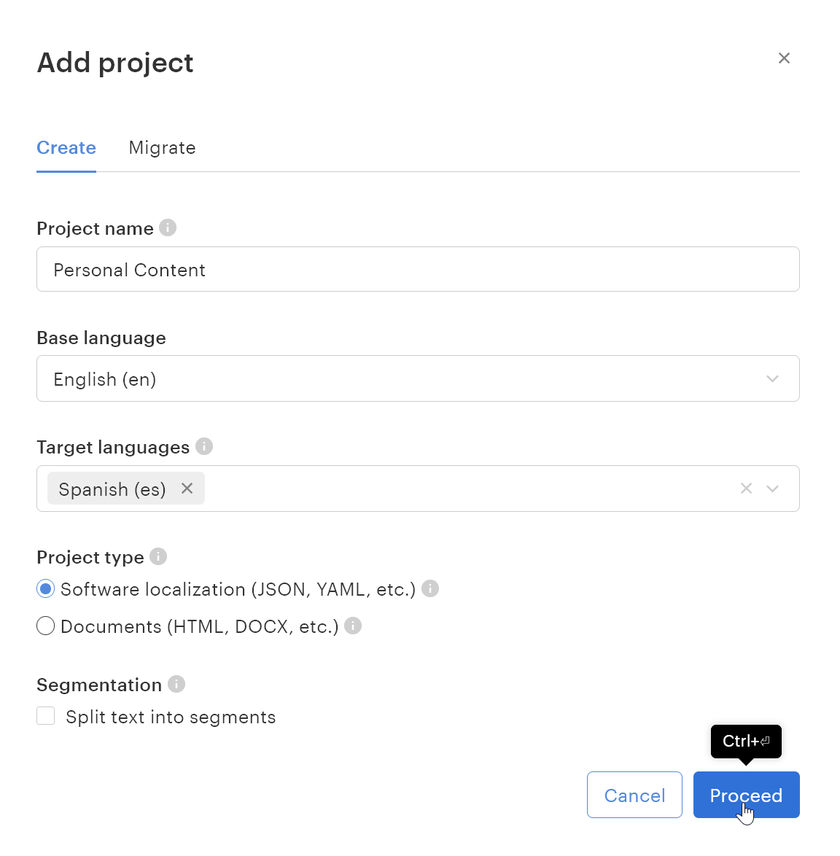
Adding a project with Lokalise
Fill in the following fields:
- Project name — enter any name you’d like. I’ll name my project “Personal content”.
- Base language — choose the primary language. It should match the primary of your content in Storyblok. I’ll keep “English”.
- Target languages — choose one or more languages you’ll be translating into. For this example, I’ll select Spanish.
- Select Storyblok from the list of CMS integrations When you are ready, hit Proceed.
Project editor
After the project is created, you will see the following screen:
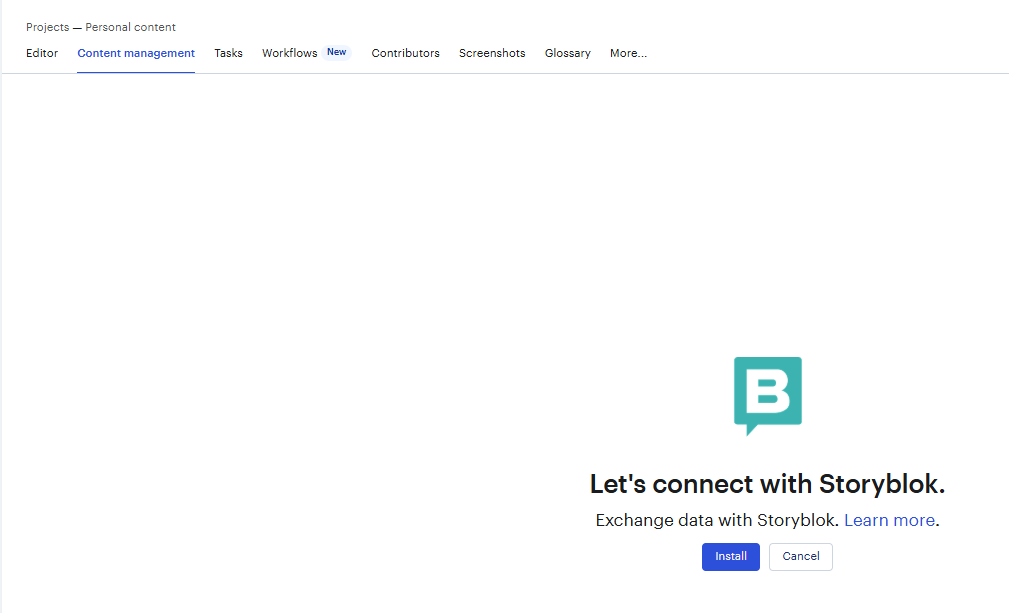
The Project Editor
This is the project editor where you will manage your translations, languages, and other aspects of your project.
Adding content languages
Now let’s switch from Lokalise to Storyblok for a moment. Open your Storyblok board and proceed to Settings {1} --> Internationalization {2}
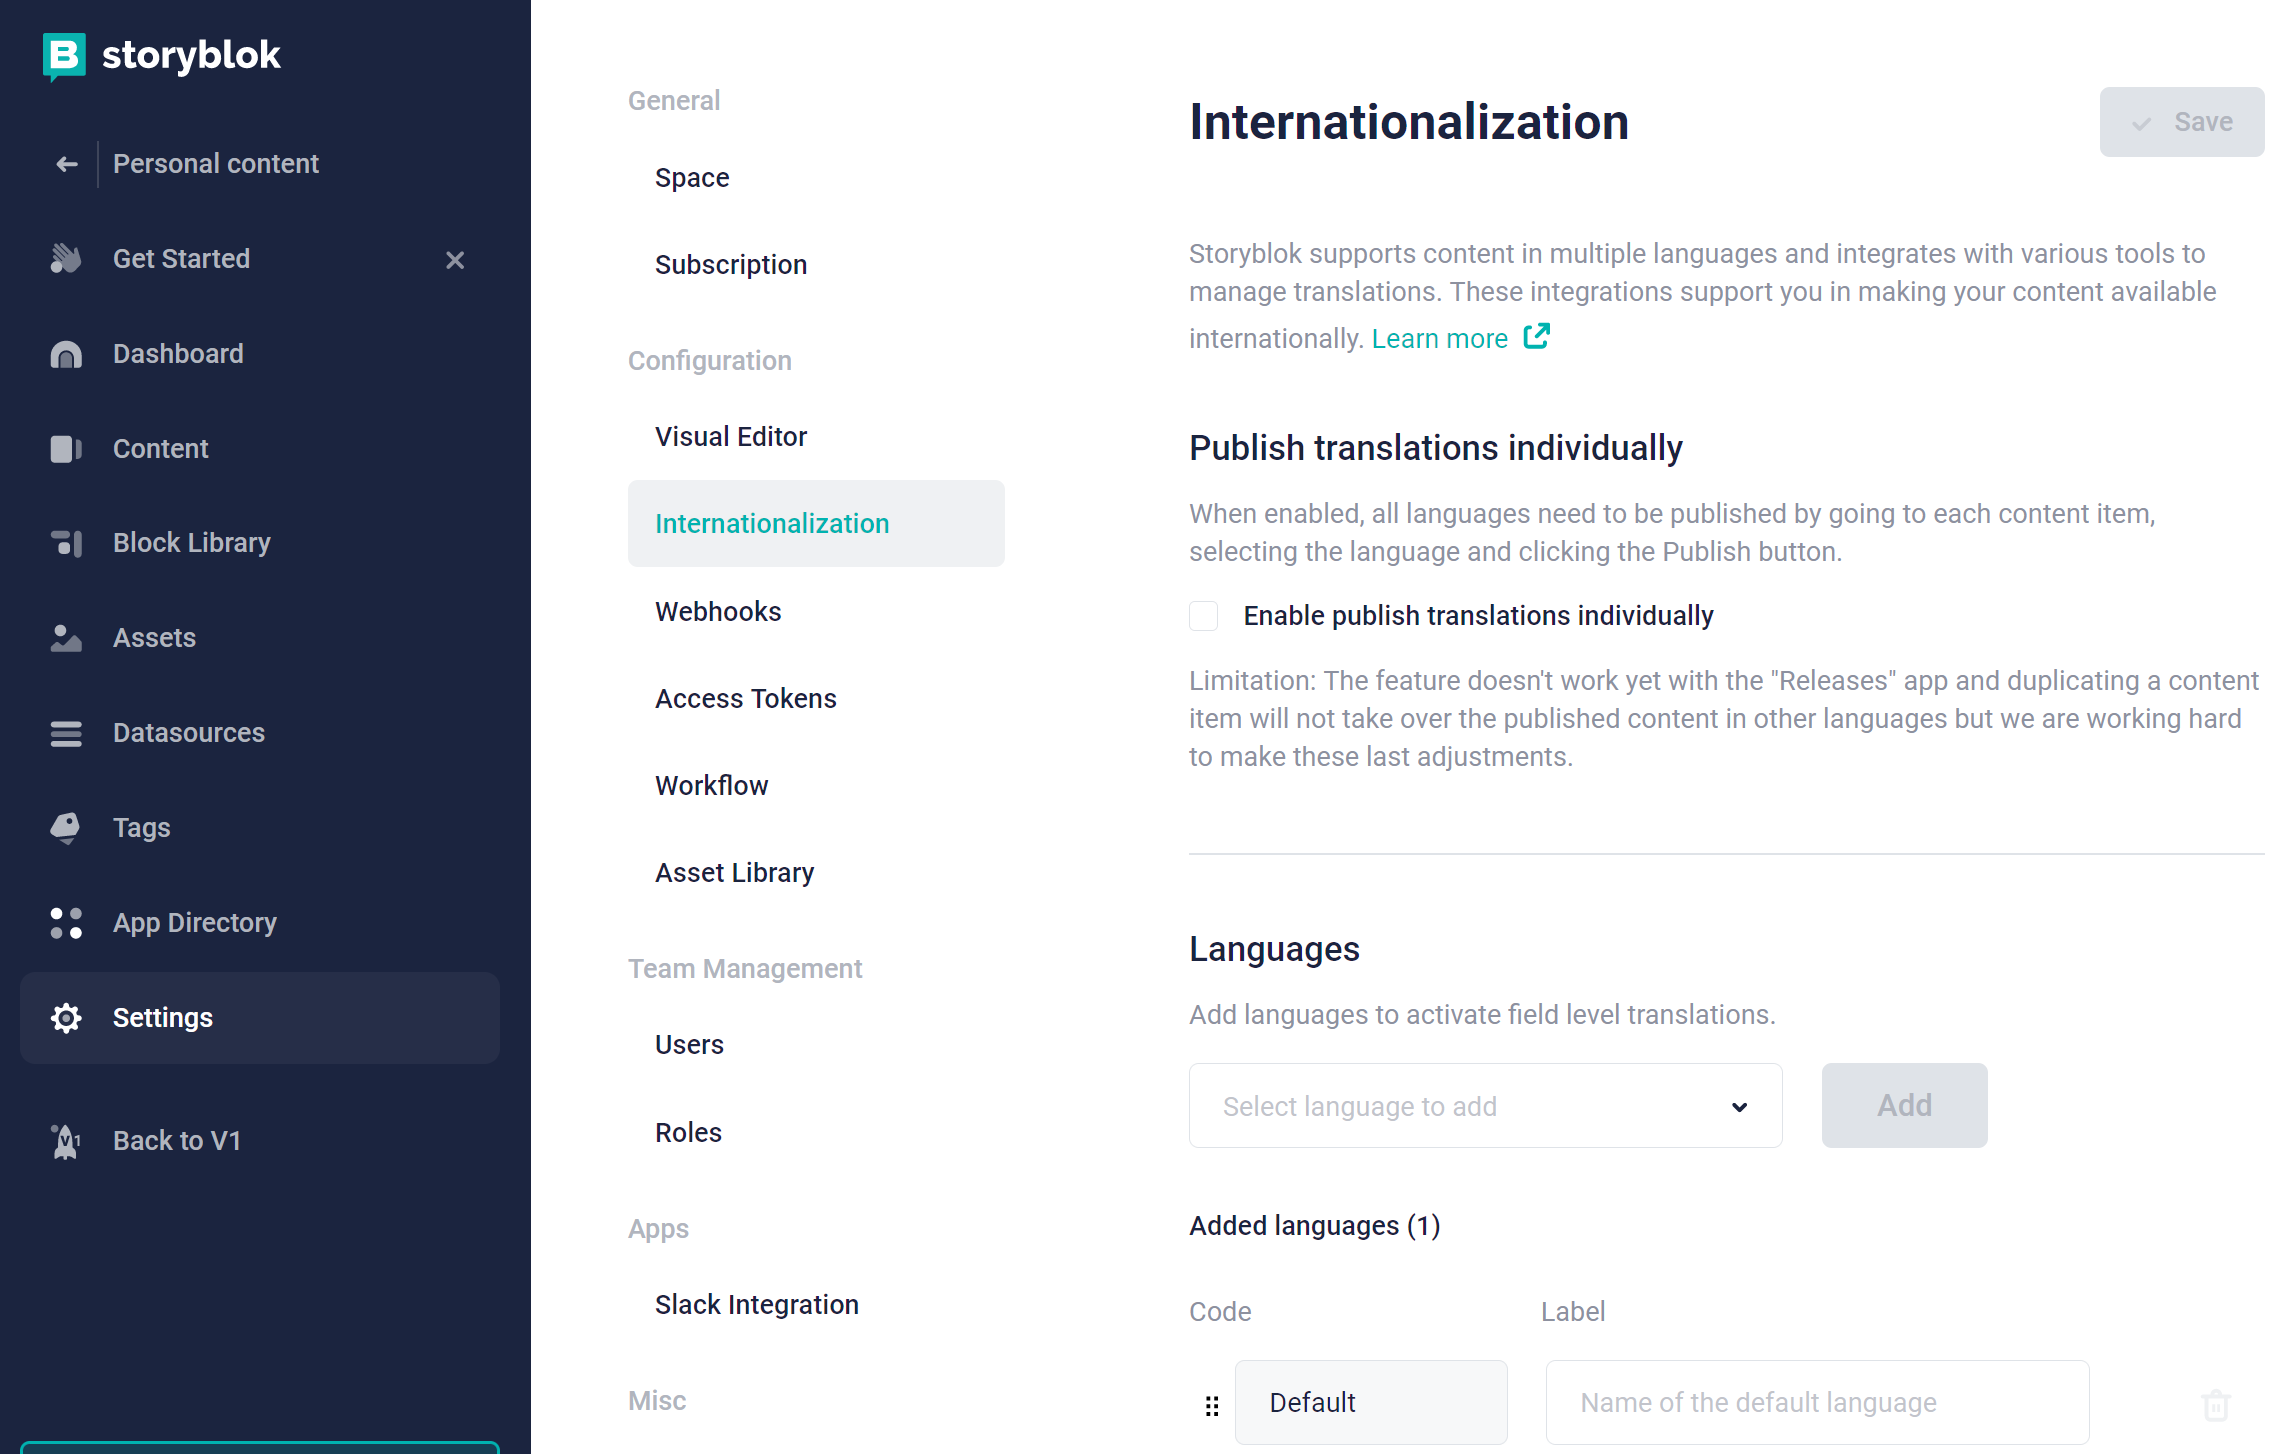
Storyblok Internationalization
Here you can set a default language for your content and add other languages into which you would like to translate. In the example above, I have English as the default language and two additional ones: German and Spanish.
After you have adjusted the language settings, hit Save. Before returning to Lokalise, make sure to change the content schema properly. Specifically, ensure that all fields you translate are marked as Translatable. To achieve that, proceed to the Block Library and click on the item that you wish to make translatable:
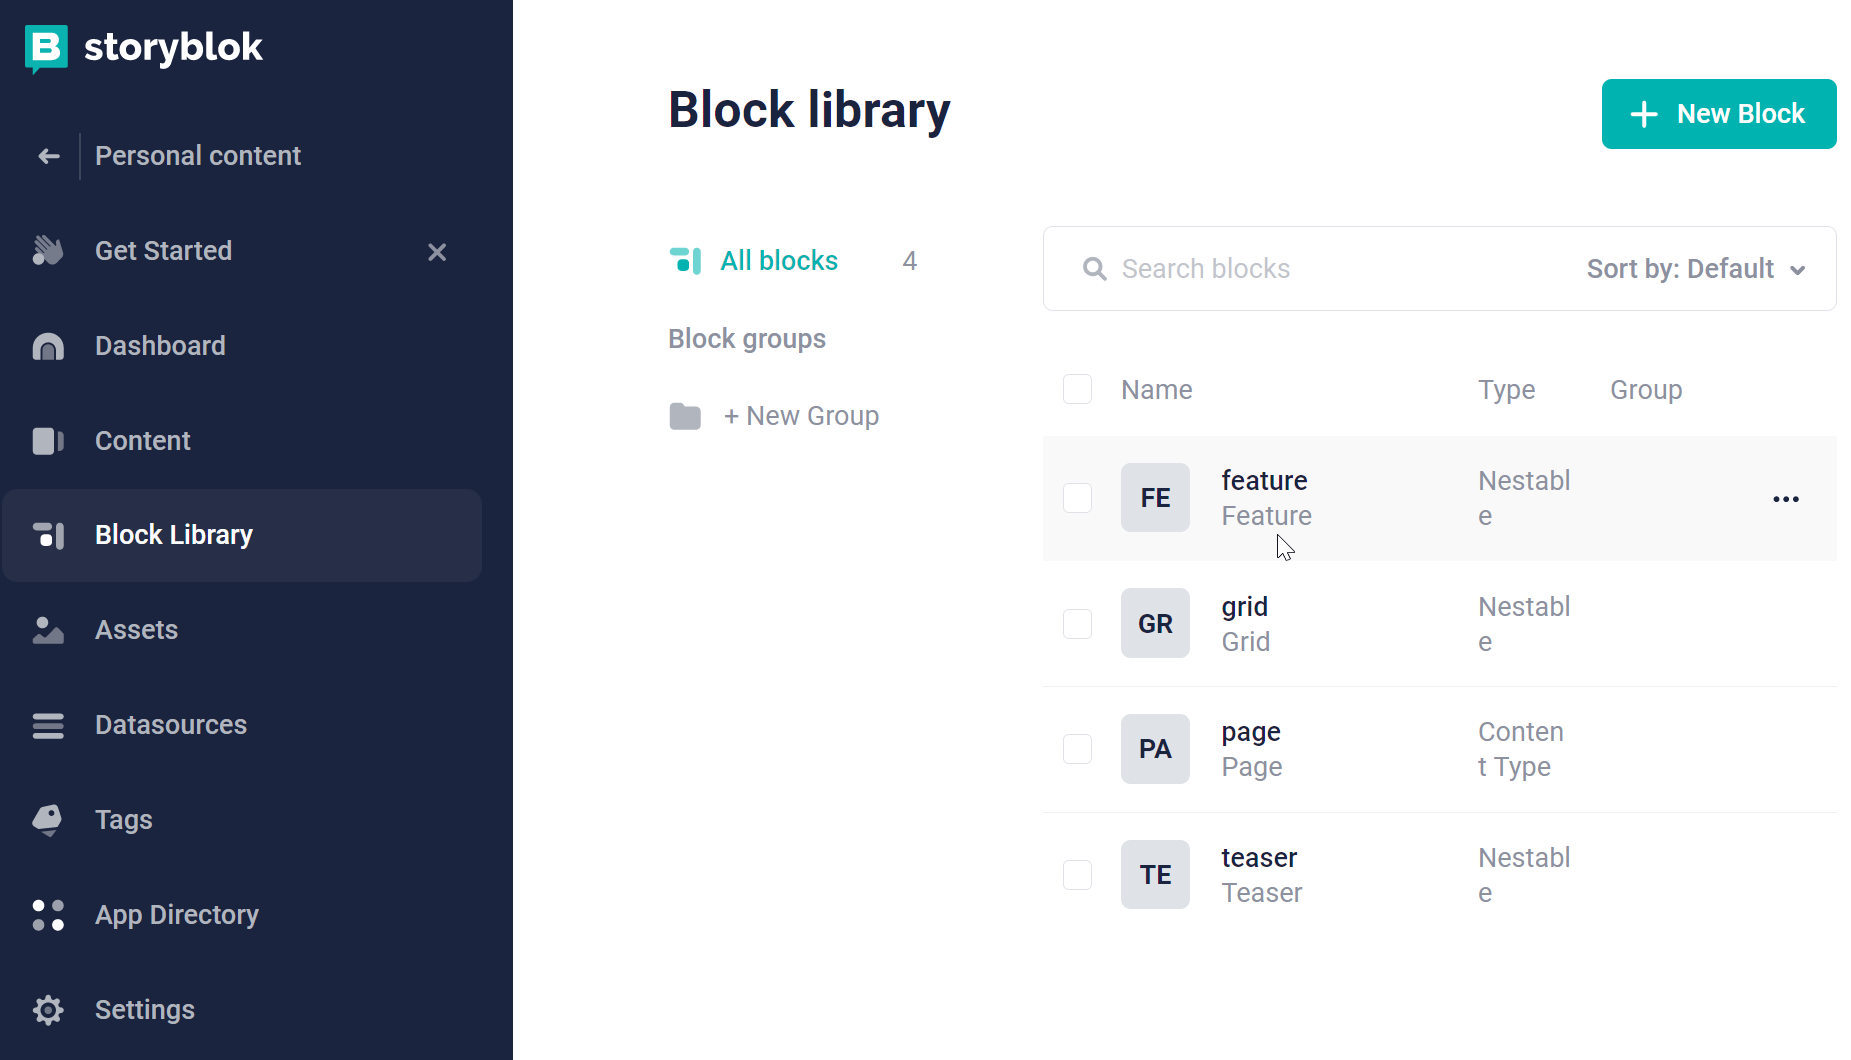
Storyblok library
Click on the field tab
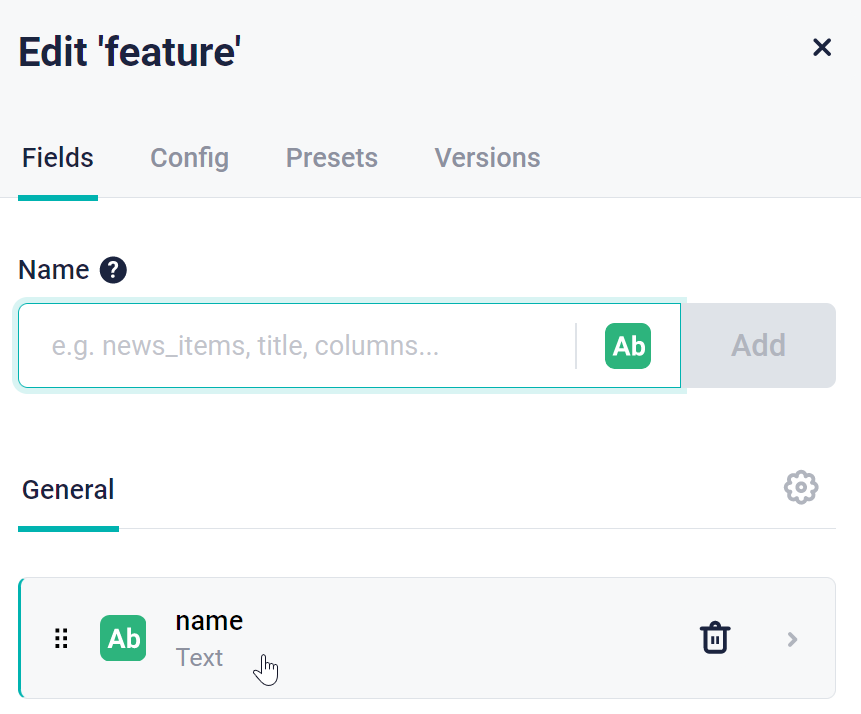
Tick the Translatable option and save the changes as shown below:
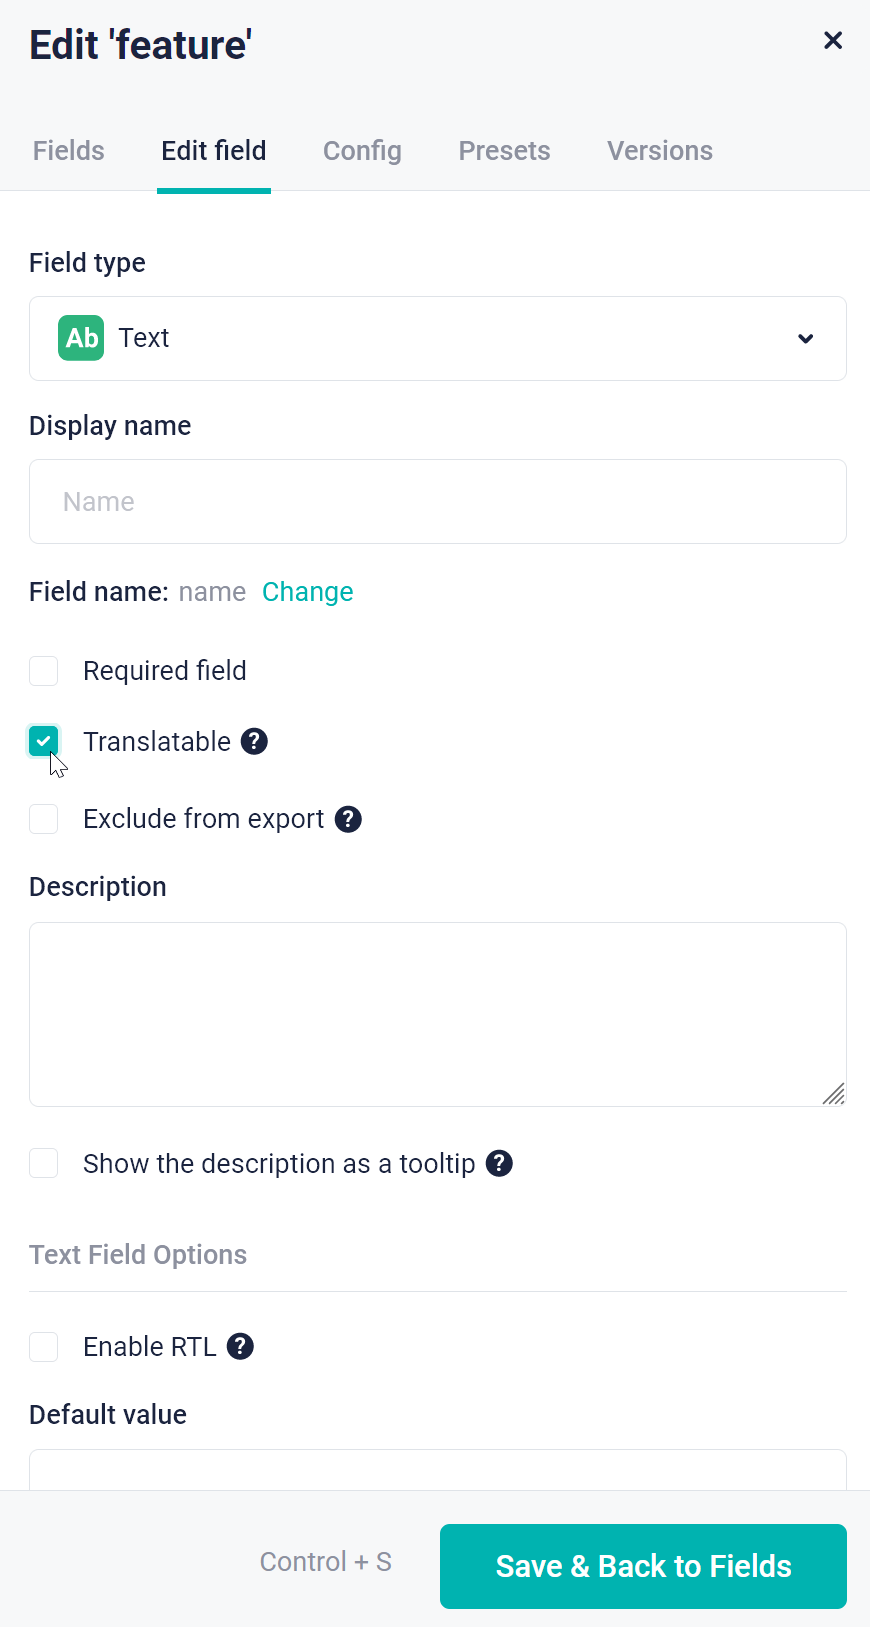
Now you can return to Lokalise!
Setting up a new integration
At this point, we are ready to integrate Storyblok with Lokalise. Return to your Lokalise project and click on “Install” in the Content Management tab.
To obtain a personal access token, return to Storyblok, click on your username in the bottom left corner, and then choose Account settings:

Find the Personal access tokens section and select Generate new Token:
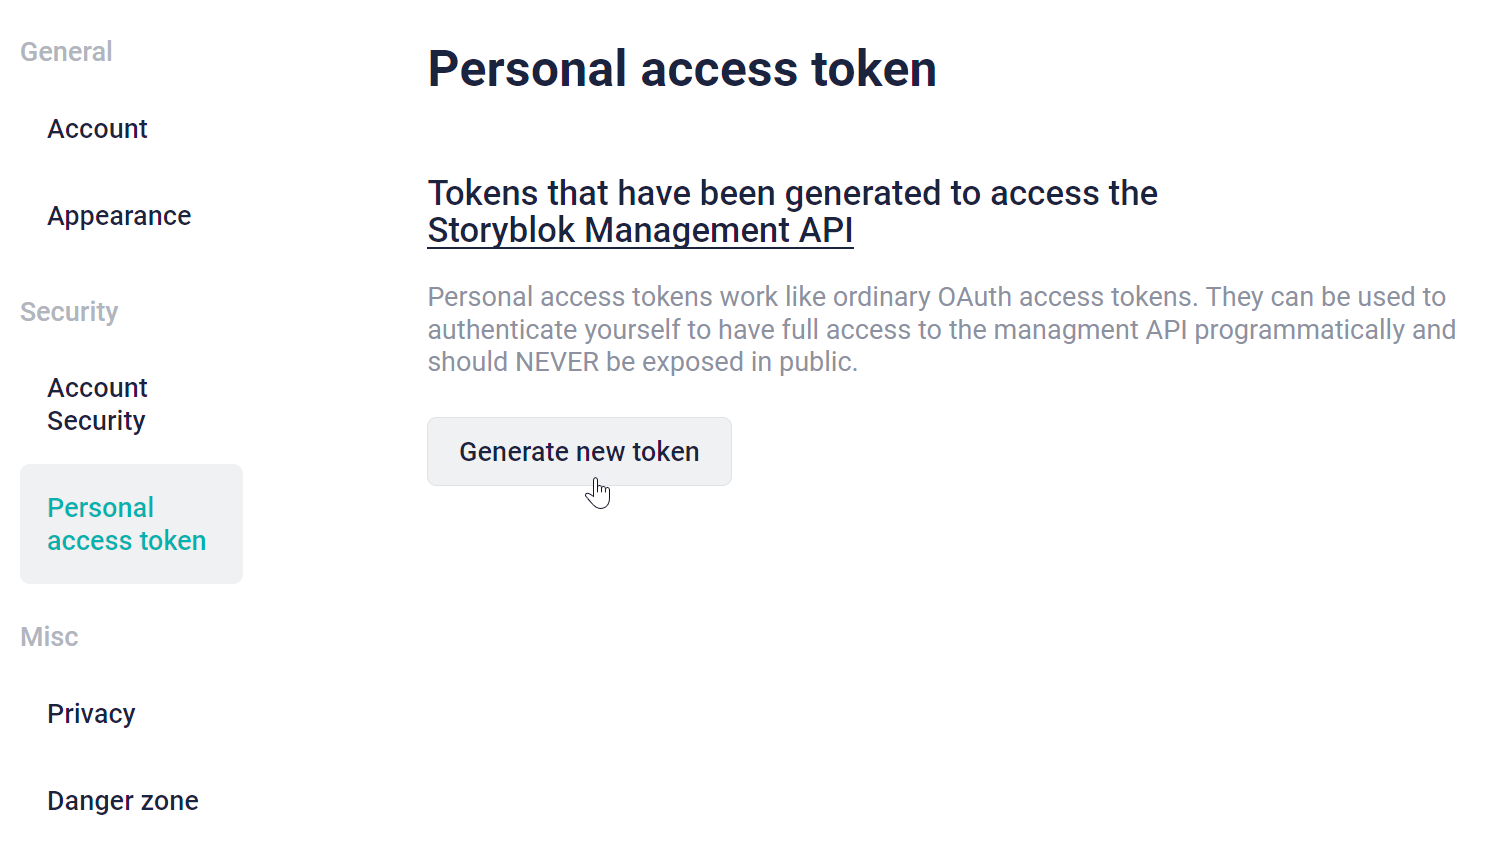
Copy your new token, return to Lokalise, paste it into the corresponding text box, and click Authorize.
Don’t share the Personal access token with anyone or post them on any public space.
Importing content from Storyblok to Lokalise
You will be presented with another dialog to configure the integration:
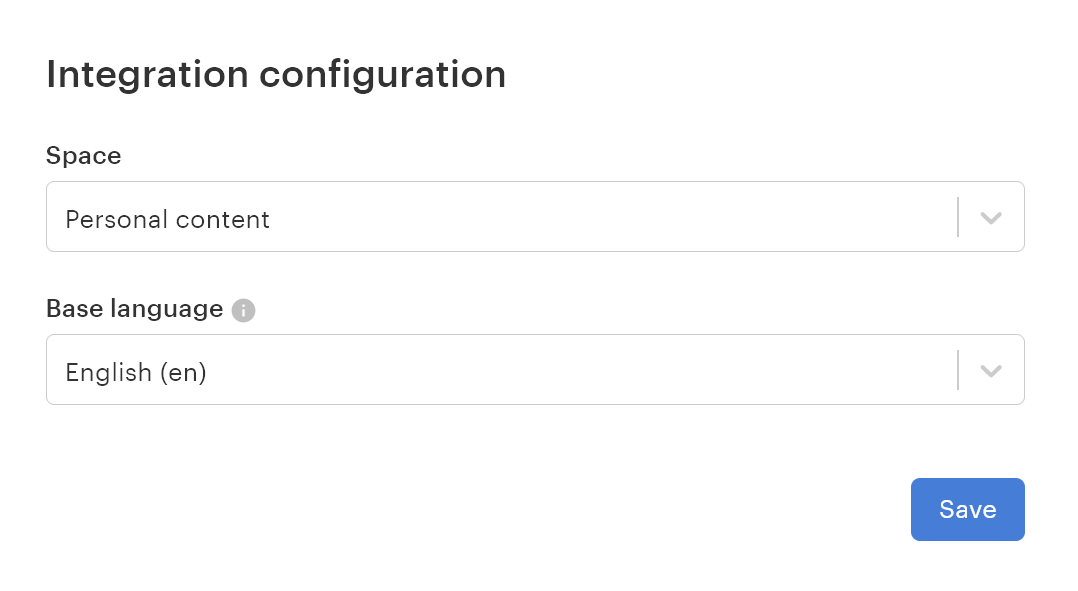
Here, choose your Storyblok space and the base language of your content. When you are ready, press Save. Your Storyblok data will be loaded automatically (you might need to click Reload list to see all the items).
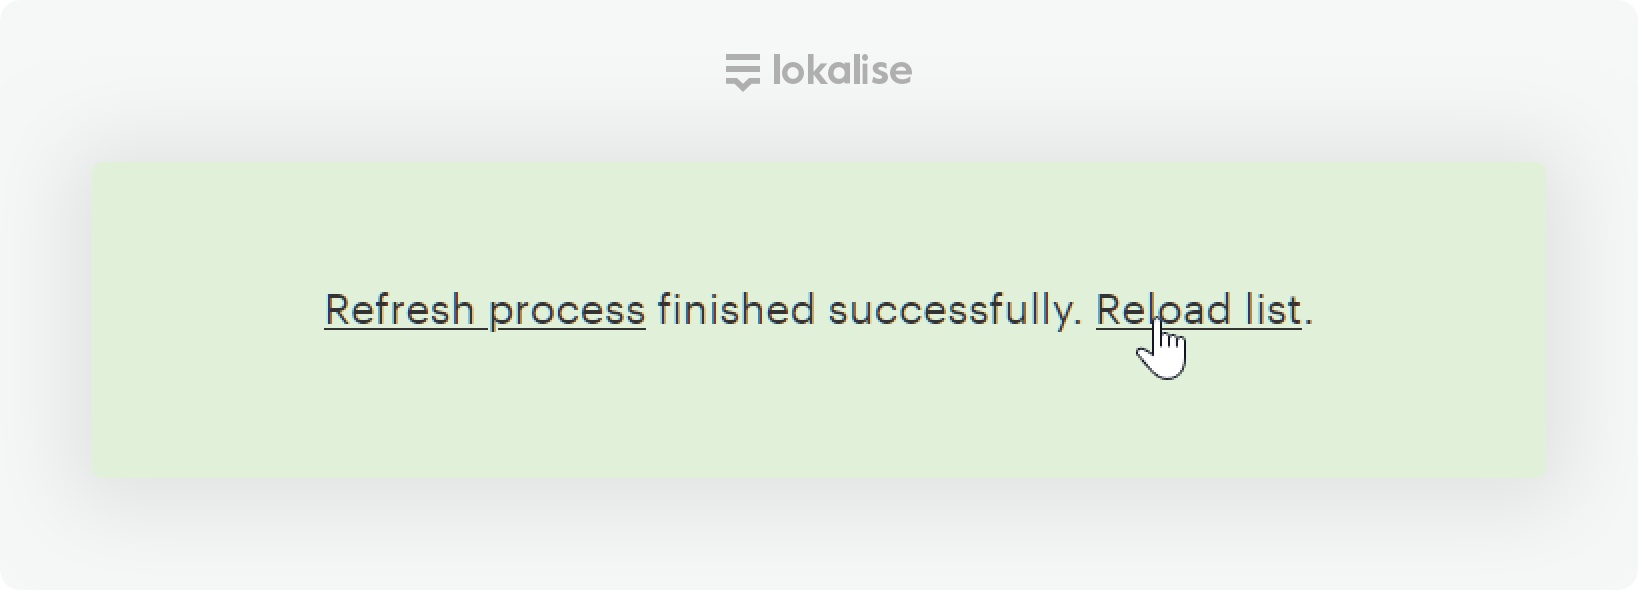
If you need to refresh the loaded data, click the corresponding button:

After the refresh process is completed, you’ll see this notification message:
To start translating your content in Lokalise, you’ll need to import the desired items first. To achieve this, find the items you want to translate and put checkmarks next to them:
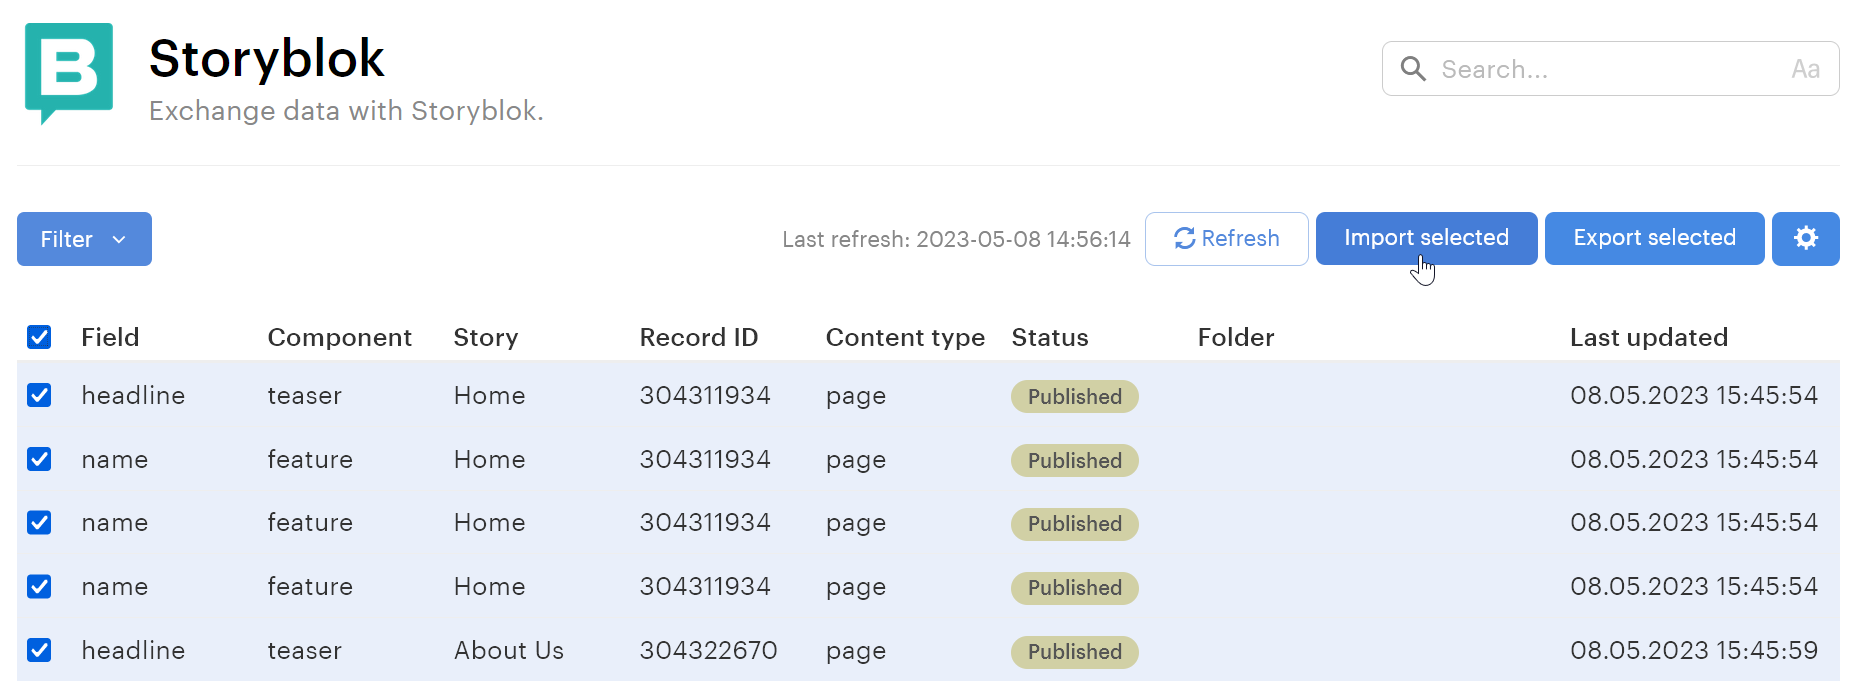
You can use the search box in the top right corner or construct a new filter using the Filter dropdown. Once you are ready, click Import selected.
Choose the content languages that you would like to import:
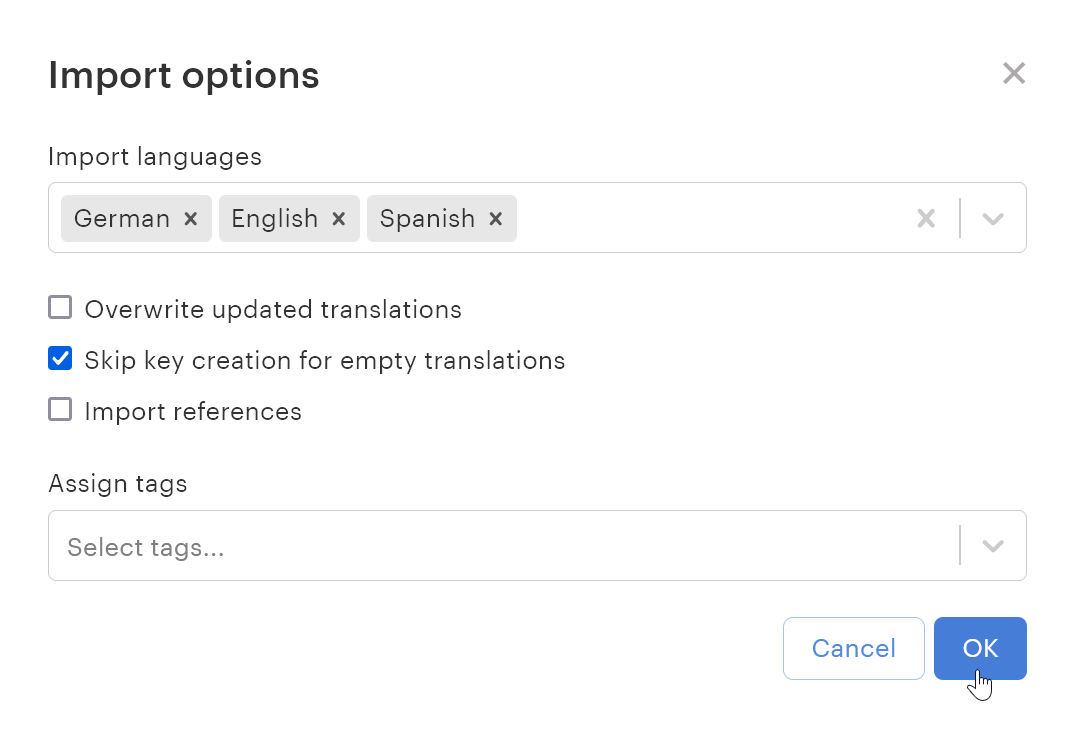
For example, if your content is currently only available in English, you can remove all other languages from this list, as the corresponding translations will be empty anyway. However, please note that if your Storyblok space contains languages that are not present on Lokalise, you’ll need to choose these languages so that they are created for you. Specifically, we have added only English and Spanish languages to Lokalise, whereas on Storyblok, we also have the German language. To add this language automatically, I’ve chosen it from the dropdown.
You can also tick the Skip key creation for empty translations option so that keys are not created on Lokalise if they do not contain translations for any languages.
If you have already imported the chosen items and wish to download newer versions to Lokalise, select the Overwrite updated translations checkbox. Please note that this will overwrite all the corresponding translations in your Lokalise project with new versions from Storyblok.
You may also need to enable the Import references option. What does that mean? If you get an issue with "Field is a reference,":

It simply means that this item will not be imported independently as it contains no translatable content. However, if you select this item and enable the Import references option, all records referenced from this field will get imported automatically.
Finally, you can assign one or more tags to the imported translation keys by adjusting the corresponding field.
Click OK. Your content will be imported to Lokalise in the background. After this process is finished, you’ll see this notification message:
Managing translations
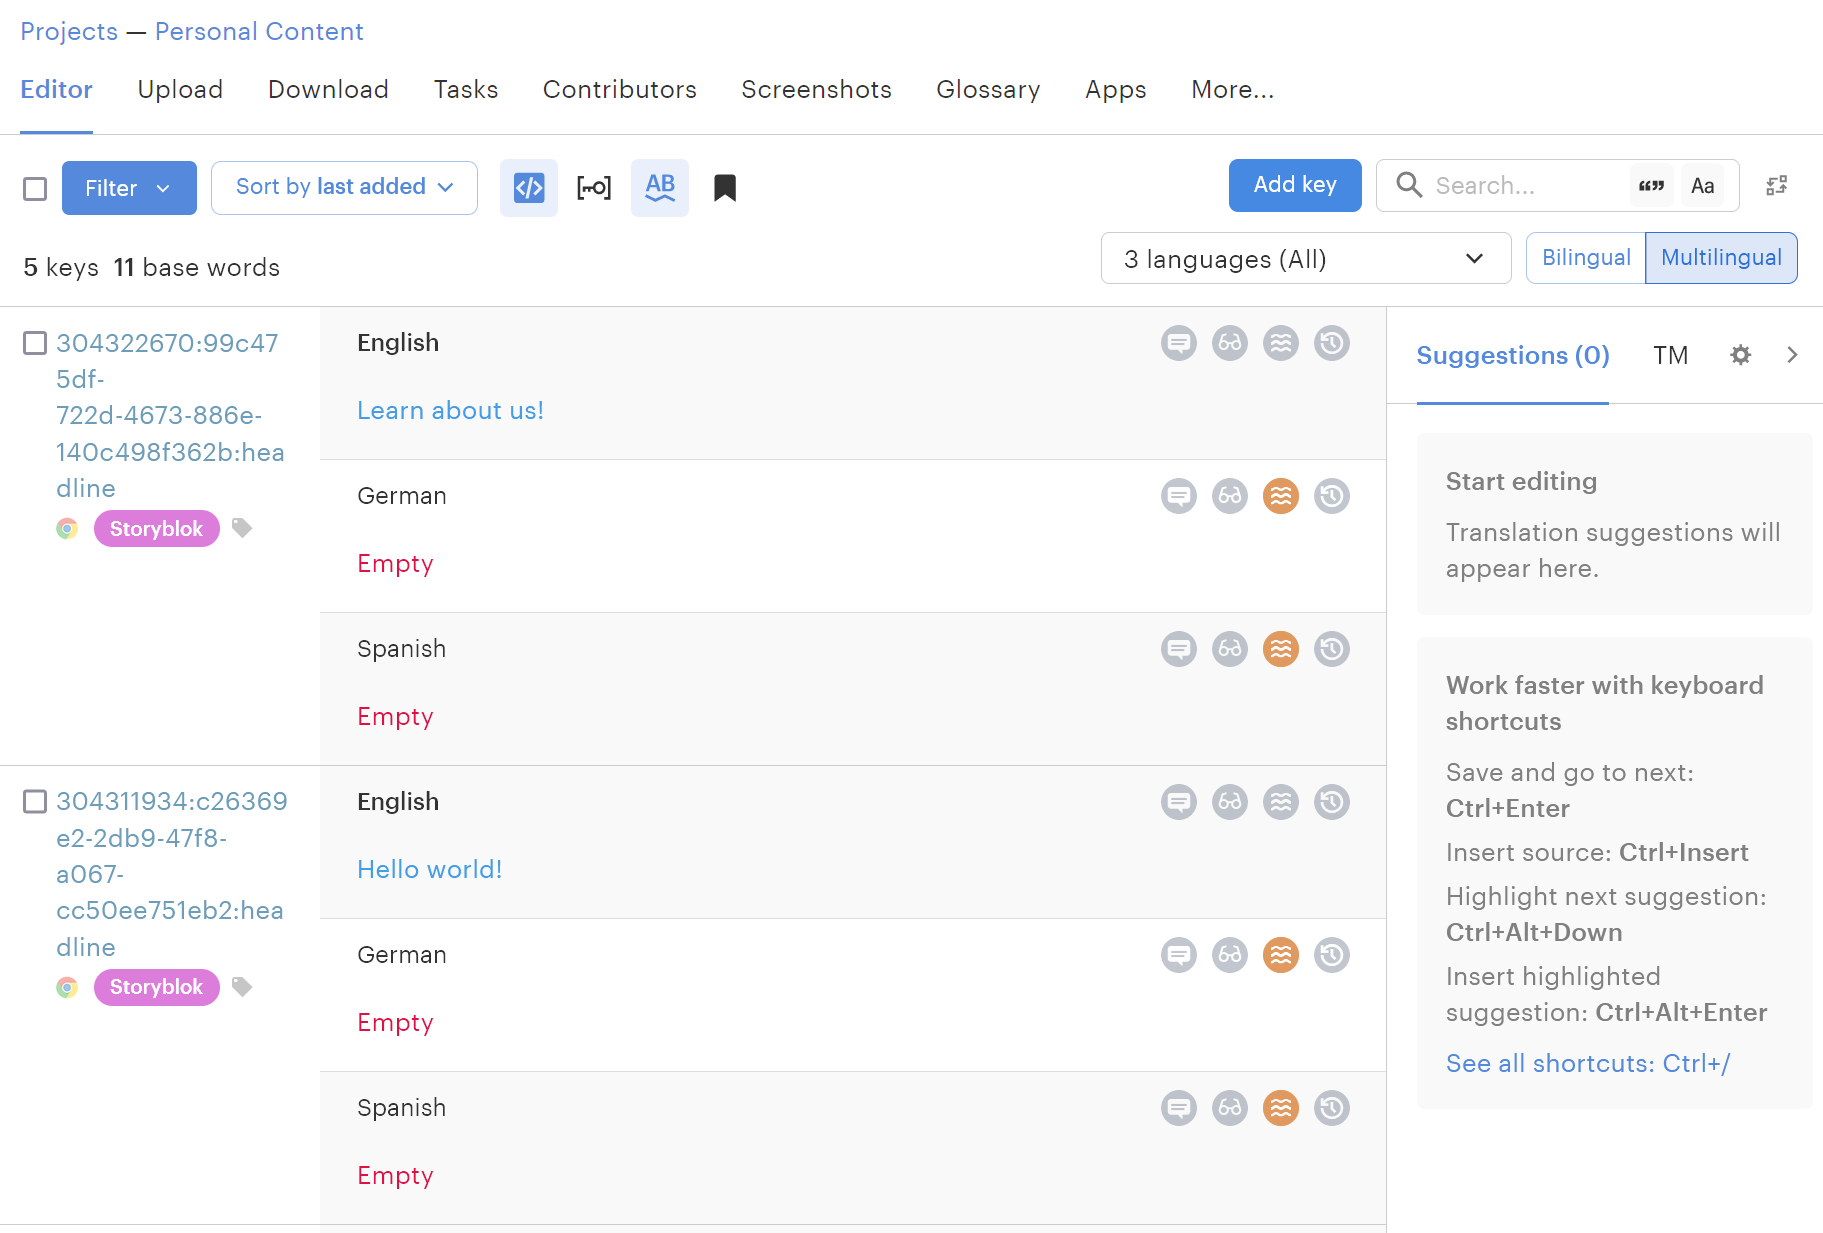
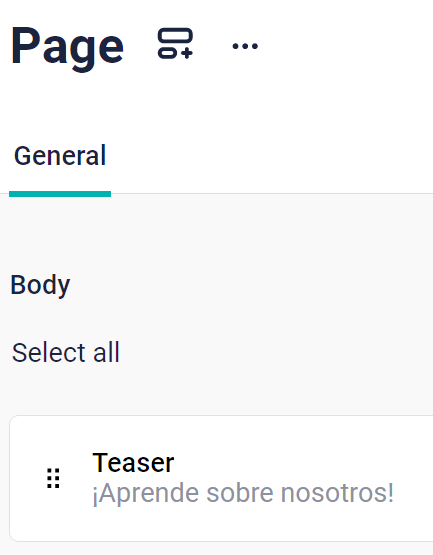
Now return to the project editor by clicking on the project name in the top left corner. Then, you will see all the imported content, for example:
Tags
The long alphanumeric values to the left are called translation keys: basically, they act as special identifiers to properly connect your translations in Lokalise with the content in Storyblok. Do not change these translation keys as doing so may lead to various technical issues.
Each translation key will be assigned a Storyblok tag and any additional tags you’ve chosen when setting up the importing operation.
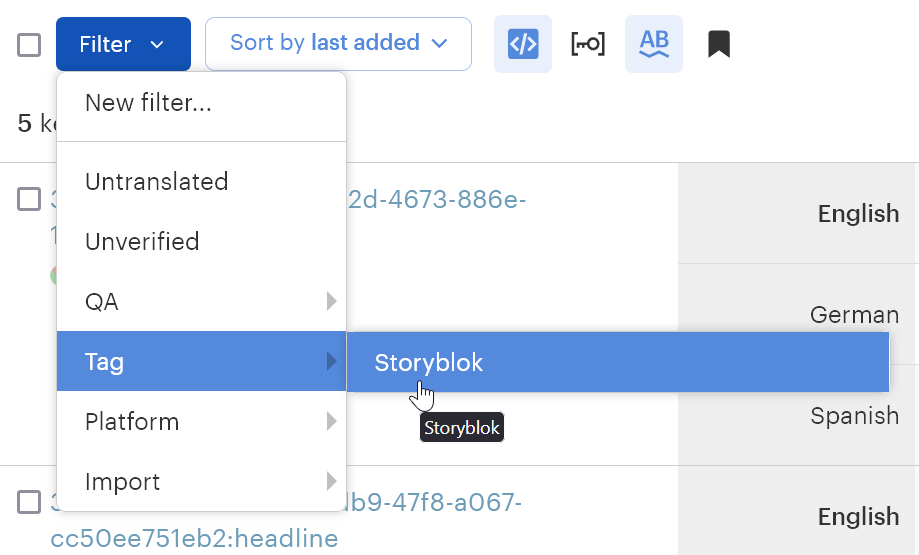
You may use these tags to filter your translations. To achieve this, click Filter --> Tag and choose the tags you are interested in:
Performing translations
Now, how do you translate something? It’s simple: just click on the text next to the desired language. For instance, I’d like to translate the header into Spanish:
After clicking on the word Empty, you’ll be presented with a text input like so:
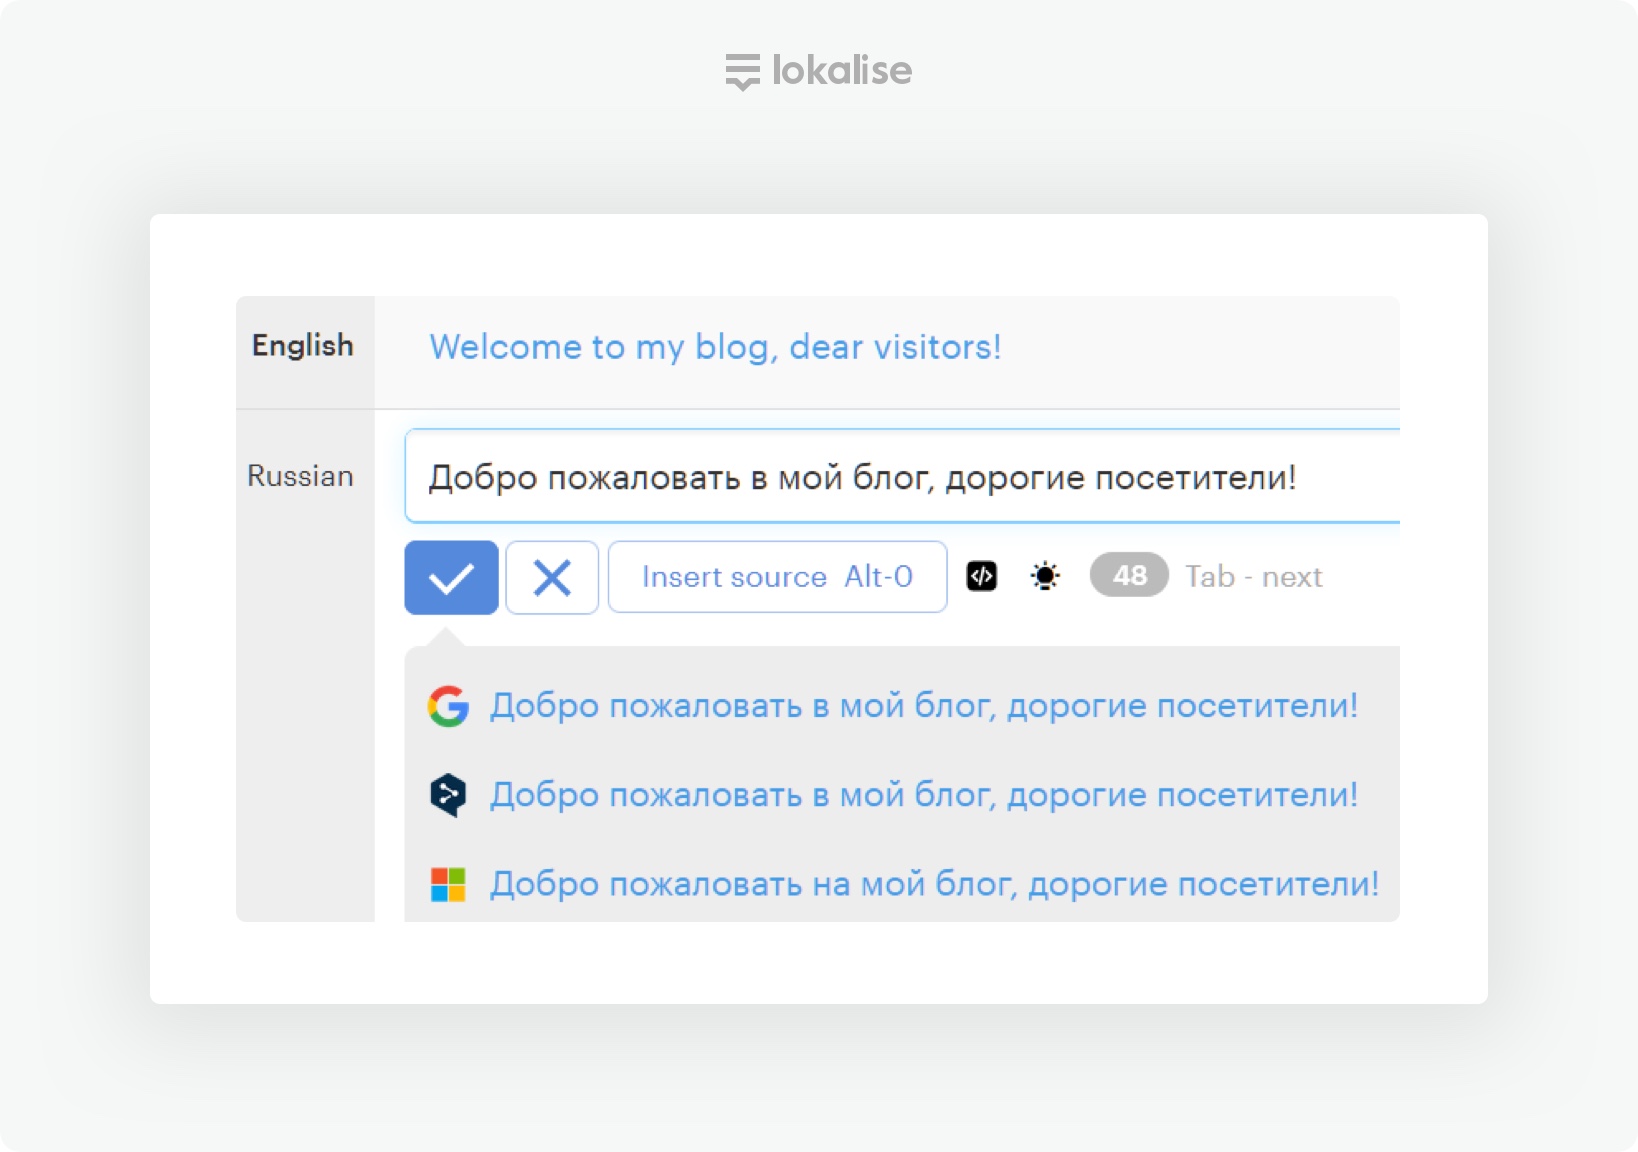
Simply enter your translation in that text field and click the Save button. Moreover, you’ll see machine translation suggestions, namely from Google Translate, DeepL, and Bing. To use one of the suggested versions, click it.
Exporting content from Lokalise to Storyblok
Once you have translated the content, you’ll need to export it back to Storyblok. To do this, click on the Content Management tab.
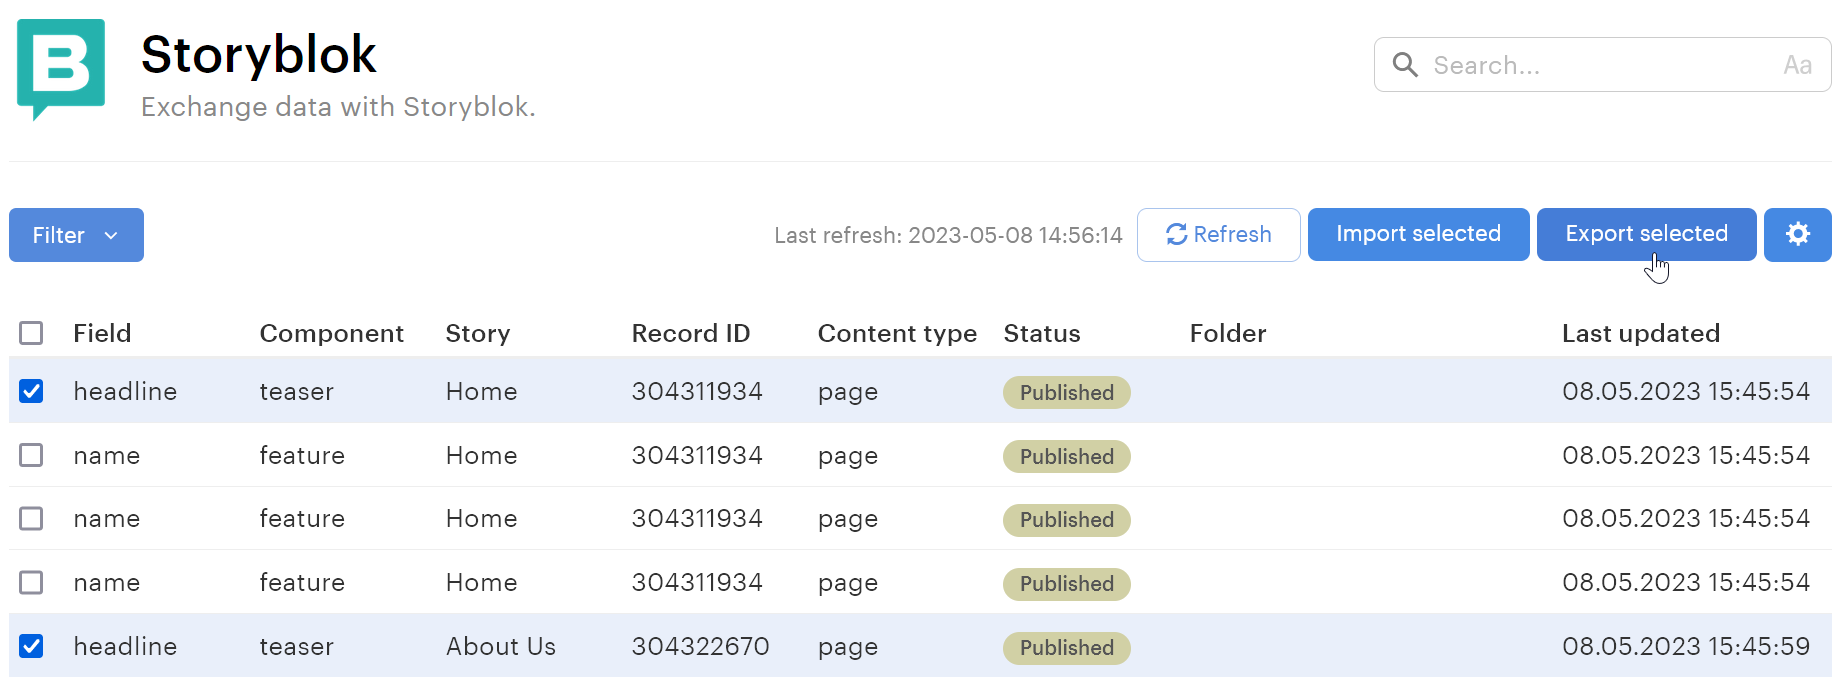
Find the items you wish to export, select the checkboxes next to them, and click Export selected:
Choose the languages you would like to export:
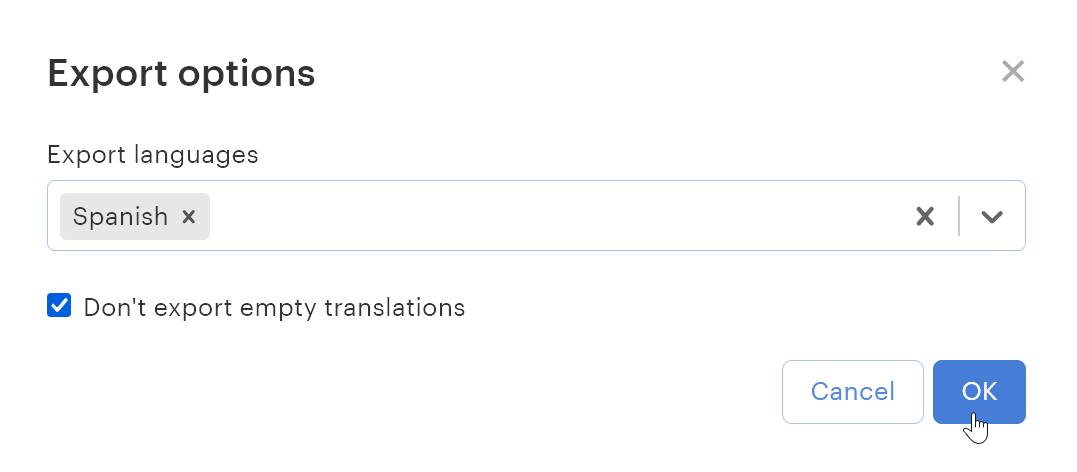
If necessary, uncheck the Don’t export empty translations option. When you are ready, click OK. Once the process is finished, you’ll see the following notification message:
Checking the result
At this point you can return to Storyblok and check out the result! For example, I have opened my first blog post to make sure that its title and body were translated properly:
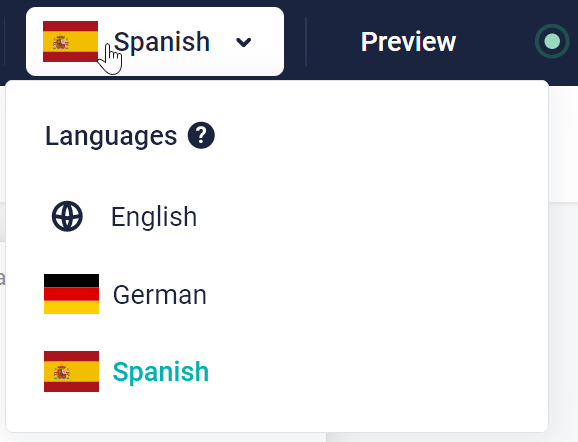
To change the content language, use the dropdown in the top menu:
Automatic import and export
The automated import and export feature allows you to set up an automatic content exchange process between your Lokalise project and Storyblok. This way, you don't need to trigger the import or export operation every time manually; it will run automatically.
To set this feature up, open the Storyblok app on Lokalise and click on the Automated settings button:

You’ll be presented with the following dialog box where you can adjust import and export:
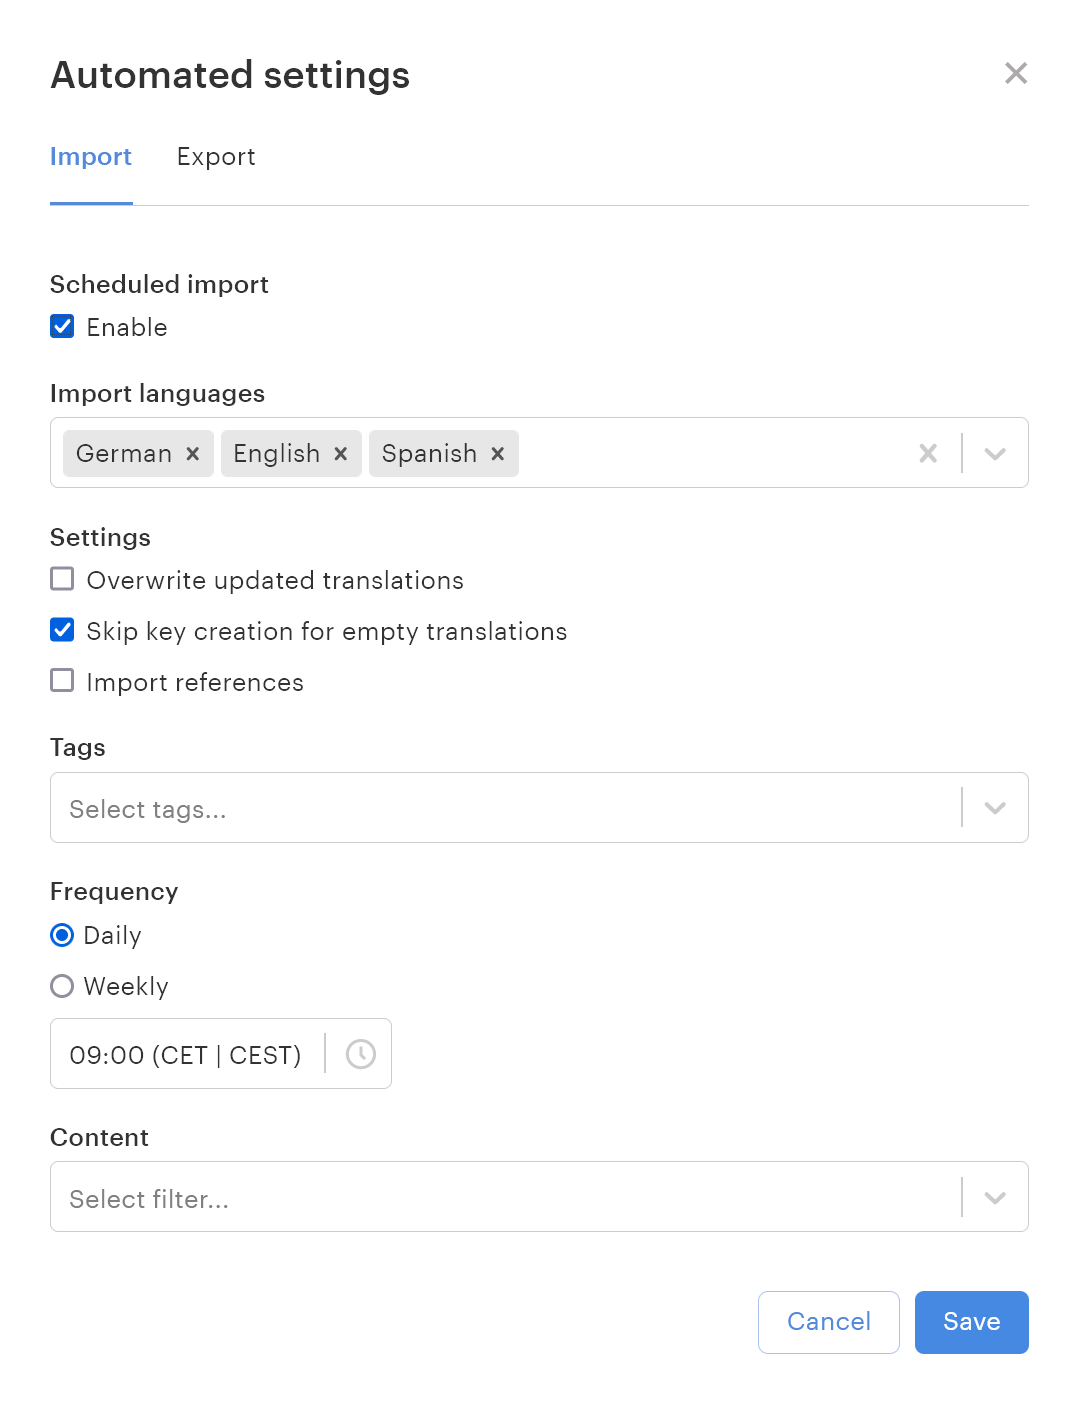
Please learn more about this feature in Lokalise docs.
Conclusion
And that’s it! You can repeat the process to translate more Storyblok content with ease. As you can see, there is nothing complex about integrating Storyblok with Lokalise, and this integration enables you to manage localized content more easily.
If you want to learn more about Lokalise features, I recommend checking out our “Getting started” guides that cover all the basic features and demonstrate these concepts in practice using screenshots and videos. More advanced topics are also covered in our docs, but if you find yourself struggling, please don’t hesitate to reach out to our support team as well.
That’s it for today, folks. Thank you for reading this post, and see you soon on Lokalise!
