Deploy Nuxt SPA with Storyblok to Netlify
Storyblok is the first headless CMS that works for developers & marketers alike.
This short guide describes how to configure & deploy your single page application (SPA) built with Nuxt and Storyblok to Netlify. You may check out the Getting Started guide from Storyblok, which will be our starting point for this guide.
You may also be interested in the static deployment of Nuxt to Netlify. Find out how to do it in this article - will come soon. 😇
Set up Storyblok space
Follow the steps in the Getting Started guide from Storyblok to create a new space. Storyblok creates sample content for us so we don't need to create any new stories. Fork the getting started repo next. You may notice that there are multiple technology folders. Open the Nuxtjs folder in your IDE and install the dependencies of the project.
console
yarn // npm installAfter these steps, you should be able to start the local environment using the following command.
console
yarn dev // npm run devDon't forget to change the access token to one of your newly created Storyblok spaces, as described in the second step in the Nuxt Example of the Getting Started.
Set up Nuxt
Make sure that your Nuxt config file is correctly configured. You have to set ssr: 'false' and target:'server' otherwise Netlify would not find the dist folder.
./nuxt.config.js
export default {
  ssr: false,
  target: 'server',
  /*
  ** Headers of the page
	...
	...
}
Set up Netlify
We will use a minimalistic Netlify setup in this case - you could do the same configuration using the Netlify UI, but I am going to show you how to do it with a netlify.toml file. 😉
Create a netlify.toml file in the root folder of the Nuxt project and copy & paste the following configuration:
./netlify.toml
[build]
  command = "yarn build"
  publish = "dist/"
We are done with coding for today! Yes, that was all. Commit & push your code to your repository and let's finish deployment in the Netlify UI.
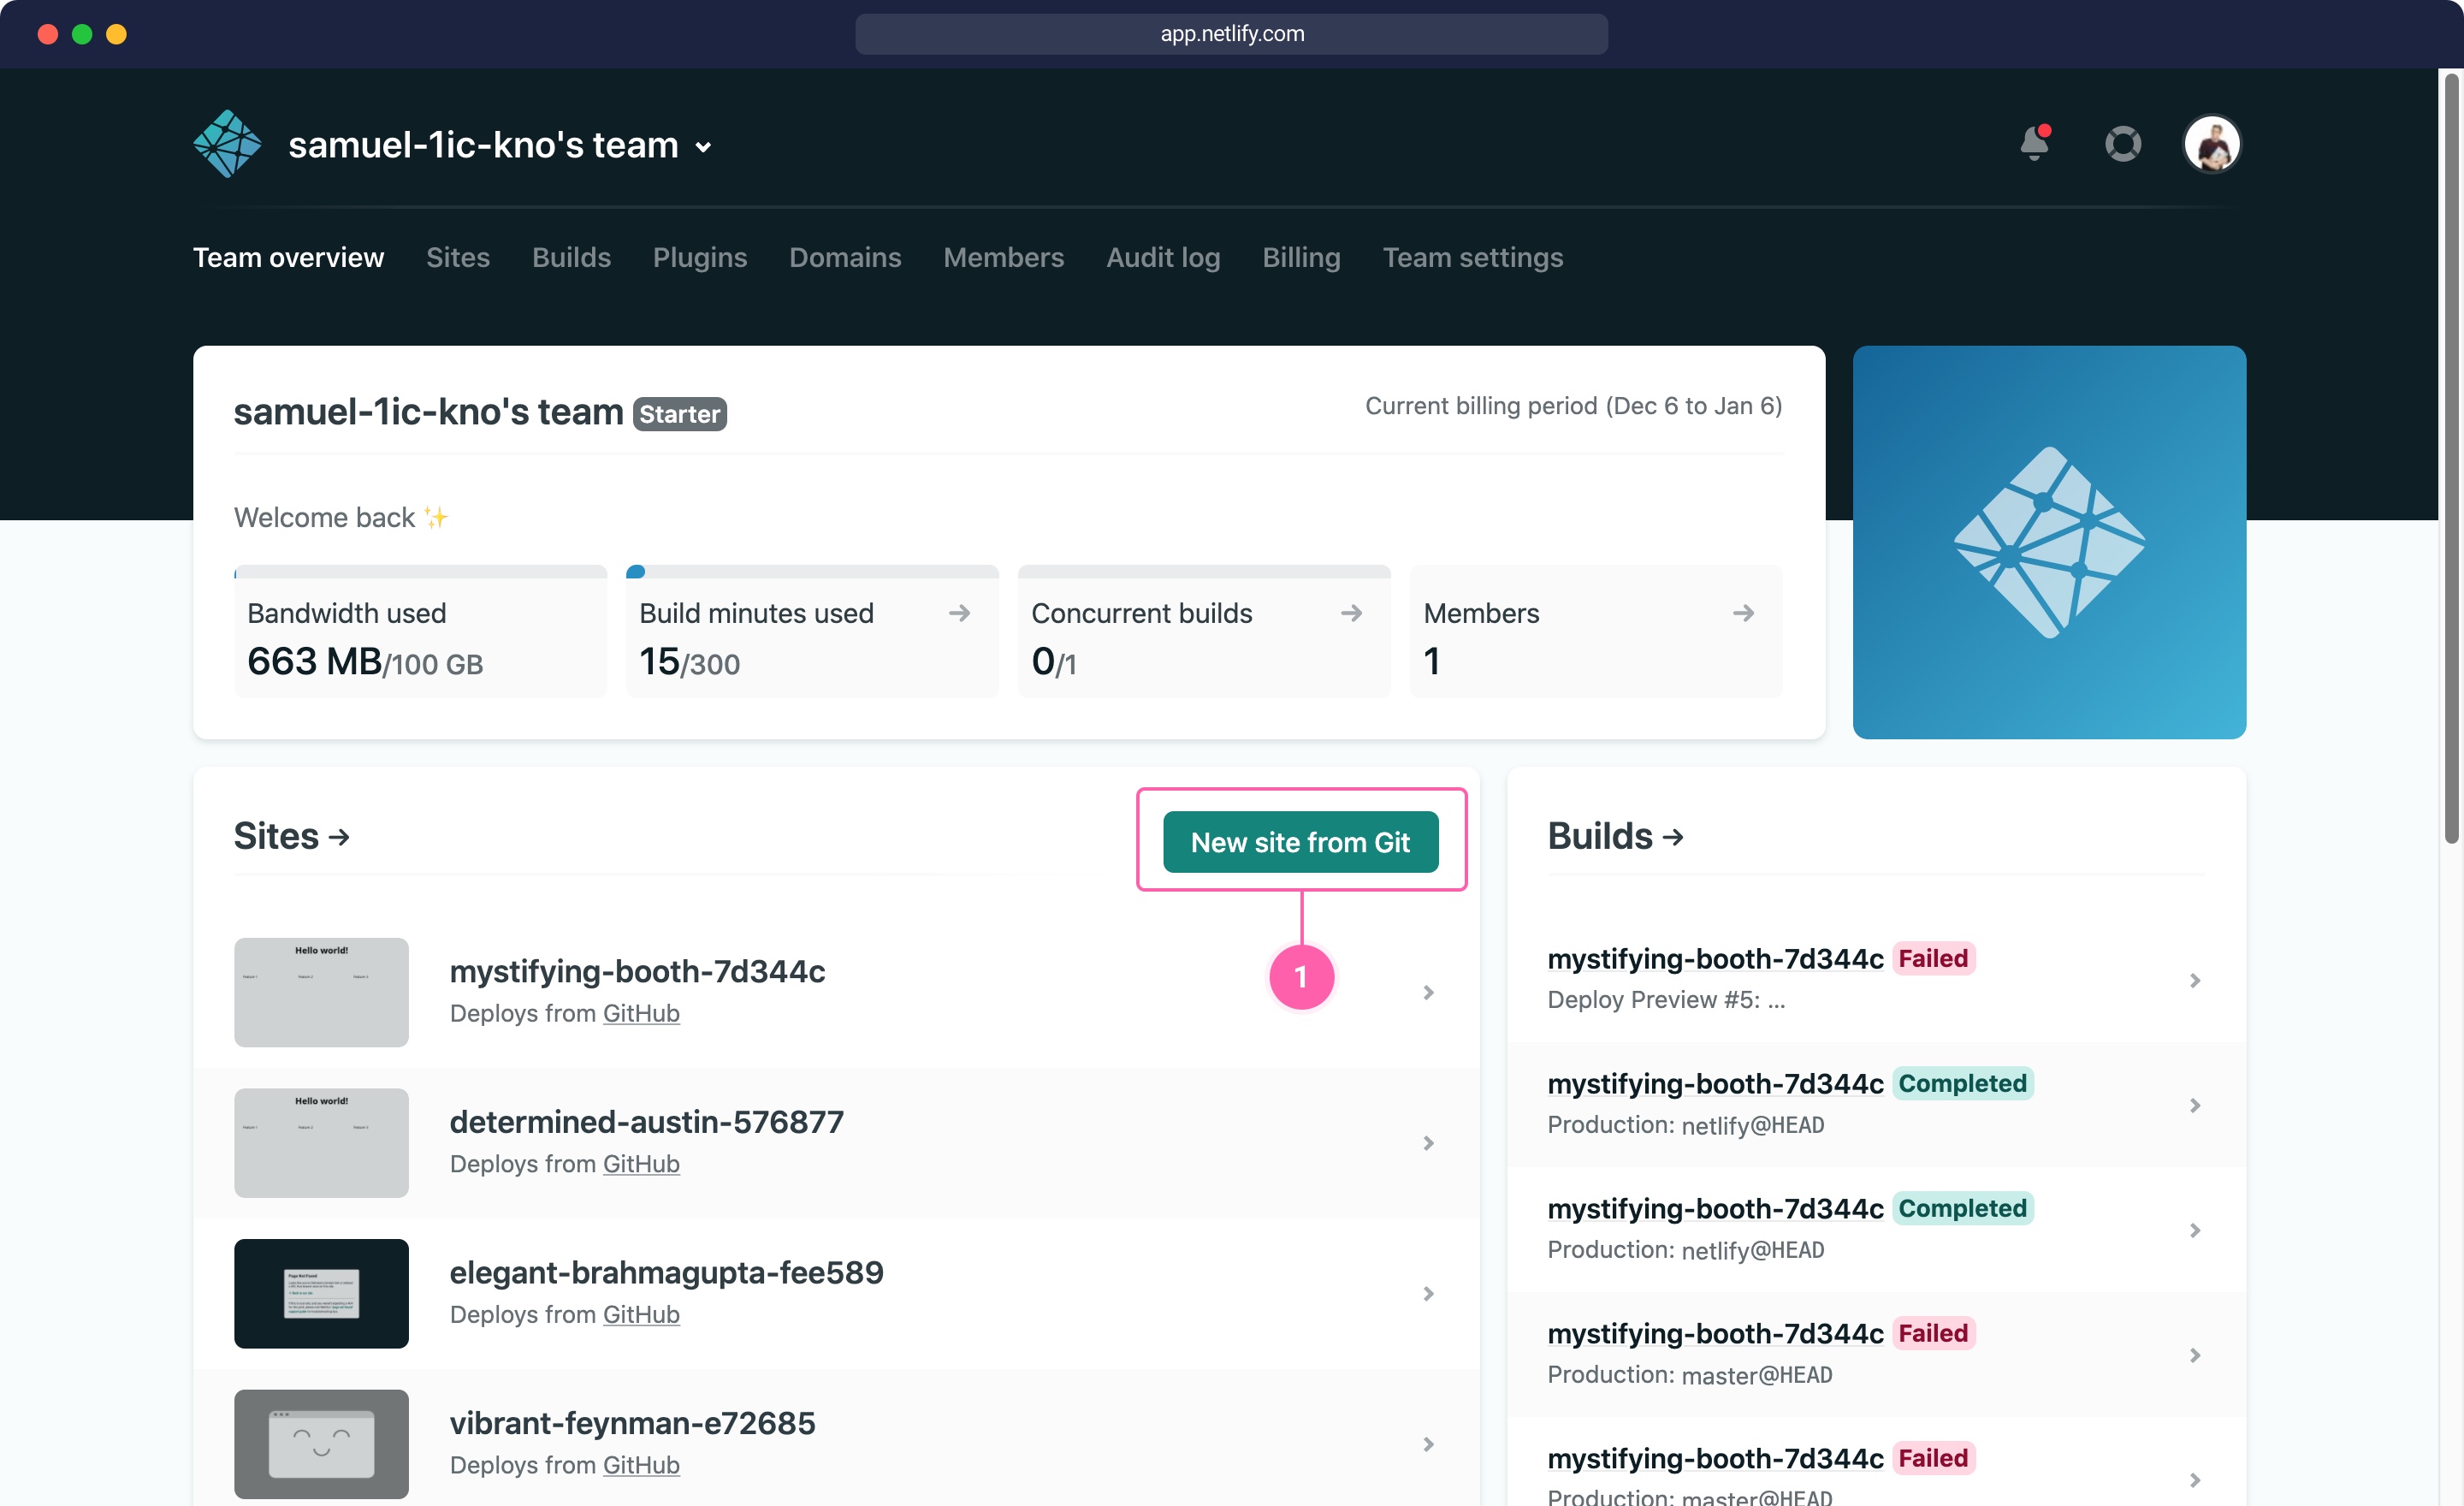
Log into your Netlify account and hit the button "New site from Git" (1).
In the following Netlify guide, the first step is to choose your Git provider (GitHub in my case 😇). The second step is to select the newly created repository and the correct branch, if you did the changes in a different branch. You can always choose the "netlify" branch where I already configured the netlify.toml file to connect to our getting started space in Storyblok.
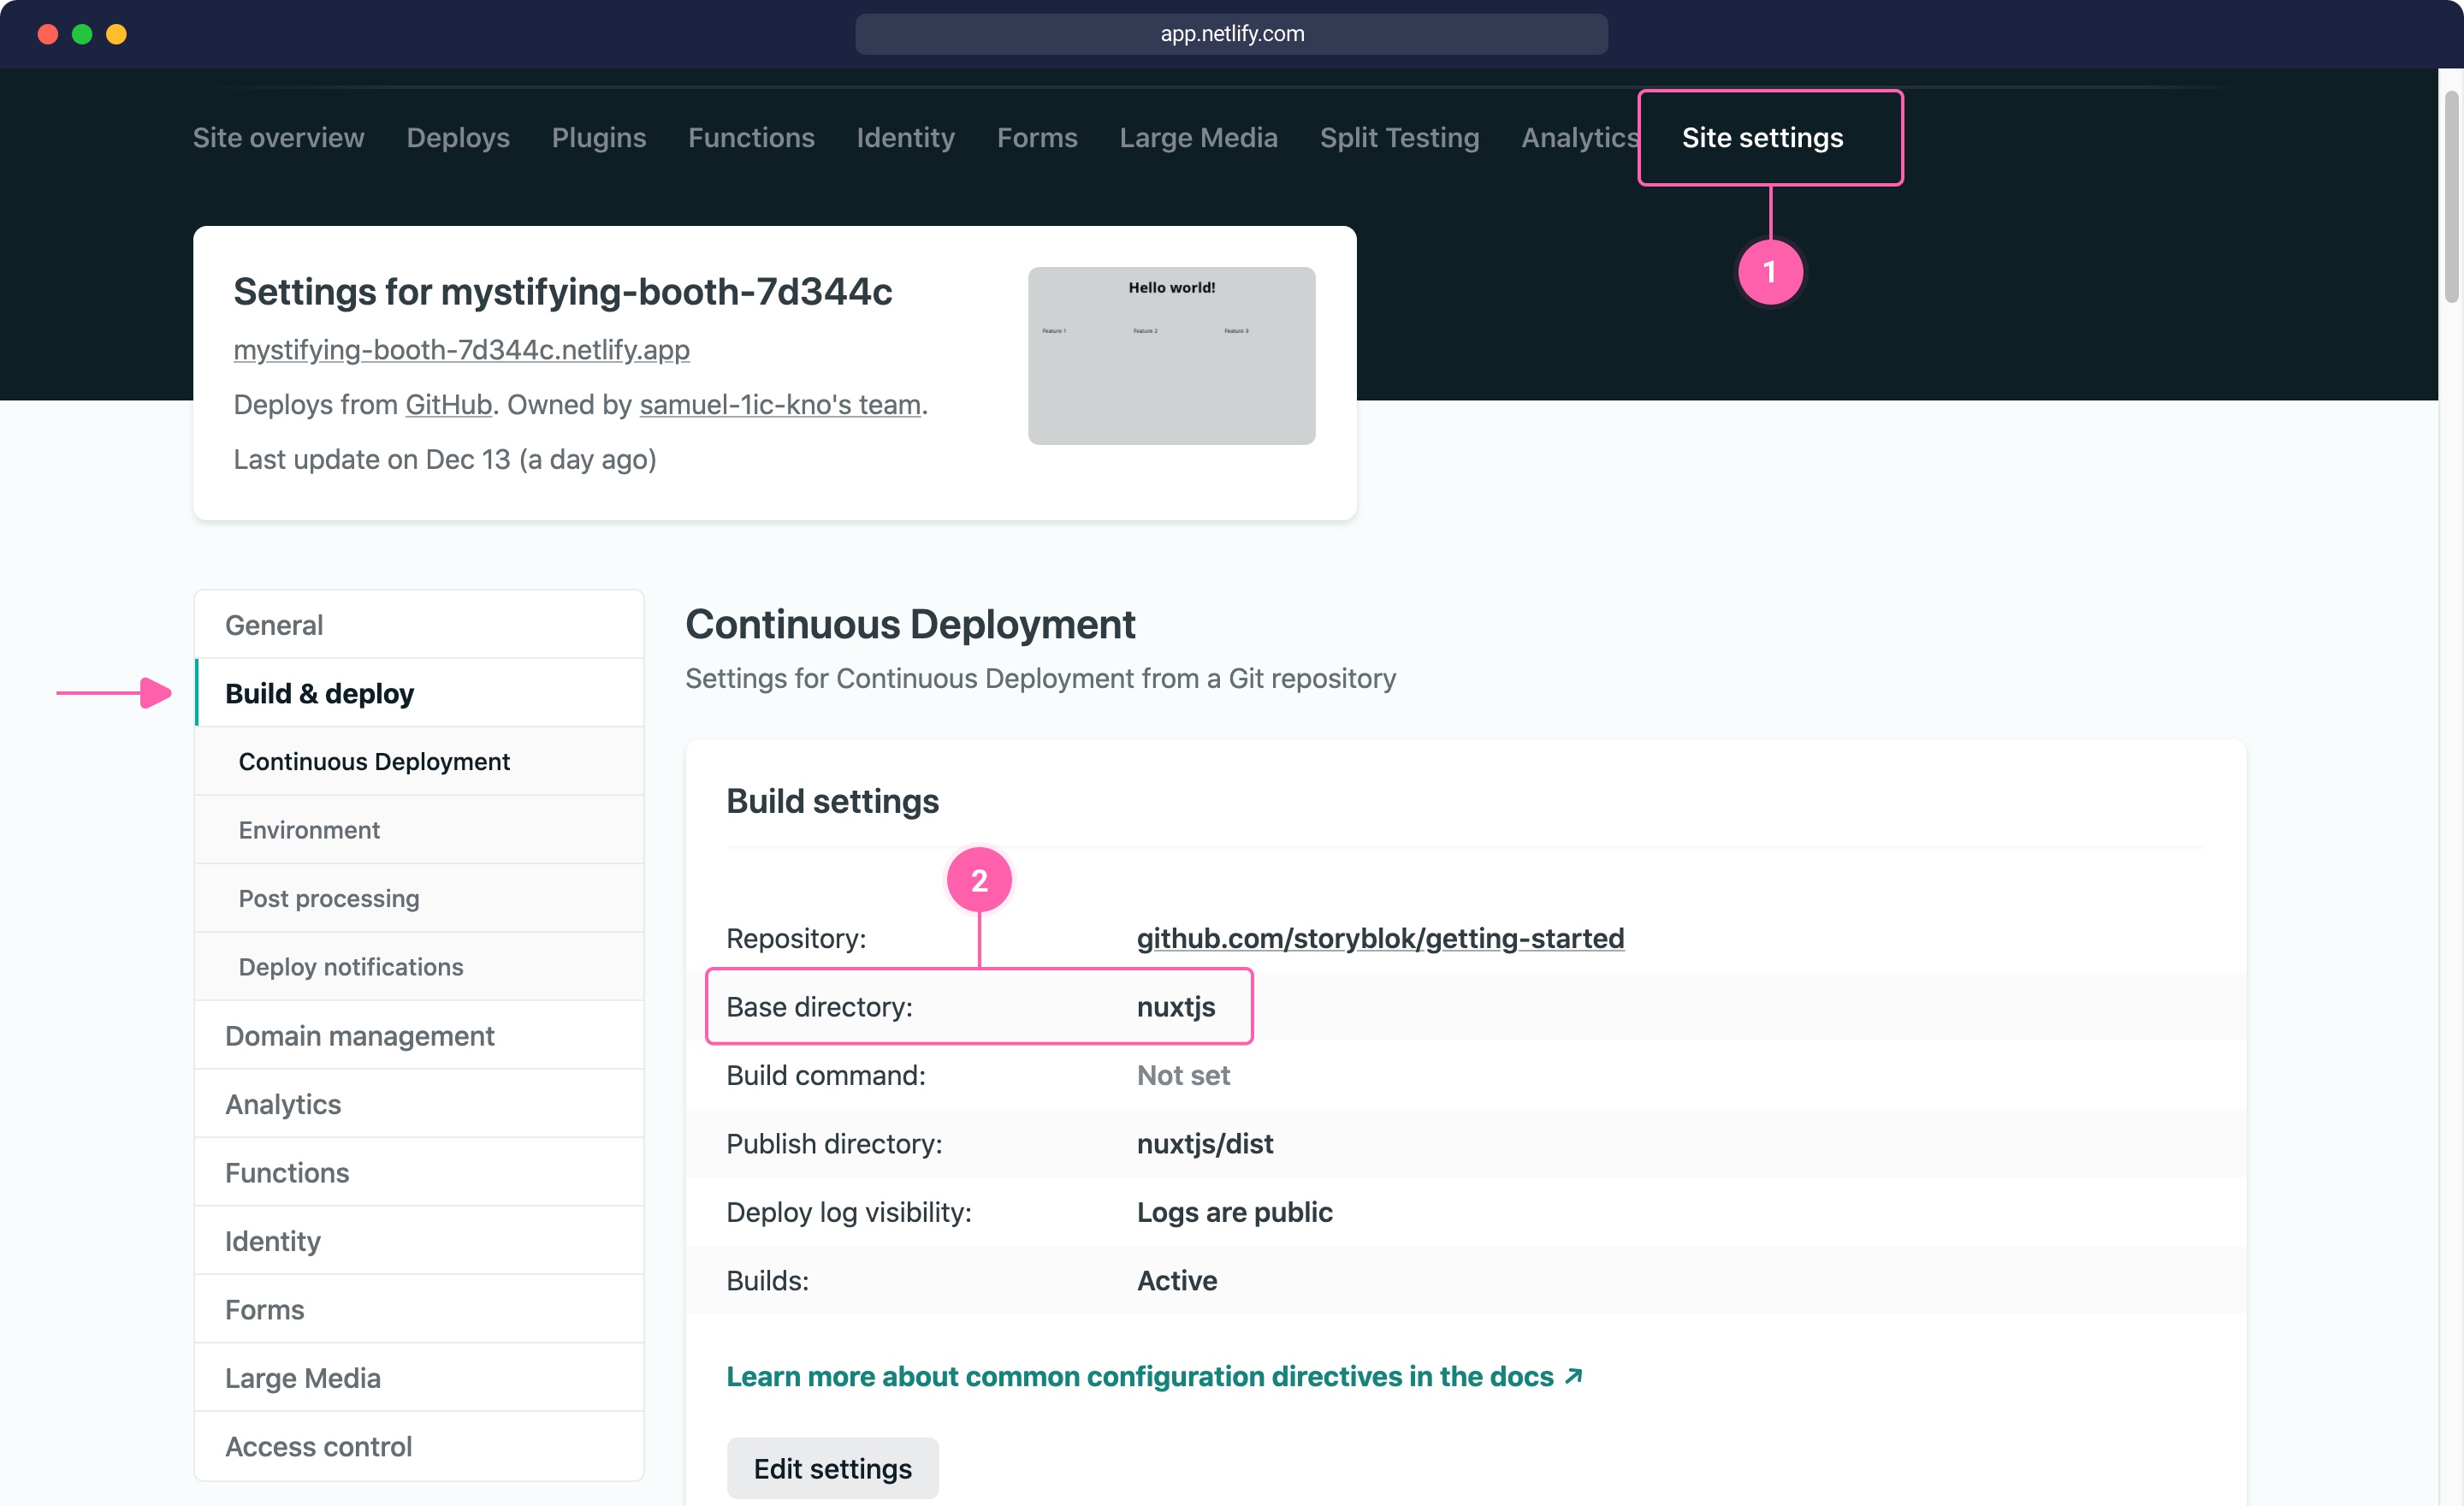
Write "dist" in the field Publish directory to deploy the site.
At first, you will see an error because we have to change the Base directory (2) in the Settings (1) of the site. Change it now to "nuxtjs".
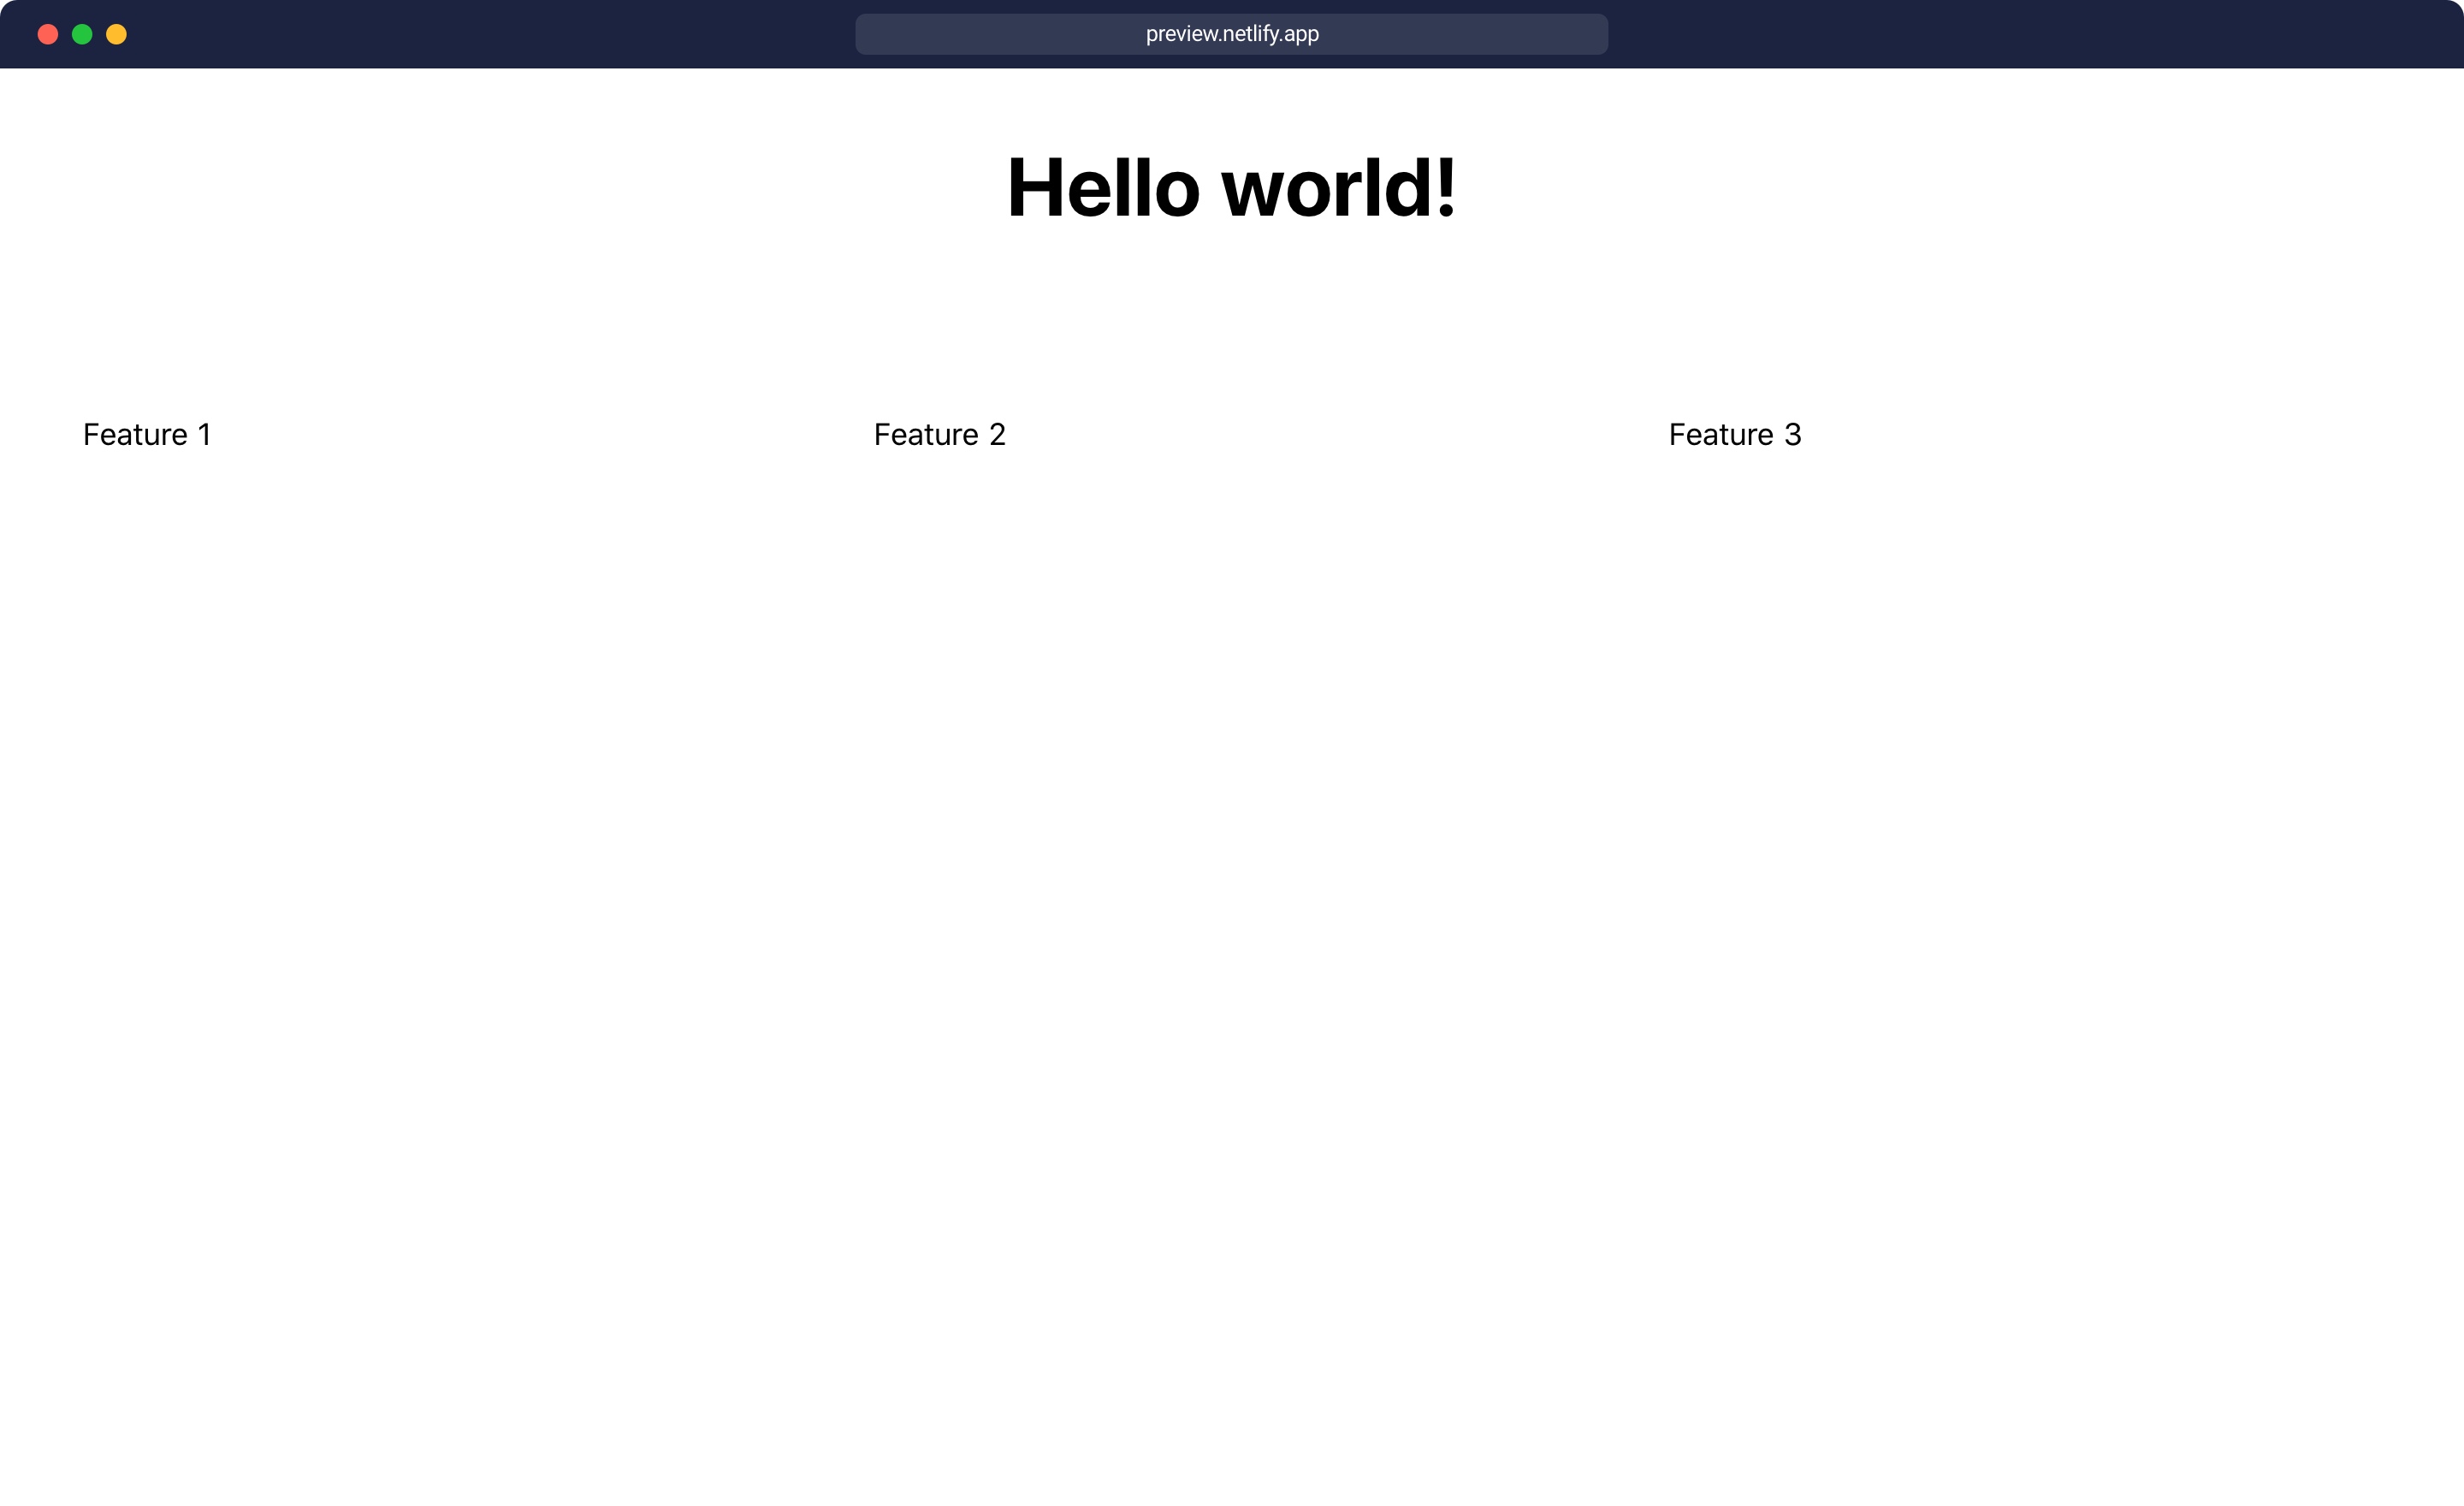
Then go to the Deploys section of Netlify and trigger the deployment again. The result of the preview should look like this simple website of Getting Started with Storyblok.
Set up webhooks
The last topic we cover is how to trigger a deployment on Netlify if new content is published.
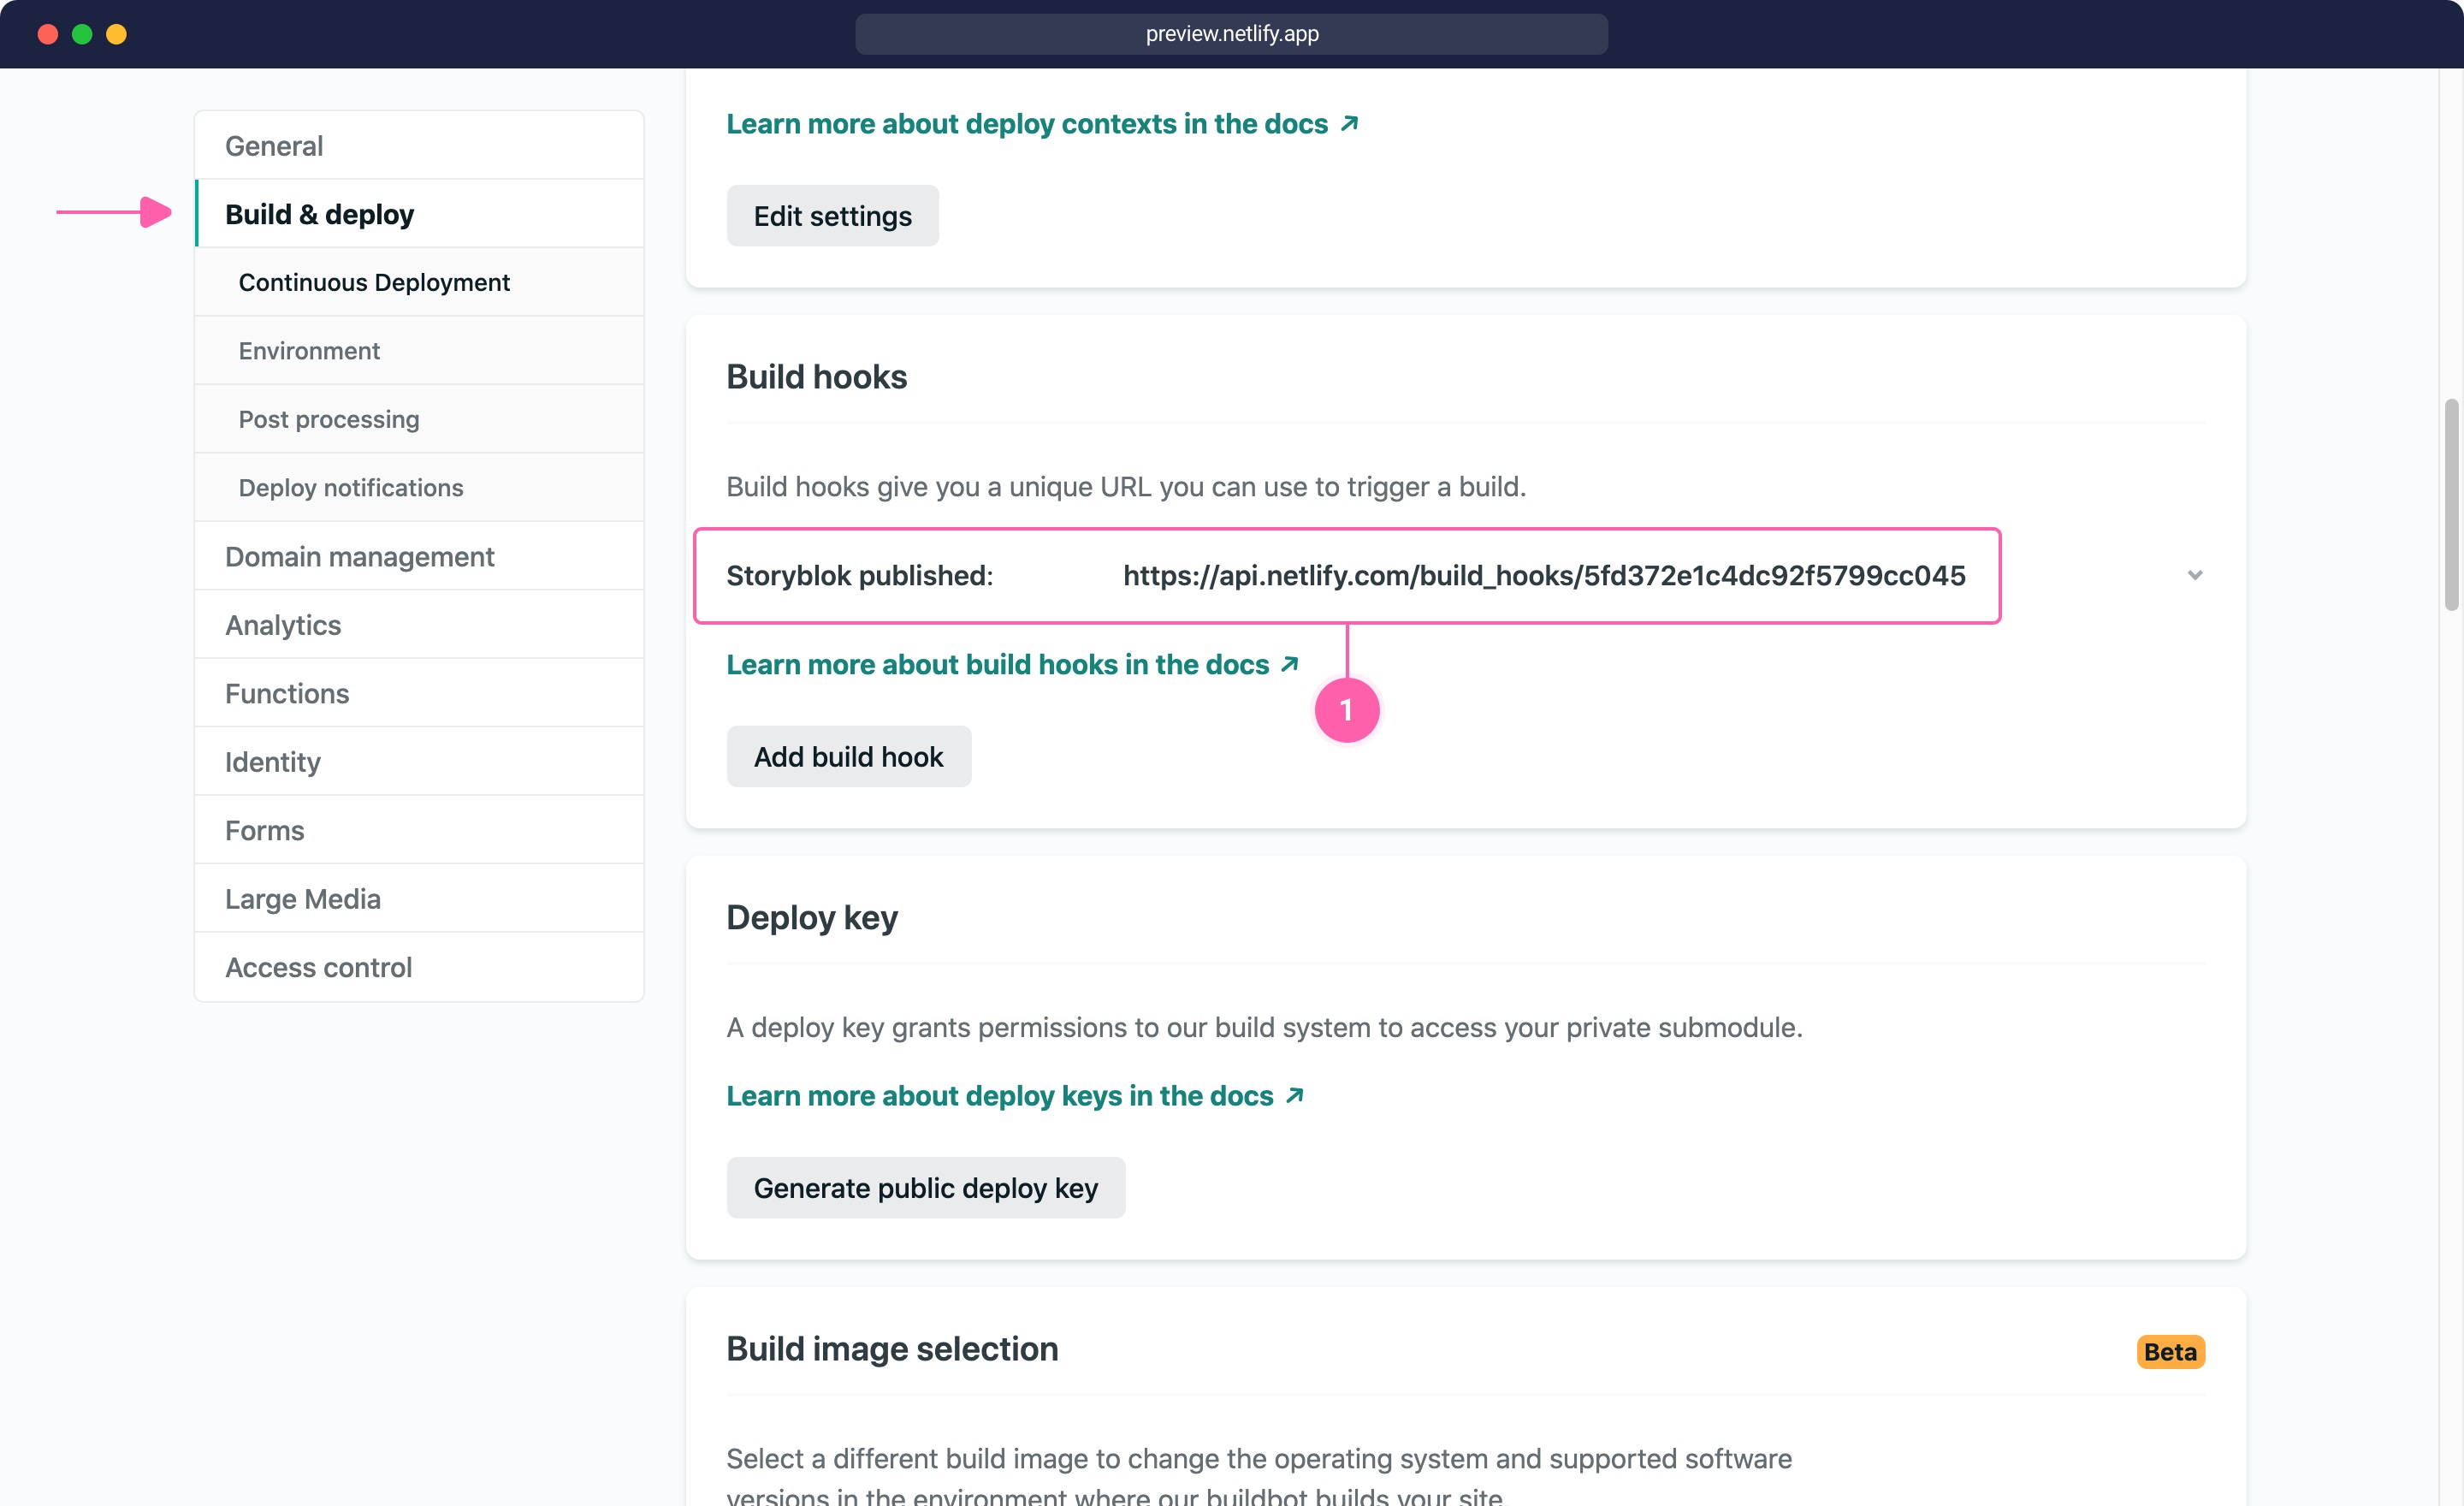
Go to Settings in Netlify and, under Build & Deploy, look for the Build hooks (1) section. Create a new hook and set the branch you want to deploy.
Copy the URL of the webhook you just created and go to the Storyblok App and open the Setting of your space. Paste the URL in the field Story published & unpublished (1) and don't forgot to save it.
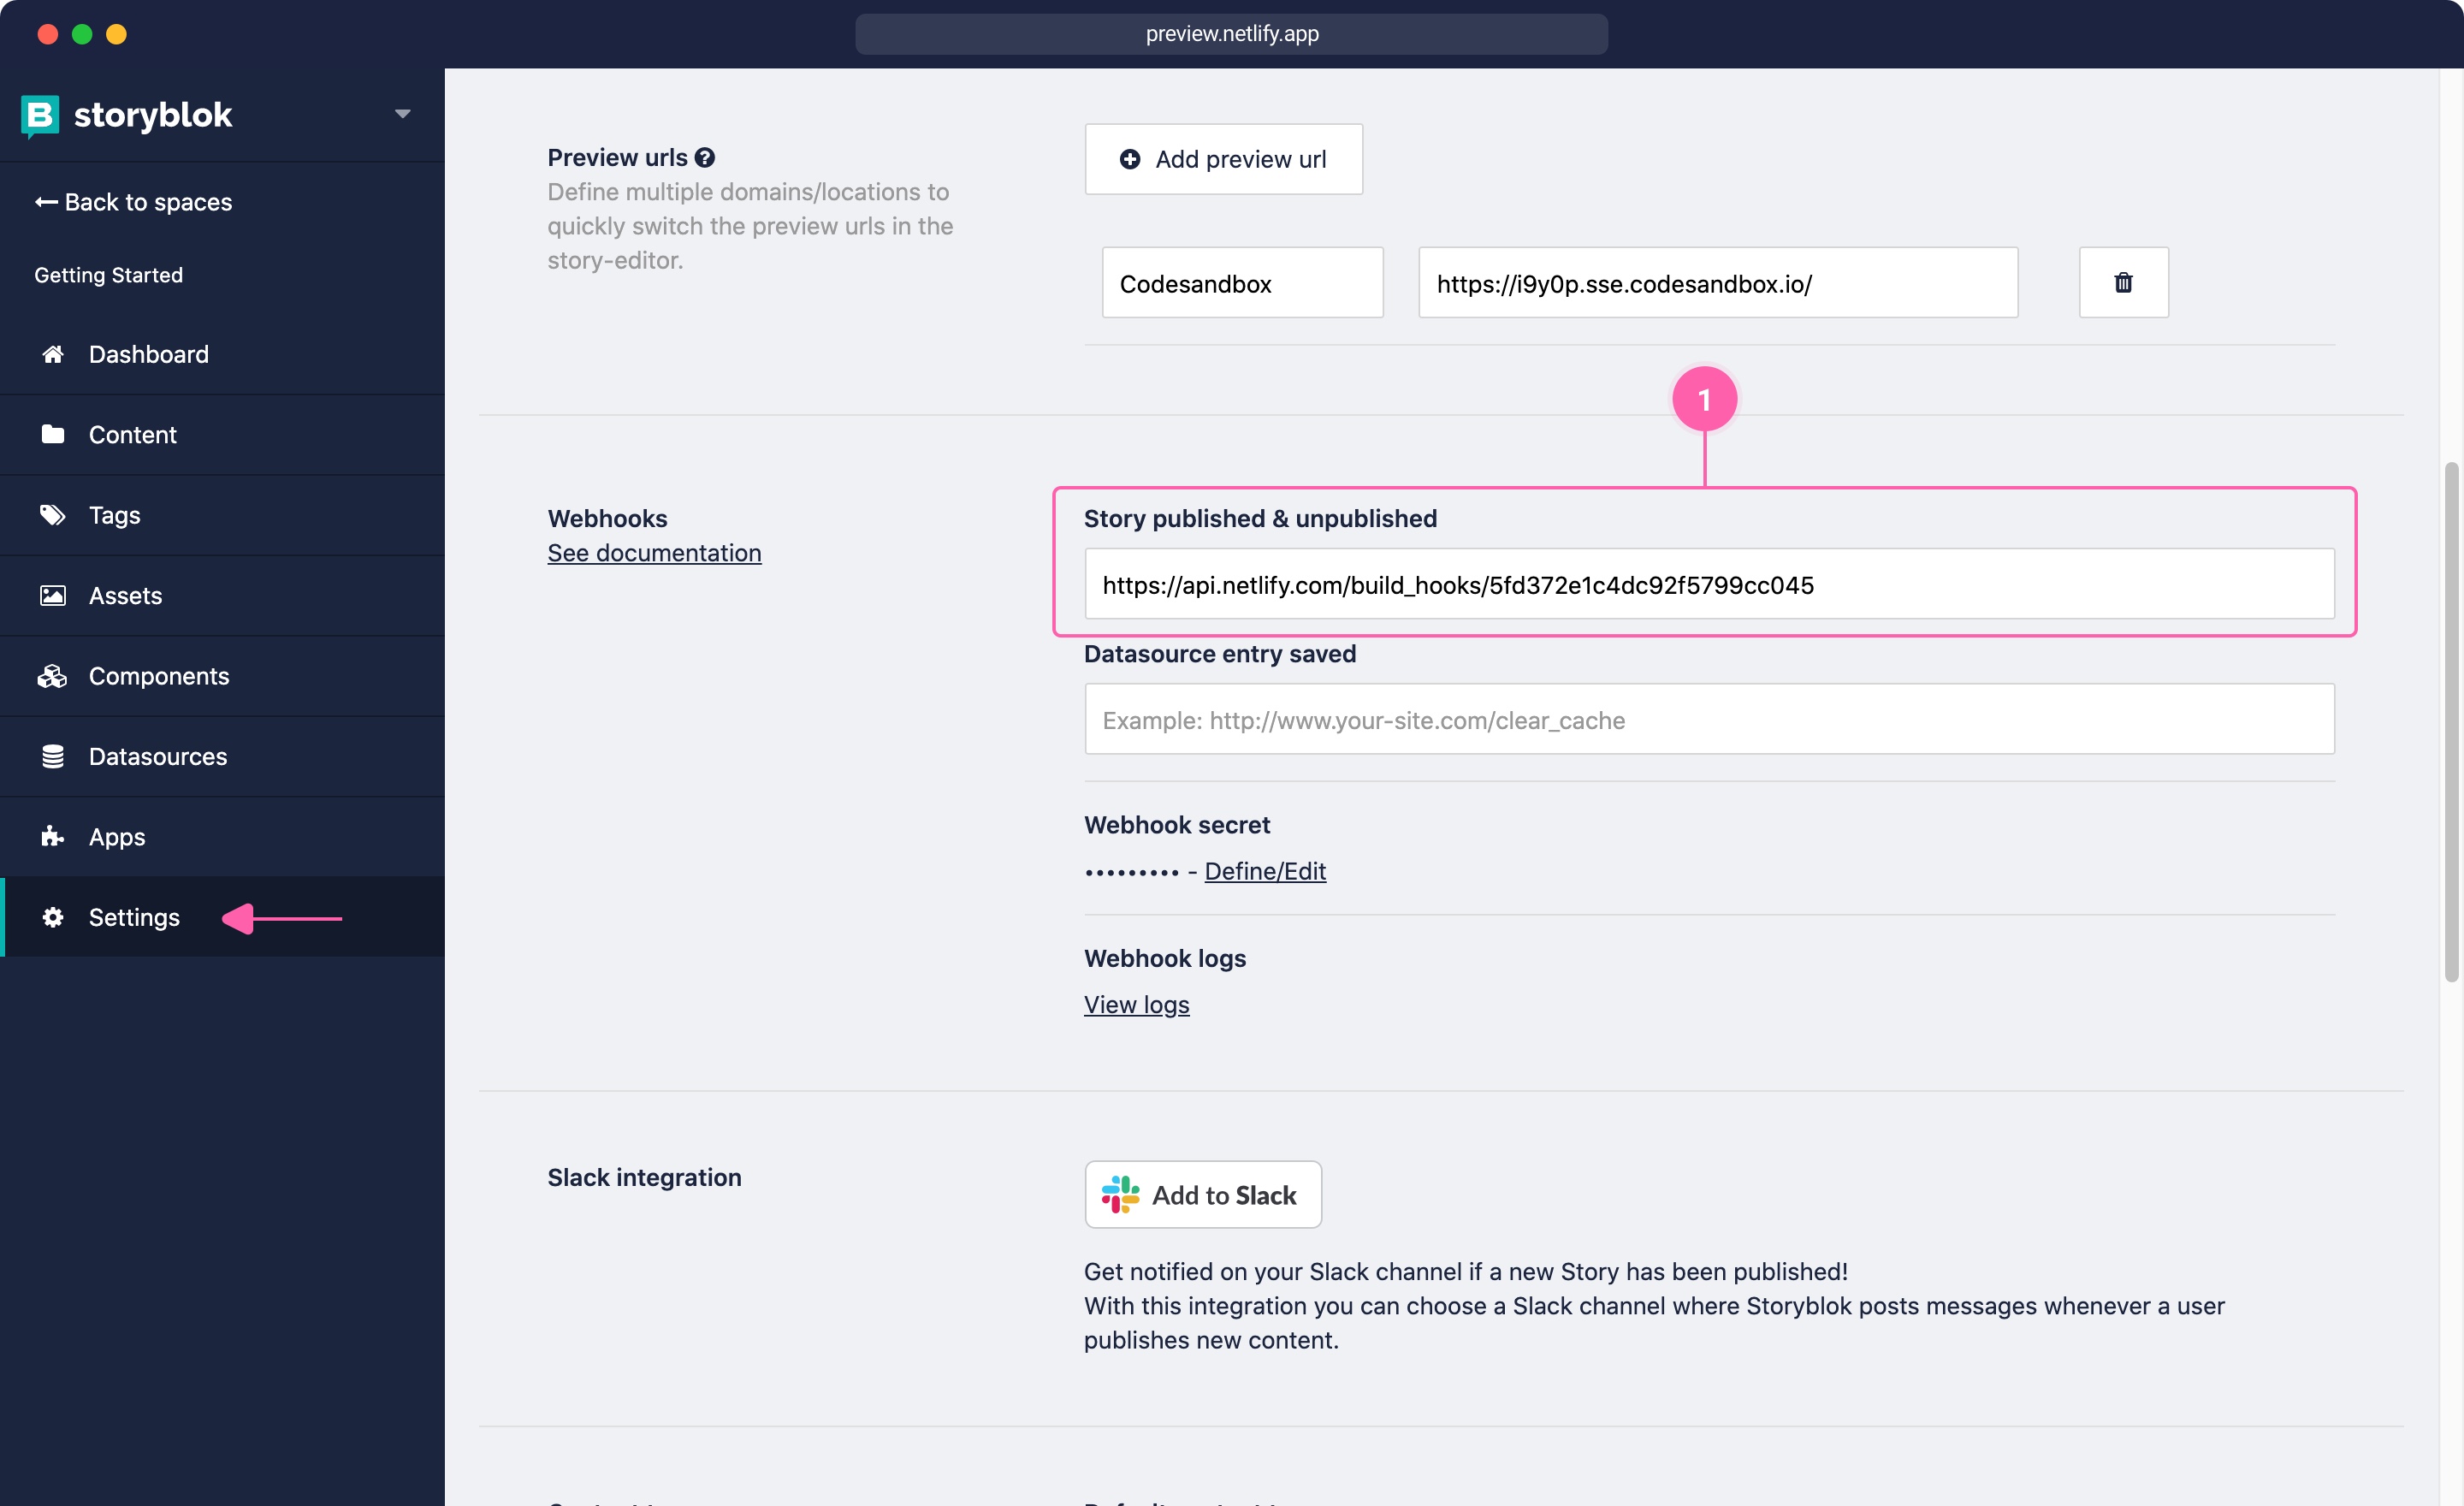
From now on, every time you publish or unpublish a story the build process on Netlify will be triggered.
Conclusion
That's all folks. It is this easy to set up the deployment of Nuxt with Storyblok to Netlify. You may also want to check our Nuxt technology page and find out how to deploy Static/SSG Nuxt to Netlify using the generate function.
Question or Feedback?
Author
