Setting Up Multi Spaces With Storyblok CLI
Storyblok is the first headless CMS that works for developers & marketers alike.
Have you ever wondered how to work with multiple spaces in your application and safely share components between them? With Storyblok CLI (opens in a new window), you can sync your components and stories in multiple spaces locally. With the CLI, you can also set up versions of different spaces for an application, similar to using `git` for version control.
This tutorial will walk you through how to set up multi-spaces, share components between spaces, and finally create a multi-space setup for an application on Storyblok.
Introduction
Storyblok doesn’t use git for version control so it's not possible to create separate environments (dev and prod) in a single space. An example will be if you have two spaces, say dev-space and prod-space, you’d have to create the same components in the two spaces. But with component sharing, you will be able to prevent that repetitiveness and also be able to share components faster between spaces.
Component sharing in Storyblok can be done using the Storyblok CLI (opens in a new window).
Shared Components App also allows you to share components in Storyblok spaces. However, this works best if you want to share the exact layout of the components.
Component Sharing with Storyblok CLI
To set up component sharing for your spaces, we will install Storyblok CLI with the command below.
npm i storyblok -gThe command installs Storyblok globally on your local machine, you can learn more about the CLI here (opens in a new window).
For the above command to work, you need to have Nodejs installed on your computer.
Creating dev and prod spaces
To share components in your application, we will need to create two (2) spaces: dev-space and prod-space. You can follow this guide (opens in a new window) to learn how to create a space. Next, let’s add some components to dev-space and push those components to prod-space.
Sharing components schema
There are two ways we can share components on Storyblok, first With the Shared components (opens in a new window) application by Storyblok, helps you manage components from a central place. The second is to pull the components in our dev-space to our local machine and then push the components we pulled to our prod-space. To do this, we’d need the space ID of both spaces. To get your space ID, click on the name of the space, then go to settings {1} and copy the space ID.
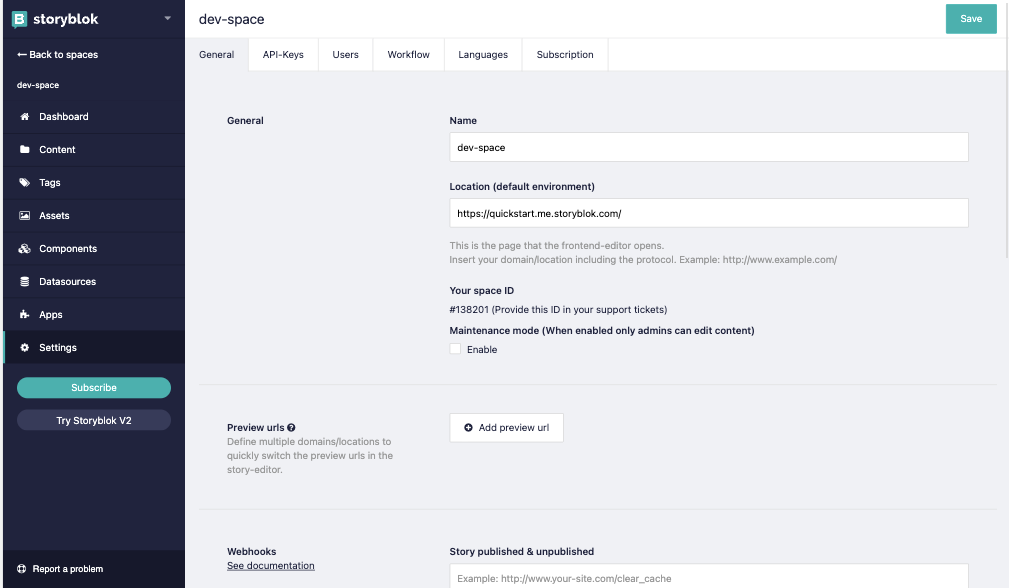
Storyblok Space ID
With the space IDs, let’s share dev-space components with prod-space.
Let’s pull the components from the dev-space using the command below.
storyblok pull-components --space {SPACE ID}If this is the first time using the CLI on your computer, you will be prompted to log in with your email and Storyblok password.
Once done, check the components json file to see all your space components, and also presets-json to see the presets of the components you pulled. Now, let’s push these components to prod-space with the command below.
storyblok push-components {SOURCE} --space {prod-space ID} --presets-source {PRESETS_SOURCE}Replace:
- prod-space
IDwith theIDof your prod-space SOURCEwith the path to the components JSON file we got when we pulled the componentsPRESET_SOURCEwith a path to the preset.json file.
storyblok push-components ./components.json --space 138200 --presets-source ./presets.json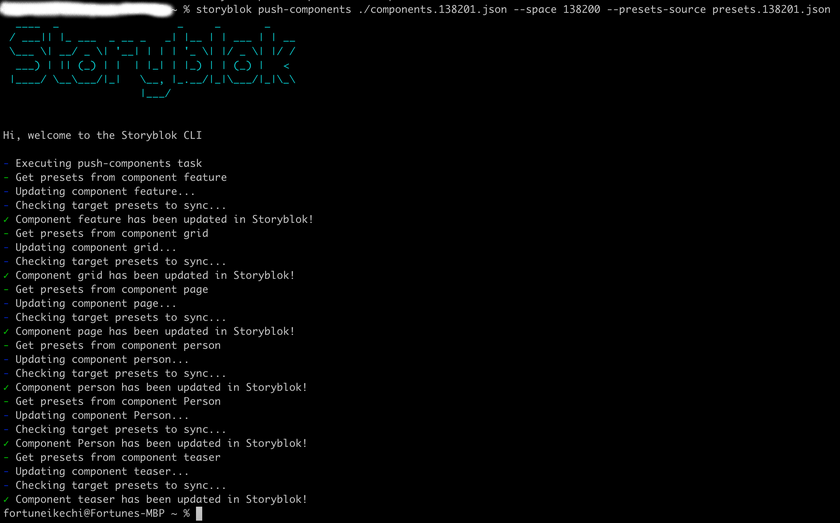
Storyblok push components
Once done, you should see the recent components from dev-space in your prod-space. It’s important to note that this replaces your prod-space with your components from dev-sapce, and if there were any updates in your, prod-space it will be overridden. Also, a special update script would be needed for updating.
storyblok push-components https://raw.githubusercontent.com/storyblok/nuxtdoc/master/seed.components.json --space 67819 When successfully done, check prod-space you’ll see the new components from dev-space have been added to your prod-space.
With Storyblok CLI, we can do a lot more than just share components between spaces. In the next sections, we'll go over other commands available in Storyblok CLI and what they do.
We can also push components from a using a URL in cases where the components json file is hosted somewhere else.
Authentication Commands
To access your spaces with Storyblok CLI, you must log in from your terminal. Use the command below to log in with the CLI.
storyblok login The command above will prompt you to enter your email address and password. Run the command below to logout
storyblok logoutThe Sync Command
Let’s say you want to Sync components, folders, roles, data sources, or stories between spaces, this is the command to run. So if you don’t want to share only your component schema as we did with the push component and pull component command, you can simply run the sync command to sync between the spaces.
storyblok sync --type <COMMAND> --source <SPACE_ID> --target <TARGET_SPACE_ID>| Sync Commands | Description |
|---|---|
| COMMAND | is the command type to execute. It can be in the folders, components, stories, data sources, or roles. You can pass multiple types separated by comma (,). e.g folders, components, and folders. |
| SPACE_ID | is the ID of the space you want to sync |
| TARGET_SPACE_ID | is the ID of the target space to sync with |
The select command
This command can be used to kickstart a boilerplate, field type, or theme.
storyblok selectThe Quickstart command
This command is used to quickly create a space using a boilerplate
storyblok quickstartThe migration command
With Storyblok CLI, we can perform migrations between spaces, we can also do the following:
- Change fields of contents
- Updated components schema e.g change a field from Markdown from Richtext
- Migrate spaces using the CLI and can also rollback from migration
- Migrate from WordPress to Storyblok
- Update a story etc.
The above can be done with the steps below.
Creating a migration file
Migration files consist of javascript functions and content for a specific component that can be updated. Let’s do a quick example with dev-space. In there, we added a new component name and add first_name and last_name fields to it. We’ll set my first_name and last_name field values to be fortune and ikechi respectively. For this example, We’ll update the first_name value to be kay.
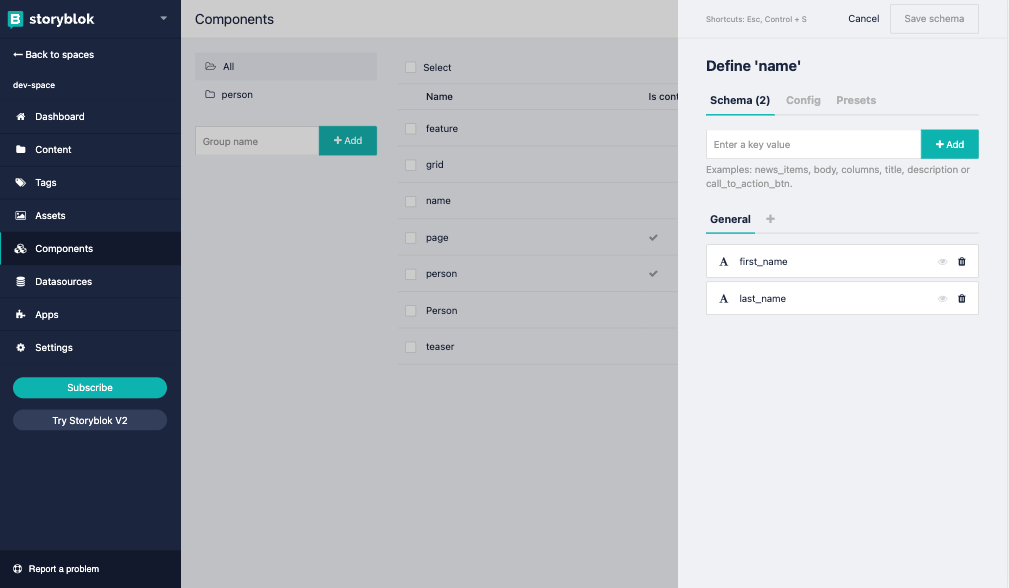
name component schema
To create a migration file, run the command below
storyblok generate-migration --space {SPACE_ID} --component {COMPONENT} --field {FIELD}Replace:
- SPACE_ID with the ID of the space the component is present in.
- COMPONENT with the name of the component you want to update and
- FIELD with the field you want to update.
You can get your space ID by navigating to your settings tab on your space. Click on General, you’d see your space ID as shown below:
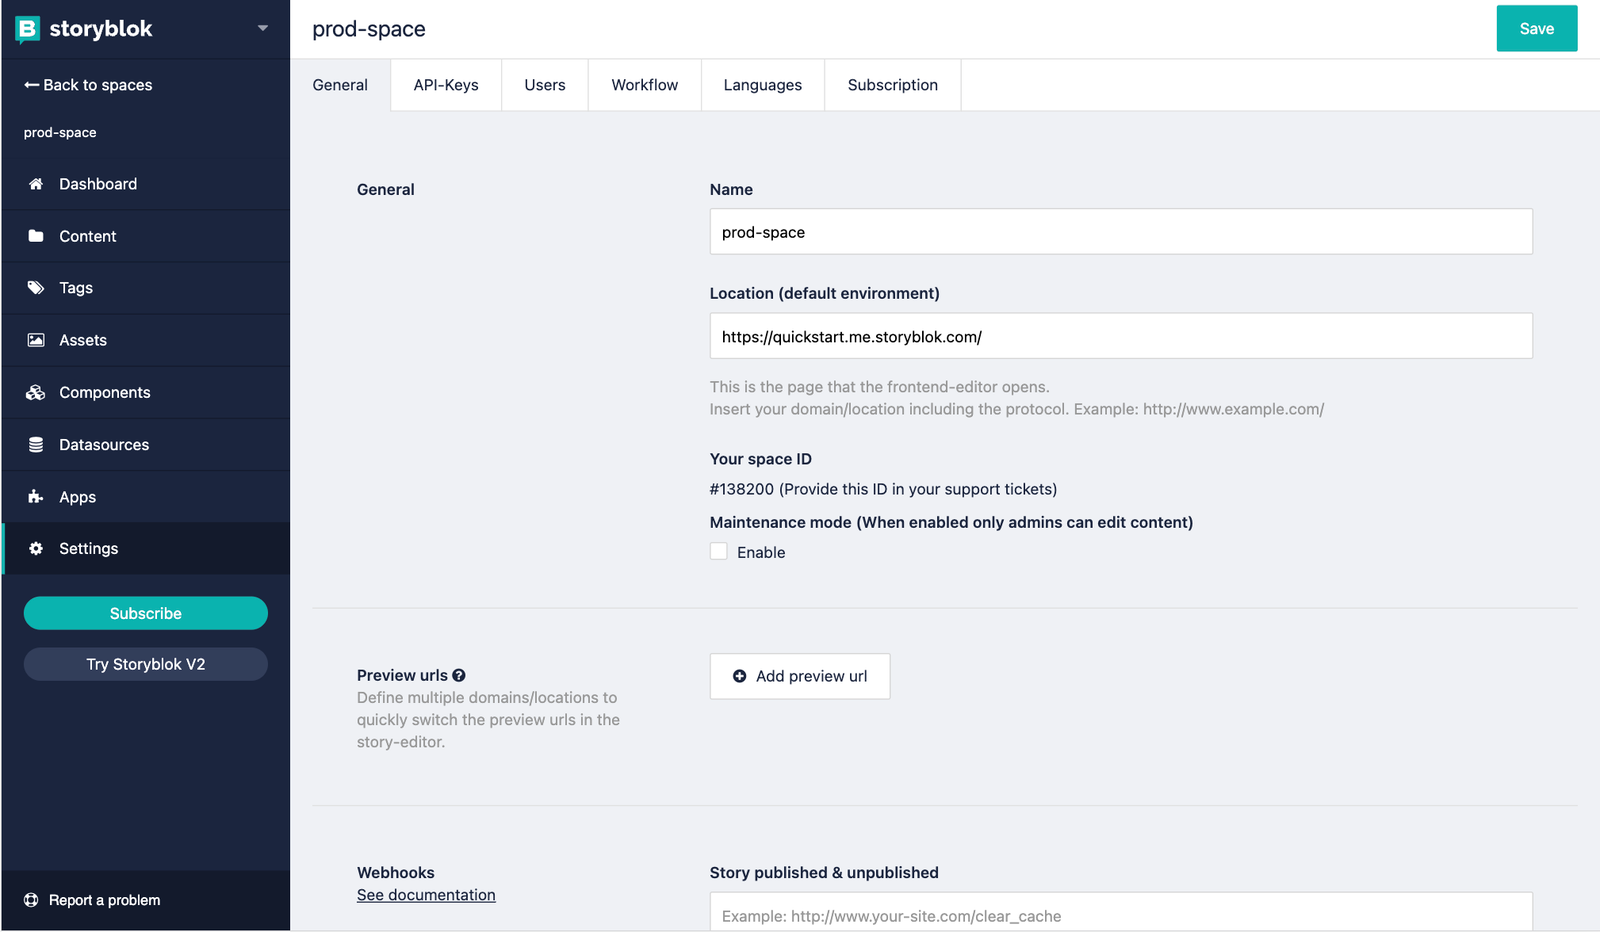
prod-space ID
Running a migration file
Before running a migration, we’d need to update the generated migration file by navigating into it and updating your specific migration. In our case, we’d update the first_name field of name the component story as shown below.
module.exports = function (block) {
      // Example to change a string to boolean
      // block.first_name = !!(block.first_name)
      // Example to transfer content from other field
      // block.first_name = block.other_field
      block.first_name = 'kay';
    }
Once done, we can run migration using the command below:
storyblok run-migration --space {SPACE_ID} --component {COMPONENT} --field {FIELD}Remember to replace
SPACE_IDwith the id of the space, the component is present in.COMPONENTwith the name of the component, you want to update.- FIELD with the field we want to update.
E.g
storyblok run-migration --space 131201 --component name --field first_nameWe can make changes without publishing them using the --dryrun flag at the end of the run-migration command.
storyblok run-migration --space {SPACE_ID} --component {COMPONENT} --field {FIELD} --dryrunRollback migration
You can add the --dryrun flag to test the results of migration but not enforce it on your prod-space. --dryrun flags can be used to roll back migrations by saving a JSON file of your dev-space contents and components when you run-migrations command twice, the JSON will be changed on your local machine enabling you to roll back any recent migrations.
Wrapping Up
In this tutorial, we learned how to set up multi spaces with Storyblok CLI. We also looked at migrating with the CLI and how to roll back migrations. For more on Storyblok CLI, you can see the resources below.
| Resources | Link |
|---|---|
| Storyblok CLI | Learn more about Storyblok CLI |
| Create a space | How to create a space |
| Handling content with Management API | Handling content with Storyblok Management API/ |
